Sponsored

head gasket swap after P0301 code

OP
OP
RenegadeT

RenegadeT

Well-Known Member
First Name
Tony
Joined
Apr 15, 2022
Threads
15
Messages
153
Reaction score
183
Location
North Carolina
Vehicle(s)
77 CJ-7, 99 XJ, 2018 JLR
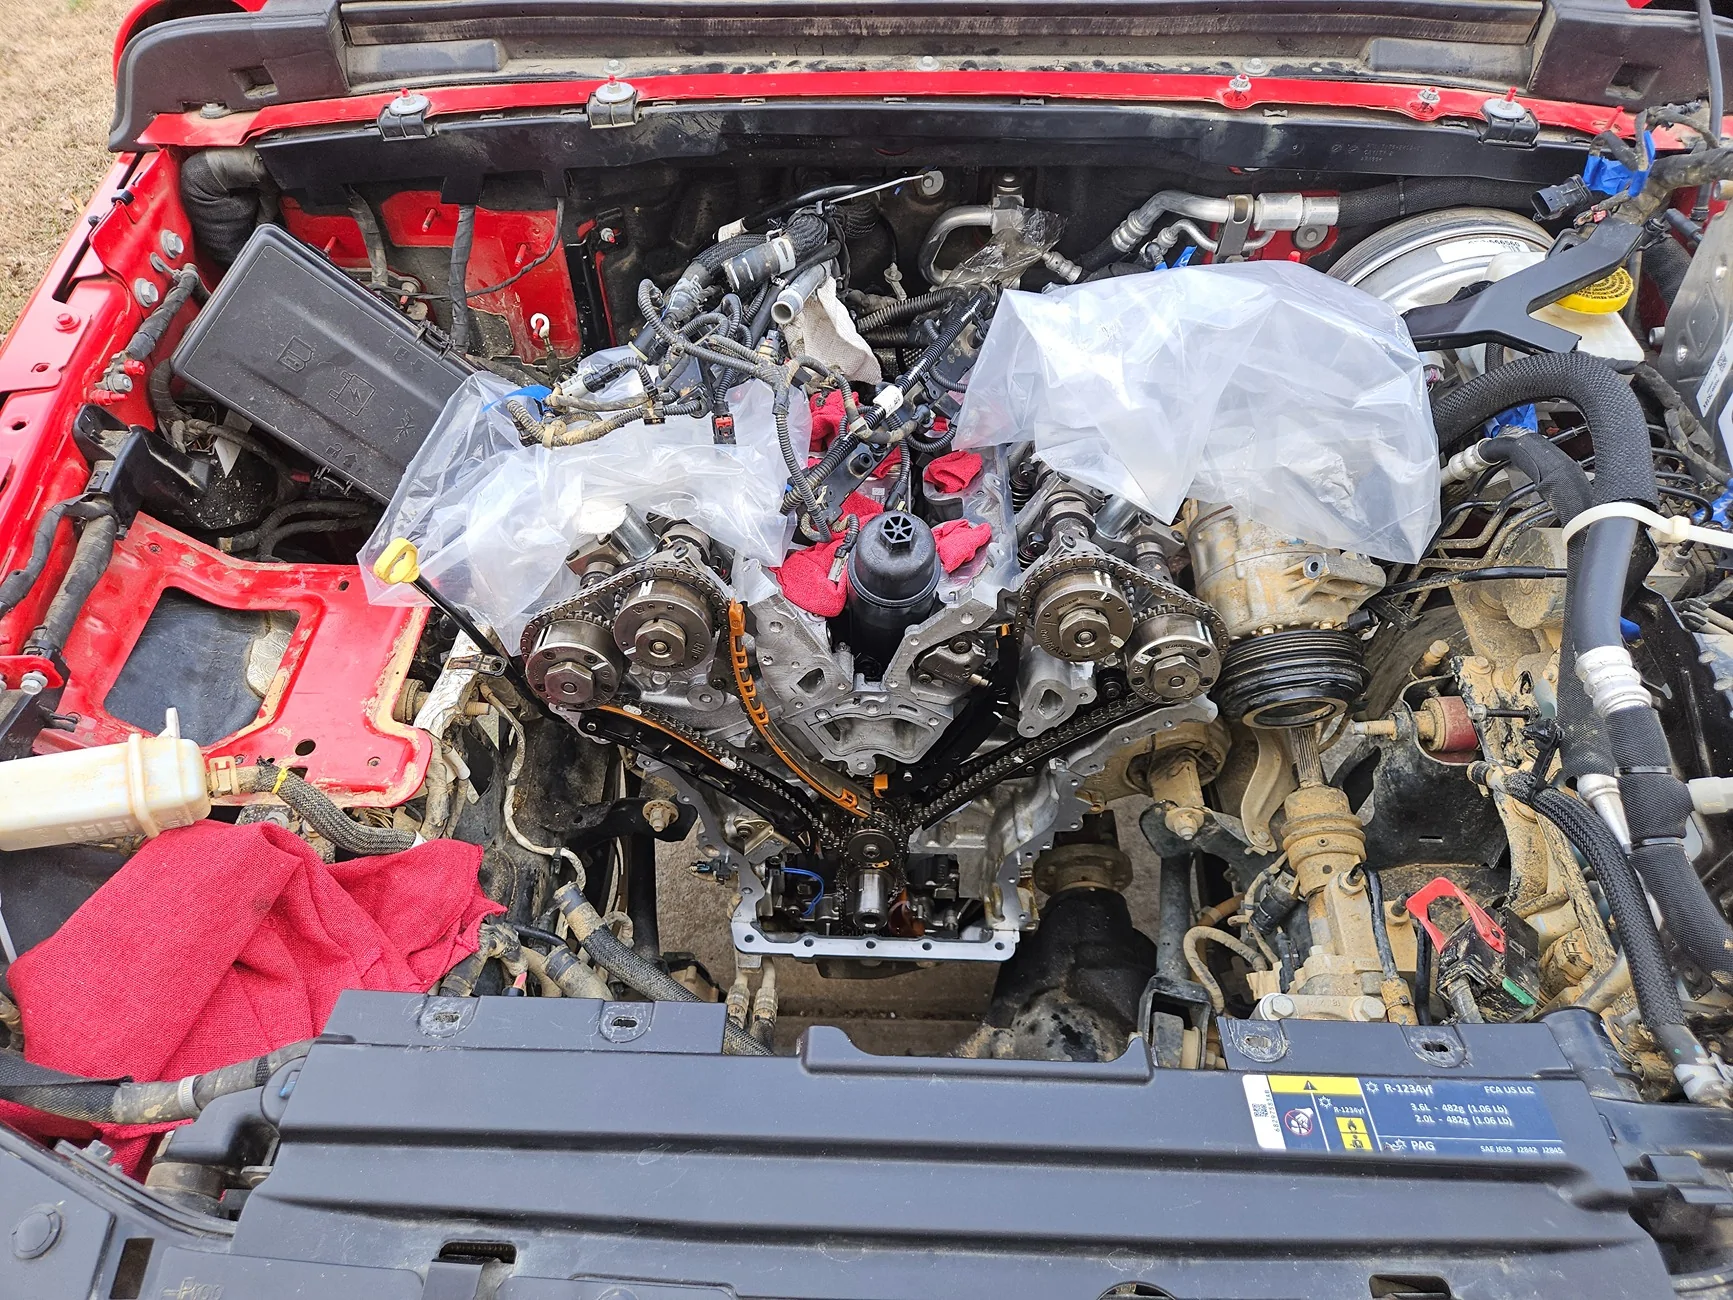
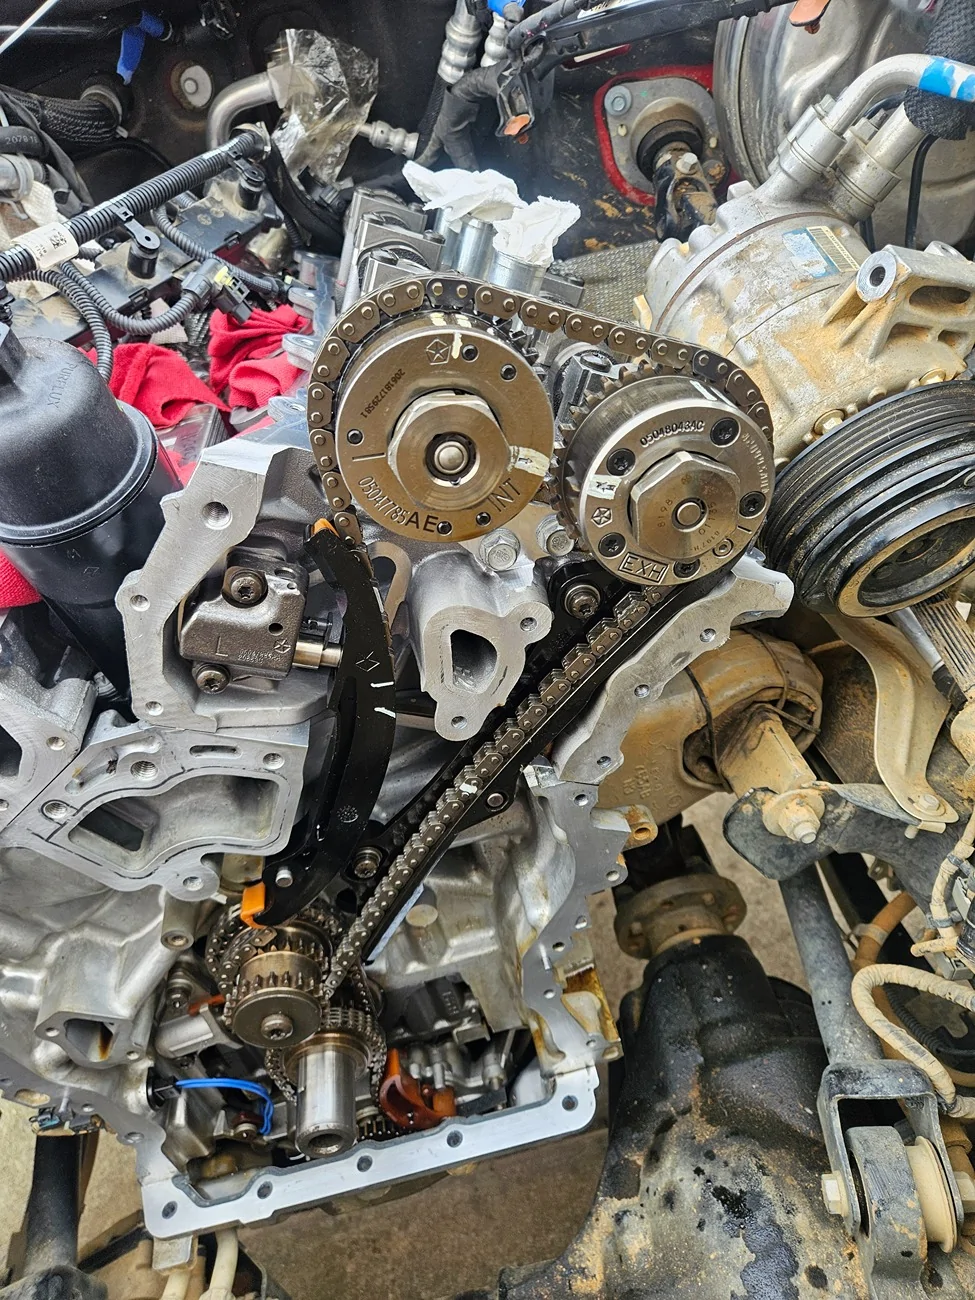
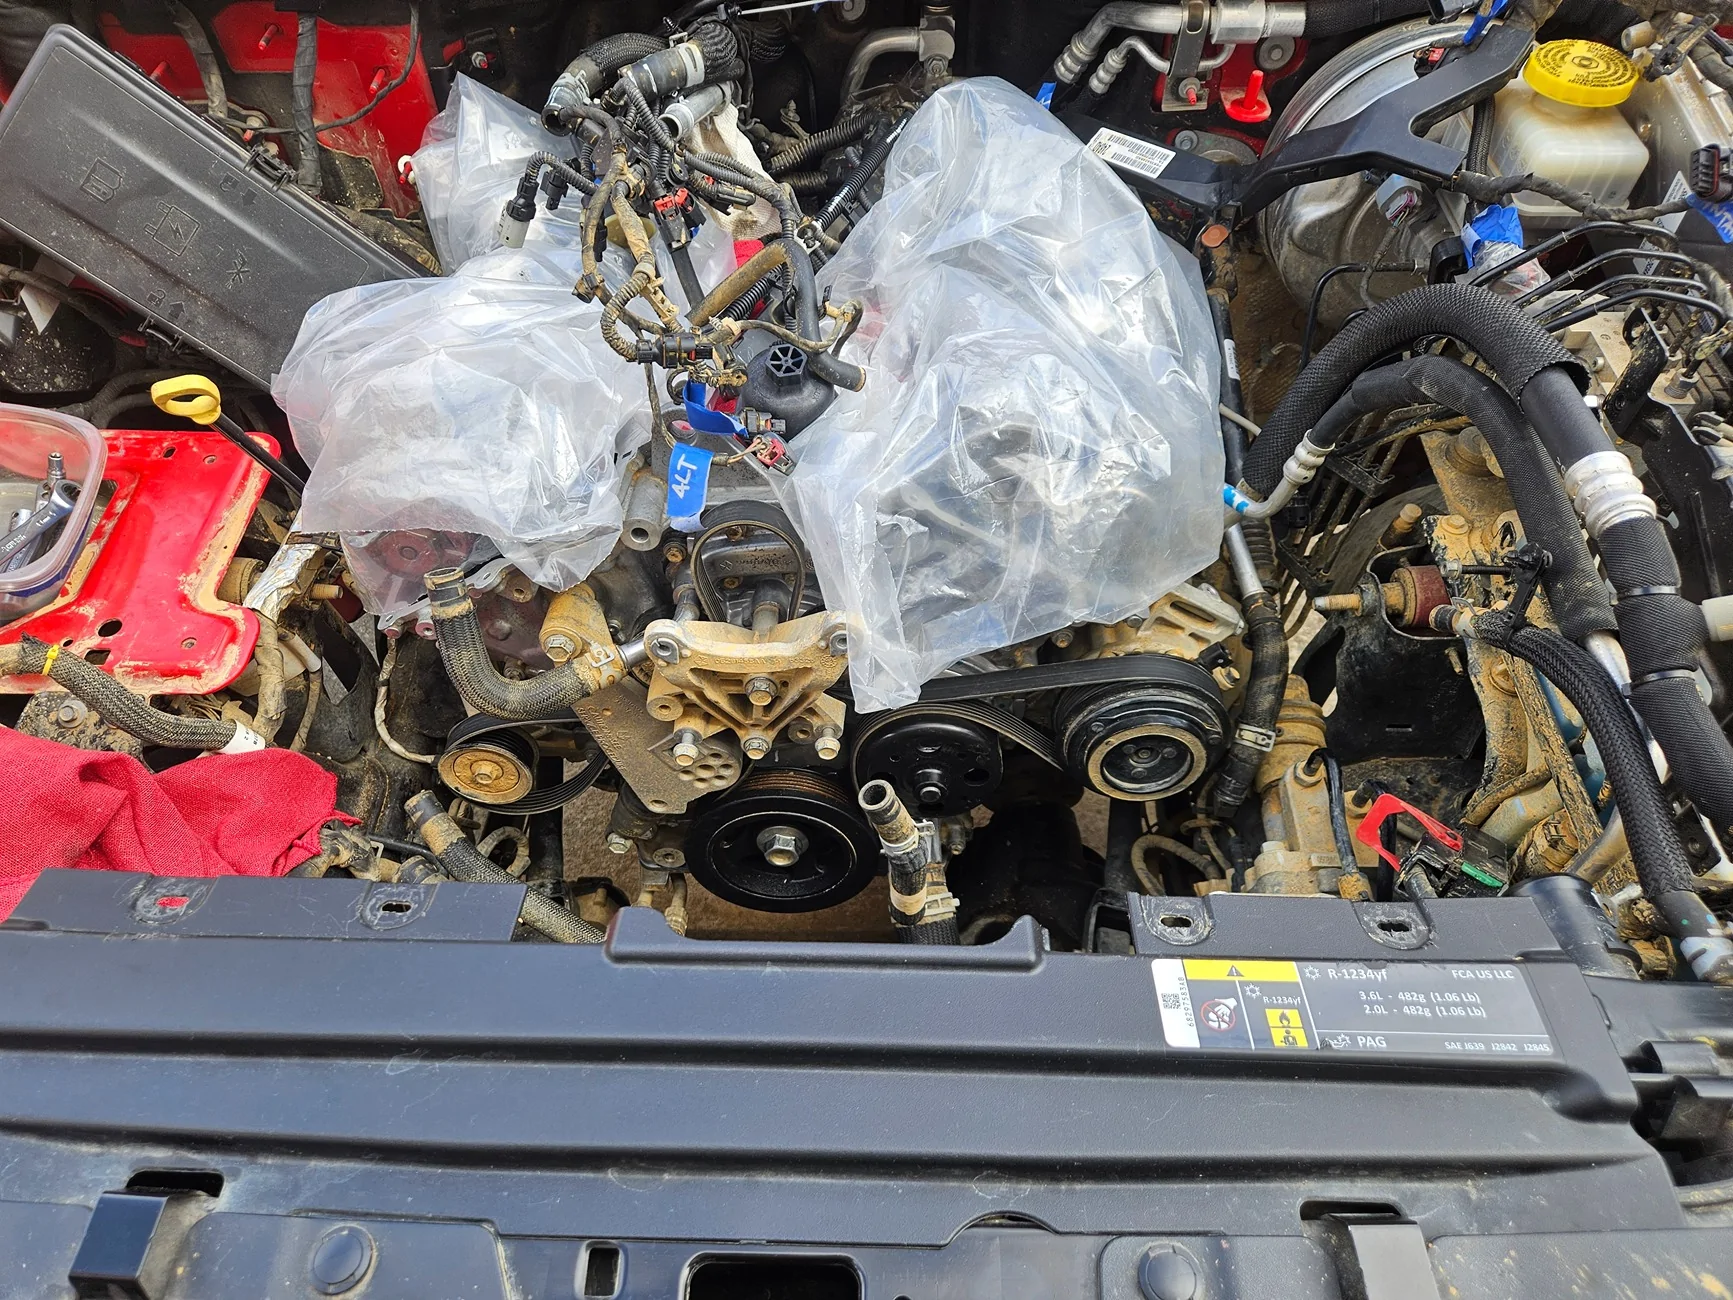
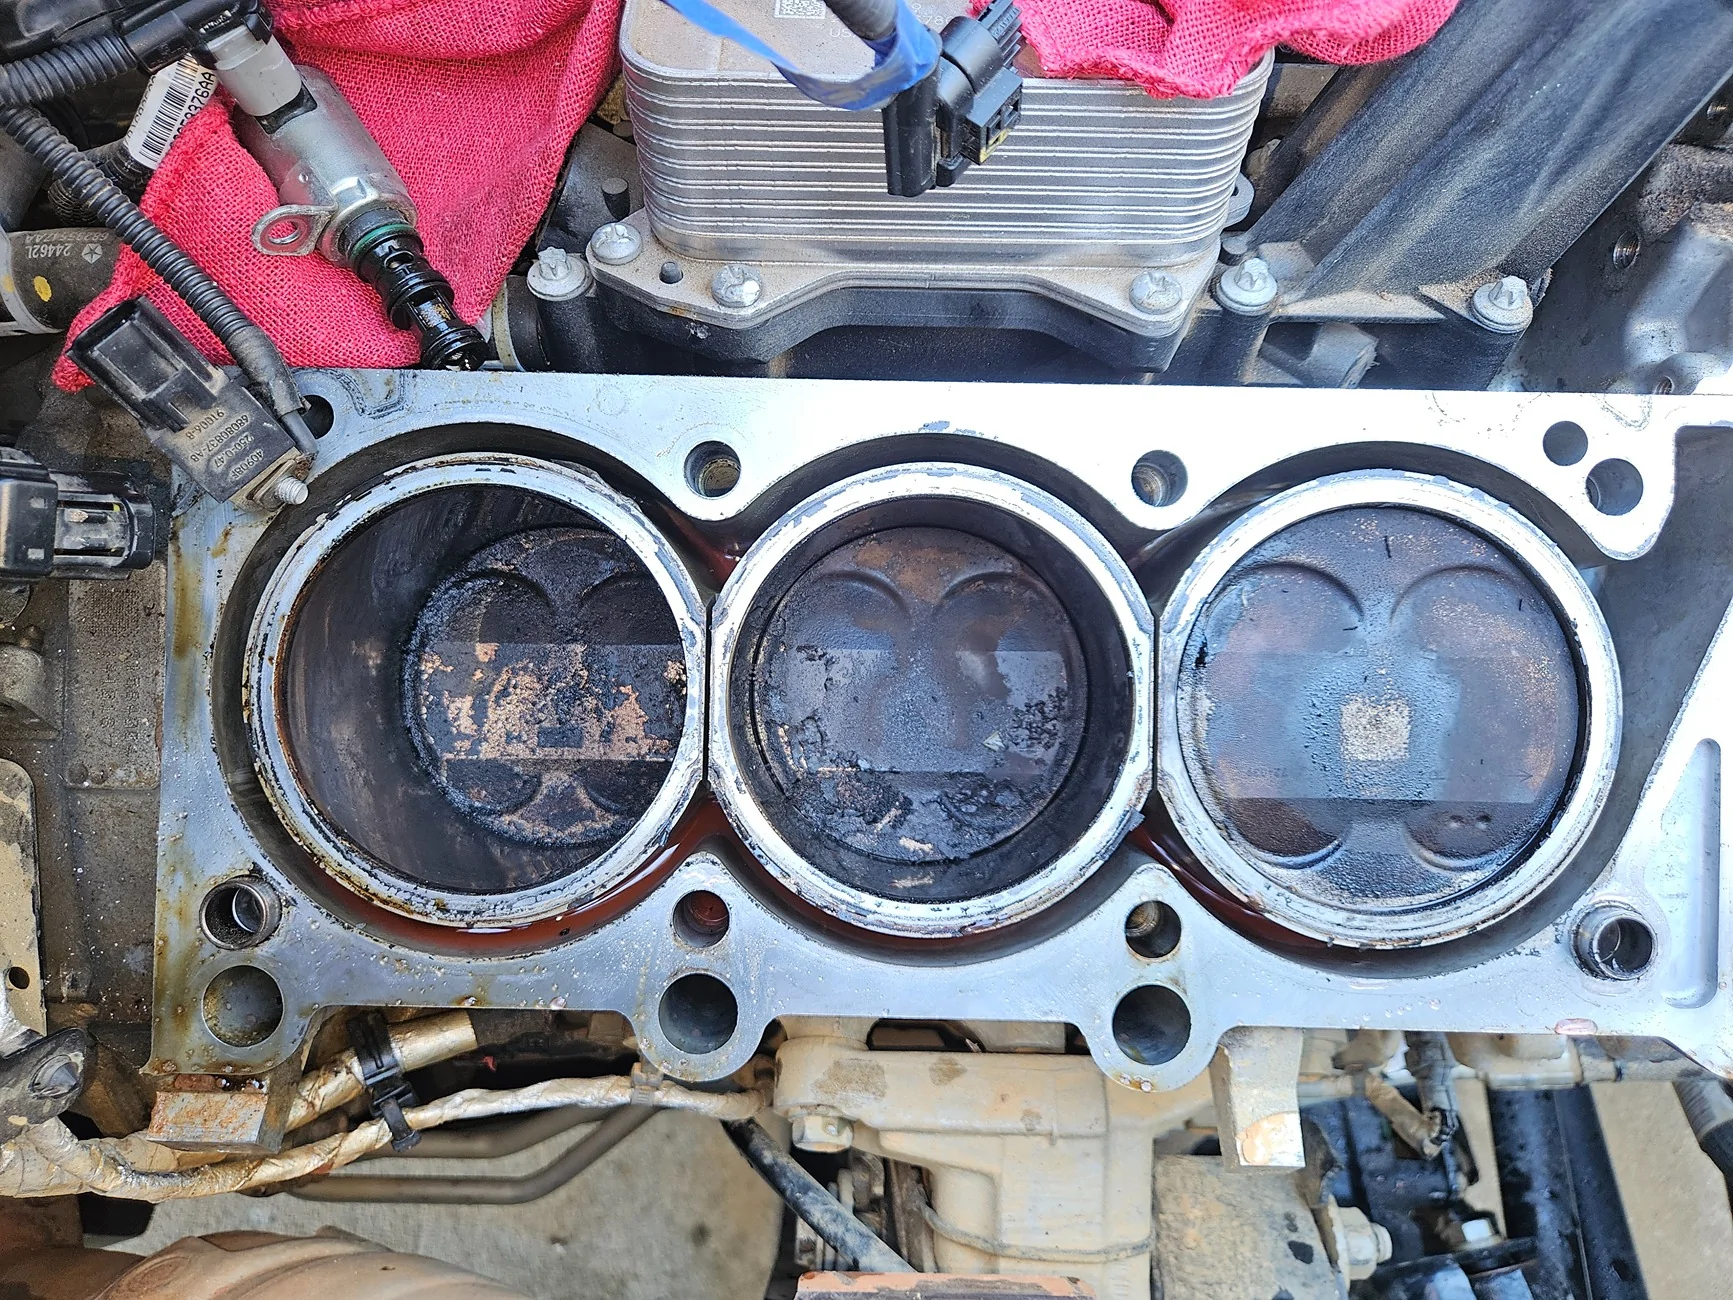
Passenger side....[check engine light, code= misfire cylinder 1]
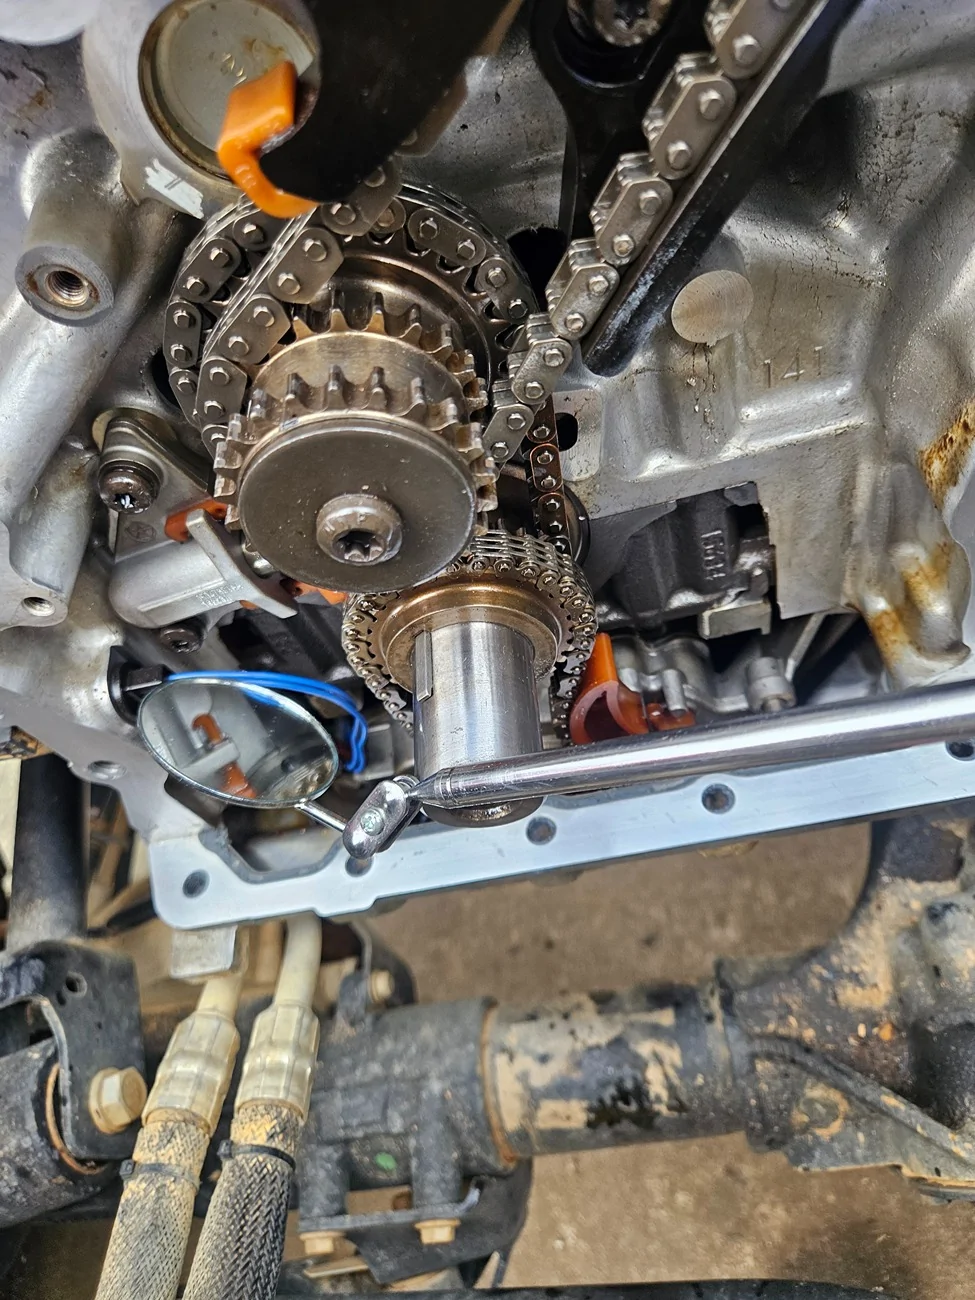
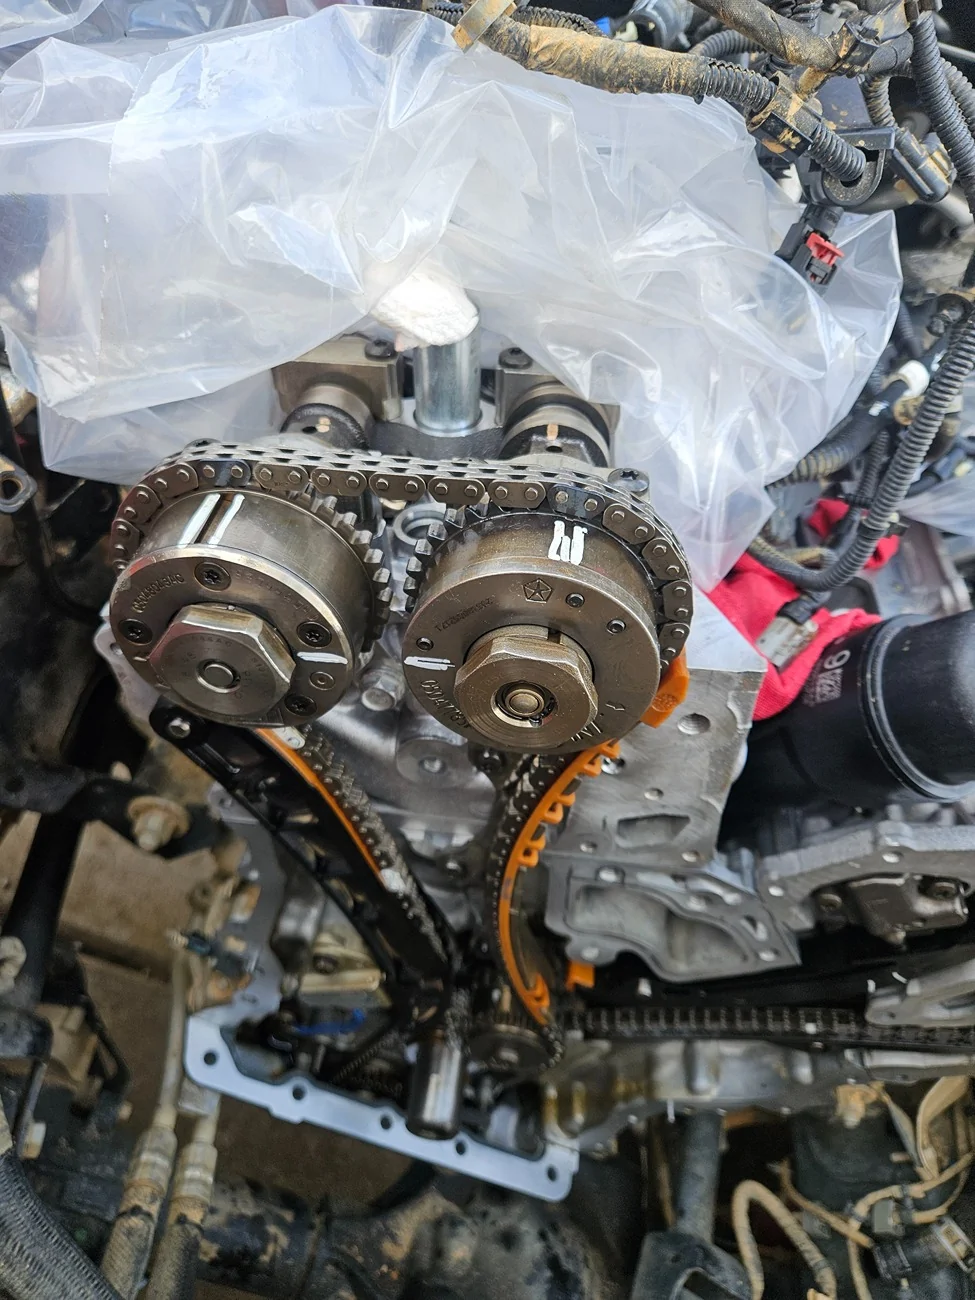
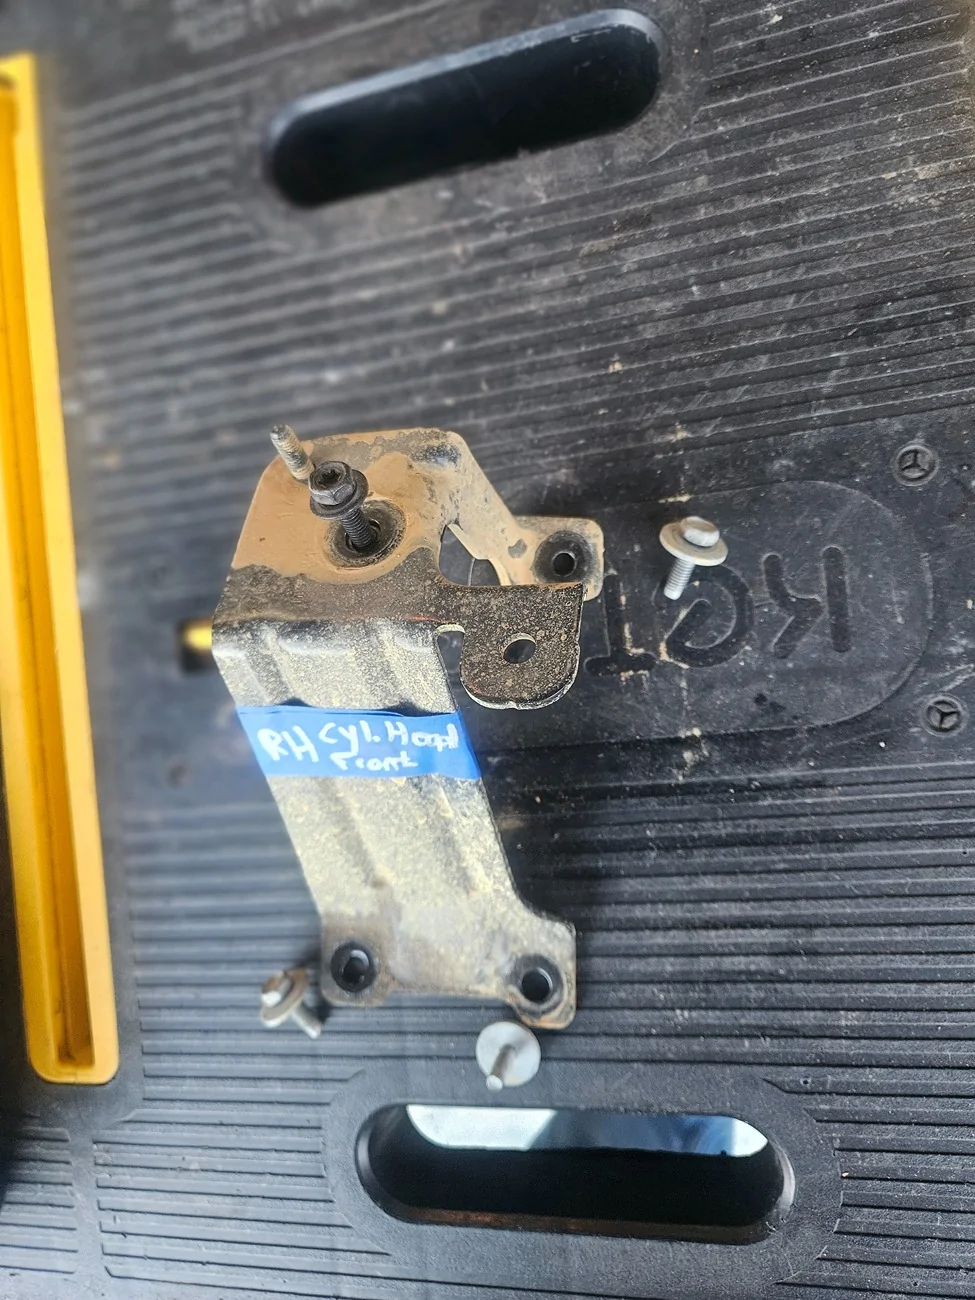
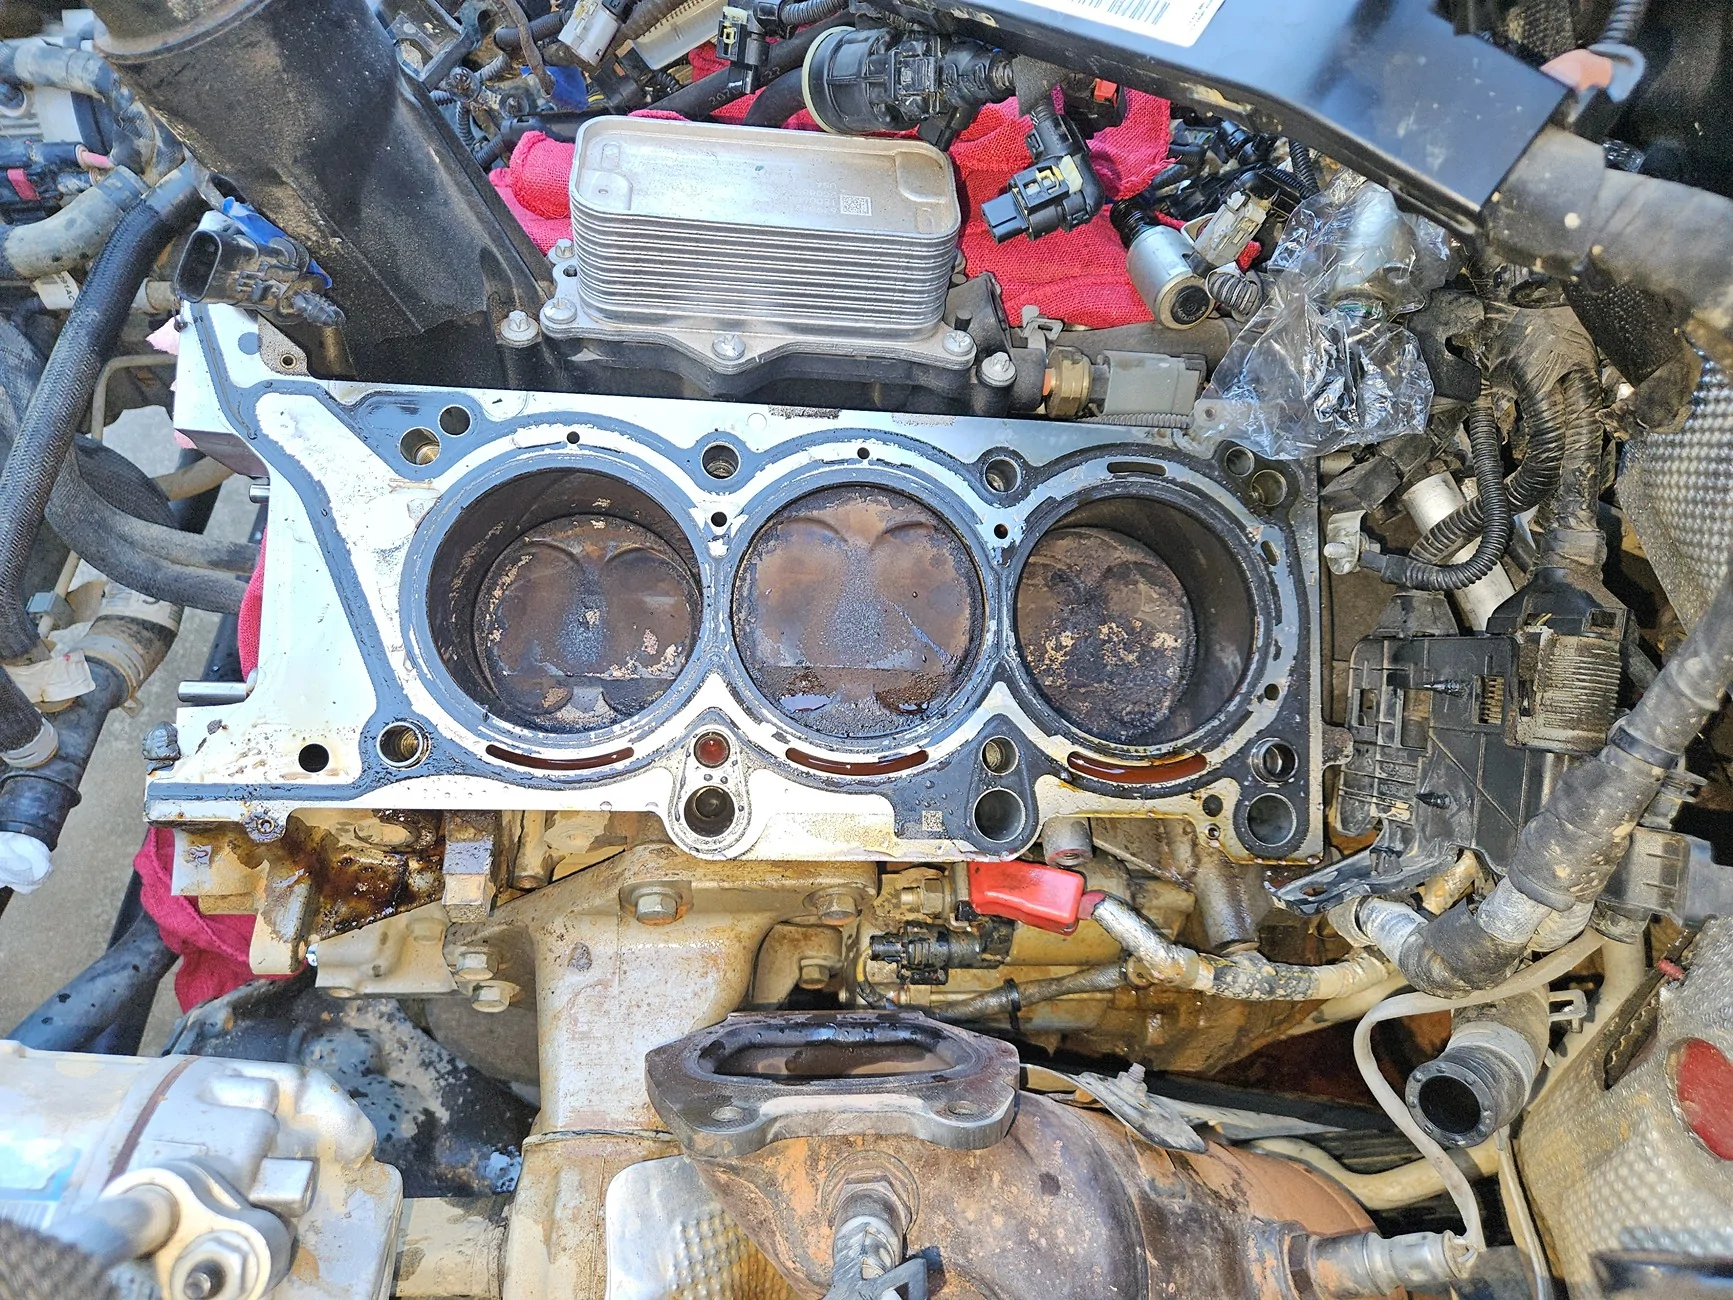
Jeep Wrangler JL head gasket swap after P0301 code 20251017_153144

Jeep Wrangler JL head gasket swap after P0301 code 20251017_153358
Jeep Wrangler JL head gasket swap after P0301 code 20251017_154026
Jeep Wrangler JL head gasket swap after P0301 code 20251017_154038


Driver side
Jeep Wrangler JL head gasket swap after P0301 code 20251017_164623
Jeep Wrangler JL head gasket swap after P0301 code 20251017_164803


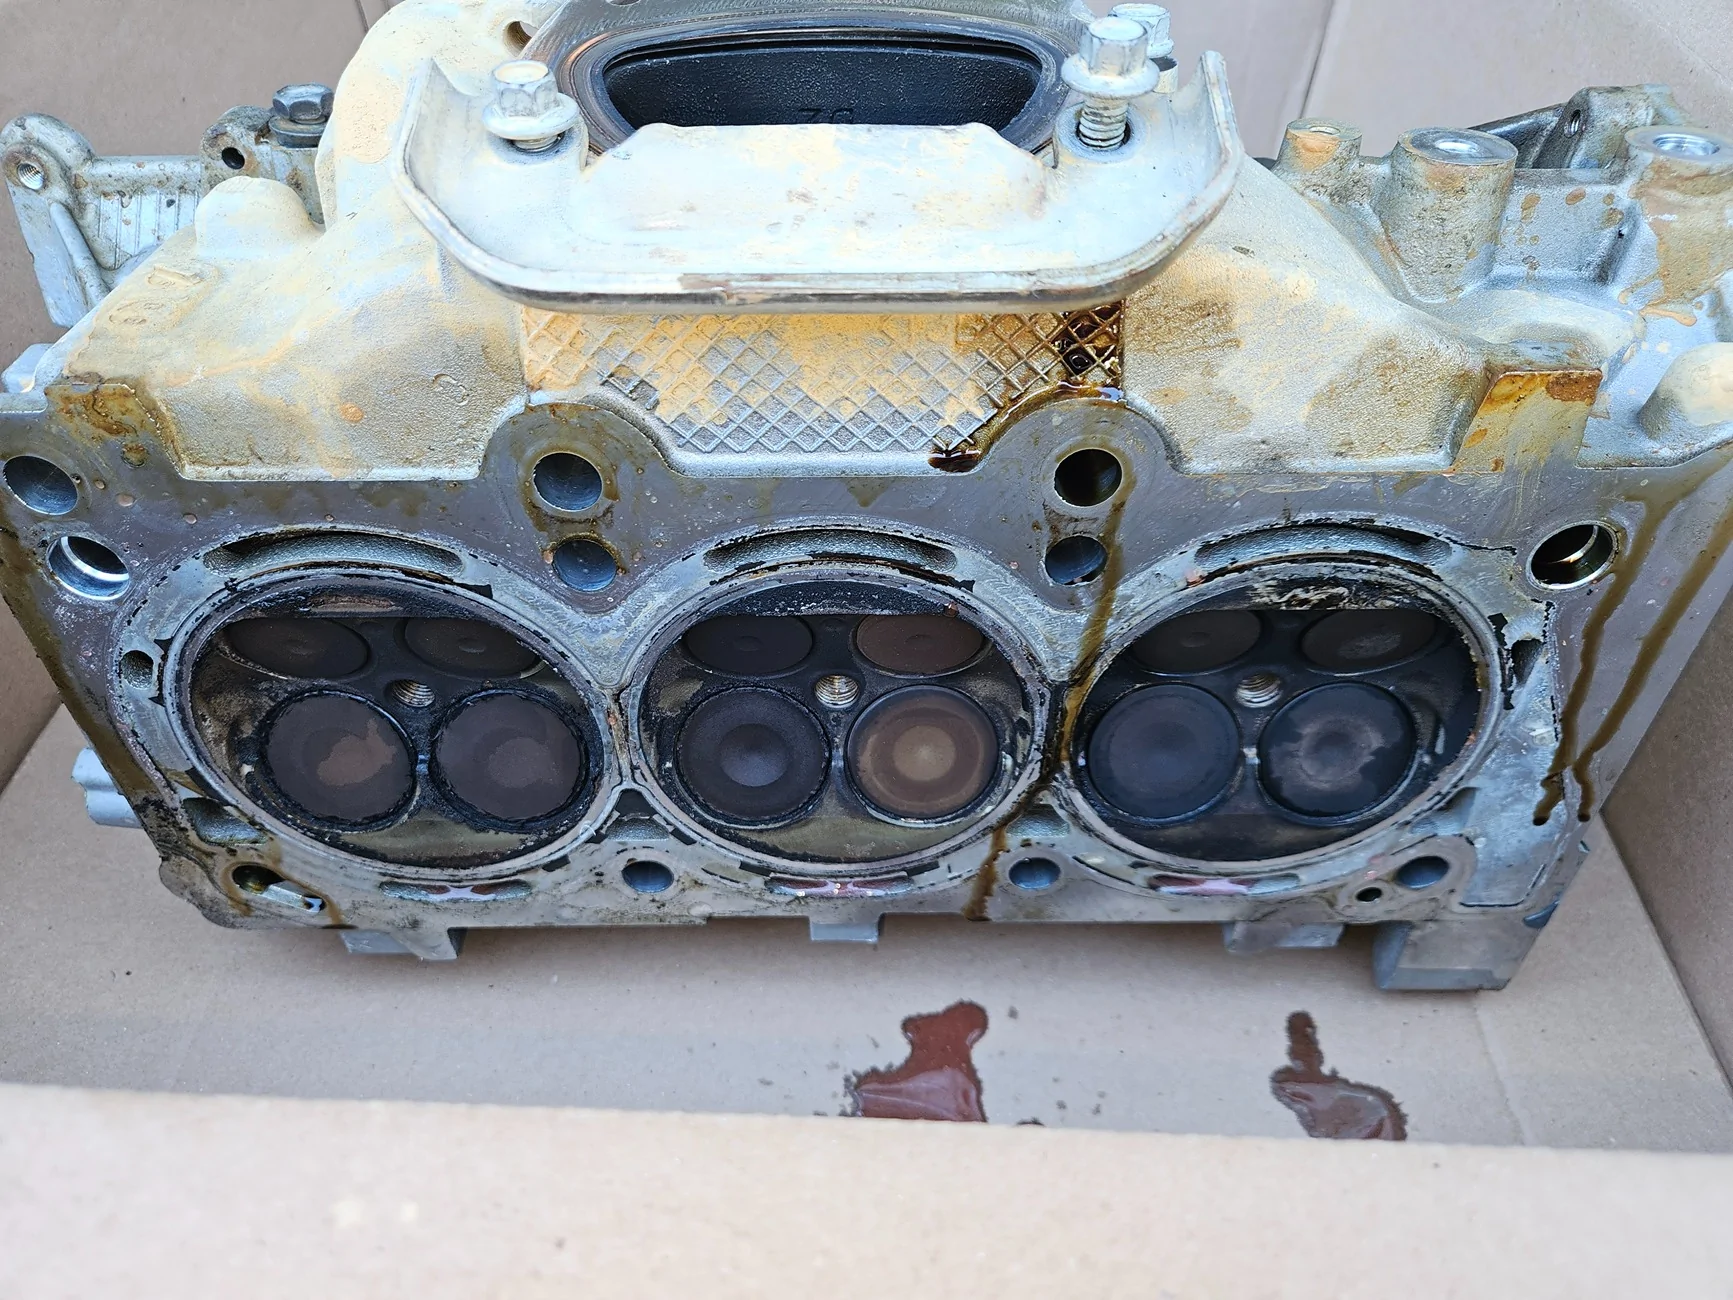
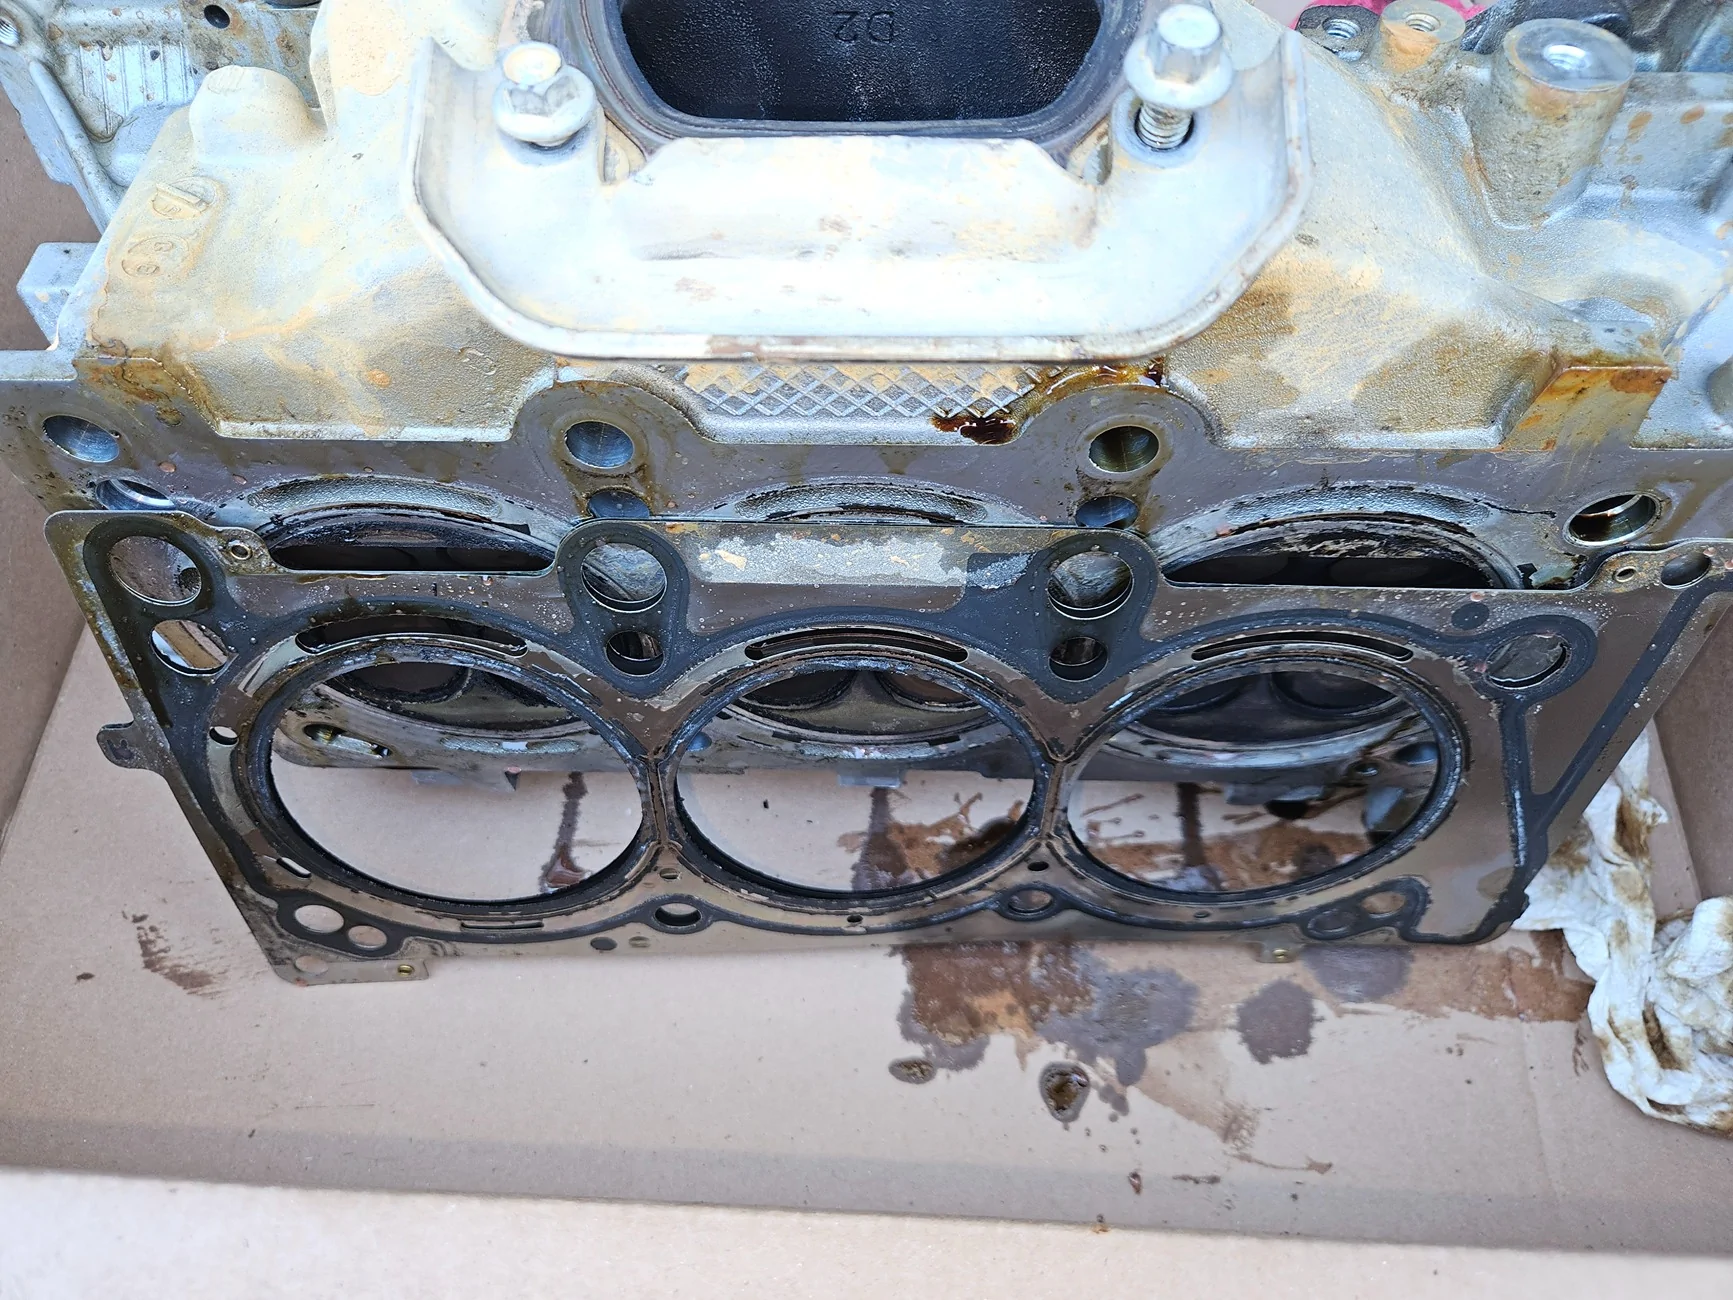
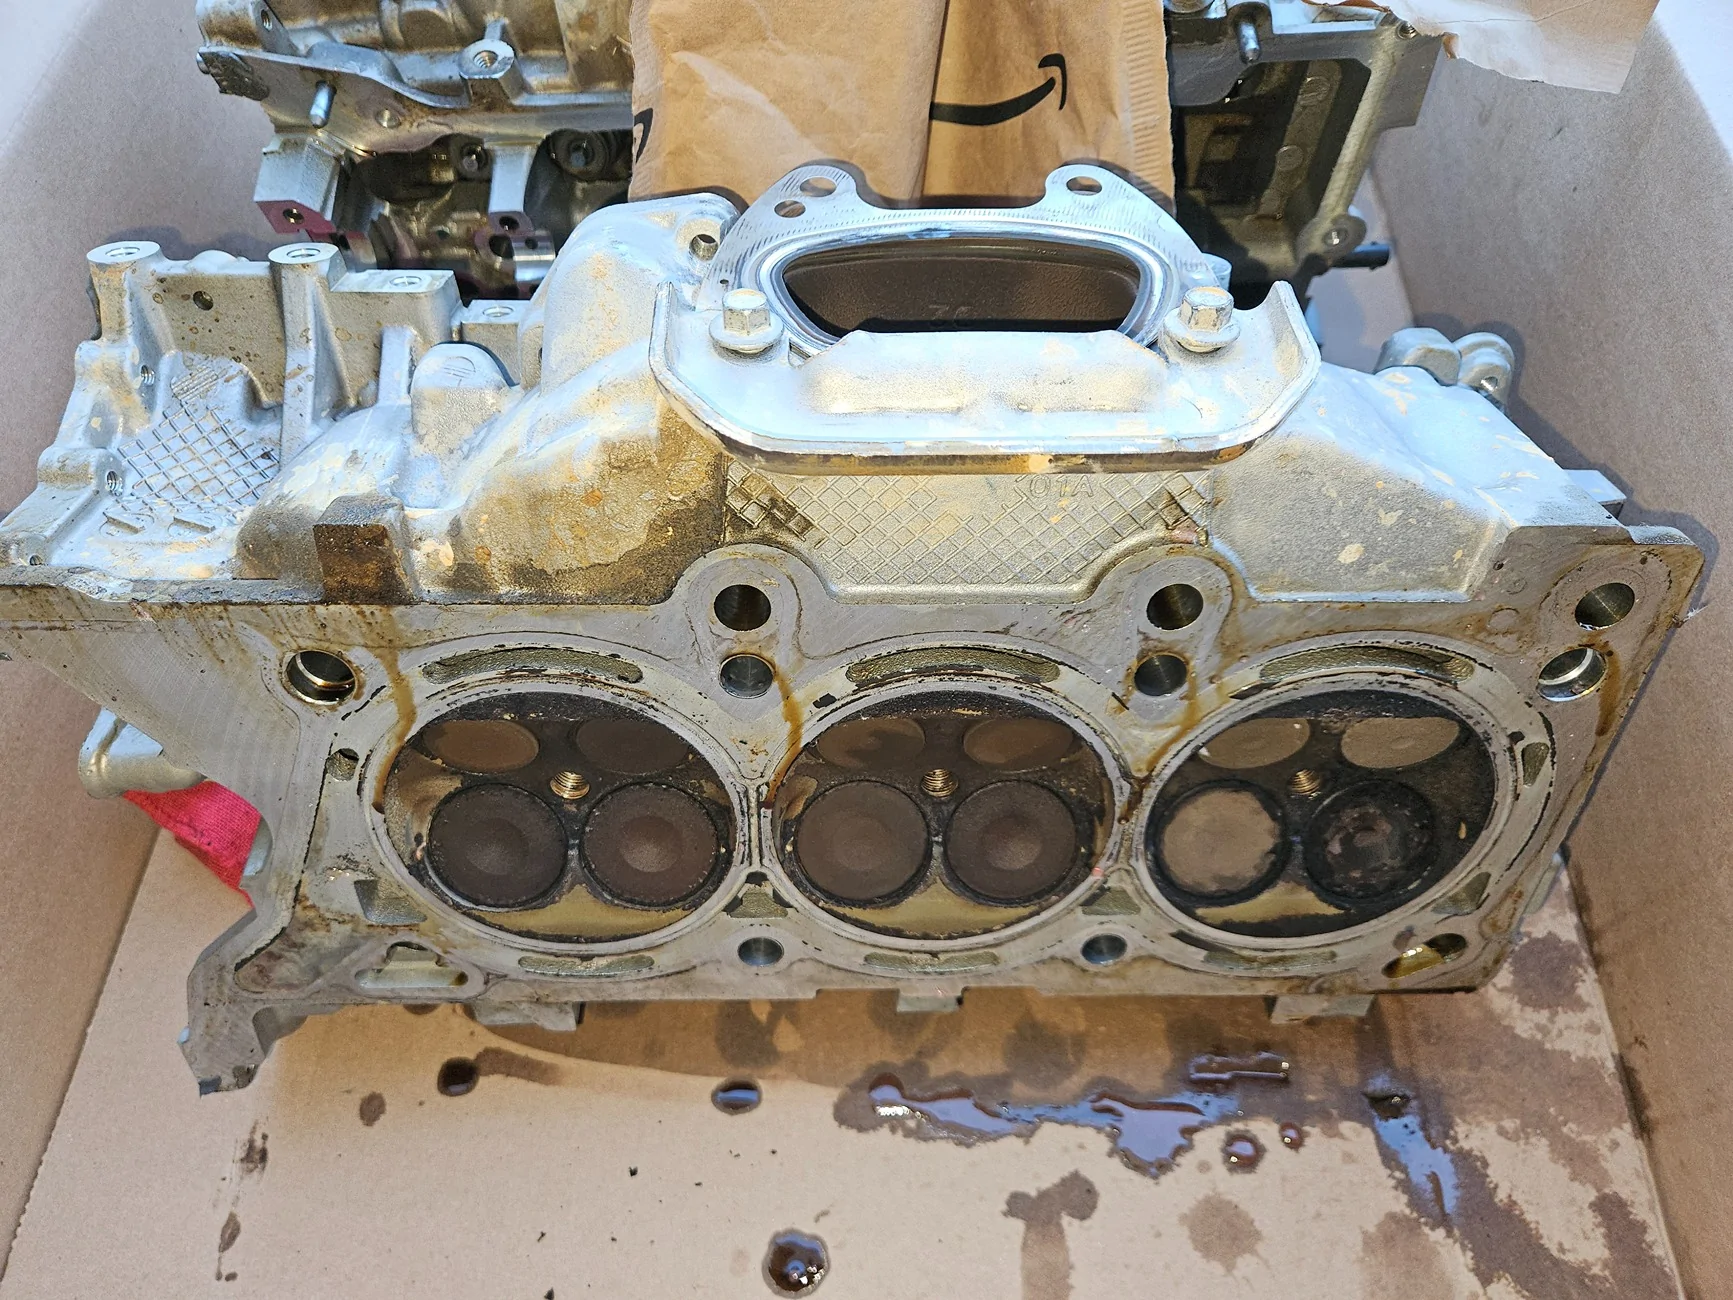
I think i will bring the heads somewhere to get checked and cleaned.

I'm no expert, but the carbon build up seems excessive to me. Can I just clean the cylinders with some BPC (brake parts cleaner) and.WD40?
Sponsored

 
OP
OP
RenegadeT

RenegadeT

Well-Known Member
First Name
Tony
Joined
Apr 15, 2022
Threads
15
Messages
153
Reaction score
183
Location
North Carolina
Vehicle(s)
77 CJ-7, 99 XJ, 2018 JLR
I suppose I should update this thread. Been pretty slack, but still making progress.

I brought both heads to my local trusted machine shop. He talked me into a complete valve job, etc. Little more than I wanted to spend, but good piece of mind. Picked them up first week of November.

I probably overthought the parts ordering stage. Had everything delivered from allmoparparts mid November. Thanksgiving crept.up and brought bitter cold weather in early December. I'm working outside, so when it's cold...I am not working.

Christmas miracle brought 70degree weather so I dropped the heads on mopar headgaskets, reused.the old.bolts, torque in circular.sequence 22ftlbs, 33ftlbs, again 33ftlbs, 40degrees then 90degrees.
Ground connections on the back of the heads done...Chrysler you're off. My Christmas card list.
Exhaust cats bolted.back to heads....still no Christmas card for you Chrysler.

Cams and timing chains installed. I rolled the engine over a few times and am pretty confident the timing is right.
Got the timing cover cleaned up, ready for new seals before installing.

Current status;
Jeep Wrangler JL head gasket swap after P0301 code 1000169922
 
OP
OP
RenegadeT

RenegadeT

Well-Known Member
First Name
Tony
Joined
Apr 15, 2022
Threads
15
Messages
153
Reaction score
183
Location
North Carolina
Vehicle(s)
77 CJ-7, 99 XJ, 2018 JLR
Let me post my timing pics.
Drivers side chain....
For removal, I had already removed the outboard cam phaser. To get it back together, I had to also remove the inboard phaser. If I did it again (hopefully never have to) I'd try removing only the inboard phaser. Big 36mm bolt head oil valve things torque to 105ftlbs
Jeep Wrangler JL head gasket swap after P0301 code 1000169912
Jeep Wrangler JL head gasket swap after P0301 code 1000169913
Jeep Wrangler JL head gasket swap after P0301 code 1000169914


Passenger side, much easier. No cam phasers removed during teardown or assembly...
Jeep Wrangler JL head gasket swap after P0301 code 1000169916
Jeep Wrangler JL head gasket swap after P0301 code 1000169917
Jeep Wrangler JL head gasket swap after P0301 code 1000169920


Edit...I forgot the beginning pics showing the idler gear dimple strait up, 12:00, the 2 arrows below for orange link on timing chains, and the crank at 9:00 TDC...
Jeep Wrangler JL head gasket swap after P0301 code 1000169800
Jeep Wrangler JL head gasket swap after P0301 code 1000169802
Jeep Wrangler JL head gasket swap after P0301 code 1000169804
 
Last edited:

azjl#3

Well-Known Member
First Name
Scott
Joined
Sep 24, 2022
Threads
17
Messages
3,050
Reaction score
3,695
Location
North AZ
Vehicle(s)
2024 silver zenith or atomic silver. JLUR Extreme Recon-ish
Occupation
retired, grumpy, yet, friendly
nice work bud.

I am still planning, engine dies, a v8 goes in.
 

Odyssey USA

Well-Known Member
First Name
Daniel
Joined
Oct 22, 2019
Threads
124
Messages
3,901
Reaction score
3,406
Location
Indiana
Website
www.youtube.com
Vehicle(s)
2021 JLU Rubicon
Build Thread
Link
Let me post my timing pics.
Drivers side chain....
For removal, I had already removed the outboard cam phaser. To get it back together, I had to also remove the inboard phaser. If I did it again (hopefully never have to) I'd try removing only the inboard phaser. Big 36mm bolt head oil valve things torque to 105ftlbs
1000169912.webp
1000169913.webp
1000169914.webp


Passenger side, much easier. No cam phasers removed during teardown or assembly...
1000169916.webp
1000169917.webp
1000169920.webp
I wish they just had a torque spec for the crank bolt. I’m not looking forward to doing that by myself. Which way you gonna go with that? I don’t wanna spend around $400 on up for a digital torque angle torque wrench and the cheap dial angle gauge I have, not sure how I’d secure that.
 

Sponsored

OP
OP
RenegadeT

RenegadeT

Well-Known Member
First Name
Tony
Joined
Apr 15, 2022
Threads
15
Messages
153
Reaction score
183
Location
North Carolina
Vehicle(s)
77 CJ-7, 99 XJ, 2018 JLR
I wish they just had a torque spec for the crank bolt. I’m not looking forward to doing that by myself. Which way you gonna go with that? I don’t wanna spend around $400 on up for a digital torque angle torque wrench and the cheap dial angle gauge I have, not sure how I’d secure that.
*cylinder head bolt.
I hear ya on the torque angle and tool. I bought a cheap chinesium angle.gauge from Amazon. It has both a magnetic end and a clip . It worked alright, but i was sure to eyeball my starting point referenced on engine in case the gauge unclipped or rotated. I thought I would use the magnetic end, but couldn't find enough steel points, so I used the clip end. One bolt, I ended up starting at negative 10 and went to 80 to get the 90 total to keep the same attachment point.
It sure seems goofy. I'm hoping there's a generous plus/minus tolerance on the angle.
 
OP
OP
RenegadeT

RenegadeT

Well-Known Member
First Name
Tony
Joined
Apr 15, 2022
Threads
15
Messages
153
Reaction score
183
Location
North Carolina
Vehicle(s)
77 CJ-7, 99 XJ, 2018 JLR
Hemi swap....yup, that keeps popping in my mind as I'm wrenching on this mess. I did a lil online window shopping, found America's most wanted 4x4 wants over $30k for a turnkey 5.7L swap. Seems fair, but not for me right now.

I also have a coworker that did a junkyard 5.7 swap in to his JK. Around $20k, some of that includes the 8spd auto tranny, same as in our JLs. He also has an electrical.background, unlike me, so was comfortable tackling that part if the swap...again unlike me lol
 

Odyssey USA

Well-Known Member
First Name
Daniel
Joined
Oct 22, 2019
Threads
124
Messages
3,901
Reaction score
3,406
Location
Indiana
Website
www.youtube.com
Vehicle(s)
2021 JLU Rubicon
Build Thread
Link
Hemi swap....yup, that keeps popping in my mind as I'm wrenching on this mess. I did a lil online window shopping, found America's most wanted 4x4 wants over $30k for a turnkey 5.7L swap. Seems fair, but not for me right now.

I also have a coworker that did a junkyard 5.7 swap in to his JK. Around $20k, some of that includes the 8spd auto tranny, same as in our JLs. He also has an electrical.background, unlike me, so was comfortable tackling that part if the swap...again unlike me lol
I called them too. Don’t care for the oiled air filter for an Offroad vehicle. Still tempting though.

I’d love to do my own swap but it’s the same for me, not a big electrical guru. I change house outlets, a battery, wire up a 90’s “system” for some shitty bass lol but that’s about it. I’m decent on the ocd of weatherproofing crimp/solder connectors. That’s as fancy as I get. A big wiring schematic…my brain goes duhhhh.
 

roaniecowpony

Well-Known Member
Joined
Dec 4, 2018
Threads
194
Messages
12,920
Reaction score
20,443
Location
SoCal
Vehicle(s)
2018 JLUR, 14 GMC 1500 CC All TERRAIN
Occupation
Retired Engineer
Good idea. Any idea what a V8 might cost?
I've been looking at how a 5.7 swap might go. I think I'd buy a 4x4 Ram take-out, with the engine, trans and transfer case, harness, PCM, and all accessories.
 

Sponsored

OP
OP
RenegadeT

RenegadeT

Well-Known Member
First Name
Tony
Joined
Apr 15, 2022
Threads
15
Messages
153
Reaction score
183
Location
North Carolina
Vehicle(s)
77 CJ-7, 99 XJ, 2018 JLR
I got all the belt drive components except the alternator back on.

AC compressor was fun. Nothing is ever as easy as it seems it should be. There's only 3 fasteners holding this on to the side of the block. May e this is docume ted somewhere, but here's what I figured out.
The bottom rear bolt is first. Insert the bolt into the comp before its in place. Otherwise the motor mount will block to slide the bolt in. A flat 13mm gearwrench works well here. Then the other long bolt can go on top to hold things in place. The third attachment, bottom front, is an E8 stud and then a 13mm hex nut, deepwell socket.

There is a hard coolant line coming from the nether regions of the bell housing, bolted to the bottom drivers side oil pan, routed up near AC compressor, maybe to the tsat. To access the exhaust catnconnection, i had unblocked it from the oil pan and tucked the loose end under the steering shaft. After bolting up the AC comp, I realized this hard pipe needed to be above the compressor. It was tight, but i was able to bend shimmy and finagle it back into position, then tighten it up to the oil pan.
Who knows maybe this was the best way. It was tricky getting the AC compressor in place without the hard pipe. If I had to do it again though, I'd try to have the pipe above the AC comp.

Now I need to buckle down for valve covers and intakes, plus all the fun wiring and coolant hoses. Then EGR cooler and battery tray, fan (clean radiator fins first), fresh oil and coolant, etc
Jeep Wrangler JL head gasket swap after P0301 code 1000170285
 

Odyssey USA

Well-Known Member
First Name
Daniel
Joined
Oct 22, 2019
Threads
124
Messages
3,901
Reaction score
3,406
Location
Indiana
Website
www.youtube.com
Vehicle(s)
2021 JLU Rubicon
Build Thread
Link
I got all the belt drive components except the alternator back on.

AC compressor was fun. Nothing is ever as easy as it seems it should be. There's only 3 fasteners holding this on to the side of the block. May e this is docume ted somewhere, but here's what I figured out.
The bottom rear bolt is first. Insert the bolt into the comp before its in place. Otherwise the motor mount will block to slide the bolt in. A flat 13mm gearwrench works well here. Then the other long bolt can go on top to hold things in place. The third attachment, bottom front, is an E8 stud and then a 13mm hex nut, deepwell socket.

There is a hard coolant line coming from the nether regions of the bell housing, bolted to the bottom drivers side oil pan, routed up near AC compressor, maybe to the tsat. To access the exhaust catnconnection, i had unblocked it from the oil pan and tucked the loose end under the steering shaft. After bolting up the AC comp, I realized this hard pipe needed to be above the compressor. It was tight, but i was able to bend shimmy and finagle it back into position, then tighten it up to the oil pan.
Who knows maybe this was the best way. It was tricky getting the AC compressor in place without the hard pipe. If I had to do it again though, I'd try to have the pipe above the AC comp.

Now I need to buckle down for valve covers and intakes, plus all the fun wiring and coolant hoses. Then EGR cooler and battery tray, fan (clean radiator fins first), fresh oil and coolant, etc
1000170285.webp
I’m not making a YT video on this job, except maybe an oil pump and cyl hd stud install video as it would be a few hours long and a PITA trying to film it all making the whole job 4X harder. That said I do take pics of routing to supplement the service manual and if it’s too complex and I’m worried I’ll forget something, I take a short video talking myself through it.

Honestly, my memory isn’t as good as it used to be BUT given how many steps and how I can only work on it here and there, even if I was 30 again, I don’t think I could retain it all. Definitely red taped & video’d those ground straps lol. Not hard to install but with electronics these days I don’t want to be looking into the mess of wiring and miss those and where they go. Did the same for the hoses/tubes around the AC compressor.

See, this stuff isn’t fun to me but at least I’m learning. I went to school for engine building/porting/all the machining. Replacing a head gasket on vehicles these days…. ain’t it.
 
OP
OP
RenegadeT

RenegadeT

Well-Known Member
First Name
Tony
Joined
Apr 15, 2022
Threads
15
Messages
153
Reaction score
183
Location
North Carolina
Vehicle(s)
77 CJ-7, 99 XJ, 2018 JLR
Any idea WTH this bracket is? I'm sure I'll figure it out as i get deeper into the reassembly as this puzzle comes together, but right now i cant seem to place it. I wrote RH, so guessing that will be pass. side, but who knows lol
Jeep Wrangler JL head gasket swap after P0301 code 1000170475
 

Odyssey USA

Well-Known Member
First Name
Daniel
Joined
Oct 22, 2019
Threads
124
Messages
3,901
Reaction score
3,406
Location
Indiana
Website
www.youtube.com
Vehicle(s)
2021 JLU Rubicon
Build Thread
Link
Any idea WTH this bracket is? I'm sure I'll figure it out as i get deeper into the reassembly as this puzzle comes together, but right now i cant seem to place it. I wrote RH, so guessing that will be pass. side, but who knows lol
1000170475.webp
I have an eTorque. I just came from the garage and though I don’t have that bracket, I have one that is constructed similarly that mounts on top of the passenger valve cover that keeps the coolant lines from moving around and another even smaller bracket that holds the power cable that runs to the MGU. Same sheet metal with the reinforcing rigidity ribs pressed into it and small hardware.
Sponsored

 
Last edited:


Top