Sponsored
Backup Lights
- Thread starter TravisRogers
- Start date
- Watchers 230
Beetle Bailey
Well-Known Member
- First Name
- Joe
- Joined
- Aug 31, 2018
- Threads
- 32
- Messages
- 163
- Reaction score
- 157
- Location
- SoCal - Orange County
- Vehicle(s)
- 2019 JLUR, HD Dyna, HD Softail
Yes you will need two of themIs ROADMASTER 690 Single Park Light Diode the preferred diode to be used?
Michael
CarbonSteel
Well-Known Member
I am about to start this project myself (waiting for my Borla S to arrive this week so I mount the lights in the best place) and I want to keep my diodes under the hood.
To that end, has anyone tapped into the trailer backup wiring under the hood? I looked at the wiring diagrams and the wire appears to go up to a relay somewhere under the hood.
Anyone have any insight?
To that end, has anyone tapped into the trailer backup wiring under the hood? I looked at the wiring diagrams and the wire appears to go up to a relay somewhere under the hood.
Anyone have any insight?
SeanD
Well-Known Member
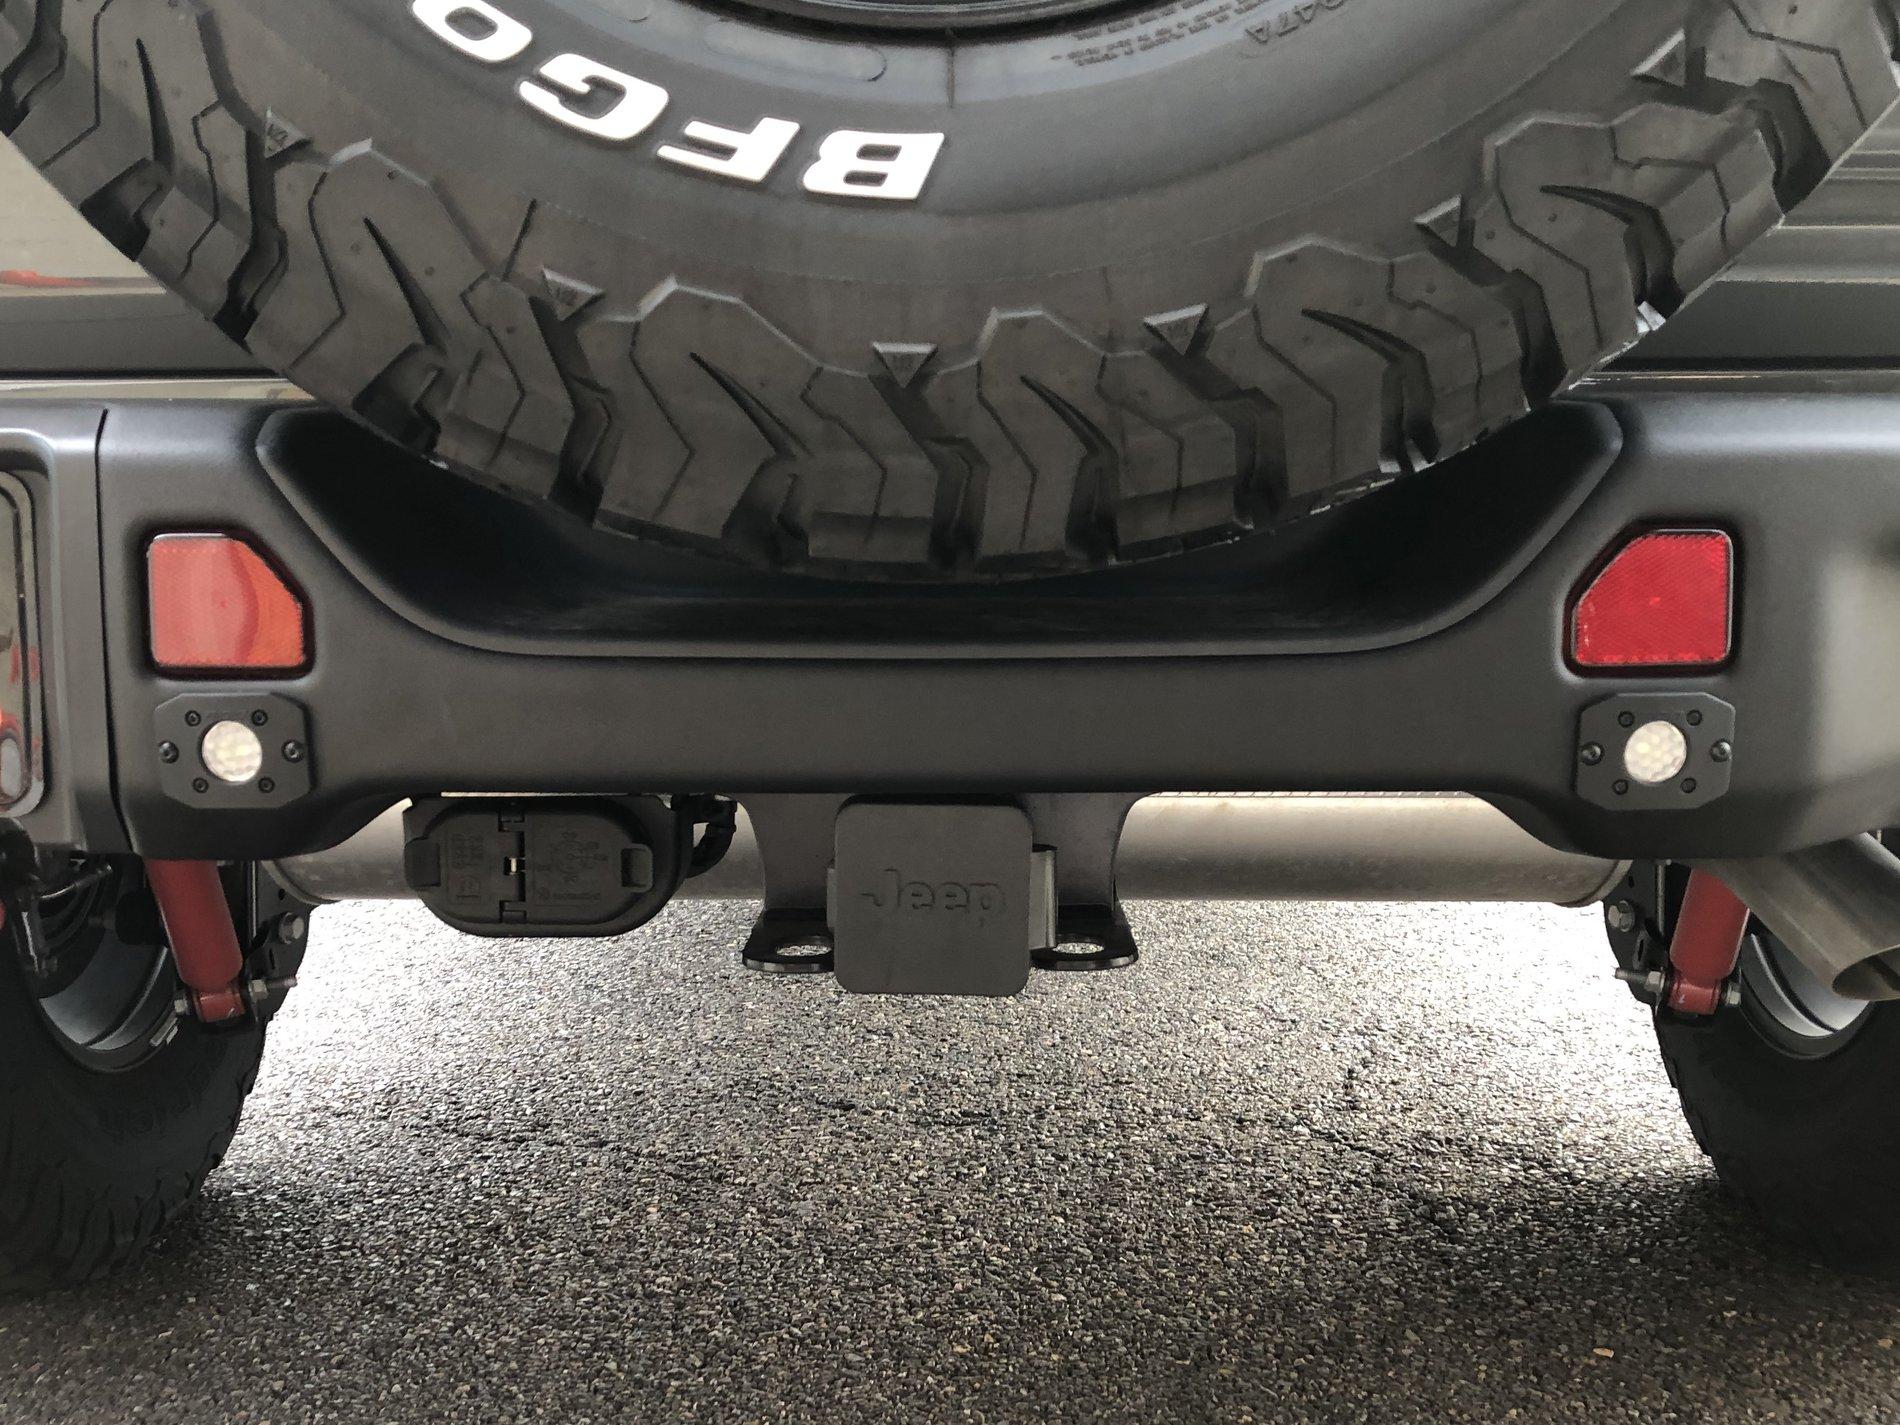
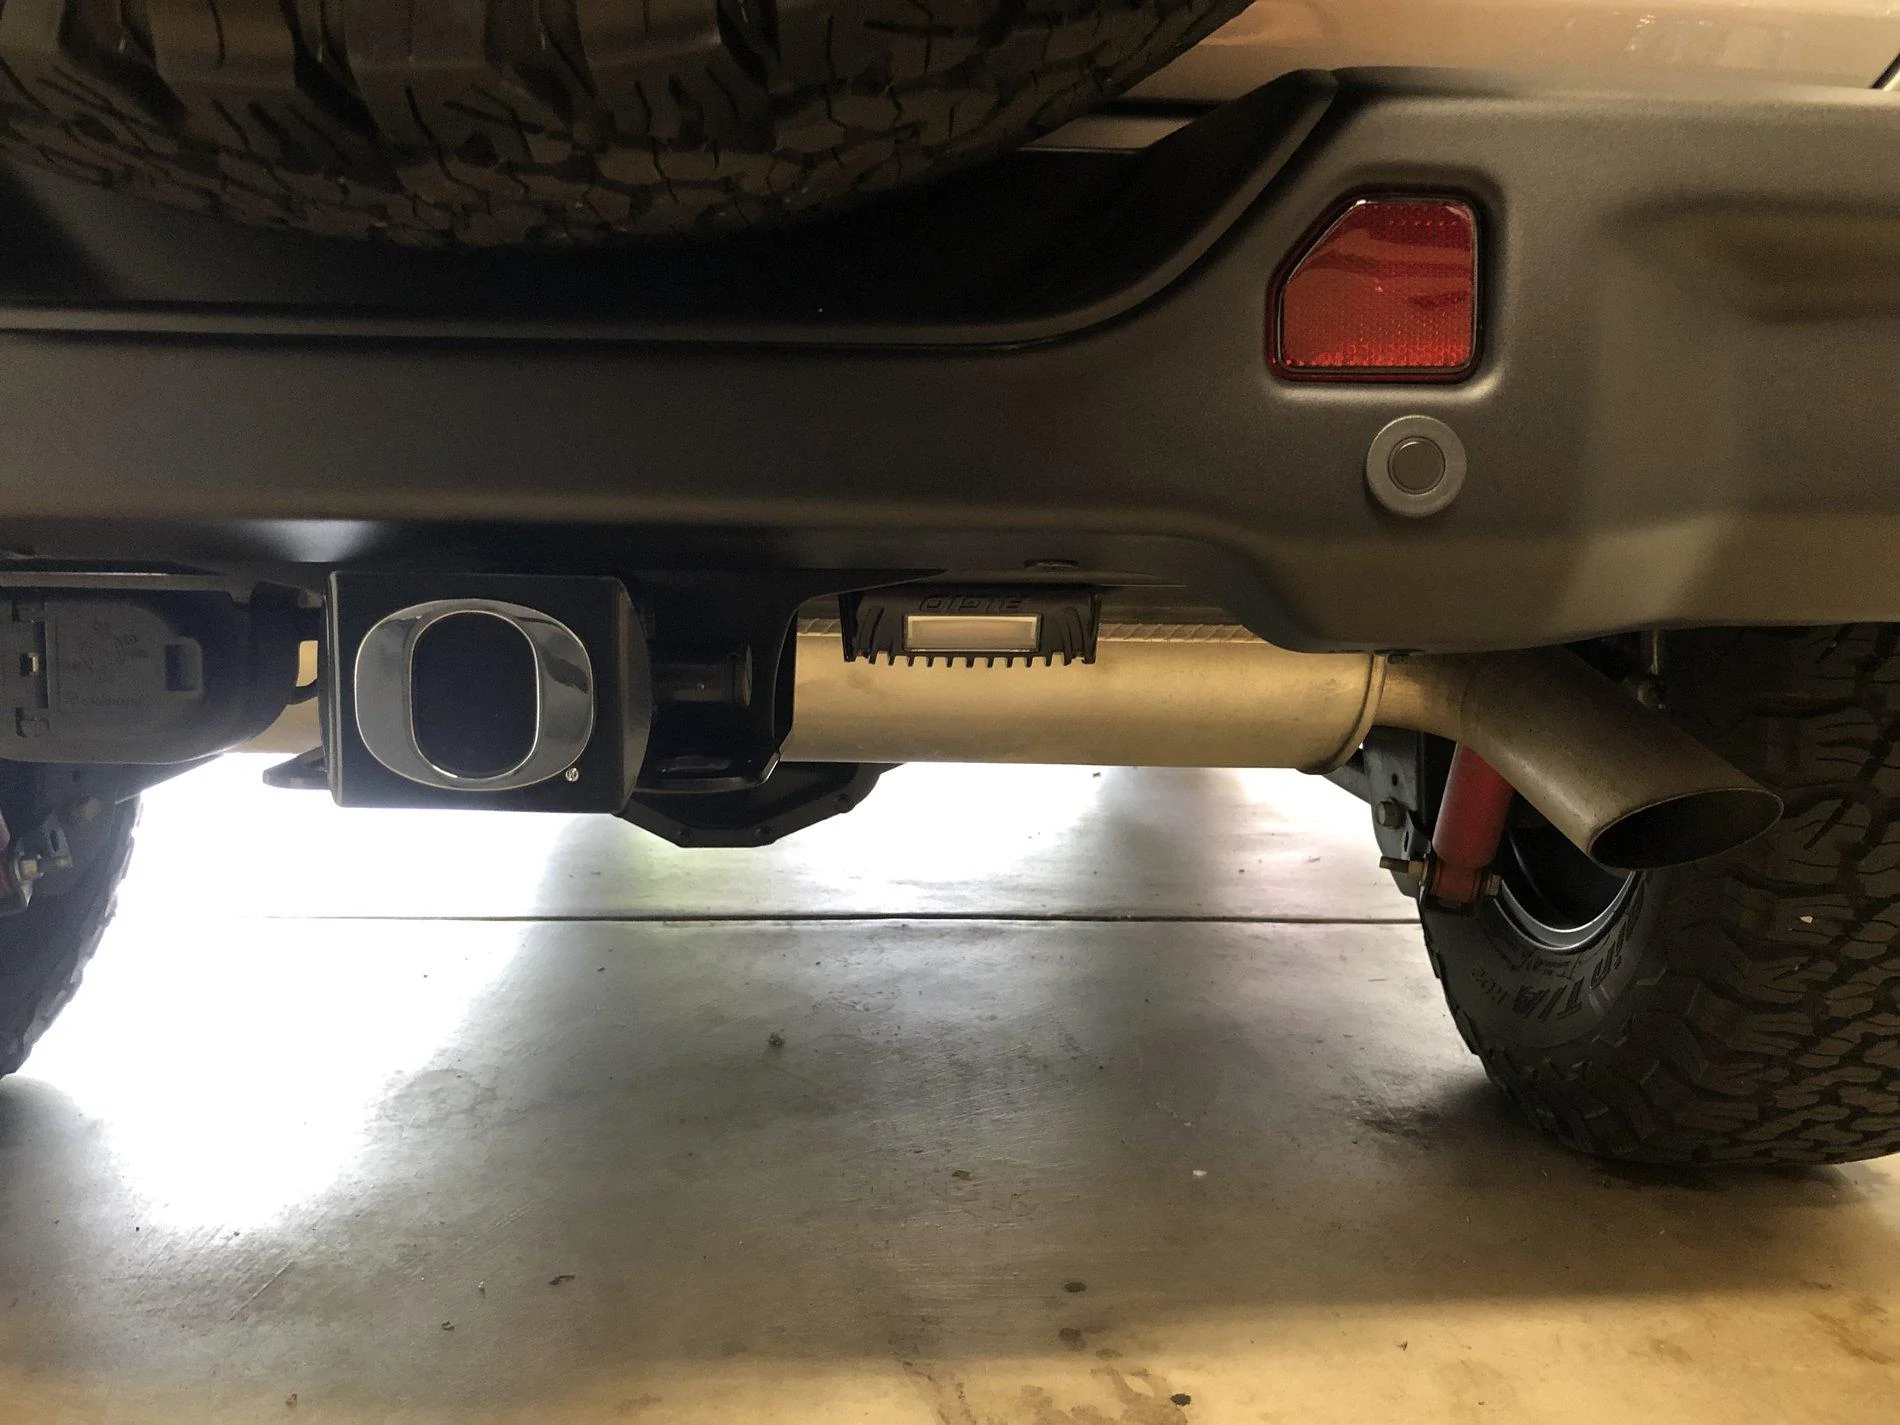
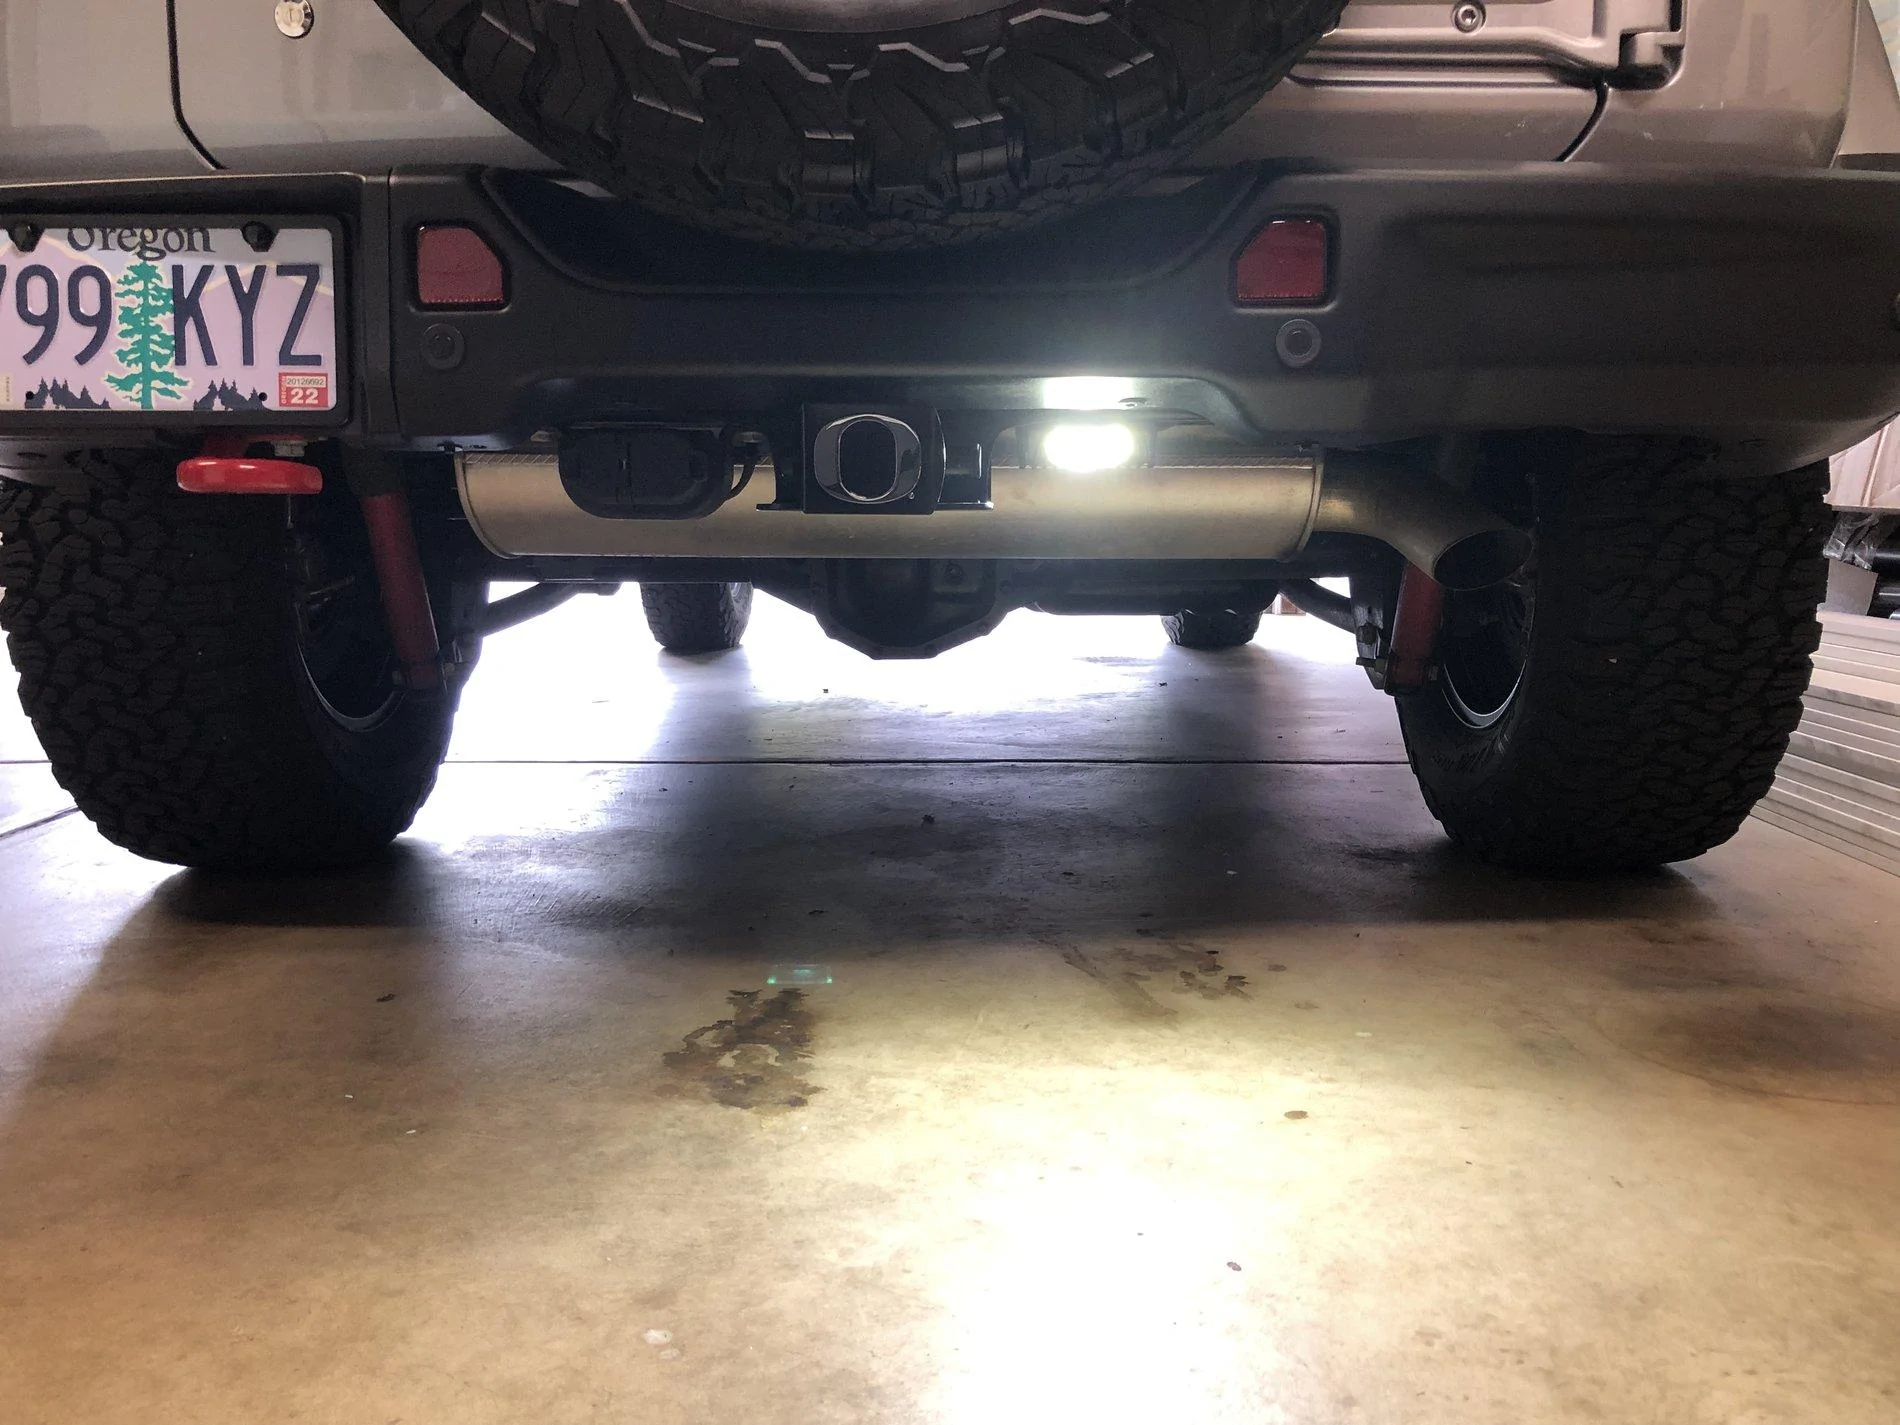
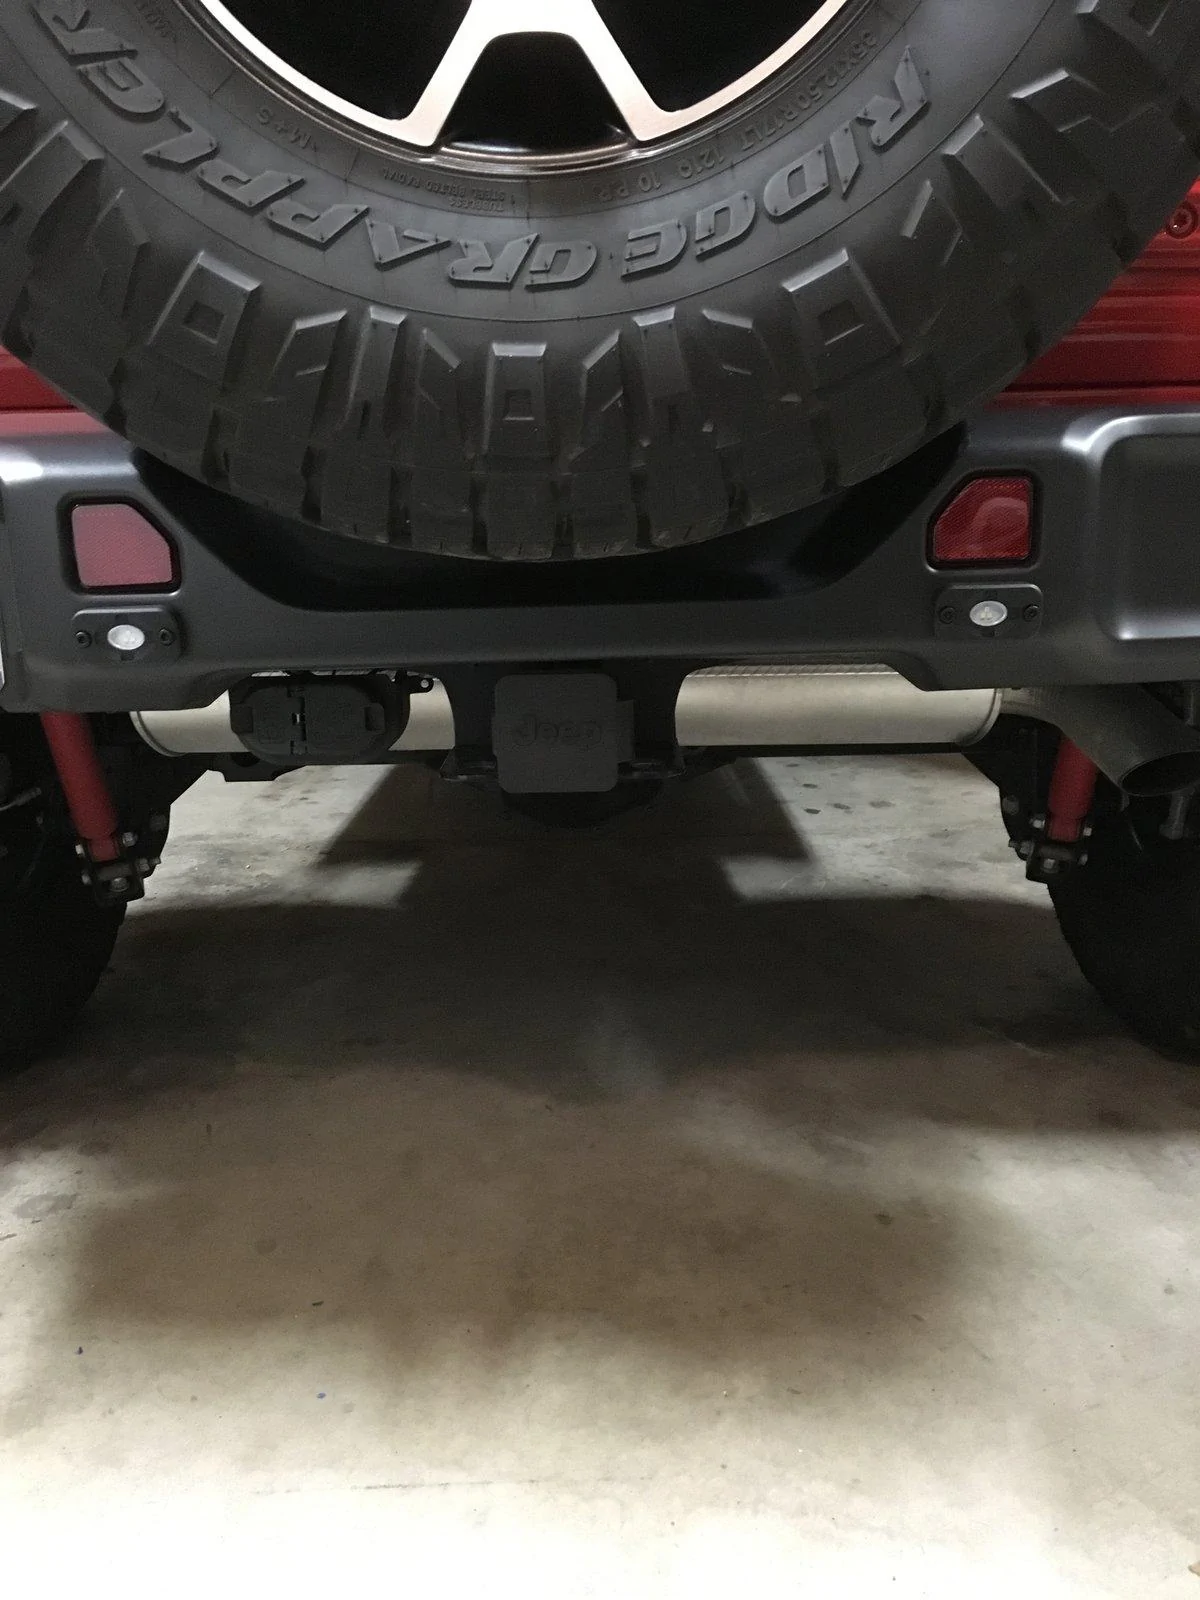
I really liked @Jeeper ‘s idea using the Rigid Scene Light, but chose to mount it to the side of my hitch like many others using a single light (eg, Baja Designs S2) rather than to the bottom of the hitch where it would have been more nicely centered. I was worried about it hanging down too far and being exposed more than I liked.
The Rigid Scene Light is relatively inexpensive ($82 on Amazon) and has a sleek, low profile which is quite elegant. However, because it doesn’t project the light out straight, it won’t be as bright and evenly spread as some other dual light solutions (which will surely bug my OCD!), but it is still quite an improvement and adequate for my needs.
I just wired it direct to Aux 4 for now going through the frame rail, but will eventually also wire to the backup lights behind the passenger side taillight using the two diode approach. I just ran out of time today.
And yes, I still need to paint my muffler.")

The Rigid Scene Light is relatively inexpensive ($82 on Amazon) and has a sleek, low profile which is quite elegant. However, because it doesn’t project the light out straight, it won’t be as bright and evenly spread as some other dual light solutions (which will surely bug my OCD!), but it is still quite an improvement and adequate for my needs.
I just wired it direct to Aux 4 for now going through the frame rail, but will eventually also wire to the backup lights behind the passenger side taillight using the two diode approach. I just ran out of time today.
And yes, I still need to paint my muffler.
Last edited:
Scarr2k
Well-Known Member
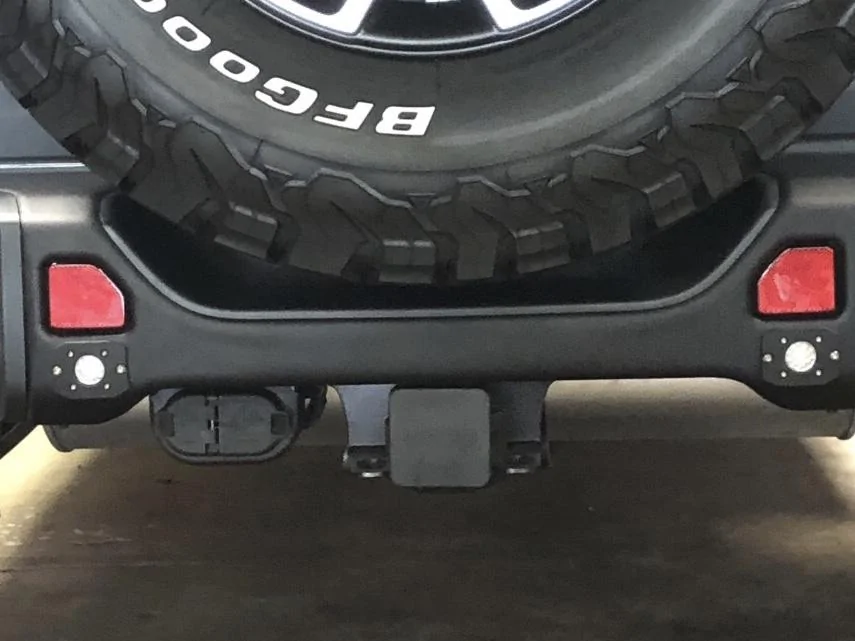
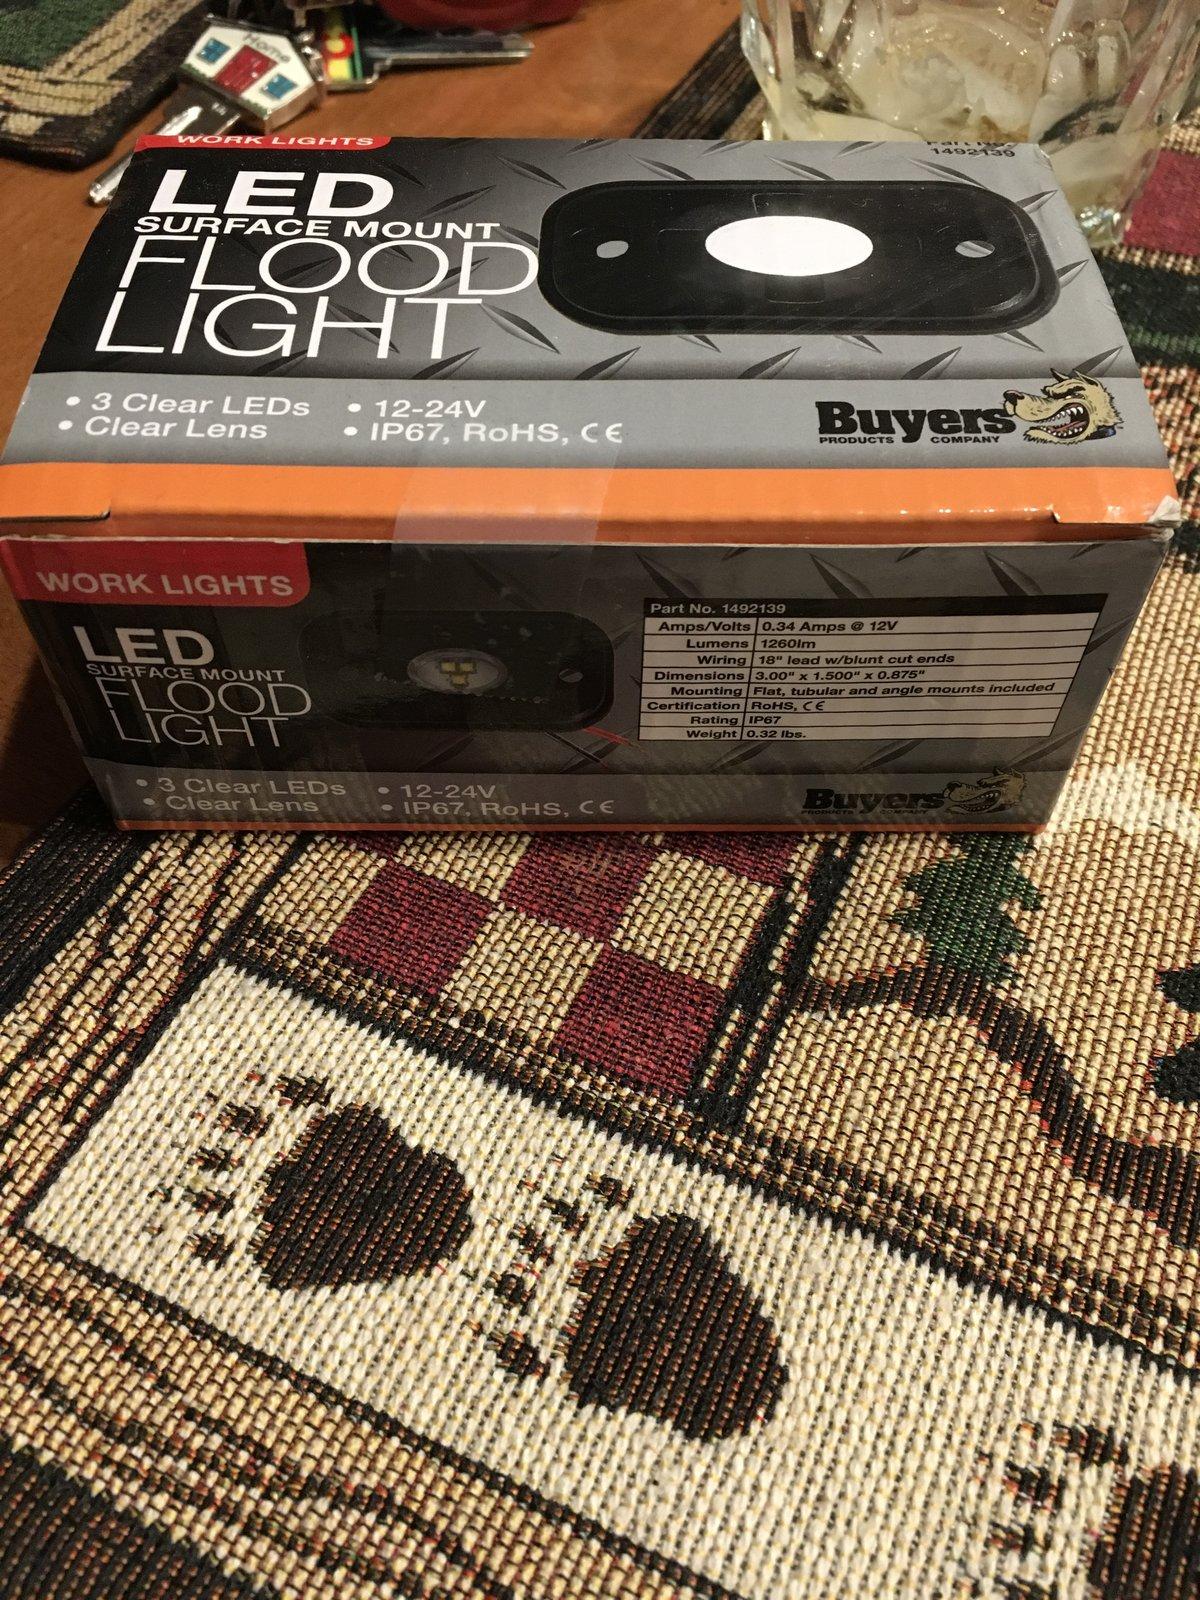
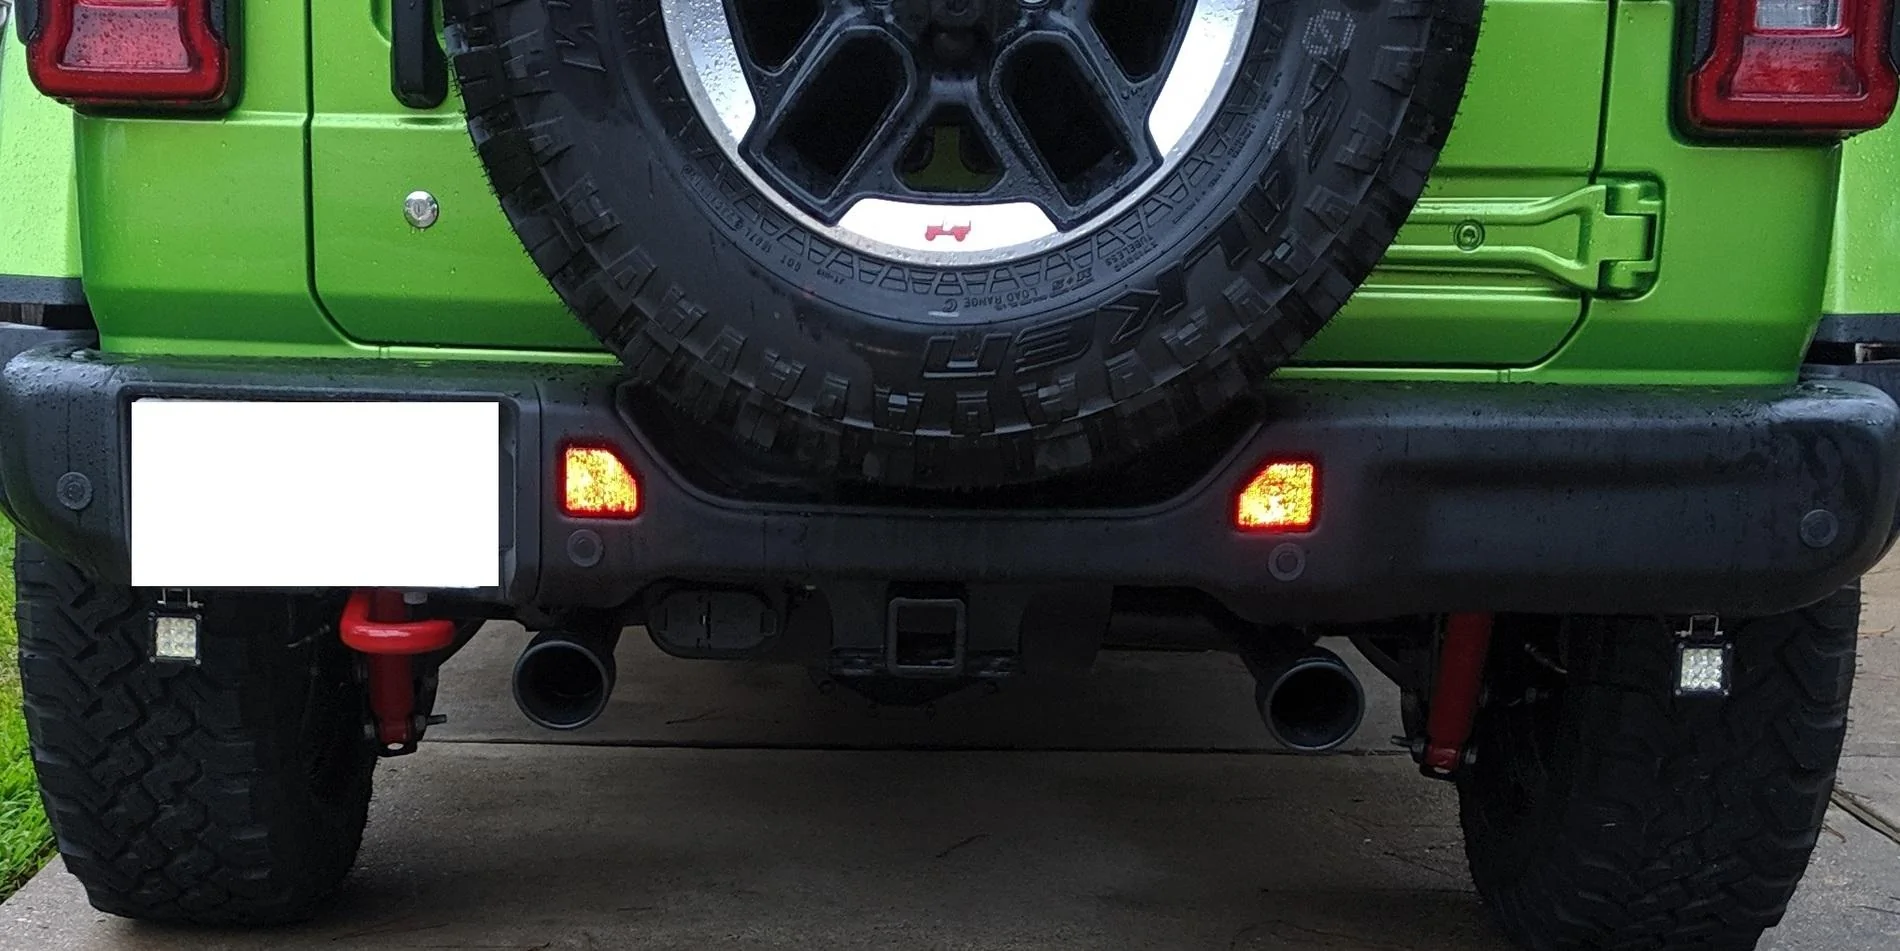
@ColoradoRubicon - Love the light install and actually ordered a set based on this. One thing I wanted to ask has anyone installed this exact set of LED's from e-trailer on a plastic bumper with the backup sensors? I believe I have two sensors right where @ColoradoRubicon installed his. I've seen a few Rigid flush mount LEDs that were mounted on the outer edges of the bumper with backup sensors but wanted to see anyone who used the e-trailer ones.Here is what I did. Looks factory to me. Super bright! No low hanging issues as with other lights. 1260 lumens each!

Sponsored
spurly
Well-Known Member
Well I read through the entire thread sitting at the bar tonight. Ok more like skimmed.
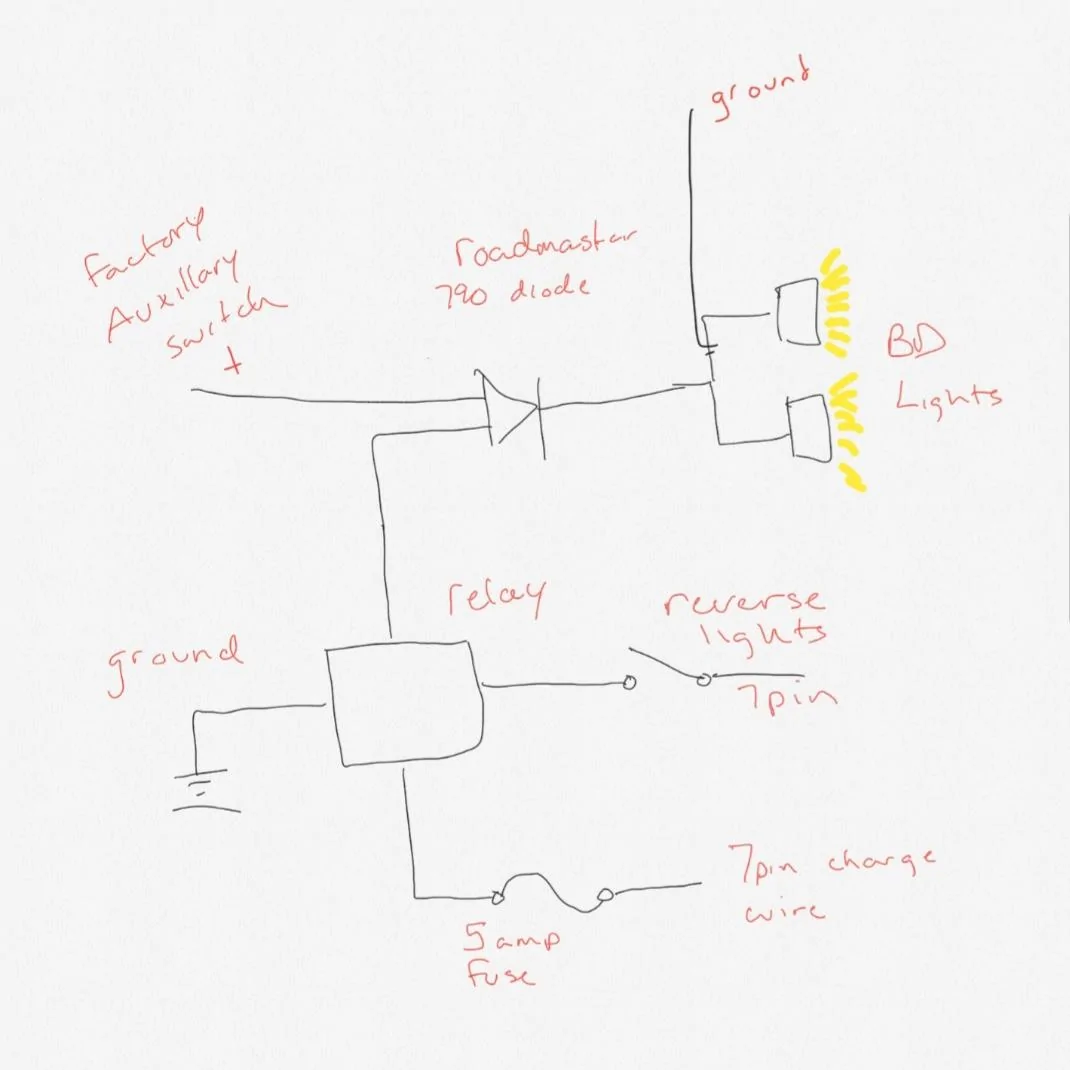
I have a new aftermarket bumper arriving tomorrow that I will be installing 2 Baja Designs S2 Sport flush mounts into. I've been planning on wiring them up to both the AUX switch AND and the reverse lights. I will not be splicing into the taillight wire harness for the reverse switch power but instead splicing into the reverse wire from the 7pin trailer harness to switch the relay AND the charge wire from the 7 pin harness to provide 12v power to the lights. After reading through the thread, I think I may have (but now I'm second guessing myself) simplified the wiring a bit but I wanted someone to double check my math so to speak (cough @Rhinebeck01 cough). Roadmaster actually makes a 2 in 1 out diode that should make this a bit easier.
(The 5 amp fuse off the charge wire is just extra security and the "switch" I show coming off the 7pin reverse lights is just my way of saying this is the trigger for the relay)
On paper it works, but will the Jeep like it?
Last edited:
- First Name
- Steve
- Joined
- Feb 27, 2017
- Threads
- 17
- Messages
- 181
- Reaction score
- 310
- Location
- Arlington, VA
- Website
- www.smartstopstart.com
- Vehicle(s)
- 2019 Wrangler JL Rubicon Unlimited Sting Gray
- Occupation
- Electronics Engineer and Business Owner
Well I read through the entire thread sitting at the bar tonight. Ok more like skimmed.
I have a new aftermarket bumper arriving tomorrow that I will be installing 2 Baja Designs S2 Sport flush mounts into. I've been planning on wiring them up to both the AUX switch AND and the reverse lights. I will not be splicing into the taillight wire harness for the reverse switch power but instead splicing into the reverse wire from the 7pin trailer harness to switch the relay AND the charge wire from the 7 pin harness to provide 12v power to the lights. After reading through the thread, I think I may have (but now I'm second guessing myself) simplified the wiring a bit but I wanted someone to double check my math so to speak (cough @Rhinebeck01 cough). Roadmaster actually makes a 2 in 1 out diode that should make this a bit easier.
(The 5 amp fuse off the charge wire is just extra security and the "switch" I show coming off the 7pin reverse lights is just my way of saying this is the trigger for the relay)
On paper it works, but will the Jeep like it?
Mostly this is OK, but It is unnecessarily complicated. You do not need to add a relay since the trailer harness backup light already has a dedicated built in relay in the vehicle for for the trailer lights. The only other issue is you have drawn the ground to the two lights on top of the power wires to the lights. The ground to the lights is a separate wire.Well I guess Rhinebeck is no longer on the forum according to his profile. So maybe someone else can help check my math.
spurly
Well-Known Member
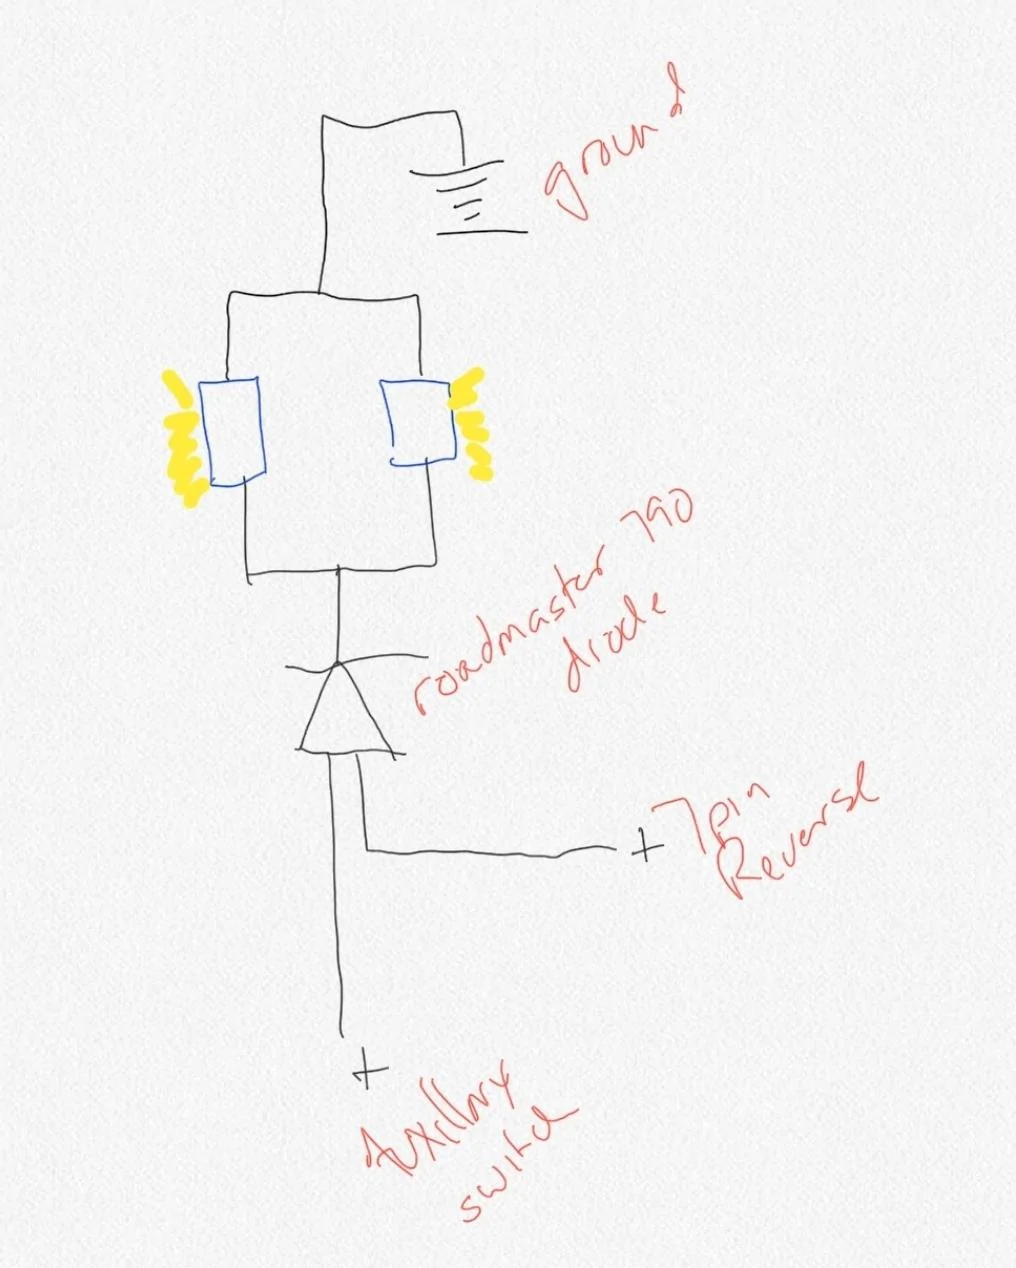
Good point, I was planning on using the wire harness that came with the lights because I didn't think about the 7pin reverse already having a dedicated relay. The ground for the lights was a last second catch and I ran out of room on my tablet to correctly draw it in. This should be much easier.Mostly this is OK, but It is unnecessarily complicated. You do not need to add a relay since the trailer harness backup light already has a dedicated built in relay in the vehicle for for the trailer lights. The only other issue is you have drawn the ground to the two lights on top of the power wires to the lights. The ground to the lights is a separate wire.
CarbonSteel
Well-Known Member
I joined the backup light club yesterday and it took about 4 hours (really took my time to do everything right). I connected the lights to Aux #4 and to the backup light lead for the 7 pin trailer connector. I could not justify the cost of the Rigid branded lights (for something that may be torn off) so I used two ADZOON 2'' 27W Waterproof Mini LED Cube lights.
I ran marine 14/2 wiring inside 3/8” split loom tubing from the engine bay to the rear using a ¼” 25 foot fish tape (https://www.lowes.com/pd/Southwire-25-ft-Steel-Fish-Tape/50114239). This particular tape is great and when I initially ran it through the frame, it hit an obstacle very quickly. I thought -great, this is what everyone has struggled with, but when I began tracing it, I was pleasantly surprised to find it hitting the bumper—totally painless, but I think the ¼” blade versus the more common 1/8” blade made the difference.
All wiring was ran inside split loom tubing and taped at appropriate intervals. All connections were either covered in heat shrink tubing or siliconed and taped. The crimper I bought does a much better job than my Thomas & Betts crimpers (https://www.amazon.com/Thomas-Betts-WT111M-Insulated-Terminals/dp/B0018LD2PU) which have a tendency to cut through the insulation.
I installed a diode in the engine bay for the wiring running from Aux #4 to the rear and installed a second diode at the top of the rear passenger taillight cavity. All in all, I am very pleased with the results and the increased light at night. Jeep seriously needs to do something about the OEM LED backup lights—they suck to the point of being dangerous.
Major parts and tools:
Lights - https://www.amazon.com/gp/product/B07JD8P1VV
Wire - https://www.amazon.com/gp/product/B0799JDF5K
Posi-Taps - https://www.amazon.com/gp/product/B01EINQXEG
Heat Shrink Butt Connectors - https://www.amazon.com/gp/product/B07B518GCJ
Diodes - https://www.amazon.com/gp/product/B007HRO4X8
Heat Shrink Tubing - https://www.amazon.com/gp/product/B075WR9FVL
Crimpers - https://www.amazon.com/gp/product/B0069TRKJ0
Sponsored
AnthemAVM
Well-Known Member
Amazing write upI joined the backup light club yesterday and it took about 4 hours (really took my time to do everything right). I connected the lights to Aux #4 and to the backup light lead for the 7 pin trailer connector. I could not justify the cost of the Rigid branded lights (for something that may be torn off) so I used two ADZOON 2'' 27W Waterproof Mini LED Cube lights.
I ran marine 14/2 wiring inside 3/8” split loom tubing from the engine bay to the rear using a ¼” 25 foot fish tape (https://www.lowes.com/pd/Southwire-25-ft-Steel-Fish-Tape/50114239). This particular tape is great and when I initially ran it through the frame, it hit an obstacle very quickly. I thought -great, this is what everyone has struggled with, but when I began tracing it, I was pleasantly surprised to find it hitting the bumper—totally painless, but I think the ¼” blade versus the more common 1/8” blade made the difference.
All wiring was ran inside split loom tubing and taped at appropriate intervals. All connections were either covered in heat shrink tubing or siliconed and taped. The crimper I bought does a much better job than my Thomas & Betts crimpers (https://www.amazon.com/Thomas-Betts-WT111M-Insulated-Terminals/dp/B0018LD2PU) which have a tendency to cut through the insulation.
I installed a diode in the engine bay for the wiring running from Aux #4 to the rear and installed a second diode at the top of the rear passenger taillight cavity. All in all, I am very pleased with the results and the increased light at night. Jeep seriously needs to do something about the OEM LED backup lights—tey suck to the point of being dangerous.
Major parts and tools:
Lights - https://www.amazon.com/gp/product/B07JD8P1VV
Wire - https://www.amazon.com/gp/product/B0799JDF5K
Posi-Taps - https://www.amazon.com/gp/product/B01EINQXEG
Heat Shrink Butt Connectors - https://www.amazon.com/gp/product/B07B518GCJ
Diodes - https://www.amazon.com/gp/product/B007HRO4X8
Heat Shrink Tubing - https://www.amazon.com/gp/product/B075WR9FVL
Crimpers - https://www.amazon.com/gp/product/B0069TRKJ0
jimmyzwheelz
Well-Known Member
- First Name
- Jimmy
- Joined
- May 4, 2018
- Threads
- 1
- Messages
- 228
- Reaction score
- 242
- Location
- Little Rock, AR
- Vehicle(s)
- 2019 Wrangler Rubicon 2DR
Thanks for the tip on the crimper tool! I always hated the way my standard crimper worked...this one looks great!I joined the backup light club yesterday and it took about 4 hours (really took my time to do everything right). I connected the lights to Aux #4 and to the backup light lead for the 7 pin trailer connector. I could not justify the cost of the Rigid branded lights (for something that may be torn off) so I used two ADZOON 2'' 27W Waterproof Mini LED Cube lights.
I ran marine 14/2 wiring inside 3/8” split loom tubing from the engine bay to the rear using a ¼” 25 foot fish tape (https://www.lowes.com/pd/Southwire-25-ft-Steel-Fish-Tape/50114239). This particular tape is great and when I initially ran it through the frame, it hit an obstacle very quickly. I thought -great, this is what everyone has struggled with, but when I began tracing it, I was pleasantly surprised to find it hitting the bumper—totally painless, but I think the ¼” blade versus the more common 1/8” blade made the difference.
All wiring was ran inside split loom tubing and taped at appropriate intervals. All connections were either covered in heat shrink tubing or siliconed and taped. The crimper I bought does a much better job than my Thomas & Betts crimpers (https://www.amazon.com/Thomas-Betts-WT111M-Insulated-Terminals/dp/B0018LD2PU) which have a tendency to cut through the insulation.
I installed a diode in the engine bay for the wiring running from Aux #4 to the rear and installed a second diode at the top of the rear passenger taillight cavity. All in all, I am very pleased with the results and the increased light at night. Jeep seriously needs to do something about the OEM LED backup lights—they suck to the point of being dangerous.
Major parts and tools:
Lights - https://www.amazon.com/gp/product/B07JD8P1VV
Wire - https://www.amazon.com/gp/product/B0799JDF5K
Posi-Taps - https://www.amazon.com/gp/product/B01EINQXEG
Heat Shrink Butt Connectors - https://www.amazon.com/gp/product/B07B518GCJ
Diodes - https://www.amazon.com/gp/product/B007HRO4X8
Heat Shrink Tubing - https://www.amazon.com/gp/product/B075WR9FVL
Crimpers - https://www.amazon.com/gp/product/B0069TRKJ0
CarbonSteel
Well-Known Member
It is a ratcheting style and will not let you over-crimp and it also does a "double crimp" about 1/8" apart. For the cost of the Titan crimpers, I am impressed.Thanks for the tip on the crimper tool! I always hated the way my standard crimper worked...this one looks great!
blnewt
Well-Known Member
- First Name
- Brad
- Joined
- Oct 8, 2018
- Threads
- 99
- Messages
- 9,956
- Reaction score
- 24,094
- Location
- New Mexico
- Vehicle(s)
- 2019 Jeep JL V6 SportS, (Retired 74 CJ-5, 80 CJ-7)
- Occupation
- Just ask @cosine he knows!
@CarbonSteel , great contribution there, way to pay it forward!
Poynter32
Well-Known Member
- Joined
- Aug 26, 2017
- Threads
- 9
- Messages
- 170
- Reaction score
- 167
- Location
- Sarasota, FL
- Vehicle(s)
- 2018 JL Rubicon Granite Crystal
Can someone please help me? I have been working on this issue for awhile and started another thread today to try and get answers. Not getting power to the reverse light anymore. Here is the thread. Thanks for any help you can give.
https://www.jlwranglerforums.com/forum/threads/help-please-reverse-light-issue.39208/
https://www.jlwranglerforums.com/forum/threads/help-please-reverse-light-issue.39208/
Sponsored
Last edited: