Sponsored

Backup Lights

SHYUperman

Well-Known Member
Joined
Jun 18, 2018
Threads
47
Messages
414
Reaction score
371
Location
VA
Vehicle(s)
2024 392
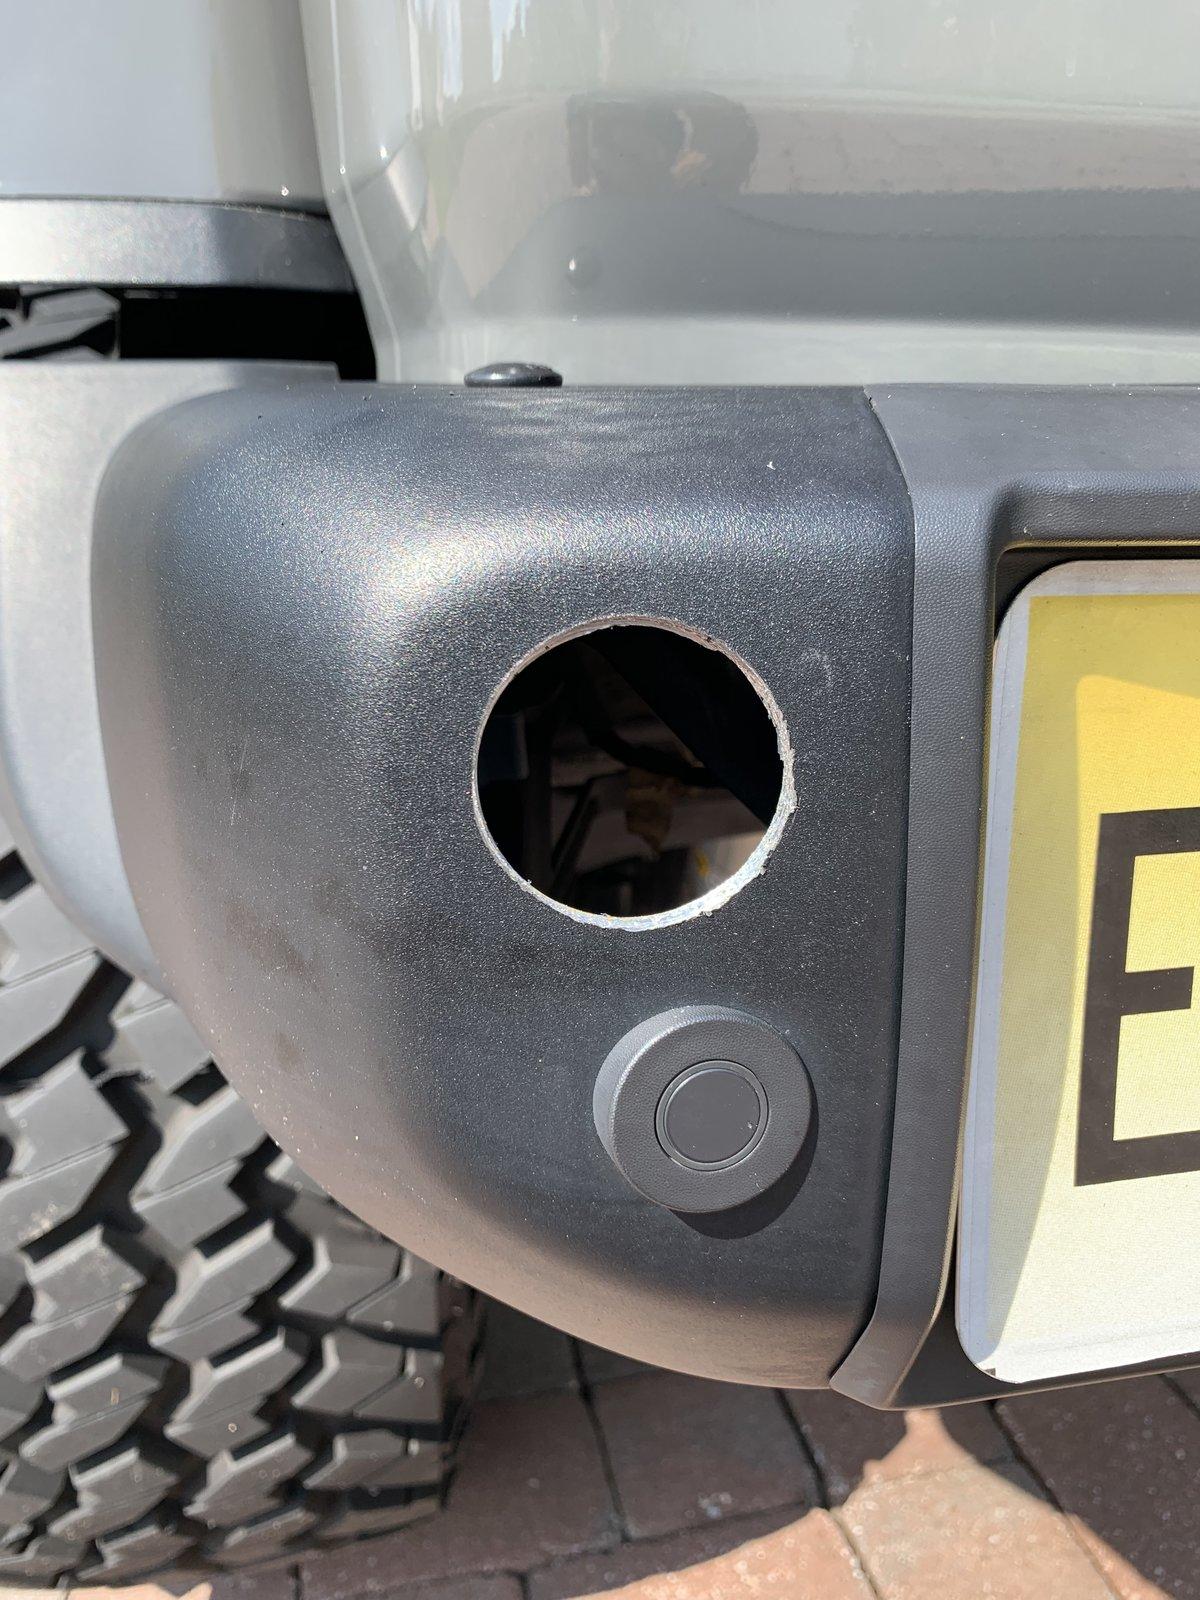
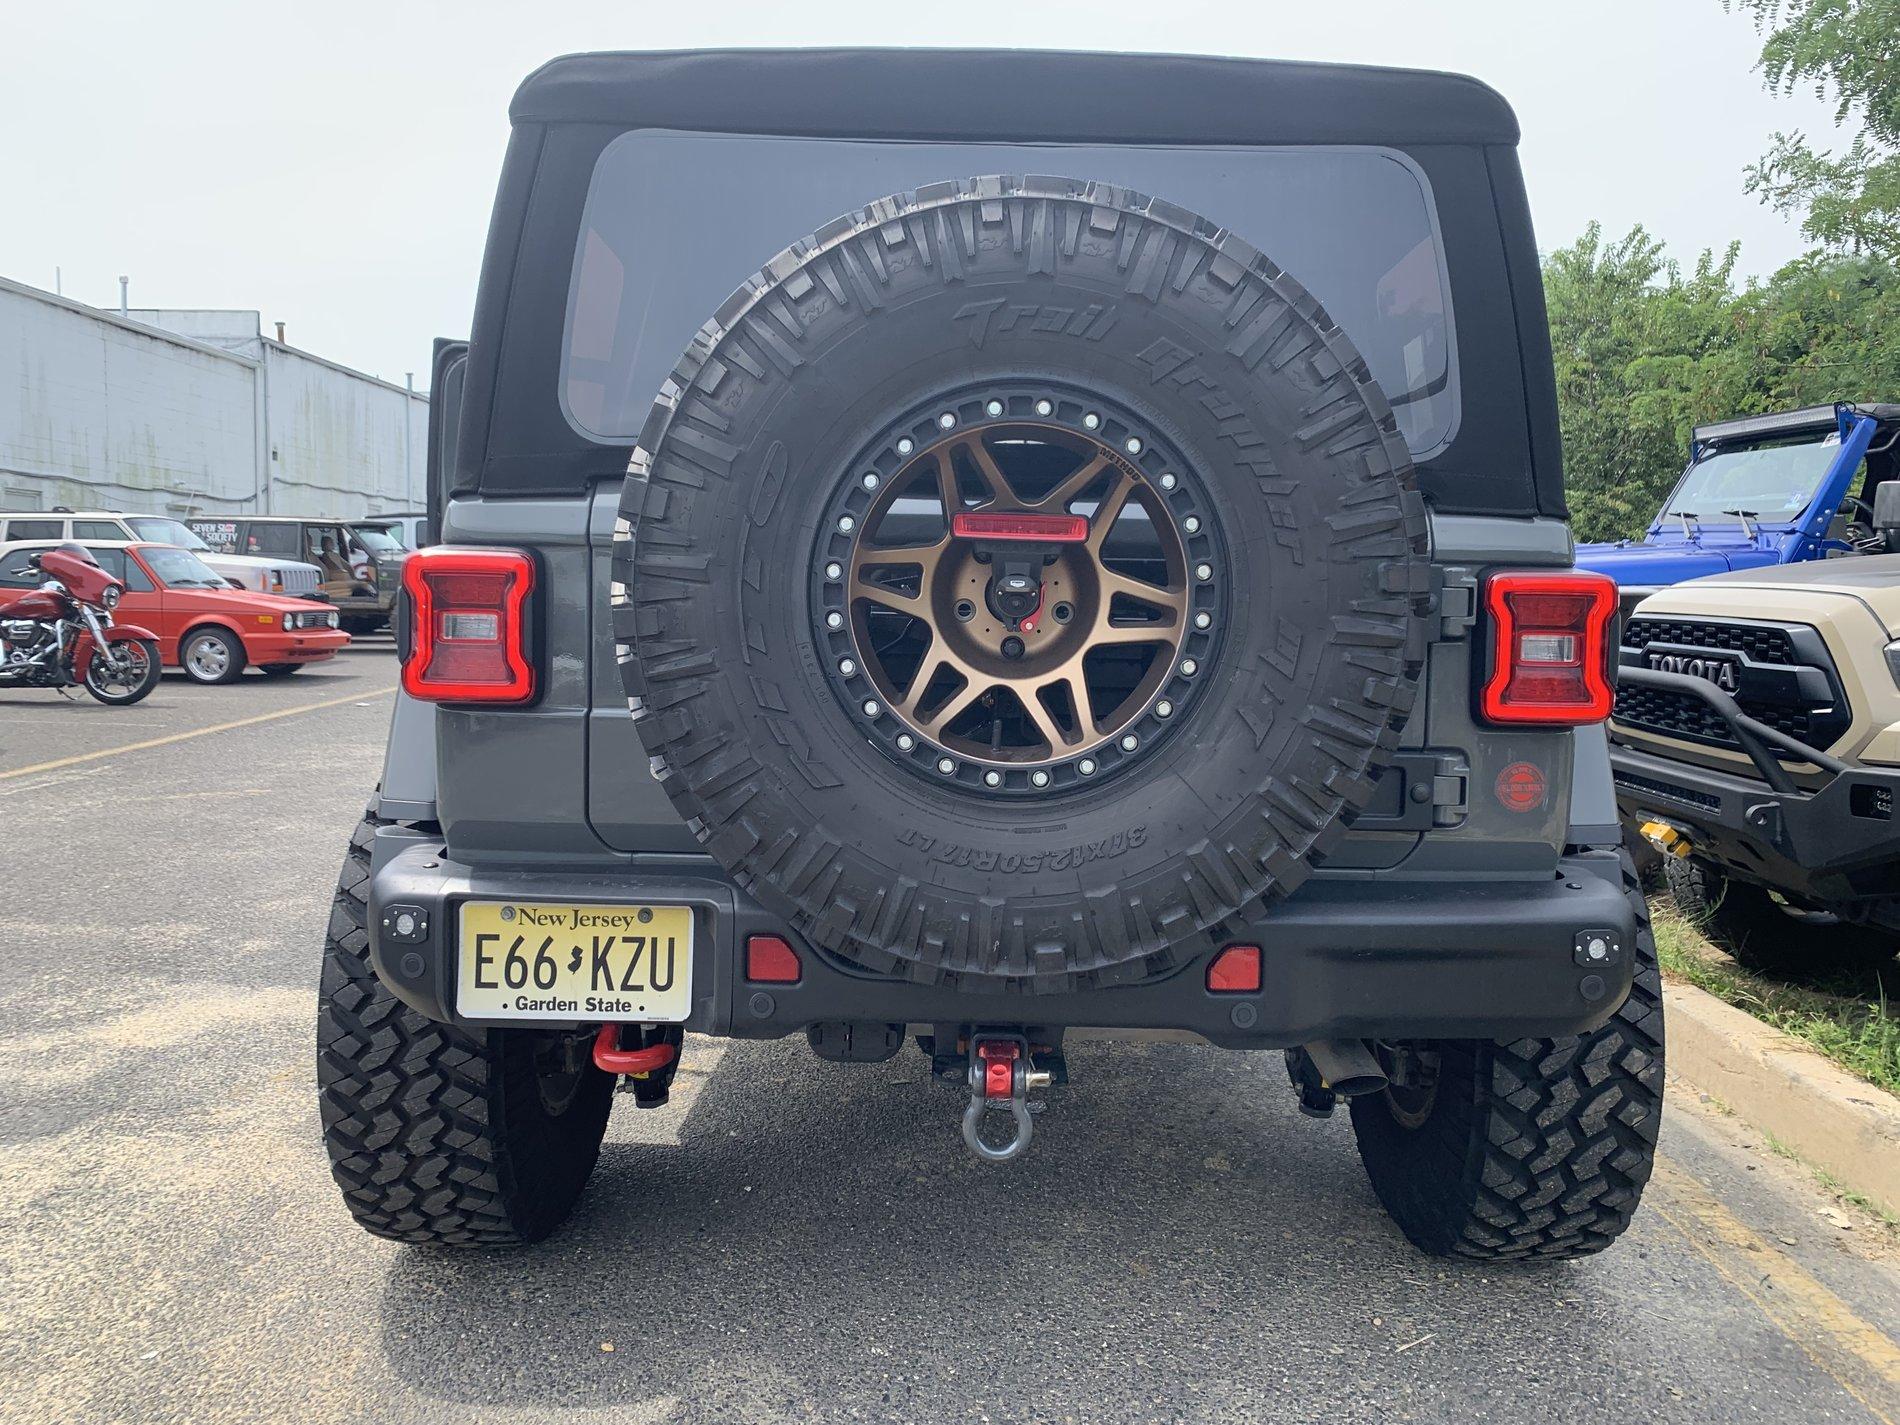
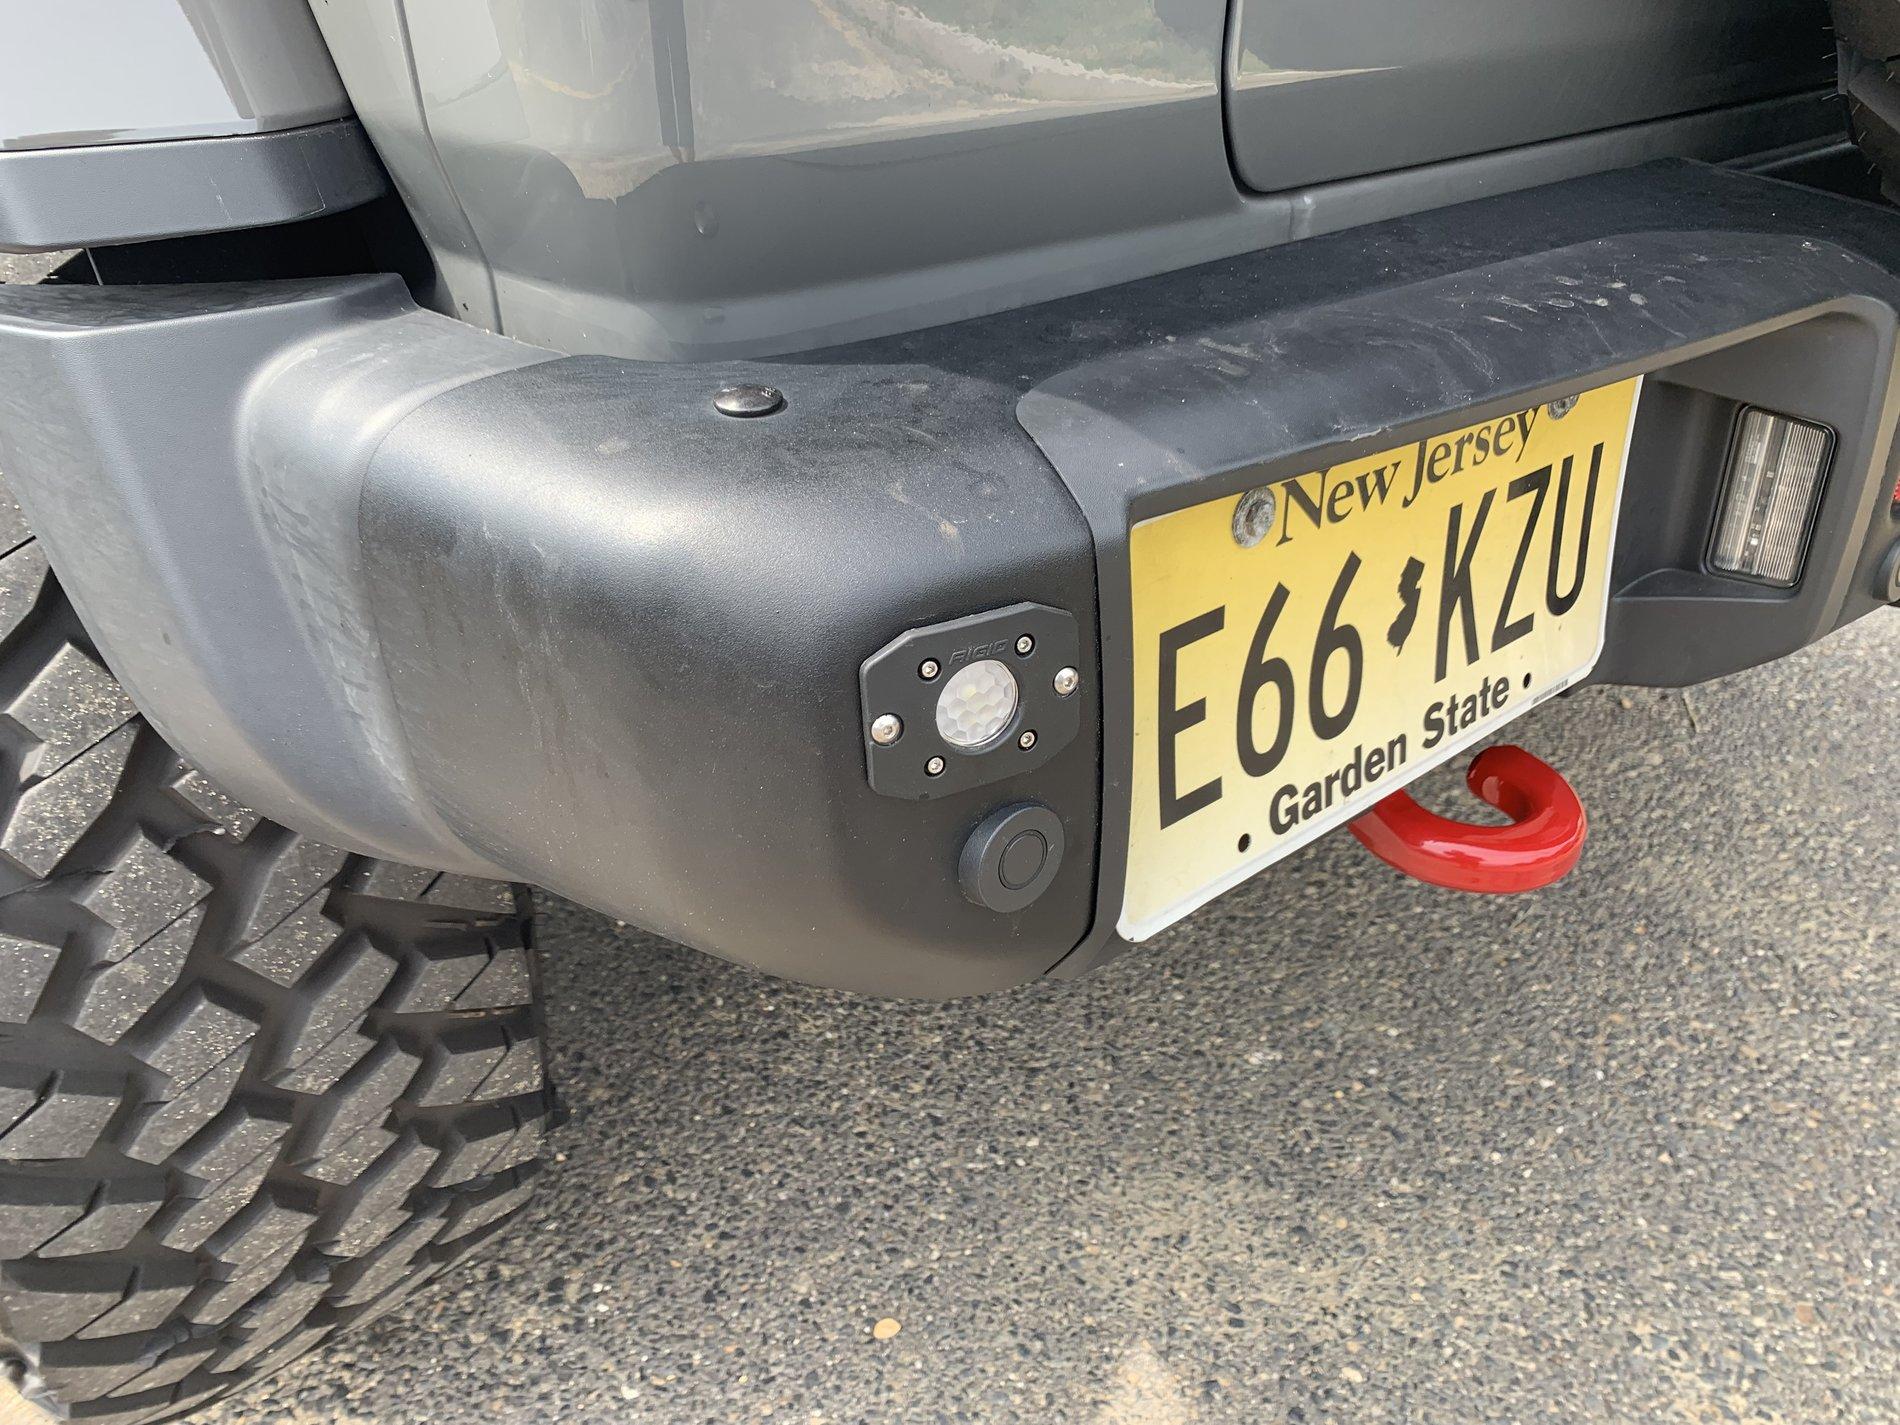
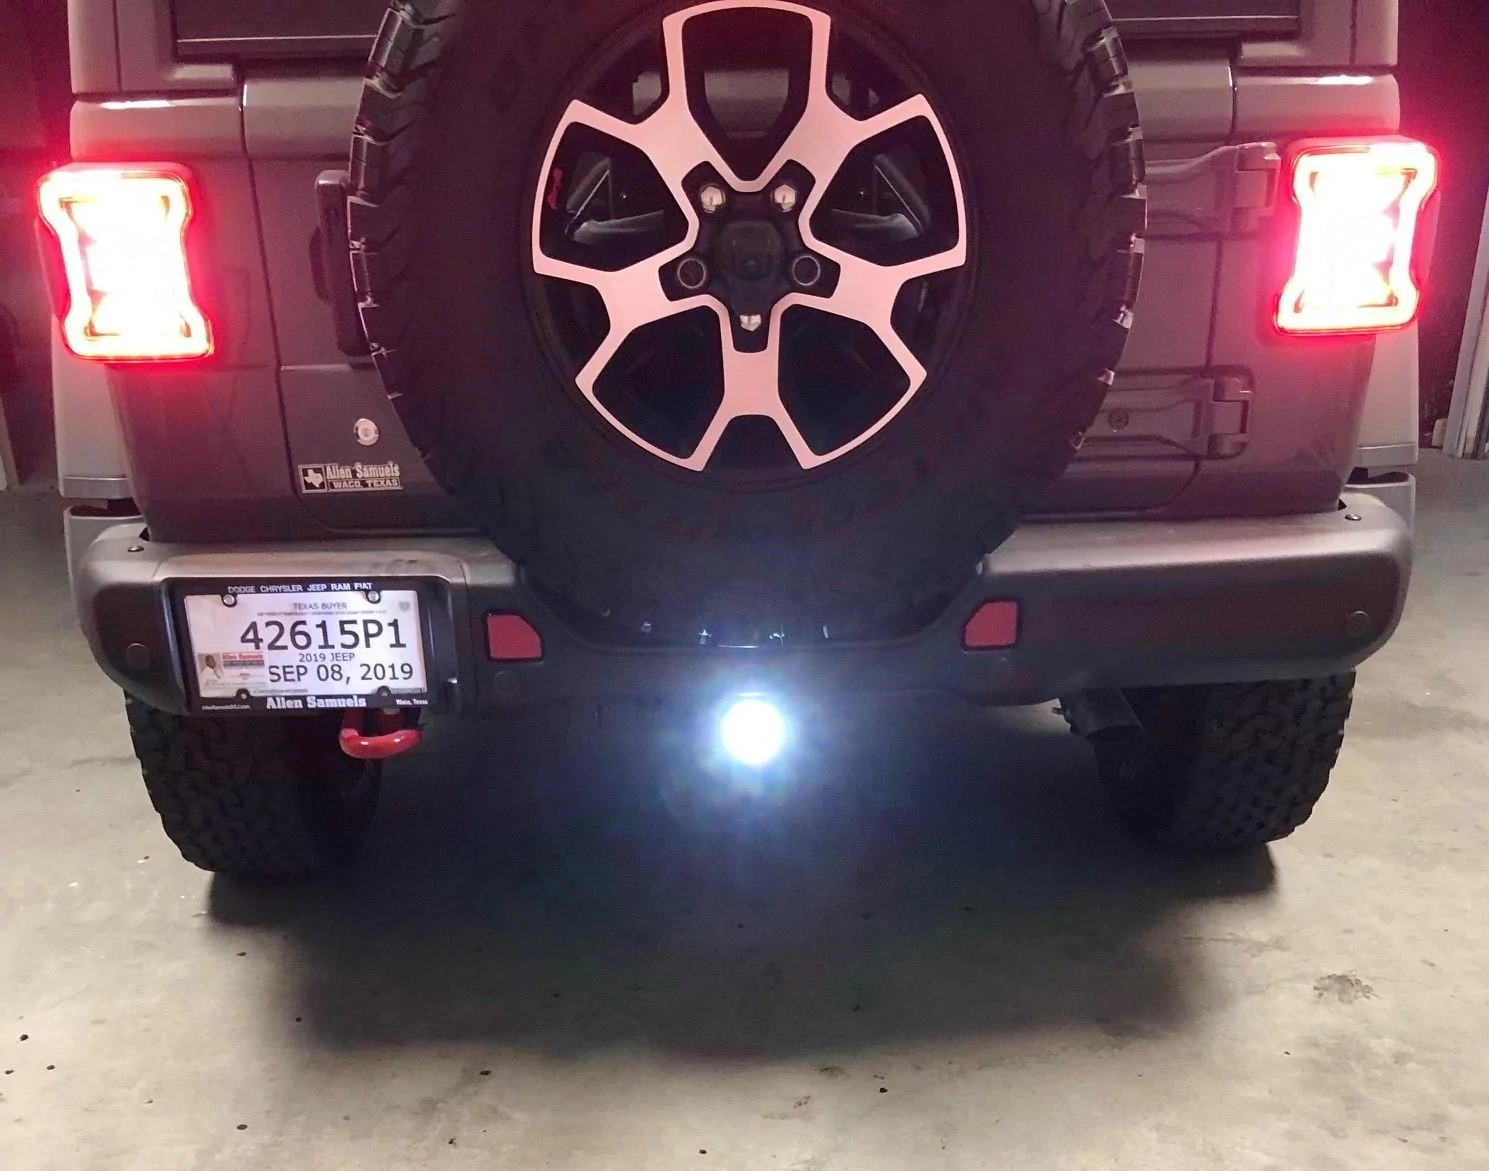
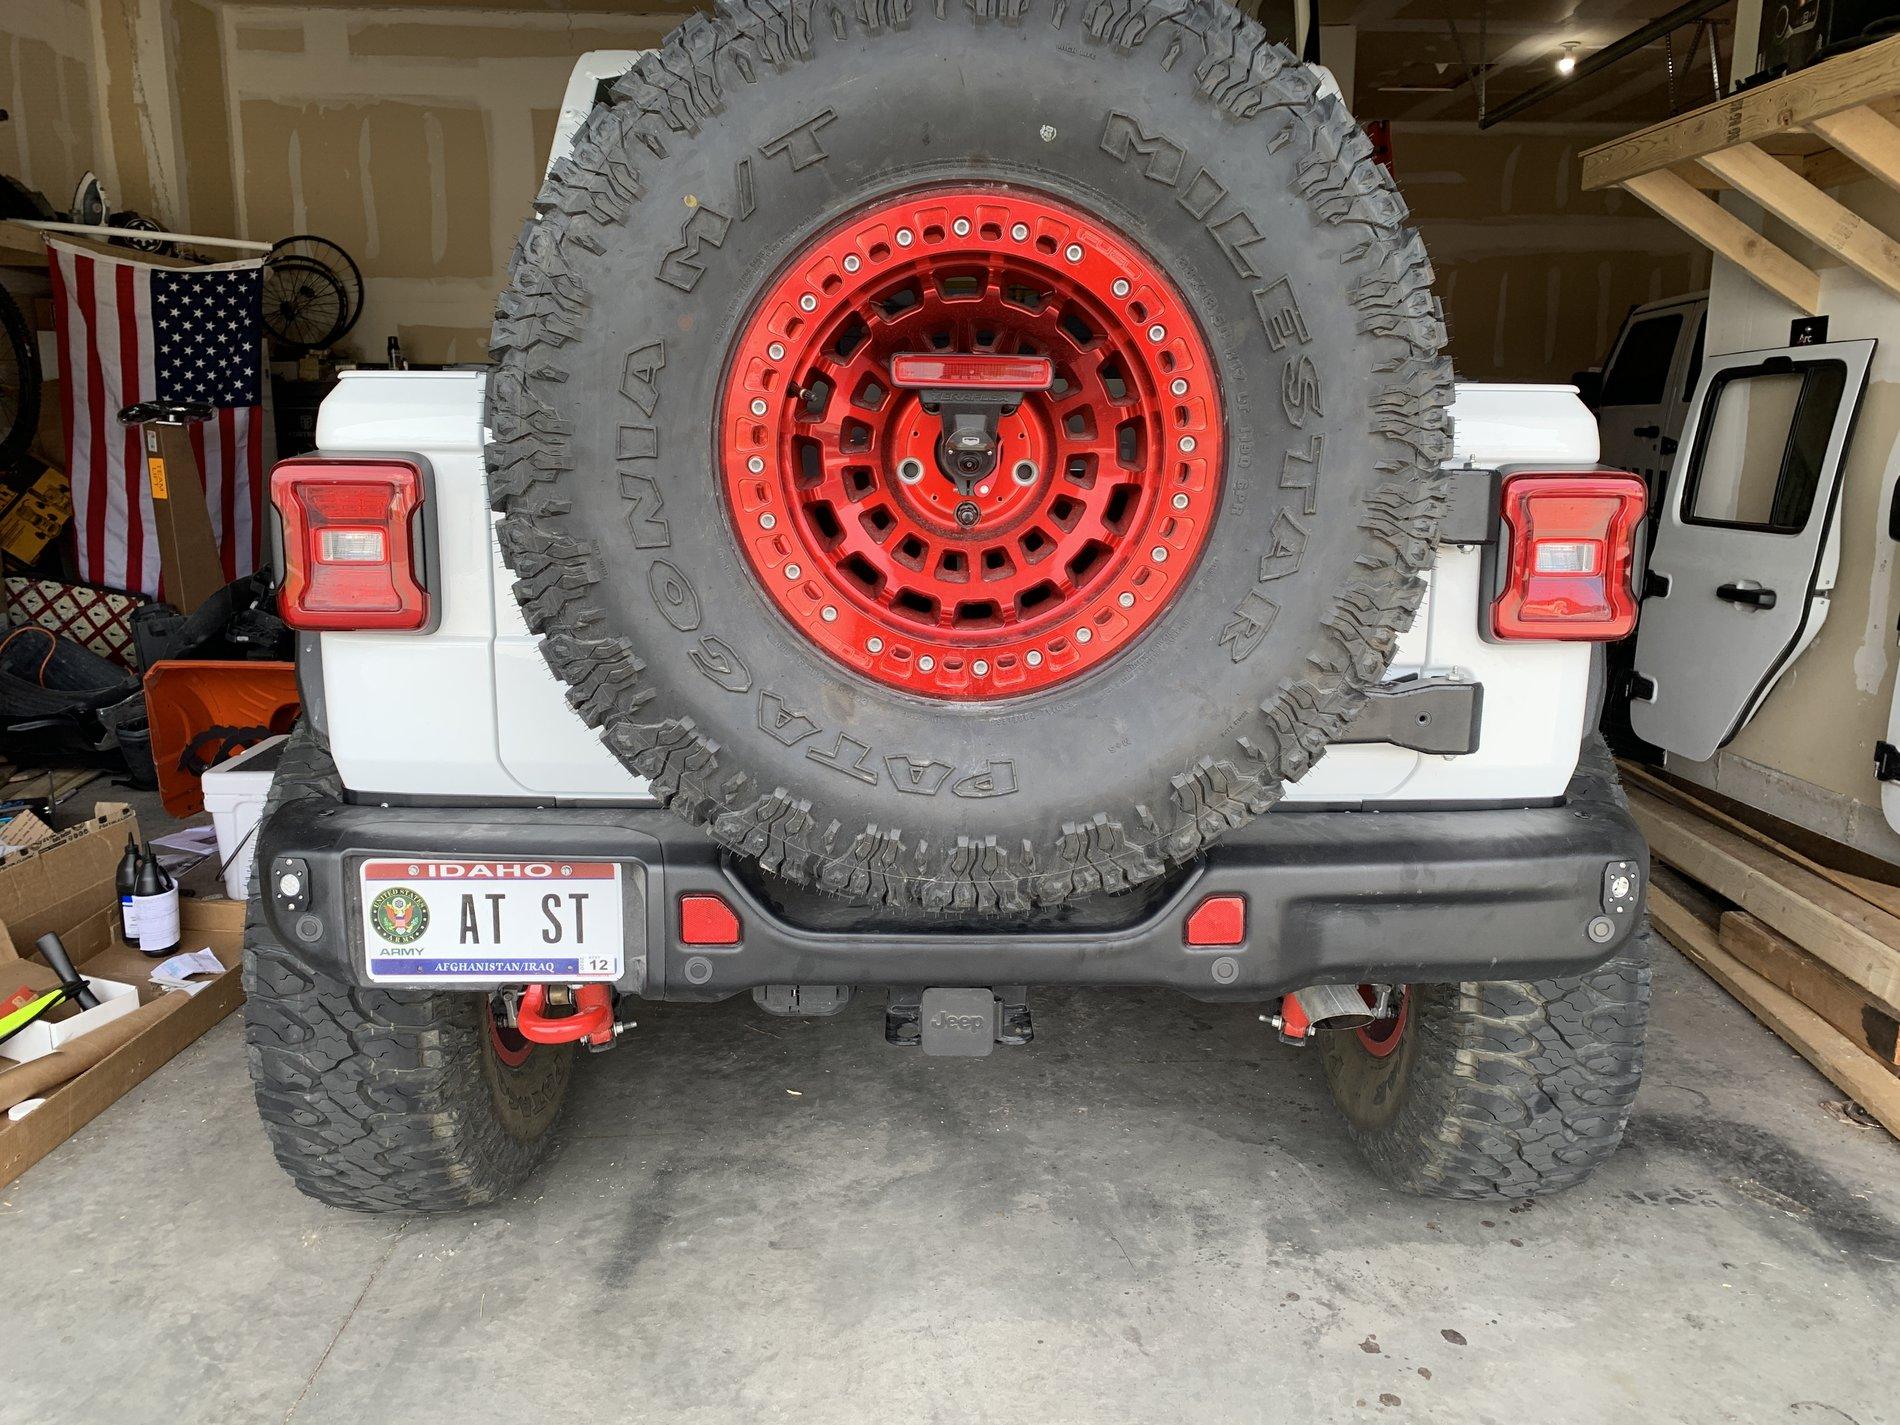
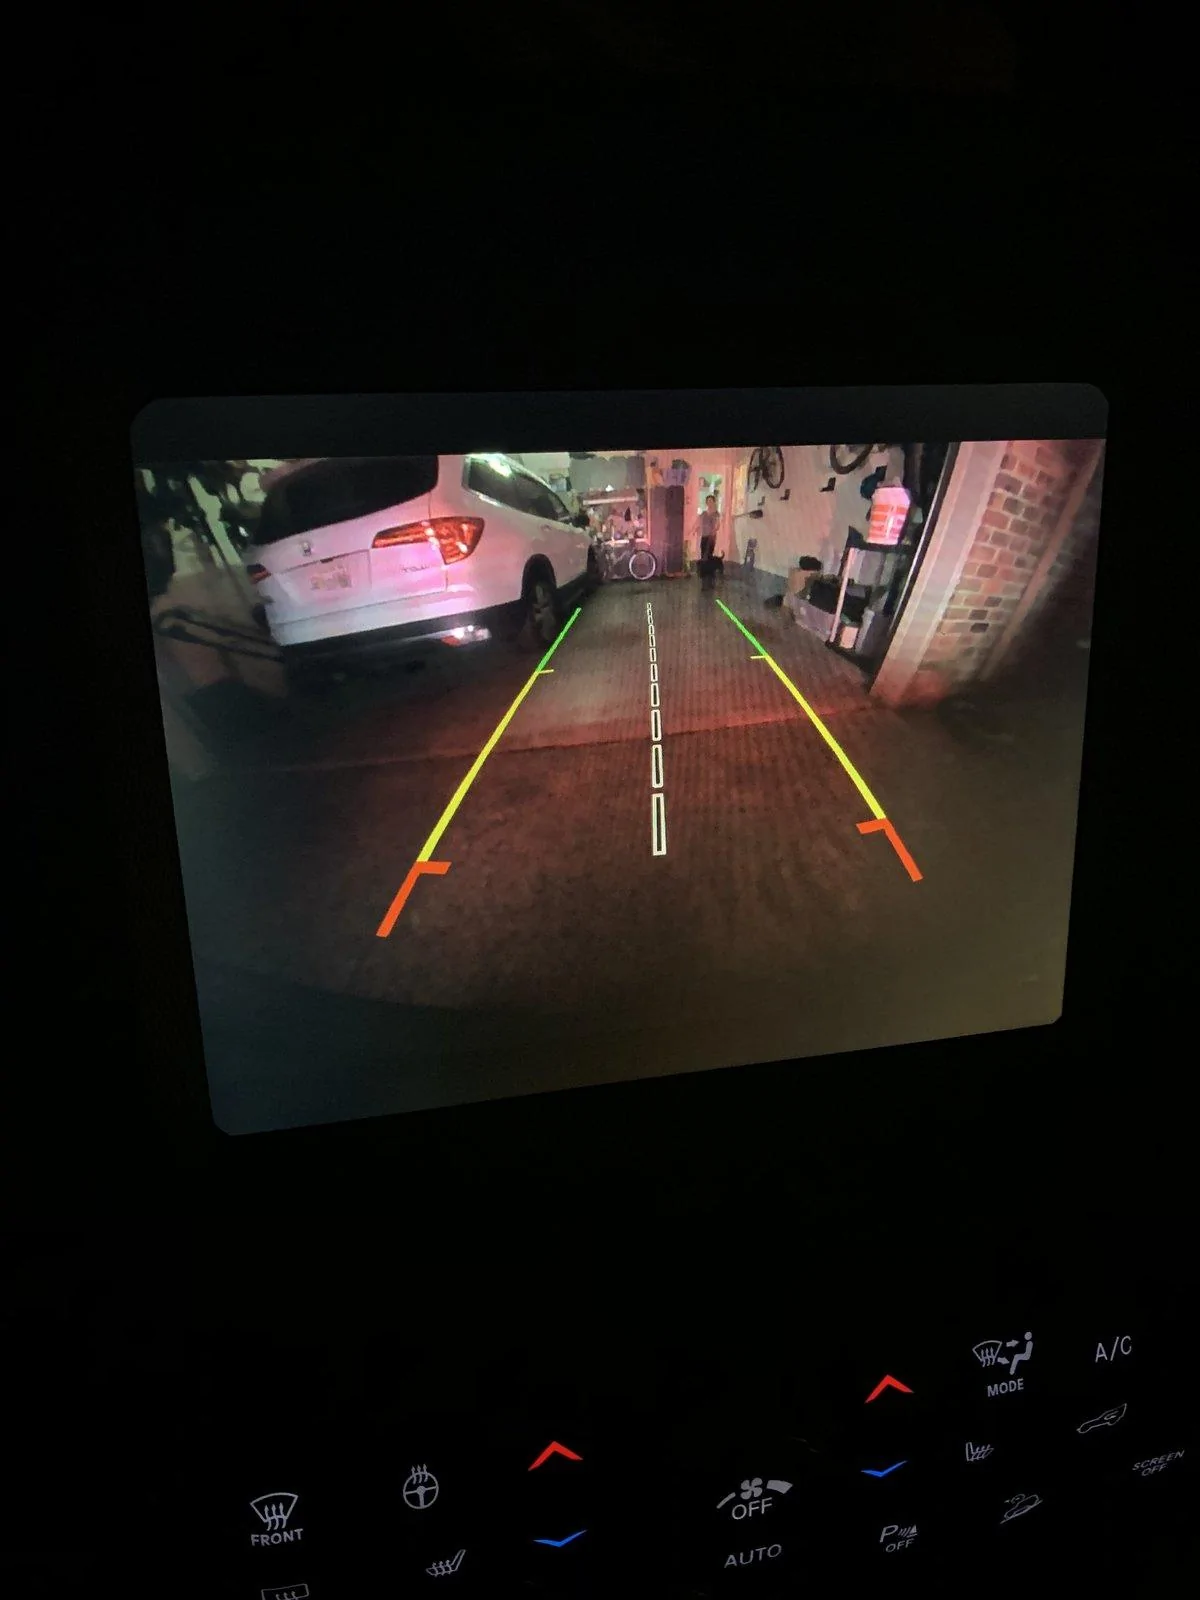
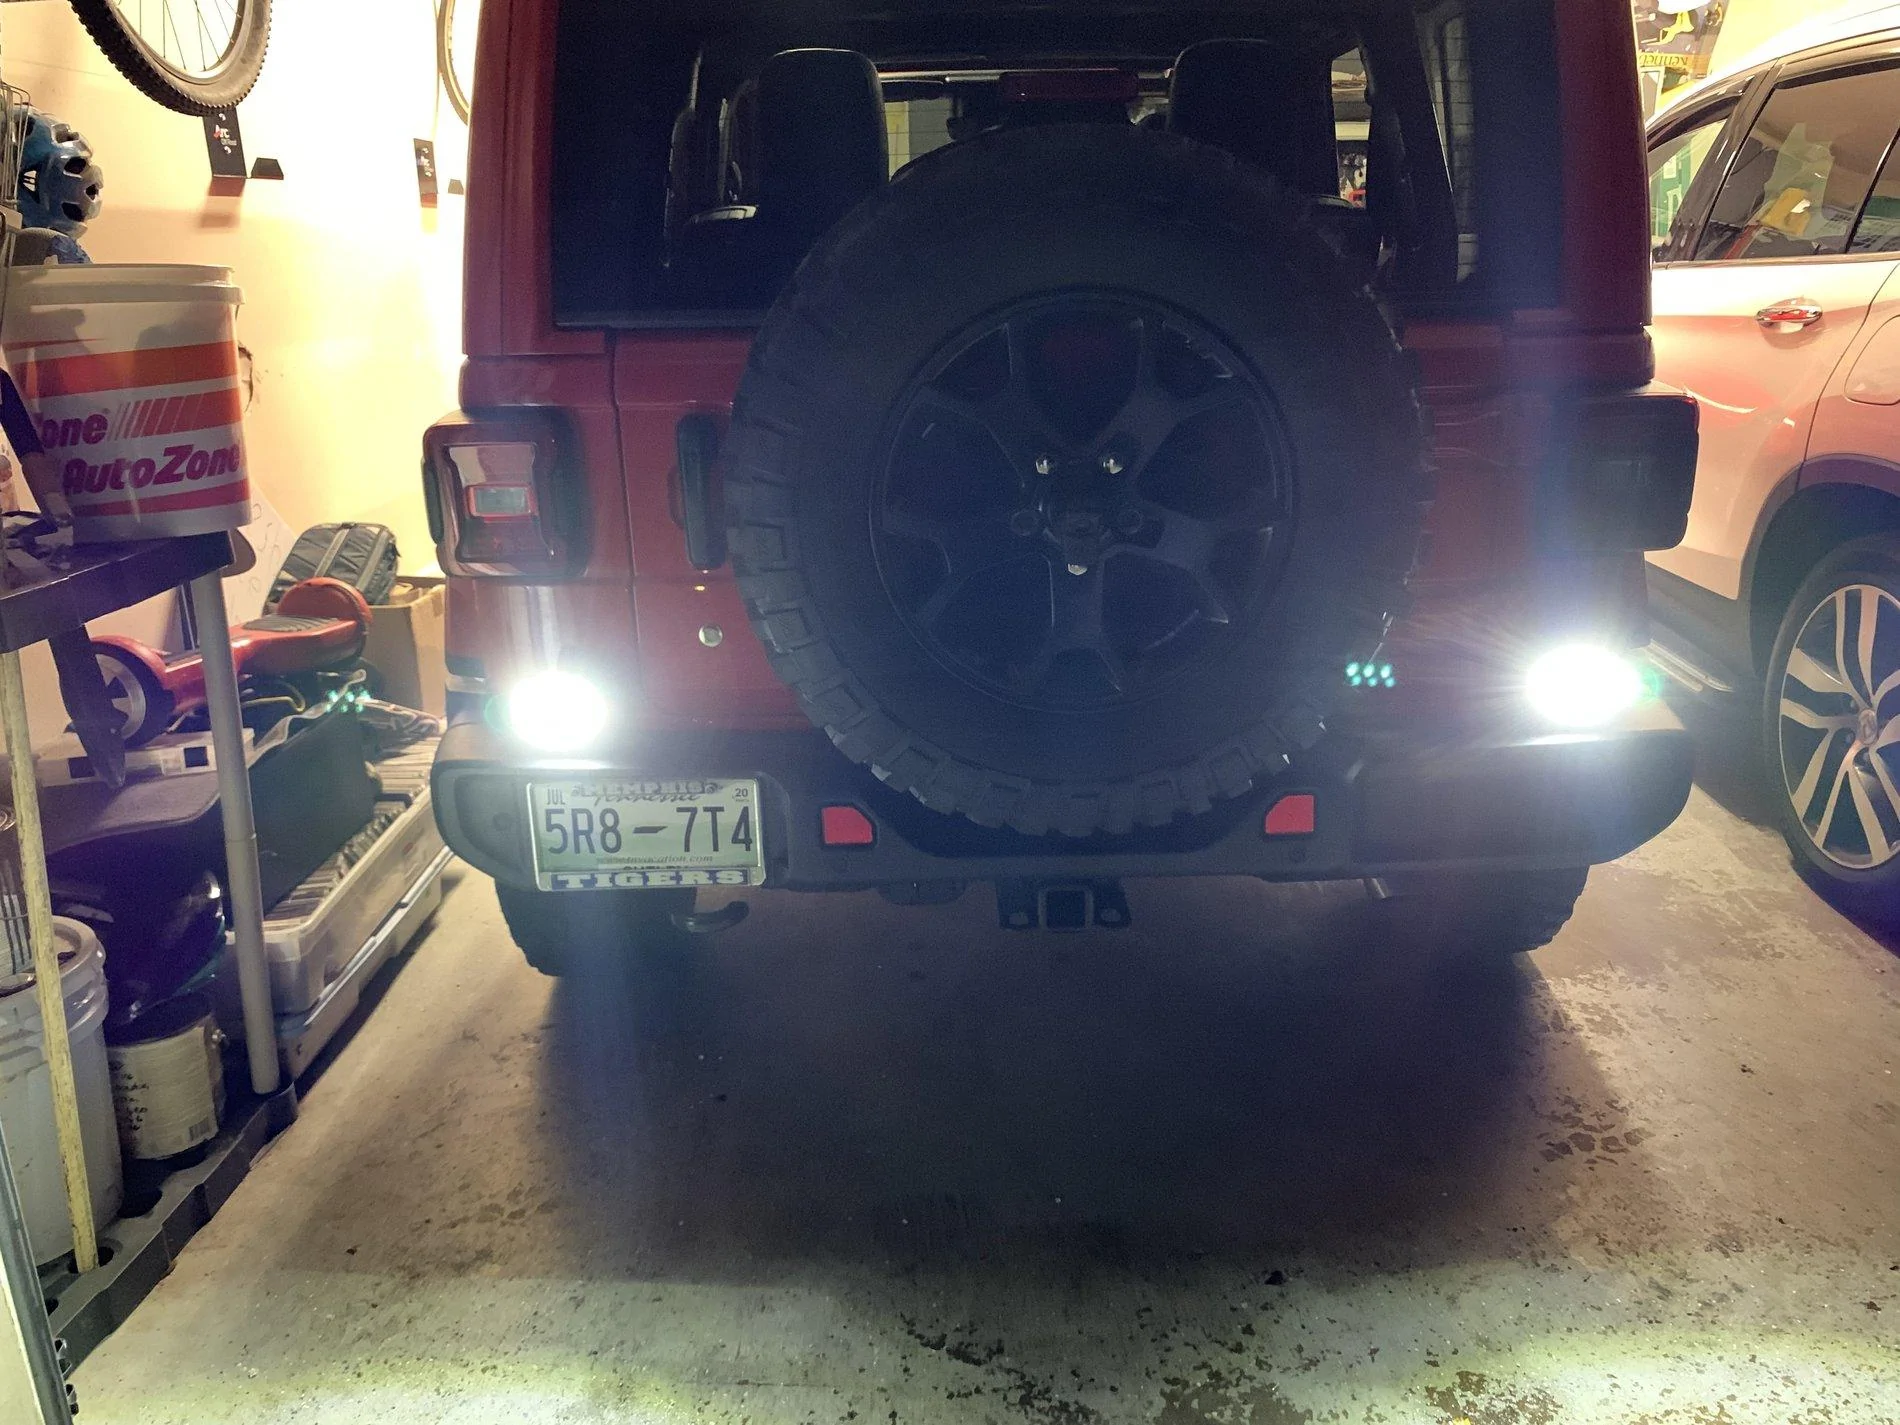
Wired up my backup leds today to the AUX switch and to the tow harness. Thanks for all of the tips and how-to's in this thread, definitely made the process a lot easier.

Ran the wiring through the frame and went from front to back. I was able to run the wire easily with the holes in the frame until about the start of the passenger door. I used fish tape to run the rest of the way. Overall pretty straight forward and didn't take more than 15mins. You could get caught up in some sections of the frame, but feed your fish tape more towards the bottom of the frame.

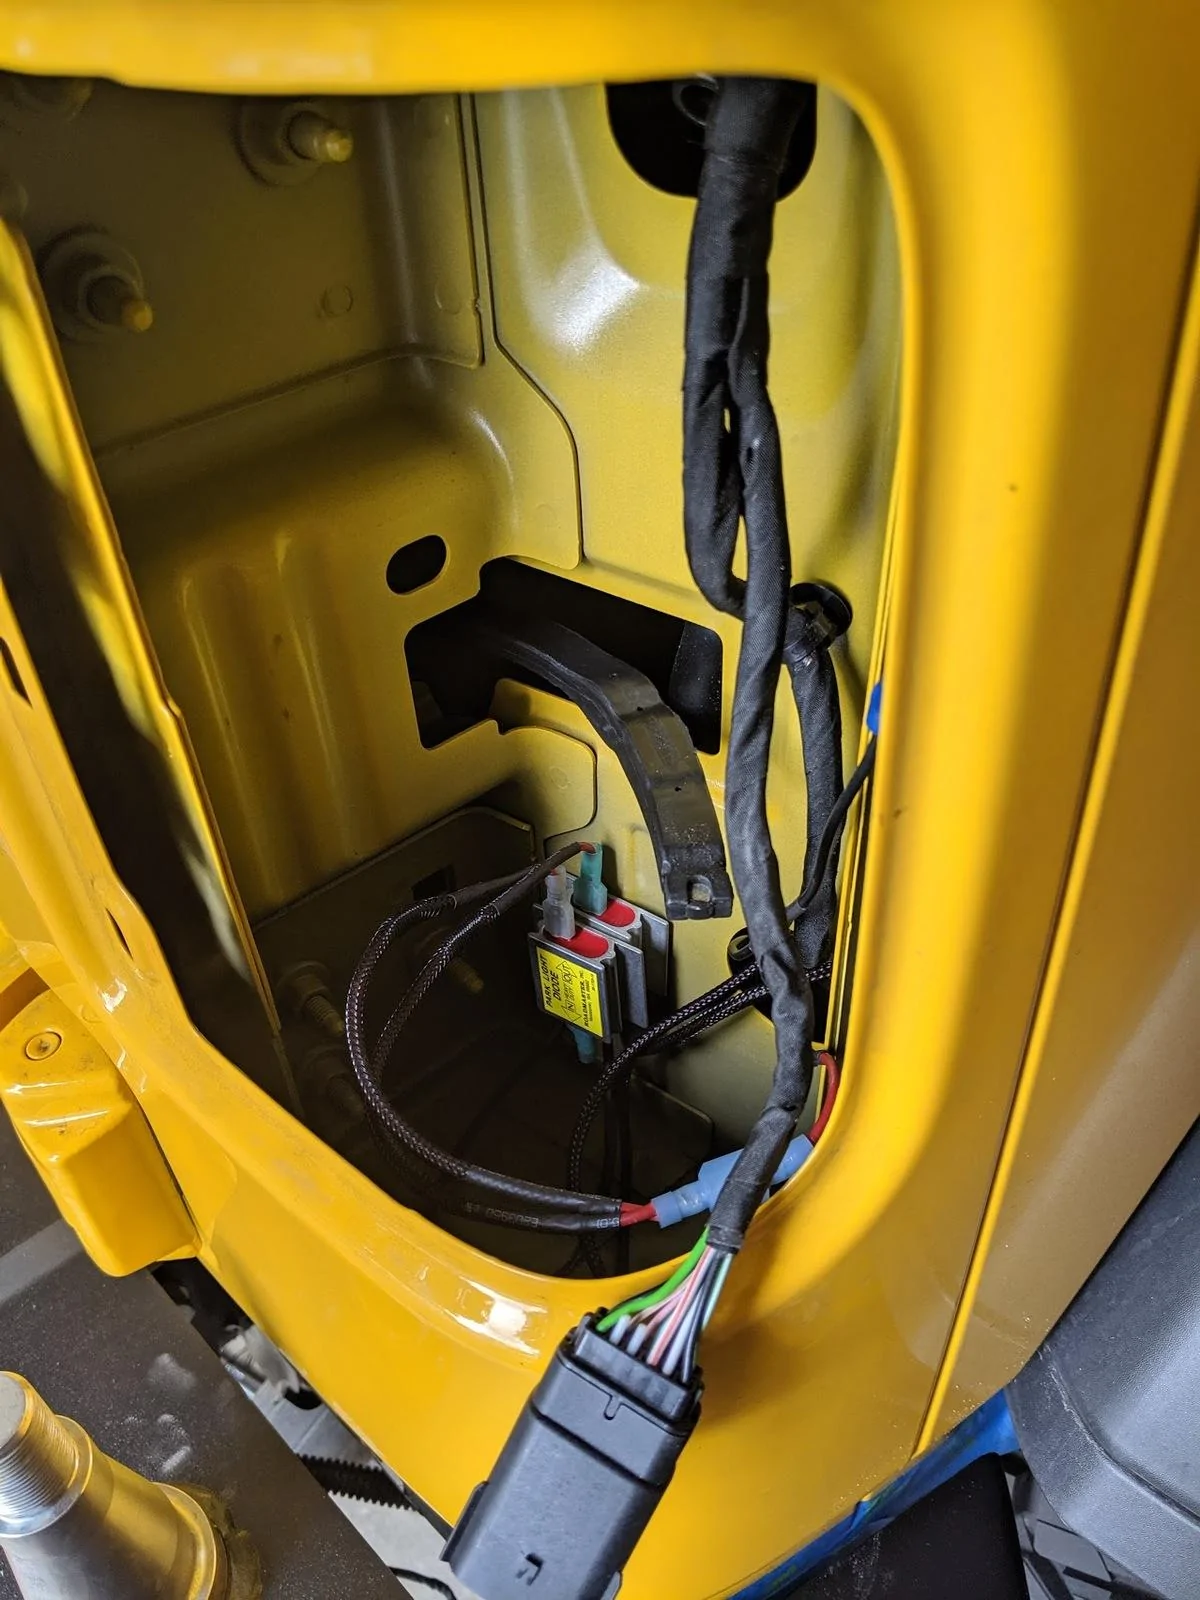
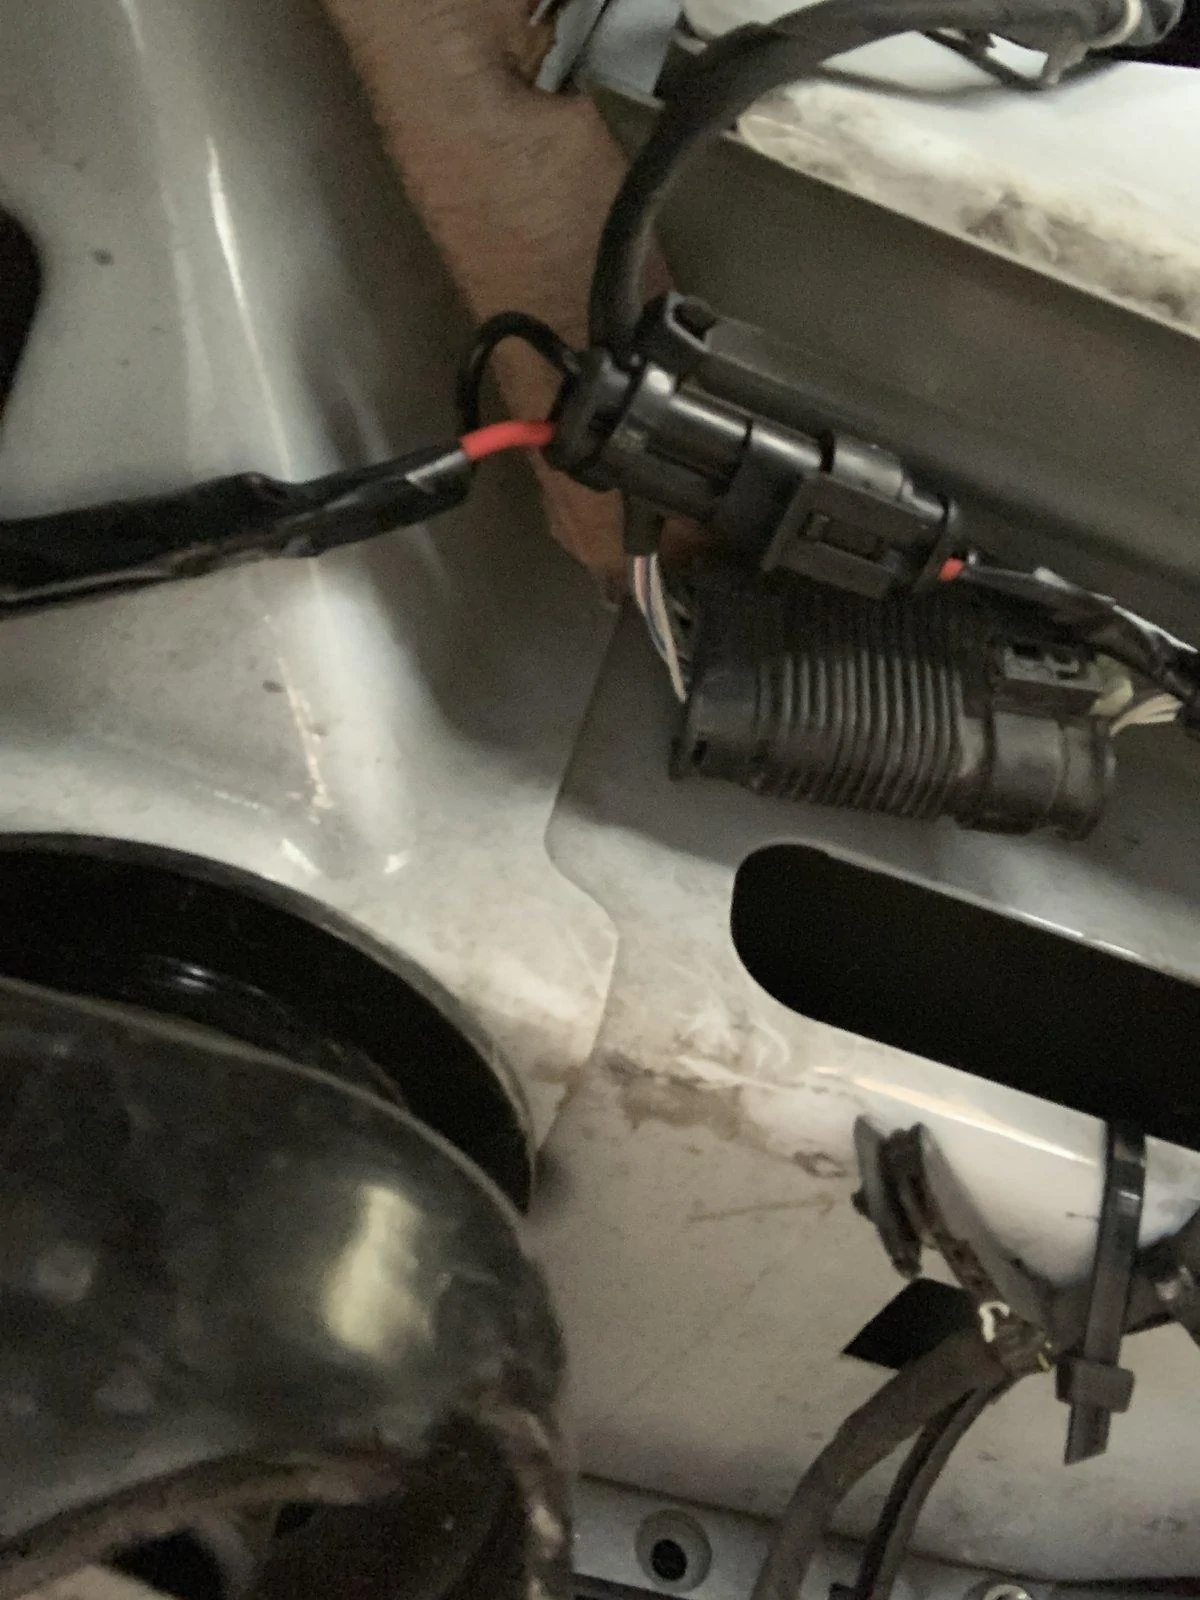
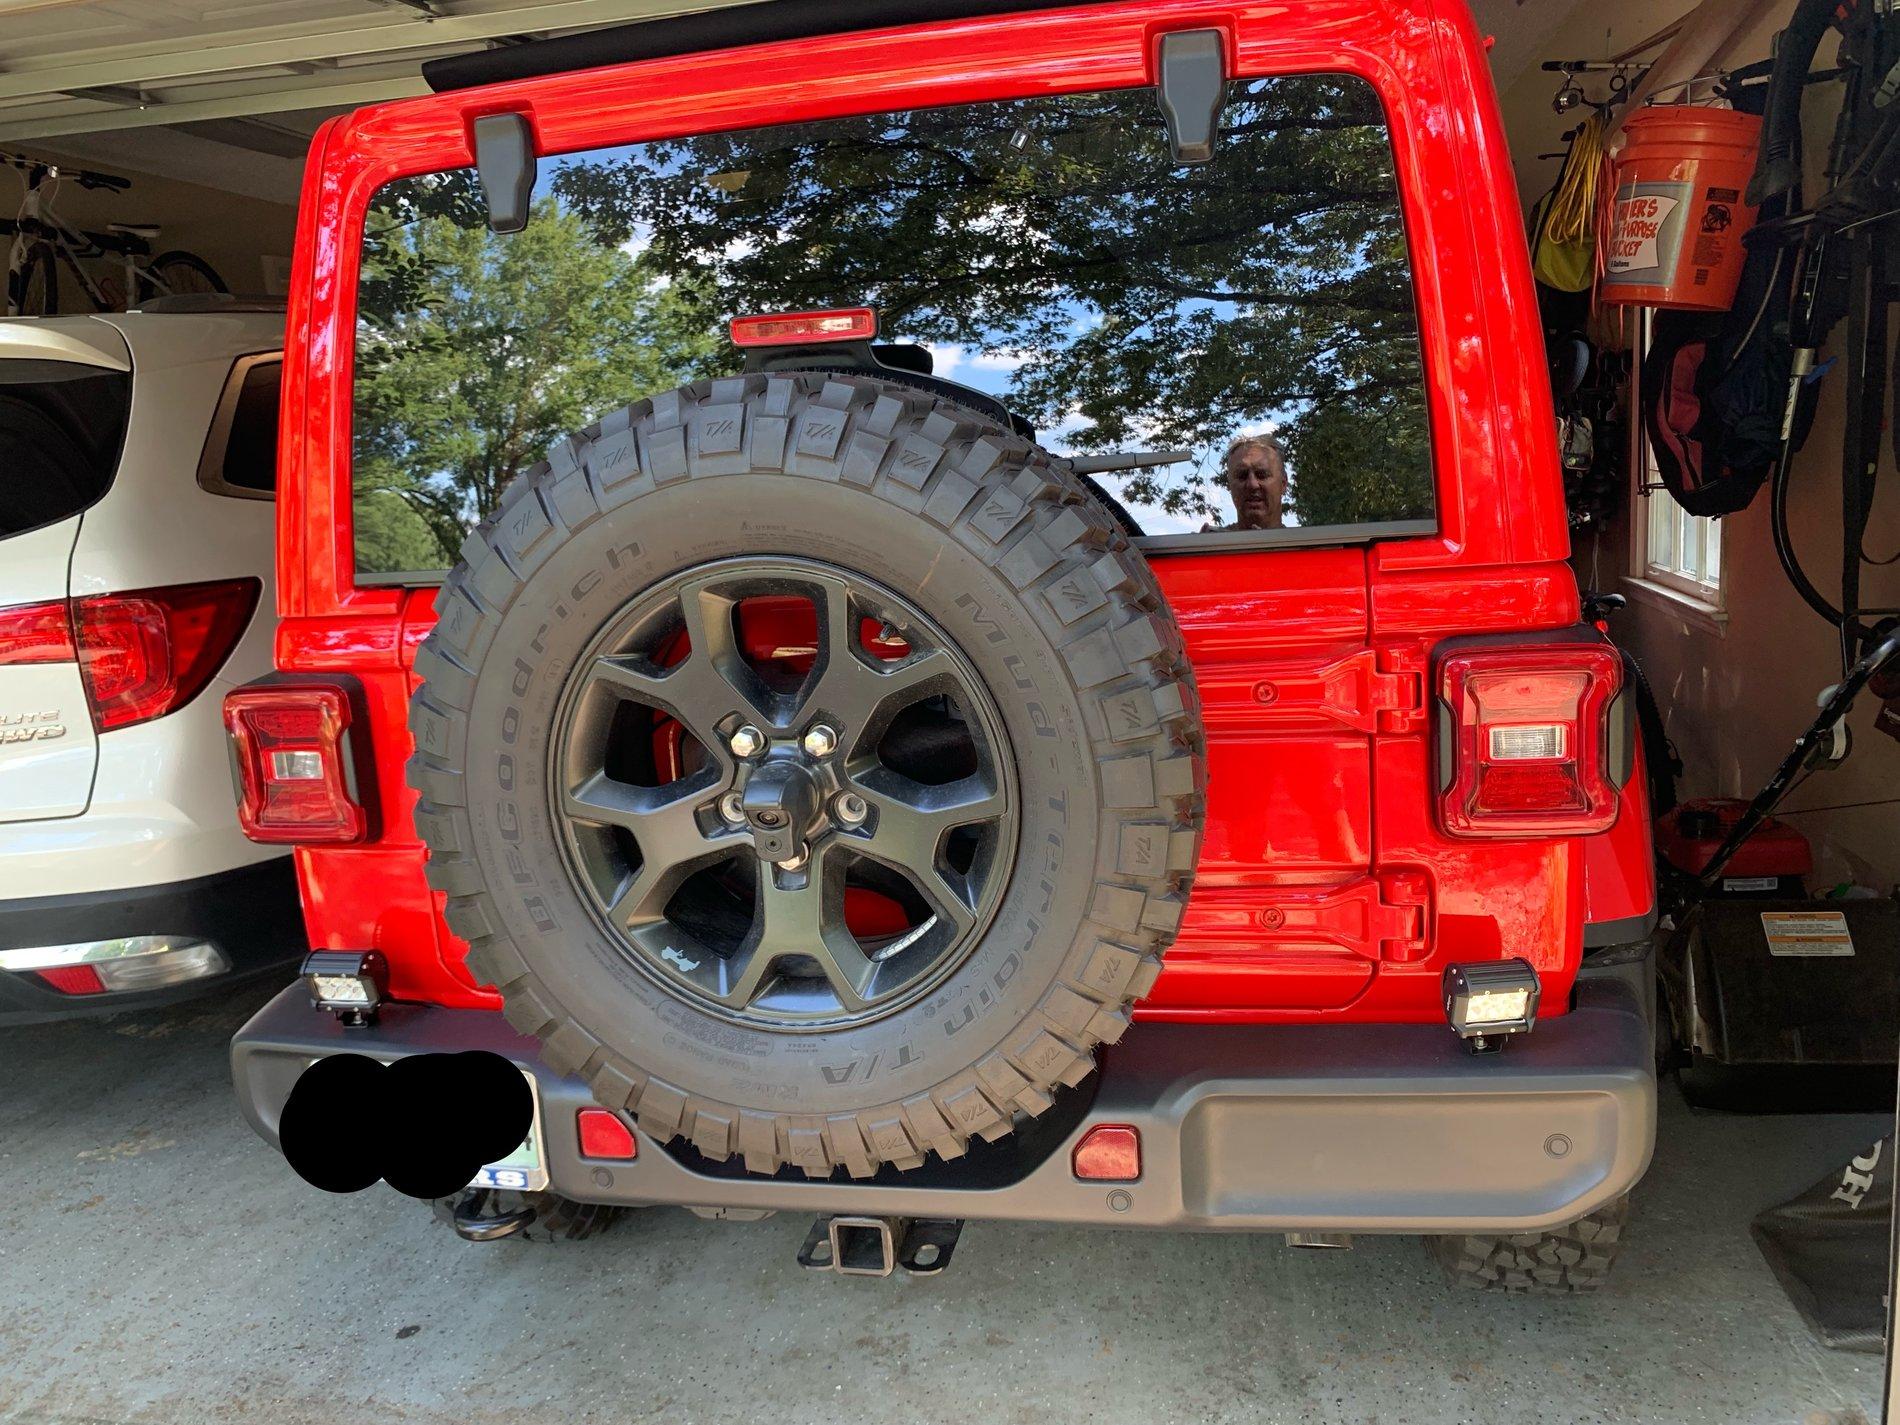
I tapped the tow wiring harness and ran the wires into the passenger side brake light compartment. Also ground and placed the diodes in the passenger brake light compartment.

PaZmoz3.jpg
Sponsored


ZachTSanders

New Member
First Name
Zach
Joined
Jul 24, 2019
Threads
0
Messages
2
Reaction score
4
Location
Texas
Vehicle(s)
2019 JL Unlimited Rubicon, 2015 JK Unlimited Rubicon
I know this will not help some of you because you need to use your trailer hitch but I installed a Rigid Ignite into a blank hitch cover. We have two Rubicons so this allowed us to buy the two light kit and use on both. We don't use the hitches to haul anything so worked for us. Here are a few pics. Very easy to do. Took only a few minutes. Tapped into the 7 pin harness. I am going to buy another cover and re-do this one because the outside bolts will not work on this application. They end up hitting the receiver and not allowing the pin to go through to lock the cover. Just used the smaller bolts and put thread lock on them. I also used male/female connectors on them so I could disconnect easily in case we ever needed to use the hitch.
Hitch 1.jpg
Hitch 2.jpg
 

SaddleTramp

Member
First Name
Scott
Joined
Sep 21, 2018
Threads
0
Messages
12
Reaction score
11
Location
Las Vegas
Vehicle(s)
2018 JLUR
I know this will not help some of you because you need to use your trailer hitch but I installed a Rigid Ignite into a blank hitch cover. We have two Rubicons so this allowed us to buy the two light kit and use on both. We don't use the hitches to haul anything so worked for us. Here are a few pics. Very easy to do. Took only a few minutes. Tapped into the 7 pin harness. I am going to buy another cover and re-do this one because the outside bolts will not work on this application. They end up hitting the receiver and not allowing the pin to go through to lock the cover. Just used the smaller bolts and put thread lock on them. I also used male/female connectors on them so I could disconnect easily in case we ever needed to use the hitch.
Hitch 1.jpg
Hitch 2.jpg

Looks great, on a JK I did a similar set up for a reverse camera in the hitch.

Quick question, what color wire did you tap from the trailer harness?
 

ZachTSanders

New Member
First Name
Zach
Joined
Jul 24, 2019
Threads
0
Messages
2
Reaction score
4
Location
Texas
Vehicle(s)
2019 JL Unlimited Rubicon, 2015 JK Unlimited Rubicon
Looks great, on a JK I did a similar set up for a reverse camera in the hitch.

Quick question, what color wire did you tap from the trailer harness?
White with Orange stripe
 

Sponsored

SSVi

Well-Known Member
First Name
Damon
Joined
Jul 8, 2018
Threads
14
Messages
124
Reaction score
270
Location
Idaho Falls
Vehicle(s)
2021 392XR
Occupation
Extreme metal drummer/ large cat wrangler / gun modder
Ok, so after reading and digesting forever I finally got the balls to attempt it all. I went through AUX4 in the engine bay, routed my conduited wires along the top of the frame and zip tied them to the OEM wires along the same path. I went into a diode along the back frame mount, branched off and tapped into the tow harness and then into the second diode, then went from that to a two cable disconnect right at the main OEM wiring disconnect. I figured if Jeep has one there, I’ll do the same. I used a 1 3/4' bi-metal hole saw, drilled the two mounting holes and installed the lights above the parking sensors, I wanted them away from the middle to avoid wash-out. I’m one of those 'better over do it' kind of guys, I used butt joints, followed by liquid masking tape, and covered in shrink-wrap. A bit longer than the "took me about an hour" I kept reading about, but I wanted to do it right and long-lasting.
Also - since I don't claim to be an electrical wiz, I sporadically tested all my connections with a 9v battery (it has enough power to at least tell you they're working, just touched the wires to the battery sporadically as I was wiring backwards from the LEDS) just to make sure I had correctly spliced the two Ignite lights into one cable, then through the quick disconnect. I also silicone sealed around the edges of the Rigid lights to the bumper.

IMG_0082.JPG


IMG_0147.JPG


IMG_0148.JPG


IMG_0149.JPG
 

Memphis Peej

Well-Known Member
First Name
PJ
Joined
May 13, 2019
Threads
9
Messages
159
Reaction score
219
Location
Memphis
Vehicle(s)
Pilot, Acura TSX, 2019 Moab!!!
So after reading this thread at least 5 times. I bit the bullet and jumped into the fray. I’m a total newb at wiring lights on a Jeep. But why let that stop me?

I wired from the engine bay, Aux 3, and ran through the frame on the passenger side. I hit some difficulty right before the right back wheel and had to buy some fish tape which worked like a charm. I installed my lights on top of my bumper (plastic) with no difficulty. As far as connecting the lights I used 16 gauge electrical cord, butt connectors, shrink wrap and electrical tape.

I connected the drivers side wires to the passenger side and then connected to the hot from the engine. For the ground I found a bolt with green paint and sanded the metal down and the. Connected my ground with a ring connector.

This wasn’t easy for me as I wish I had better connectors for the wiring. After finishing the first time I eagerly turned the ignition on, set Aux 3 via controls for ignition, and nothing...... so I called it a night (3 hours in) and the next day reconnected everything and tested every connector using a volt meter. 2 hours later! Lights!!!

What I learned;
  • Working on this was fun
  • I gained some new skills and confidence
  • Buy fish tape
  • Get an electrical connector kit
  • Practice soldering which I attempted but sucked at
  • Check connections as you go
  • Make sure your ground area is well sanded
Now for the pics!

CF0A1D28-7424-4DA5-A92B-3755B6E391C3.jpeg


C1EE42B7-59CE-455C-9FB5-31EC31D8929B.jpeg


7A4D2259-8BEE-40DF-8D05-8D083B387558.jpeg


5A19C106-CBE2-4FFB-904F-BEB0BCBFEFA7.jpeg


E35392FD-6AD2-414F-BF86-6A0506A6B52E.jpeg


52F4031C-0762-40EB-9B92-4091CC65C216.jpeg
 

SeanS

Active Member
First Name
Sean
Joined
Dec 14, 2018
Threads
1
Messages
37
Reaction score
39
Location
WA
Vehicle(s)
2018 JLUR
Nice work! Next time, if you don't want to mess with soldering, you can use these kind of things. https://www.amazon.com/gp/product/B07KBXL17K They have solder built in so that when you heat it up with a heat gun, it basically does the soldering for you, plus it has glue inside on the ends to make a nice waterproof connection. Way easier/quicker then doing it yourself (although it is a good skill to have!)
 

kobejo34

Well-Known Member
First Name
Stephen
Joined
Jan 29, 2019
Threads
12
Messages
316
Reaction score
198
Location
Hoschton, Ga
Vehicle(s)
19 JLUR
Vehicle Showcase
1
Nice work! Next time, if you don't want to mess with soldering, you can use these kind of things. https://www.amazon.com/gp/product/B07KBXL17K They have solder built in so that when you heat it up with a heat gun, it basically does the soldering for you, plus it has glue inside on the ends to make a nice waterproof connection. Way easier/quicker then doing it yourself (although it is a good skill to have!)
@SeanS Hey the link didnt work Im interested in this if you dont mind re-posting.
 

Sponsored

SeanS

Active Member
First Name
Sean
Joined
Dec 14, 2018
Threads
1
Messages
37
Reaction score
39
Location
WA
Vehicle(s)
2018 JLUR
@SeanS Hey the link didnt work Im interested in this if you dont mind re-posting.
I'm not sure why the links not working for you, but you can just search Amazon for "solder seal wire connectors" and you should see lots of options!
 

Akmurphy14

Member
First Name
Amanda
Joined
Jul 28, 2019
Threads
1
Messages
10
Reaction score
1
Location
Fayetteville, ga
Vehicle(s)
Jeep JL Wrangler 2018
Took the Wrangler back to the dealership because I thought the backup lights weren't working. They showed me that they only turn on when you start moving–not when you put the truck in reverse.

Is that how it's supposed to be? Seems unsafe in a parking lot that you're not able to show intent to reverse.
I had the same issue but the dealership thinks it’s the gear sensor. It’s not reading what gear I’m in so when I shift into reverse I guess it was still thinking I’m in neutral- this is their explanation. Hopefully when they replace this sensor I will have reverse lights again. Lol.
 

Memphis Peej

Well-Known Member
First Name
PJ
Joined
May 13, 2019
Threads
9
Messages
159
Reaction score
219
Location
Memphis
Vehicle(s)
Pilot, Acura TSX, 2019 Moab!!!
Nice work! Next time, if you don't want to mess with soldering, you can use these kind of things. https://www.amazon.com/gp/product/B07KBXL17K They have solder built in so that when you heat it up with a heat gun, it basically does the soldering for you, plus it has glue inside on the ends to make a nice waterproof connection. Way easier/quicker then doing it yourself (although it is a good skill to have!)
Now you tell me :)
 

beammmer

Well-Known Member
First Name
D
Joined
May 6, 2019
Threads
0
Messages
64
Reaction score
69
Location
NOLa
Vehicle(s)
2019 JL two-door, 2017 X5, 1973 2002
I researched a solution to the terrible reverse light situation on the JL for a few months and settled on the flush mount Rigid Ignites after seeing @SSVi installation. Huge improvement and I highly recommend!!!

IMG_6298.jpeg


IMG_6303.jpeg


IMG_6304.jpeg
Is the bumper removered to add these lights?

Thanks,

Don
Sponsored

 
Last edited:


Top