Steel24
Well-Known Member
- First Name
- Cory
- Joined
- Jun 28, 2022
- Threads
- 12
- Messages
- 63
- Reaction score
- 86
- Location
- Pittsburgh
- Vehicle(s)
- 2022 Jeep Wrangler Unlimited Sahara
- Thread starter
- #1
Hey All
I know there are a few threads on the various issues faced with the Mopar Auxiliary (Aux) Switch install, but I felt it might help to summarize what I (and many of you all) learned in the install process.
Before reading the below, I will say to anyone thinking about this that you can get through this install, it just takes time, patience, and attention to detail with wiring.
The following are some tips and tricks I picked up along the way for anyone considering the install or doing it.
I hope all of this helps.
I know there are a few threads on the various issues faced with the Mopar Auxiliary (Aux) Switch install, but I felt it might help to summarize what I (and many of you all) learned in the install process.
Before reading the below, I will say to anyone thinking about this that you can get through this install, it just takes time, patience, and attention to detail with wiring.
The following are some tips and tricks I picked up along the way for anyone considering the install or doing it.
- Be prepared for a long install. I would dedicate at least a solid half day to this if not the entire day. Especially if you are going to take breaks. The install videos don't really give justice to how long this takes.
- Make sure you have a little portable led light or something like it because the areas you will be working at in in your JL/U are cramped, and there is no lighting. Also, have an interior trim removal tool (they are cheap and can be bought off of amazon or at your local auto parts store)
- Watch these videos before the install: Mopar Auxiliary Switch Install with Z Auto Tazer for Jeep Wrangler JL and Jeep Wrangler JL Gains More Accessory Options with a Mopar Auxiliary Switch System Install
- The mopar instructions that come with the switch kit are awful. Be prepared for that.
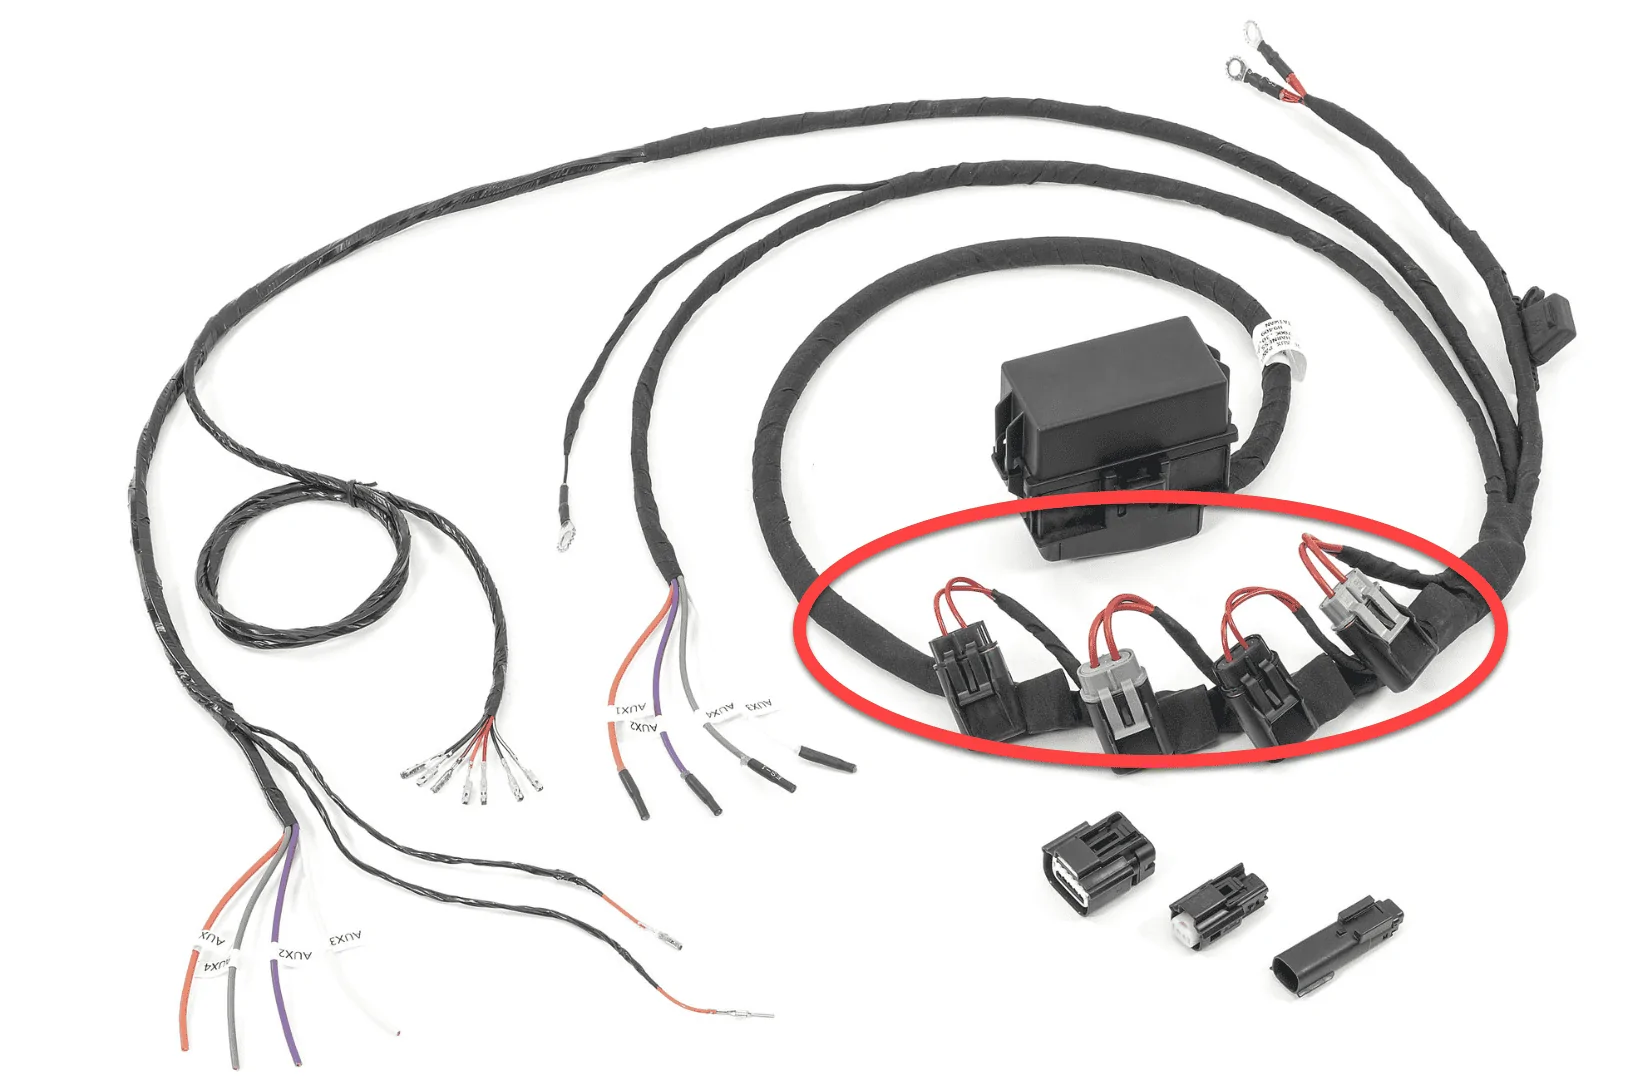
- The most difficult part is getting the wire harness through to the interior. Basically, they have you reach into this very tight area in the inner front passenger wheel well area and stick it through. There is a plastic barrier that is very thick you have to get through. The mopar instructions tell you to kind of slide it around the barrier which requires a ton of force. It is next to impossible to get it through this way. and I broke a pin off of a wire form the aux wiring harness trying it this way. Here's an alternative:
- Like in the videos I linked to, wrap the entire harness tight in electrical tape to make it as skinny as you can get
- Get a metal coat hanger or something of similar material and thickness and tape it tightly to the wrapped harness. (I used the metal piece from a Macy's suit coat hangar than was thicker than your normal flimsy wire coat hangar)
- Use grease, vaseline, or any type of lube and put it on the hangar and the harness to make it easier to pass through this plastic barrier.
- Use a pair of scissors or something with a sharp end to poke a hole through the plastic barrier from under the dash where the glovebox is (you have to take out the glovebox for this install). This is not the easiest of tasks because it is a tight area and you really don't have room to put your head there to see where you are poking so a lot of it is going to be by feel. This is a thick barrier so some force is required with the scissors.
- Once you feel the scissors or whatever you have break the barrier to the other side, leave them in.
- Go to the inner fender wheel well and, again, this is really by feel, and put your hand up, and feel where the scissors or other object is. Then take the coat hangar and insert into into the punctured hole pushing the scissors out. If you have another person that can be underneath the glovebox dash area to let you know if you're getting it through, it makes it a lot easier.
- Once you pass it through, pull it all the way through.
- Now, you have to unwrap the lubed wiring harness that has electrical tape all over it. So, wipe the lube off and remove the electrical tape. This takes a little more time than you would think. You have wires underneath the tape so you just can't willy nilly use scissors or a utility knife to cut the tape off.
- The next most difficult part of the install is the famed "loose orange wire problem" mentioned in other threads on this install. They have you take off a panel near the glovebox dash and rewire an already existing wiring harness. I'll call this the dash harness. If you search through the forum on this install, this is where a lot of us have encountered the loose orange wire problem. You have to take out an orange wire pin of the existing dash wiring harness and insert another orange wire from the aux wiring harness into the dash harness. They then have you take the orange wire that pinned into the dash harness and insert it into a connector and take another wire from the aux wiring harness, and insert it into a connector and connect them together. The issue is the connectors are not that great, and the orange pins don't always securely insert. if this happens, your aux switch won't work. Phew...that's a lot Here's a simpler alternative:
- Cut the applicable wires and wire them together. Use heat shrink and a heat gun, and they are as good as new. You don't have to worry about removing pins and loose connectors. Either way, make sure the wire you remove/cut from the dash harness is the correct one. I triple checked before removing the orange wire. There are very similar colored wires in the dash wiring harness, and me being a little colorblind (like most men are), it is often hard to tell them apart. This is where the little led light I mentioned really helps so you're not guessing wires in a low light environment.
- So you're done with that, and move to removing the center console dash panels with your trim removal tool (make sure you remember how everything plugs in to the center console dash panel for your a/c, uconnect, etc. or mark it so you remember). The last hurdle is wiring pins from the aux wiring harness into a connector so you can plug the connector into the switches. Again, we have similar colored wires, so be careful or the switch won't work. Make sure you look at which way the connector is facing in the mopar instructions or how Matt is doing it in the CJ Offroad video or else you'll get the wiring backwards.
- Finally, you have everything wired. If you have a z auto taser mini, you can flash it. If you don't have the taser you will have to take it to the dealer. Having the taser makes life so much easier because you can leave everything apart and flash it to see if it works so you're not taking dash panels off again.
I hope all of this helps.
Sponsored
Last edited: