Dadawada
Well-Known Member
- First Name
- Barrett
- Joined
- Jul 10, 2018
- Threads
- 25
- Messages
- 187
- Reaction score
- 110
- Location
- Raleigh, NC
- Vehicle(s)
- 2018 Rubicon Unlimited, 2020 Honda Goldwing Bagger
- Occupation
- Network Technology Executive
- Thread starter
- #1
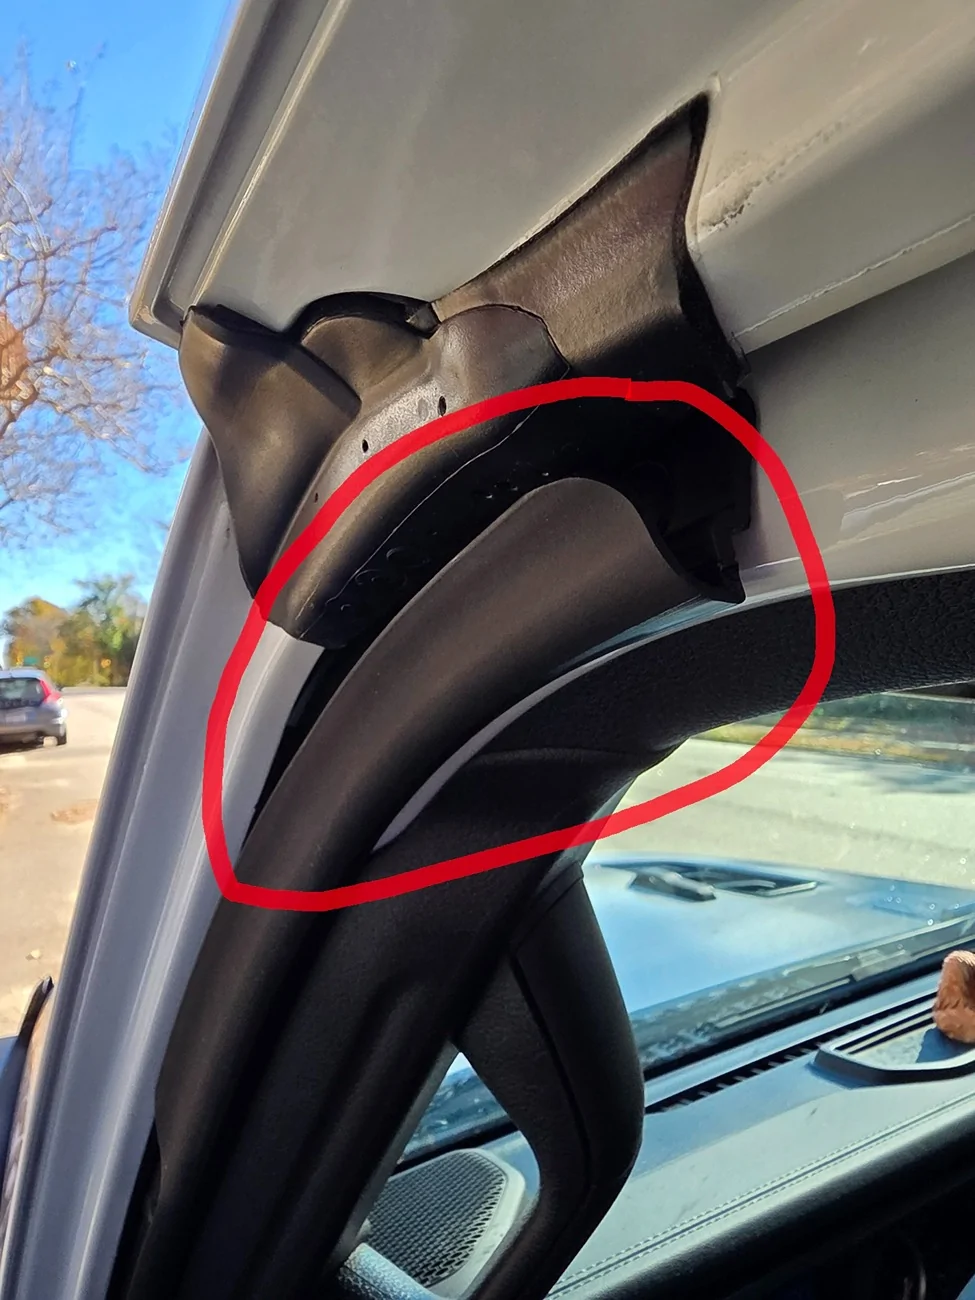
One of the biggest complaints with earlier JLs (my 2018 JLUR) was the fact when it was raining and you opened the front driver or passenger doors, you were met with a stream of water running off the top of the Jeep at the door opening between the seat and footwell. I just noticed this device on my 2025 JLURX.
When did they start adding these? Can't wait to see if it works.

When did they start adding these? Can't wait to see if it works.
Sponsored

")