Sponsored

Sun Visor Fix

roaniecowpony

Well-Known Member
Joined
Dec 4, 2018
Threads
144
Messages
7,240
Reaction score
9,298
Location
SoCal
Vehicle(s)
2018 JLUR, 14 GMC 1500 CC All TERRAIN
Occupation
Retired Engineer
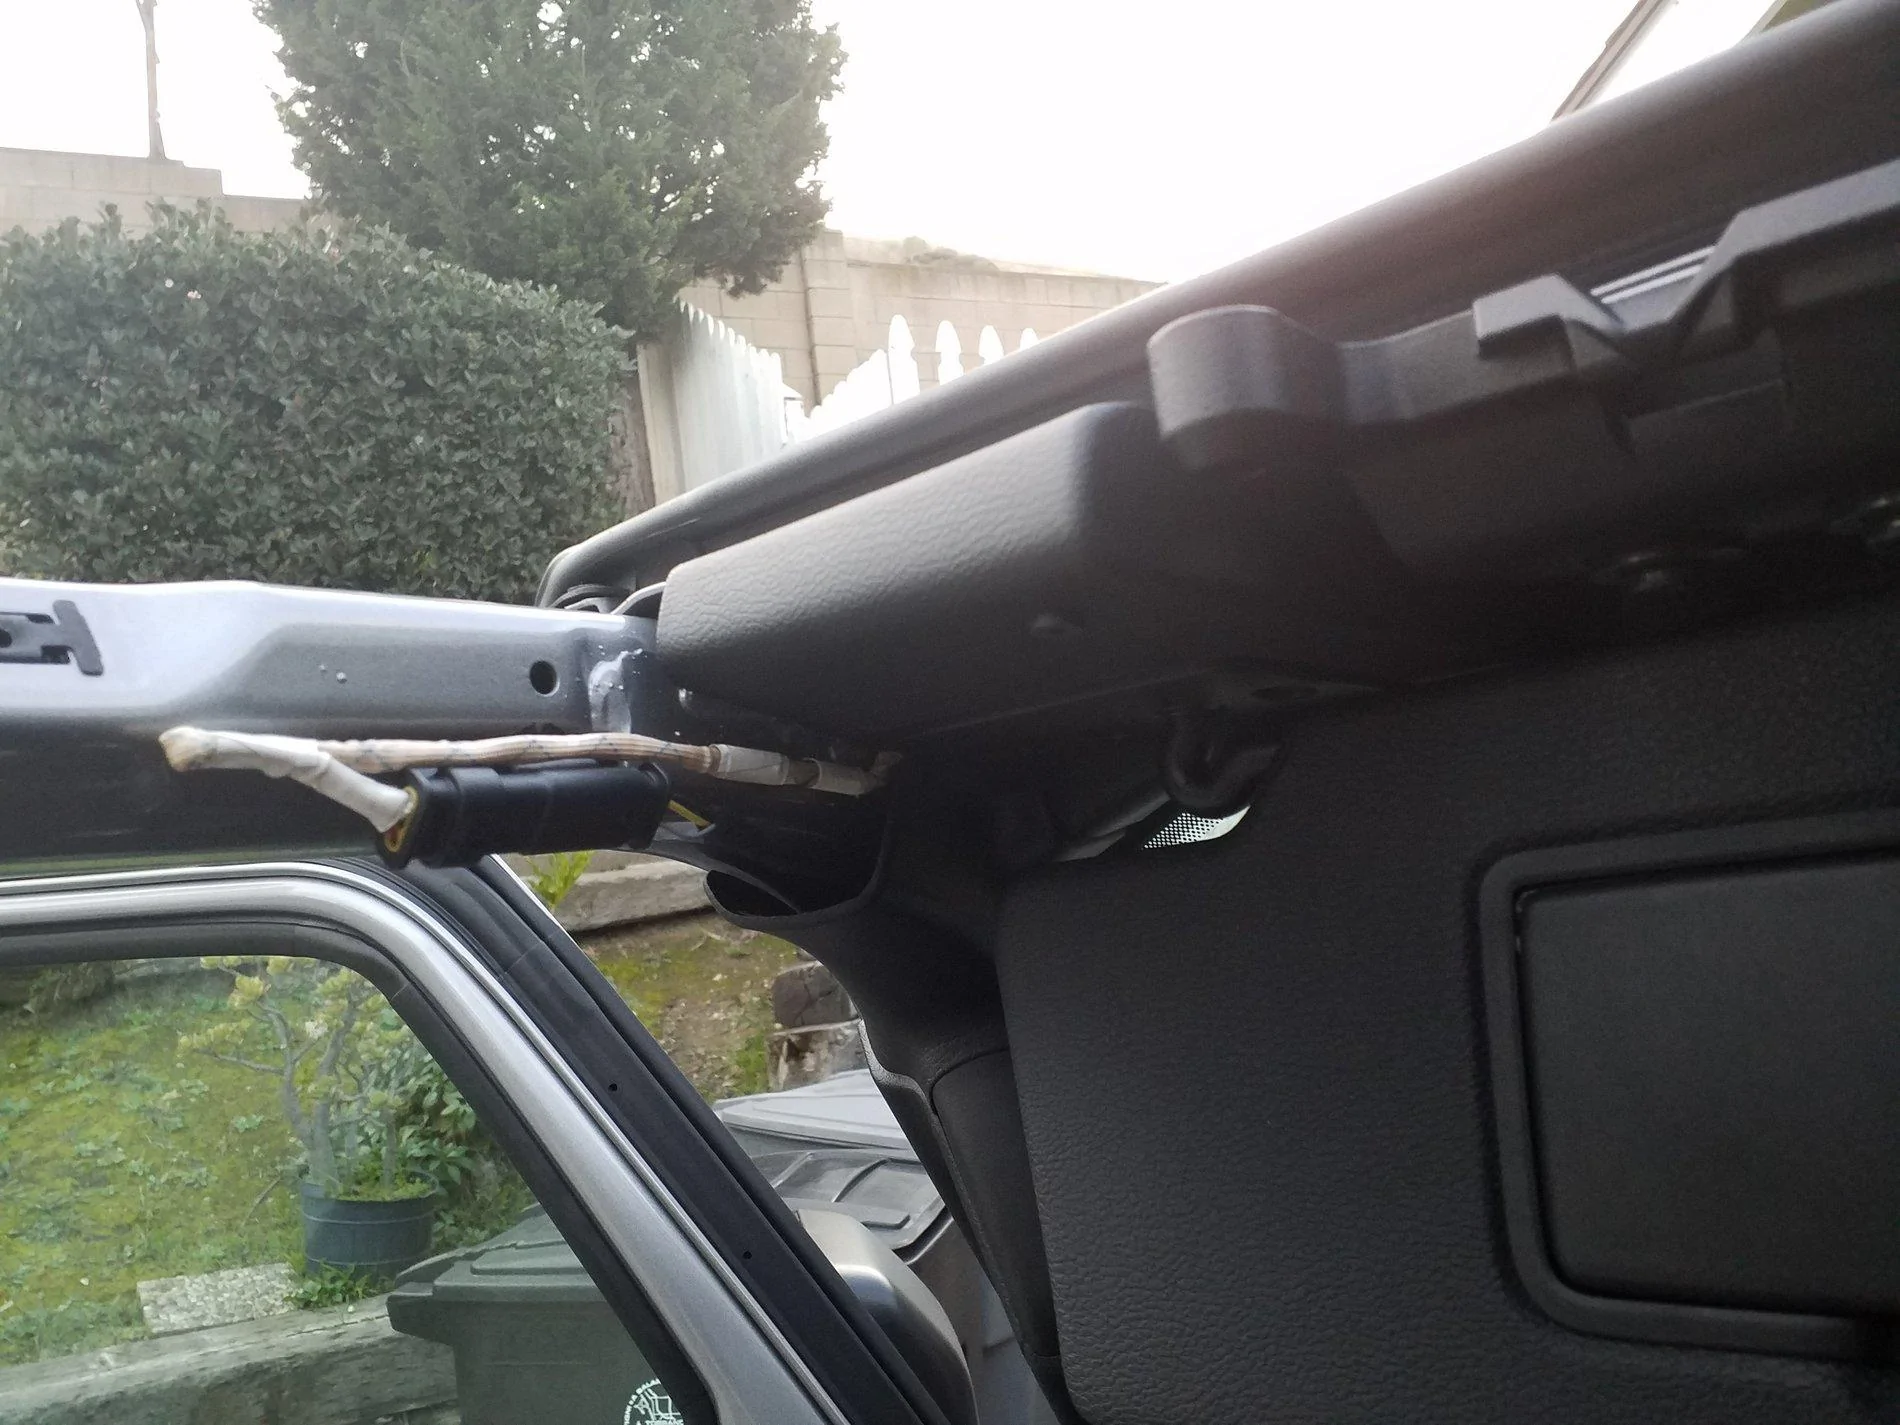
It seems the sun visors are breaking like Chinese toys after Christmas. I found a thread in the Issues, warranty, repairs section of the forums. Mine failed about a couple months ago. I deferred taking it in to a dealer until it was early December. The service lane writer told me they'd need to take it apart to see what was wrong and maybe order a part. He said I'd have to leave it. I left the dealer annoyed. Later, I realized it just went out of warranty for this kind of stuff.

Later, I looked up the part on the internet seller's sites. This visor is nearly $400 online with discounts. Given that the OEM design sucks, I wasn't going to buy another just like it. I wanted to make it better if I could repair it.

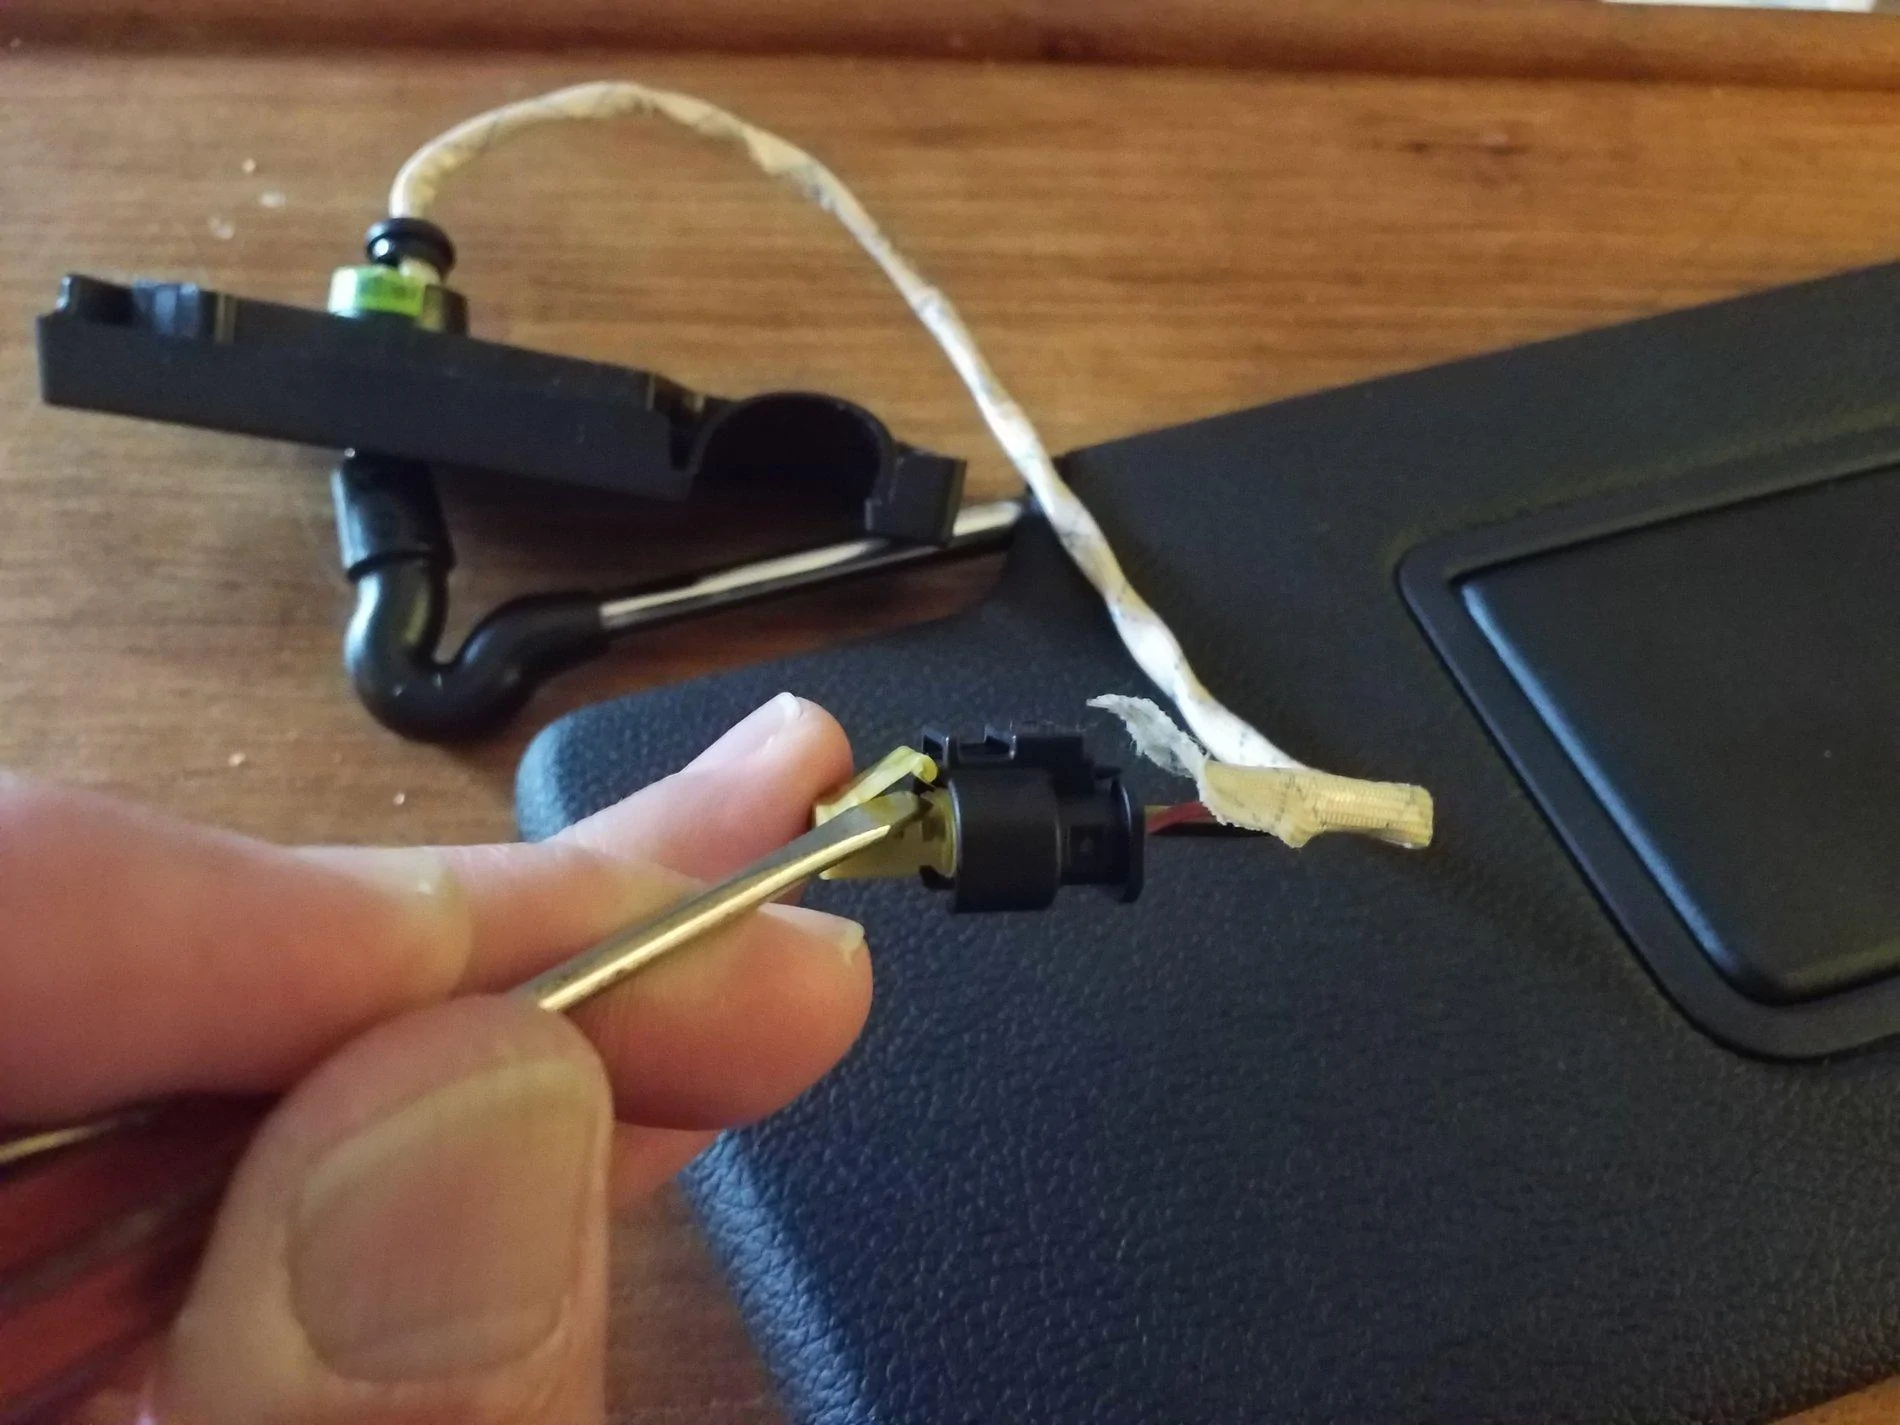
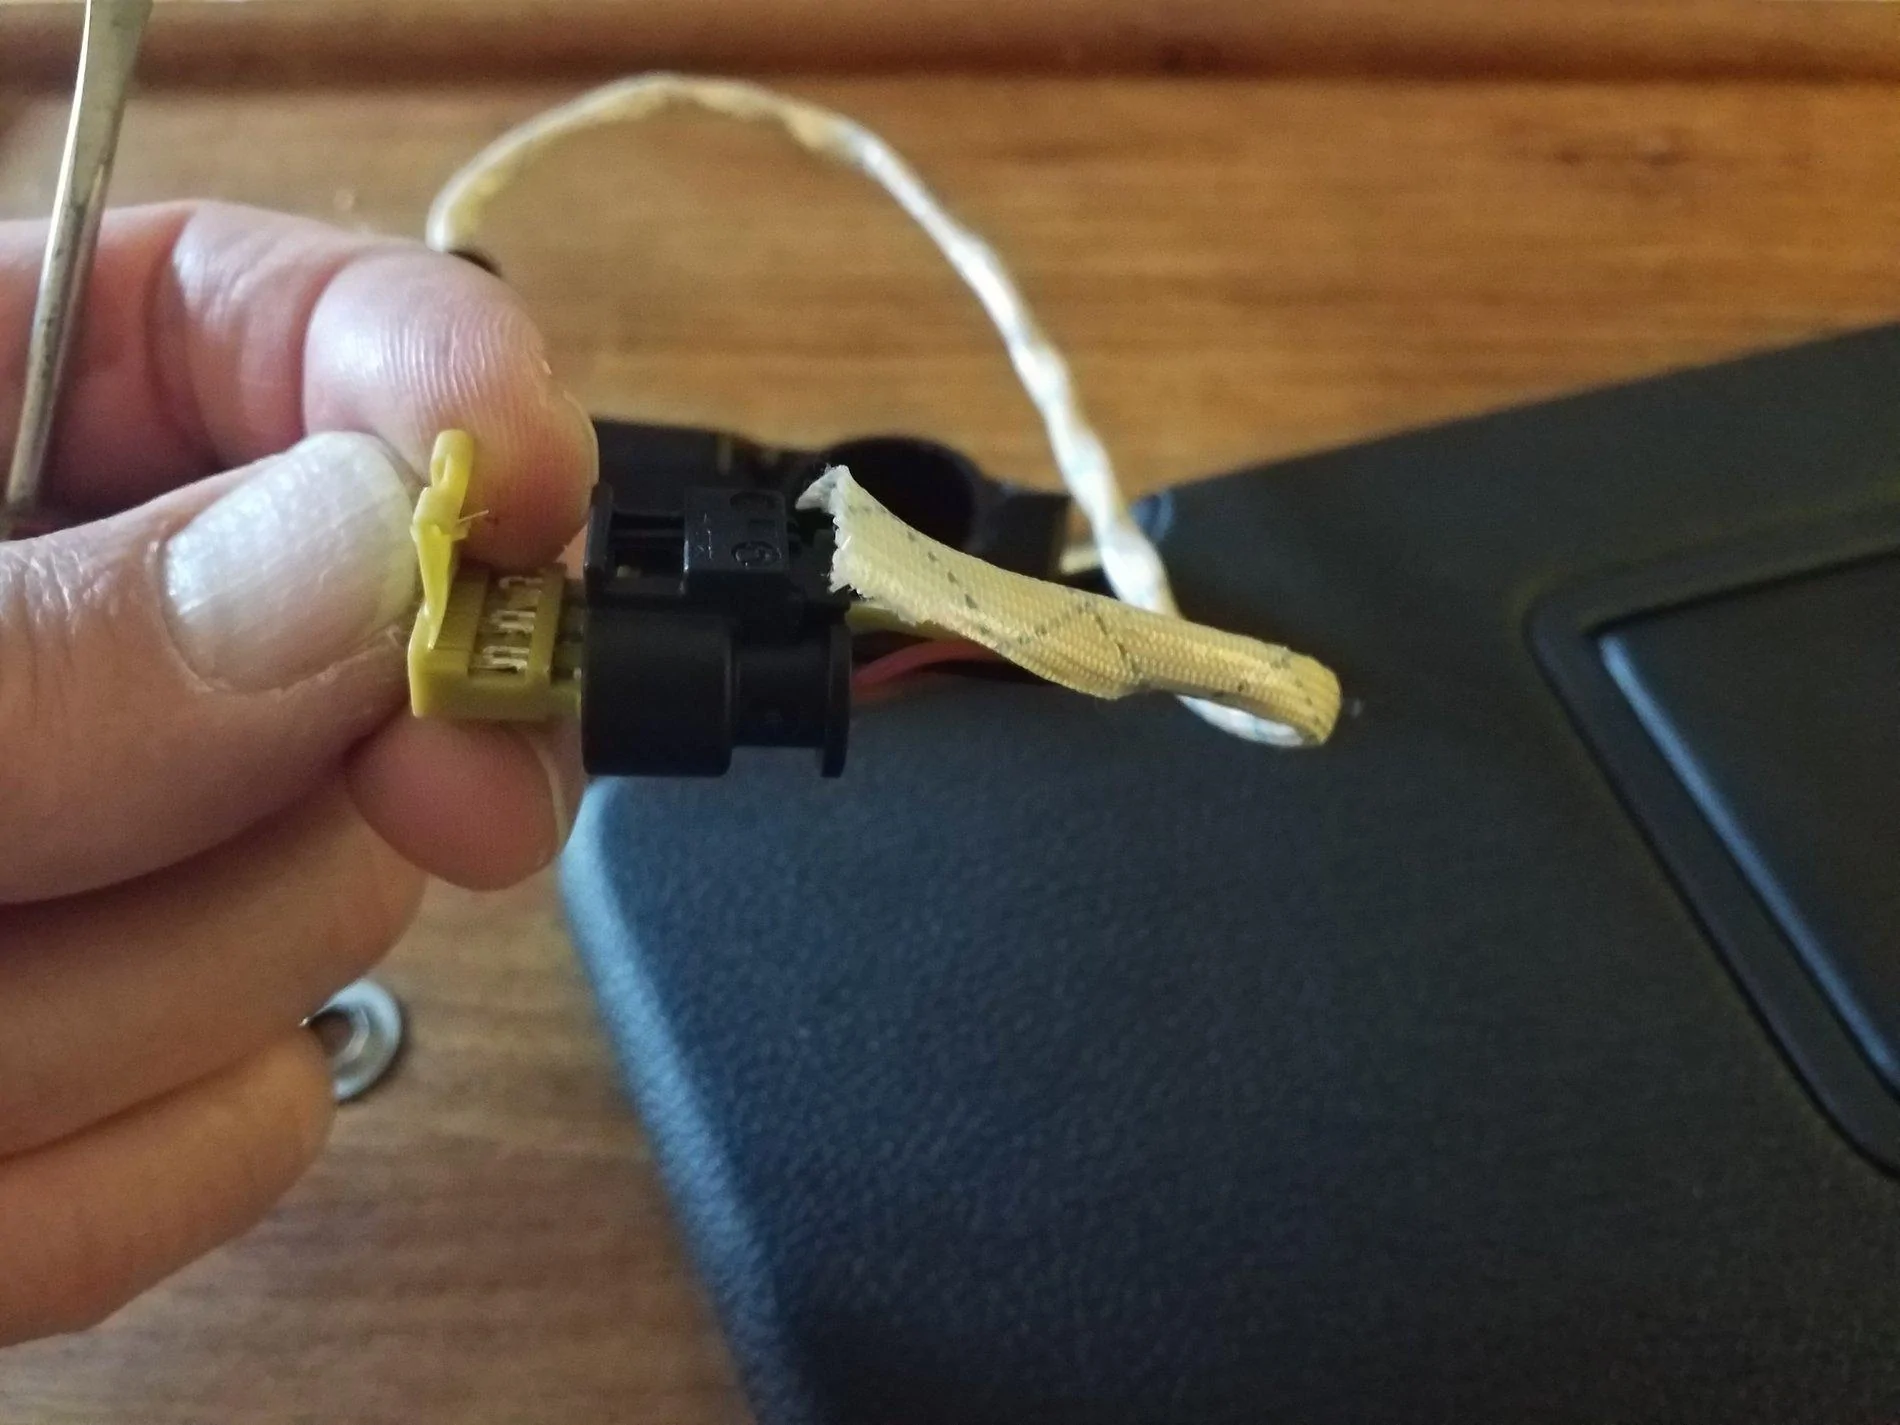
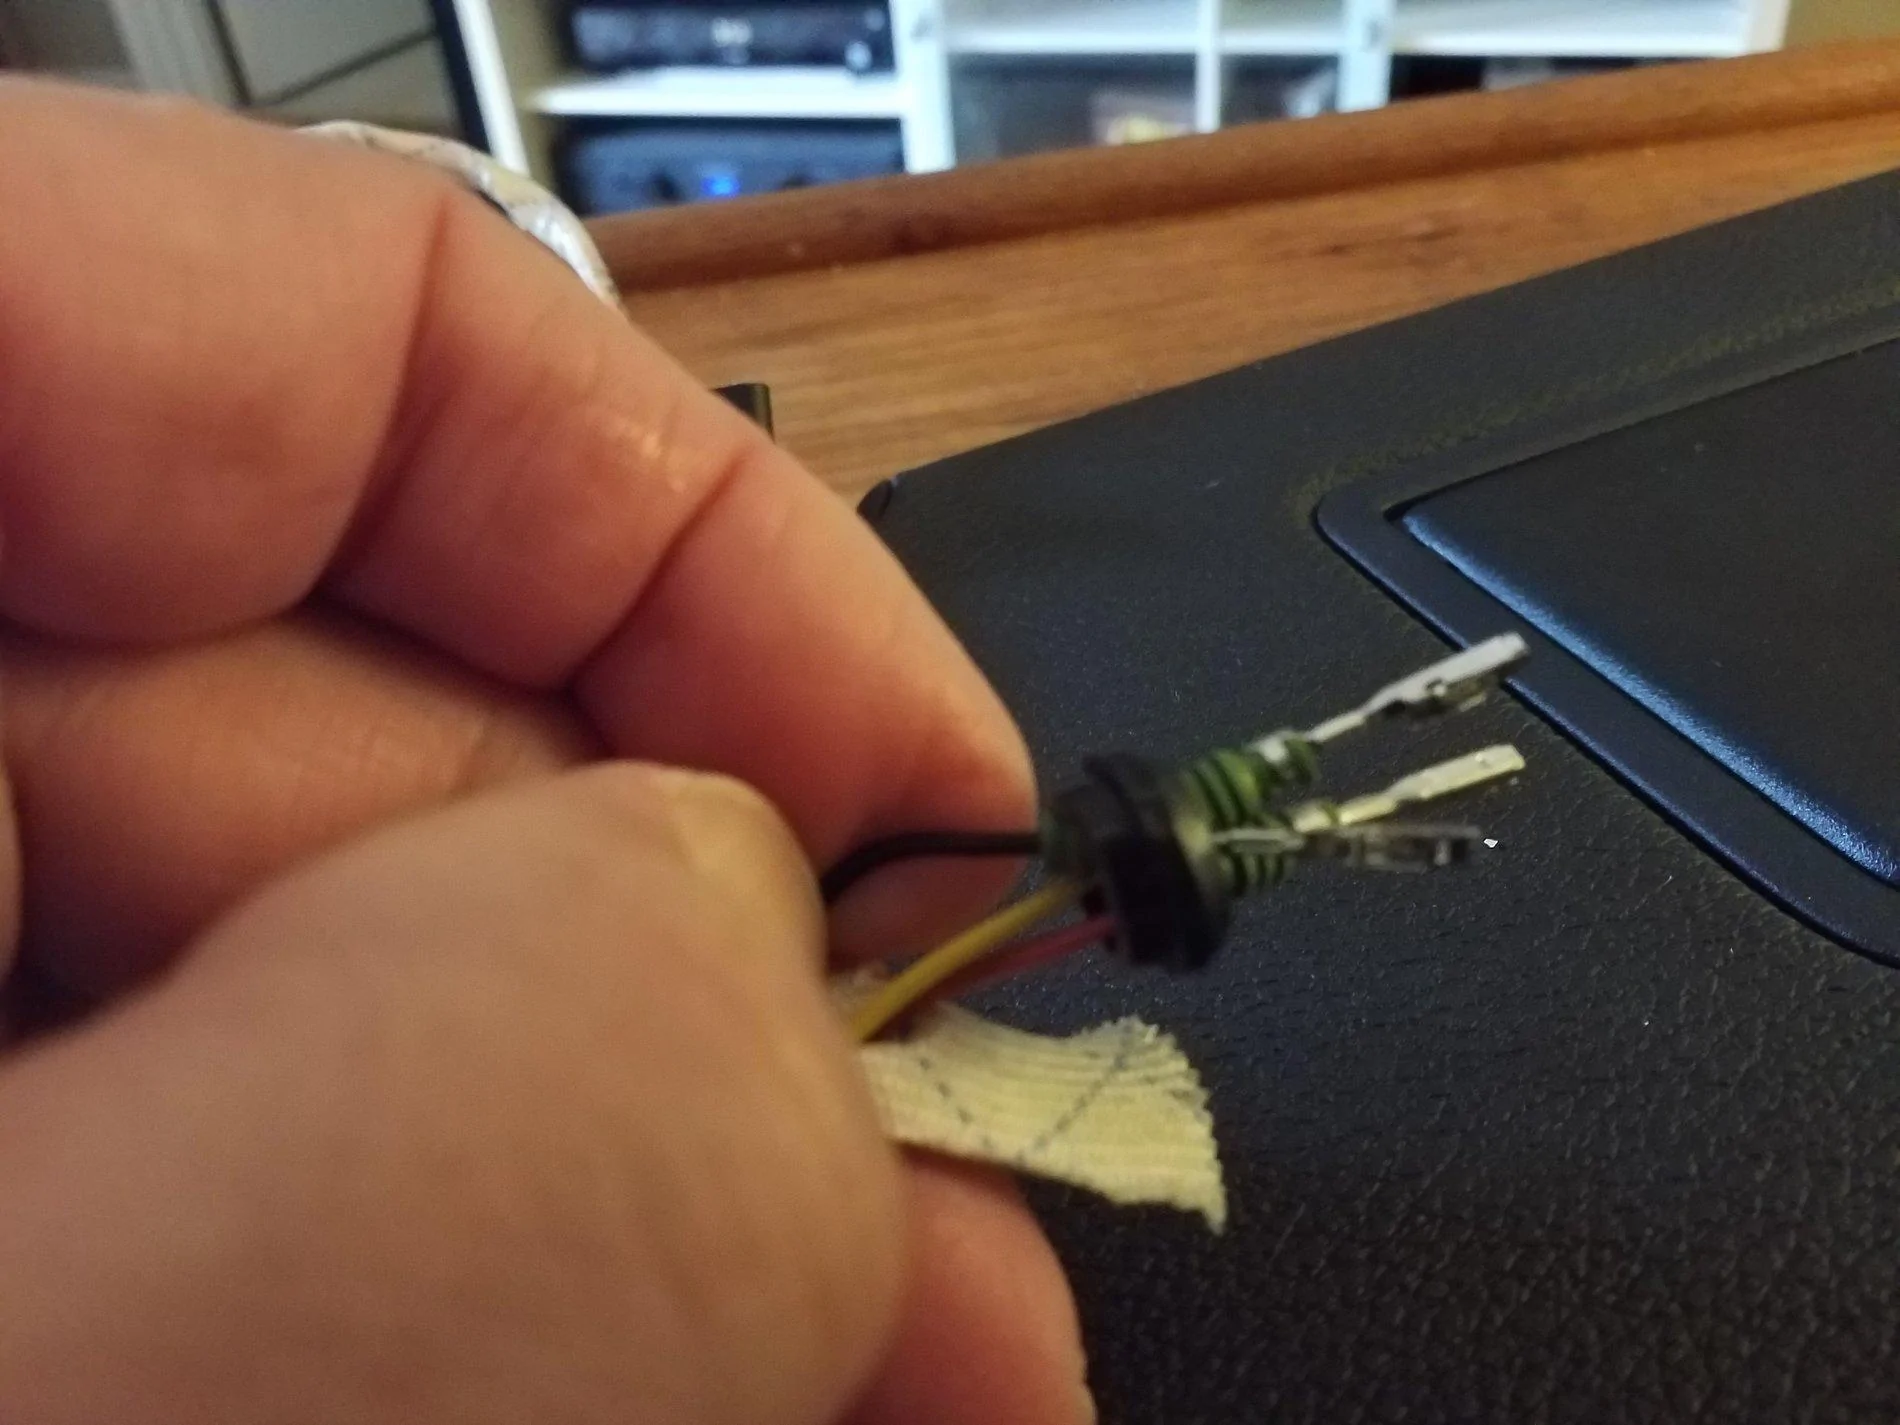
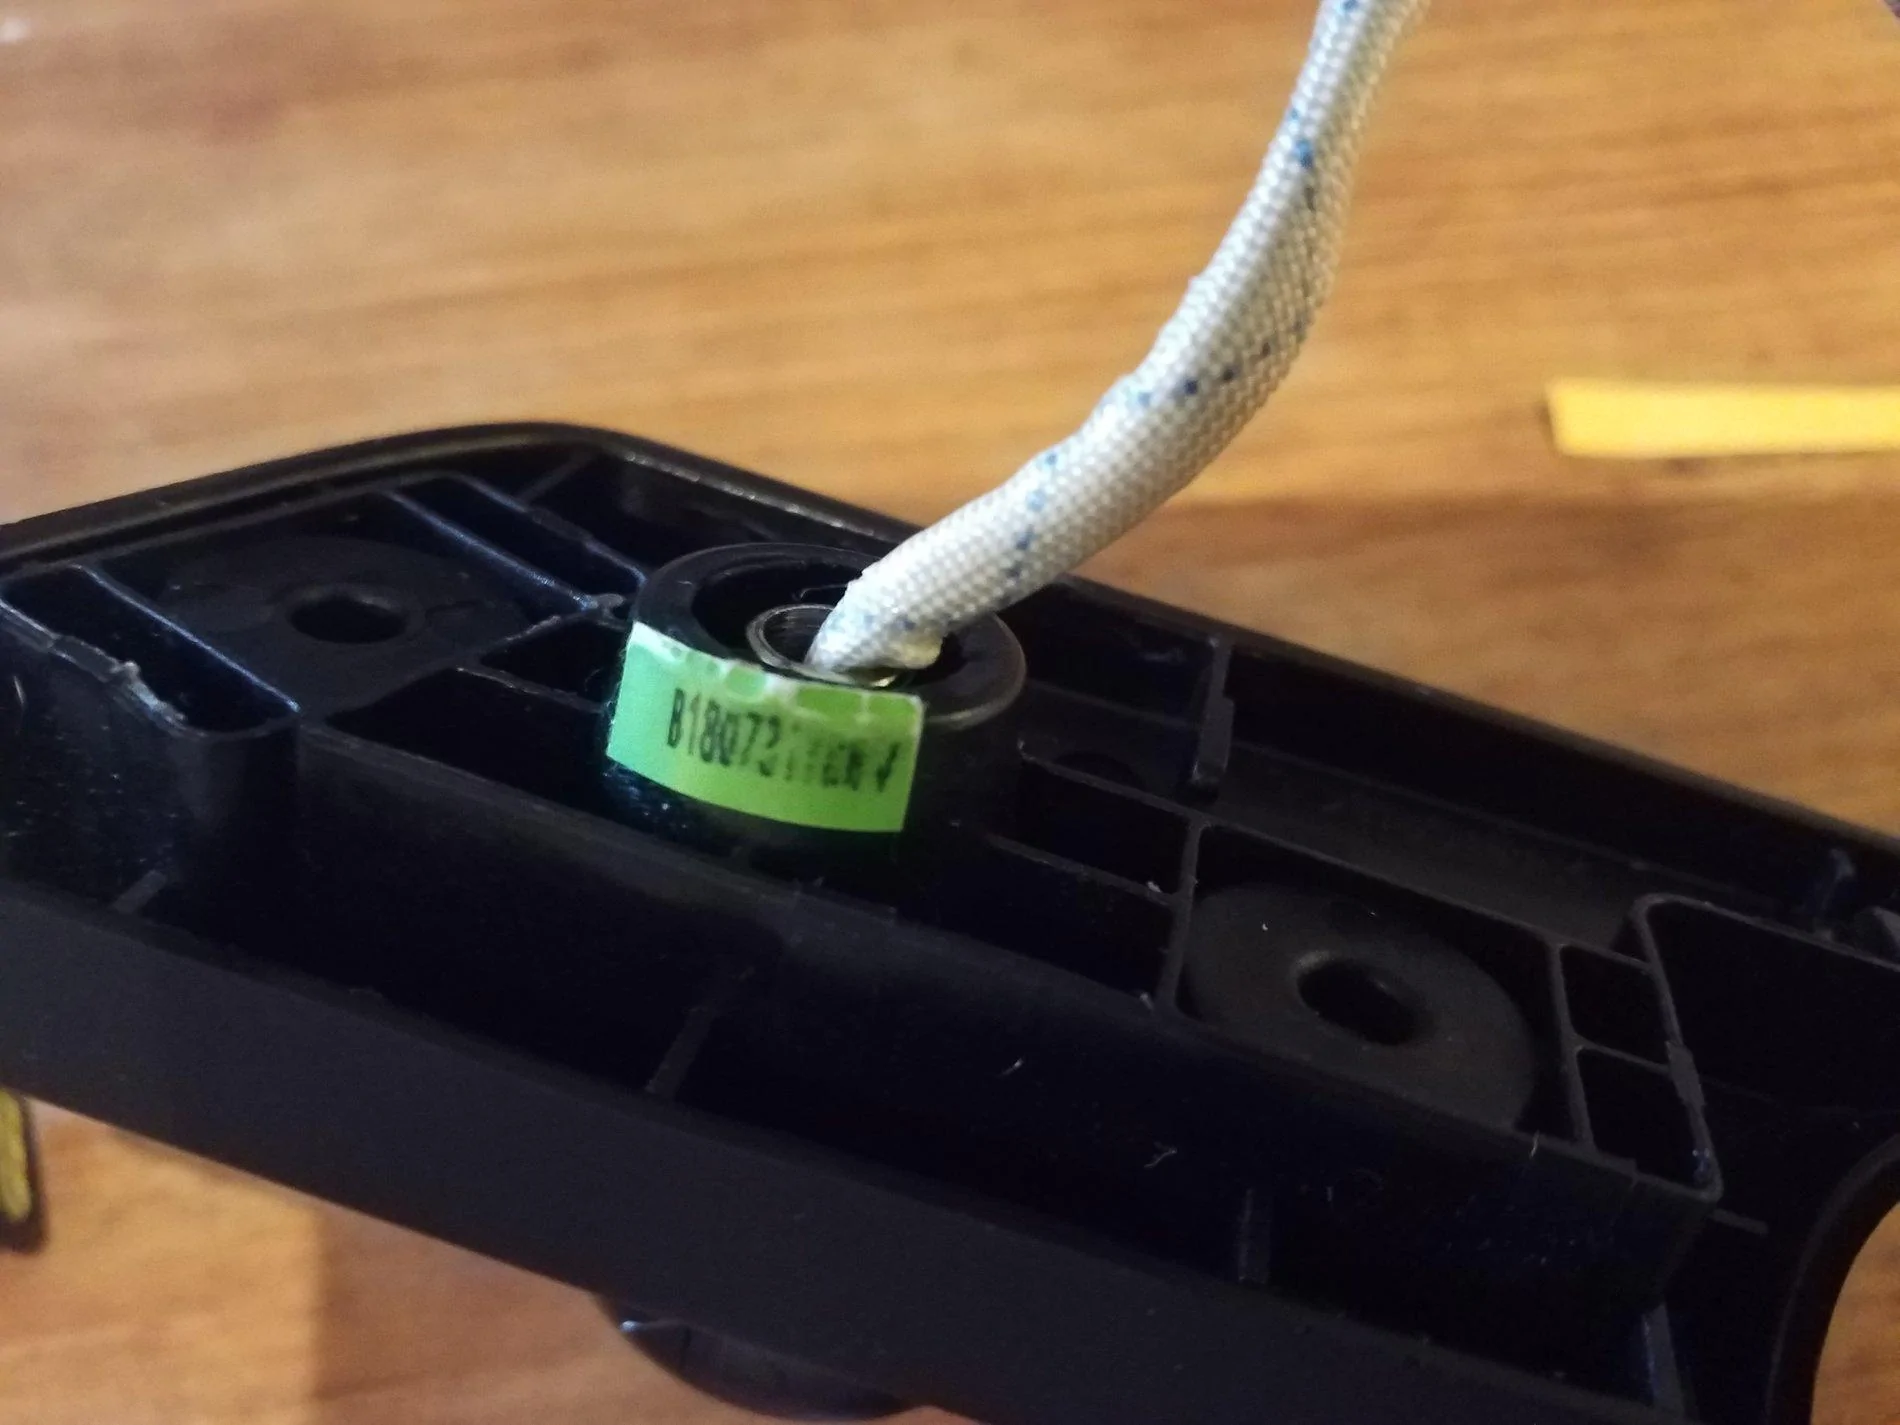
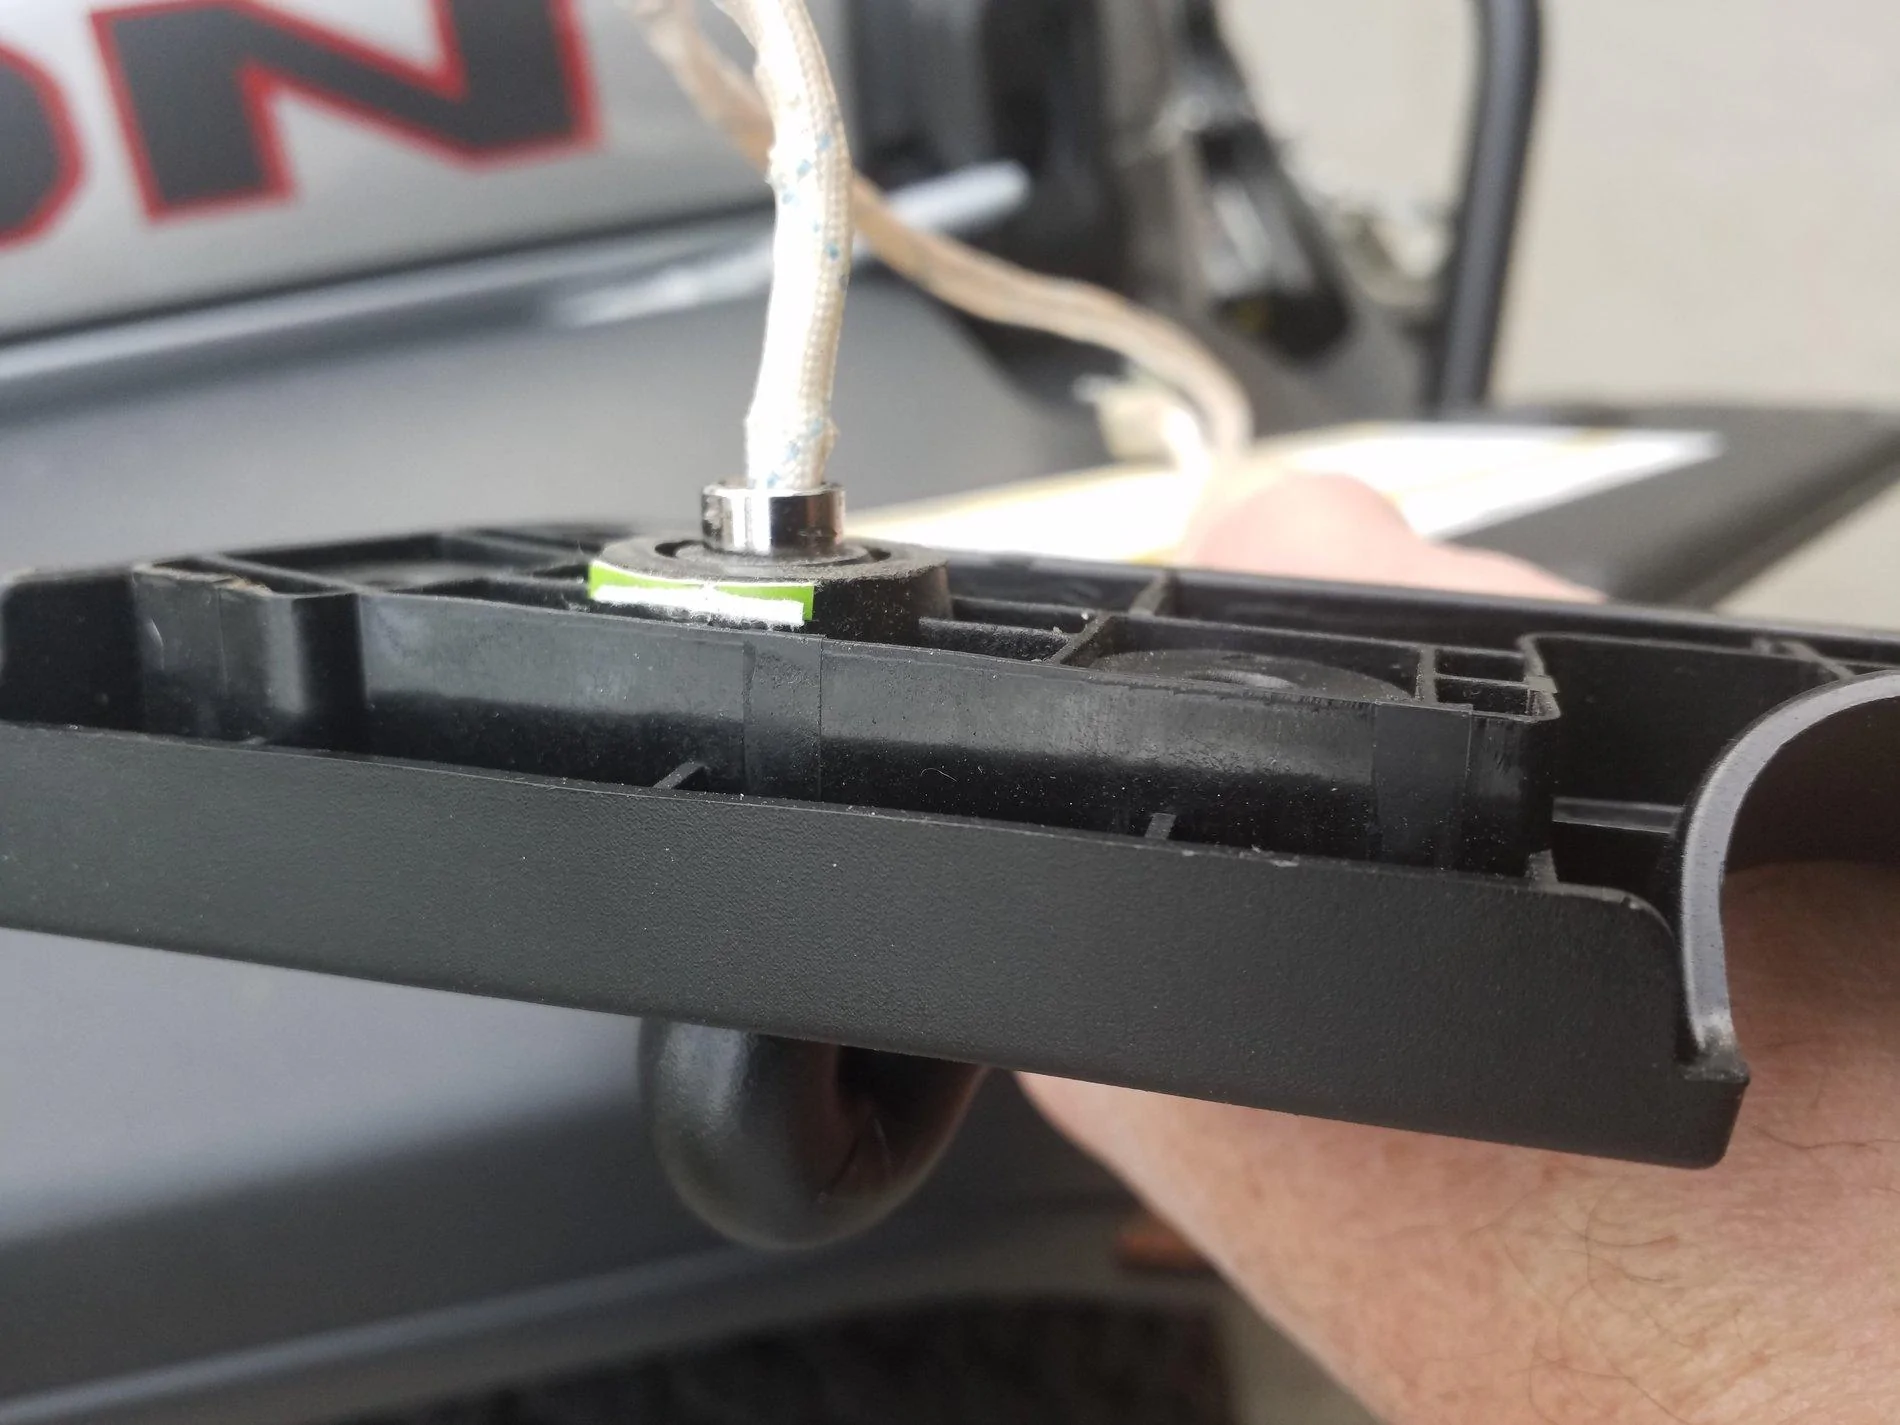
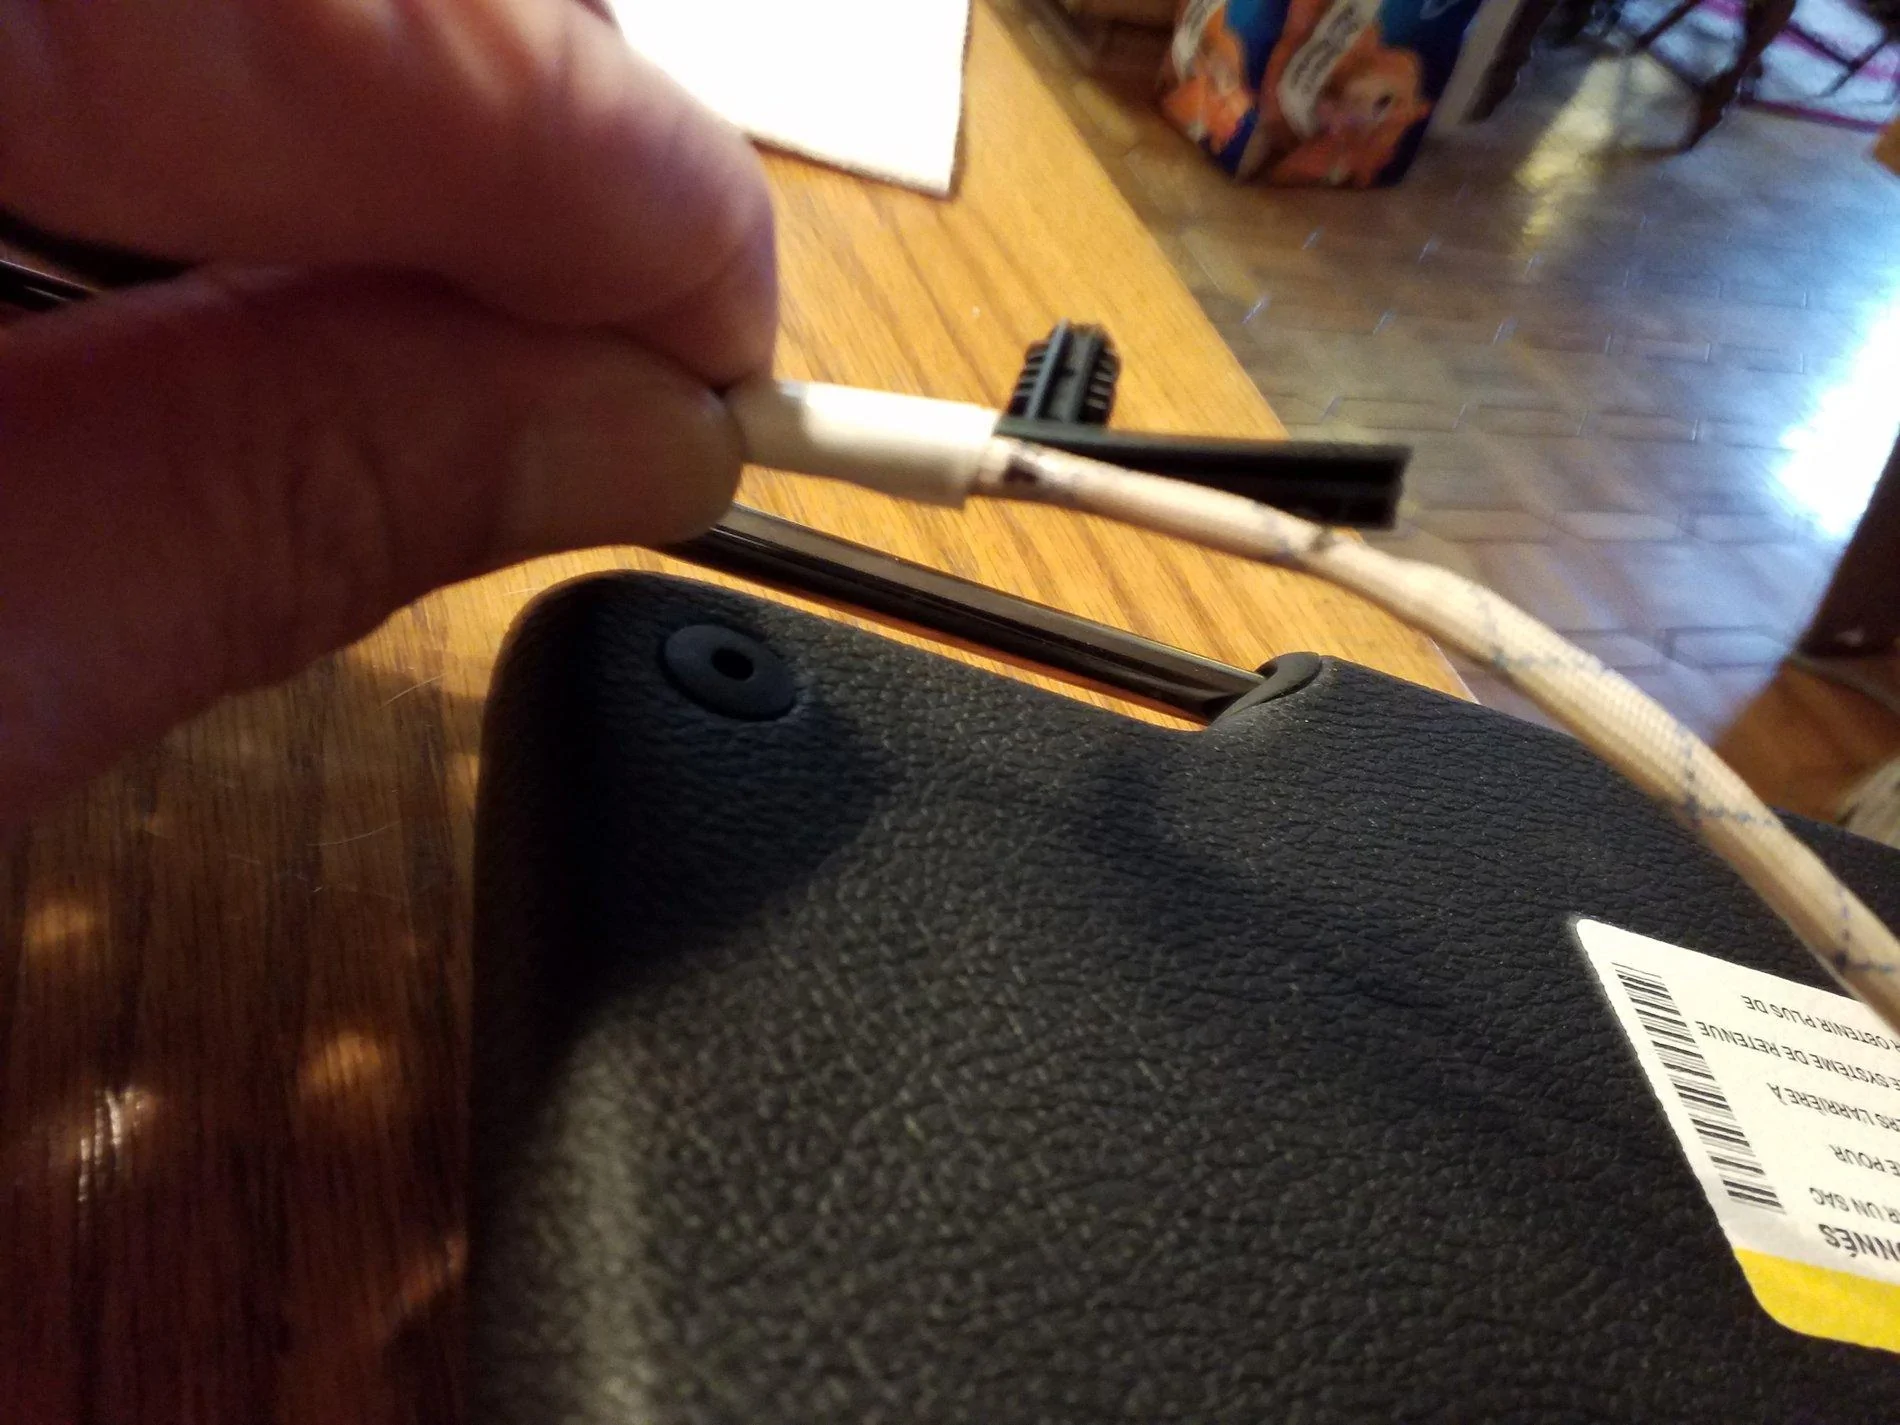
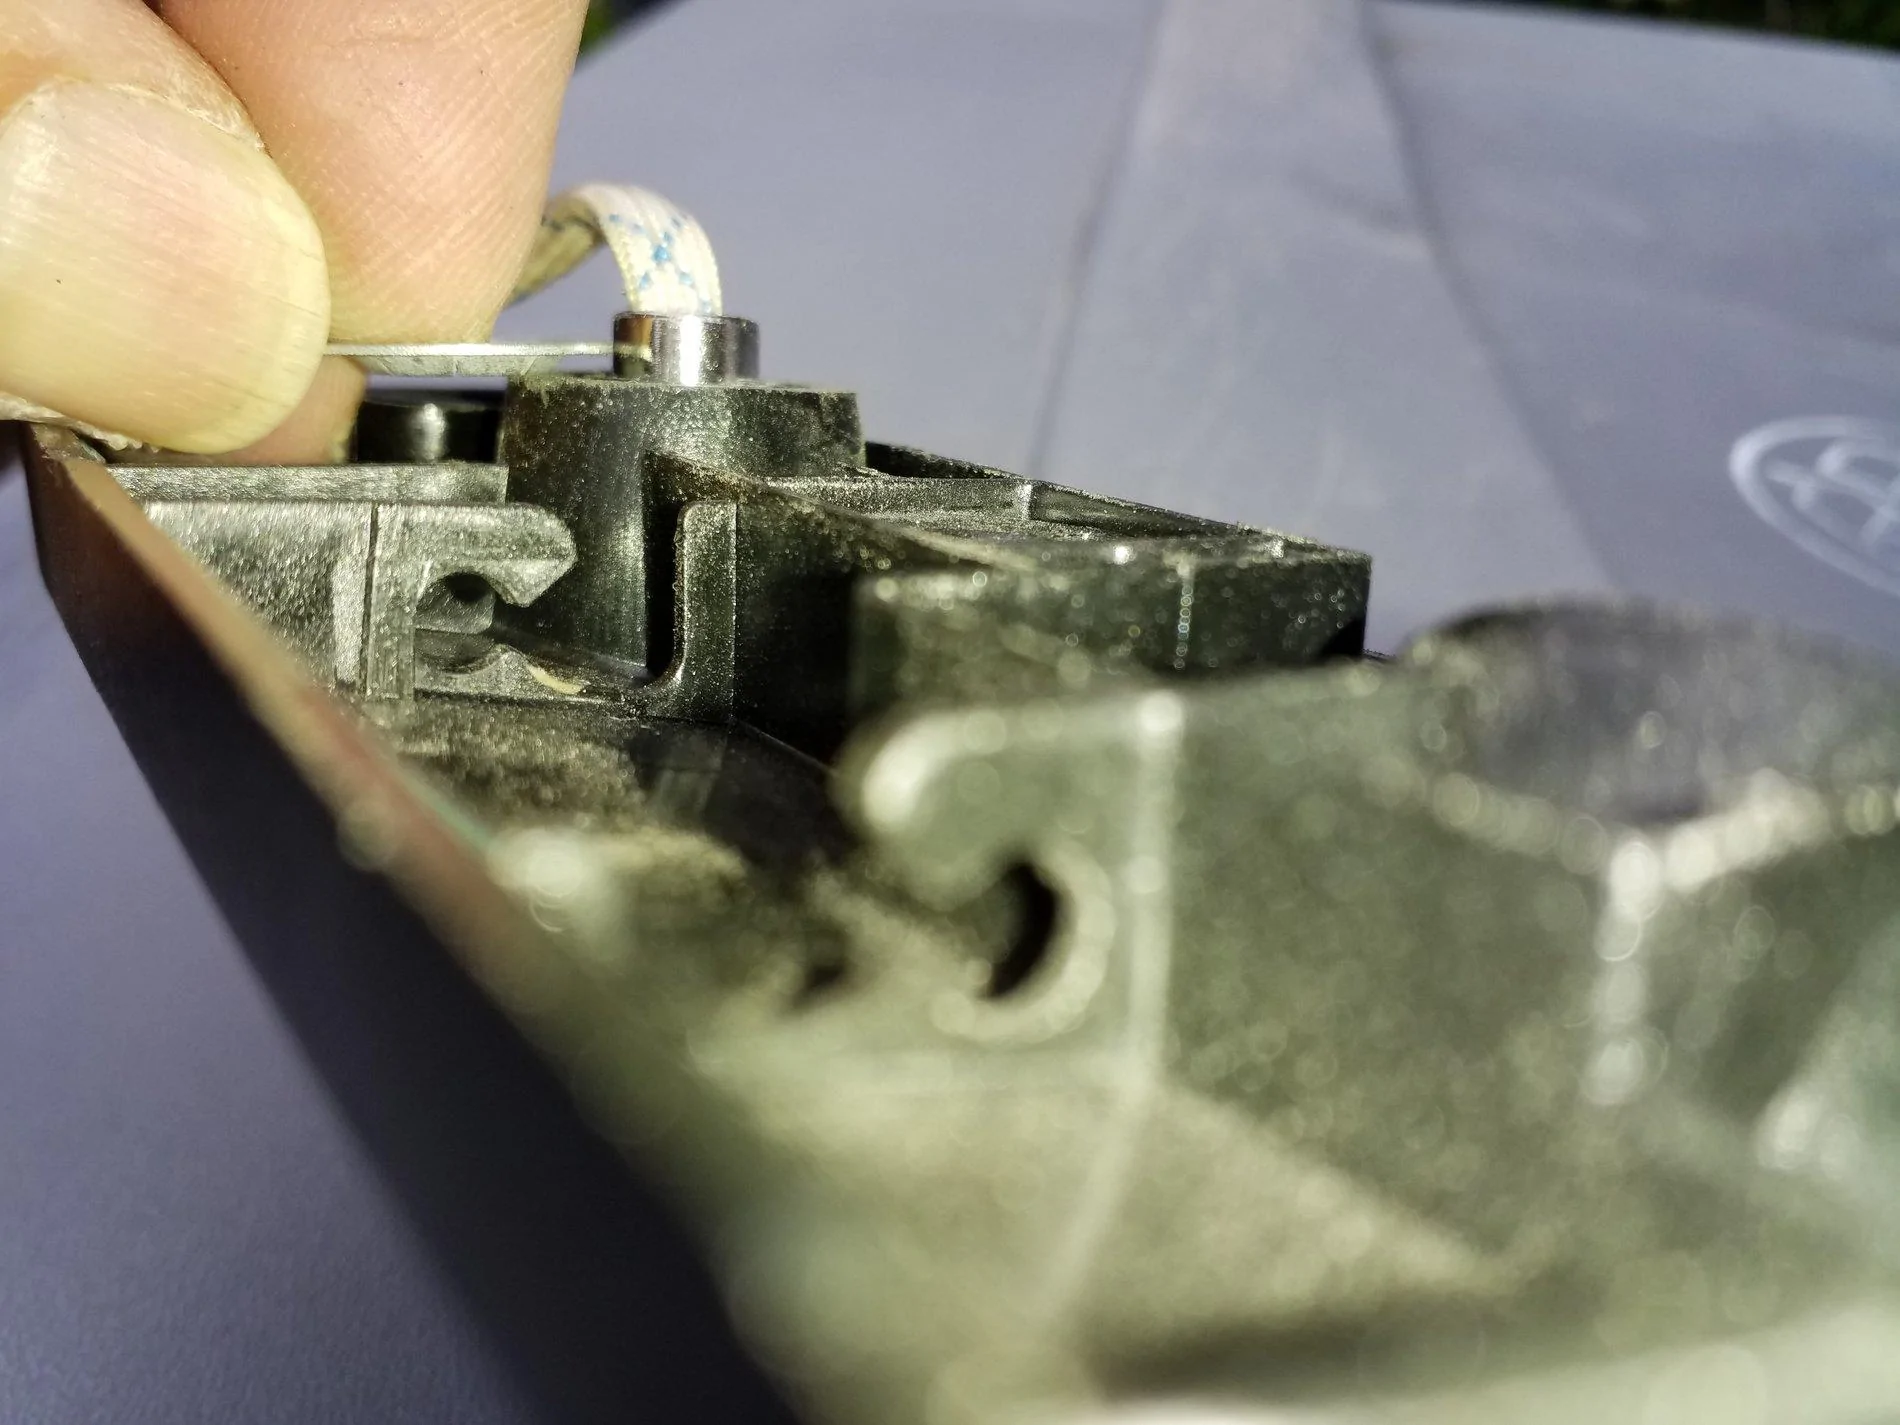
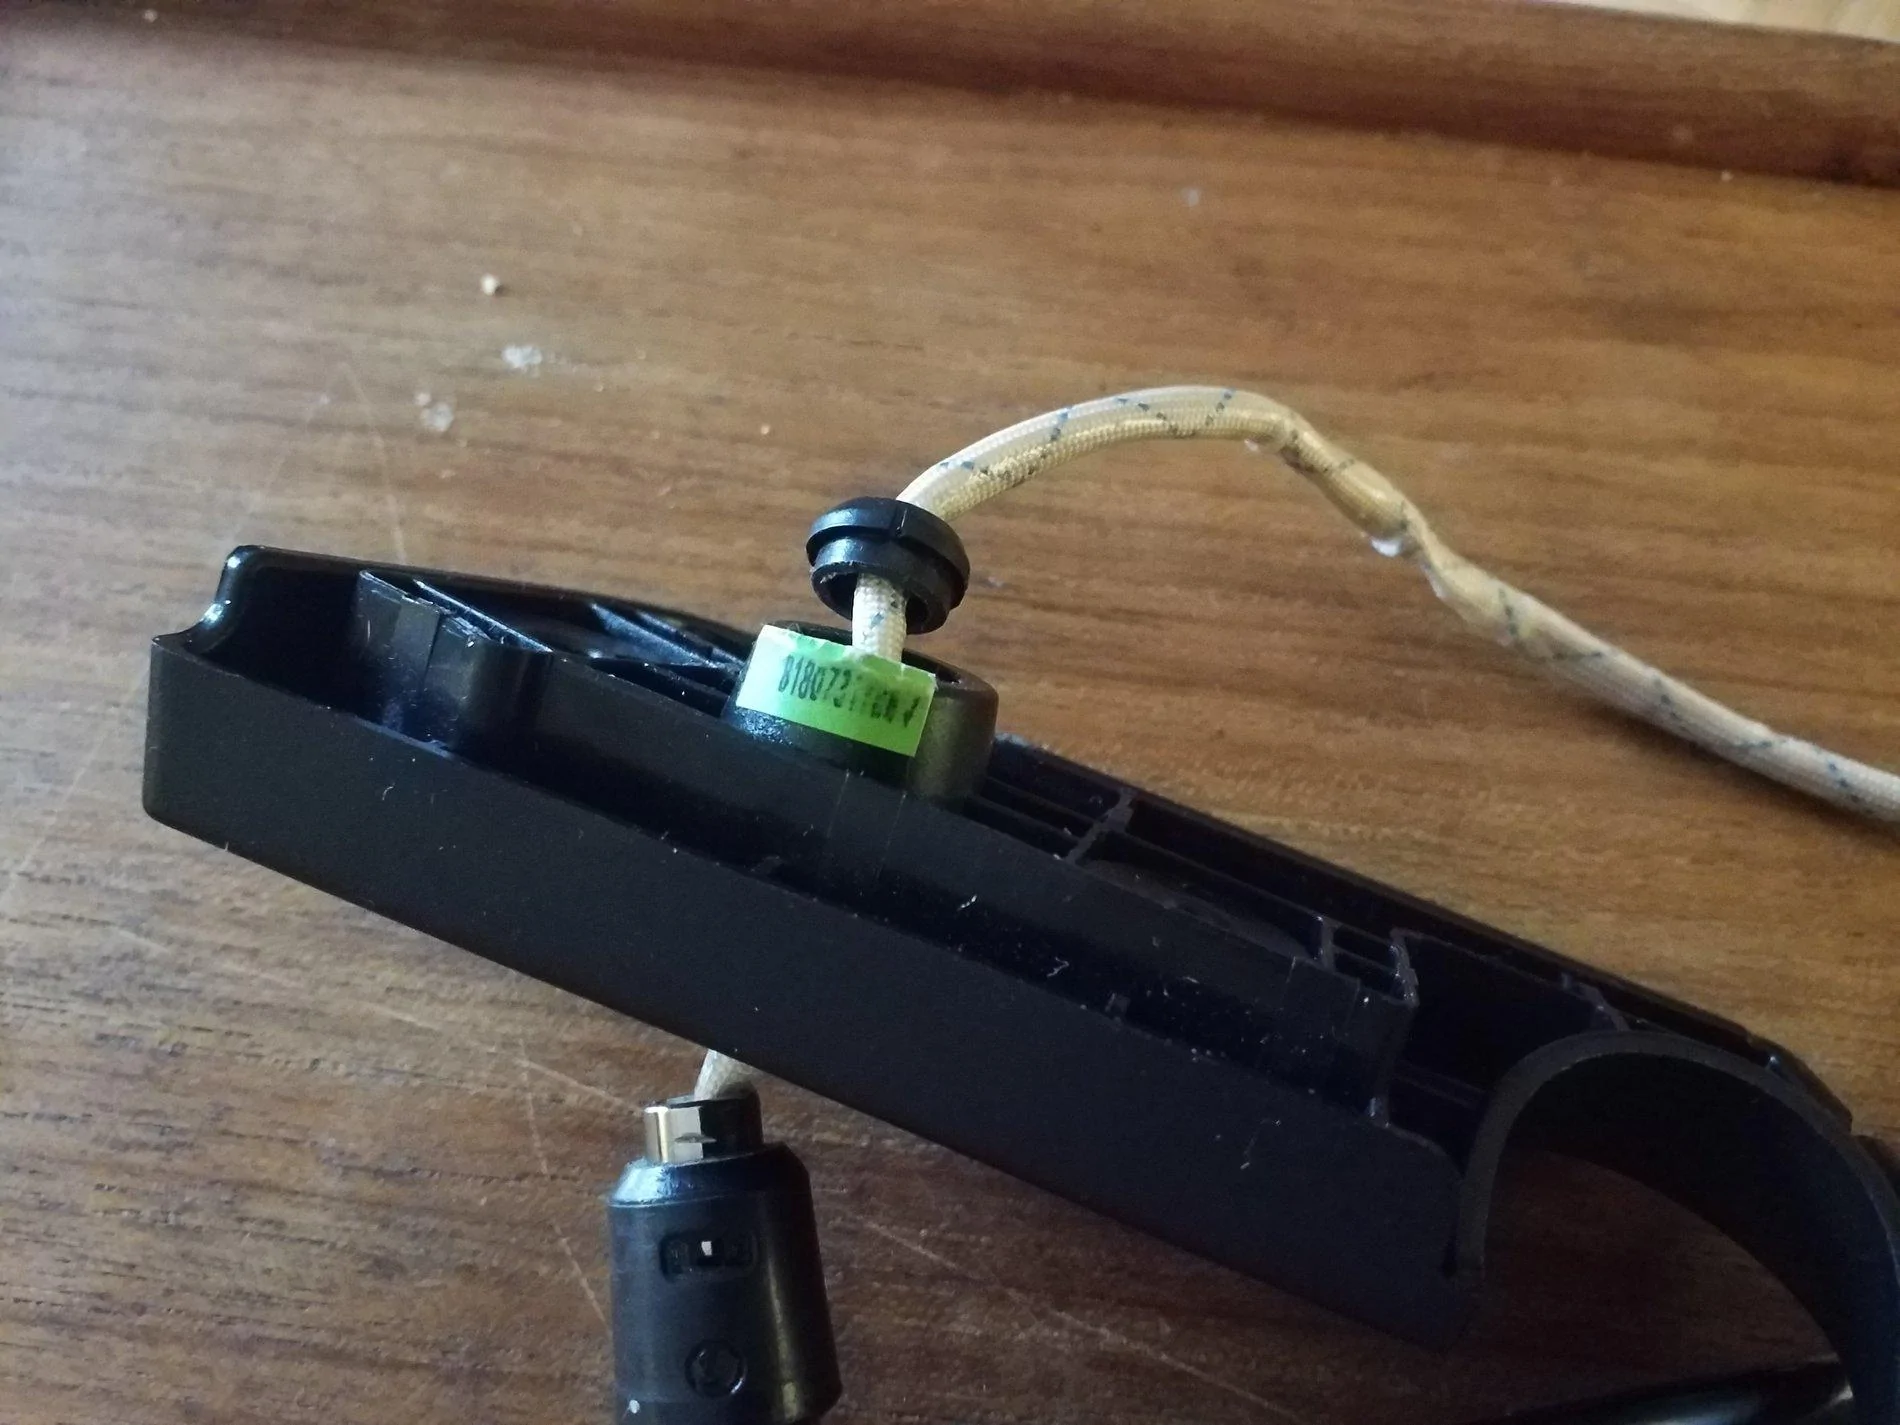
I finally took it apart a week or two ago. Here's a picture of the detached retaining ring, allowing the tapered shank of the visor to drop out.
20200118_154947.jpg
Sponsored

 
Last edited:
OP
OP
roaniecowpony

roaniecowpony

Well-Known Member
Joined
Dec 4, 2018
Threads
144
Messages
7,240
Reaction score
9,298
Location
SoCal
Vehicle(s)
2018 JLUR, 14 GMC 1500 CC All TERRAIN
Occupation
Retired Engineer
20200120_062651.jpg
It took me a few days of thinking about how to repair the visor in a way that would be stronger than the OEM POS. I had all kinds of ideas about machining rings and cross drilling the metal shank.

In the end, I came up with an idea, all on my own, that apparently was also devised by Dorman for the JK in their repair kit. I found this out later after I had ordered what I needed for the repair.

Here's the repair.
You need a T25 Torx driver, a very small flat blade screw driver, some electrical tape, a sanding disk or other method to remove some plastic and a little triangle jeweler's file.

You'll need to get a 5/16 push-on retainer of a specific type. I found them on amazon for $3.59 + $3 shipping.
https://www.amazon.com/Push-Pushnut-Stud-Size-5-Piece/dp/B078B71X81
You can find similar ones from McMaster-Carr or Grainger for about 5 to 10 cents each if you buy 100-200 pieces. I just went with the amazon listing because it was easy and I can't envision using many of these. Although, I can see the need for one more for the passenger visor.

I've written this for a Jeep equipped with the garage door opener and lighted mirror. If you don't have these options, yours may not have any wiring and you might not need to remove the rollbar cover.

If you have a top on the jeep, you need to remove at least enough to get access to 2 Torx screws on the plastic cover on the top rollbar tube. I have a hardtop and just removed the "Freedom panel". Remove 2 other lower screws on the rollbar cover and remove it. That will expose the tube and you'll see a connector near the A-pillar. Disconnect it. Also remove the push-pin retainer that holds the harness in the rollbar. Remove the 2 Torx screws in the visor base and you should have the whole visor in your hand.

20200118_165849.jpg
20200118_165920.jpg
20200118_165456.jpg


View attachment 273096
 

Attachments

  • 0 bytes Views: 0
Last edited:
OP
OP
roaniecowpony

roaniecowpony

Well-Known Member
Joined
Dec 4, 2018
Threads
144
Messages
7,240
Reaction score
9,298
Location
SoCal
Vehicle(s)
2018 JLUR, 14 GMC 1500 CC All TERRAIN
Occupation
Retired Engineer
If you have the wiring harness on your visor, now is the time to take a picture of the connector showing where wire colors are placed in the connector. Trust me on this one. LOL.

Here's what we are going to do:
  1. remove the wires/pins from the connector body
  2. remove the push pin harness retainer (taped on the harness)
  3. remove the tape holding the harness fold over
  4. remove the broken plastic ring and discard it
  5. slide the visor baseplate off the harness
  6. grind down the plastic boss around the hole where the visor shank goes thru the visor baseplate, so a retainer can be put on the metal part of the visor shank.
  7. reassemble
To remove the wire pins from the connector body, use a little flat blade screwdriver to pry the cover up on the connector as shown in my picture. That exposes the pins where their locking tabs are located and can be easily depressed and pulled out. Do them one at a time, lightly depressing the area exposed and gently pulling the wire. Be careful not to pull so hard you pull the wire out of the pin.

BTW, I had to split the fiberglass sleeving back about an inch or so, on the harness, near the connector, so I could pull the pins one at a time thru the little broken plastic retainer. But, you shouldn't need to split the sleeve to get the pins thru that plastic retainer if you just use some wire cutters to cut the broken old plastic retainer in two.
20200118_155318.jpg
20200118_155344.jpg
20200118_155826.jpg
 
Last edited:
OP
OP
roaniecowpony

roaniecowpony

Well-Known Member
Joined
Dec 4, 2018
Threads
144
Messages
7,240
Reaction score
9,298
Location
SoCal
Vehicle(s)
2018 JLUR, 14 GMC 1500 CC All TERRAIN
Occupation
Retired Engineer
Here's the original protrusion of the visor shank thru the baseplate. I ground down and filed the boss until I got the fit in the second picture. You have to wring the baseplate on the taper of the visor shank very hard to check the fit. It needs the friction when it's installed. So get it in there very tight. A twisting with pressure will get it seated well.

The third picture shows the new metal retainer seated. But before I seated the new retainer, I filed some grooves around the metal shank so the new metal retainer could bite into them. Just very shallow grooves should do it. They don't need to be continuous, but need to be about the right placement from the end of the shank so it will seat and the edges of the metal retainer grab. I used a plastic interior tool that has a split crowbar like end to assist in pressing the retainer on and seating it.
20200118_160021.jpg
20200118_162443.jpg
20200118_163147.jpg
 
Last edited:
OP
OP
roaniecowpony

roaniecowpony

Well-Known Member
Joined
Dec 4, 2018
Threads
144
Messages
7,240
Reaction score
9,298
Location
SoCal
Vehicle(s)
2018 JLUR, 14 GMC 1500 CC All TERRAIN
Occupation
Retired Engineer
Reassemble the wiring pins into the connector using the photo you took before you removed the pins from the connector body. (I told you)

Route the harness into the slots in the back side of the visor baseplate. Install the visor with the 2 screws. Locate where the push retainer should be taped on the harness to match the hole in the rollbar. Tape it on. Plug in the harness. Fold the harness so it fits neatly under the cover and tape the fold of the harness. Replace the rollbar cover. Put your top back together. Done.

That retainer should hold for this use. One manufacturer of these claims 900 lbs of retaining force for this size. Other makers claims are lower, but still way up above what should be adequate and way above the plastic OEM POS.
 

Sponsored

OP
OP
roaniecowpony

roaniecowpony

Well-Known Member
Joined
Dec 4, 2018
Threads
144
Messages
7,240
Reaction score
9,298
Location
SoCal
Vehicle(s)
2018 JLUR, 14 GMC 1500 CC All TERRAIN
Occupation
Retired Engineer
I repaired the passenger side today. I'm getting better at it. LOL.

Some helpful tips...

Put a mark on the harness where the fold is taped and the harness retaining stud is taped on the harness so you can tape it back after you're done with the repair.


After you've ground the baseplate boss down to be level with the remaining plastic taper section of the visor shank, wring the visor on the baseplate tightly and use a metal push on retainer to estimate where the "teeth" of the push on retainer will be once in place, as shown below, so you can locate where you are going to file some grooves in the shank.
20200120_141923.jpg
20200120_140445.jpg
20200120_140628.jpg
 
OP
OP
roaniecowpony

roaniecowpony

Well-Known Member
Joined
Dec 4, 2018
Threads
144
Messages
7,240
Reaction score
9,298
Location
SoCal
Vehicle(s)
2018 JLUR, 14 GMC 1500 CC All TERRAIN
Occupation
Retired Engineer
I used this interior panel tool for helping to press the push on retainer.

P.S. thinking about it, a 9/16 deep socket would work well to press the retainer on the shank too.
20200120_141504.jpg
 
Last edited:

Aidencaster

Well-Known Member
First Name
Anto
Joined
Aug 25, 2019
Threads
6
Messages
48
Reaction score
109
Location
Alberta
Vehicle(s)
2018 Jeep Wrangler JLU sport
Thanks for this. Same sort of thing happened to me. I dont remember if the plastic retainer ring broke completely. But I will remember this if I come across a metal retainer ring in my travels. Definitely not spending the 400 for it to happen again.
 

No IFS

Banned
Banned
Banned
Joined
Nov 13, 2019
Threads
10
Messages
1,167
Reaction score
2,306
Location
So Cal
Vehicle(s)
JL Rubicon
Thank you , maybe a stupid question but do you think the broken end could be JB weld / epoxy back together ?
 
OP
OP
roaniecowpony

roaniecowpony

Well-Known Member
Joined
Dec 4, 2018
Threads
144
Messages
7,240
Reaction score
9,298
Location
SoCal
Vehicle(s)
2018 JLUR, 14 GMC 1500 CC All TERRAIN
Occupation
Retired Engineer
Thank you , maybe a stupid question but do you think the broken end could be JB weld / epoxy back together ?
I don't think it would hold for long. I glued mine with a cyanoacrylate (super) glue made for plastics and steel. It failed almost instantly. These retaining washers cost $6 to your door from amazon. It's the easiest solution I could come up with that has many, many times the strength of the original. If you don't have the abilities to do this, maybe a friend? It's really not all that hard but does require some basic mechanical skills.
 

Sponsored

OP
OP
roaniecowpony

roaniecowpony

Well-Known Member
Joined
Dec 4, 2018
Threads
144
Messages
7,240
Reaction score
9,298
Location
SoCal
Vehicle(s)
2018 JLUR, 14 GMC 1500 CC All TERRAIN
Occupation
Retired Engineer
Thanks for this, I just bought the parts today...
Make sure you use a little file to put that groove in the shank.
 

No IFS

Banned
Banned
Banned
Joined
Nov 13, 2019
Threads
10
Messages
1,167
Reaction score
2,306
Location
So Cal
Vehicle(s)
JL Rubicon
I have another idea for putting a groove in the shank. If you have a Dremel tool that’s what I’m going to try it comes with all those little grinder wheels and stuff I think it would be perfect for making a little groove.
 
OP
OP
roaniecowpony

roaniecowpony

Well-Known Member
Joined
Dec 4, 2018
Threads
144
Messages
7,240
Reaction score
9,298
Location
SoCal
Vehicle(s)
2018 JLUR, 14 GMC 1500 CC All TERRAIN
Occupation
Retired Engineer
Might work. I used a jewelers file since that was what was around and you can see in the picture it put the corner right where I needed it when the file was on the flat of the baseplate boss. I gave some thought to threading the tube with a fine thread,but I didn't have a fine thread die. I think a 5/16"- 48 special fine thread would work very well. I gave some thought to making some tooling to make quick, consistent work out of this. But, it really isn't a service that a lot of people would need.
Sponsored


Top