TTEChris
Well-Known Member
- First Name
- Chris
- Joined
- May 17, 2017
- Threads
- 71
- Messages
- 2,175
- Reaction score
- 5,292
- Location
- Houston, TX
- Website
- www.tankcustoms.com
- Vehicle(s)
- 2021 JTD & 2021 4XE
- Vehicle Showcase
- 5
- Thread starter
- #1
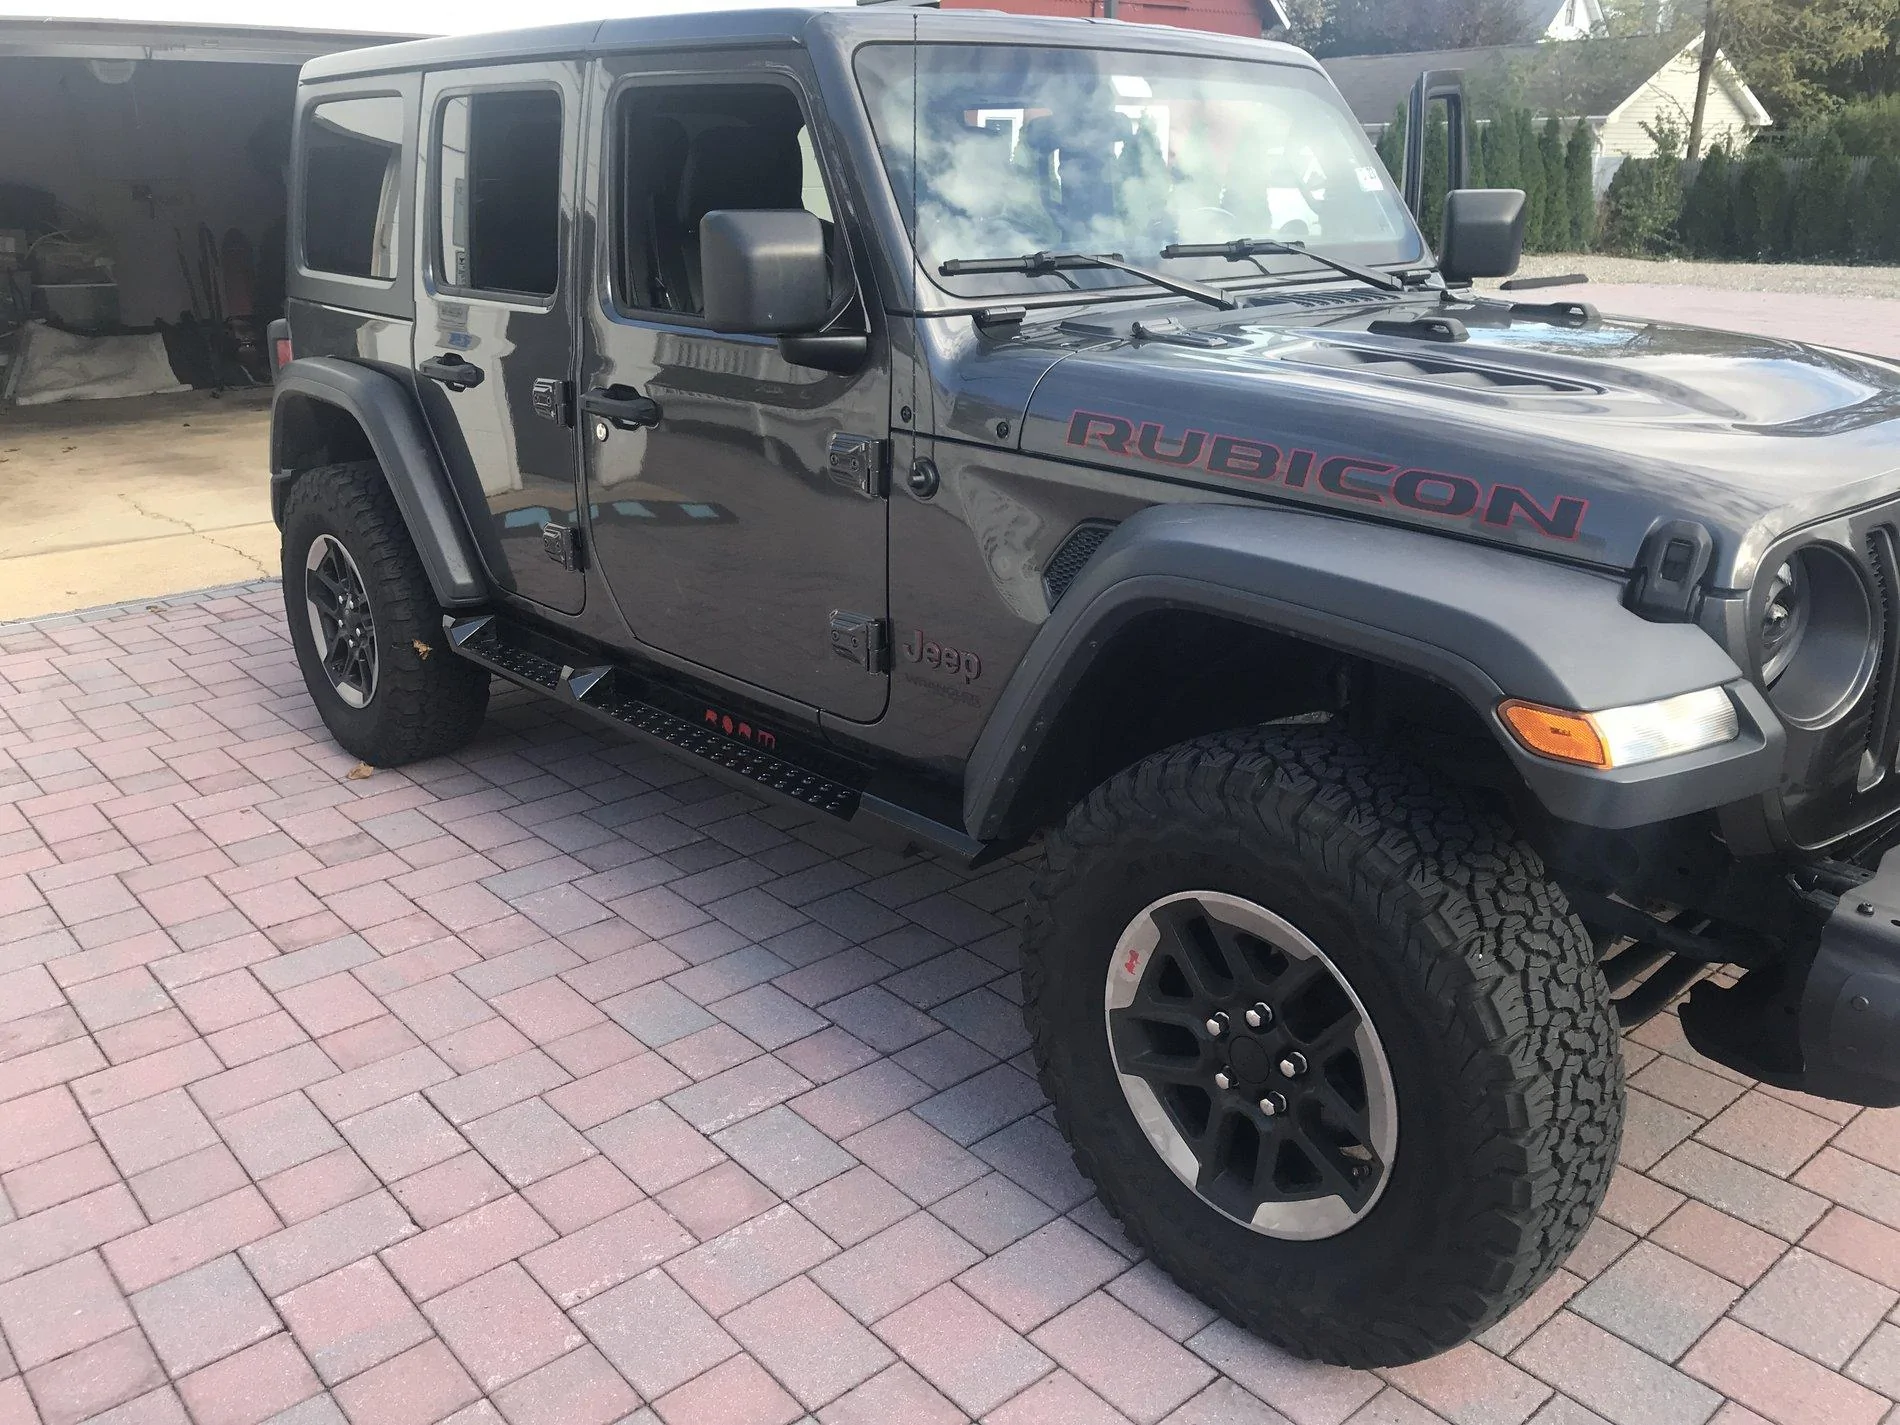
This installation is fairly easy, but figure some may benefit from a DIY.
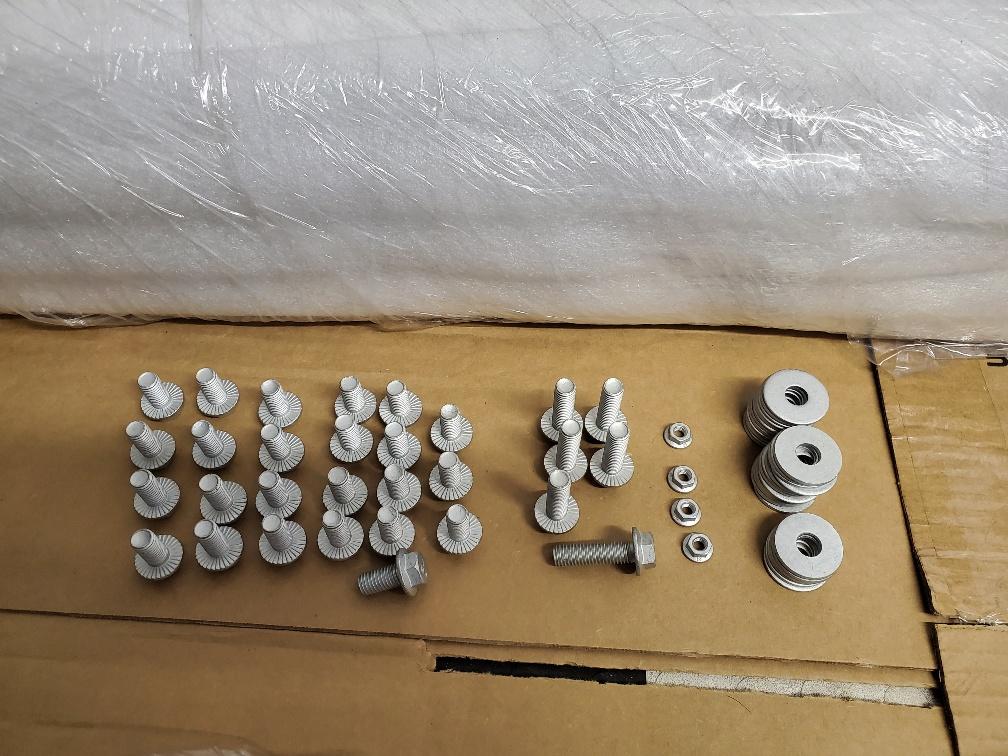
Torque specs:
M6 -> 9 Nm / 7 ft-lbs
M6 (trilobial) -> 6 Nm / 4.4 ft-lbs
M8 -> 22 Nm / 16 ft-lbs
M10 -> 44 Nm / 32 ft-lbs
M12 -> 77 Nm / 57 ft-lbs
3/8" -> 44 Nm / 32 ft-lbs
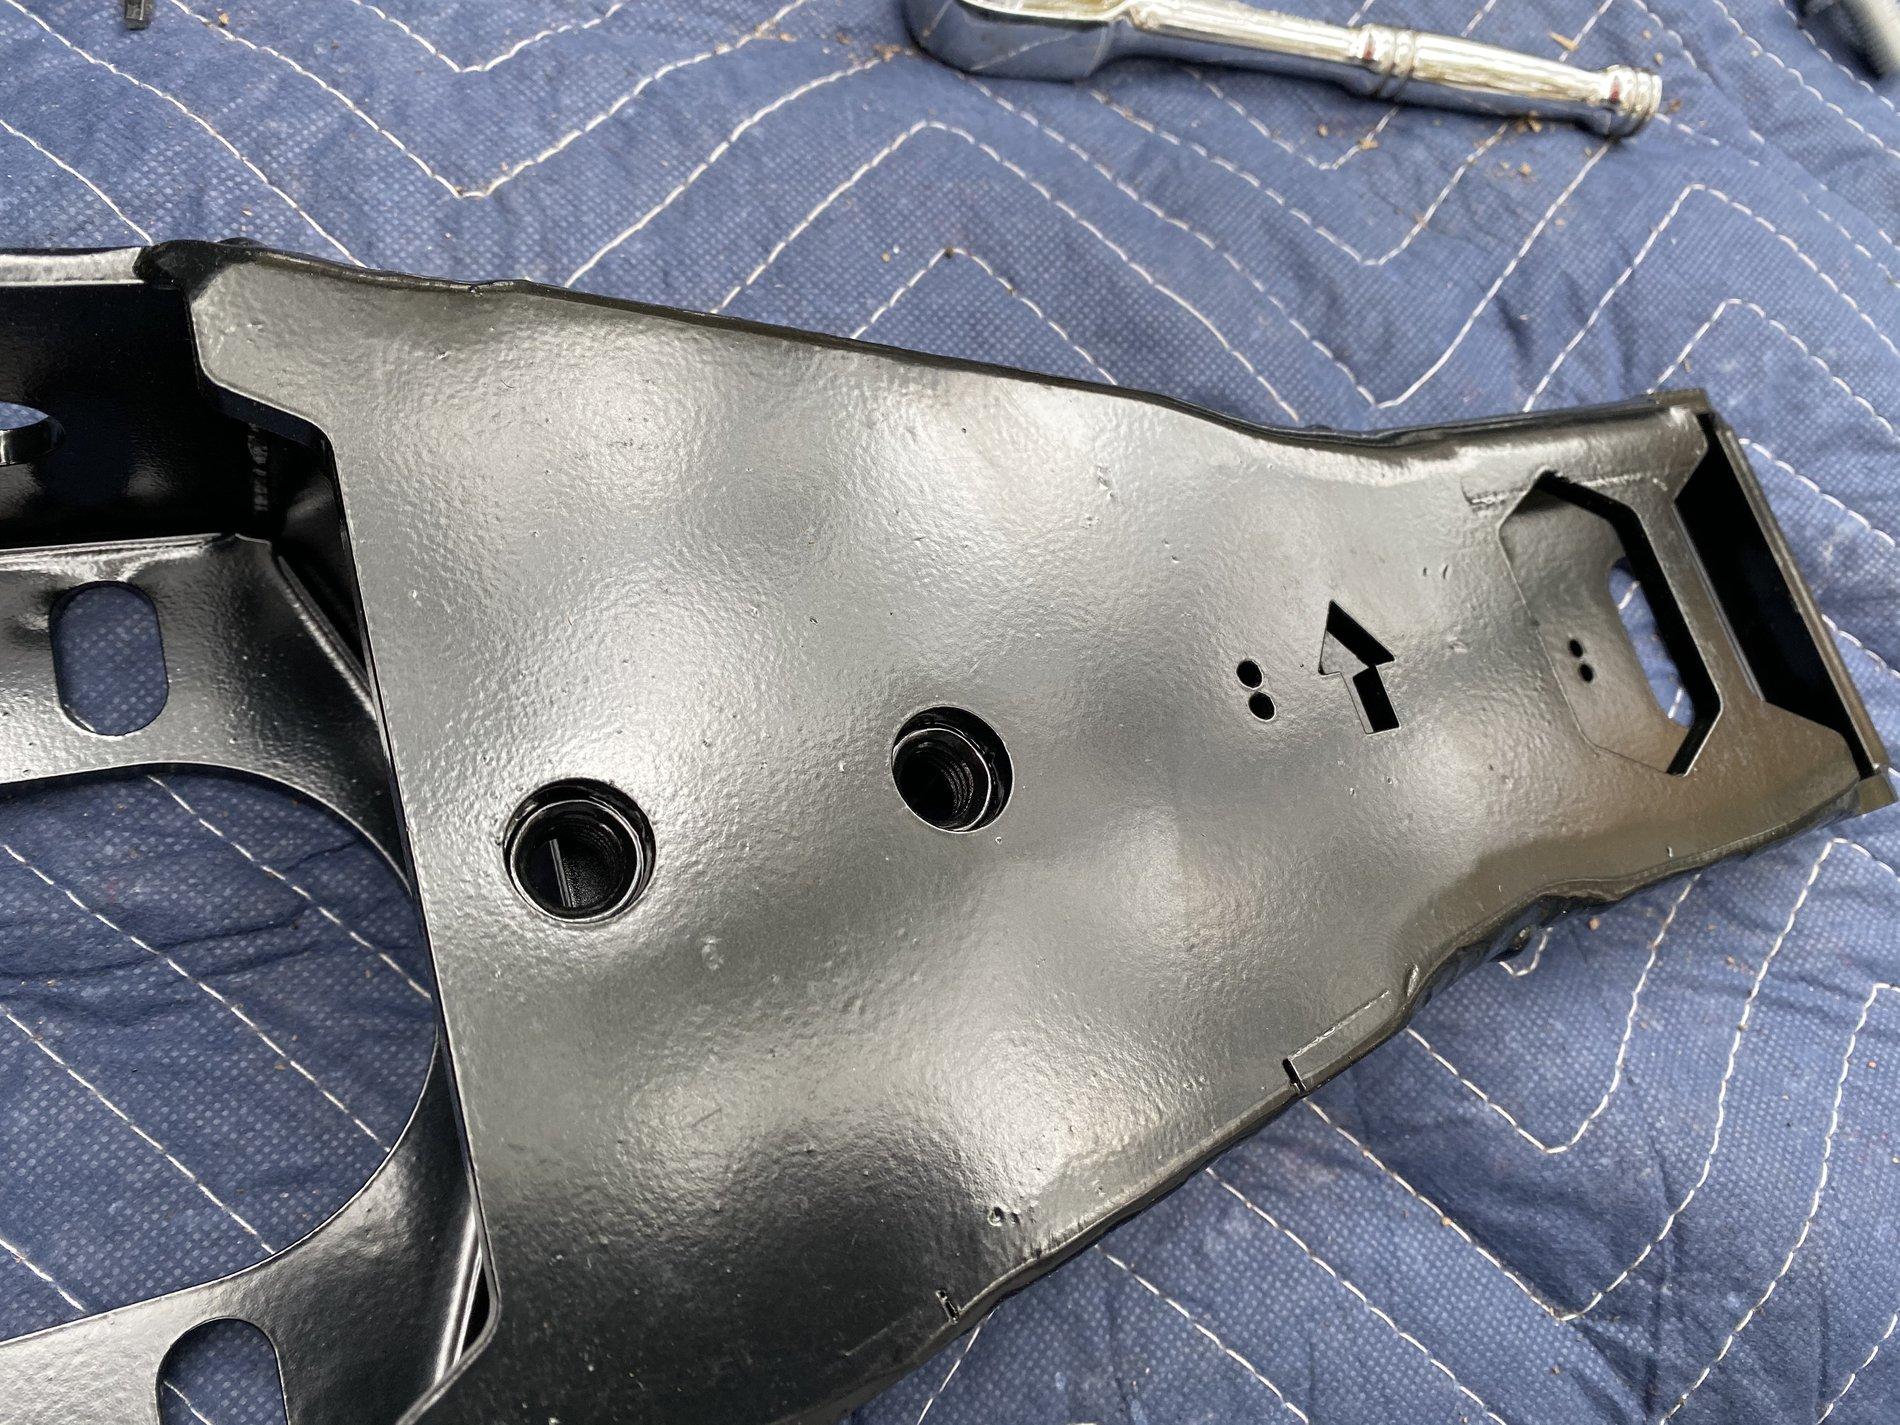
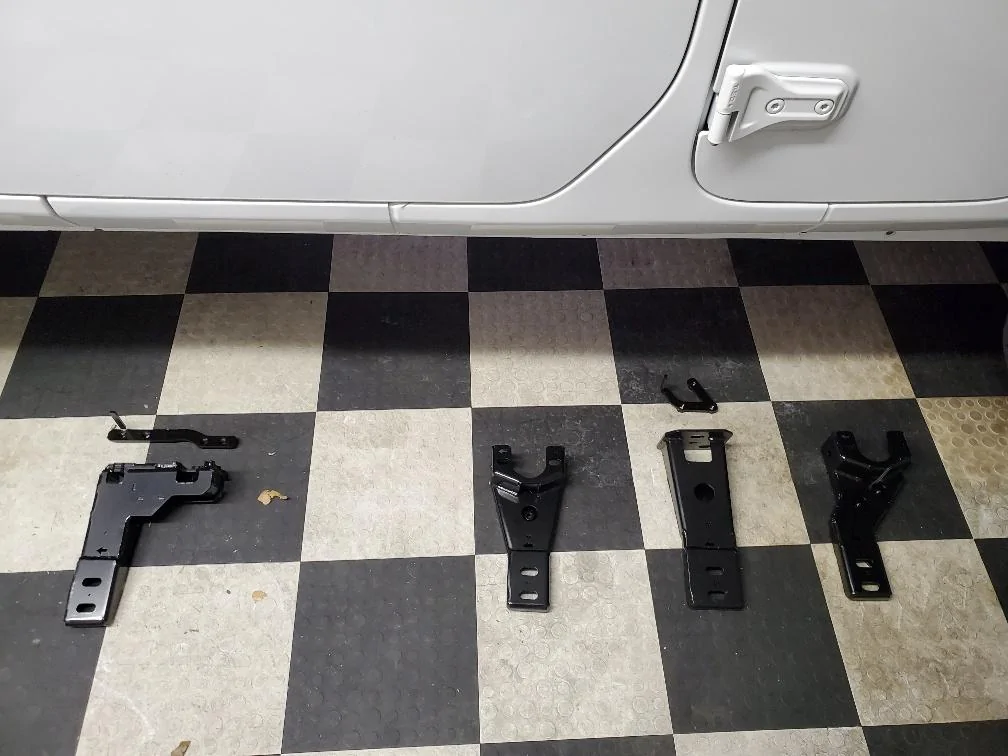
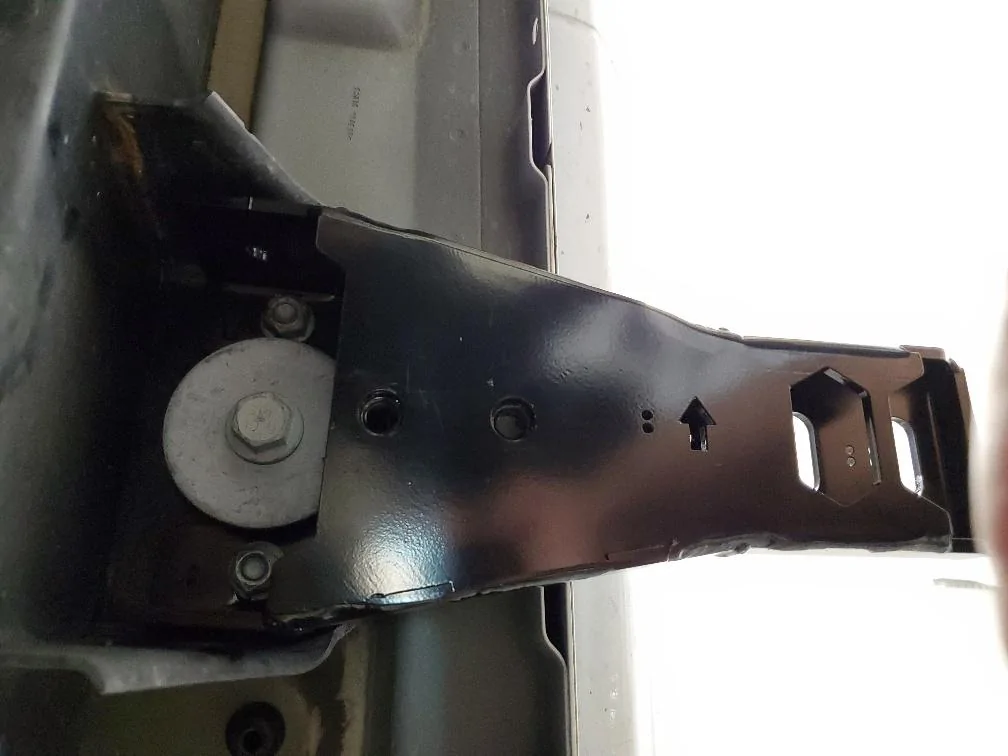
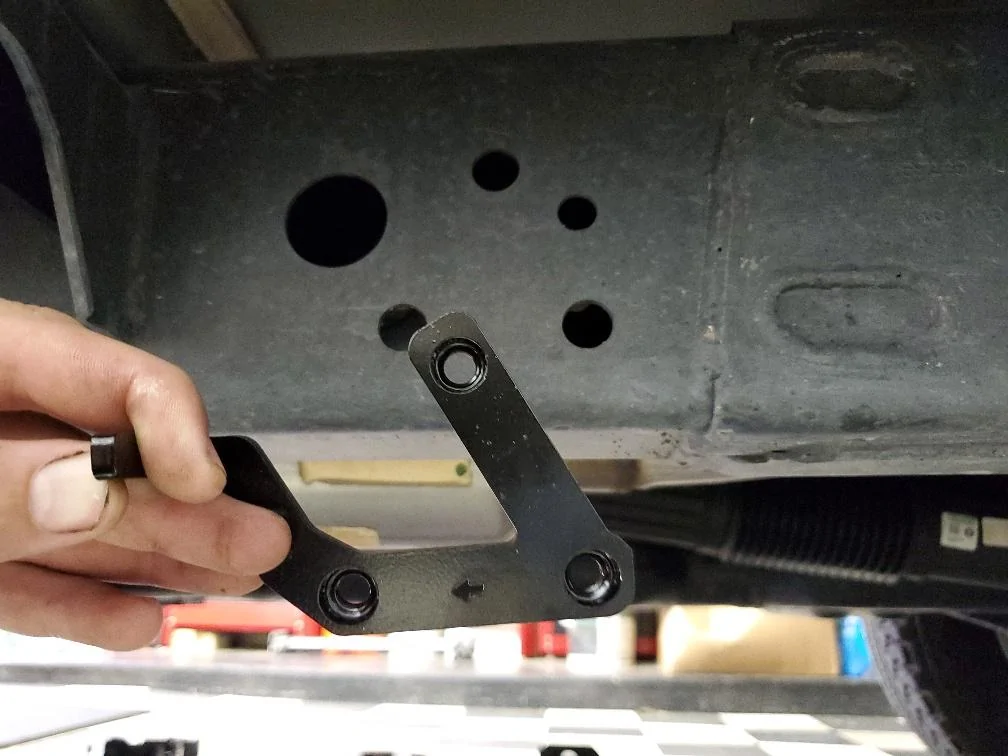
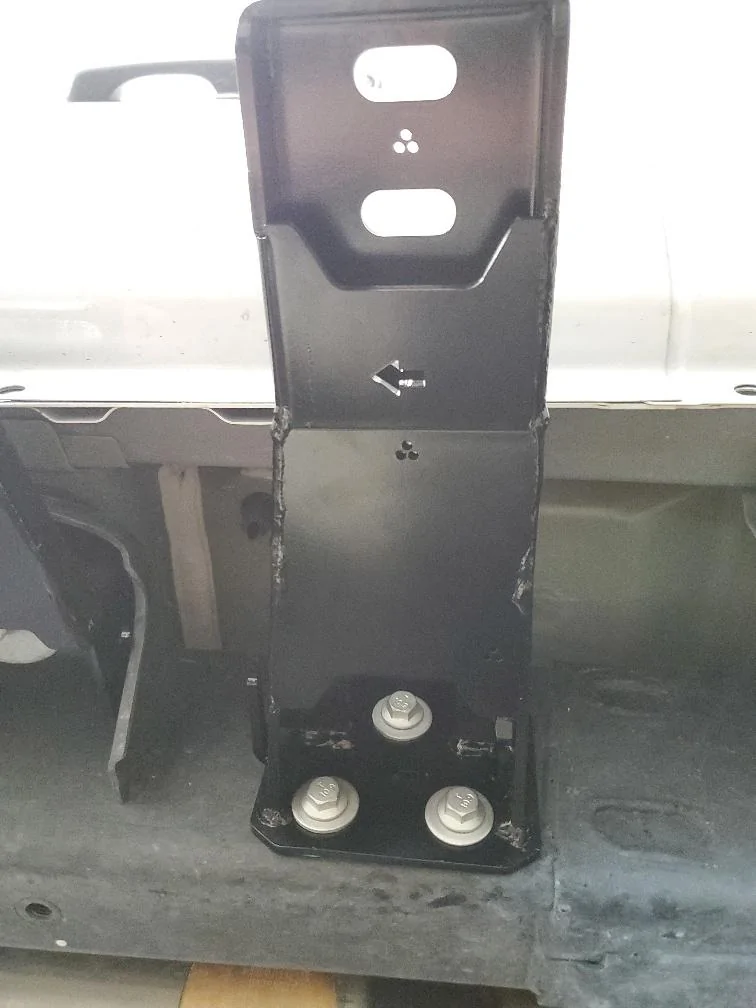
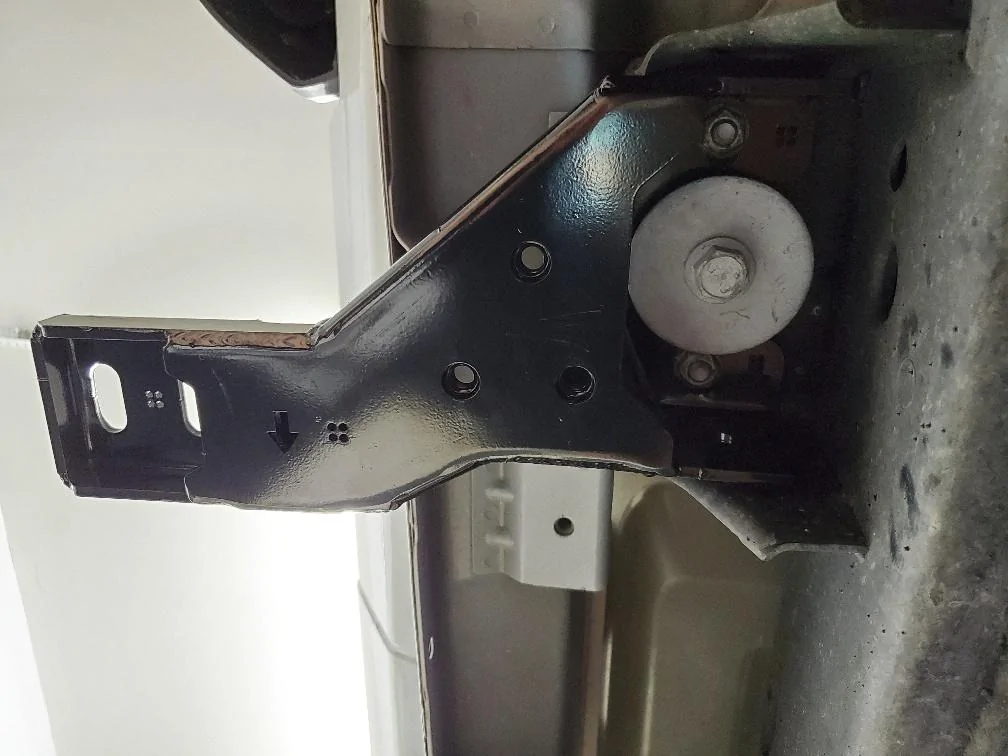
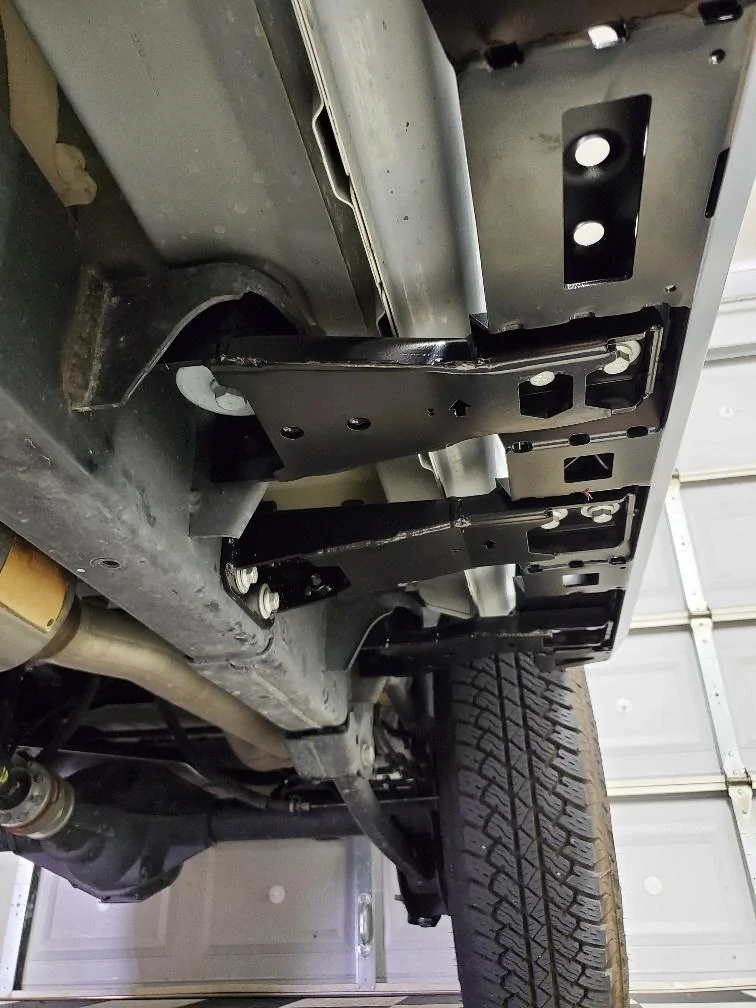
The Brackets are all marked with small holes to signify their position, and arrows to signify their orientation. The bracket with one hole goes to the very front, and the bracket with 4 holes goes to the rear. I have roughly positioned the 4 brackets where they will be mounted as well as the flag nuts to secure brackets #1 & #3.

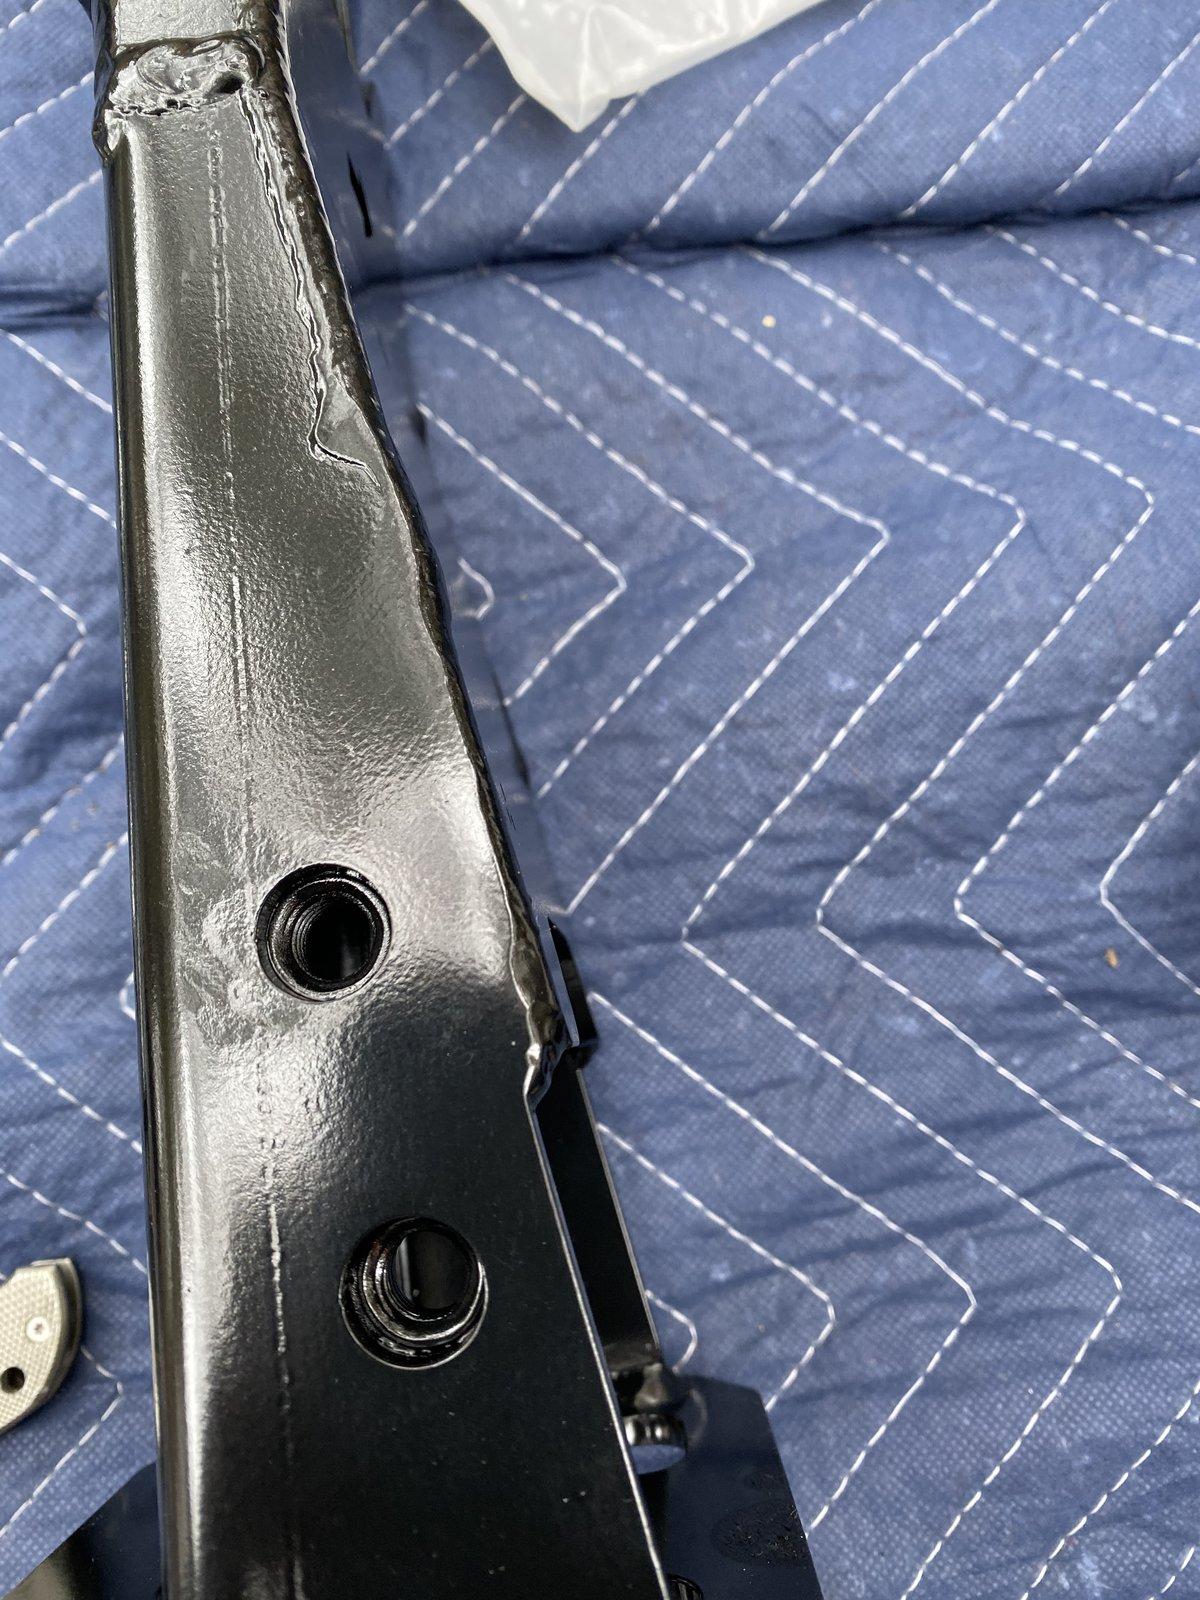
In the hardware kit there will be some longer bolts, and some shorter bolts. The 6(per side) longer bolts go into the mounts that attach to the side of the frame(Bracket #1, and #3.) Washers are to be installed on every bolt. The shorter bolts secure the steps to the mounts. The smaller 10mm head nuts are for the logo plate on the backside of the rails.
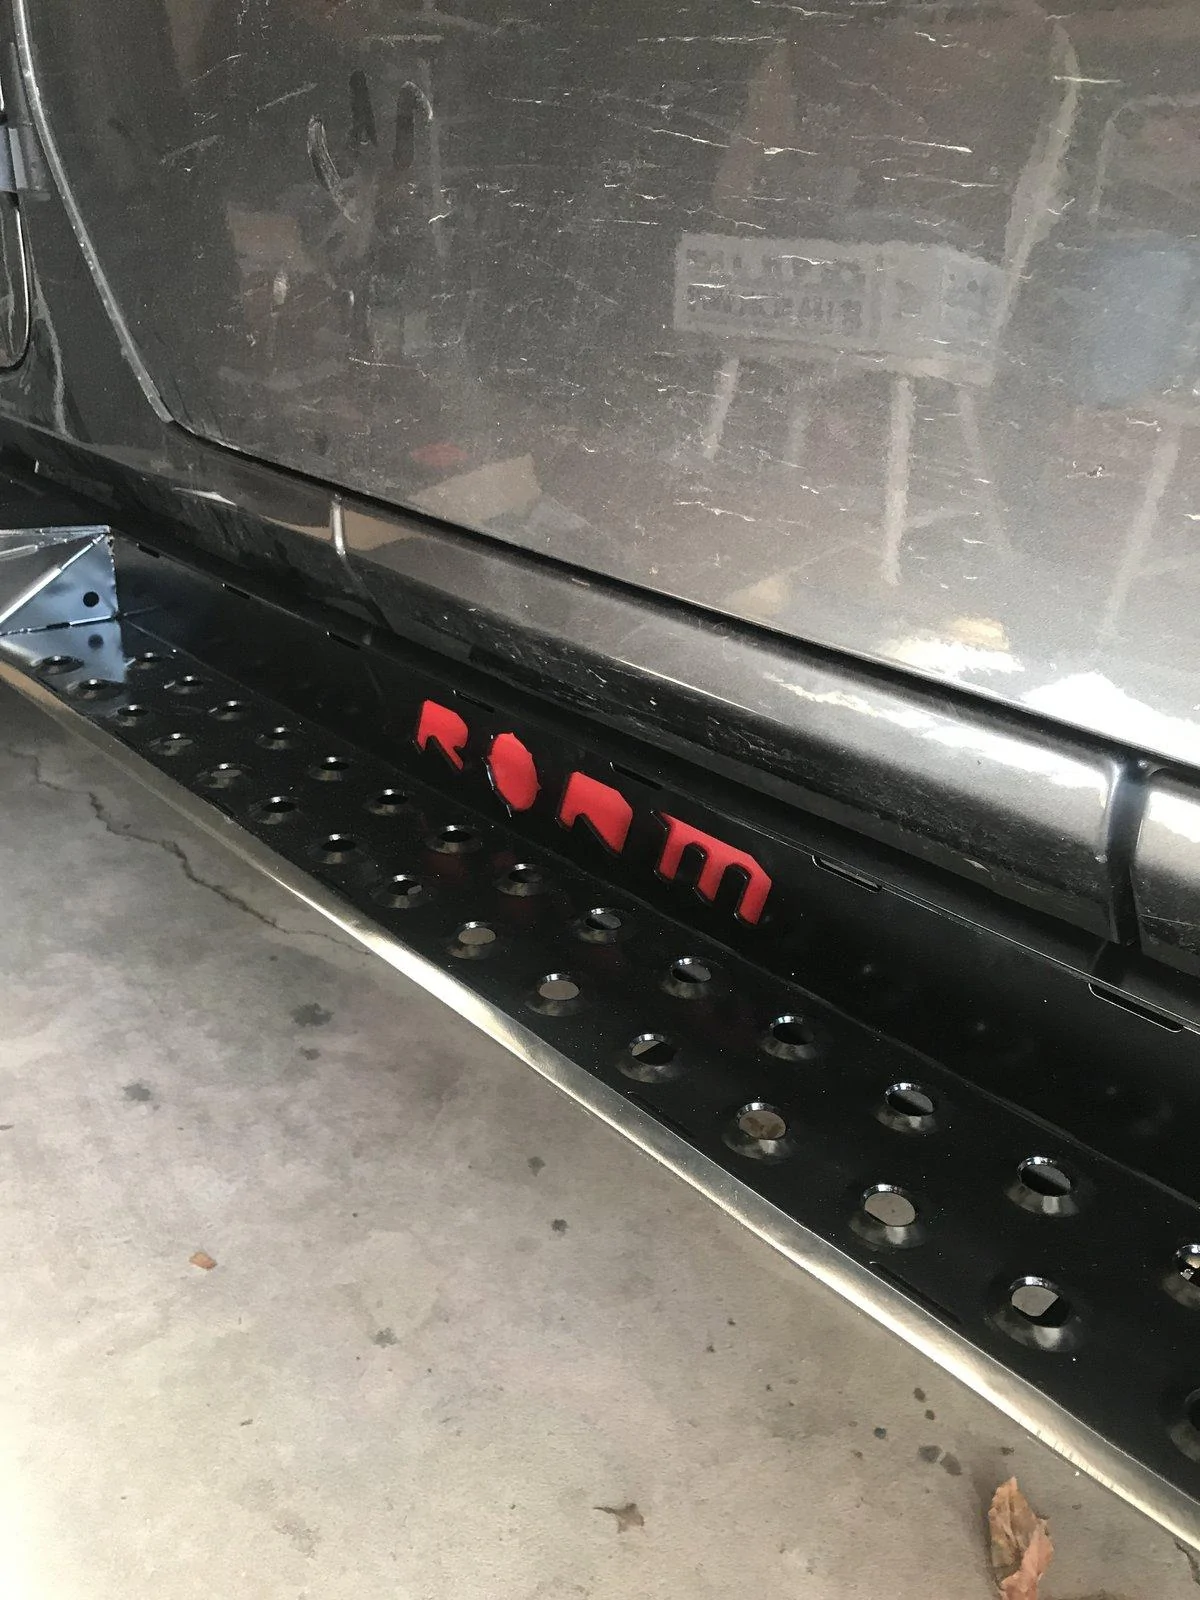
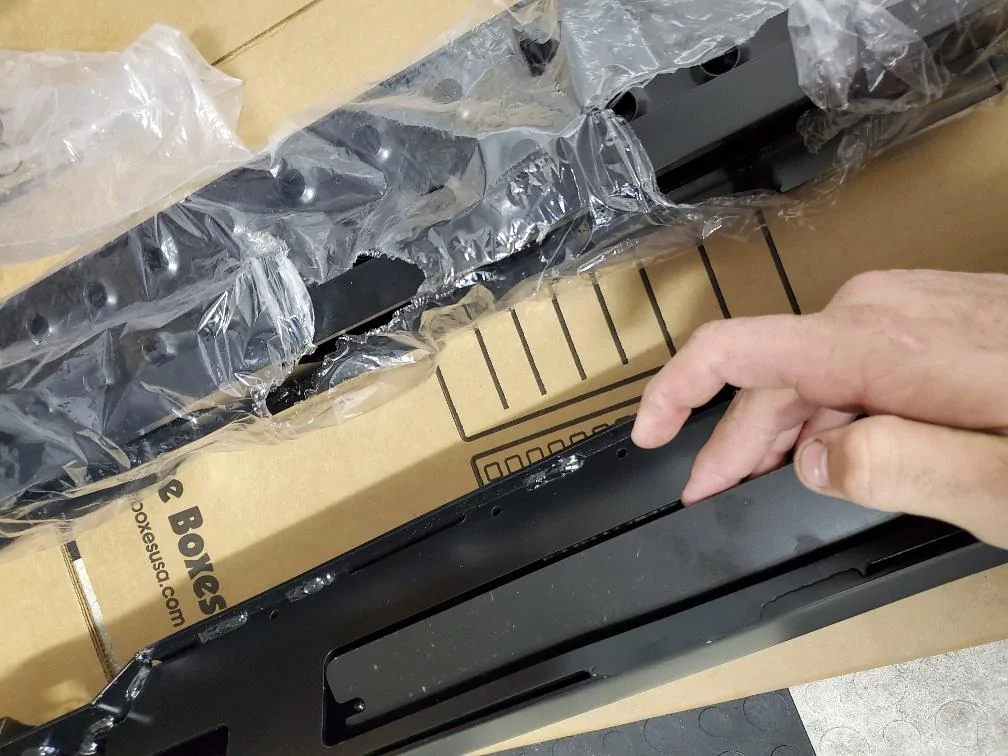
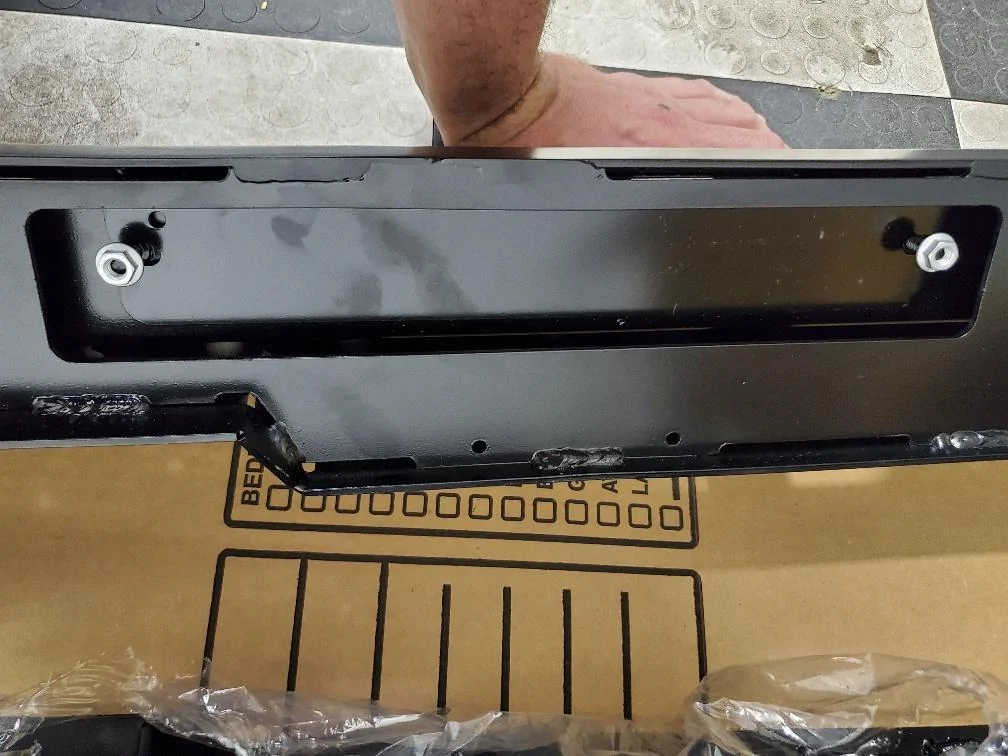
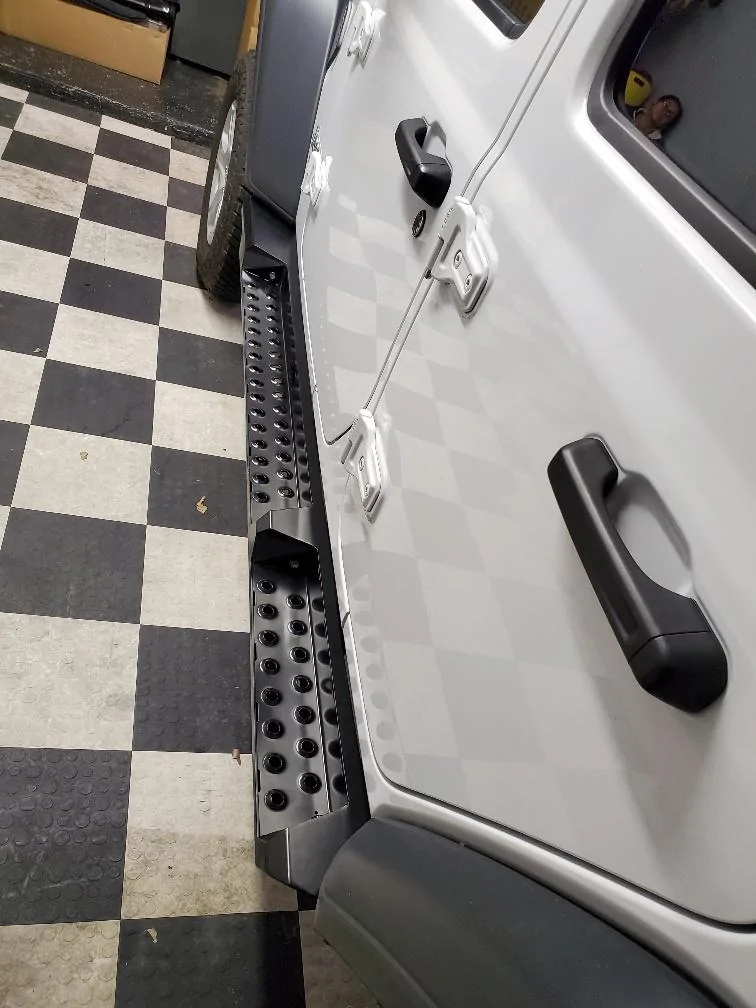
First thing you will want to do is attach the logo backing plate to the rails as it is a little difficult to get installed once they are mounted on the Jeep. The plate needs to slide into the top of the steps first and then over the mounting studs. Use the 4 10mm head nuts to secure them in place. We will be covering our plates in Red Vinyl to accentuate the logo, but for this installation we kept the plate out.
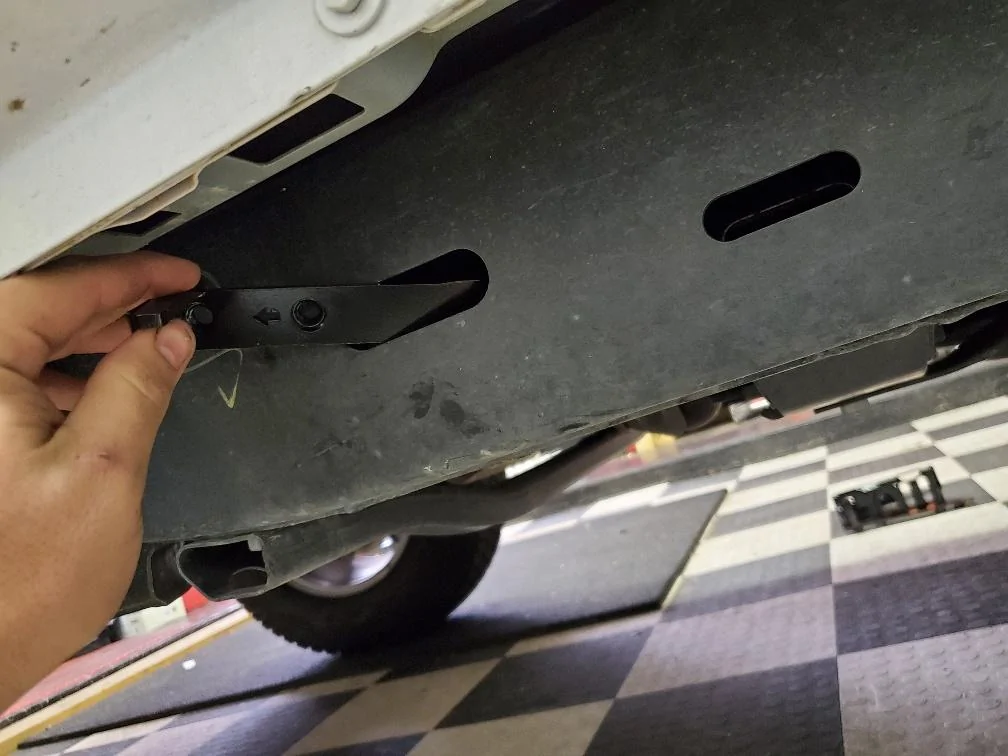
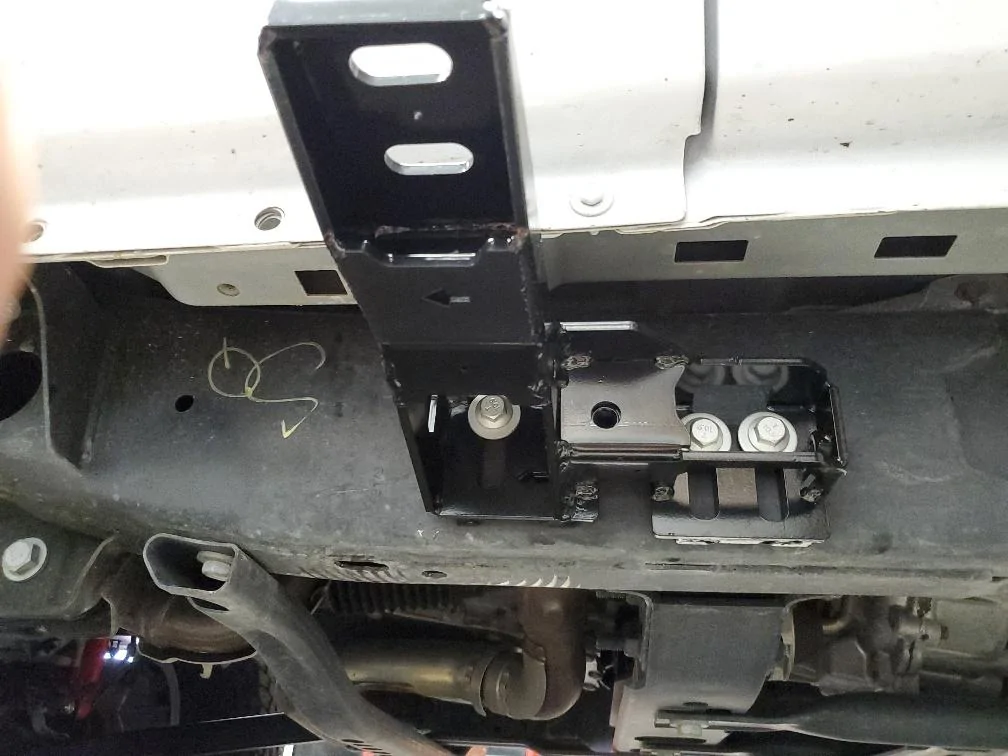
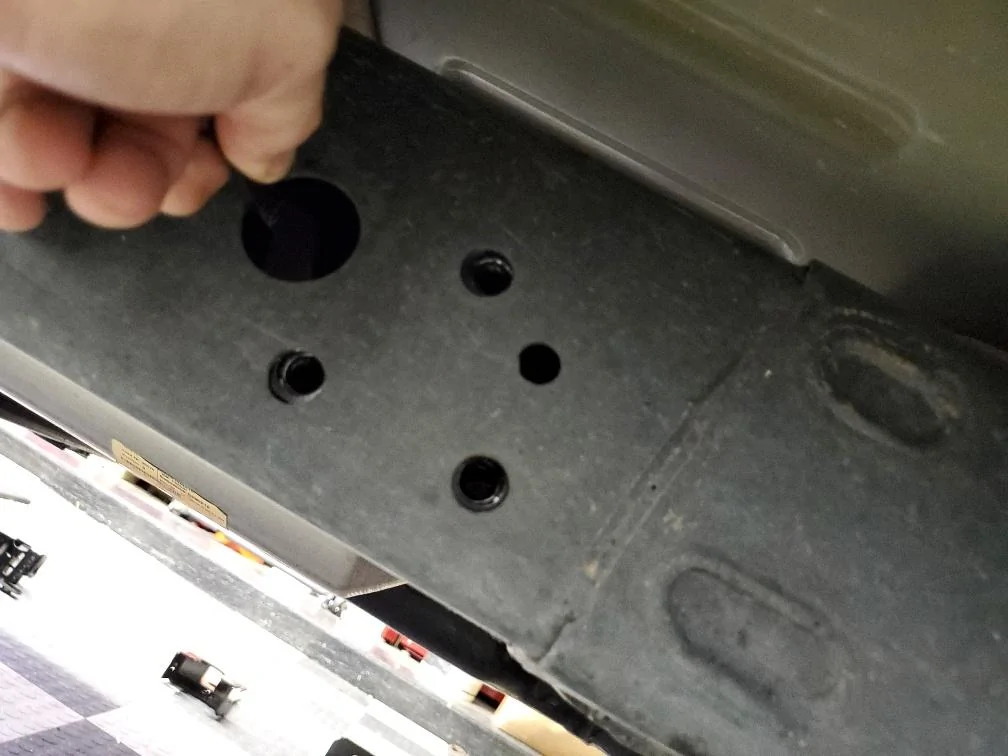
This next step is easier with a second set of hands. Grab bracket #1, and take the long 4 hole flag nut and fish it through the frame so all the holes roughly line up. Using the longer bolts/washers loosely secure bracket #1 to the flag nut.
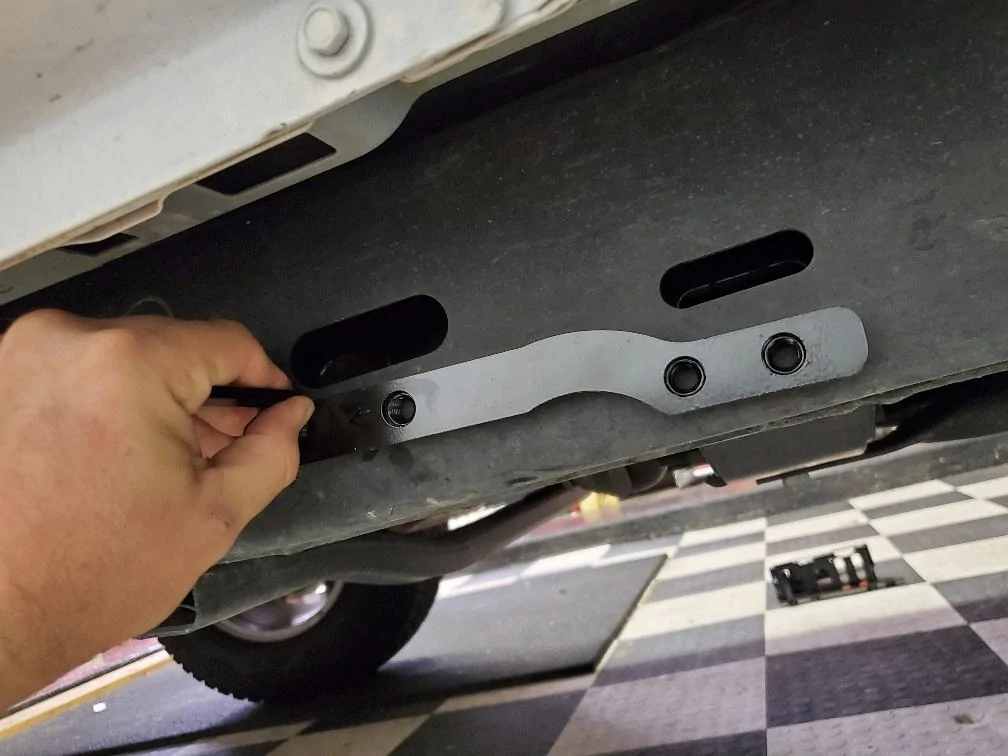
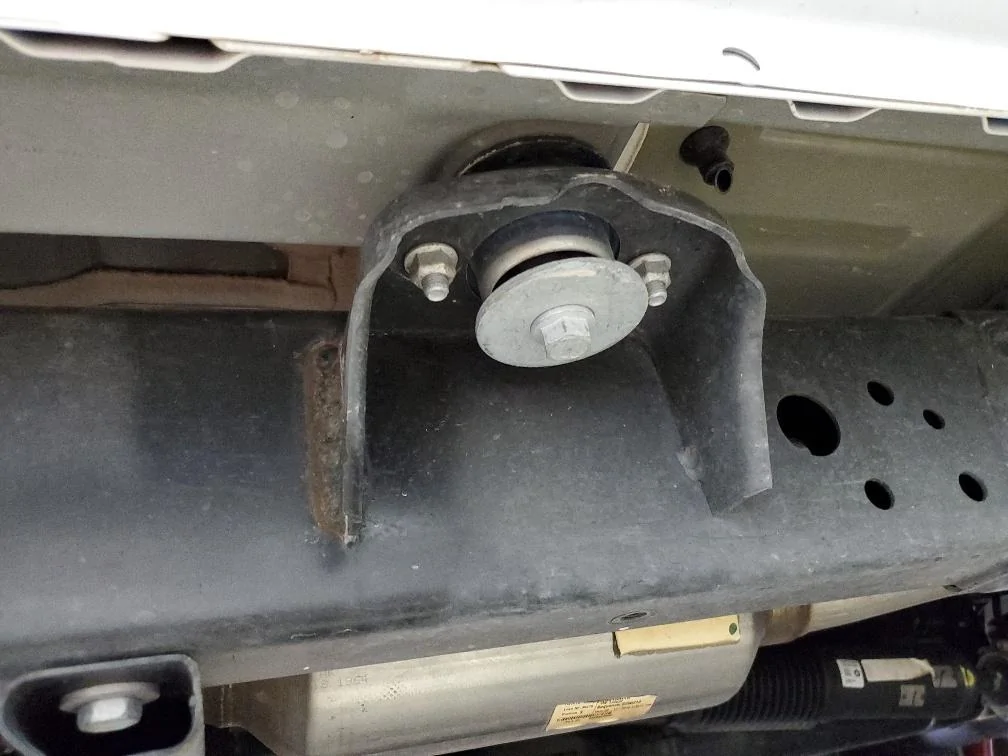
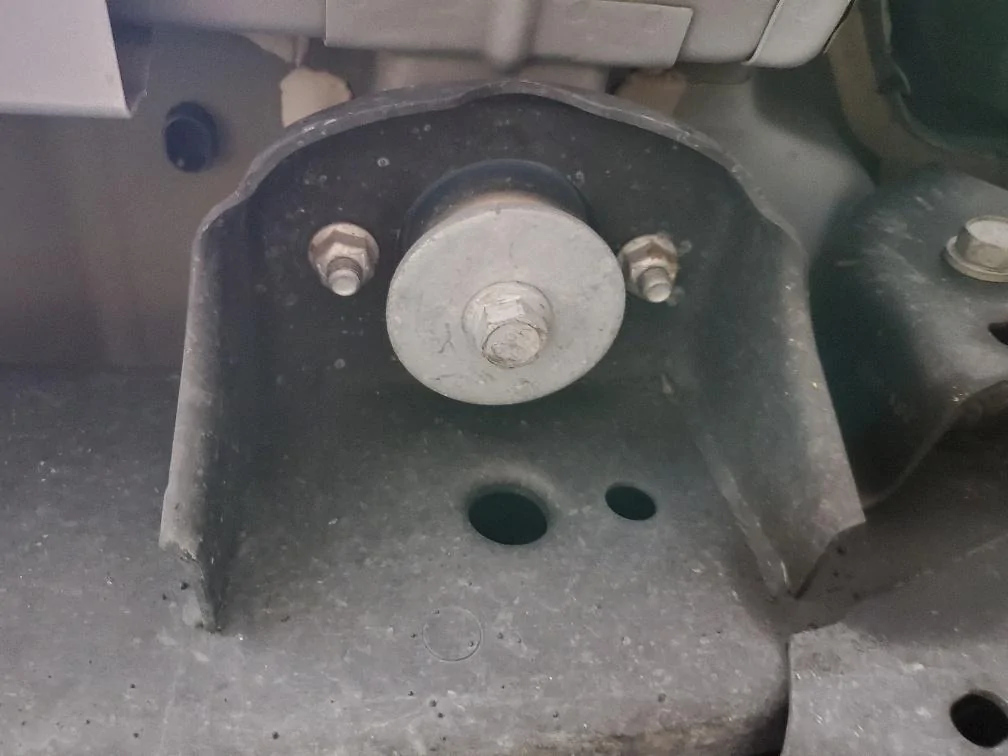
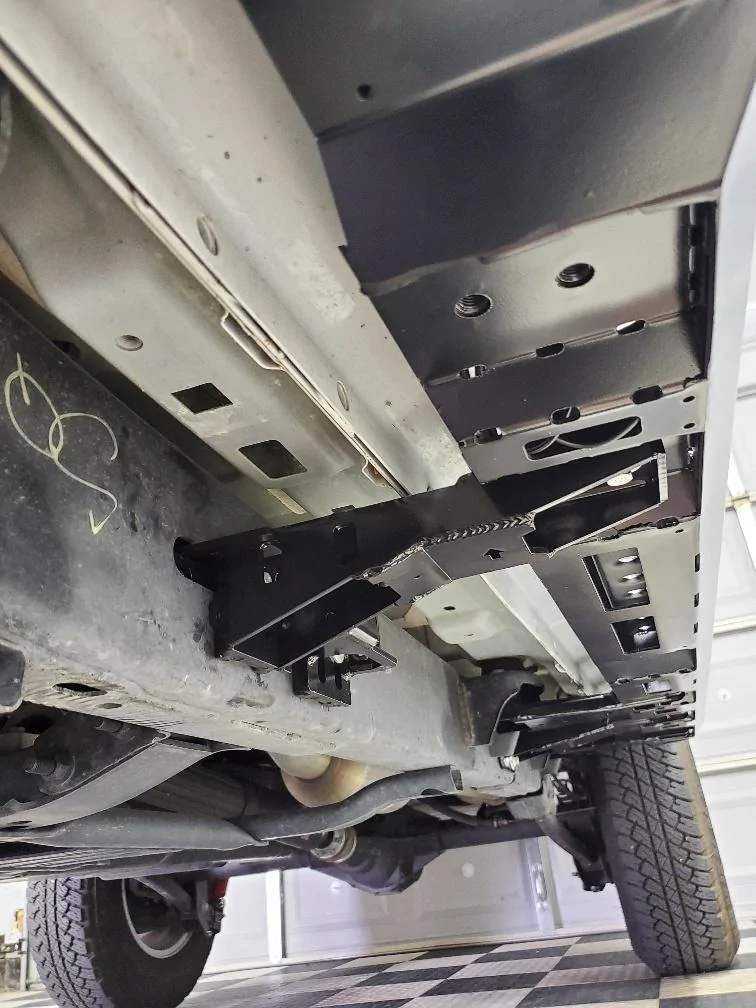
For Bracket #2, you just need to remove the two body mount nuts then slide the bracket over the large body mount washer and onto the studs. Secure the bracket with the 2 factory nuts.
For bracket #3(Just like #1) a second set of hands makes it easier to hold the flag nut in place.
Slide the flag nut in place keeping note of the orientation arrow. Once in place loosely mount the bracket with 3 longer bolts & washers.

Bracket #4 is just like Bracket #2. Remove the rear body mount nuts, slide the bracket over the larger body mount washer and secure it to the studs with the factory hardware.
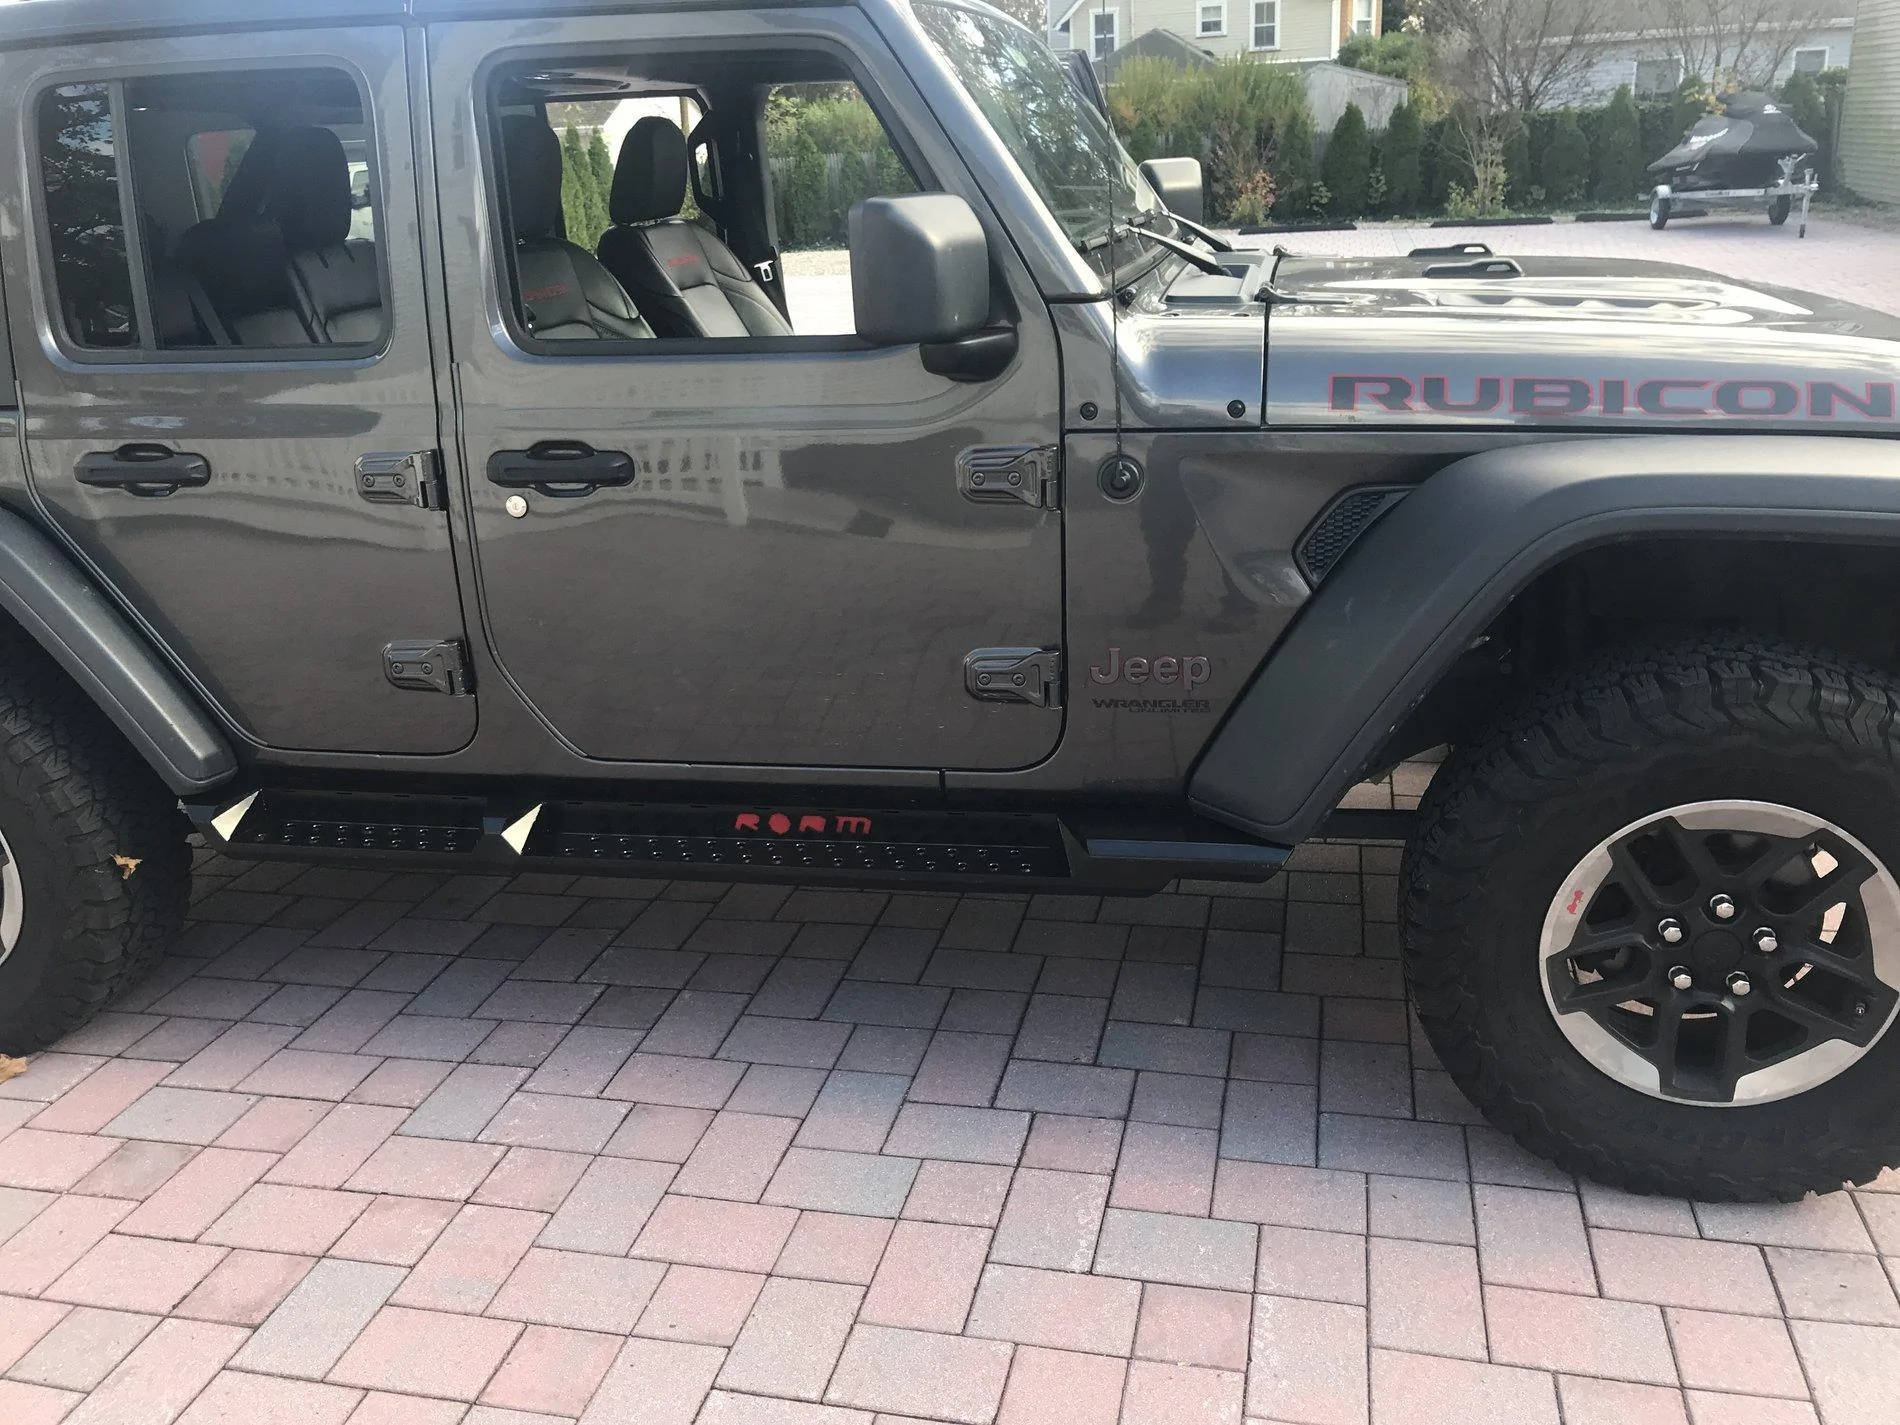
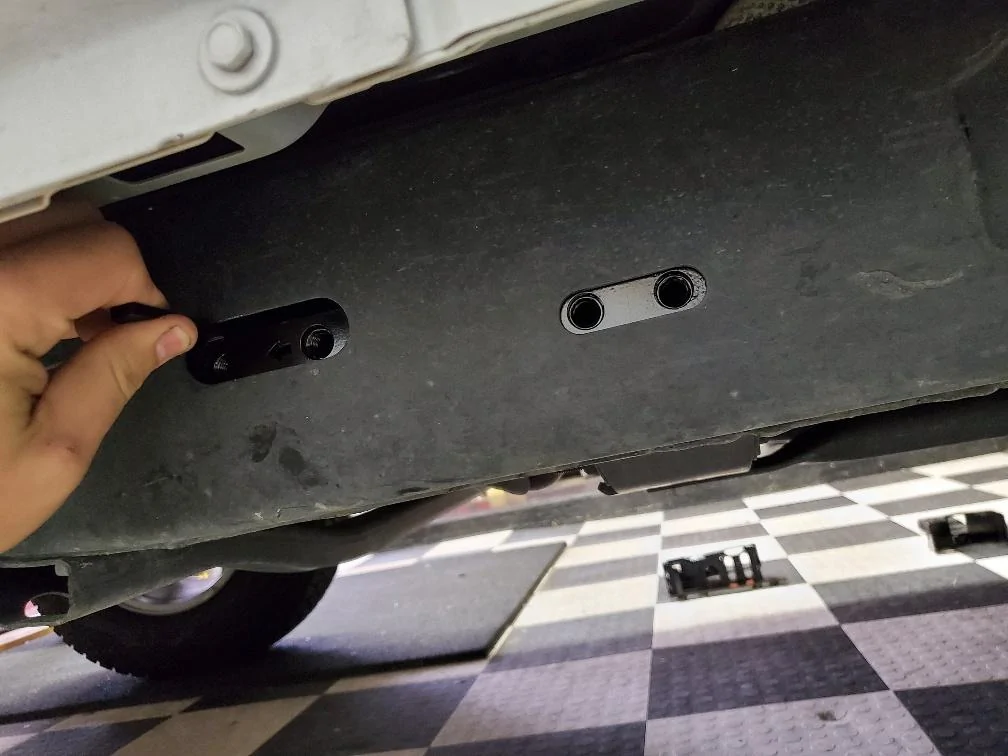
Once all the brackets are installed I found it easiest to tighten the #2 & #4 as they are for the most part in a "fixed" position. Once secured mount the steps on top of the brackets and used all the shorter bolts/washers to loosely secure the brackets to the steps. I found it easiest to start with the 4 bolts on brackets number 2 & 4, then slide mounts 1 & 3 up until I was able to get the remaining bolts threaded. Once all the bolts are threaded align the rail height front to back and then tightened the 6 bolts securing brackets #1 & 3 to the frame.
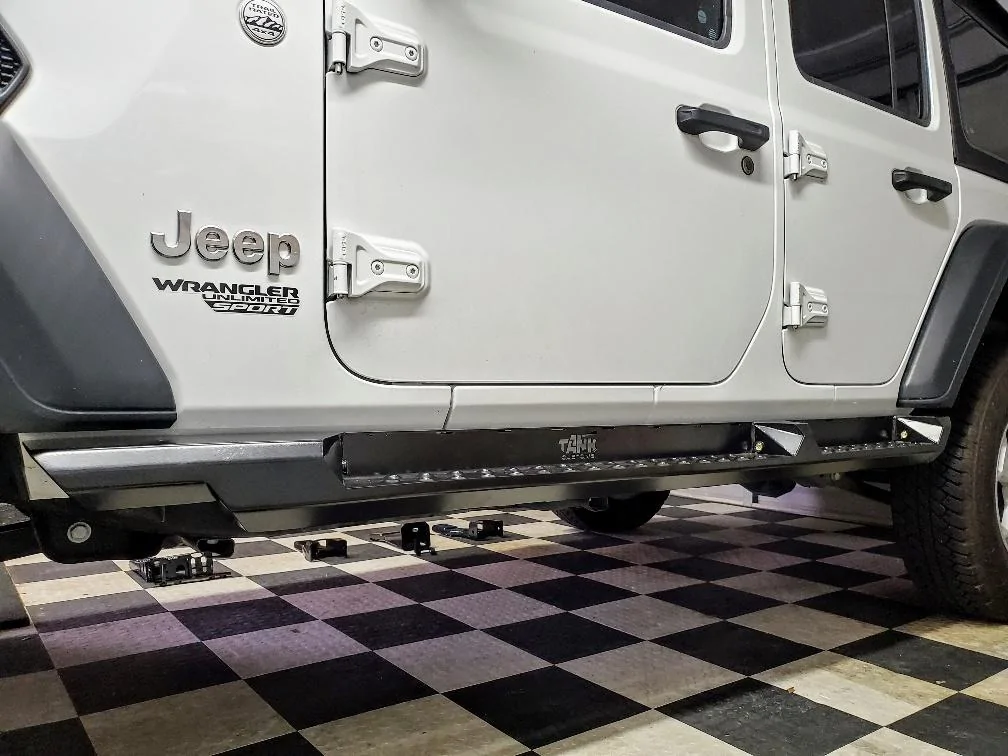
Once all the brackets are tightened use a piece of cardboard between the body and the rails in order to keep the same body gap front & rear. I slowly tightened the bolts securing the rails starting from the center two brackets and working my way out. Keep an eye out for the gap as it may change as you are tightening the bolts.
Repeat on the other side, and admire your work!
Torque specs:
M6 -> 9 Nm / 7 ft-lbs
M6 (trilobial) -> 6 Nm / 4.4 ft-lbs
M8 -> 22 Nm / 16 ft-lbs
M10 -> 44 Nm / 32 ft-lbs
M12 -> 77 Nm / 57 ft-lbs
3/8" -> 44 Nm / 32 ft-lbs
The Brackets are all marked with small holes to signify their position, and arrows to signify their orientation. The bracket with one hole goes to the very front, and the bracket with 4 holes goes to the rear. I have roughly positioned the 4 brackets where they will be mounted as well as the flag nuts to secure brackets #1 & #3.
In the hardware kit there will be some longer bolts, and some shorter bolts. The 6(per side) longer bolts go into the mounts that attach to the side of the frame(Bracket #1, and #3.) Washers are to be installed on every bolt. The shorter bolts secure the steps to the mounts. The smaller 10mm head nuts are for the logo plate on the backside of the rails.
First thing you will want to do is attach the logo backing plate to the rails as it is a little difficult to get installed once they are mounted on the Jeep. The plate needs to slide into the top of the steps first and then over the mounting studs. Use the 4 10mm head nuts to secure them in place. We will be covering our plates in Red Vinyl to accentuate the logo, but for this installation we kept the plate out.
This next step is easier with a second set of hands. Grab bracket #1, and take the long 4 hole flag nut and fish it through the frame so all the holes roughly line up. Using the longer bolts/washers loosely secure bracket #1 to the flag nut.
For Bracket #2, you just need to remove the two body mount nuts then slide the bracket over the large body mount washer and onto the studs. Secure the bracket with the 2 factory nuts.
For bracket #3(Just like #1) a second set of hands makes it easier to hold the flag nut in place.
Slide the flag nut in place keeping note of the orientation arrow. Once in place loosely mount the bracket with 3 longer bolts & washers.
Bracket #4 is just like Bracket #2. Remove the rear body mount nuts, slide the bracket over the larger body mount washer and secure it to the studs with the factory hardware.
Once all the brackets are installed I found it easiest to tighten the #2 & #4 as they are for the most part in a "fixed" position. Once secured mount the steps on top of the brackets and used all the shorter bolts/washers to loosely secure the brackets to the steps. I found it easiest to start with the 4 bolts on brackets number 2 & 4, then slide mounts 1 & 3 up until I was able to get the remaining bolts threaded. Once all the bolts are threaded align the rail height front to back and then tightened the 6 bolts securing brackets #1 & 3 to the frame.
Once all the brackets are tightened use a piece of cardboard between the body and the rails in order to keep the same body gap front & rear. I slowly tightened the bolts securing the rails starting from the center two brackets and working my way out. Keep an eye out for the gap as it may change as you are tightening the bolts.
Repeat on the other side, and admire your work!
Sponsored
Last edited: