Tdkrum5
Well-Known Member
Been thinking about this location. Do you have more info on the wiring? Did you add any out air up locations?Loving my MORE mount. convenient spot. I cut the bracket for the switch off and use my AUX 4 switch.


Sponsored
Been thinking about this location. Do you have more info on the wiring? Did you add any out air up locations?Loving my MORE mount. convenient spot. I cut the bracket for the switch off and use my AUX 4 switch.
I first installed a dual ARB underhood using the Grimm mounting bracket. Loved it ... you simply lift the hood and everything is right there on top of the fender. But, I found out that the bracket doesn't work with a MetalCloak after market inner fender liner ... not enough room. Damn.Been thinking about this location. Do you have more info on the wiring? Did you add any out air up locations?
Thanks for the info. I am leaning towards this location.I first installed a dual ARB underhood using the Grimm mounting bracket. Loved it ... you simply lift the hood and everything is right there on top of the fender. But, I found out that the bracket doesn't work with a MetalCloak after market inner fender liner ... not enough room. Damn.
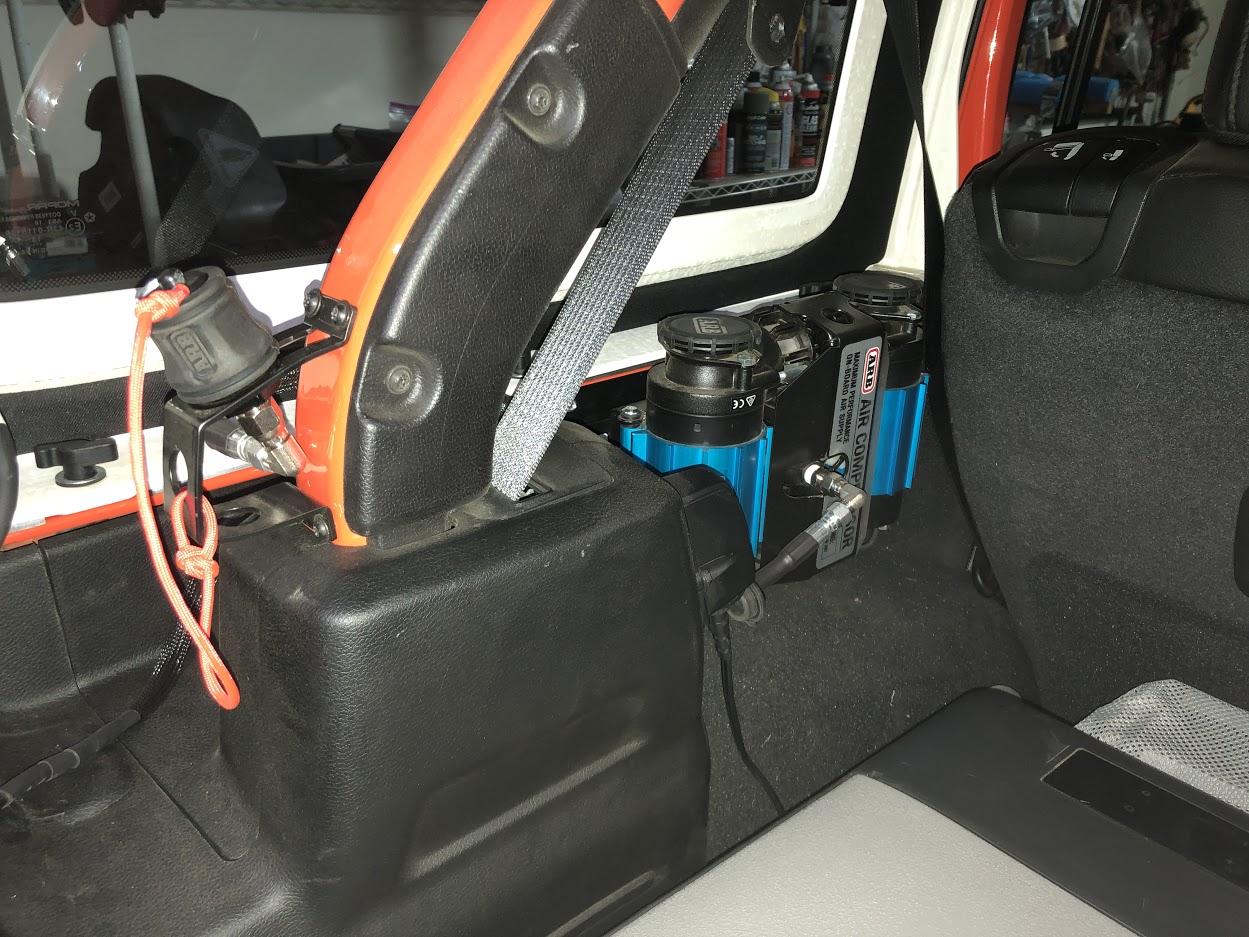
So, I bought the M.O.R.E. mounting bracket and moved the compressor to the rear cargo area. No more concerns with engine heat. And, it is every bit as convenient as the Grimm mounting position. Actually it's more convenient. All my hoses (I made a dual tire inflation hose) are able to be laid out on the cargo deck out of the dirt. It's super convenient when tearing down and wrapping up the hoses. The only negative is noise inside the cab ... but, since it only takes 3.5 minutes per side, the noise isn't a real problem. My wife is usually cleaning up while I'm airing up, so she hasn't complained yet.
As to wiring, I bought this wiring harness extension: https://www.amazon.com/gp/product/B07MJHX6SL/ref=ppx_yo_dt_b_asin_title_o09_s00?ie=UTF8&psc=1. Pulled one connector off that wiring harness and fed it through the carpeting and under it down along the back of the seat (there's a U-channel there to hide and protect it), through the drain plug right over the fuel tank, and then reinstalled the connector. For the ARB wiring harness, I again pulled the connector off the end, taped up the loose wires, and fished it down along the firewall, and then, ran it along a wiring harness by the frame rail back to the purchased harness. Installed the connector on the ARB harness and plugged the connectors into each other.
Since I never take my hardtop off, I was happy with the switch being back at the compressor. I can lean in and turn the pump on or off without having to get to my aux switches. I really liked the short Grimm wiring harness from the switch to the pump, so duplicated that design.
Oh yes, do rotate the quick connection back towards the rear door. Instructions are in the ARM manual. That way if the hose is pressurize when you remove it and it slips out of your hand, it won't go through the side window.
It isn't a two minute install ... if you do it right, it will take some time and maybe a few cuss words, but the effort is worth it.
Here is a video that I used for my install inspiration.Been thinking about this location. Do you have more info on the wiring? Did you add any out air up locations?
I moved the air chuck because when I use the big fridge it blocks it. Not super happy with the location but it worksBeen thinking about this location. Do you have more info on the wiring? Did you add any out air up locations?
Take a peak at this thread ... in your situation, I'd seriously consider it. https://www.jlwranglerforums.com/forum/threads/concealed-air-fitting-in-the-jl-fuel-door.34843/I moved the air chuck because when I use the big fridge it blocks it. Not super happy with the location but it works

Thats a cool place to put the coupler, I have a coupler pacifier the keep dust and water out of the coupler.Take a peak at this thread ... in your situation, I'd seriously consider it. https://www.jlwranglerforums.com/forum/threads/concealed-air-fitting-in-the-jl-fuel-door.34843/
BTW, ARB sells a rubber dust cover for the quick coupler. See here: https://www.northridge4x4.com/part/compressor-mounts-accessories/0740113-arb-hose-coupling-dust-cap
Wow do they value those "binkies" ... very cool, but very expensive.Thats a cool place to put the coupler, I have a coupler pacifier the keep dust and water out of the coupler.
https://absolute-wits-end.com/quick-connect-air-coupler-pacifier/
If you are going to mount in the cabin then you really should look at the JK Innovation under passenger seat option. I know many use the More but why? You now have an ugly tumor in the back, it is harder to wire and will be in the way and take up space you might actually want to use. The under seat option is using space you will never use, super easy to hook up your line on either side, install is easier and best of all when not in use you can’t even see it is there.Been thinking about this location. Do you have more info on the wiring? Did you add any out air up locations?
I looked on under seat options before I chose the MORE mount. The Innovative one looks like it would get kicked by the back seat passenger.If you are going to mount in the cabin then you really should look at the JK Innovation under passenger seat option. I know many use the More but why? You now have an ugly tumor in the back, it is harder to wire and will be in the way and take up space you might actually want to use. The under seat option is using space you will never use, super easy to hook up your line on either side, install is easier and best of all when not in use you can’t even see it is there.
Big fan of the ARB myself. Modifying the duct is really not a big deal. If you cut and measure carefully, you can even graft the diffuser back onto the end of the duct.I looked on under seat options before I chose the MORE mount. The Innovative one looks like it would get kicked by the back seat passenger.
I like the ARB under seat one except that you have to cut the heat duct under the passengers seat.
")
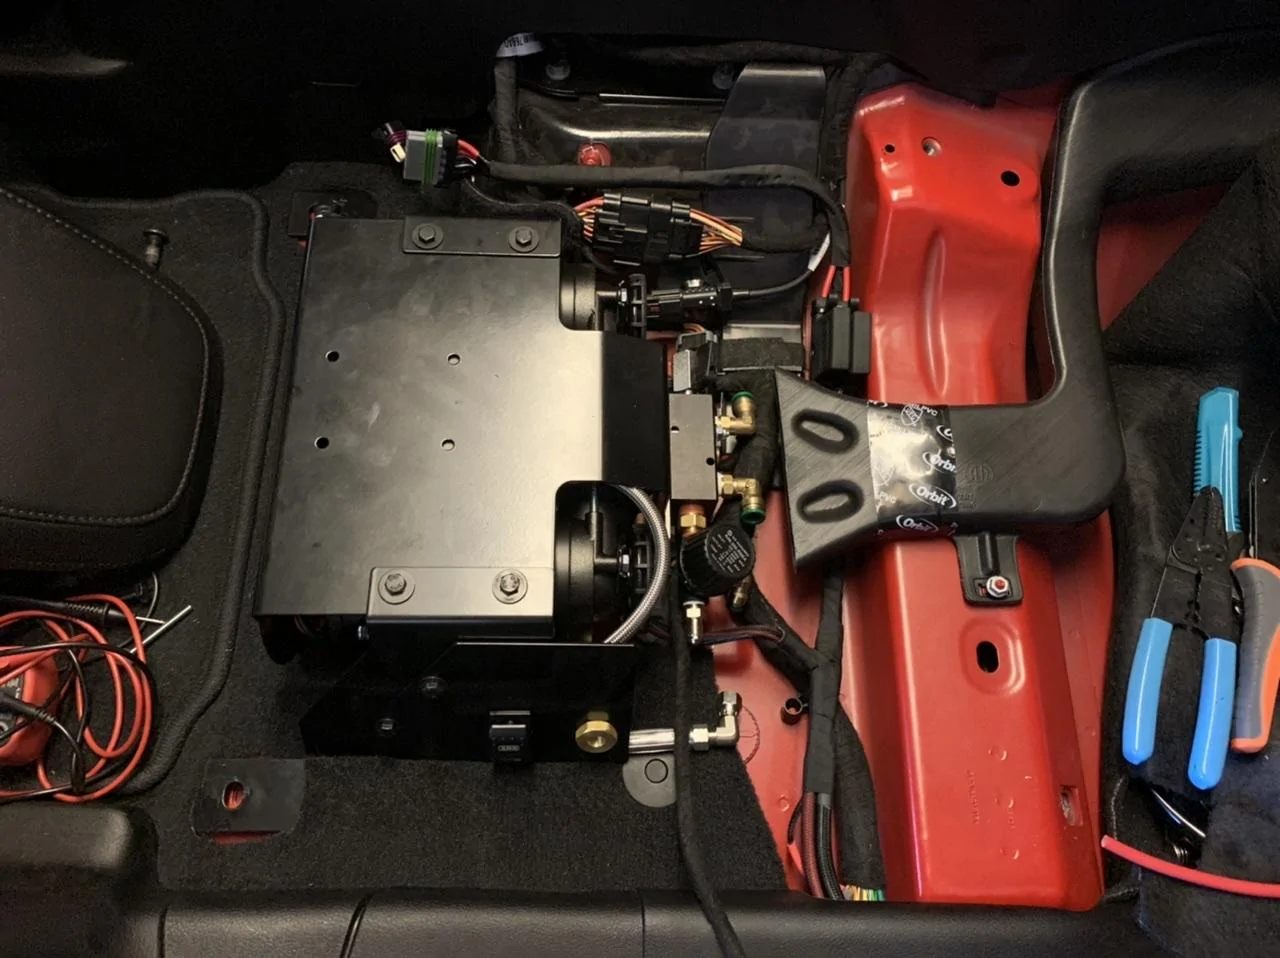
Looks really good. I like it. Do you think there would be room here for the locker manifold tank?Big fan of the ARB myself. Modifying the duct is really not a big deal. If you cut and measure carefully, you can even graft the diffuser back onto the end of the duct.

Thanks. Can't say for sure as I've never had one in my possession, but there was room for me to mount my custom manifold in the same spot. Based upon the stock photos from ARB, I'd say there's plenty of room. The only potential obstruction I see is the air fittings sticking out the side of the manifold possibly interfering with the grafted on diffuser. I'd imagine they could be rotated out of the way, but again, I've never messed with the ARB manifold myself.Looks really good. I like it. Do you think there would be room here for the locker manifold tank?
Thanks I see your custom manifold, is it for air lockers?Thanks. Can't say for sure as I've never had one in my possession, but there was room for me to mount my custom manifold in the same spot. Based upon the stock photos from ARB, I'd say there's plenty of room. The only potential obstruction I see is the air fittings sticking out the side of the manifold possibly interfering with the grafted on diffuser. I'd imagine they could be rotated out of the way, but again, I've never messed with the ARB manifold myself.
No. Just two outlets, a regulator, and a bleeder valve to make my own version of an air up/down system. The manifold feeds a fill chuck mounted under each of the front seats. I did however buy the manifold block with an extra outlet should I decide to aid an air tank or air lockers in the future. More pictures of my system in posts #374 and #392 if you're interested.Thanks I see your custom manifold, is it for air lockers?
