Sponsored
Locker Position Sensor Potting - DANA 44
- Thread starter chevymitchell
- Start date
- Watchers 210
OP
OP
chevymitchell
Well-Known Member
- First Name
- Shawn
- Joined
- Feb 18, 2018
- Threads
- 112
- Messages
- 5,017
- Reaction score
- 12,147
- Location
- Pueblo West, CO
- Vehicle(s)
- 2022 392XR, 2025 Wagoneer S, 2006 LJ 6-spd
- Occupation
- Avi Engineer
- Thread starter
- #662
Link to the potting compound is in the first post.What is the best potting compound?
Found MG chemicals thermally conductive 1 to 1 epoxy ??
Thermal compound is for heat sinks and installations where you need to adhere something that requires heat to dissipate.
You need encapsulating compounds. Specifically for potting electrical components.
OP
OP
chevymitchell
Well-Known Member
- First Name
- Shawn
- Joined
- Feb 18, 2018
- Threads
- 112
- Messages
- 5,017
- Reaction score
- 12,147
- Location
- Pueblo West, CO
- Vehicle(s)
- 2022 392XR, 2025 Wagoneer S, 2006 LJ 6-spd
- Occupation
- Avi Engineer
- Thread starter
- #664
You’re welcome man. Hit me up if you run into trouble.Ordered, thanks for the great info.
roaniecowpony
Well-Known Member
I checked function on my lockers yesterday. Front won't engage. The LED next to the switch flashes then goes out. Tried six ways to Sunday. No go.
I recently had gears installed. Aside from pinched wires or other obvious damage, I'm guessing this may be my issue. I had not used the front locker since a July trip. So, it's possible it's a sensor.
I'd like to have a potted sensor in hand before I open the diff. Are they all the same? (front and rear, calibration, size, etc..)
Sponsored
OP
OP
chevymitchell
Well-Known Member
- First Name
- Shawn
- Joined
- Feb 18, 2018
- Threads
- 112
- Messages
- 5,017
- Reaction score
- 12,147
- Location
- Pueblo West, CO
- Vehicle(s)
- 2022 392XR, 2025 Wagoneer S, 2006 LJ 6-spd
- Occupation
- Avi Engineer
- Thread starter
- #666
They're not all the same, unfortunately.I checked function on my lockers yesterday. Front won't engage. The LED next to the switch flashes then goes out. Tried six ways to Sunday. No go.
I recently had gears installed. Aside from pinched wires or other obvious damage, I'm guessing this may be my issue. I had not used the front locker since a July trip. So, it's possible it's a sensor.
I'd like to have a potted sensor in hand before I open the diff. Are they all the same? (front and rear, calibration, size, etc..)
The kit from the dealer comes with 4 or 5 sensors that need to be swapped in and out until the right one is found. You might get lucky and one of the left over ones someone has here from that kit will work.
roaniecowpony
Well-Known Member
Any idea what the difference is between the various sensors? Also, front to rear... same kit?They're not all the same, unfortunately.
The kit from the dealer comes with 4 or 5 sensors that need to be swapped in and out until the right one is found. You might get lucky and one of the left over ones someone has here from that kit will work.
OP
OP
chevymitchell
Well-Known Member
- First Name
- Shawn
- Joined
- Feb 18, 2018
- Threads
- 112
- Messages
- 5,017
- Reaction score
- 12,147
- Location
- Pueblo West, CO
- Vehicle(s)
- 2022 392XR, 2025 Wagoneer S, 2006 LJ 6-spd
- Occupation
- Avi Engineer
- Thread starter
- #668
I’m not sure what the difference is. I would assume it’s an impedance difference.Any idea what the difference is between the various sensors? Also, front to rear... same kit?
Yeah, same kit, from my understanding. I don’t have first hand experience with these kits. There have been previous posts in this thread about them. Sorry I don’t have more info than that.
Hercules
Well-Known Member
- Joined
- Jan 1, 2022
- Threads
- 9
- Messages
- 563
- Reaction score
- 1,178
- Location
- Clearwater, FL
- Vehicle(s)
- 2012 Ram 2500 Longhorn, 2022 JLURD
I’m about to pot my sensors following this thread steps. Question- after I pot the sensor, tape it, and it cures, do you remove the tape before re-installing that in the diff? I would think so, right?Good evening everyone.
I took the time today to run through the potting of my locker sensors. This seems to be a very frustrating point of failure for all of us. I have experienced it myself.
Here are the DIY steps you can follow to properly pot the sensors.
**Keep in mind the amount of time required for the potting material to cure. Tacky at 3-5 hours. 24 hour full cure. Best to do both sensors at the same time when you can wait, at least, overnight.
Also, please understand that this is a temporary fix to an issue we all hope FCA is going to remedy. Hopefully there is, at a minimum, a part number for this sensor we can order through Dealers and Distributors**
Jeep JL TQ Specs: https://www.jlwranglerforums.com/complete-torque-values-for-jeep-jl-wrangler/
Tools Required:
Parts Required:
- 1/4" Ratchet
- 1/4" Drive T20 Bit
- 3/8" Drive Ratchet
- 3/8" Drive 10mm
- 1/2" Drive Ratchet
- 1/2" Drive 15mm
- Drill
- 3/32" Drill Bit
- Flathead Screwdriver
- Drain Pan
- Teflon Tape
- Electrical Tape
- Sharpe/Marker
- Acetone (Optional)
- Red Loctite
- Dielectric Grease
- Shop towels or Microfiber Cloth
- 832HD Potting Compound (25mL)
These steps are the same for the Front and Rear Axles.
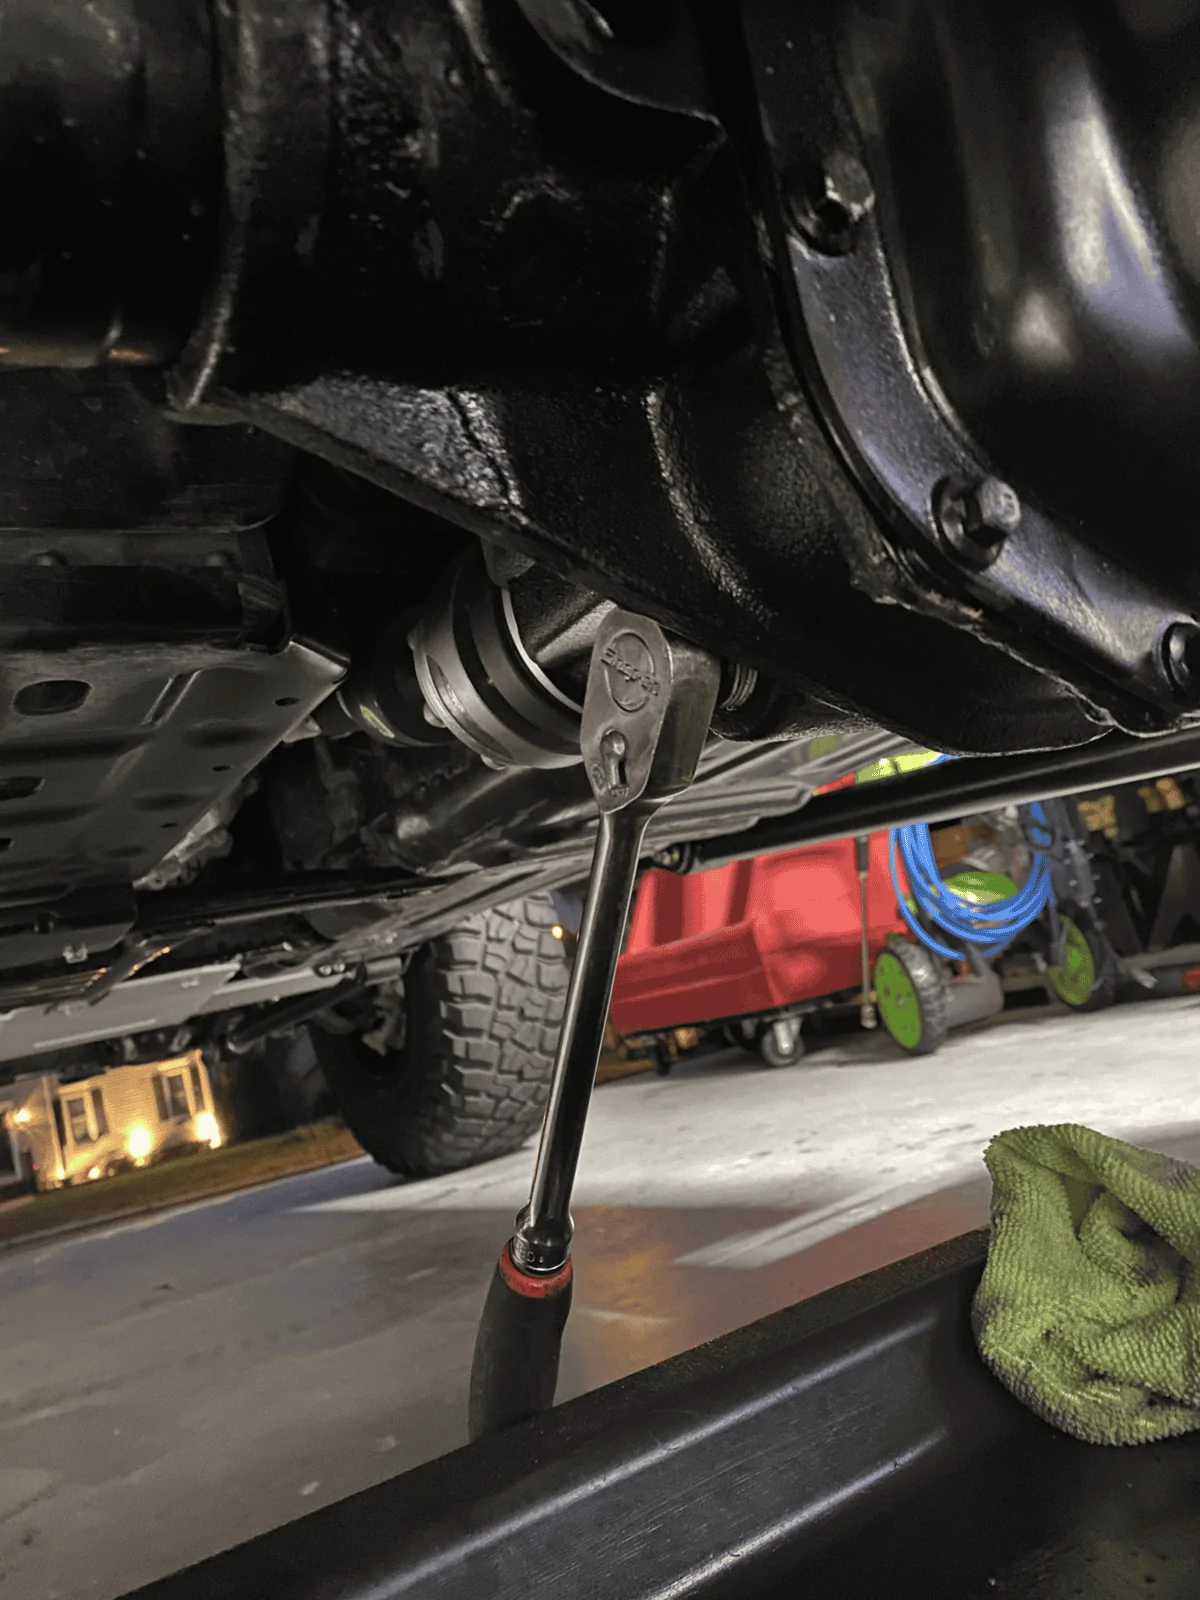
- Using a 3/8" Drive ratchet, drain the diff fluid into your drain pan. Wait for the diff to finish draining. Clean the drain plug and apply teflon tape to the threads. Reinstall at this time.

- Using a 10mm socket, remove the diff cover bolts.

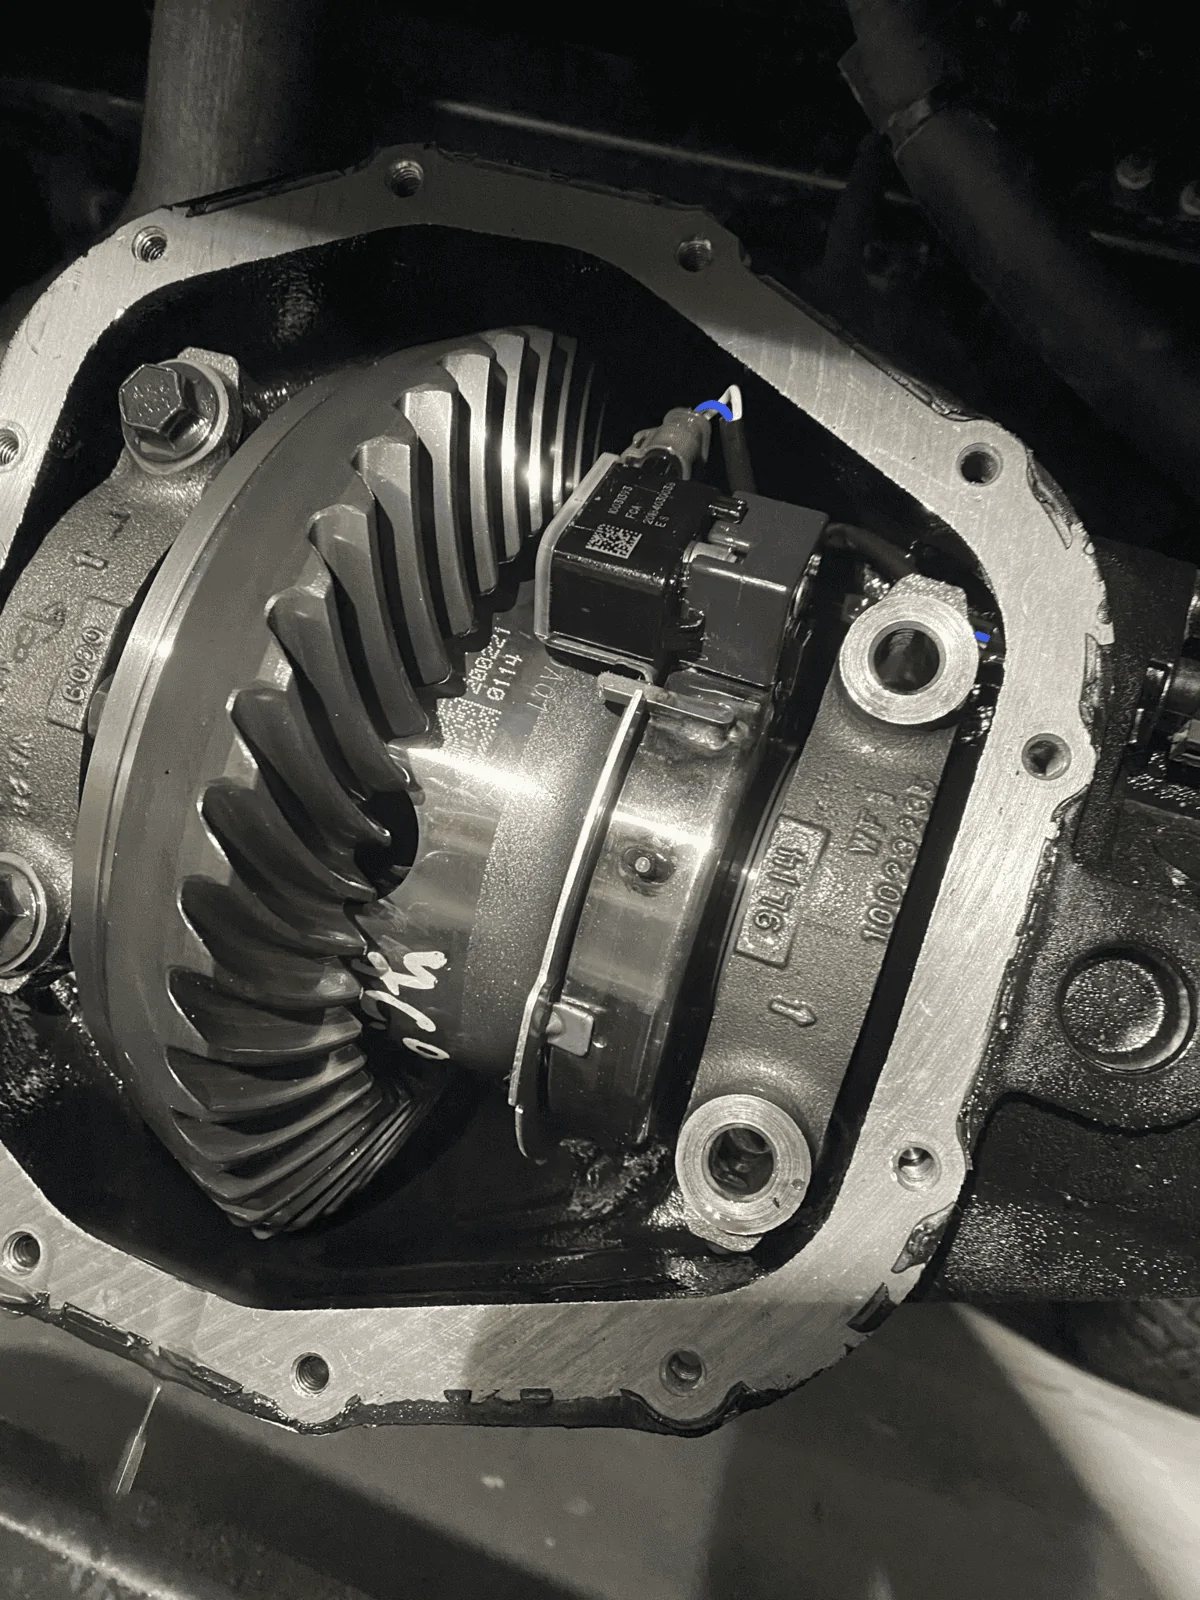
- Using a flathead (or finger tips), remove diff cover.
- Remove the reusable diff gasket.
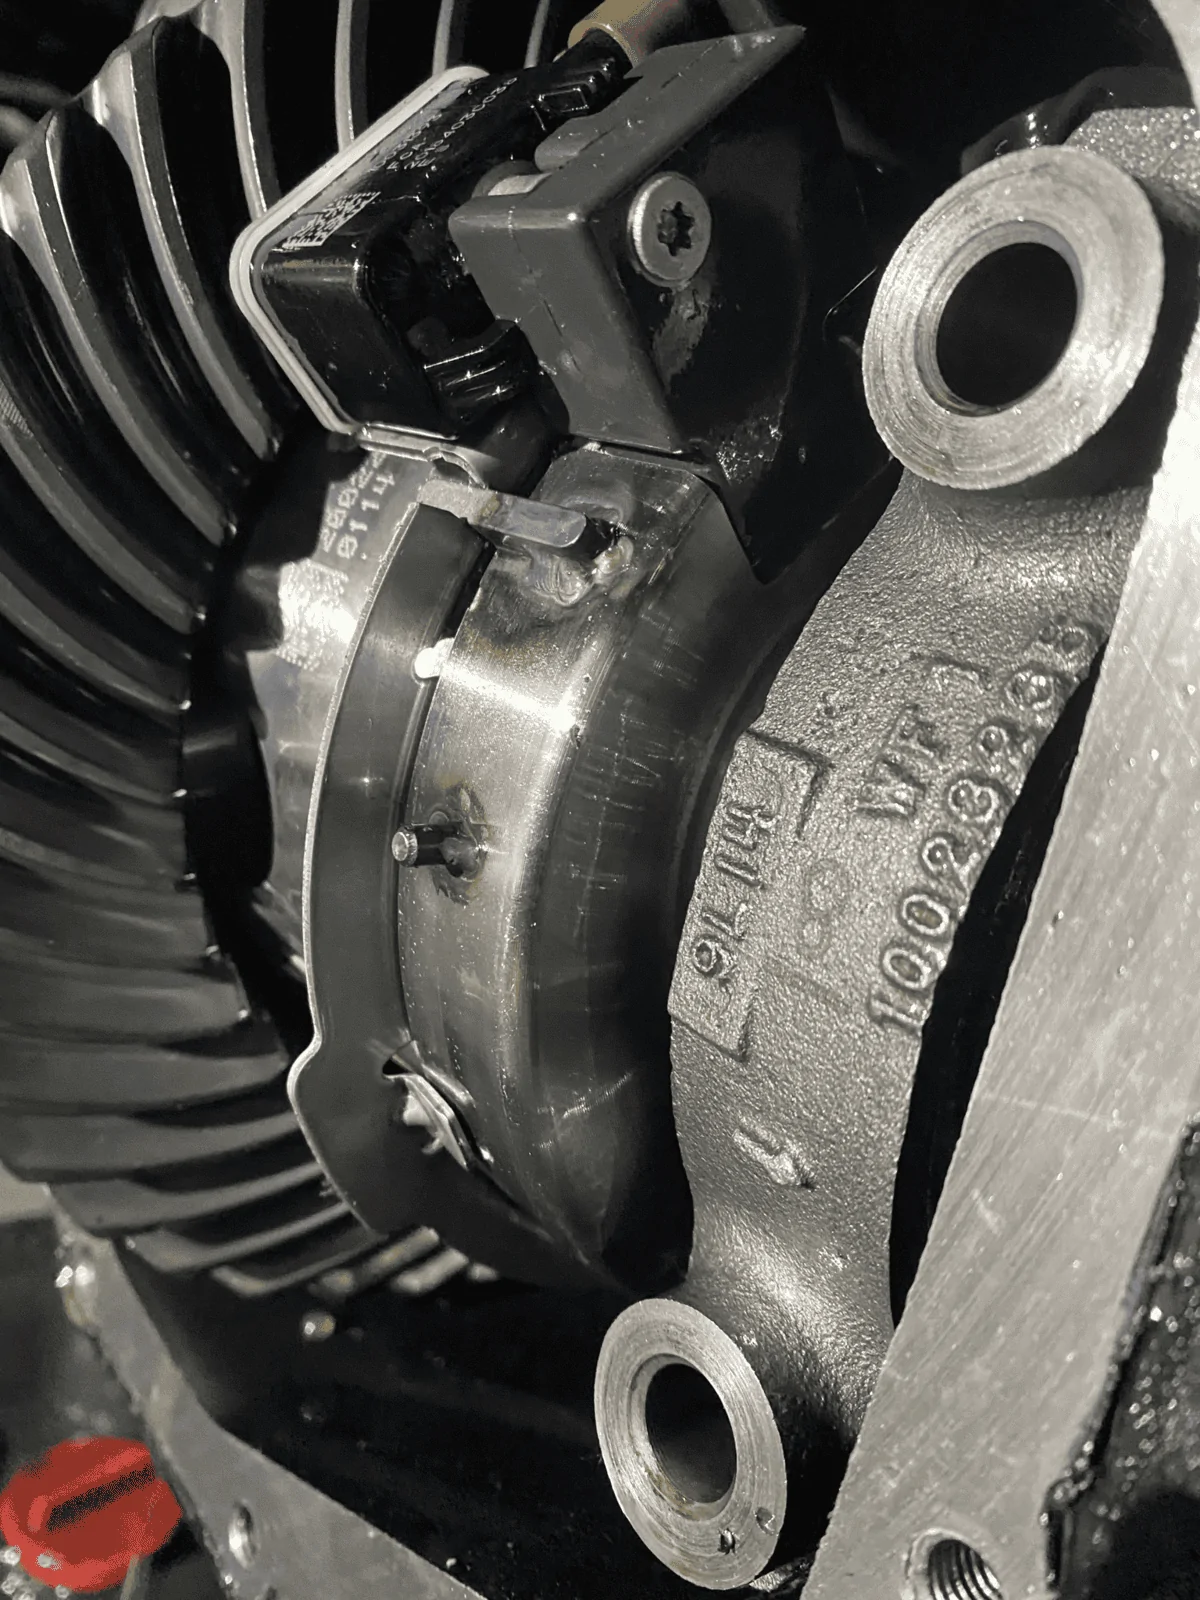
- Using a 15mm socket, remove the R/H side Cap Bolts.
- Remove Cap Bolts with alignment plate. Keep the bolts with the plate so they go back in the same spots they came out of.
- Using a T20 bit, remove the screw holding the Locker Sensor in place.
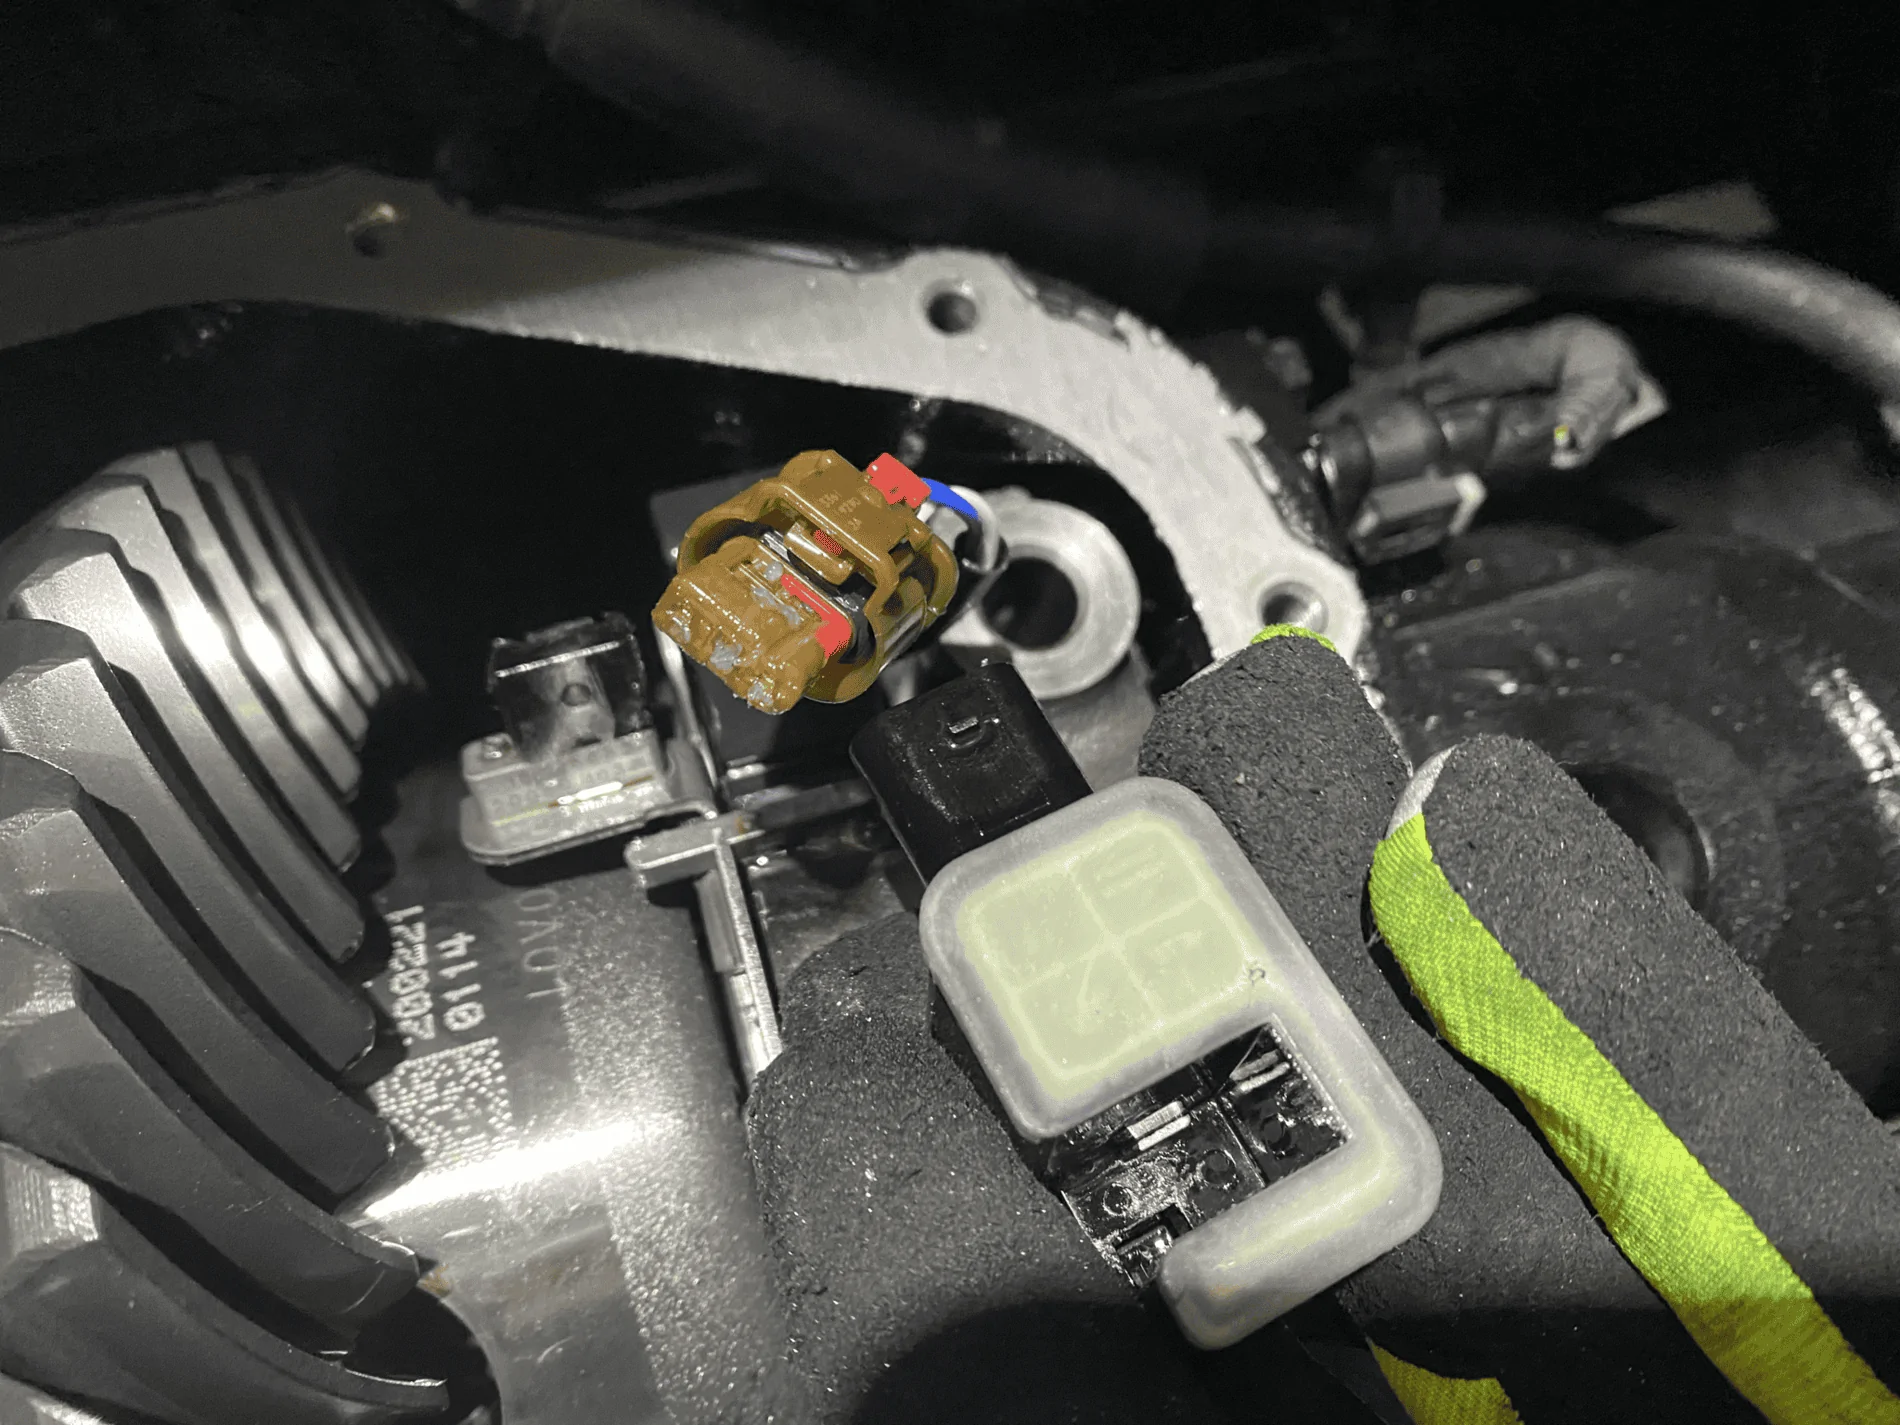
- Using a flathead (or fingers), disengage connector safety clip.
- Remove Connector and Sensor.
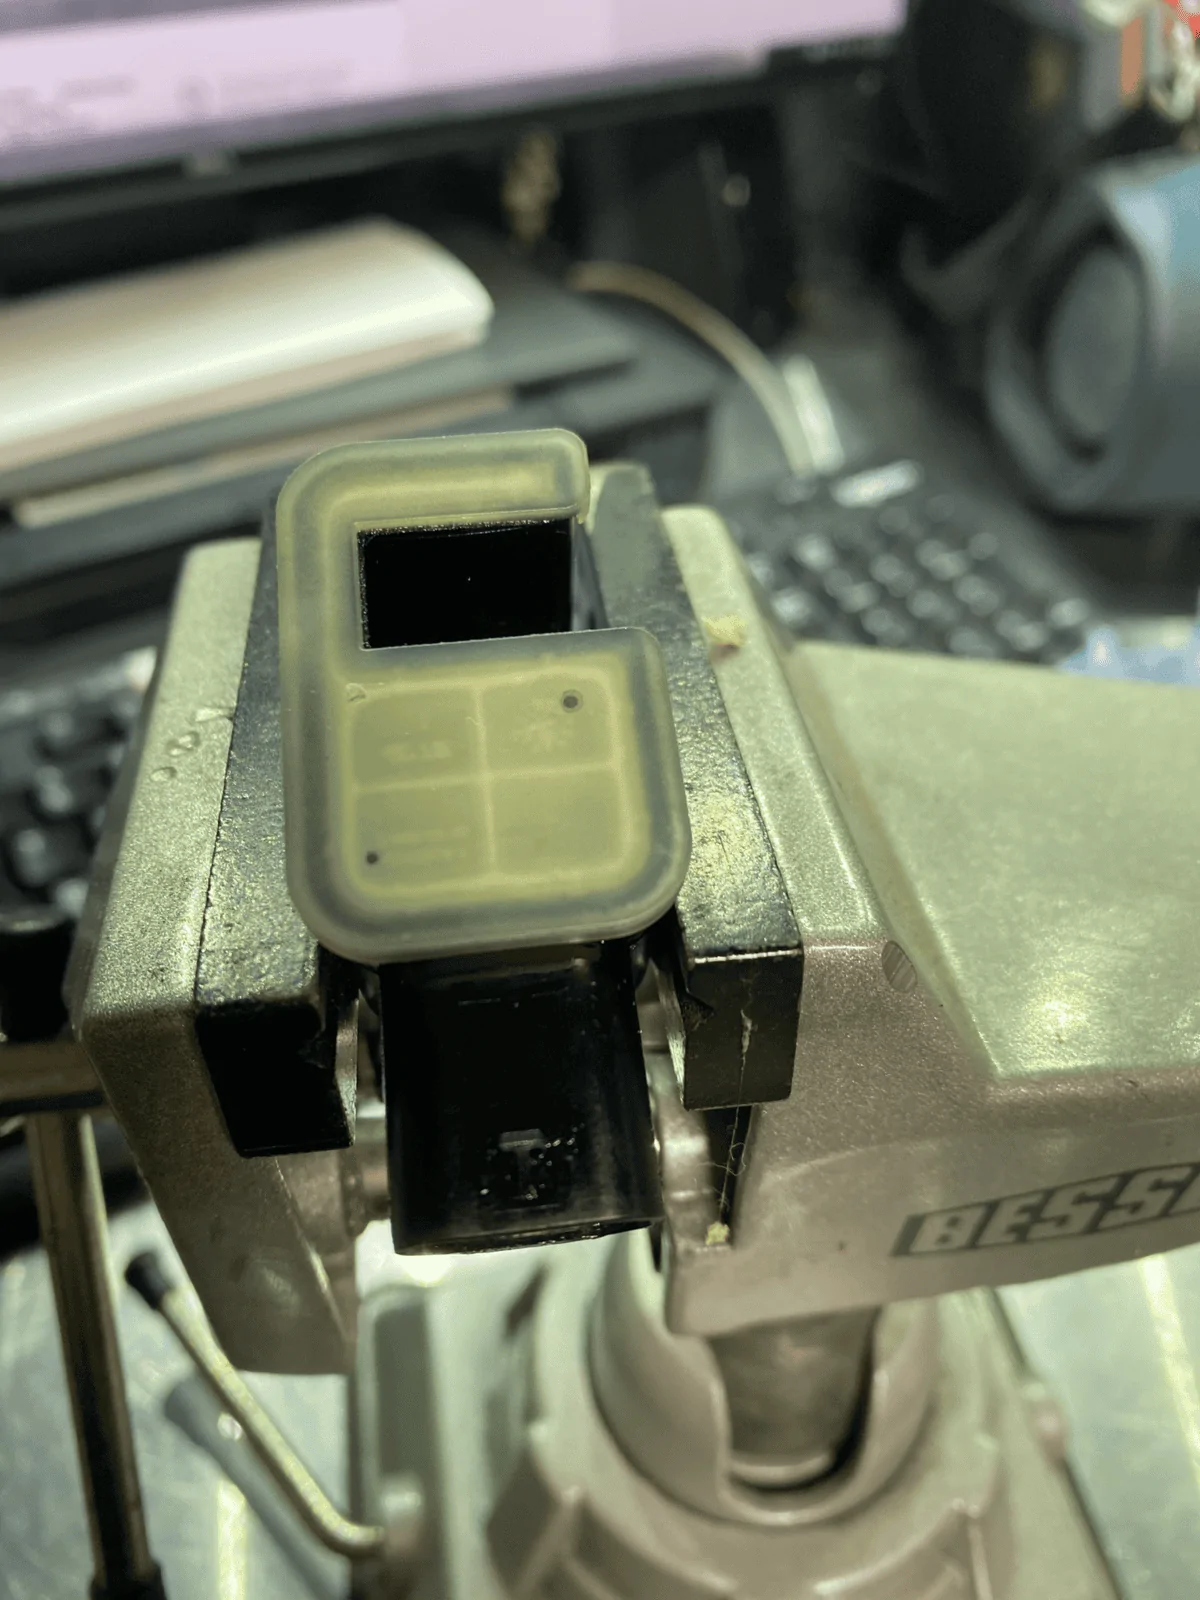
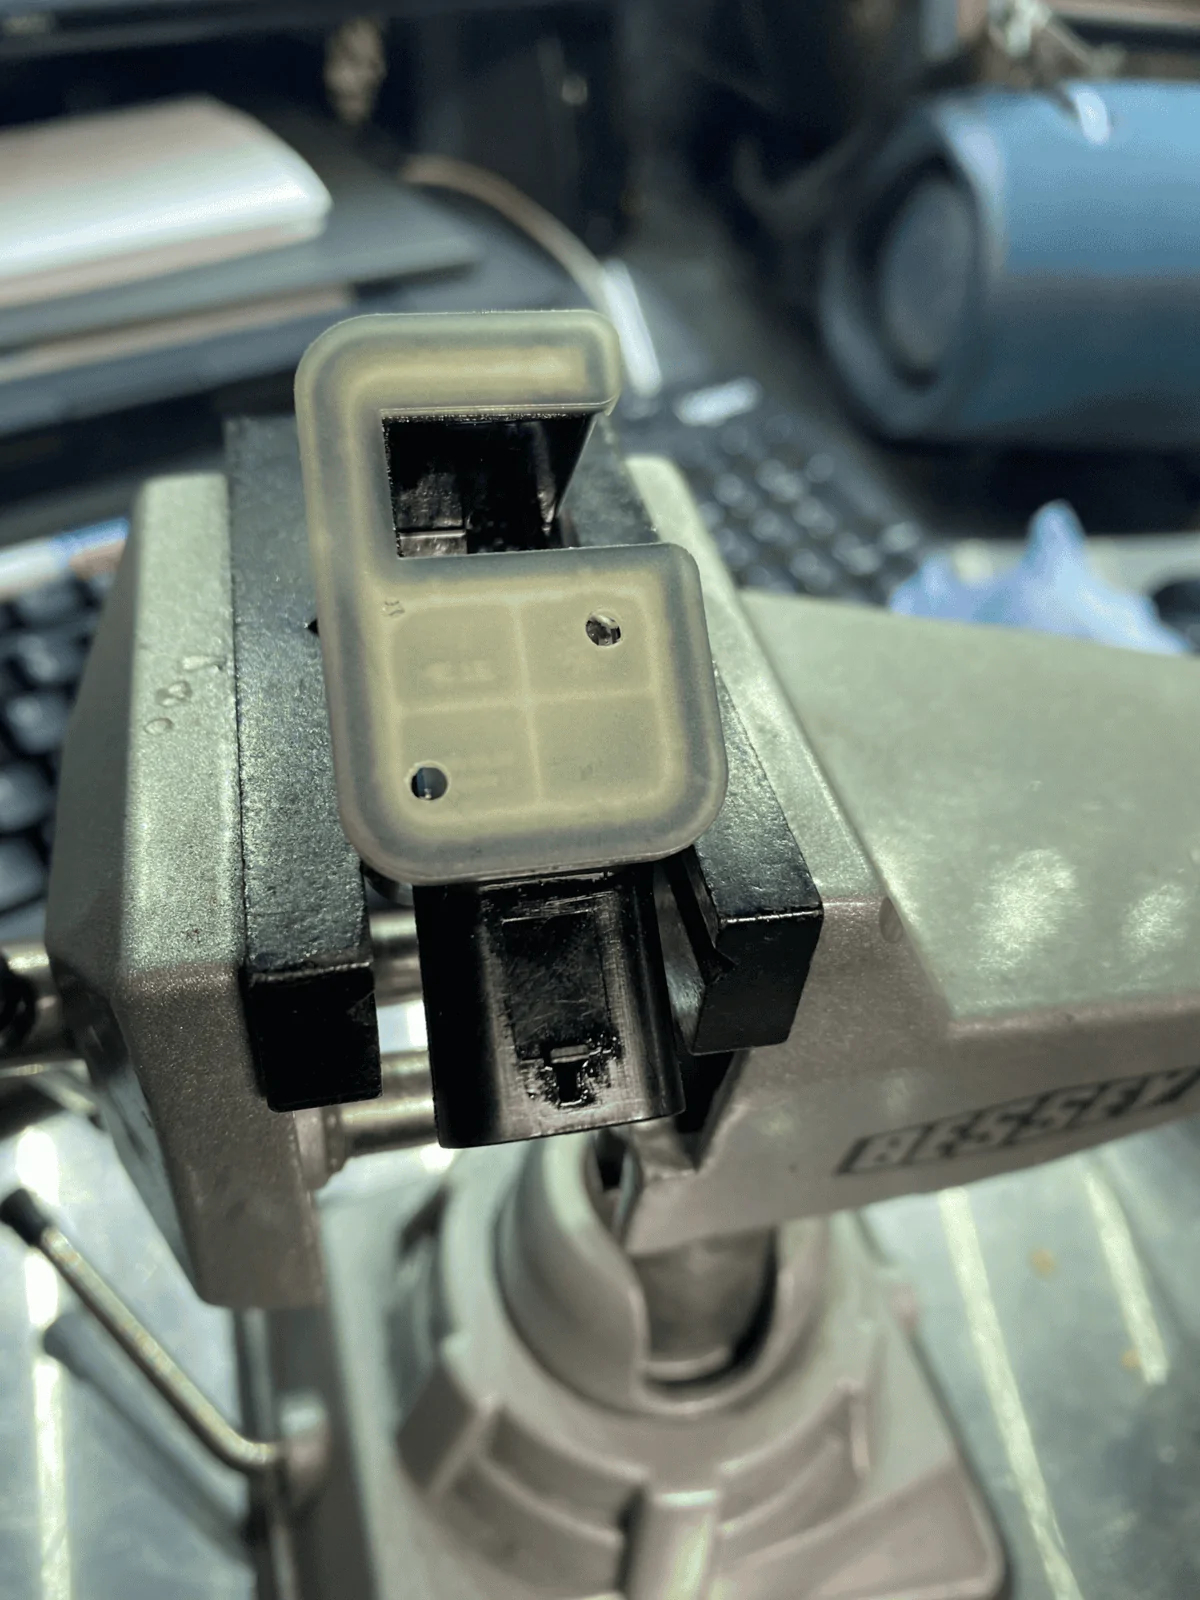
- Wipe sensor off using a shop towel or microfiber cloth.
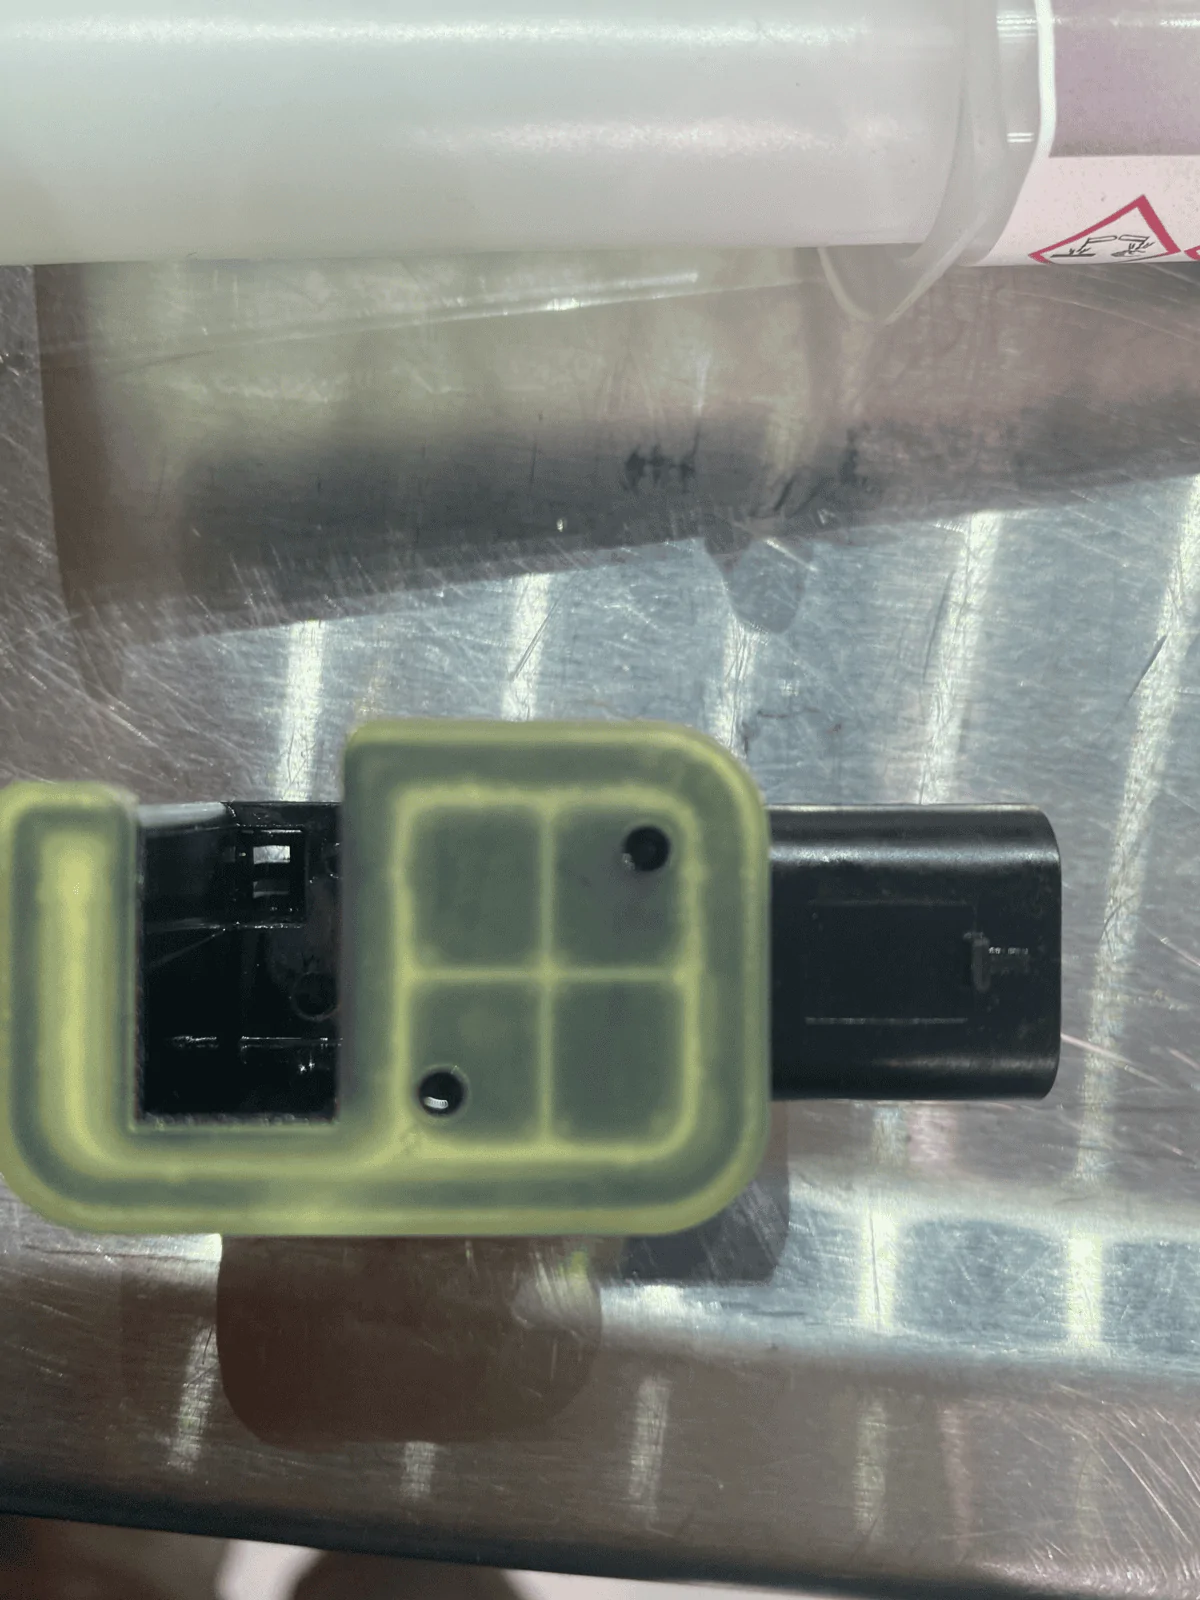
- Mark sensor as shown in the picture with a sharpe.
- Using a 3/32" drill bit, drill 3 holes as shown in the pictures. Be VERY careful with this step as the PCB (Circuit Board) is located very close to the clear cap on the sensor. Drill at a very low speed, with light pressure. We need 3 holes for this work properly. One is used to inject potting compound into the top side of the PCB, one for the bottom side of the PCB, and one to let air escape as we are injecting potting compound. Without an air escape, there will be air pockets and this whole thing will be for nothing.
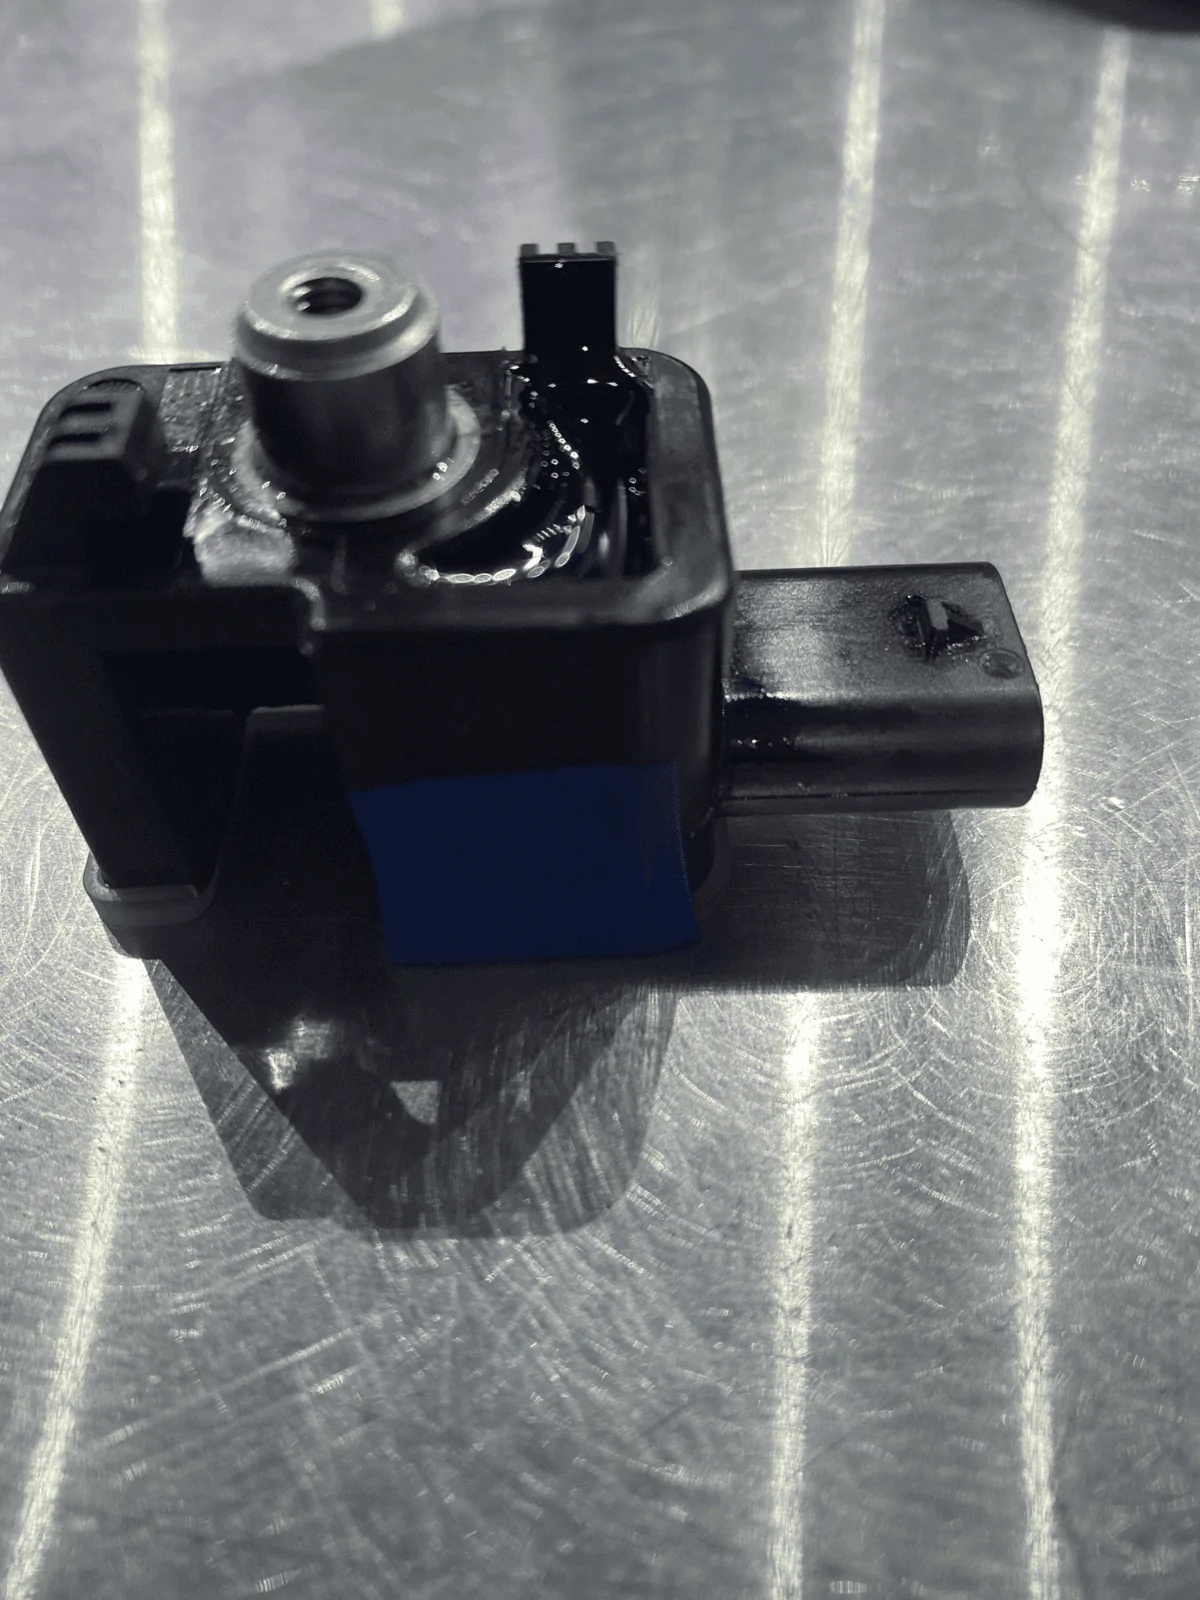
- Inject potting compound as shown in the video. Once you inject the compound in the bottom hole, you will notice the air being pushed out first and then a rush of compound will come out when it's full.
- Once the sensor is full, wipe the top side off with a shop towel.
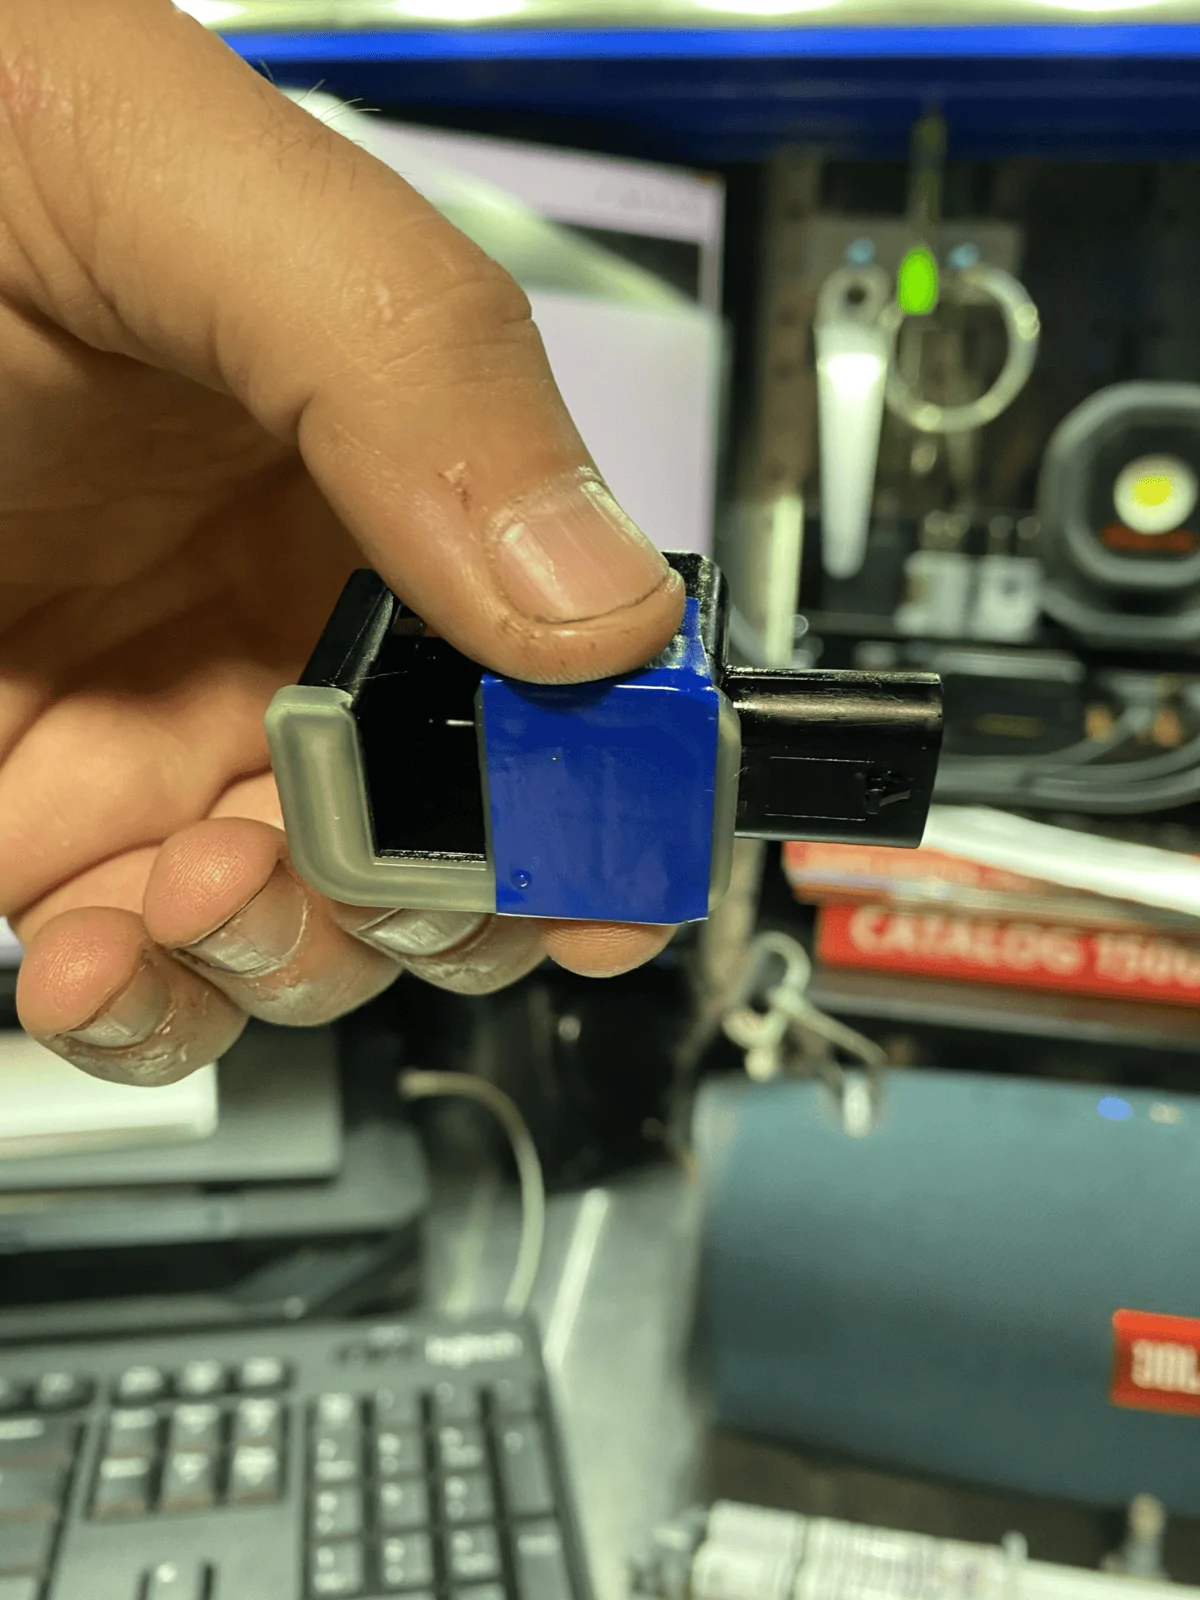
- Apply electrical tape over the two holes and set the sensor down on its top.
- Wipe off any excess potting compound and fill the void in the back of the sensor with more compound. Let sit for 3-5 hours. Once tacky, clean the sensor using Acetone so there isn't any left over potting material on the outside of the sensor once fully cured.
- Once cleaned, let sit for 24 hours. (At least 12 hours before reinstallation.)
- Once cured, install sensor in reverse order. (Use Dielectric Grease on the connector and Loctite on the T20 screw.)
- Install alignment plate and R/H side Cap Bolts. Be sure to TQ to spec. The TQ specs are different front to rear.
- Install Diff Cover.
- Service Diff.
- Test Locker System.


OP
OP
chevymitchell
Well-Known Member
- First Name
- Shawn
- Joined
- Feb 18, 2018
- Threads
- 112
- Messages
- 5,017
- Reaction score
- 12,147
- Location
- Pueblo West, CO
- Vehicle(s)
- 2022 392XR, 2025 Wagoneer S, 2006 LJ 6-spd
- Occupation
- Avi Engineer
- Thread starter
- #670
Yeah. Definitely remove the tape.I’m about to pot my sensors following this thread steps. Question- after I pot the sensor, tape it, and it cures, do you remove the tape before re-installing that in the diff? I would think so, right?
Sponsored
Hercules
Well-Known Member
- Joined
- Jan 1, 2022
- Threads
- 9
- Messages
- 563
- Reaction score
- 1,178
- Location
- Clearwater, FL
- Vehicle(s)
- 2012 Ram 2500 Longhorn, 2022 JLURD
Thanks brother. Fingers crossed all goes well the weekend. Thanks for the great write up.Yeah. Definitely remove the tape.
Hercules
Well-Known Member
- Joined
- Jan 1, 2022
- Threads
- 9
- Messages
- 563
- Reaction score
- 1,178
- Location
- Clearwater, FL
- Vehicle(s)
- 2012 Ram 2500 Longhorn, 2022 JLURD
So when drilling through, and let’s say the bit just popped thru and soft touched, stopped, I stopped drill spinning, what do you think my odds are of damaging the pcb? It wasn’t a full bore drill hard through, but just a soft touch? The sensors are curing now. Am I paranoid?
OP
OP
chevymitchell
Well-Known Member
- First Name
- Shawn
- Joined
- Feb 18, 2018
- Threads
- 112
- Messages
- 5,017
- Reaction score
- 12,147
- Location
- Pueblo West, CO
- Vehicle(s)
- 2022 392XR, 2025 Wagoneer S, 2006 LJ 6-spd
- Occupation
- Avi Engineer
- Thread starter
- #673
Yeah, you'll be alright. No harm done.So when drilling through, and let’s say the bit just popped thru and soft touched, stopped, I stopped drill spinning, what do you think my odds are of damaging the pcb? It wasn’t a full bore drill hard through, but just a soft touch? The sensors are curing now. Am I paranoid?
redsyphon
Well-Known Member
- First Name
- James
- Joined
- Mar 26, 2018
- Threads
- 31
- Messages
- 639
- Reaction score
- 1,017
- Location
- North Florida
- Vehicle(s)
- 2018 JLU Rubicon
- Occupation
- IT Project Manager
- Vehicle Showcase
- 1
Second this.Yeah, you'll be alright. No harm done.
On my first sensor I touched the pcb (or it felt like I did) with the bit. No harm was done, but I was paranoid up until trying the lockers after re-installing when everything worked fine.
A few years later, lockers are still going strong and I'm glad I took the time to do this early.
OP
OP
chevymitchell
Well-Known Member
- First Name
- Shawn
- Joined
- Feb 18, 2018
- Threads
- 112
- Messages
- 5,017
- Reaction score
- 12,147
- Location
- Pueblo West, CO
- Vehicle(s)
- 2022 392XR, 2025 Wagoneer S, 2006 LJ 6-spd
- Occupation
- Avi Engineer
- Thread starter
- #675
@JeepCares - PM me for an address to send my check. LolA few years later, lockers are still going strong and I'm glad I took the time to do this early.
Sponsored
Similar threads
- Replies
- 23
- Views
- 11,204