4x4tographer
Well-Known Member
- First Name
- Ryan
- Joined
- Feb 2, 2019
- Threads
- 8
- Messages
- 76
- Reaction score
- 218
- Location
- Phoenix, AZ
- Vehicle(s)
- 2018 Jeep Wrangler Rubicon
- Thread starter
- #1
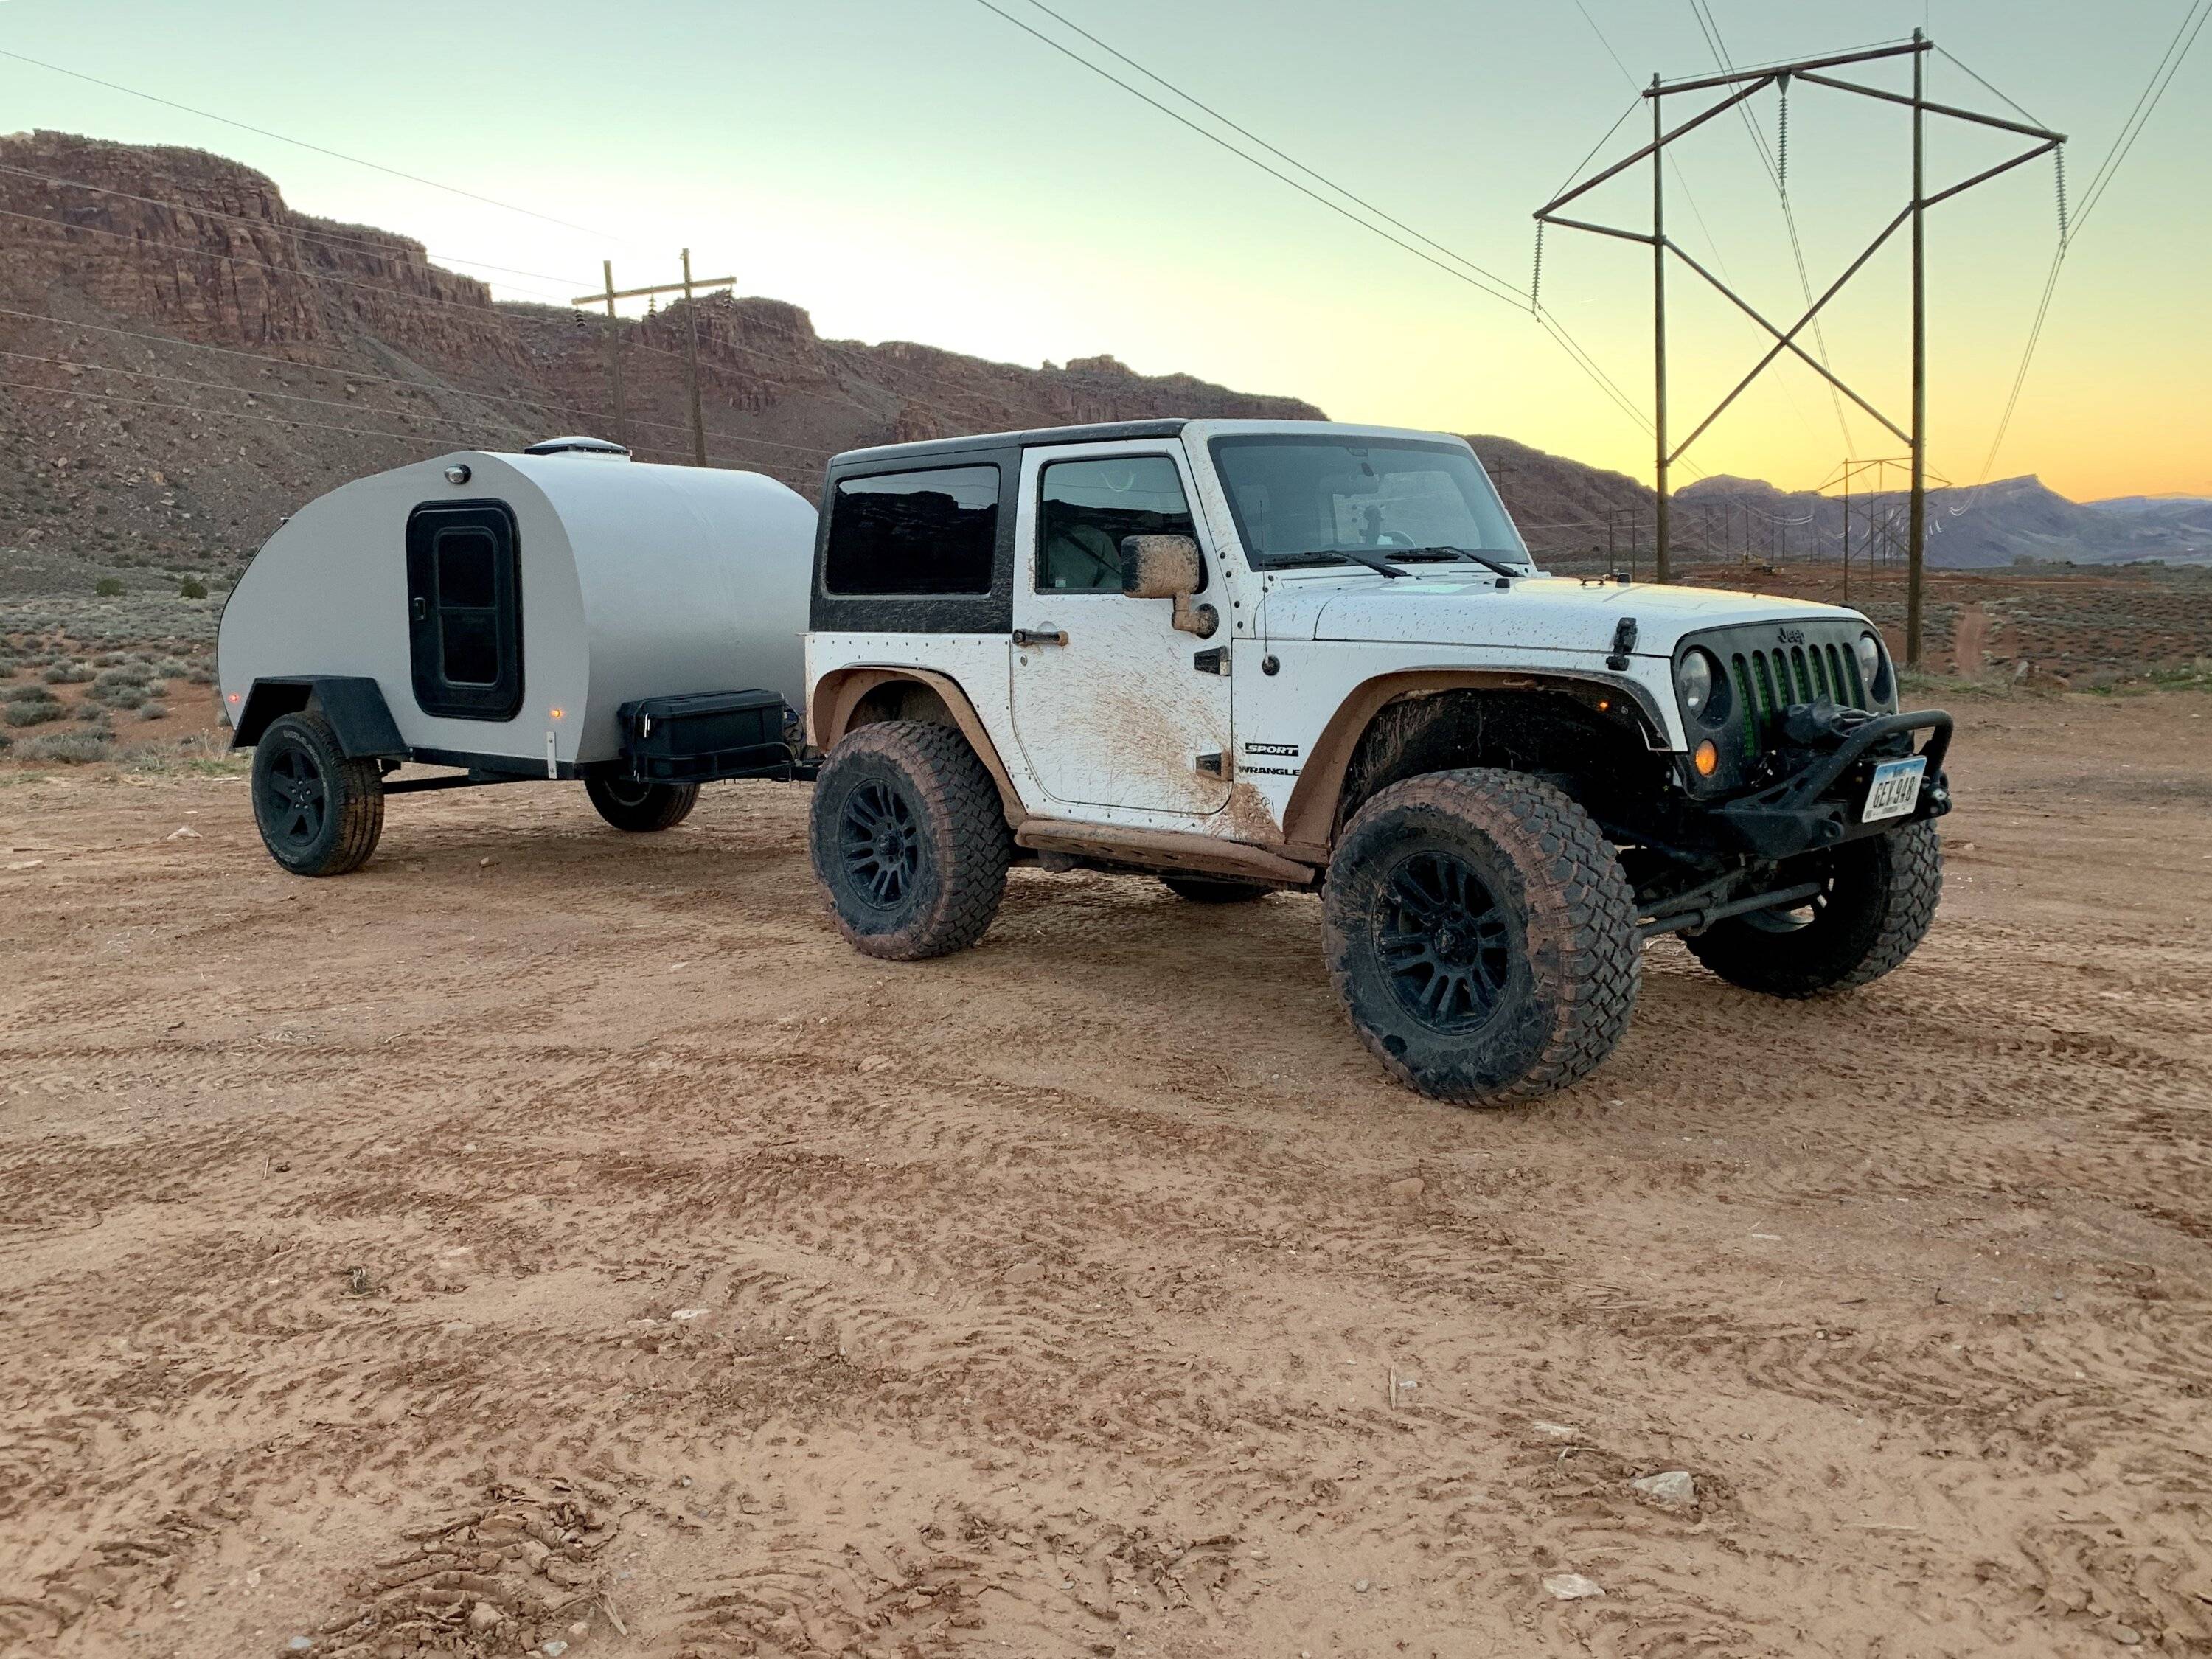
Previously, I'd asked out on the forums if anyone knew of an "overland" fridge slide solution for those of us with the soft top. The challenge (in my case) was that I want the functionality of a fridge slide without the need to unsnap the rear soft top panel every time I want to access the fridge.
Over 5 years of ownership (I'm an early adopter with a 2018), constant access into the rear of the Jeep has taken its toll on the stitching on my premium twill rear soft top panel, with tears and separations beginning to form. The fact it's held up this long with near daily "un-snappings" is a testament to the design and material quality.
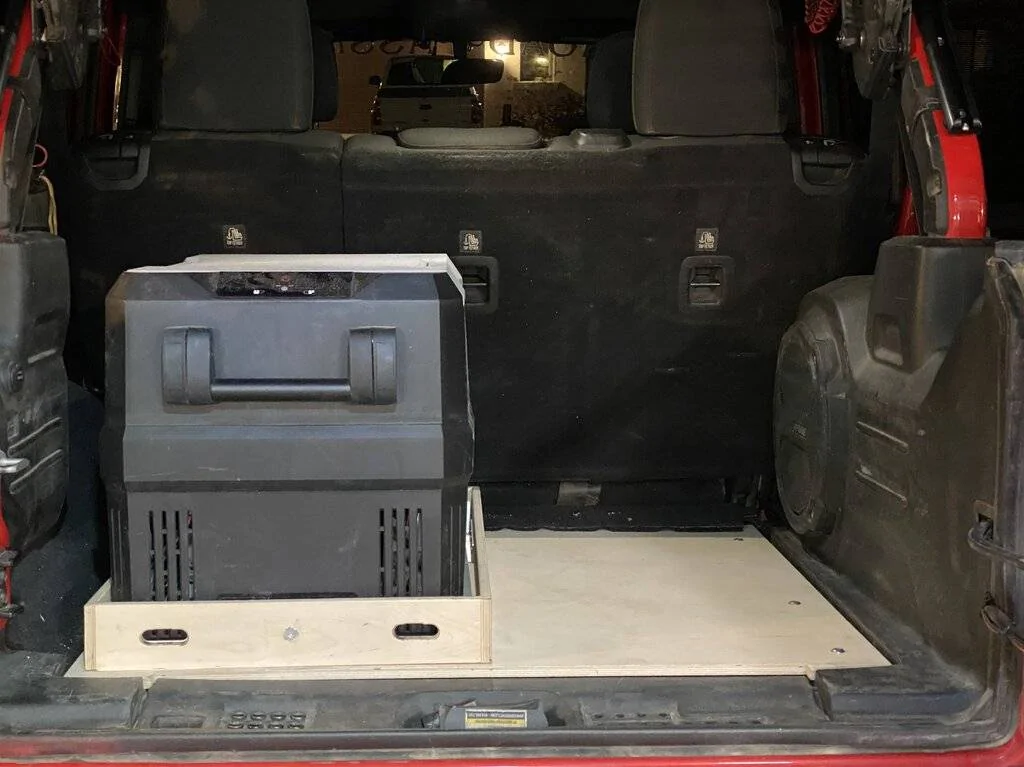
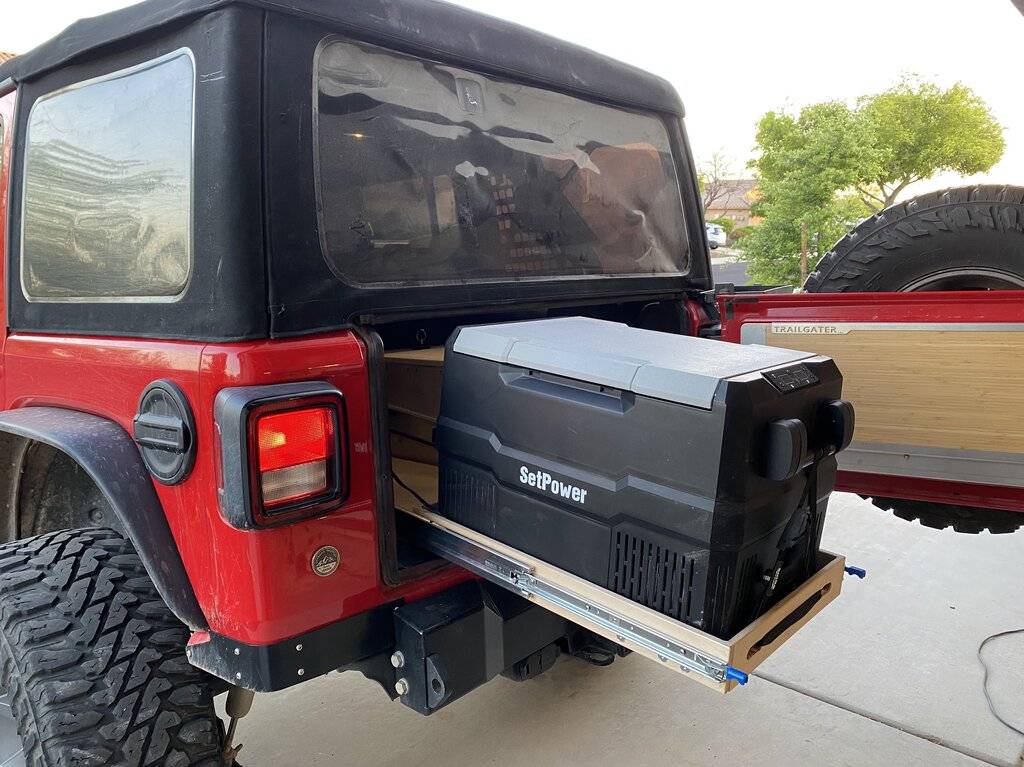
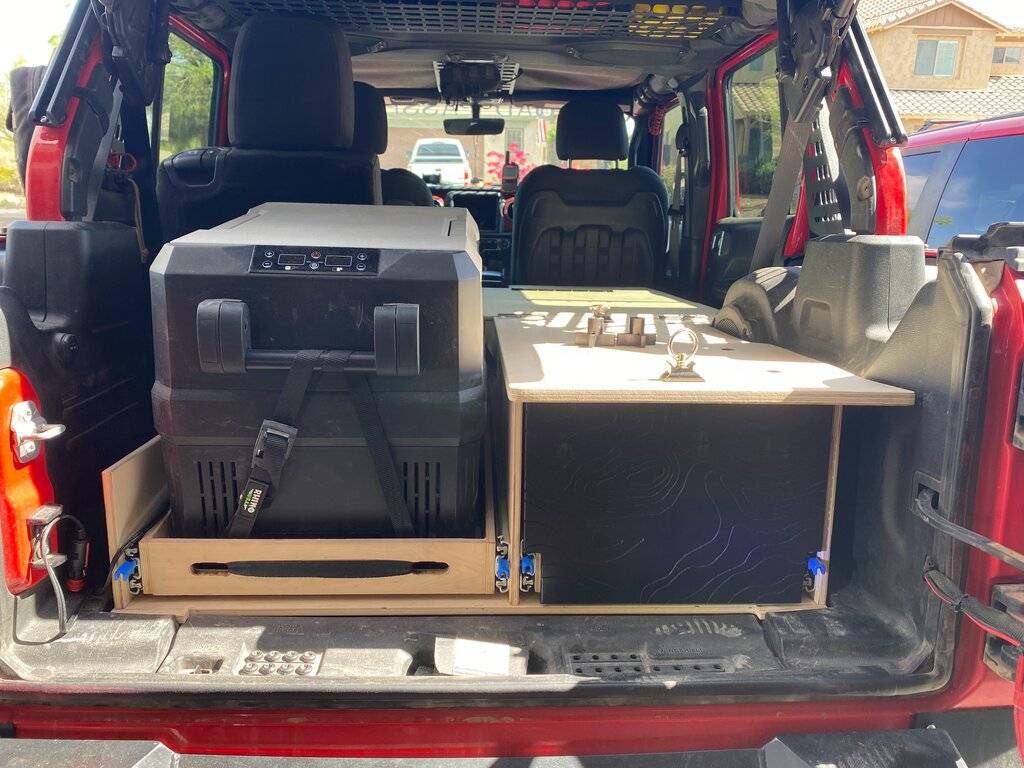
My 2nd challenge was the selection of a "medium" sized fridge - A 45qt SetPower RV45 - which has proven to be a fine fridge with good capacity and great features, including dual-zone capability. This unit stands at 17.3" tall, which just clears the bottom of the soft top retention bar when sitting flat on the load floor, but leaves little room for the necessary vertical height it would sit at once on a slide platform.
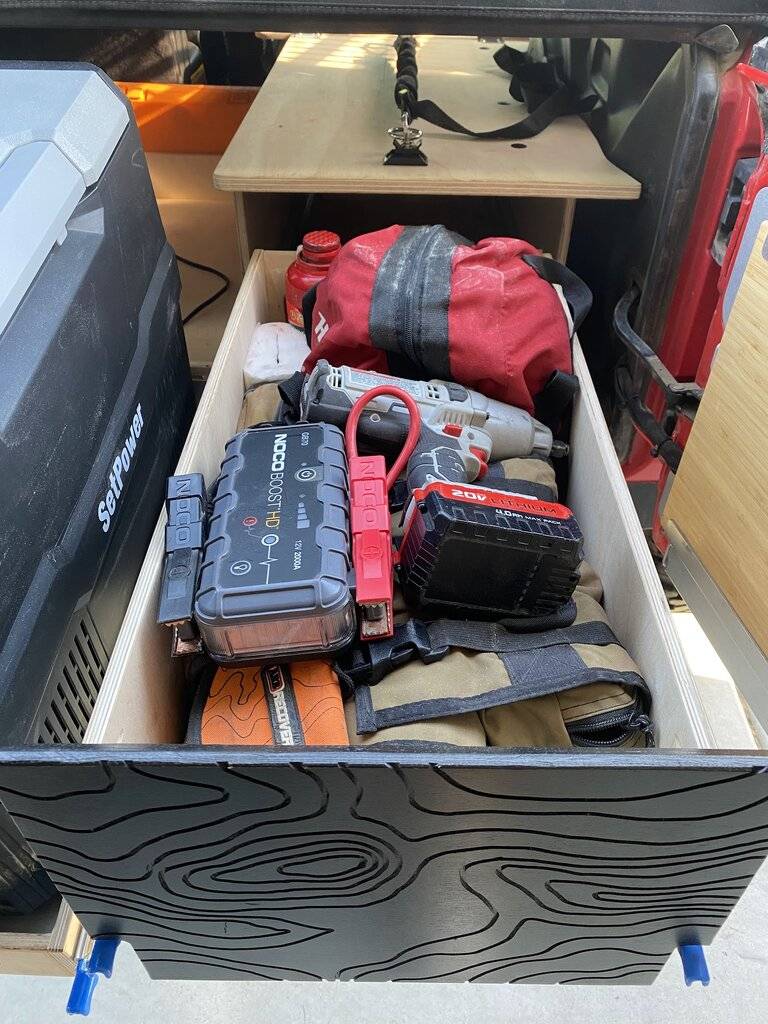
With a lack of commercial solutions on the market for the soft top gang, this called for a DIY solution. I had previously built a drawer and deck system for my JL, so this was my second shot at building a custom solution for the rear. With the new fridge, I've been simply strapping it down into the rear of the Jeep on top of my previous deck and that's been just fine - until now.
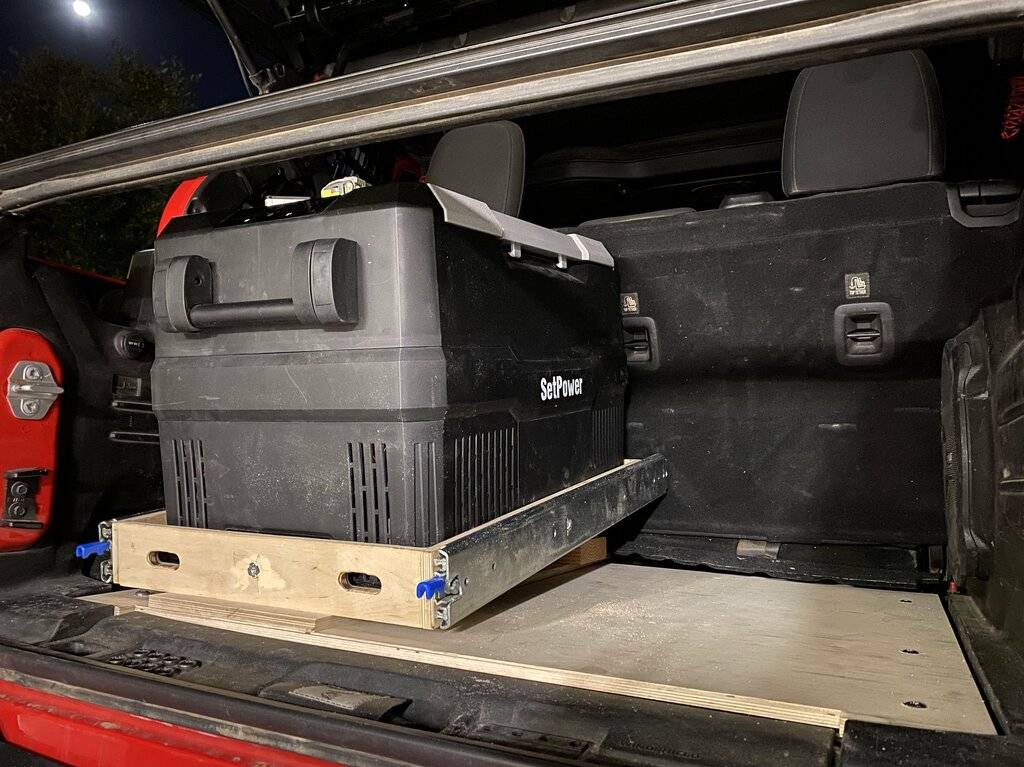
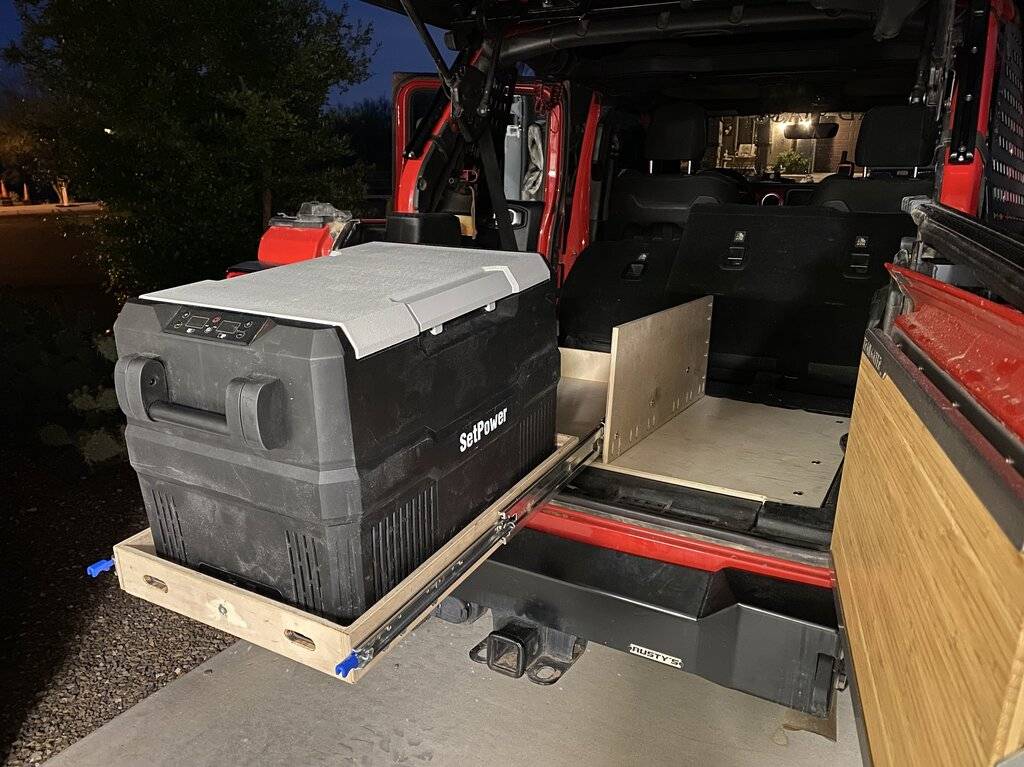
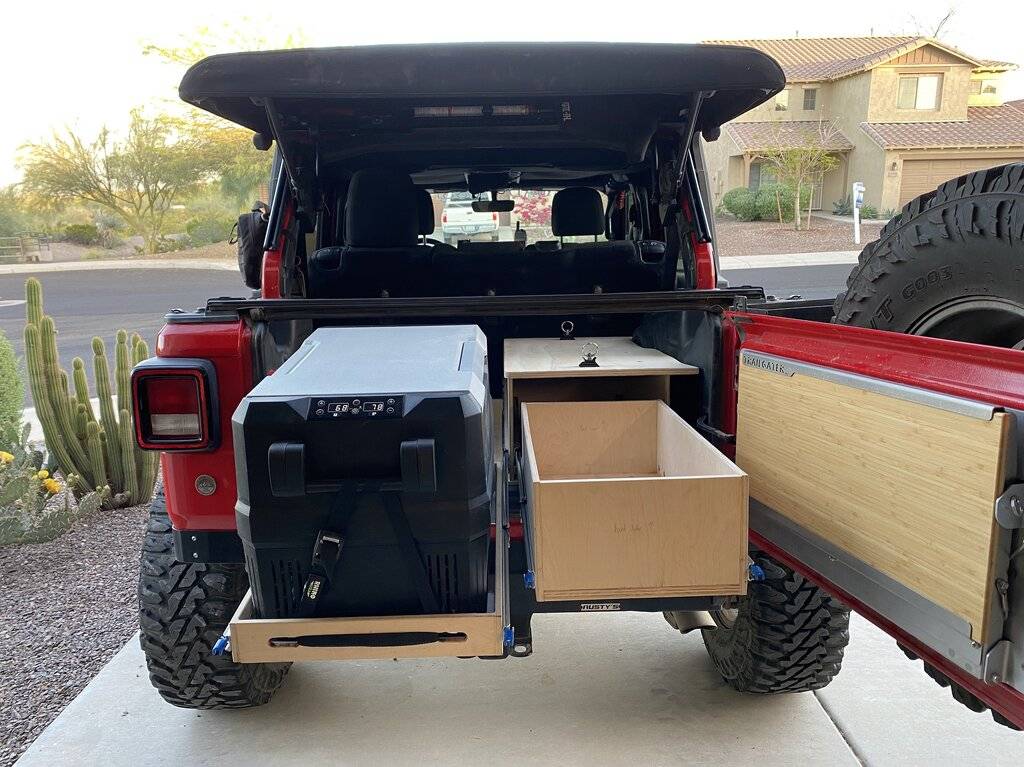
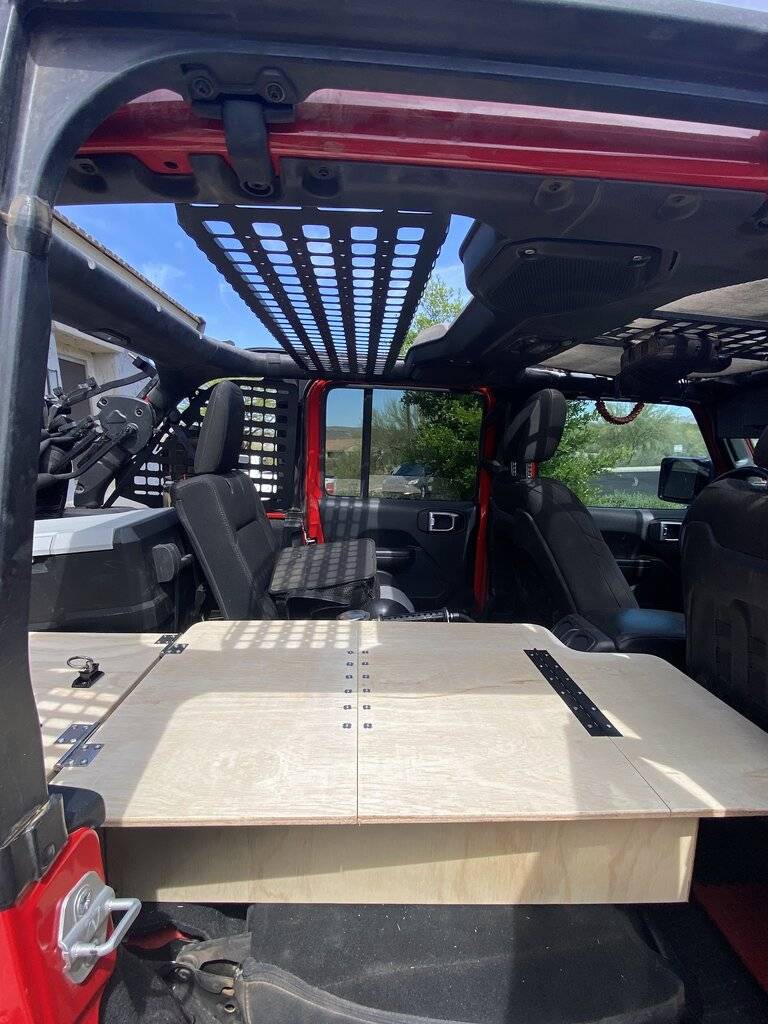
Up front, here is the final result (before bed liner, paint & poly).

So - its time for a new building project!
Project Goals:
Materials include:
Tools used:
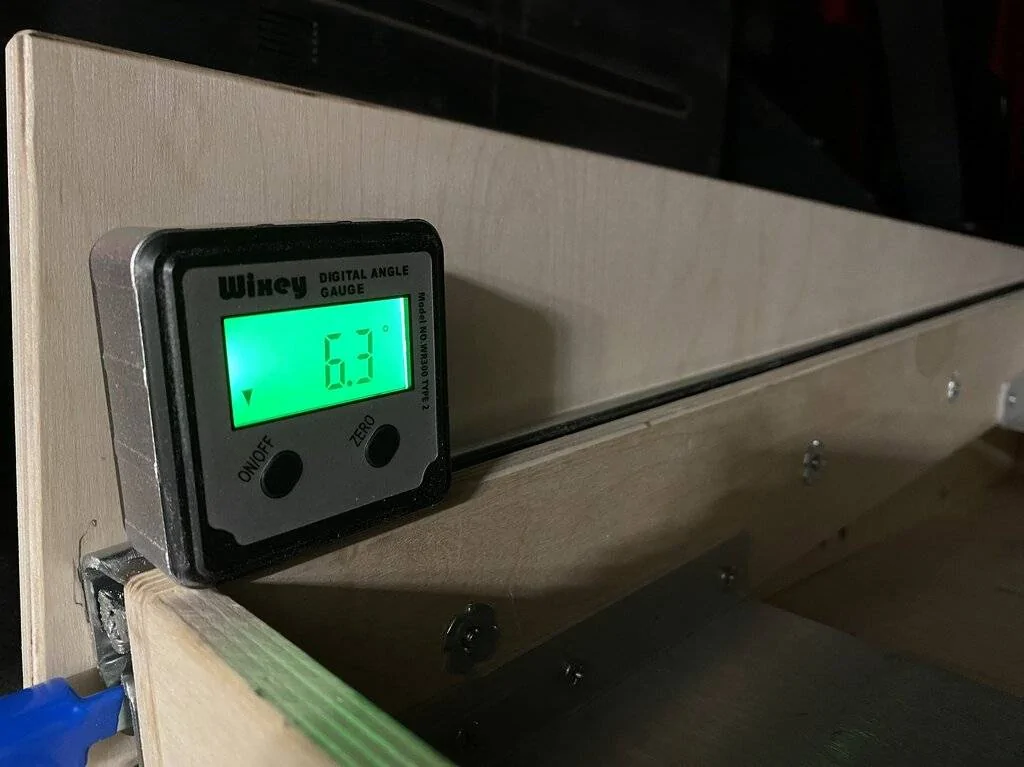
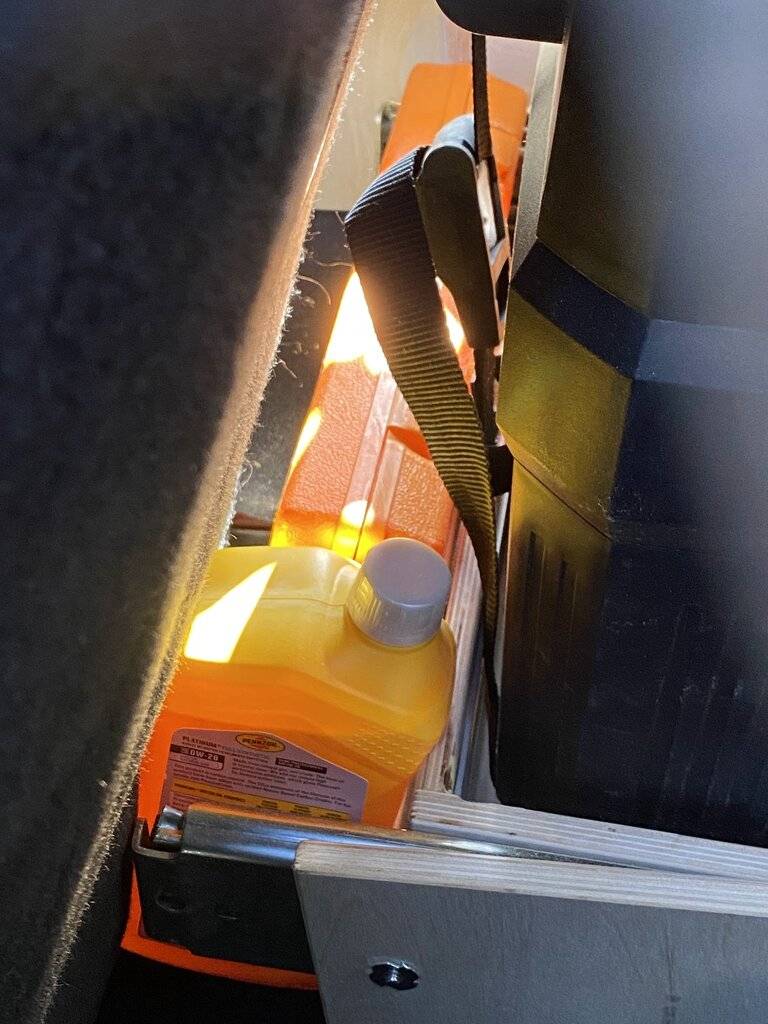
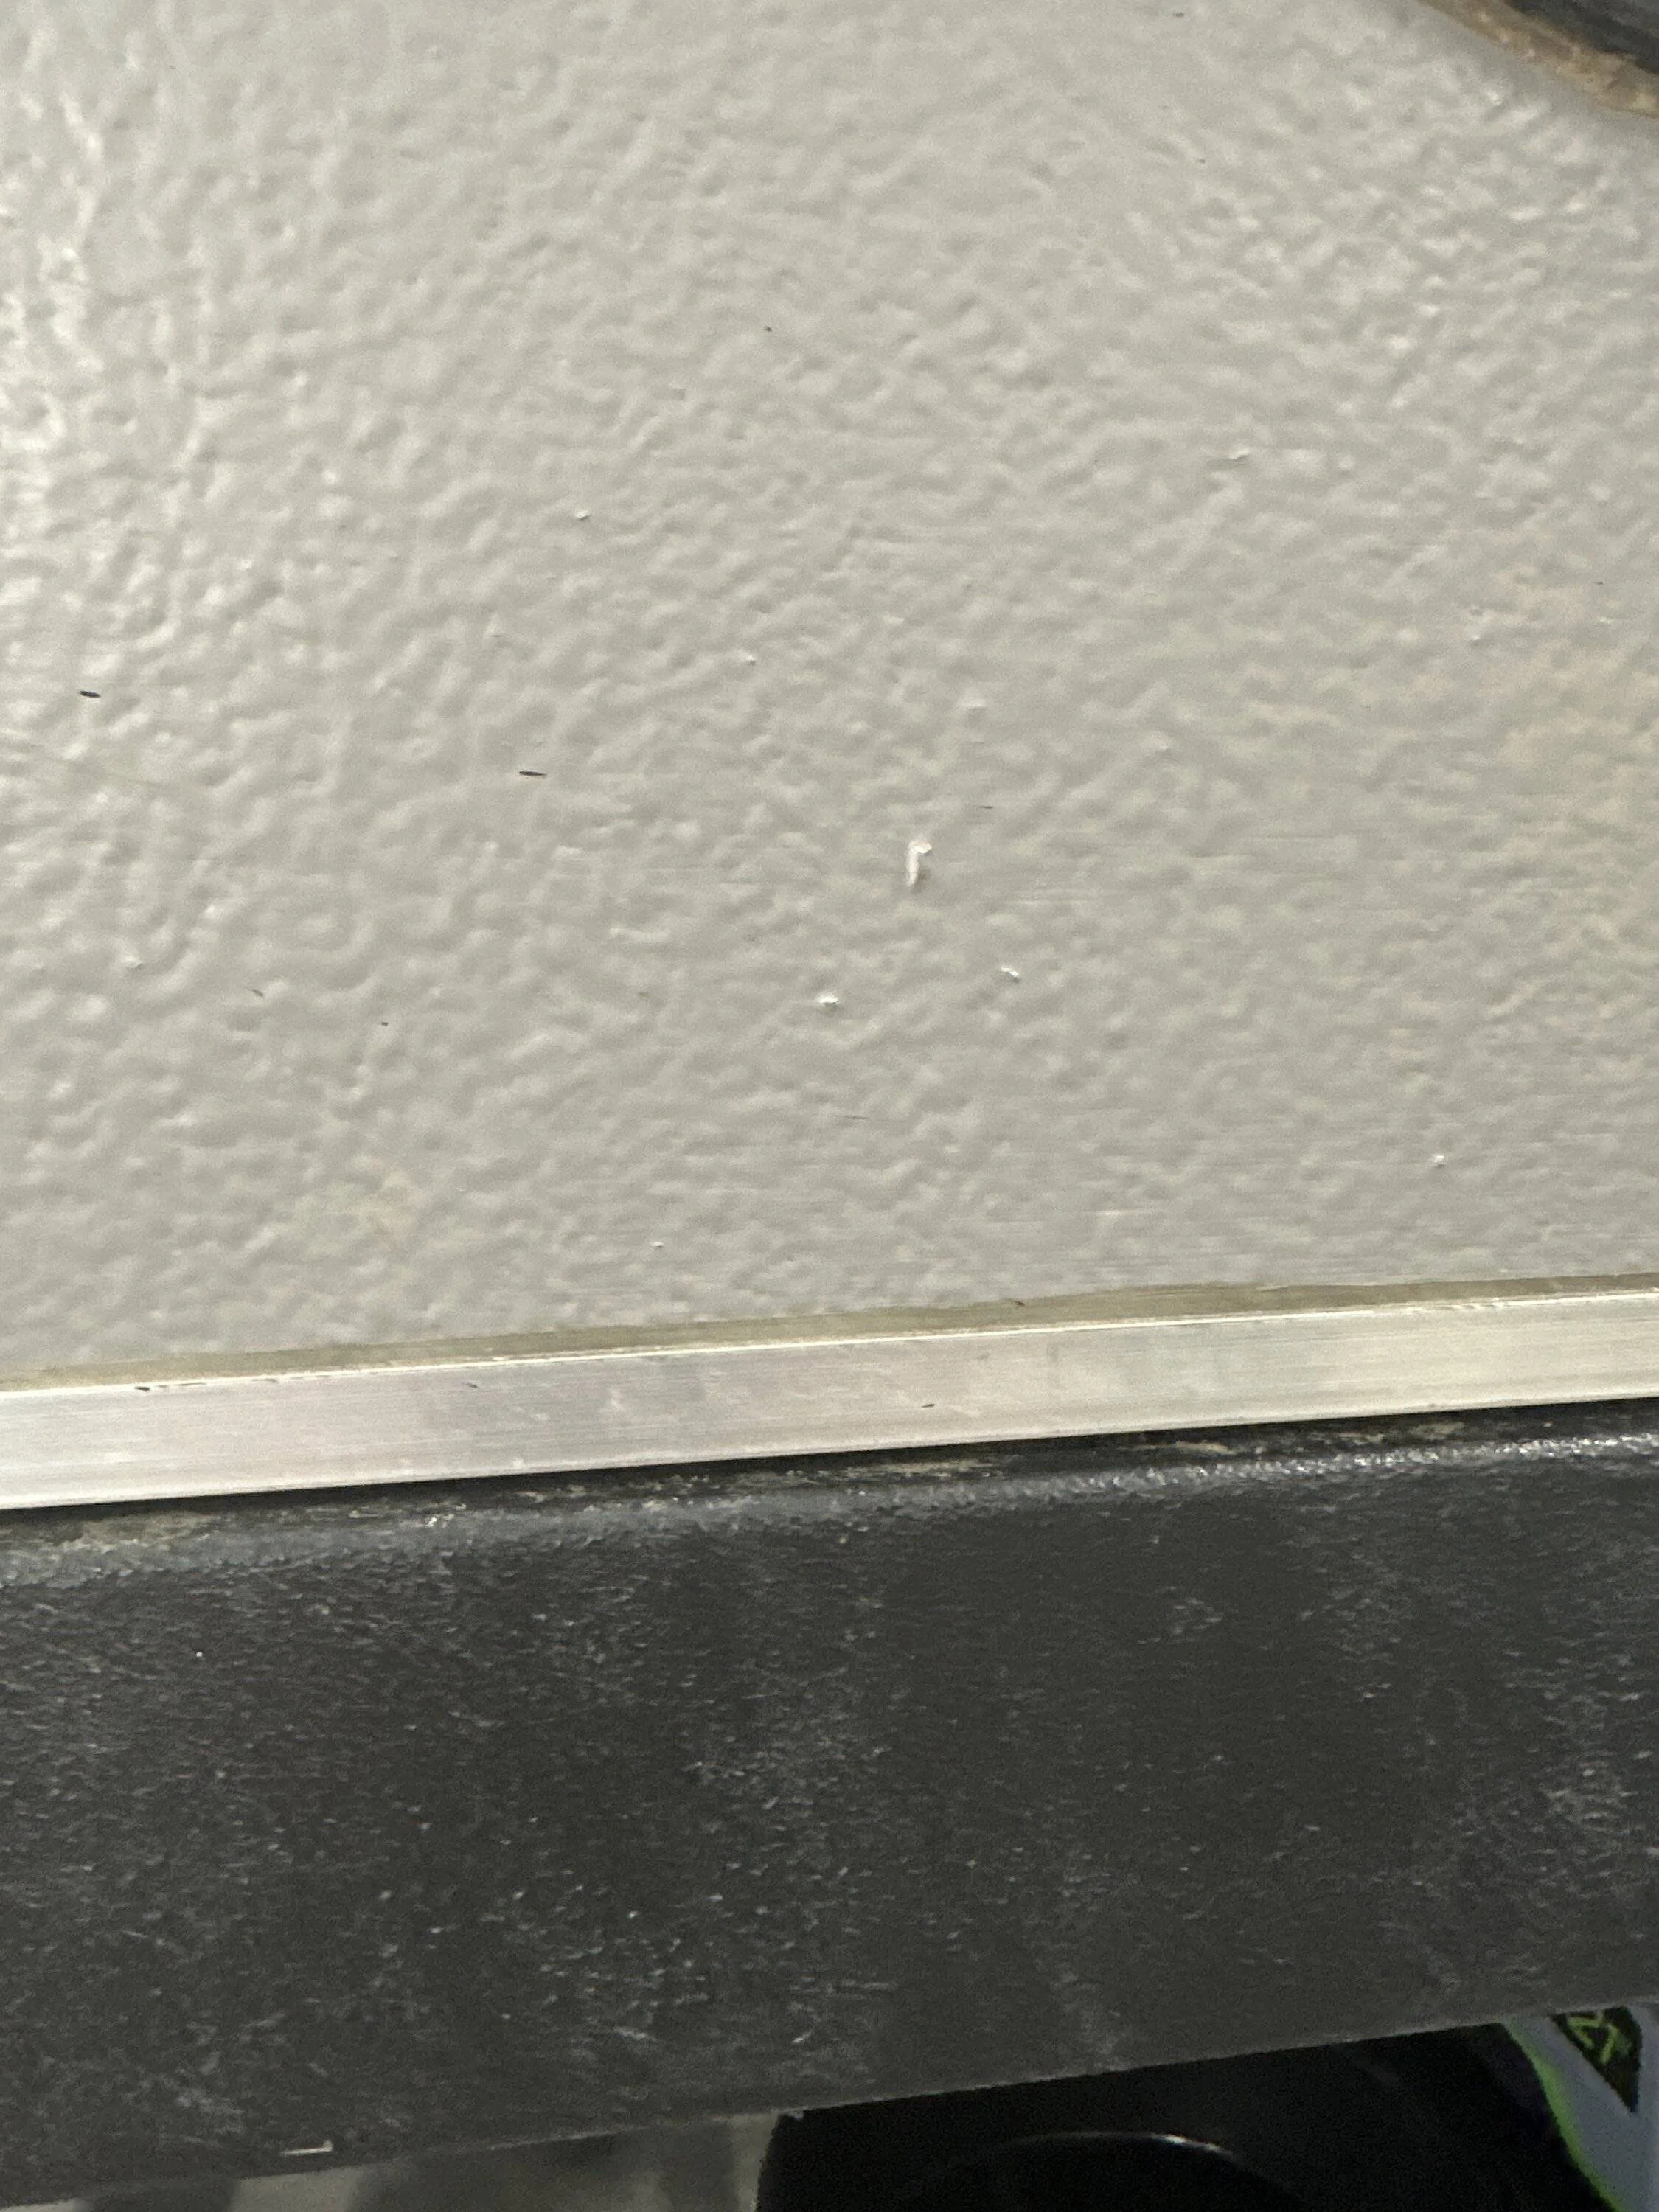
The angle of the photo isn't great - but using a straight edge I was able to determine that the fridge would just squeak by beneath the rear soft top tailgate bar. Once you add in the additional height of a slide system and something to actually support the fridge from beneath..... there's no way it was going to work. But mounting the fridge at an angle would! We'd still need to low profile fridge slide that just barely scrapped by the floor of the deck.
A good friend of mine sent me over an awesome idea for a fridge support made of thin, but strong aluminum. He's been using a company called SendCutSend for various custom parts for a few years, and it was remarkably easy to design and build your own ideas without the need for any ultra-fancy CAD skills. If you can use a 2D design program like Adobe Illustrator - you can pretty much build anything with SendCutSend. They also have their own online design program.
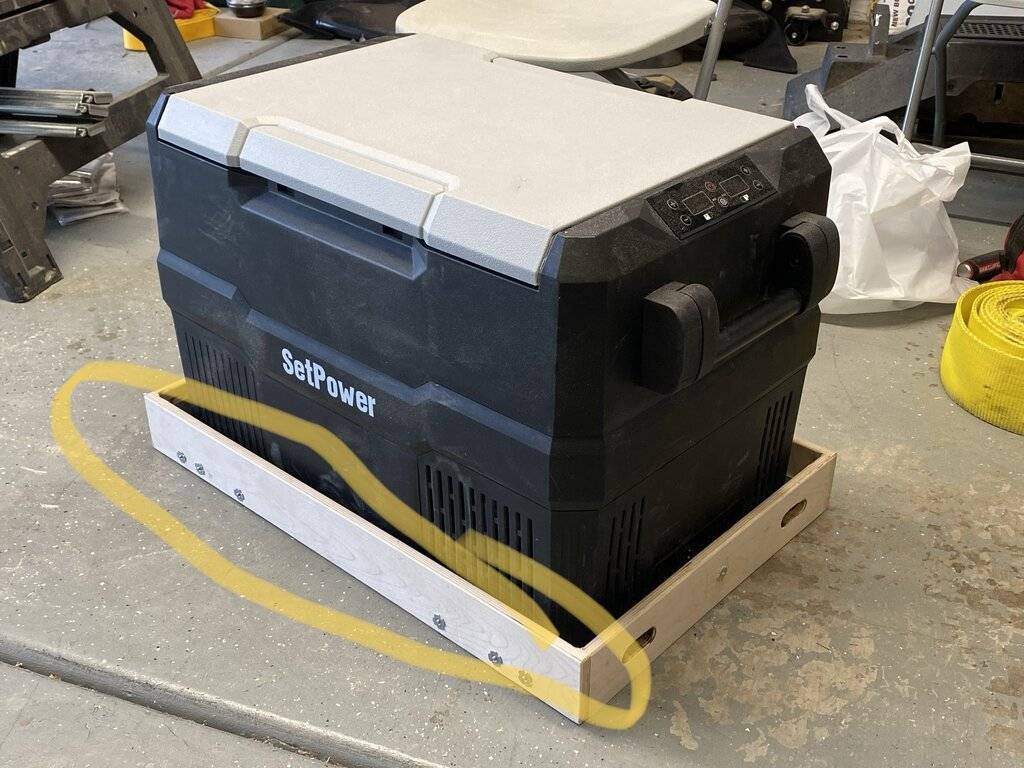
The idea was to build a wooden frame around the outside of the fridge that the slides would connect to - then support the fridge with the aluminum panel. I took the idea a little further and included cut-outs for the feet of the fridge, allowing it to sit as low as absolutely possible, and included some provisions for strapping the fridge down, front and rear without the need for any hardware.
Here are a few shots of the "paper to reality" process:
The bottom of the fridge - note the riser (bumps) and the rubber feet
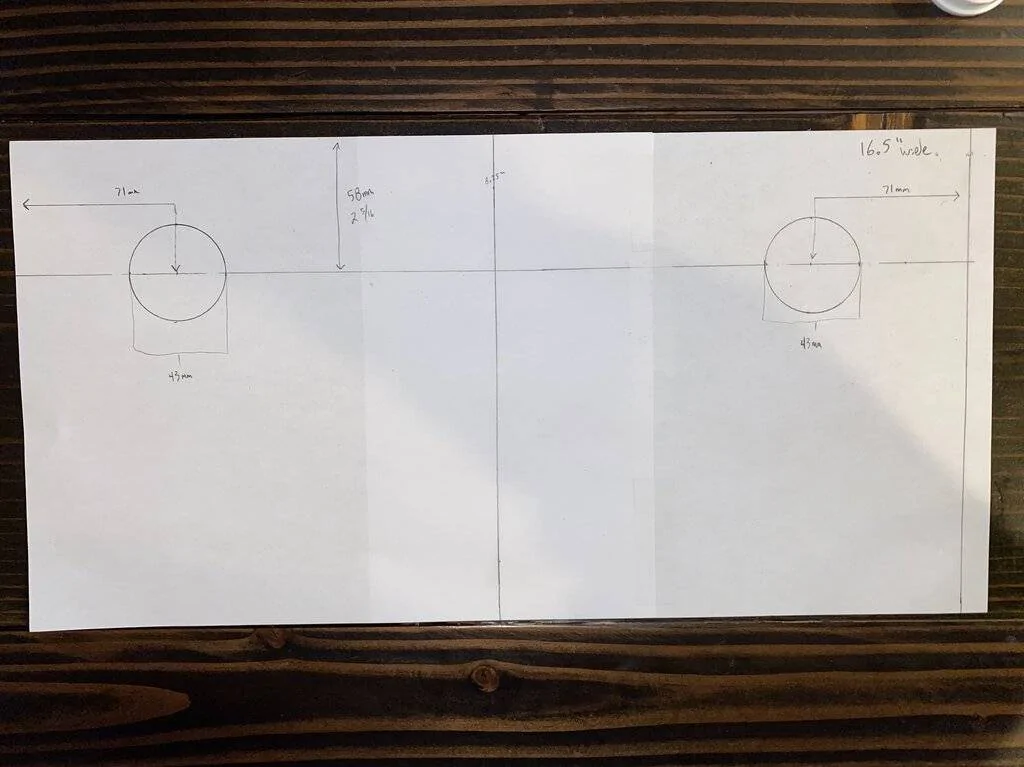
A paper template I put together based on the actual fridge dimensions. I prefer to work in metric (no, I'm not a commie!) since it's a lot more precise and much easer for my brain to do the math (I hate fractional measurements).
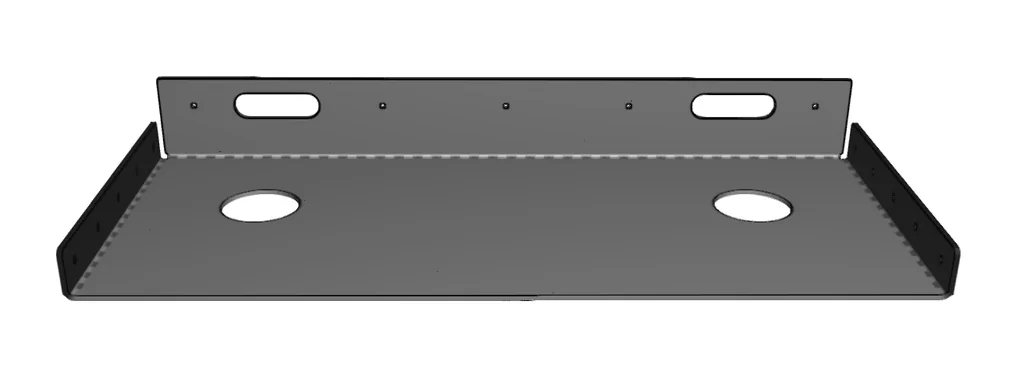
Here's the 3D rendering from SendCutSend of my 2D design. I used Adobe Illustrator. It allows you to note cutouts and bends.
I added in pre-drilled pilot holes around the perimeter of the panel to make installing a little easier. Note the cut-outs for the fridge straps and the feet.

Here are the parts, fresh from SendCutSend. The total process was pretty simple and they do a great job of keeping you informed as to where in the process your parts are - from cutting to deburring to bending to shipping. I believe total turnaround time was 7 days for my parts.

Once the parts were in, it was time to build!
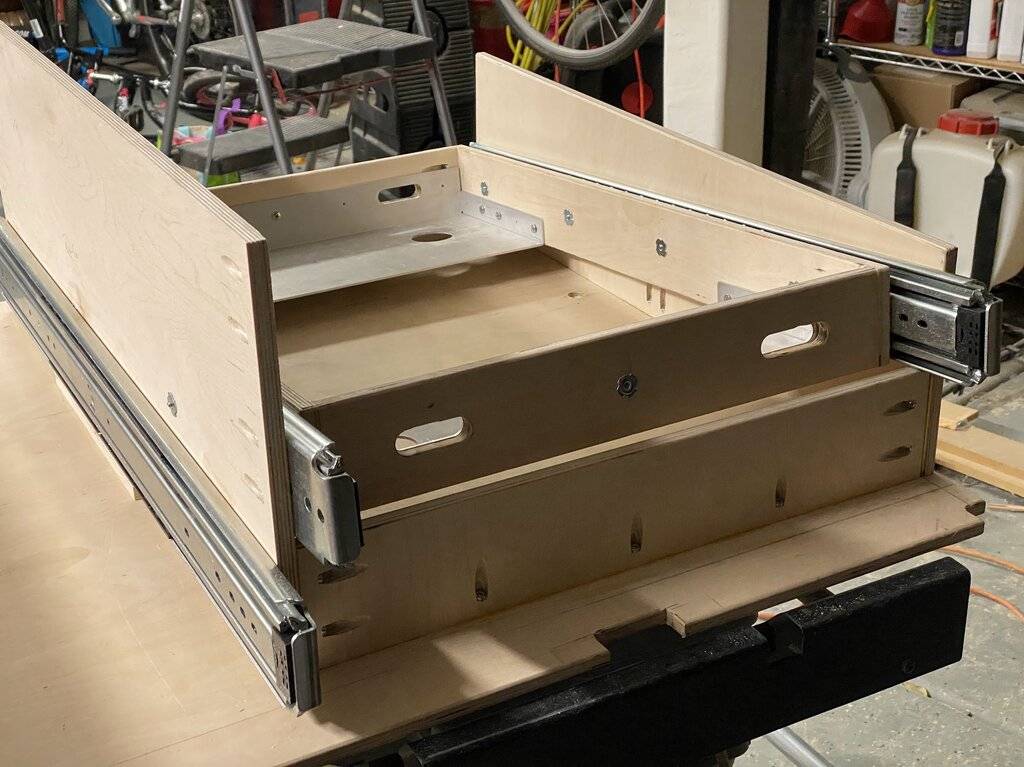
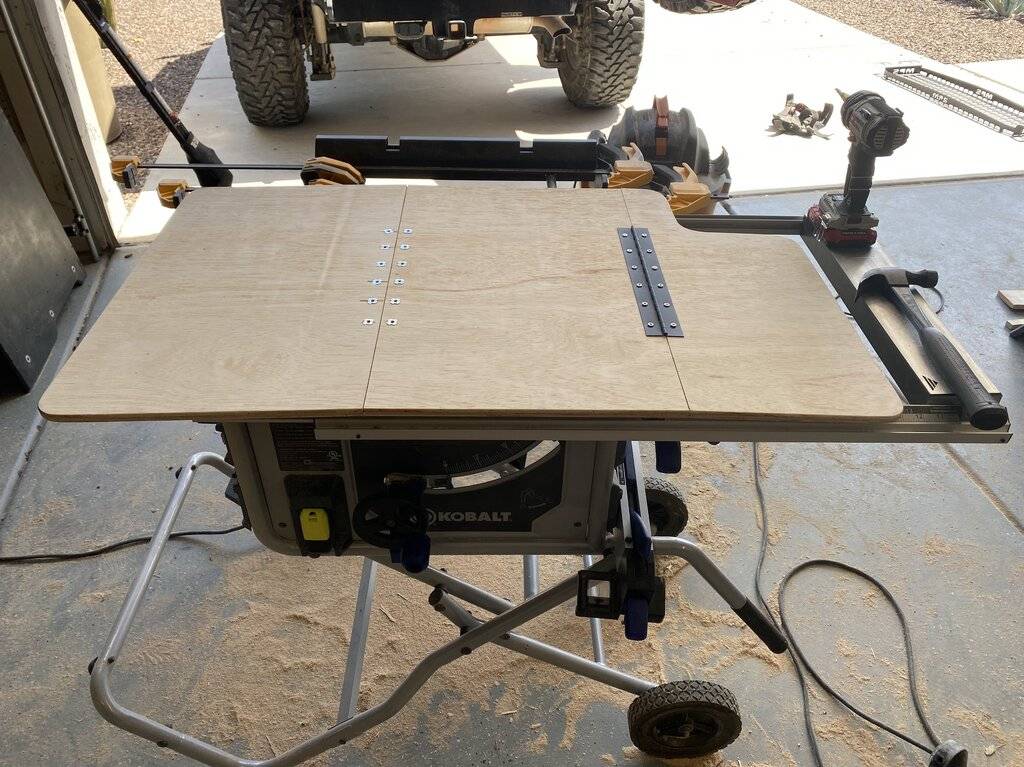
First up was a simple "box frame" build with pocket holes and screws. I use Kreg products for almost all of my woodworking projects, from tables to desks to Jeep storage systems. ? All of the pockethole screws are Kreg 1/2" stainless steel.
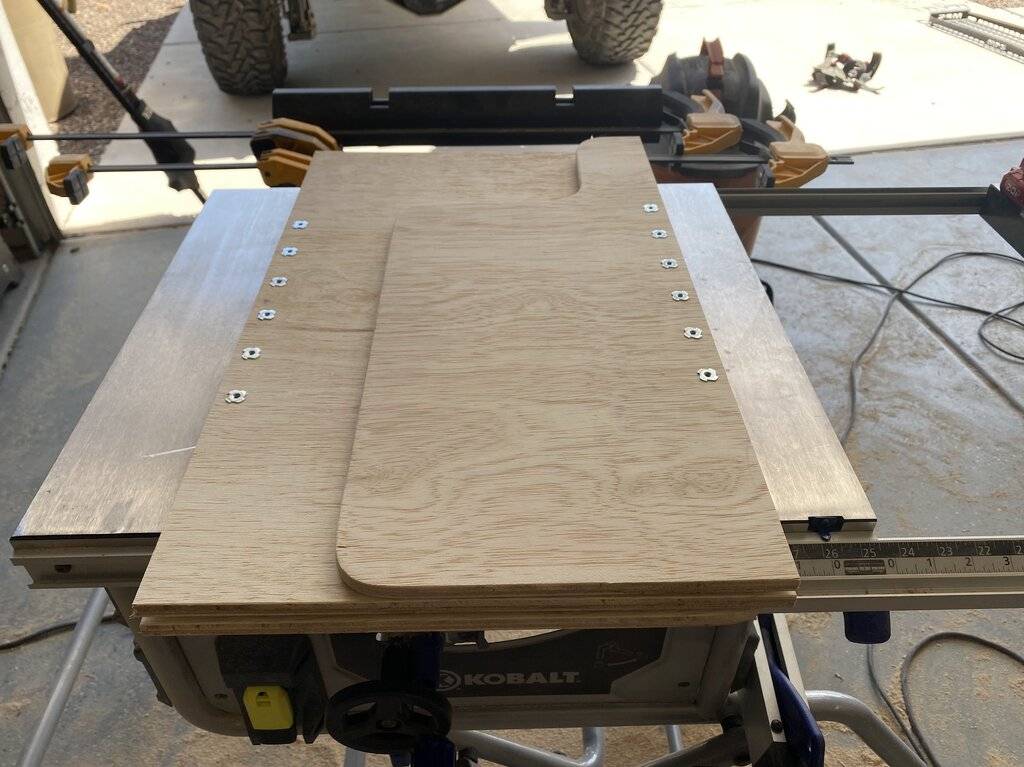
Here's the frame, glued and screwed with the tray panel in for a quick test fit. I used the tray itself as a template to route out the holes for the tie down straps fore and aft.
Used a countersink bit to help sink those #10 screws a little deeper into the tray
Zinc-plated t-nuts and #10 screws are used liberally throughout this project. It makes for a stronger build and is super easy to disassemble and reassemble as you work through the project. I started off with 3/4" screws, but they proved to be a little too long. 1/2" was a little too short. 5/8" proved to be juuuuuuust right.

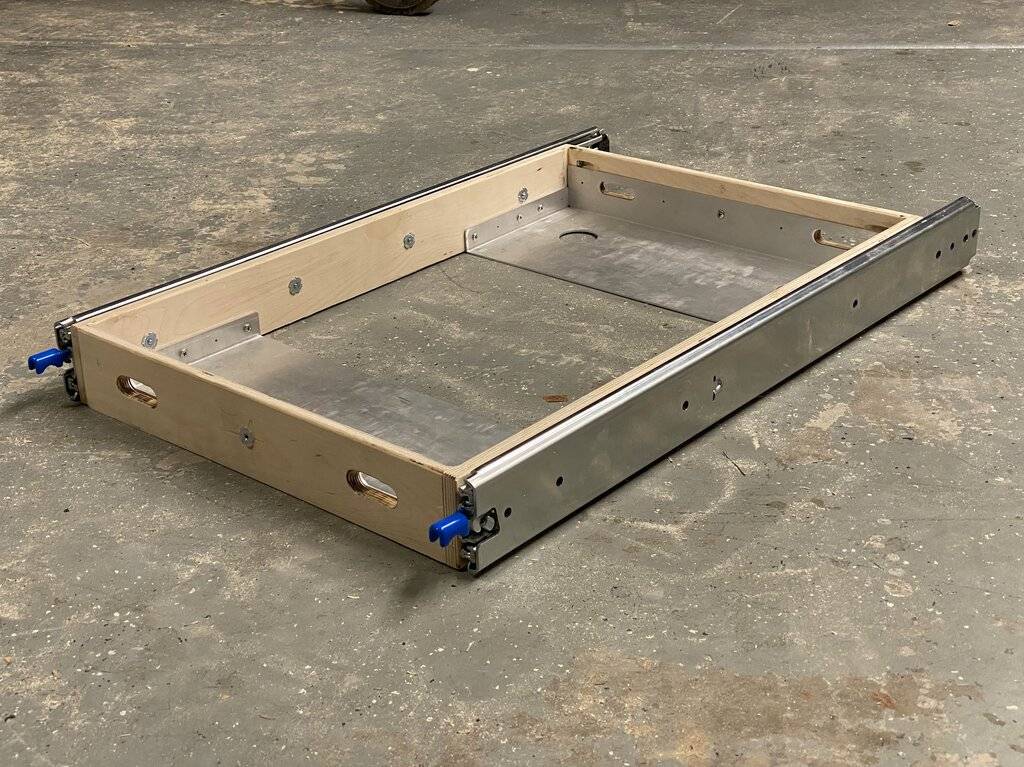
Next up was to add on the slides. I measured and marked the centerline of the frame, and then bumped it up a few millimeters to allow for the frame/slide to sit as low as absolutely possible.
Again, t-nuts make this process a snap and stress free.
I'm using Ryadon B3600 500lbs HD drawer slides. They lock in, out and at the half-way mark. They are not "take apart", so that makes them a little tricky to install. You need to push the slides forwards and backwards to access the mounting holes on both the drawer-side and mount-side. They slam latch upon close, which is a nice touch.
Stay Tuned for More...
Over 5 years of ownership (I'm an early adopter with a 2018), constant access into the rear of the Jeep has taken its toll on the stitching on my premium twill rear soft top panel, with tears and separations beginning to form. The fact it's held up this long with near daily "un-snappings" is a testament to the design and material quality.
My 2nd challenge was the selection of a "medium" sized fridge - A 45qt SetPower RV45 - which has proven to be a fine fridge with good capacity and great features, including dual-zone capability. This unit stands at 17.3" tall, which just clears the bottom of the soft top retention bar when sitting flat on the load floor, but leaves little room for the necessary vertical height it would sit at once on a slide platform.
With a lack of commercial solutions on the market for the soft top gang, this called for a DIY solution. I had previously built a drawer and deck system for my JL, so this was my second shot at building a custom solution for the rear. With the new fridge, I've been simply strapping it down into the rear of the Jeep on top of my previous deck and that's been just fine - until now.
Up front, here is the final result (before bed liner, paint & poly).

So - its time for a new building project!
Project Goals:
- Access the fridge without the need to unbutton the top every time I want to grab a drink
- Full extension slides that will extend the fridge out far enough to clear the top and open the lid
- Retain a 1/2 width deck that blends into the contours of the trunk
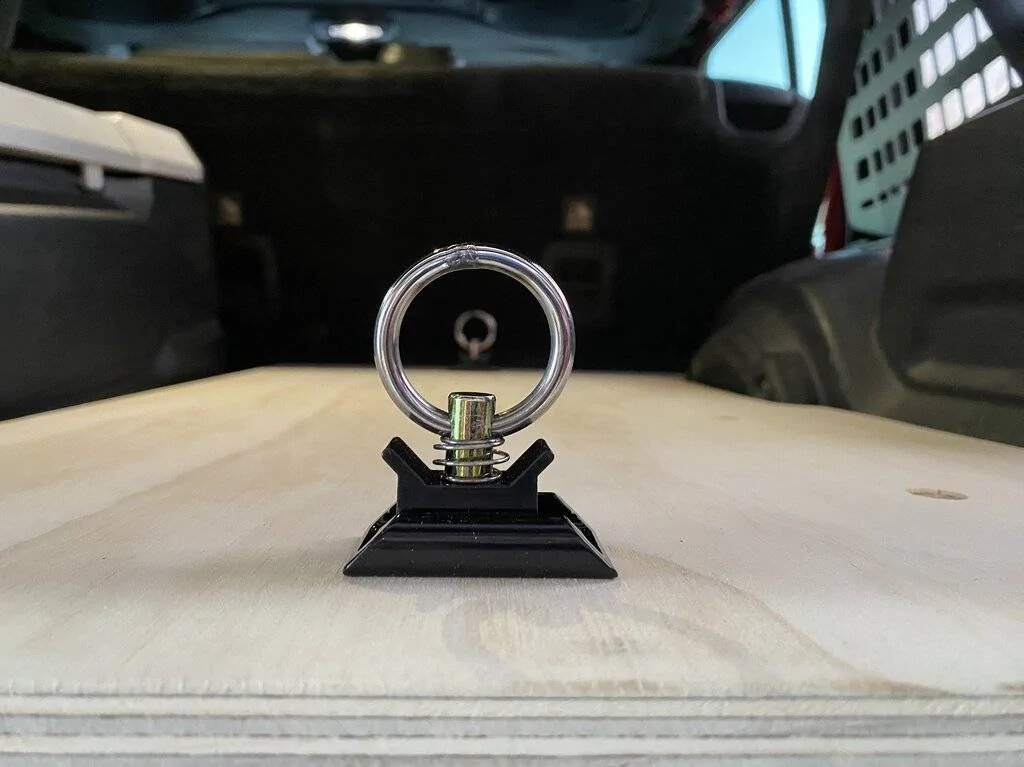
- Tie downs on the top of the deck for additional gear boxes, Gerry cans, etc....
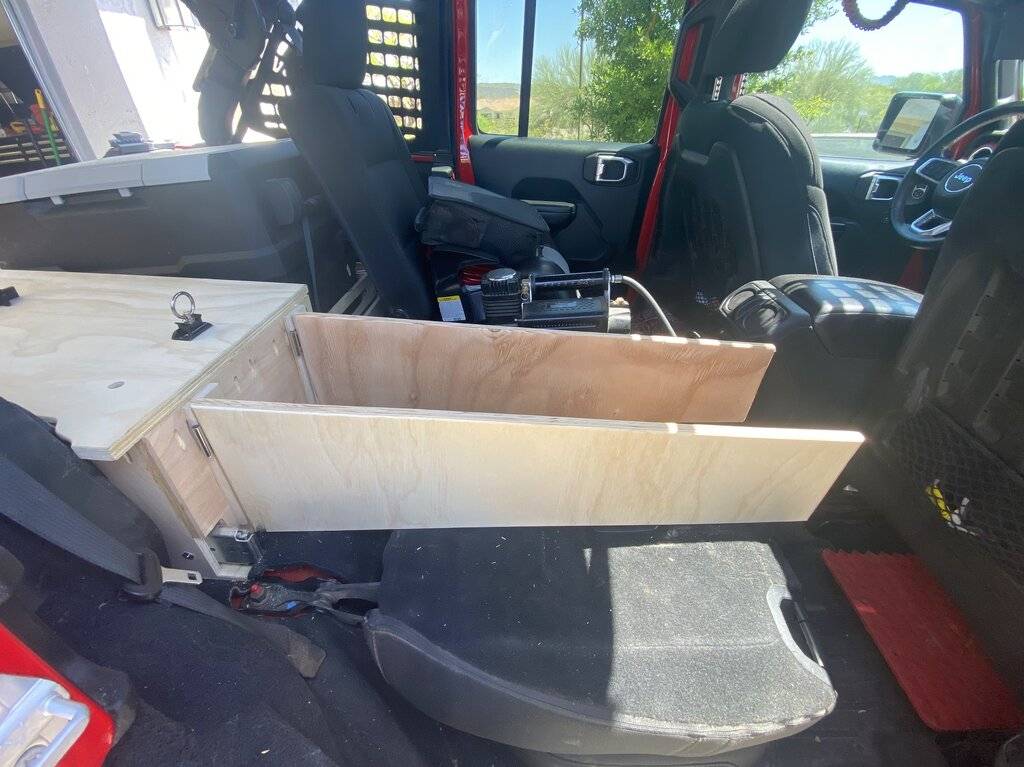
- Robust drawer that will handle the weight of my trail tools and recovery gear
- Bedliner/sealant incase I get caught in the rain with the top off
- A rebuild of my sleeping platform
Materials include:
- 1/2 birch plywood from Woodworkers Source (there are a thousand benefits from working with good quality, multi-ply plywood)
- Beadboard (used to cut as a template for mapping the Jeeps contours)
- 500lb lock in/lock out sliders
- Pocket screws
- Nails
- Wood glue
- Kilz primer paint
- Paint/bedliner
- Varathane Jet Black stain
Tools used:
- Table saw
- Jig saw
- Router
- Circular saw
- Impact Driver
- Nail gun
- Clamps
- Kreg jig (pocket hole jig)
- Mouse sander
- Speed square
- Contour gauge
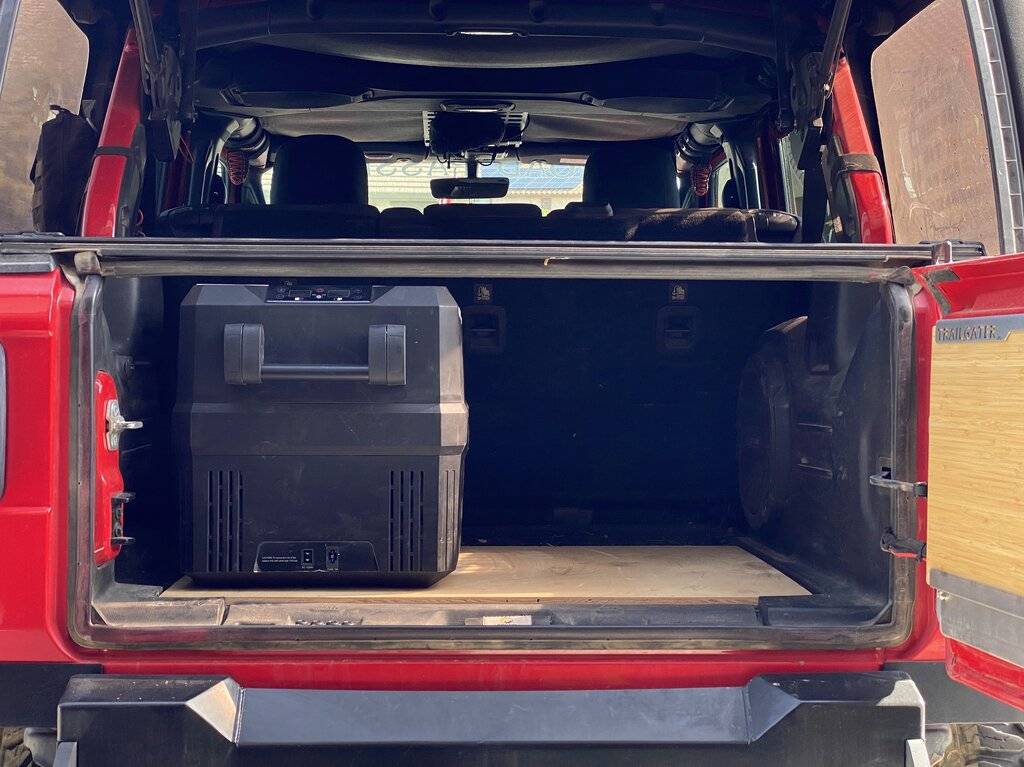
The angle of the photo isn't great - but using a straight edge I was able to determine that the fridge would just squeak by beneath the rear soft top tailgate bar. Once you add in the additional height of a slide system and something to actually support the fridge from beneath..... there's no way it was going to work. But mounting the fridge at an angle would! We'd still need to low profile fridge slide that just barely scrapped by the floor of the deck.
A good friend of mine sent me over an awesome idea for a fridge support made of thin, but strong aluminum. He's been using a company called SendCutSend for various custom parts for a few years, and it was remarkably easy to design and build your own ideas without the need for any ultra-fancy CAD skills. If you can use a 2D design program like Adobe Illustrator - you can pretty much build anything with SendCutSend. They also have their own online design program.
The idea was to build a wooden frame around the outside of the fridge that the slides would connect to - then support the fridge with the aluminum panel. I took the idea a little further and included cut-outs for the feet of the fridge, allowing it to sit as low as absolutely possible, and included some provisions for strapping the fridge down, front and rear without the need for any hardware.
Here are a few shots of the "paper to reality" process:
The bottom of the fridge - note the riser (bumps) and the rubber feet

A paper template I put together based on the actual fridge dimensions. I prefer to work in metric (no, I'm not a commie!) since it's a lot more precise and much easer for my brain to do the math (I hate fractional measurements).

Here's the 3D rendering from SendCutSend of my 2D design. I used Adobe Illustrator. It allows you to note cutouts and bends.
I added in pre-drilled pilot holes around the perimeter of the panel to make installing a little easier. Note the cut-outs for the fridge straps and the feet.
Here are the parts, fresh from SendCutSend. The total process was pretty simple and they do a great job of keeping you informed as to where in the process your parts are - from cutting to deburring to bending to shipping. I believe total turnaround time was 7 days for my parts.


Once the parts were in, it was time to build!
First up was a simple "box frame" build with pocket holes and screws. I use Kreg products for almost all of my woodworking projects, from tables to desks to Jeep storage systems. ? All of the pockethole screws are Kreg 1/2" stainless steel.
Here's the frame, glued and screwed with the tray panel in for a quick test fit. I used the tray itself as a template to route out the holes for the tie down straps fore and aft.


Used a countersink bit to help sink those #10 screws a little deeper into the tray

Zinc-plated t-nuts and #10 screws are used liberally throughout this project. It makes for a stronger build and is super easy to disassemble and reassemble as you work through the project. I started off with 3/4" screws, but they proved to be a little too long. 1/2" was a little too short. 5/8" proved to be juuuuuuust right.
Next up was to add on the slides. I measured and marked the centerline of the frame, and then bumped it up a few millimeters to allow for the frame/slide to sit as low as absolutely possible.
Again, t-nuts make this process a snap and stress free.

I'm using Ryadon B3600 500lbs HD drawer slides. They lock in, out and at the half-way mark. They are not "take apart", so that makes them a little tricky to install. You need to push the slides forwards and backwards to access the mounting holes on both the drawer-side and mount-side. They slam latch upon close, which is a nice touch.
Stay Tuned for More...
Sponsored


")
 I did an imitation GooseGear platform w/60% seat delete, but am always dealing with things sliding around in the back. Looks like I'll be adding some sliders and compartments in the near future. Your article will greatly assist me with parts and materials, and of course the concept! DIY is always the way to go for me... I like the "originality" and the pride of having done it myself vs bought it off a shelf. And sometimes it ends up being cheaper!