Sponsored

ROAM MK3 Rock Rail Installation

tts42572

Well-Known Member
Joined
Jul 27, 2020
Threads
12
Messages
209
Reaction score
164
Location
NY
Vehicle(s)
2021 Rubicon
Thanks for the reply.

Appreciate the offer to help but I'm in Upstate NY outside of Buffalo. So that would be a pretty big trek for you lol!

I haven't even taken delivery of my 2021 Rubi yet as it's on order and due to arrive in a couple weeks. I'm just planning ahead :) I can't bring myself to order anything until I actually get the car though. Would be really silly to order them and have something happen that messes up my order or something.

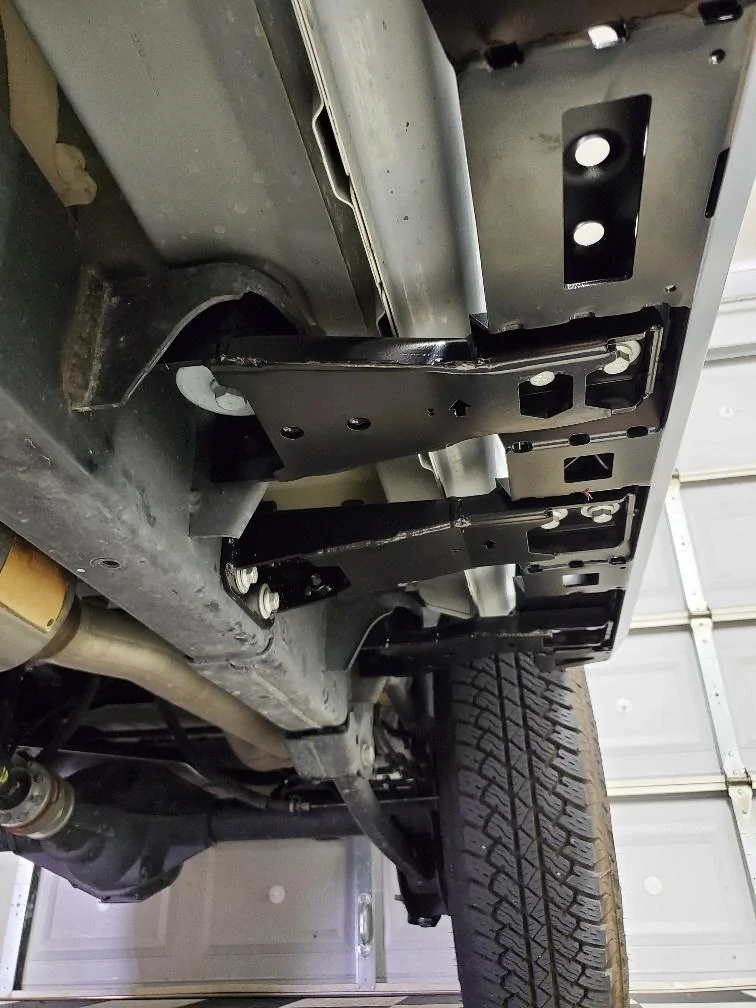
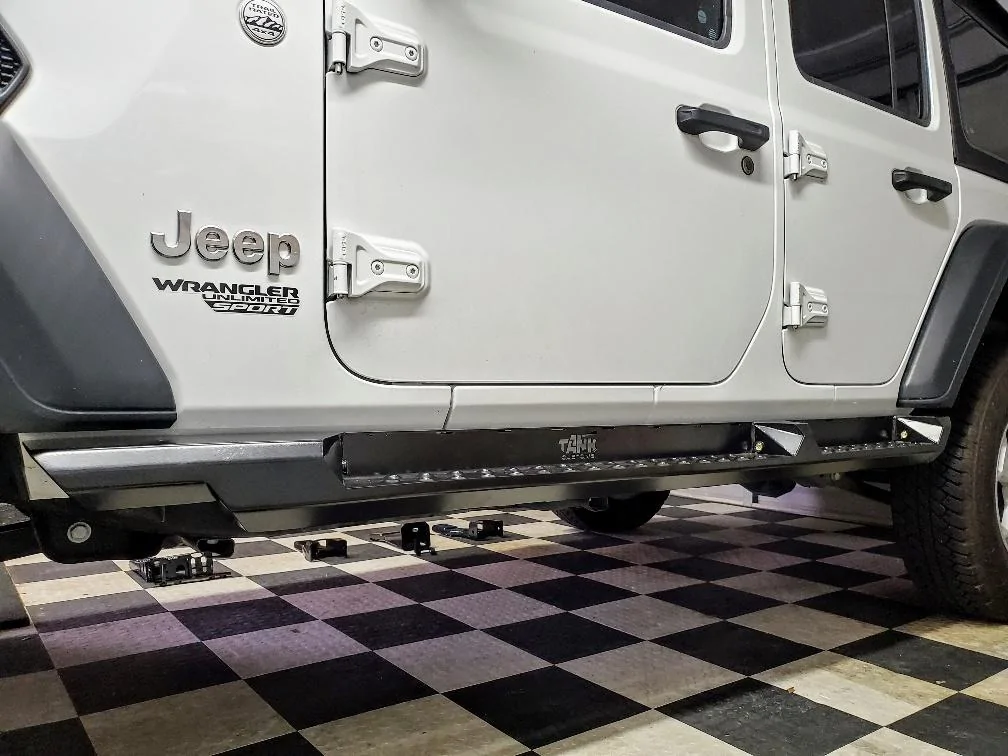
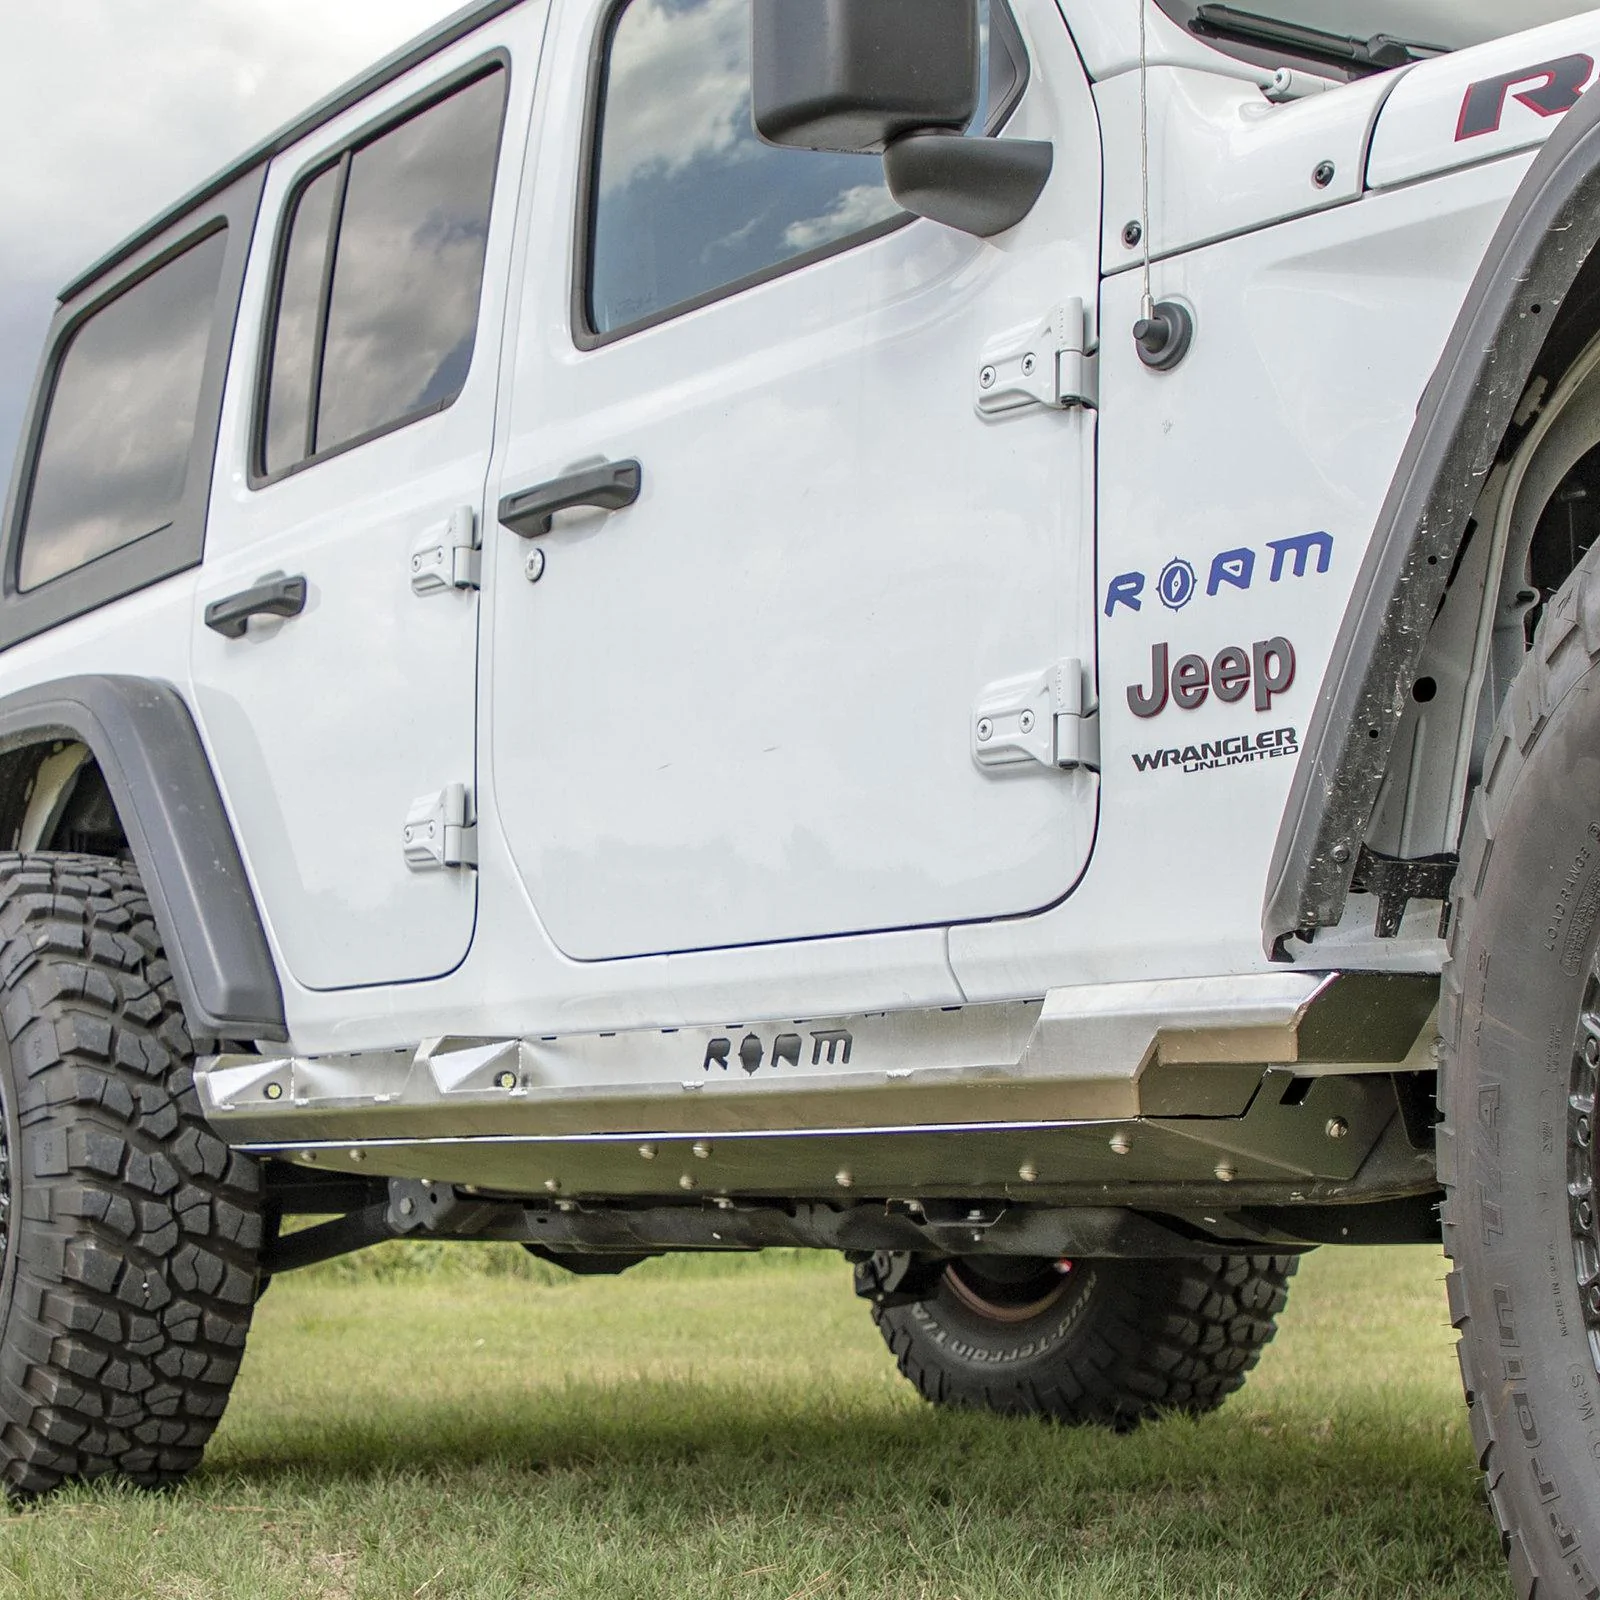
I'd probably lean toward the frame mounted rails if I'm getting these. Would likely need the extra durability with the salt and Upstate NY winters.

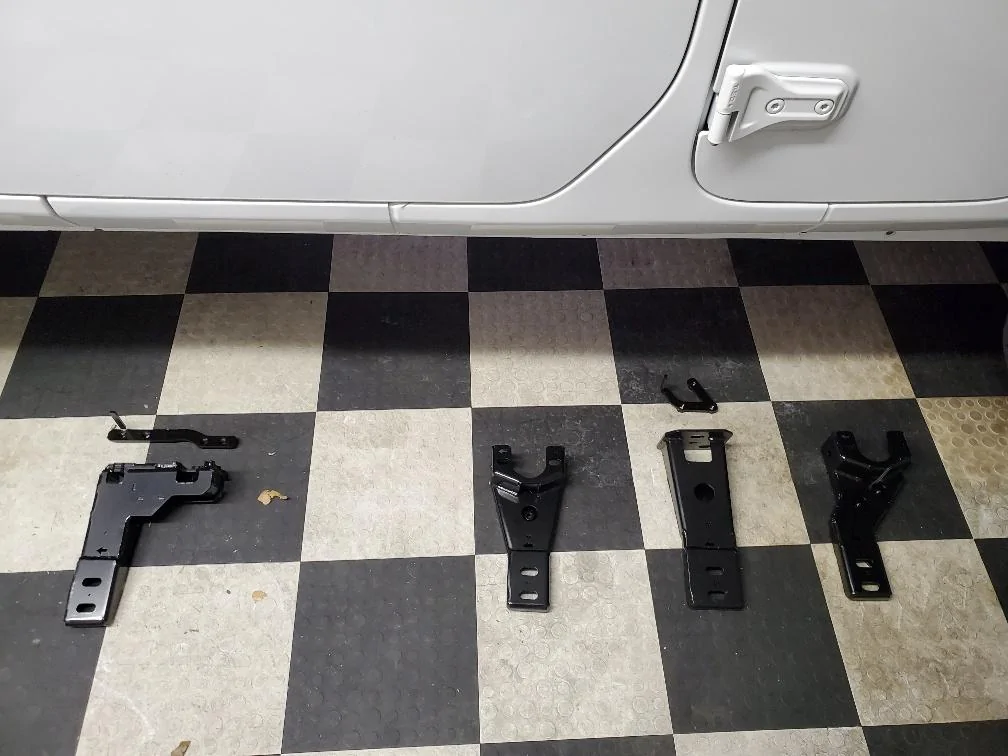
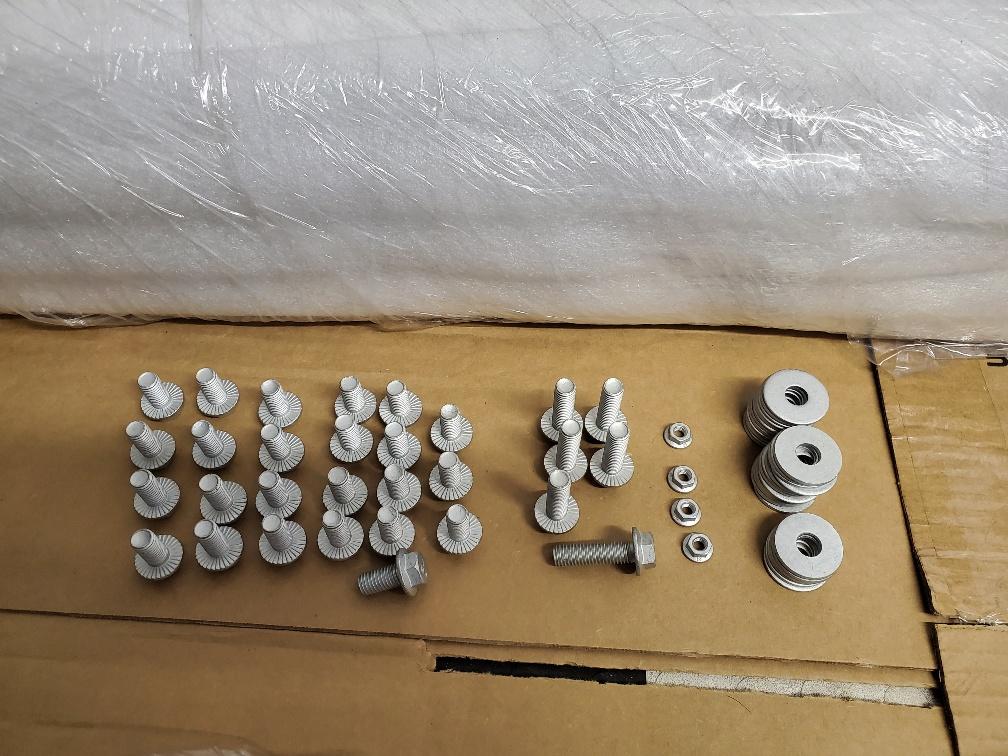
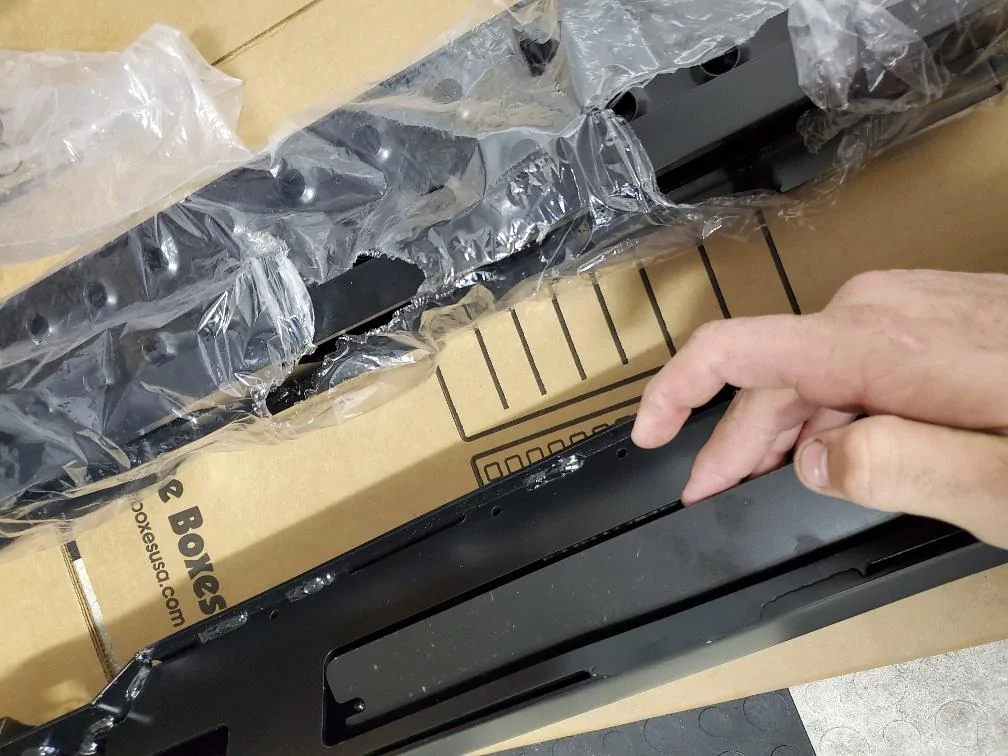
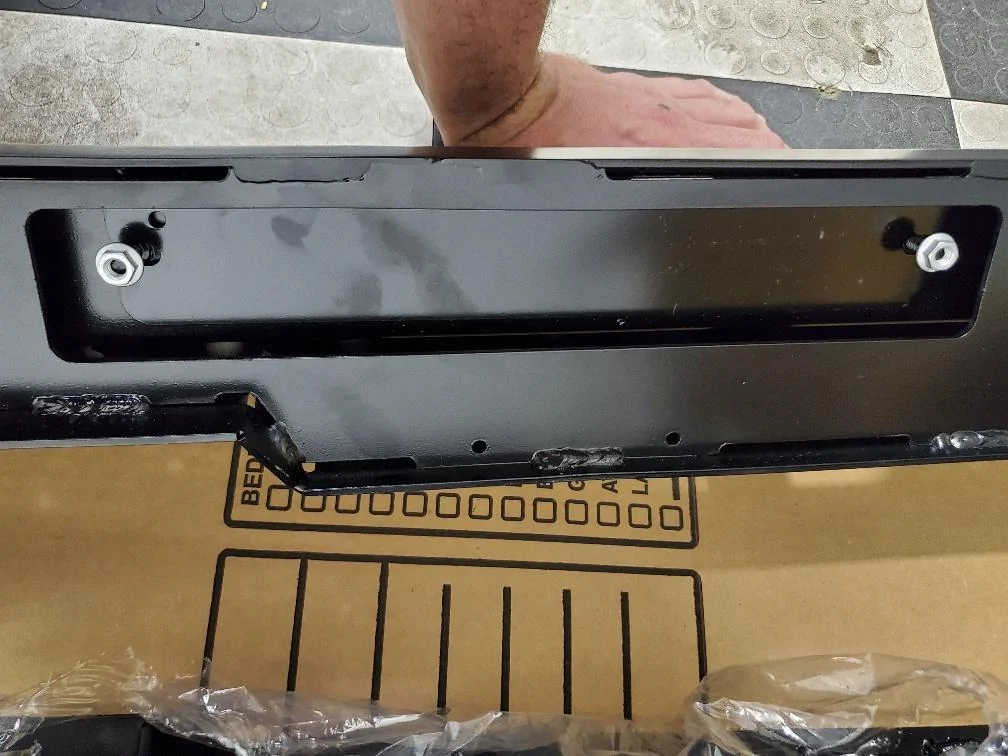
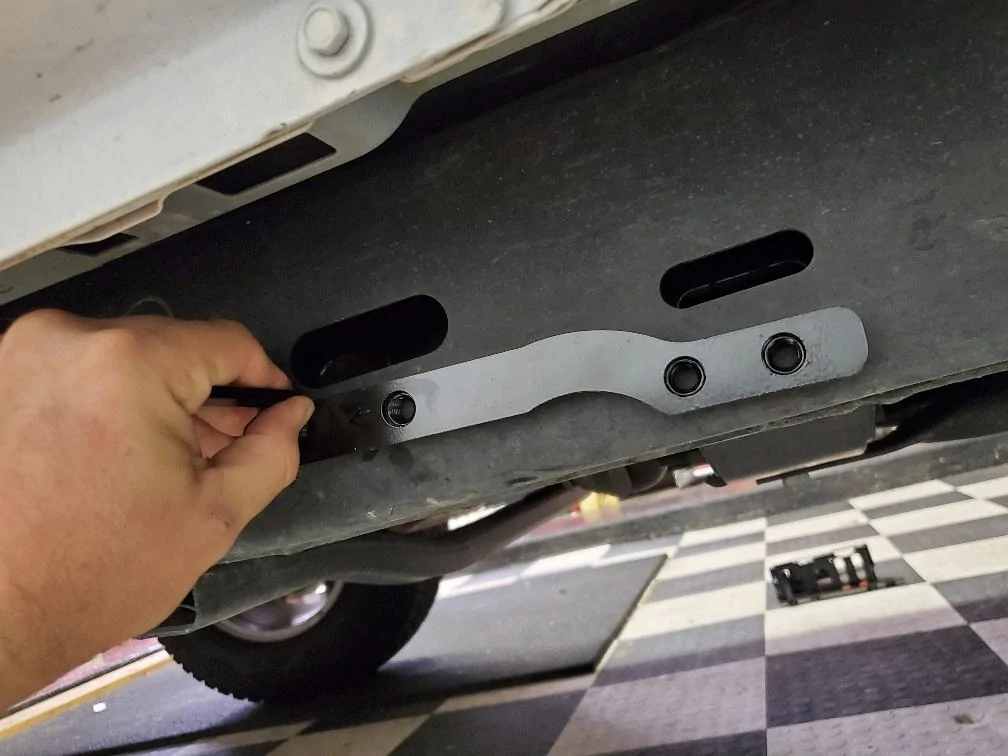
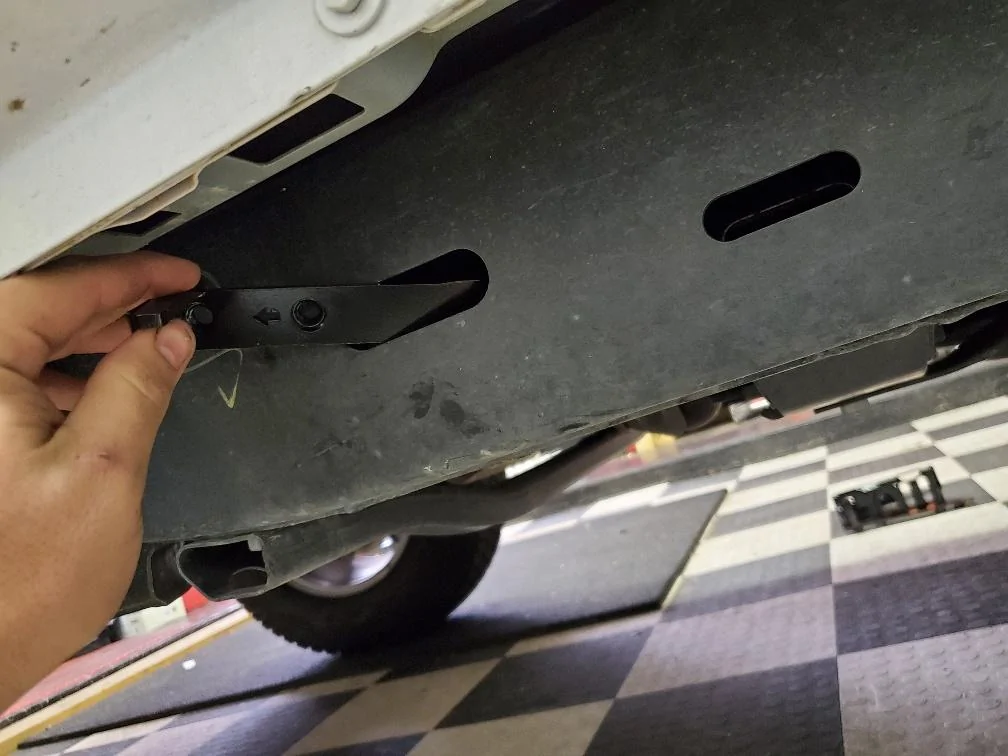
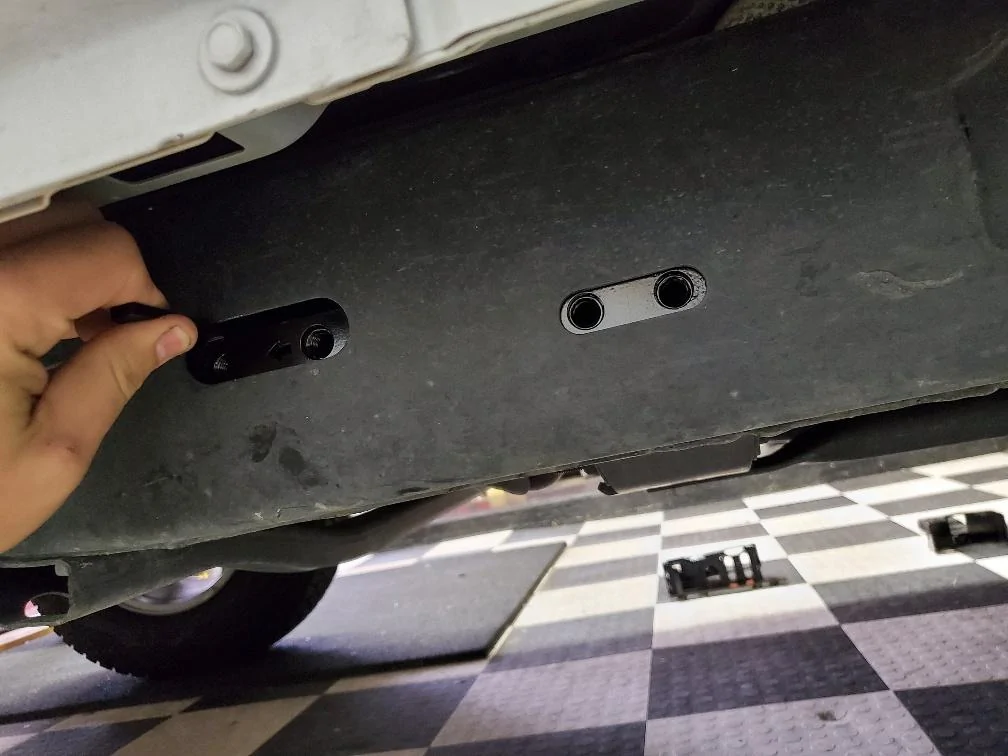
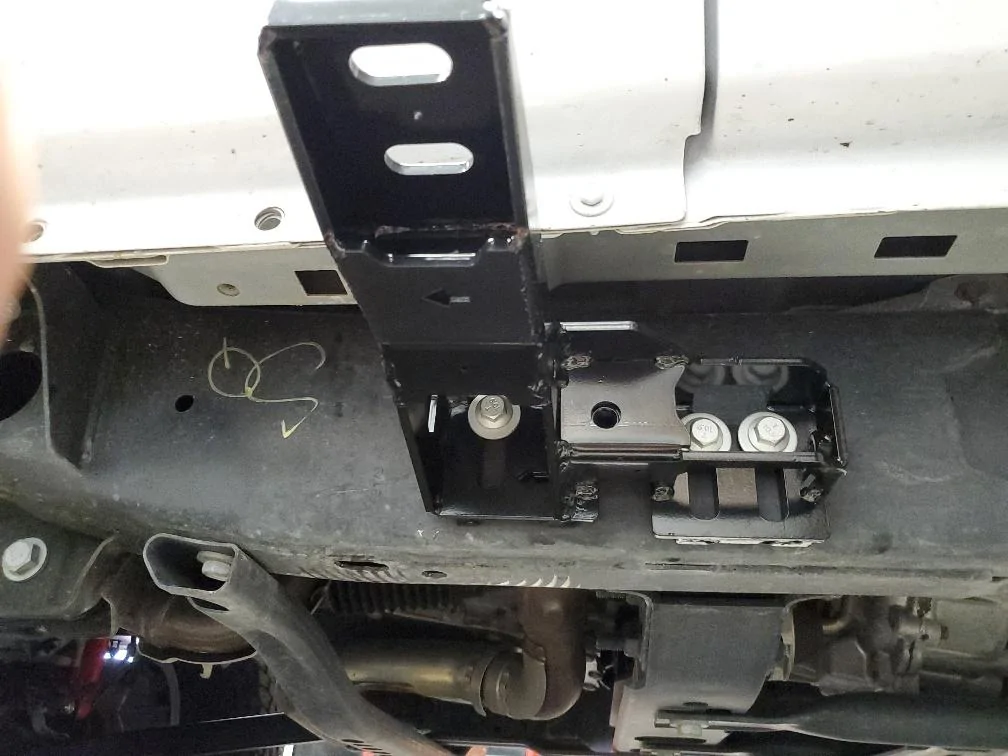
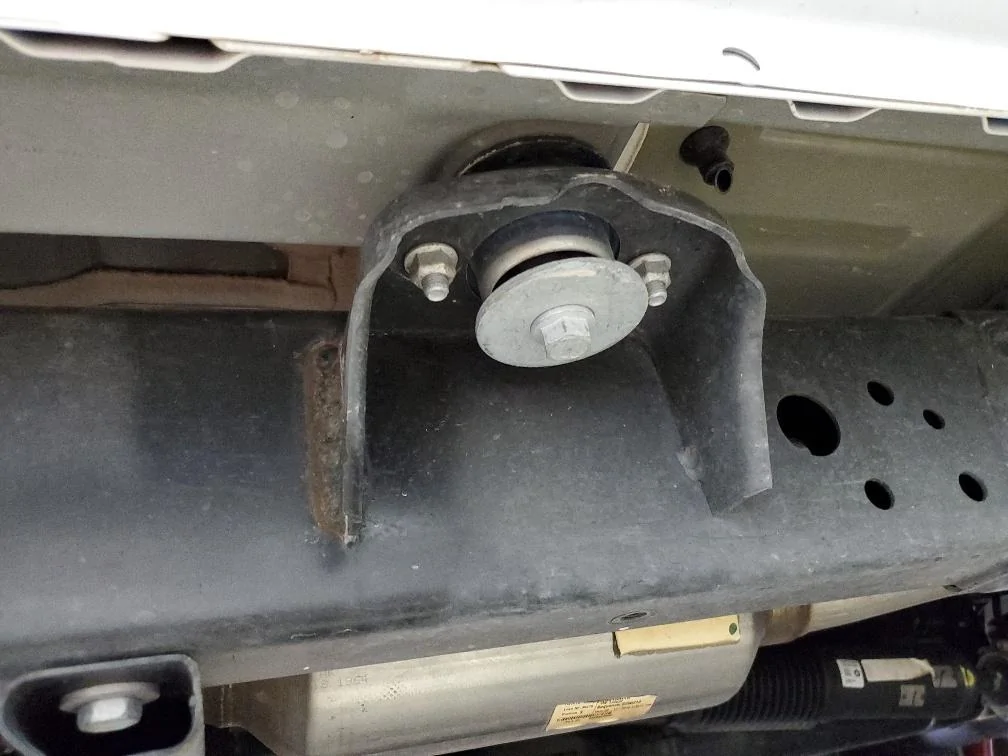
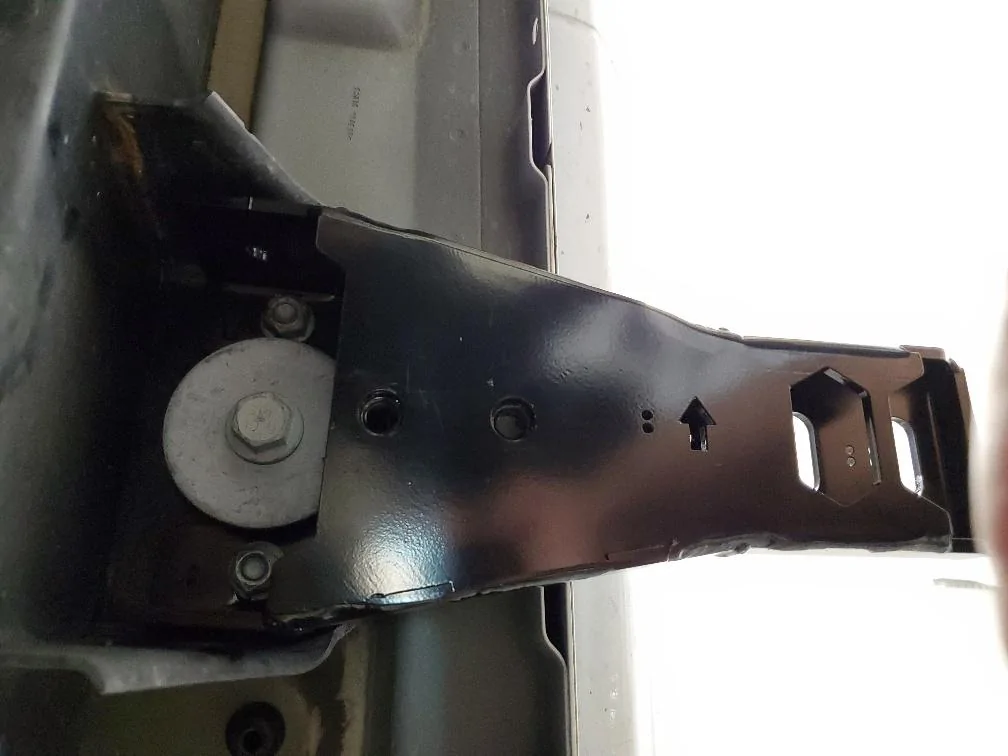
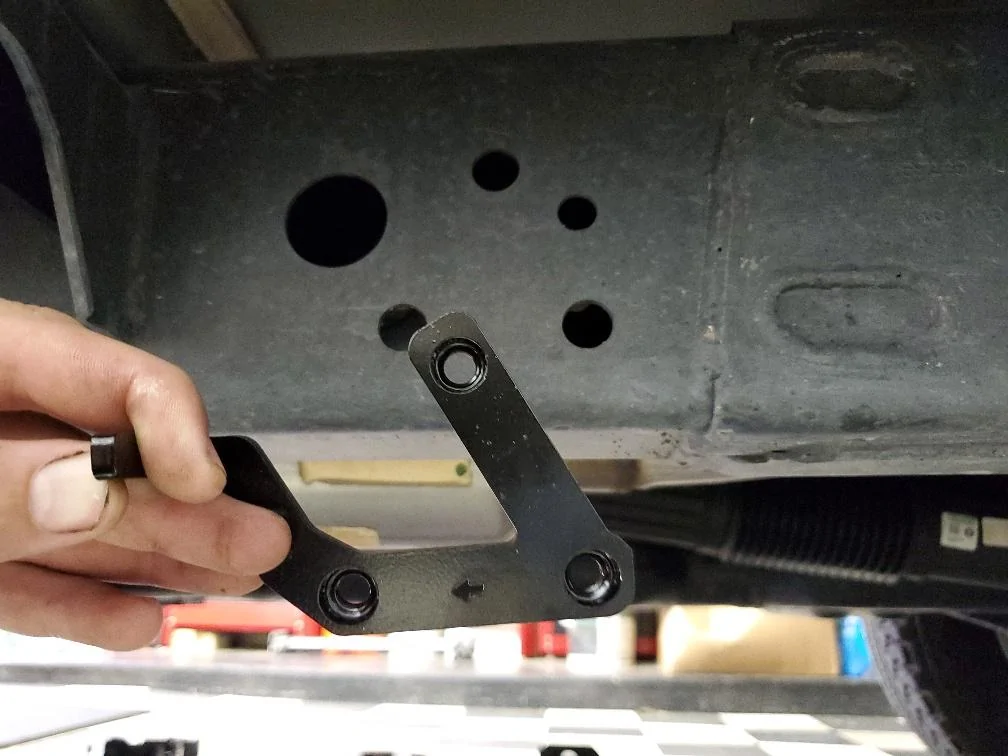
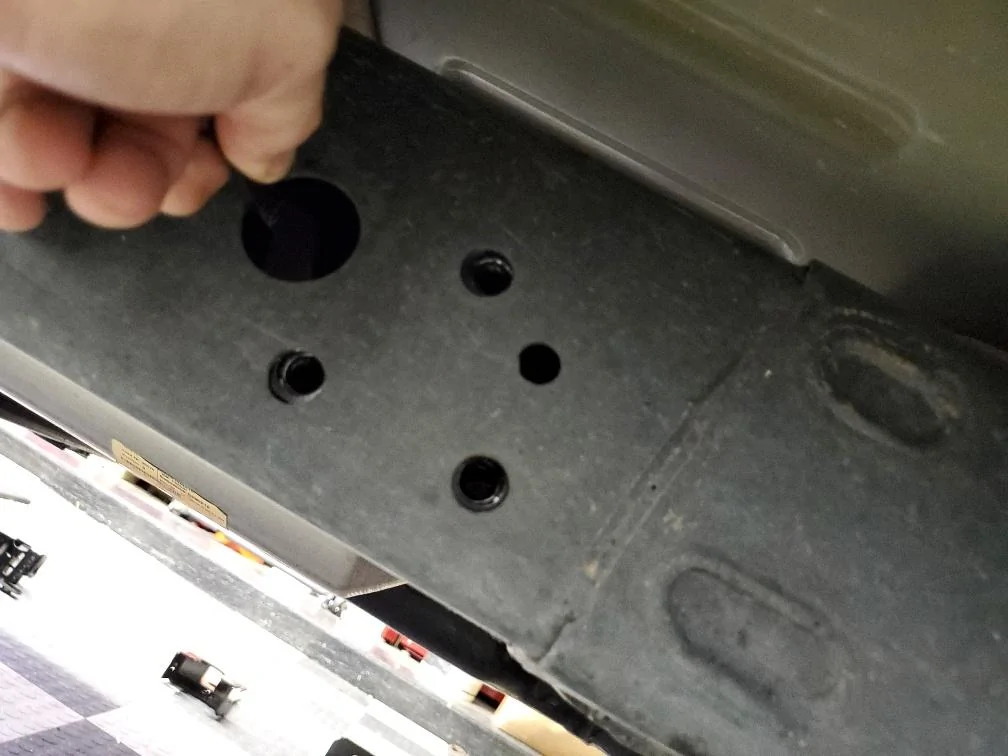
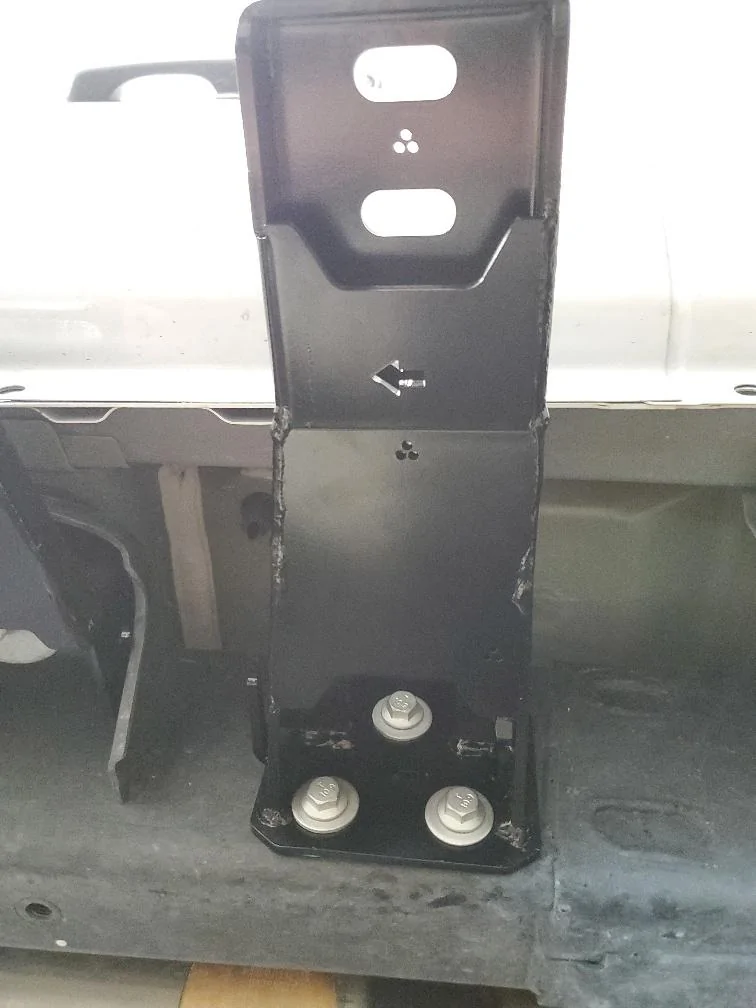
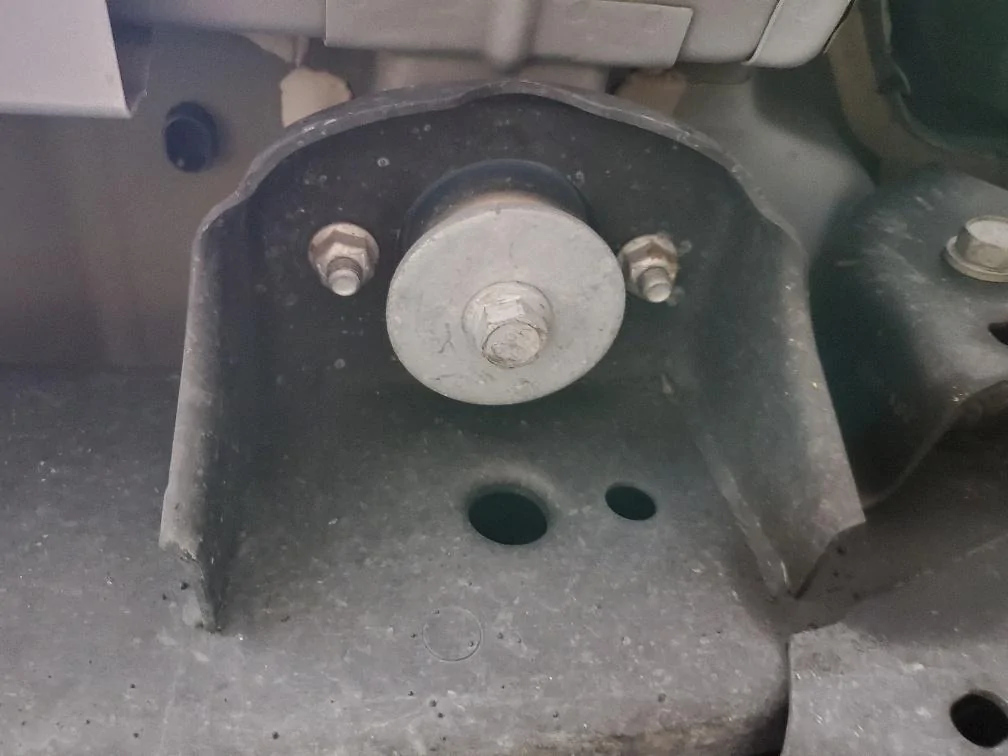
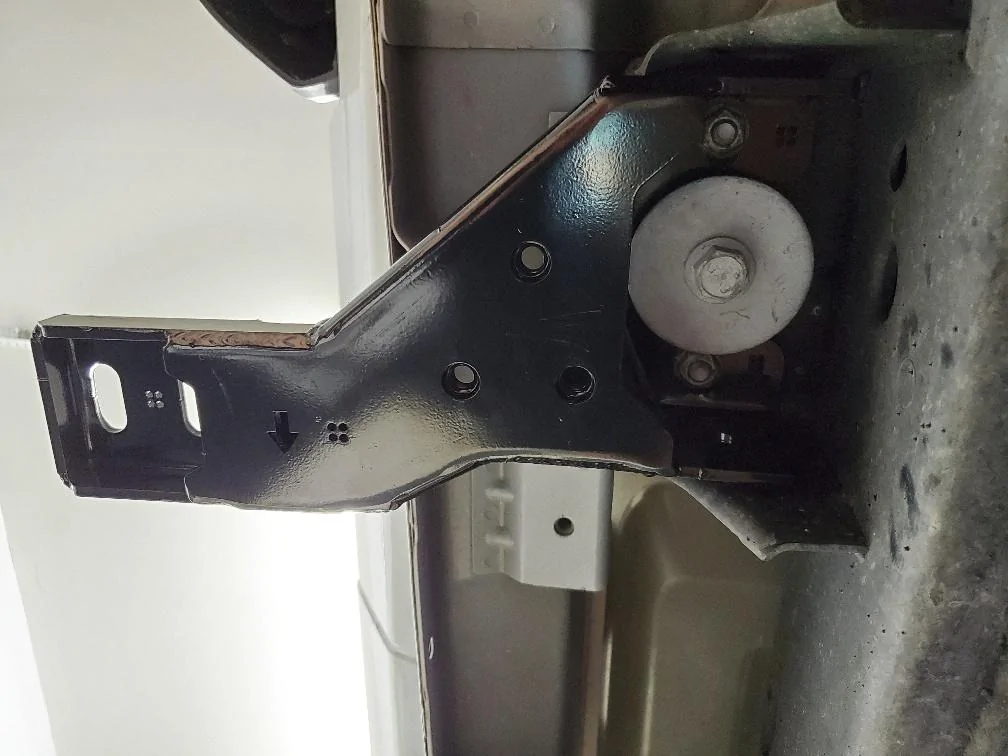
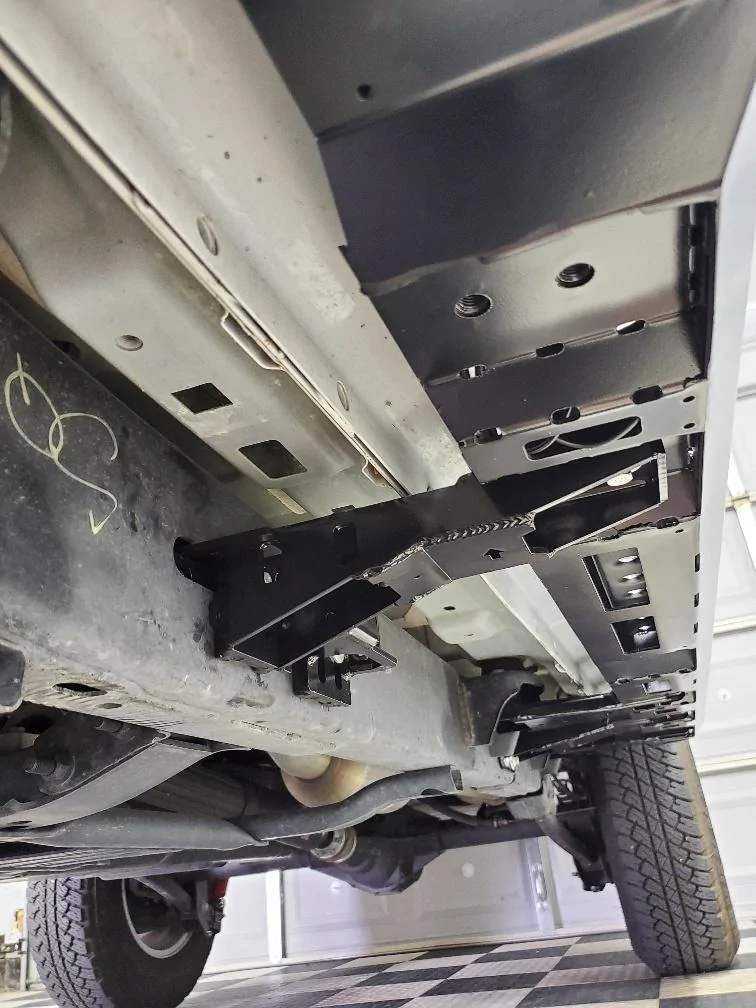
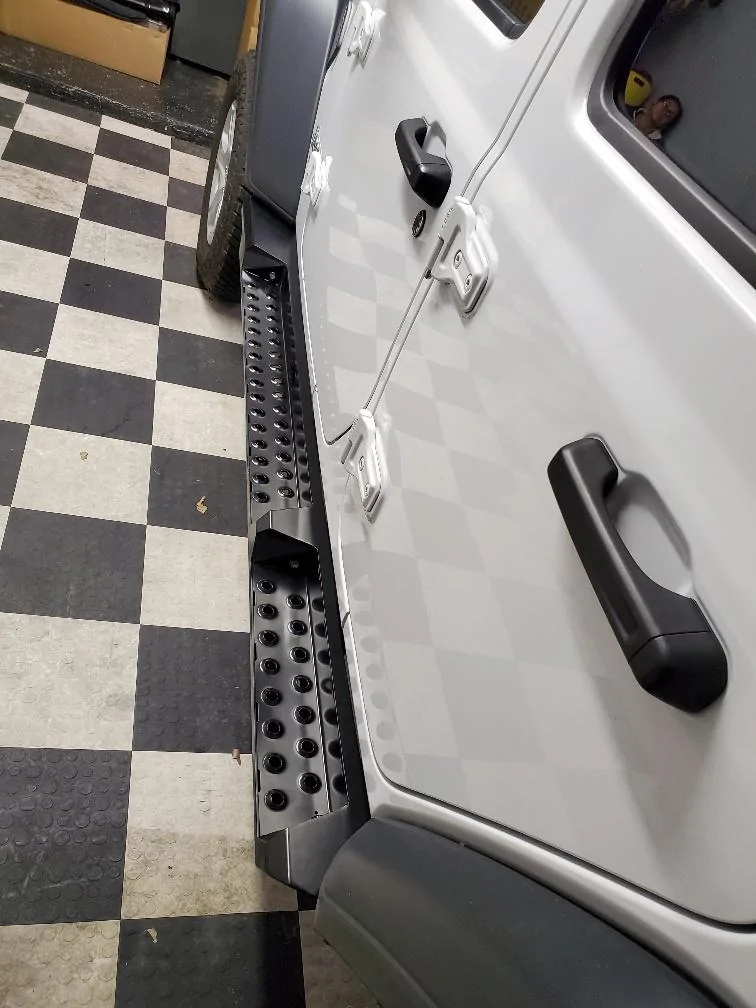
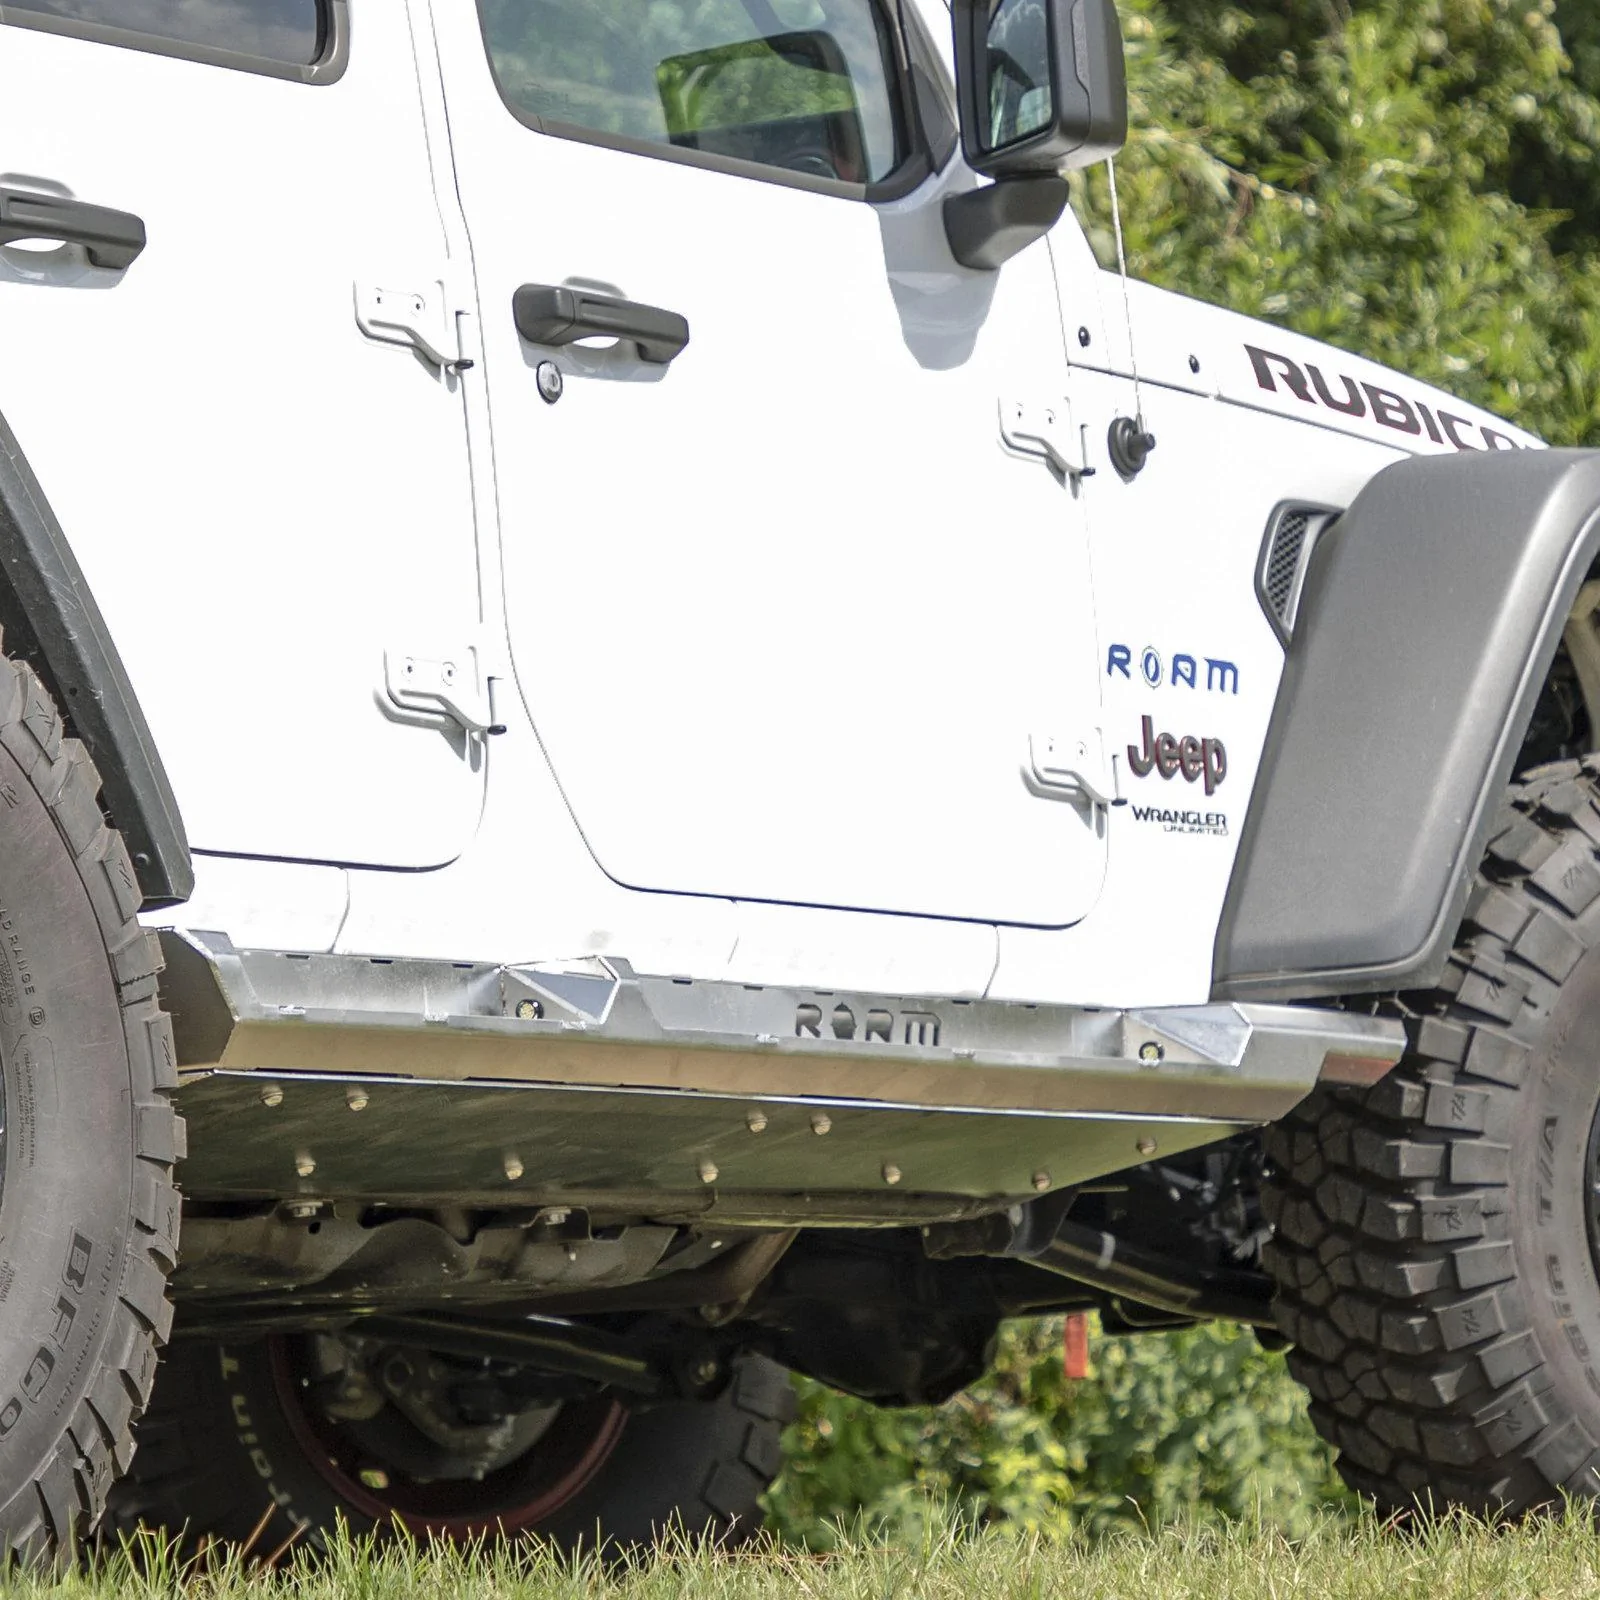
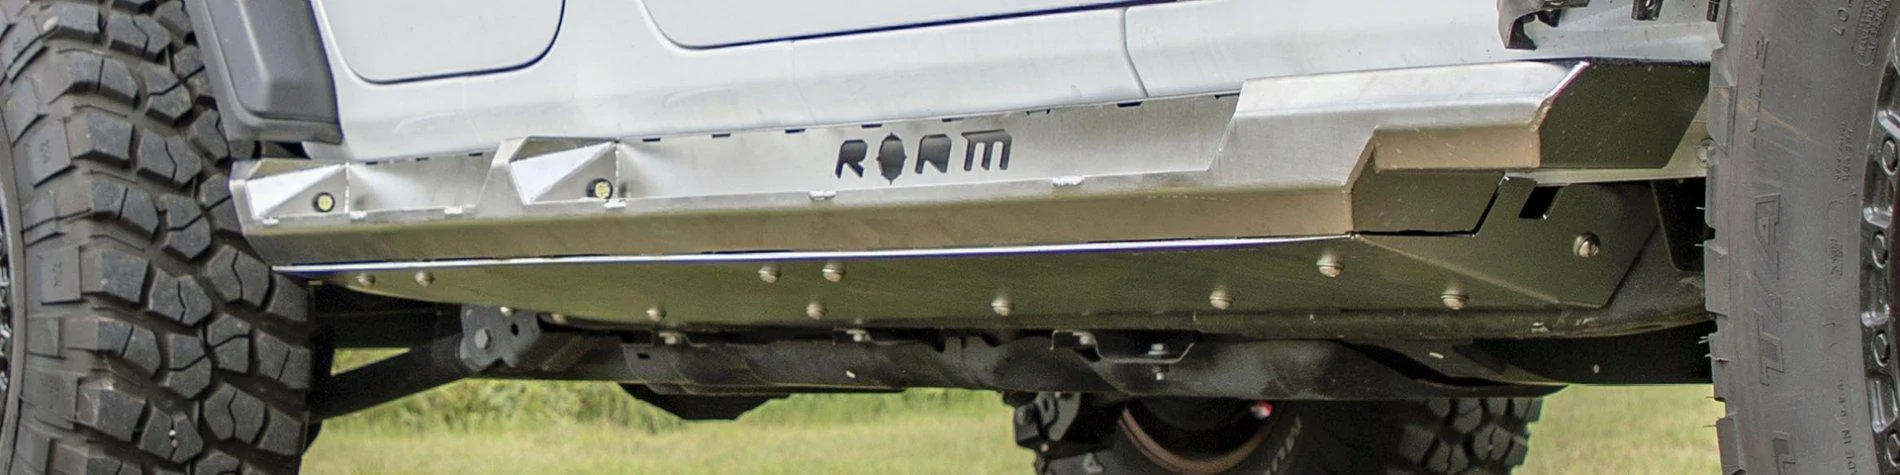
1st post is frame mounted.
they are stronger
not difficult to install. depending on your location in NY i'd be happy to help you install them (mine went on easily) in centralish jersey.
Sponsored


dpike

Well-Known Member
Joined
May 28, 2020
Threads
34
Messages
744
Reaction score
1,057
Location
New Jersey
Vehicle(s)
'20 JLUR 3.6
consider having them bed lined then as well if you're concerned about corrosion, either from roam or local.

took me about 3 or 4 hours total alone with a motorcycle jack to help hold the rails. one of the handles was broken off the flag nut cluster (looked like in shipping) so i had to jb weld that on to last long enough to get them set.
 

FlashGordon

Well-Known Member
Joined
Jan 22, 2020
Threads
0
Messages
49
Reaction score
94
Location
North Dakota
Vehicle(s)
2020 JLUR - Billet Silver, 2017 Grand Cherokee Altitude
+1 on the bedlined sprayed and well worth the $100 additional cost and very happy with how these look. Hope the extra protection helps with the potential rust concerns, although the frame mount MK3's have the e-coating per ROAMs website. Will be keeping a close eye on it as the winter months are quickly approaching.

Very sturdy rails when frame mounted.
 

CaddyshackGopher

Well-Known Member
Joined
Apr 14, 2018
Threads
7
Messages
301
Reaction score
273
Location
North Dakota
Vehicle(s)
2019 Sting Gray JLUR
Vehicle Showcase
1
+1 on the bedlined sprayed and well worth the $100 additional cost and very happy with how these look. Hope the extra protection helps with the potential rust concerns, although the frame mount MK3's have the e-coating per ROAMs website. Will be keeping a close eye on it as the winter months are quickly approaching.

Very sturdy rails when frame mounted.
Agreed, bedlined definitely worth it. Mine have been through one ND/MN winter and zero rust issues.
 

swamyg1

New Member
First Name
Gautama
Joined
Nov 2, 2020
Threads
0
Messages
1
Reaction score
0
Location
Bay Area
Vehicle(s)
Jeep Rubicon 2020
I just finished installing my mk3’s with the guidance in this post. It would have been very difficult without it!

I realized after my install that blue loctite is recommended.. which I didn’t use! Do you think I’ll have any issues without it?
 

Sponsored

Themistocles

Well-Known Member
Joined
Dec 12, 2019
Threads
3
Messages
408
Reaction score
702
Location
Virginia
Vehicle(s)
'03 Ram 2500 Cummins / 20 JLURD
Build Thread
Link
I just finished installing my mk3’s with the guidance in this post. It would have been very difficult without it!

I realized after my install that blue loctite is recommended.. which I didn’t use! Do you think I’ll have any issues without it?
I did not use it, I have gone back twice now over the last couple months to check bolts...all remain tight. That is not to say that some time in the future they wont loosen up, but after about 3-months of driving they remain rock solid.
 

DonBindas

Well-Known Member
First Name
Don
Joined
Nov 20, 2018
Threads
12
Messages
289
Reaction score
209
Location
Naples, Florida
Vehicle(s)
Ordered a 2020 JL Rubicon Unlimited in Bikini with Dark Saddle Leather on 7-8-19 and was delivered by Criswell 8-22-19
Occupation
KBB Analyst
I did not use it, I have gone back twice now over the last couple months to check bolts...all remain tight. That is not to say that some time in the future they wont loosen up, but after about 3-months of driving they remain rock solid.
I did mine a year ago without the loctite and I have no issues. I also got the e-coating and they still look like new!
 

Jeepmanic

Member
First Name
Mark
Joined
Sep 27, 2020
Threads
0
Messages
11
Reaction score
1
Location
Texas
Vehicle(s)
2021 Jeep Wrangler unlimited rubicon
Occupation
Semi retired
Just received my roam frame mount mk3’s. Do they come with the lights for the rails? Mine did not. I thought they did come with lights
 

Themistocles

Well-Known Member
Joined
Dec 12, 2019
Threads
3
Messages
408
Reaction score
702
Location
Virginia
Vehicle(s)
'03 Ram 2500 Cummins / 20 JLURD
Build Thread
Link
Just received my roam frame mount mk3’s. Do they come with the lights for the rails? Mine did not. I thought they did come with lights
Mine did and from the write-ups I have seen so did everyone else's.
 

DonBindas

Well-Known Member
First Name
Don
Joined
Nov 20, 2018
Threads
12
Messages
289
Reaction score
209
Location
Naples, Florida
Vehicle(s)
Ordered a 2020 JL Rubicon Unlimited in Bikini with Dark Saddle Leather on 7-8-19 and was delivered by Criswell 8-22-19
Occupation
KBB Analyst
Just received my roam frame mount mk3’s. Do they come with the lights for the rails? Mine did not. I thought they did come with lights
Mine did a year ago
 

Sponsored

Jeepmanic

Member
First Name
Mark
Joined
Sep 27, 2020
Threads
0
Messages
11
Reaction score
1
Location
Texas
Vehicle(s)
2021 Jeep Wrangler unlimited rubicon
Occupation
Semi retired
Thanks. Guess I’ll send roam an email then. See what what happens
 

Jeepmanic

Member
First Name
Mark
Joined
Sep 27, 2020
Threads
0
Messages
11
Reaction score
1
Location
Texas
Vehicle(s)
2021 Jeep Wrangler unlimited rubicon
Occupation
Semi retired
Thanks. Guess I’ll send roam an email then. See what what happens
Got ahold Anthony from Roam on the forum. He was very nice about the lights not being in packaging. Said he will send me some Monday.
 

Cabomark

Active Member
First Name
Mark
Joined
Feb 11, 2020
Threads
3
Messages
27
Reaction score
1
Location
Santa Barbara, CA
Vehicle(s)
2019 Jeep Wrangler JLU Sport High Altitiude
This installation is fairly easy, but figure some may benefit from a DIY.


Torque specs:

M6 -> 9 Nm / 7 ft-lbs
M6 (trilobial) -> 6 Nm / 4.4 ft-lbs
M8 -> 22 Nm / 16 ft-lbs
M10 -> 44 Nm / 32 ft-lbs
M12 -> 77 Nm / 57 ft-lbs
3/8" -> 44 Nm / 32 ft-lbs

The Brackets are all marked with small holes to signify their position, and arrows to signify their orientation. The bracket with one hole goes to the very front, and the bracket with 4 holes goes to the rear. I have roughly positioned the 4 brackets where they will be mounted as well as the flag nuts to secure brackets #1 & #3.
20191012_121745_resized.jpg


In the hardware kit there will be some longer bolts, and some shorter bolts. The 6(per side) longer bolts go into the mounts that attach to the side of the frame(Bracket #1, and #3.) Washers are to be installed on every bolt. The shorter bolts secure the steps to the mounts. The smaller 10mm head nuts are for the logo plate on the backside of the rails.
20191012_122140_resized.jpg


First thing you will want to do is attach the logo backing plate to the rails as it is a little difficult to get installed once they are mounted on the Jeep. The plate needs to slide into the top of the steps first and then over the mounting studs. Use the 4 10mm head nuts to secure them in place. We will be covering our plates in Red Vinyl to accentuate the logo, but for this installation we kept the plate out.
20191012_122952_resized.jpg
20191012_123044_resized.jpg


This next step is easier with a second set of hands. Grab bracket #1, and take the long 4 hole flag nut and fish it through the frame so all the holes roughly line up. Using the longer bolts/washers loosely secure bracket #1 to the flag nut.
20191012_123421_resized.jpg

20191012_123428_resized.jpg

20191012_123405_resized.jpg

20191012_123653_resized.jpg


For Bracket #2, you just need to remove the two body mount nuts then slide the bracket over the large body mount washer and onto the studs. Secure the bracket with the 2 factory nuts.
20191012_123856_resized.jpg
20191012_124015_resized.jpg


For bracket #3(Just like #1) a second set of hands makes it easier to hold the flag nut in place.
Slide the flag nut in place keeping note of the orientation arrow. Once in place loosely mount the bracket with 3 longer bolts & washers.
20191012_124128_resized.jpg
20191012_124200_resized.jpg
20191012_124338_resized.jpg


Bracket #4 is just like Bracket #2. Remove the rear body mount nuts, slide the bracket over the larger body mount washer and secure it to the studs with the factory hardware.

20191012_124412_resized.jpg
20191012_124635_resized.jpg


Once all the brackets are installed I found it easiest to tighten the #2 & #4 as they are for the most part in a "fixed" position. Once secured mount the steps on top of the brackets and used all the shorter bolts/washers to loosely secure the brackets to the steps. I found it easiest to start with the 4 bolts on brackets number 2 & 4, then slide mounts 1 & 3 up until I was able to get the remaining bolts threaded. Once all the bolts are threaded align the rail height front to back and then tightened the 6 bolts securing brackets #1 & 3 to the frame.

Once all the brackets are tightened use a piece of cardboard between the body and the rails in order to keep the same body gap front & rear. I slowly tightened the bolts securing the rails starting from the center two brackets and working my way out. Keep an eye out for the gap as it may change as you are tightening the bolts.
20191012_130540_resized.jpg
20191012_130533_resized.jpg
20191012_130201~2_resized.jpg
20191012_130437_resized.jpg


Repeat on the other side, and admire your work!
 

Cabomark

Active Member
First Name
Mark
Joined
Feb 11, 2020
Threads
3
Messages
27
Reaction score
1
Location
Santa Barbara, CA
Vehicle(s)
2019 Jeep Wrangler JLU Sport High Altitiude
Are these true rock sliders or just steps ? It doesn't look like there is much protection underneath the step or anything to "slide" off rocks...


Top