Sponsored

Locker Position Sensor Potting - DANA 44

206dude

Member
First Name
Todd
Joined
Nov 12, 2020
Threads
1
Messages
7
Reaction score
1
Location
San Diego
Vehicle(s)
2018 JLUR
This is normal as there are 5 sensors in the kit. The instructions for this kit specifically say to try each one until one works.
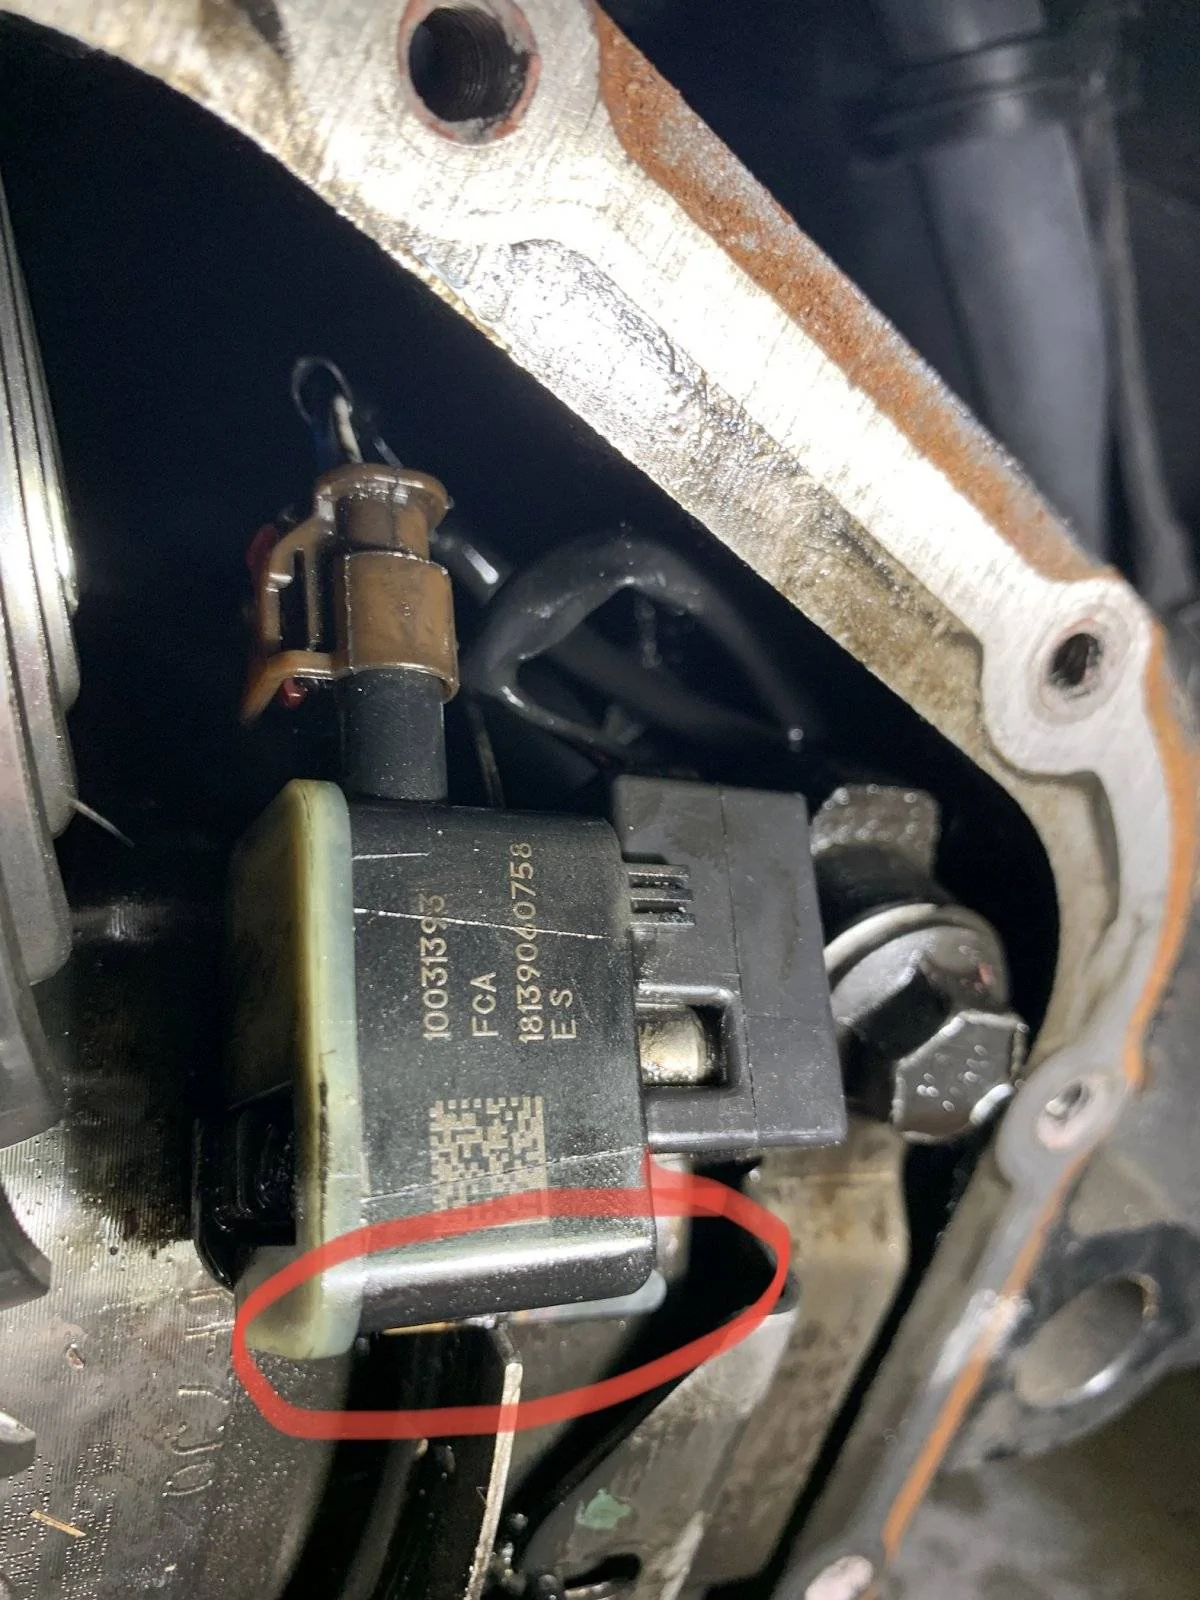
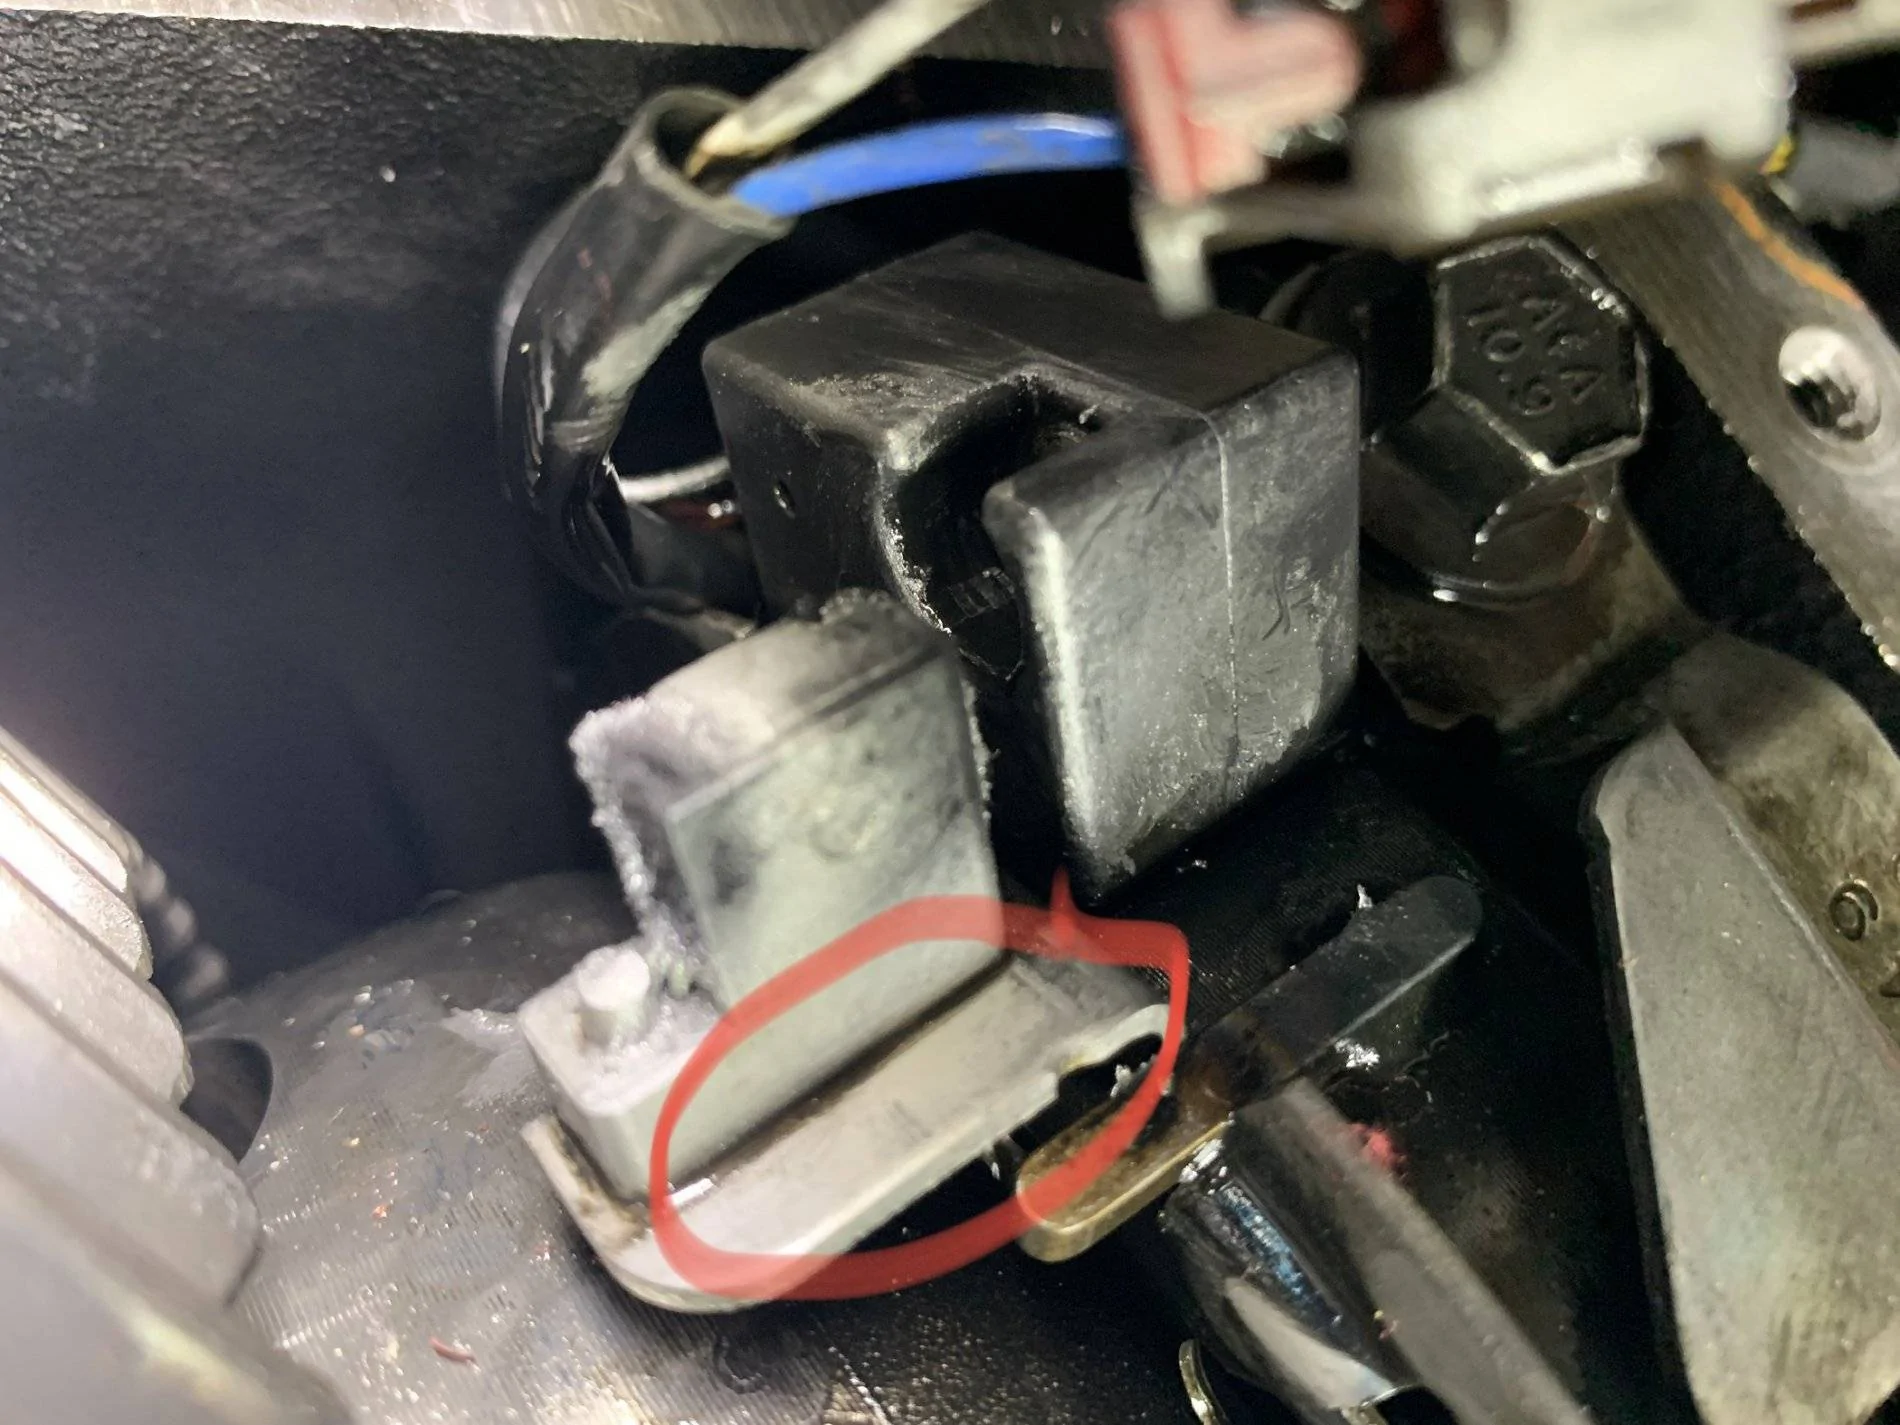
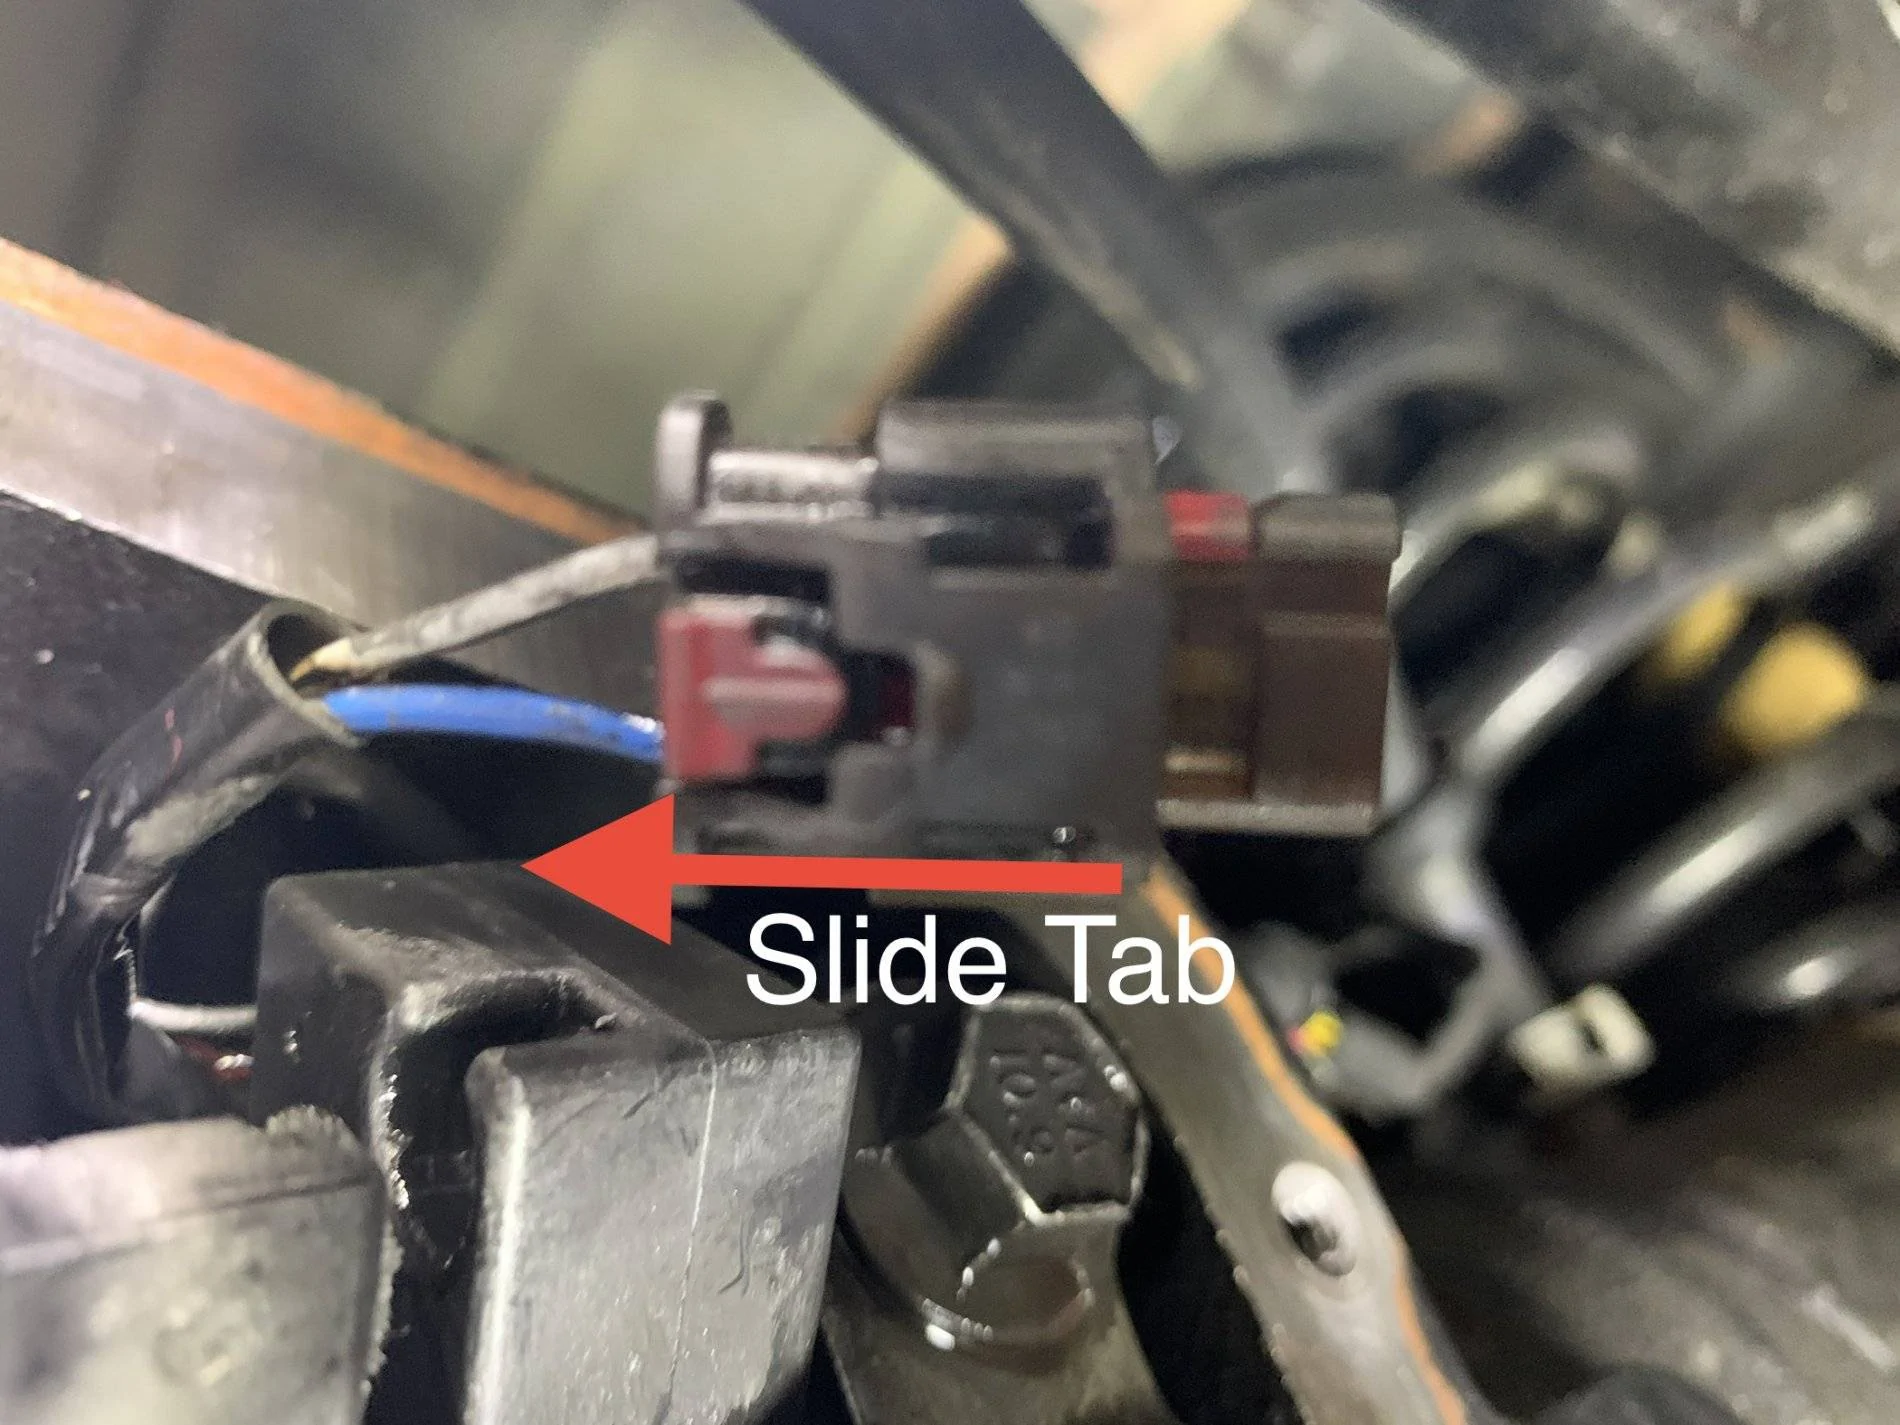
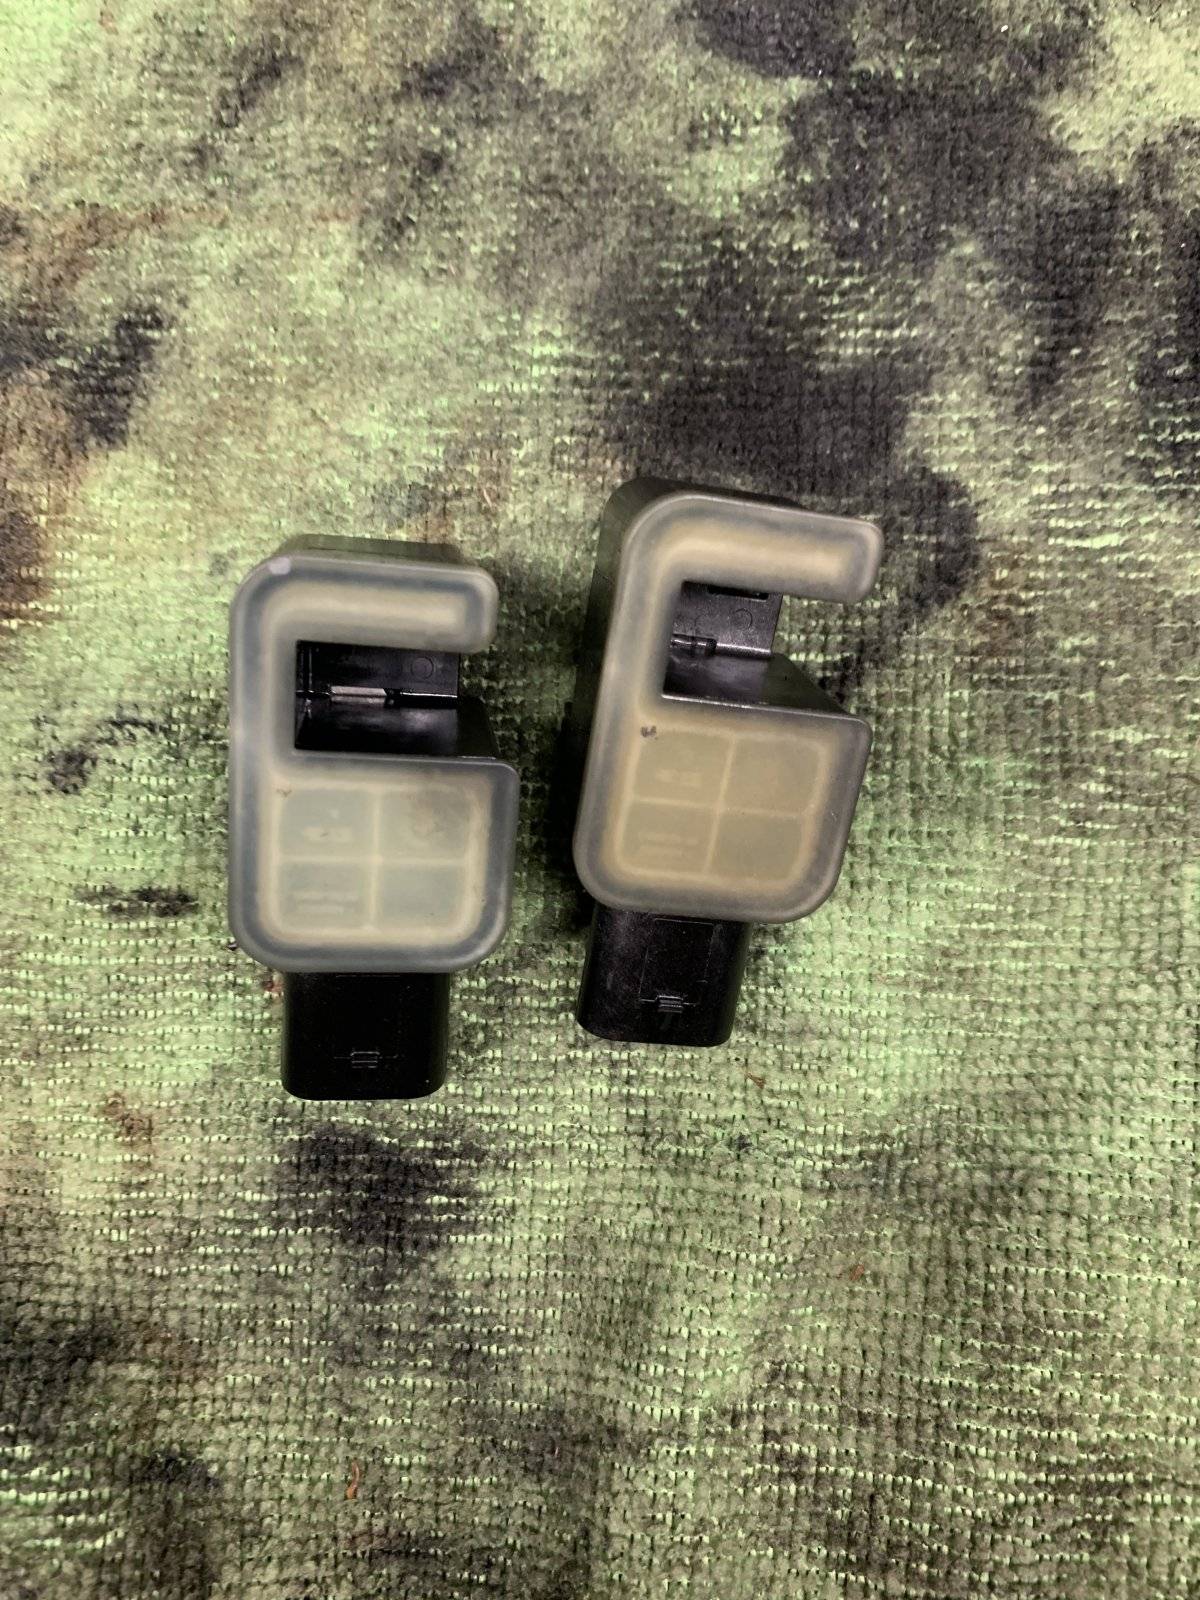
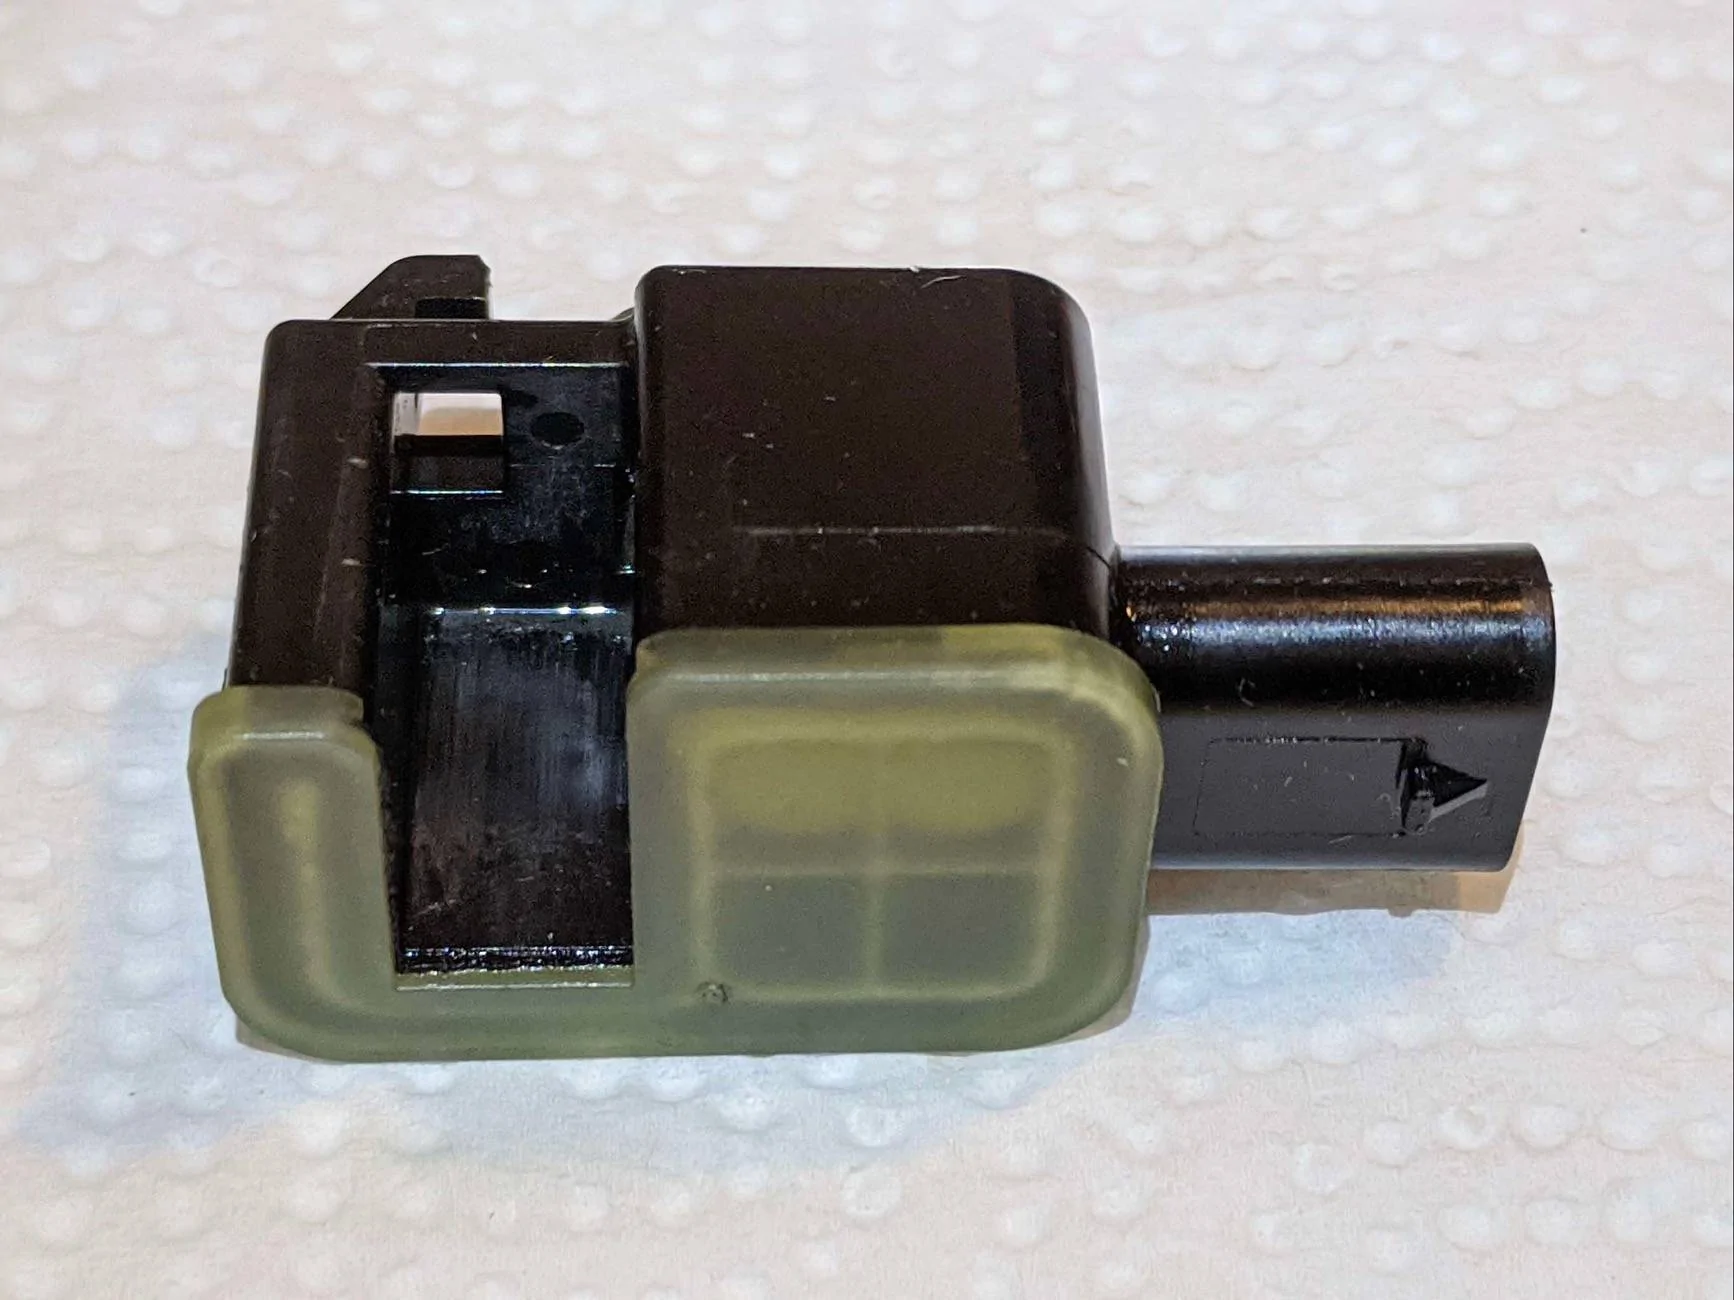
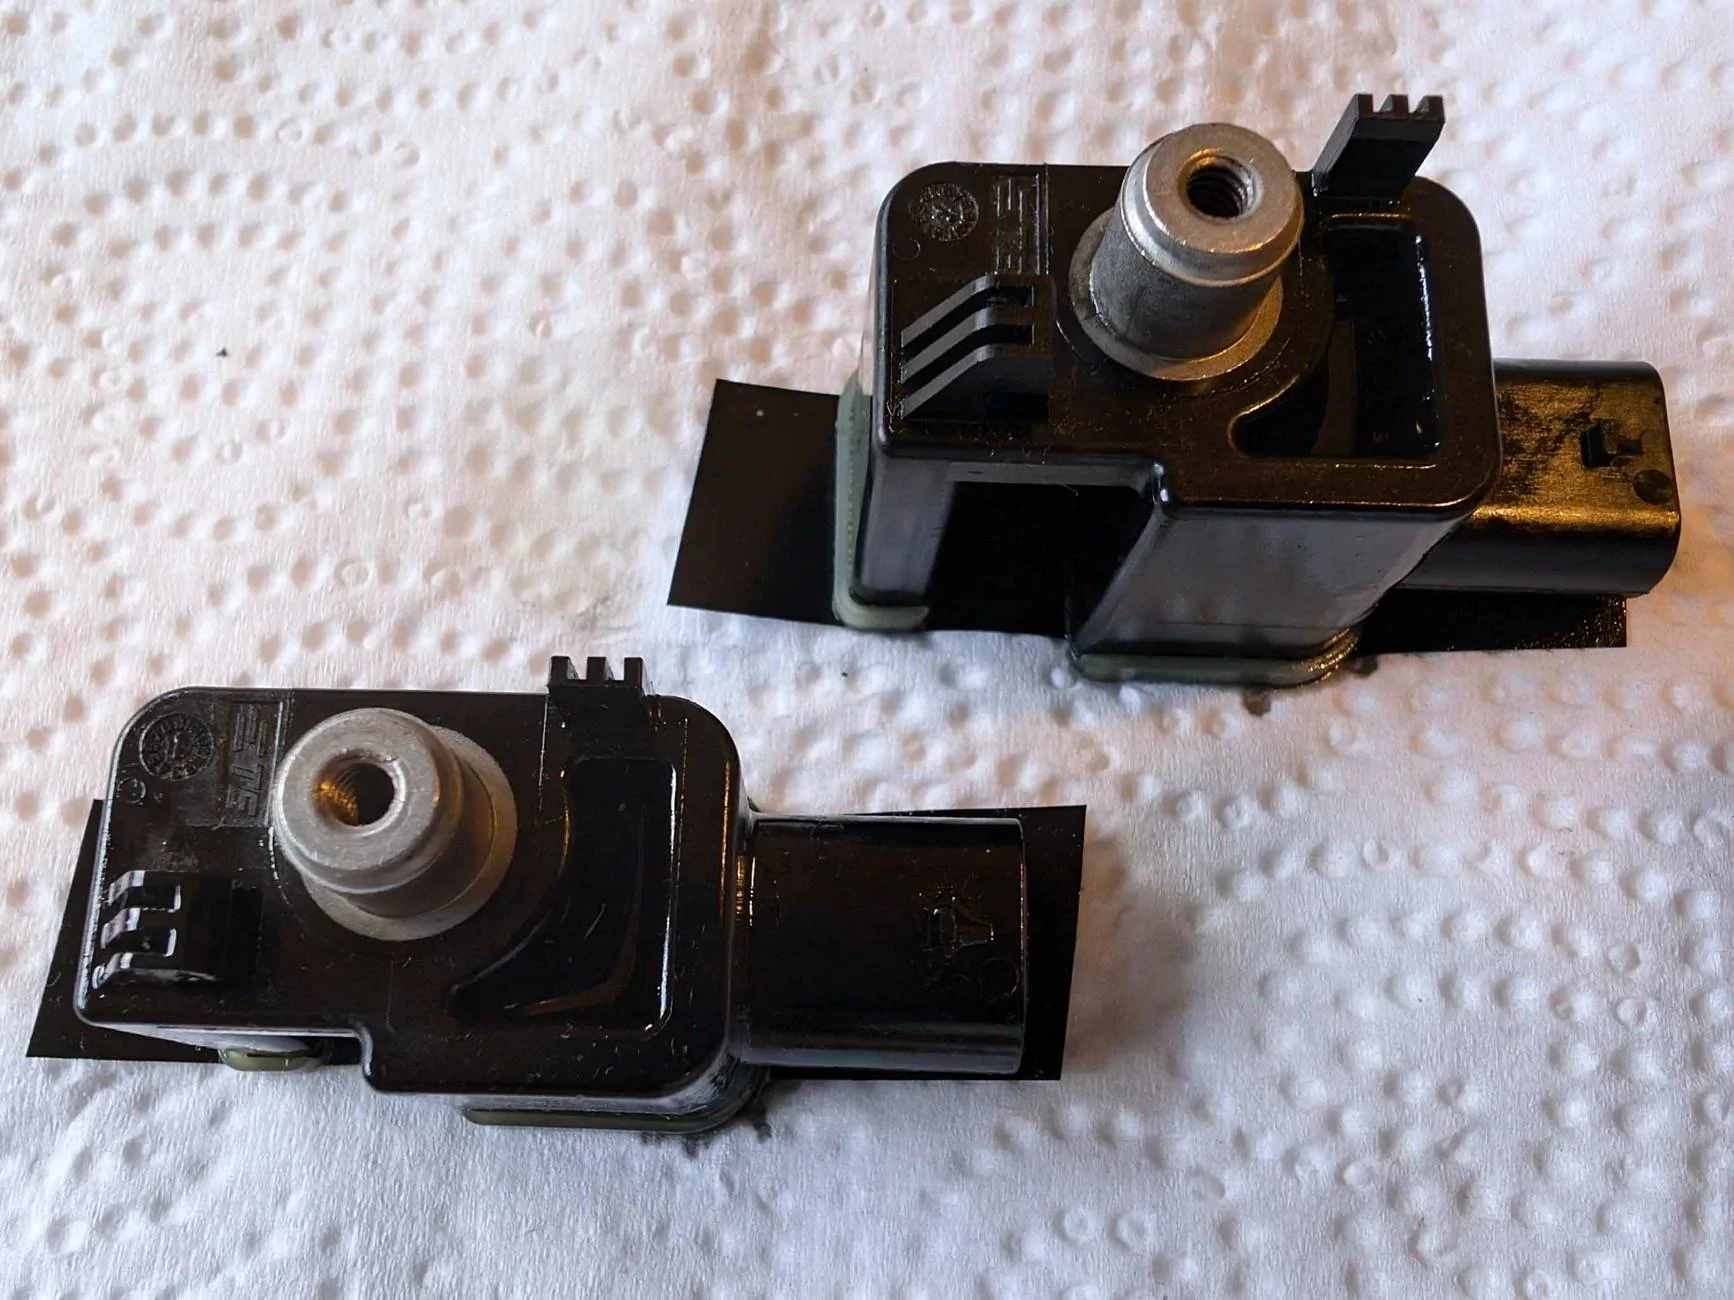
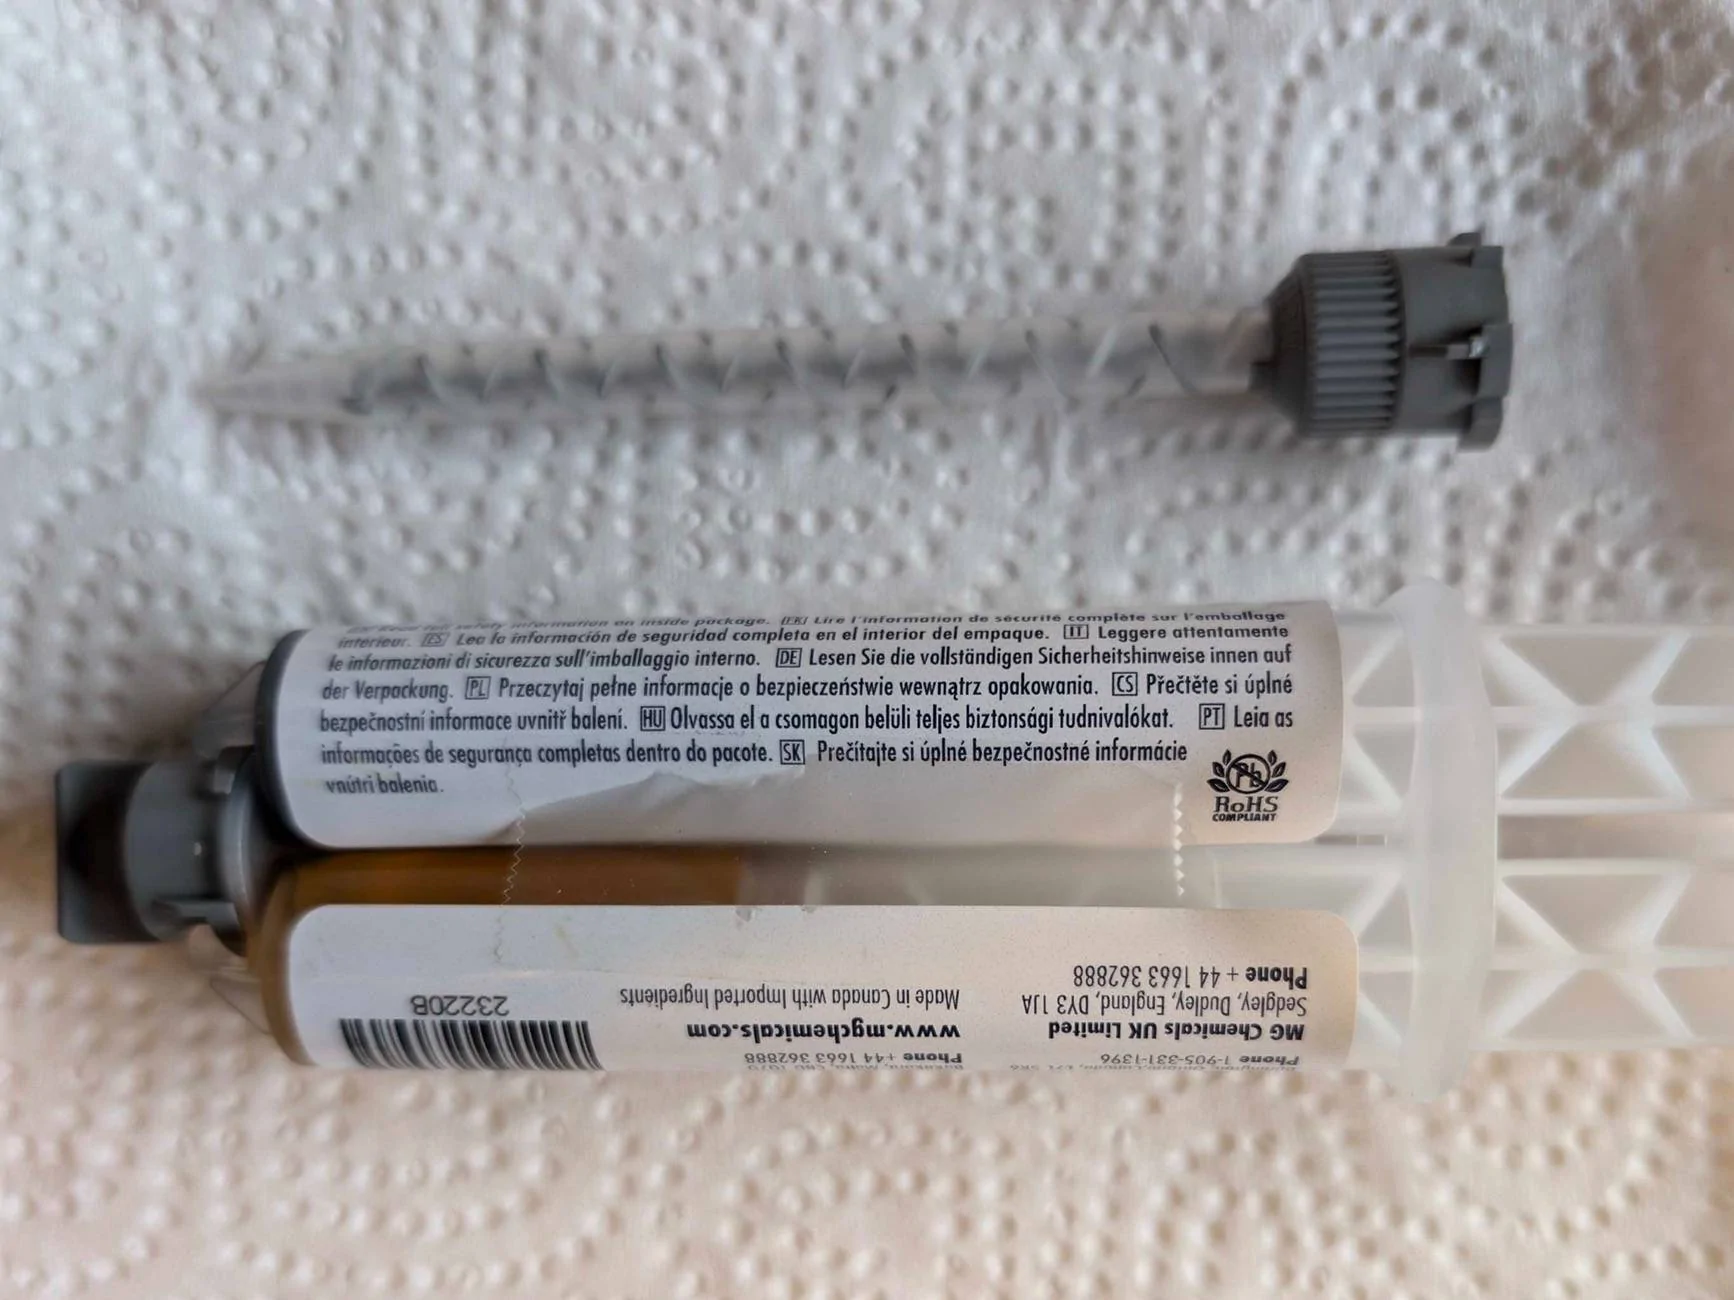
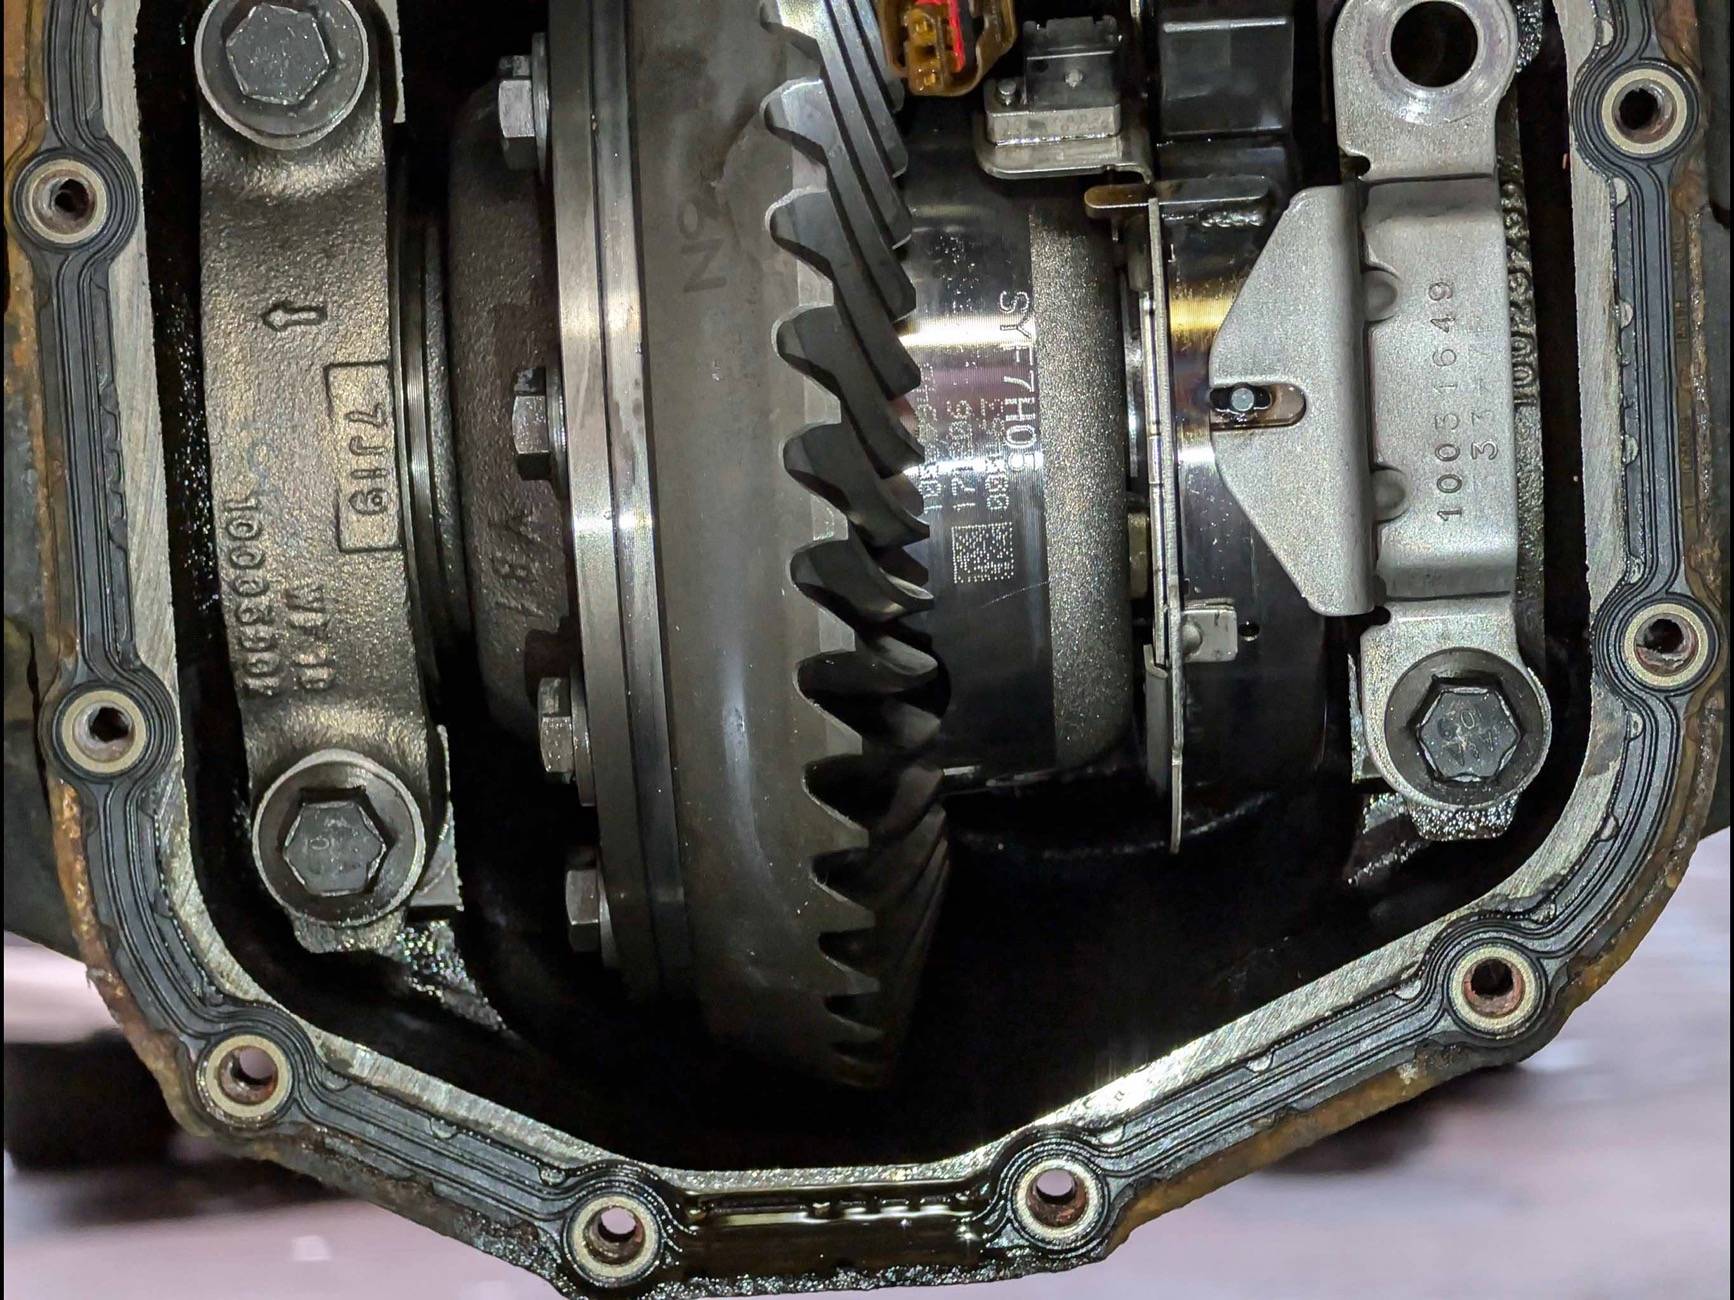
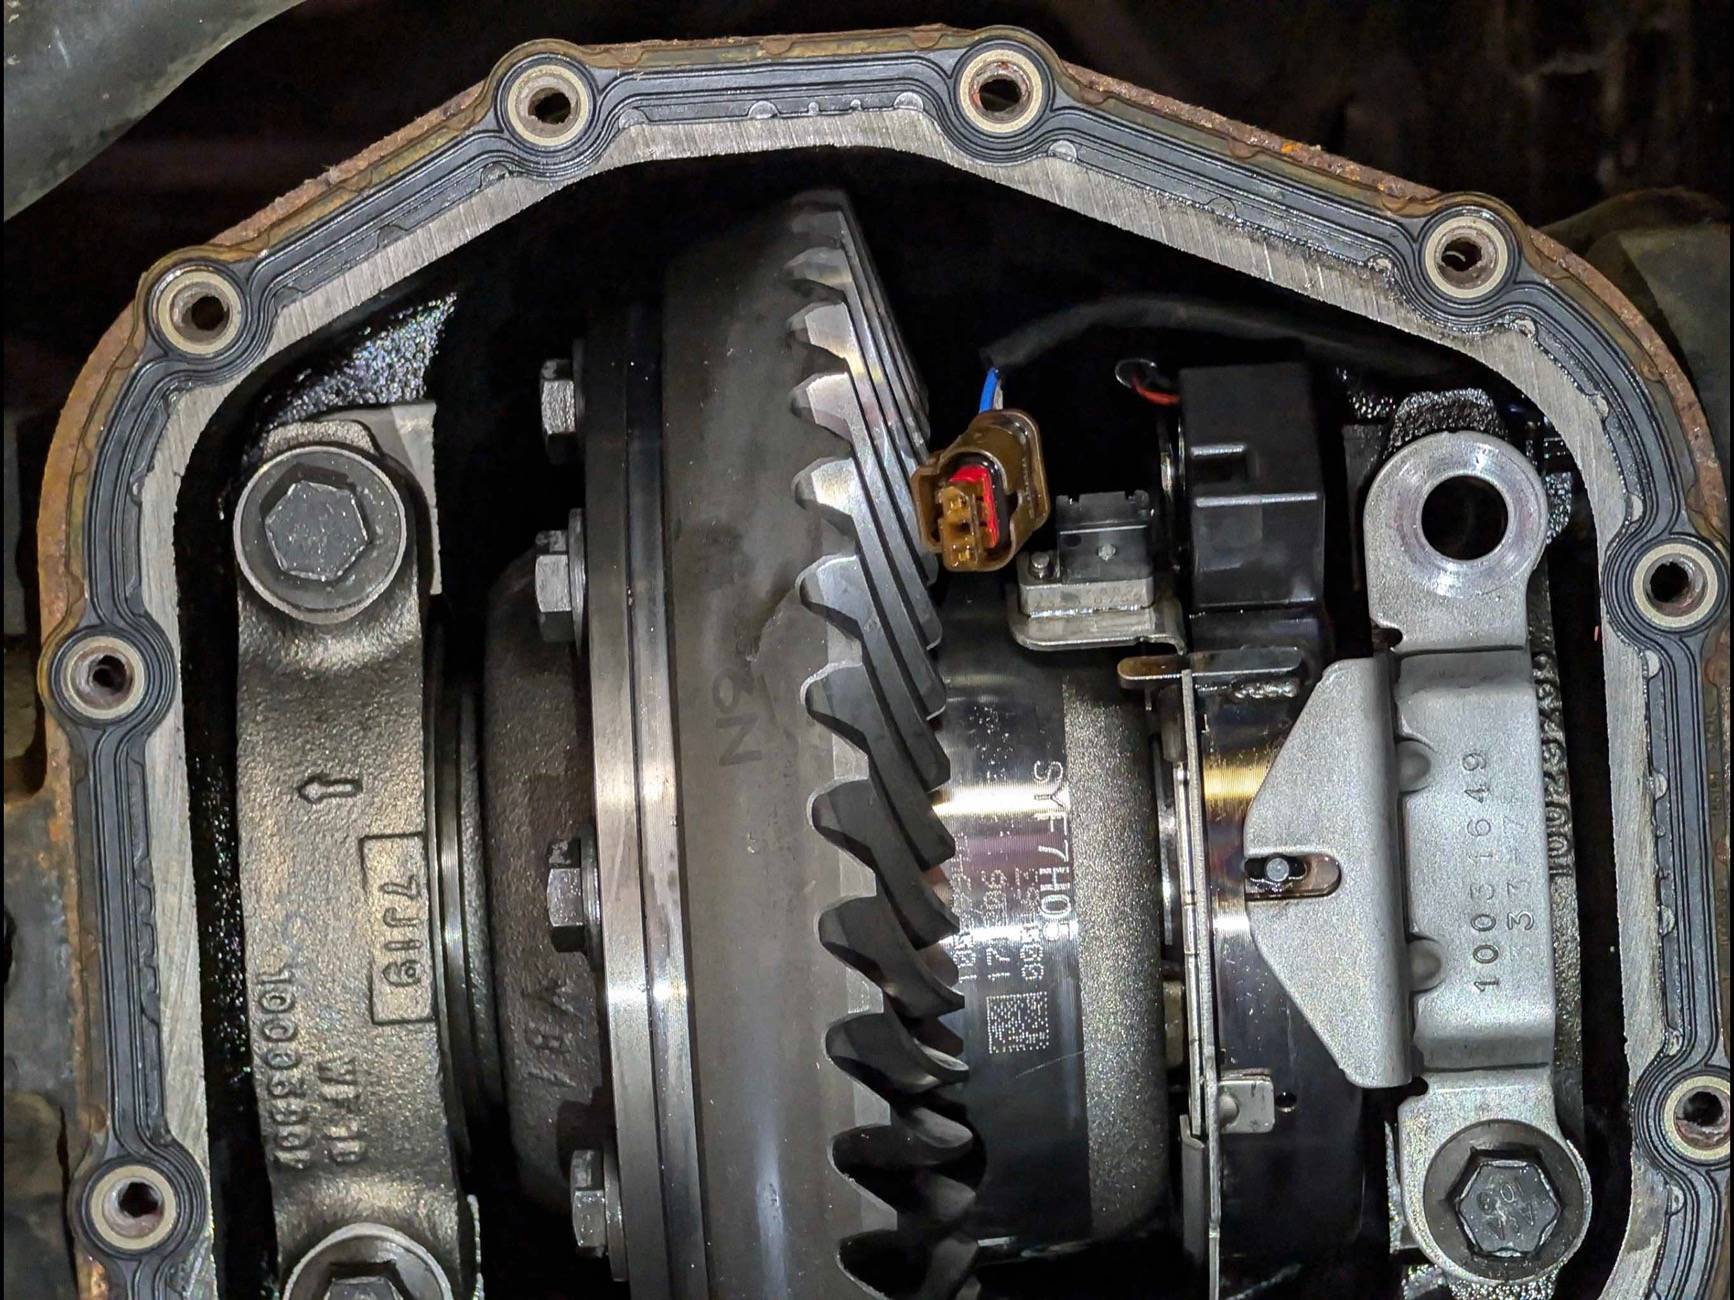
Are the instructions for the kit available somewhere online? I'm prepping to do this and have familiarized myself with this thread and others, but it would be nice to see the official doc as well.
Sponsored


HungryHound

Well-Known Member
First Name
Rick
Joined
Dec 24, 2020
Threads
22
Messages
1,366
Reaction score
2,833
Location
TN & FL
Vehicle(s)
1975 CJ-5, 1983 CJ-5, 1998 TJ, 2021 JLURe
For goodness sakes people…if you have old design sensors just pot them ASAP. Did mine 2.5 years ago and no problems. It is exasperating that even the fix is unnecessarily difficult. Great writes ups on this board how to accomplish.
I potted mine with less than 5,000 miles on them, but got the error light pulling a heavy trailer 500 miles on a hot day. I had it in 4-hi-auto to spread the load between axles, but I’m guessing the rear diff still got hot and triggered the light.

I’ve driven several hundred miles since then with no issues. So…. Potting doesn’t necessarily fix everything. It’s a poor design for a sensor and probably the result of cost-cutting at Stellantis. Other types or sensors (inductive for instance) would have been more reliable but cost more. Knowing Jeep, Dana had the design forced on them yet they are covering warranty costs.
 

Jeep Wick

Well-Known Member
First Name
Wick
Joined
Dec 7, 2021
Threads
17
Messages
1,767
Reaction score
2,055
Location
America
Vehicle(s)
2022 High Tide XR
Occupation
Mechanic
I potted mine with less than 5,000 miles on them, but got the error light pulling a heavy trailer 500 miles on a hot day. I had it in 4-hi-auto to spread the load between axles, but I’m guessing the rear diff still got hot and triggered the light.

I’ve driven several hundred miles since then with no issues. So…. Potting doesn’t necessarily fix everything. It’s a poor design for a sensor and probably the result of cost-cutting at Stellantis. Other types or sensors (inductive for instance) would have been more reliable but cost more. Knowing Jeep, Dana had the design forced on them yet they are covering warranty costs.
That is interesting. I have to ask, what type of gear oil are you running?
 

Gbax79

New Member
First Name
Greg
Joined
Jan 5, 2023
Threads
0
Messages
2
Reaction score
3
Location
Iowa
Vehicle(s)
22 JT Rubi
Just another thanks to @chevymitchell for this write up. 22 JT 25k mi rear had slight contamination and lots of metal sludge on magnet. Front looked new. Potted as PM while doing gear oil change this weekend hoping to avoid changing sensors like fluid going forward.
 

Terrymo

Well-Known Member
First Name
Terry
Joined
Jun 17, 2022
Threads
48
Messages
10,755
Reaction score
33,215
Location
SoCal
Vehicle(s)
2023 JLURXR 3.6 ET
Clubs
 
@chevymitchell
I ordered the locker position sensor 5 piece kit as well as new pass through connectors. I have a flashing rear locker position sensor light and oil has seeped (wicked?) into the harness connector on the exterior of the axle. I plan on potting all 5 sensors. I will replace the connector in an abundance of caution but I’m wondering if you feel it’s necessary.
Jeep Wrangler JL Locker Position Sensor Potting - DANA 44 IMG_1884
 
Last edited:

Sponsored

Astro Jeep

Well-Known Member
First Name
Darryl
Joined
Nov 13, 2021
Threads
34
Messages
680
Reaction score
1,930
Location
Wherever I am.
Vehicle(s)
2022 Silver Zynith JLURD
Build Thread
Link
Occupation
Retired.
@chevymitchell
I ordered the locker position sensor 5 piece kit as well as new pass through connectors. I have a flashing rear locker position sensor light and oil has seeped (wicked?) into the harness connector on the exterior of the axle. I plan on potting all 5 sensors. I will replace the connector in an abundance of caution but I’m wondering if you feel it’s necessary.
IMG_1884.jpeg
I am going to replace my sensors this weekend. I potted all five of them last week, but now I just need to find time to change them. If oil has gotten inside the wiring harness connector, stuffing dielectric grease in the connector should take care of it. If you already have the connectors, then you might as well swap them out, but I would still use the dielectric grease.
 

Terrymo

Well-Known Member
First Name
Terry
Joined
Jun 17, 2022
Threads
48
Messages
10,755
Reaction score
33,215
Location
SoCal
Vehicle(s)
2023 JLURXR 3.6 ET
Clubs
 
I am going to replace my sensors this weekend. I potted all five of them last week, but now I just need to find time to change them. If oil has gotten inside the wiring harness connector, stuffing dielectric grease in the connector should take care of it. If you already have the connectors, then you might as well swap them out, but I would still use the dielectric grease.
Thanks. Yep I’ve got dielectric grease, electrical cleaner, potting material etc ready to go. Just waiting of the locker position sensor kit to arrive.
 

BRuby

Well-Known Member
Joined
Nov 28, 2019
Threads
5
Messages
754
Reaction score
897
Location
Chilling or working out at 60+
Vehicle(s)
JLUR Benz Porsche-M Subie-M
Well, step one is done.

EFF THOSE DIFF COVER BOLTS ON THE TOP.

Edit: further along in this thread someone advised that jacking up one side a little bit will give easy access to the bolts.

A couple of tips that I haven’t seen mentioned:
  • Milwaukee M12 3/8” ratchet made diff cover removal much easier than hand tools would have been
  • Neither my Milwaukee nor my Tekton ratchet could squeeze in to get the very top bolt (true for front and rear). Make sure you have a good 10mm wrench or a shallow 10mm socket (I will be buying a cheap one at Harbor Freight, tomorrow, to make reassembly easier)
  • Getting to the red tab that releases the wiring harness is pretty much impossible unless you wiggle the sensor free, first
  • Wiggling the sensor free takes patience. I found that I had to put some pressure on the metal clip thing (see picture)
  • T20 screwdriver was a piece of cake. I’m glad I didn’t monkey with the “single use” cap bolts. (I don’t know if they’re all the same, but my T20 is a Tekton. It fit easily and the handle is stout enough to get plenty of torque to prevent stripping.)
  • I found the front to be easier to see. I started with the rear, but recommend starting in the front so you can get the hang of wiggling the sensor out and disconnecting the harness.
Gently pushing the circled part helped me get the sensor free:

1618106339453.jpeg

1618106272537.jpeg


Here’s the red tab. It slides. Small flathead for the win. Easy does it!

1618106622831.jpeg


My sensors look to be in great condition for 36,000 miles. Tomorrow I will pot them.

SO APPRECIATIVE of this thread. What a great community.

1618106687525.jpeg
Appreciate you and everyone else taking time to contribute by posting photos and videos to this thread especially OP ChevyM. Backstory - our 2018 has never had any issues getting in and out of "Rear Only" or "Front and Rear". Takes about 2 seconds or less. Sway disconnect takes less than 2 seconds and out takes less than 5 seconds. So never had any major concerns. Never any "Service Lockers" notifications. Zero random blinking. Zero locking for no reason. Works perfect.

But wanted to service the diff fluid and check the magnets for big chunks of metal - so popped off the cover and pulled out the "locker sensor".

Front. Fluid looked not that bad. Zero really bad smell. Not burnt. Magnet at drain bolt and magnet under locker sensor - covered in super fine metal particles. But zero pieces of solid metal fragments like others have shown. All super fine super silty.

Locker sensor - 60% to 85% filled with diff oil depending on which position it is oriented. All of the oil looking to enter from the connector. Very surprised this has not already shorted out long ago. So am super lucky everything is still working perfectly with zero idiot lights zero problems.

Takeaways for others planning to do this. Do this asap. Minimum get a couple of ramps - 4 is better. Ours is OEM so no suspension height upgrades. All stock. Since we have only 2 ramps those went on the front - jack stands with blocks under - went on back axle for max height up. Lift as high as you can for better access vs all cramped.

Also "add a jack at the boxed frame rail" - on the drivers side under the driver door area for the front diff. This lifts the track bar up and out of the way of the top 10mm hex bolts fastening the diff cover. Lift it high so you have really good clearance. More the better as after the diff cover comes off - you have to remove the T20 screw holding on the "locker sensor" component. Standard draining procedure with 3/8" square drive for fill - and drain with magnet.

Like you did not need to remove the cap nut. The T20 fit fine - but was stuck in very tight with some original red substance on the threads. Probs that typical dry thread sealer factory product. So will use red Locktite as ChevyM recommends. It needs to be affixed tight so it will not loosen off. With a longer handle the T20 would have easier to remove - but all we had at the moment was a shorter stubby with minimal grip purchase. Probs will pull out my extension to crank down when re-installing.

The red tab on the wired plastic connector needs to be pushed backwards towards the wires with a thin flathead. Then the red tab needs to be pushed down as it acts as a clasp. Locking on a small piece of plastic nub on the "locker sensor". If you do not push down on the red while pulling apart - the connector will not disconnect.

Was careful not to push or pull too hard - as others have unfortunately broken off some small brittle pieces of plastic. Same pulling off the "locker sensor". It is magnetized in place. So you have to lift up the bottom corner to release the magnetic force. With gentle persuasion it will detach once enough force in the proper upward tipping direction is applied.

Then wiped away all the metal silt stuck to the magnet upstand. Then sprayed brake cleaner to dissolve the remaining oil stuck in the diff letting it all drain out. Will spray CRC electronics cleaner on the connects and will apply some dialectic grease at the connections. As that whole wired connection was filled will oil.

Now once the "rear locker sensor" is pulled - will drill clean pot both yada yada. Got 3 pouches of Valvoline Flex Fill 75w140 since Dana recommends 140 - and not 85 like FCA. For sure 140 will protect better vs 85 at high temps and high loads. As am not worried about MPG like FCA is. But definitely do your research on this - as if still under warranty - you do not want to jeopardize your coverage.

Takeaways. Even if your lockers turn on and off perfectly in about a second or so with zero idiot lights. Pull out the "locker sensors" and pot them with proper potting compound as per ChevyM recommendations. Makes a lot of really good sense vs leaving them to their own devices to eventually short out with hot oil and metal particle contamination.

Just assemble everything and get your quacking ducks in a row. Then trust your expertise and your skill set. It is a task that most Rubicon owners should "at the minimum" be capable of doing at the drop of a hat. Since FCA or Dana will probably never do this very important task.

Apparently even the newly designed "locker sensors" are failing on current Rubicon models. So FCA and Dana have not learned from poor designs. Typical. Haha!

Jeep Wrangler JL Locker Position Sensor Potting - DANA 44 075485B0-5641-4184-86EB-A1DE77277A60


Jeep Wrangler JL Locker Position Sensor Potting - DANA 44 29816940-E58E-462C-B397-26329B8C8830


Jeep Wrangler JL Locker Position Sensor Potting - DANA 44 7750D86C-73FB-4703-9904-3A616BFD6D3F
 
OP
OP
chevymitchell

chevymitchell

Well-Known Member
First Name
Shawn
Joined
Feb 18, 2018
Threads
112
Messages
5,017
Reaction score
12,147
Location
Pueblo West, CO
Vehicle(s)
2022 392XR, 2025 Wagoneer S, 2006 LJ 6-spd
Occupation
Avi Engineer
@chevymitchell
I ordered the locker position sensor 5 piece kit as well as new pass through connectors. I have a flashing rear locker position sensor light and oil has seeped (wicked?) into the harness connector on the exterior of the axle. I plan on potting all 5 sensors. I will replace the connector in an abundance of caution but I’m wondering if you feel it’s necessary.
IMG_1884.jpeg
Hey there.

I definitely think you should replace it at the same time. It's cheap and you're already there. This bulkhead connector has caused a lot of problems with oil getting through to the pins. You certainly won't be going backwards by replacing it.
 

Terrymo

Well-Known Member
First Name
Terry
Joined
Jun 17, 2022
Threads
48
Messages
10,755
Reaction score
33,215
Location
SoCal
Vehicle(s)
2023 JLURXR 3.6 ET
Clubs
 
Hey there.

I definitely think you should replace it at the same time. It's cheap and you're already there. This bulkhead connector has caused a lot of problems with oil getting through to the pins. You certainly won't be going backwards by replacing it.
Thanks for the advice.
 

Sponsored

Astro Jeep

Well-Known Member
First Name
Darryl
Joined
Nov 13, 2021
Threads
34
Messages
680
Reaction score
1,930
Location
Wherever I am.
Vehicle(s)
2022 Silver Zynith JLURD
Build Thread
Link
Occupation
Retired.
Today I tried all five of my sensors that came in the kit on my rear lockers. None of them worked. I think that my wiring harness is bad though because it looks like burned oil around where the connector pins go. Hopefully the new sensors are still good. I guess tonight I will be tracking down the harness part numbers and hopefully one of the local dealers in the DFW area has them in stock.
 

Terrymo

Well-Known Member
First Name
Terry
Joined
Jun 17, 2022
Threads
48
Messages
10,755
Reaction score
33,215
Location
SoCal
Vehicle(s)
2023 JLURXR 3.6 ET
Clubs
 
Today I tried all five of my sensors that came in the kit on my rear lockers. None of them worked. I think that my wiring harness is bad though because it looks like burned oil around where the connector pins go. Hopefully the new sensors are still good. I guess tonight I will be tracking down the harness part numbers and hopefully one of the local dealers in the DFW area has them in stock.
Just to clarify. Your original sensor was not functioning at all either?
 

Astro Jeep

Well-Known Member
First Name
Darryl
Joined
Nov 13, 2021
Threads
34
Messages
680
Reaction score
1,930
Location
Wherever I am.
Vehicle(s)
2022 Silver Zynith JLURD
Build Thread
Link
Occupation
Retired.
Just to clarify. Your original sensor was not functioning at all either?
Yes my original sensor is bad. It is full of oil. I misspoke when I said my wiring harness is bad. I think my pass through connector is bad as well. The same one you are replacing. There are some in stock local to the DFW area so early in the AM I am off to buy two of them. One for my front axle, and one for my back axle. I think that will solve the problem. Summit in Arlington has Crown Automotive 68400411AA Axle Locker Sensor Connector in stock, and some of the CDJR dealerships have the Mopar version in stock.
 

Terrymo

Well-Known Member
First Name
Terry
Joined
Jun 17, 2022
Threads
48
Messages
10,755
Reaction score
33,215
Location
SoCal
Vehicle(s)
2023 JLURXR 3.6 ET
Clubs
 
Yes my original sensor is bad. It is full of oil. I misspoke when I said my wiring harness is bad. I think my pass through connector is bad as well. The same one you are replacing. There are some in stock local to the DFW area so early in the AM I am off to buy two of them. One for my front axle, and one for my back axle. I think that will solve the problem. Summit in Arlington has Crown Automotive 68400411AA Axle Locker Sensor Connector in stock, and some of the CDJR dealerships have the Mopar version in stock.
Fingers Crossed
 

BRuby

Well-Known Member
Joined
Nov 28, 2019
Threads
5
Messages
754
Reaction score
897
Location
Chilling or working out at 60+
Vehicle(s)
JLUR Benz Porsche-M Subie-M
Appreciate you and everyone else taking time to contribute by posting photos and videos to this thread especially OP ChevyM. Backstory - our 2018 has never had any issues getting in and out of "Rear Only" or "Front and Rear". Takes about 2 seconds or less. Sway disconnect takes less than 2 seconds and out takes less than 5 seconds. So never had any major concerns. Never any "Service Lockers" notifications. Zero random blinking. Zero locking for no reason. Works perfect.

But wanted to service the diff fluid and check the magnets for big chunks of metal - so popped off the cover and pulled out the "locker sensor".

Front. Fluid looked not that bad. Zero really bad smell. Not burnt. Magnet at drain bolt and magnet under locker sensor - covered in super fine metal particles. But zero pieces of solid metal fragments like others have shown. All super fine super silty.

Locker sensor - 60% to 85% filled with diff oil depending on which position it is oriented. All of the oil looking to enter from the connector. Very surprised this has not already shorted out long ago. So am super lucky everything is still working perfectly with zero idiot lights zero problems.

Takeaways for others planning to do this. Do this asap. Minimum get a couple of ramps - 4 is better. Ours is OEM so no suspension height upgrades. All stock. Since we have only 2 ramps those went on the front - jack stands with blocks under - went on back axle for max height up. Lift as high as you can for better access vs all cramped.

Also "add a jack at the boxed frame rail" - on the drivers side under the driver door area for the front diff. This lifts the track bar up and out of the way of the top 10mm hex bolts fastening the diff cover. Lift it high so you have really good clearance. More the better as after the diff cover comes off - you have to remove the T20 screw holding on the "locker sensor" component. Standard draining procedure with 3/8" square drive for fill - and drain with magnet.

Like you did not need to remove the cap nut. The T20 fit fine - but was stuck in very tight with some original red substance on the threads. Probs that typical dry thread sealer factory product. So will use red Locktite as ChevyM recommends. It needs to be affixed tight so it will not loosen off. With a longer handle the T20 would have easier to remove - but all we had at the moment was a shorter stubby with minimal grip purchase. Probs will pull out my extension to crank down when re-installing.

The red tab on the wired plastic connector needs to be pushed backwards towards the wires with a thin flathead. Then the red tab needs to be pushed down as it acts as a clasp. Locking on a small piece of plastic nub on the "locker sensor". If you do not push down on the red while pulling apart - the connector will not disconnect.

Was careful not to push or pull too hard - as others have unfortunately broken off some small brittle pieces of plastic. Same pulling off the "locker sensor". It is magnetized in place. So you have to lift up the bottom corner to release the magnetic force. With gentle persuasion it will detach once enough force in the proper upward tipping direction is applied.

Then wiped away all the metal silt stuck to the magnet upstand. Then sprayed brake cleaner to dissolve the remaining oil stuck in the diff letting it all drain out. Will spray CRC electronics cleaner on the connects and will apply some dialectic grease at the connections. As that whole wired connection was filled will oil.

Now once the "rear locker sensor" is pulled - will drill clean pot both yada yada. Got 3 pouches of Valvoline Flex Fill 75w140 since Dana recommends 140 - and not 85 like FCA. For sure 140 will protect better vs 85 at high temps and high loads. As am not worried about MPG like FCA is. But definitely do your research on this - as if still under warranty - you do not want to jeopardize your coverage.

Takeaways. Even if your lockers turn on and off perfectly in about a second or so with zero idiot lights. Pull out the "locker sensors" and pot them with proper potting compound as per ChevyM recommendations. Makes a lot of really good sense vs leaving them to their own devices to eventually short out with hot oil and metal particle contamination.

Just assemble everything and get your quacking ducks in a row. Then trust your expertise and your skill set. It is a task that most Rubicon owners should "at the minimum" be capable of doing at the drop of a hat. Since FCA or Dana will probably never do this very important task.

Apparently even the newly designed "locker sensors" are failing on current Rubicon models. So FCA and Dana have not learned from poor designs. Typical. Haha!

075485B0-5641-4184-86EB-A1DE77277A60.jpeg


29816940-E58E-462C-B397-26329B8C8830.jpeg


7750D86C-73FB-4703-9904-3A616BFD6D3F.jpeg
Astro hopefully you can get your matter sorted out asap.

But for those still planning to get this completed sometime soon - a few other final notable comments and photos after pulling the rear locker sensor and potting both front and rear.

1 The rear T20 screw was stuck on so tight - it could never loosen on its own
2 So to not strip the head - pulled the cap bolt to provide straight access
3 This provided a direct shot and with a longer driver the T20 came out clean
4 Notice the size of metal particles on the fixed magnet - these are not very silty
5 Otherwise all looked fine and was now time to drill clean and pot both sensors

6 Drilling was super simple if you have a moveable guide on your hand drill
7 Just take it slow and make sure you have very bright lighting to see depths
8 Note that the front translucent is much firmer vs the black back material
9 Potting used more that 1/2 of the 25ml tube - to pot both front and rear
10 To ensure every air bubble and air pocket was for sure pumped out

11 You want a very steady stream of compound to flow not sporadic bubbles
12 Which actually did happen for quite a while - while doing the final injecting
13 Tomorrow will re-install and probably pull the front cap bolt for the T20
14 That way enough straight on drive force can be applied with red threadlock
15 Also might as well buzz off any rust and apply more CRC Marine cosmoline

16 Since after 6 salt brine years the amount of underbody rust is almost zero
17 Finally notice the potting compound injector nozzle looks almost unused
18 Just run under very hot tap water and the product clears right out
19 Then blow air through and it can for sure be re-used again

Good luck with it.

Jeep Wrangler JL Locker Position Sensor Potting - DANA 44 71B17593-2B02-4601-8484-82A15D4F80D5


Jeep Wrangler JL Locker Position Sensor Potting - DANA 44 4FBB212A-8365-47DA-9D99-E943B3CD9F7E


Jeep Wrangler JL Locker Position Sensor Potting - DANA 44 A40CA4D9-53CA-4C2F-B802-0A800075A5C5


Jeep Wrangler JL Locker Position Sensor Potting - DANA 44 D4D94D45-A2B6-4A96-BA1B-E7BA26B5323C


Jeep Wrangler JL Locker Position Sensor Potting - DANA 44 283CE137-5C00-492E-970C-15CF79CDDBB6
Sponsored


Top