usmcss
Well-Known Member
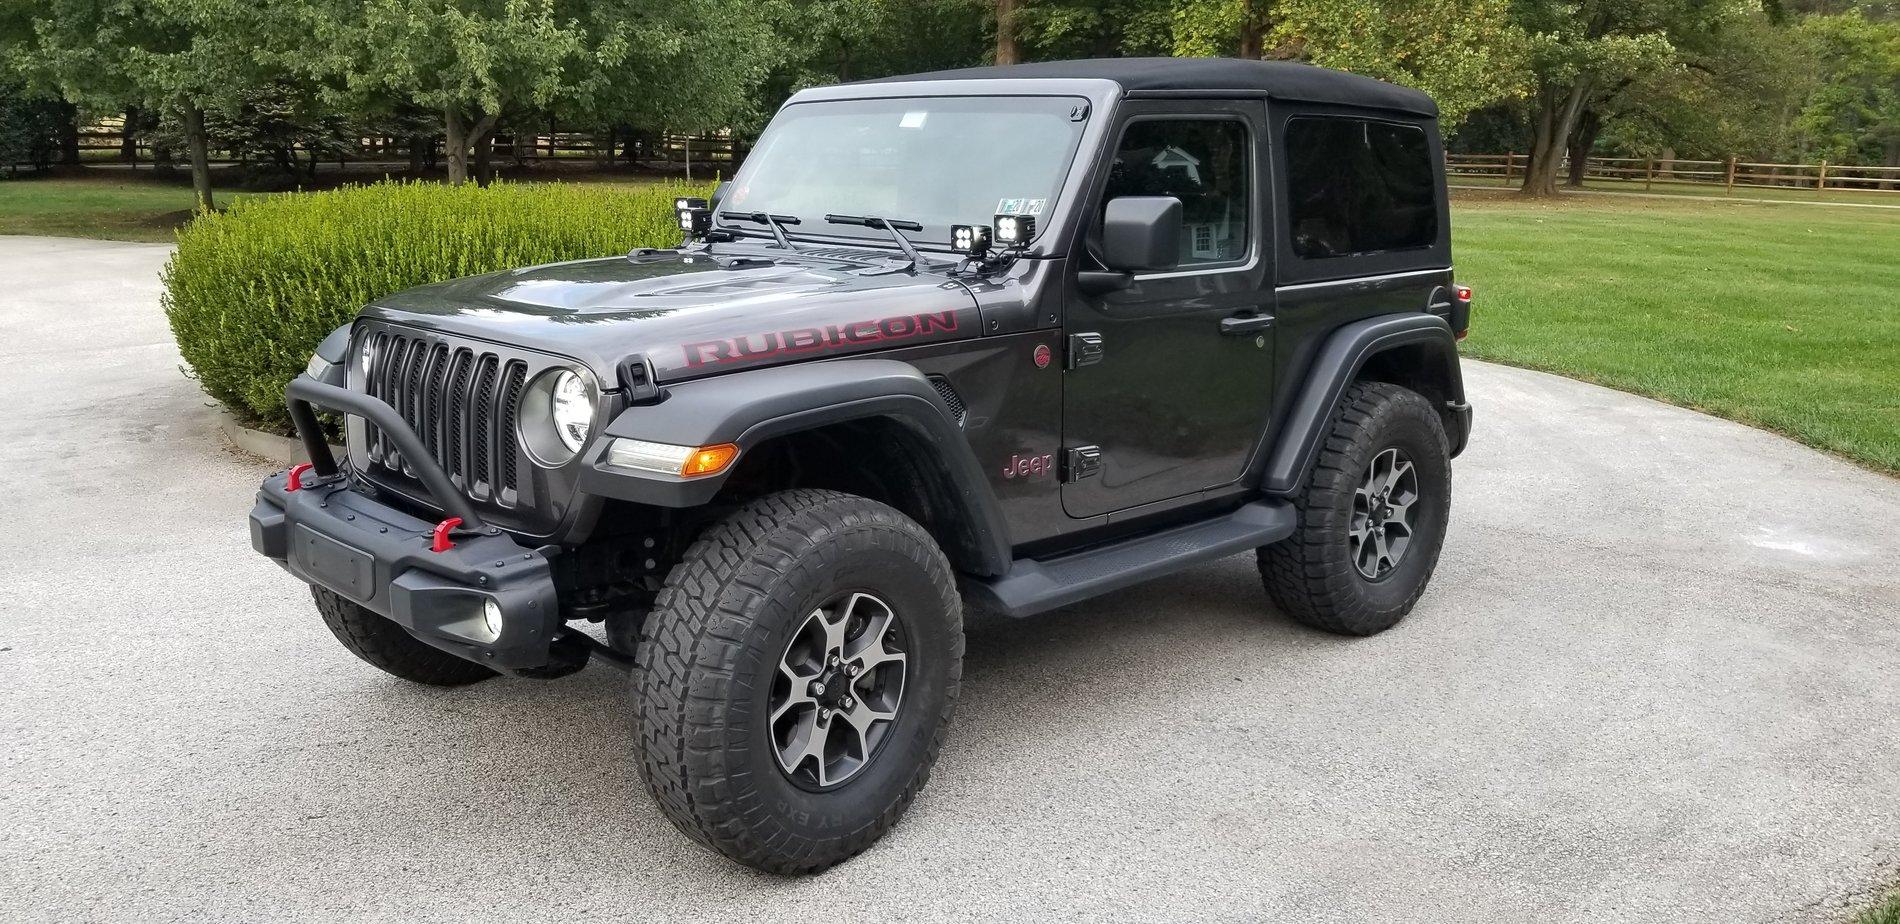
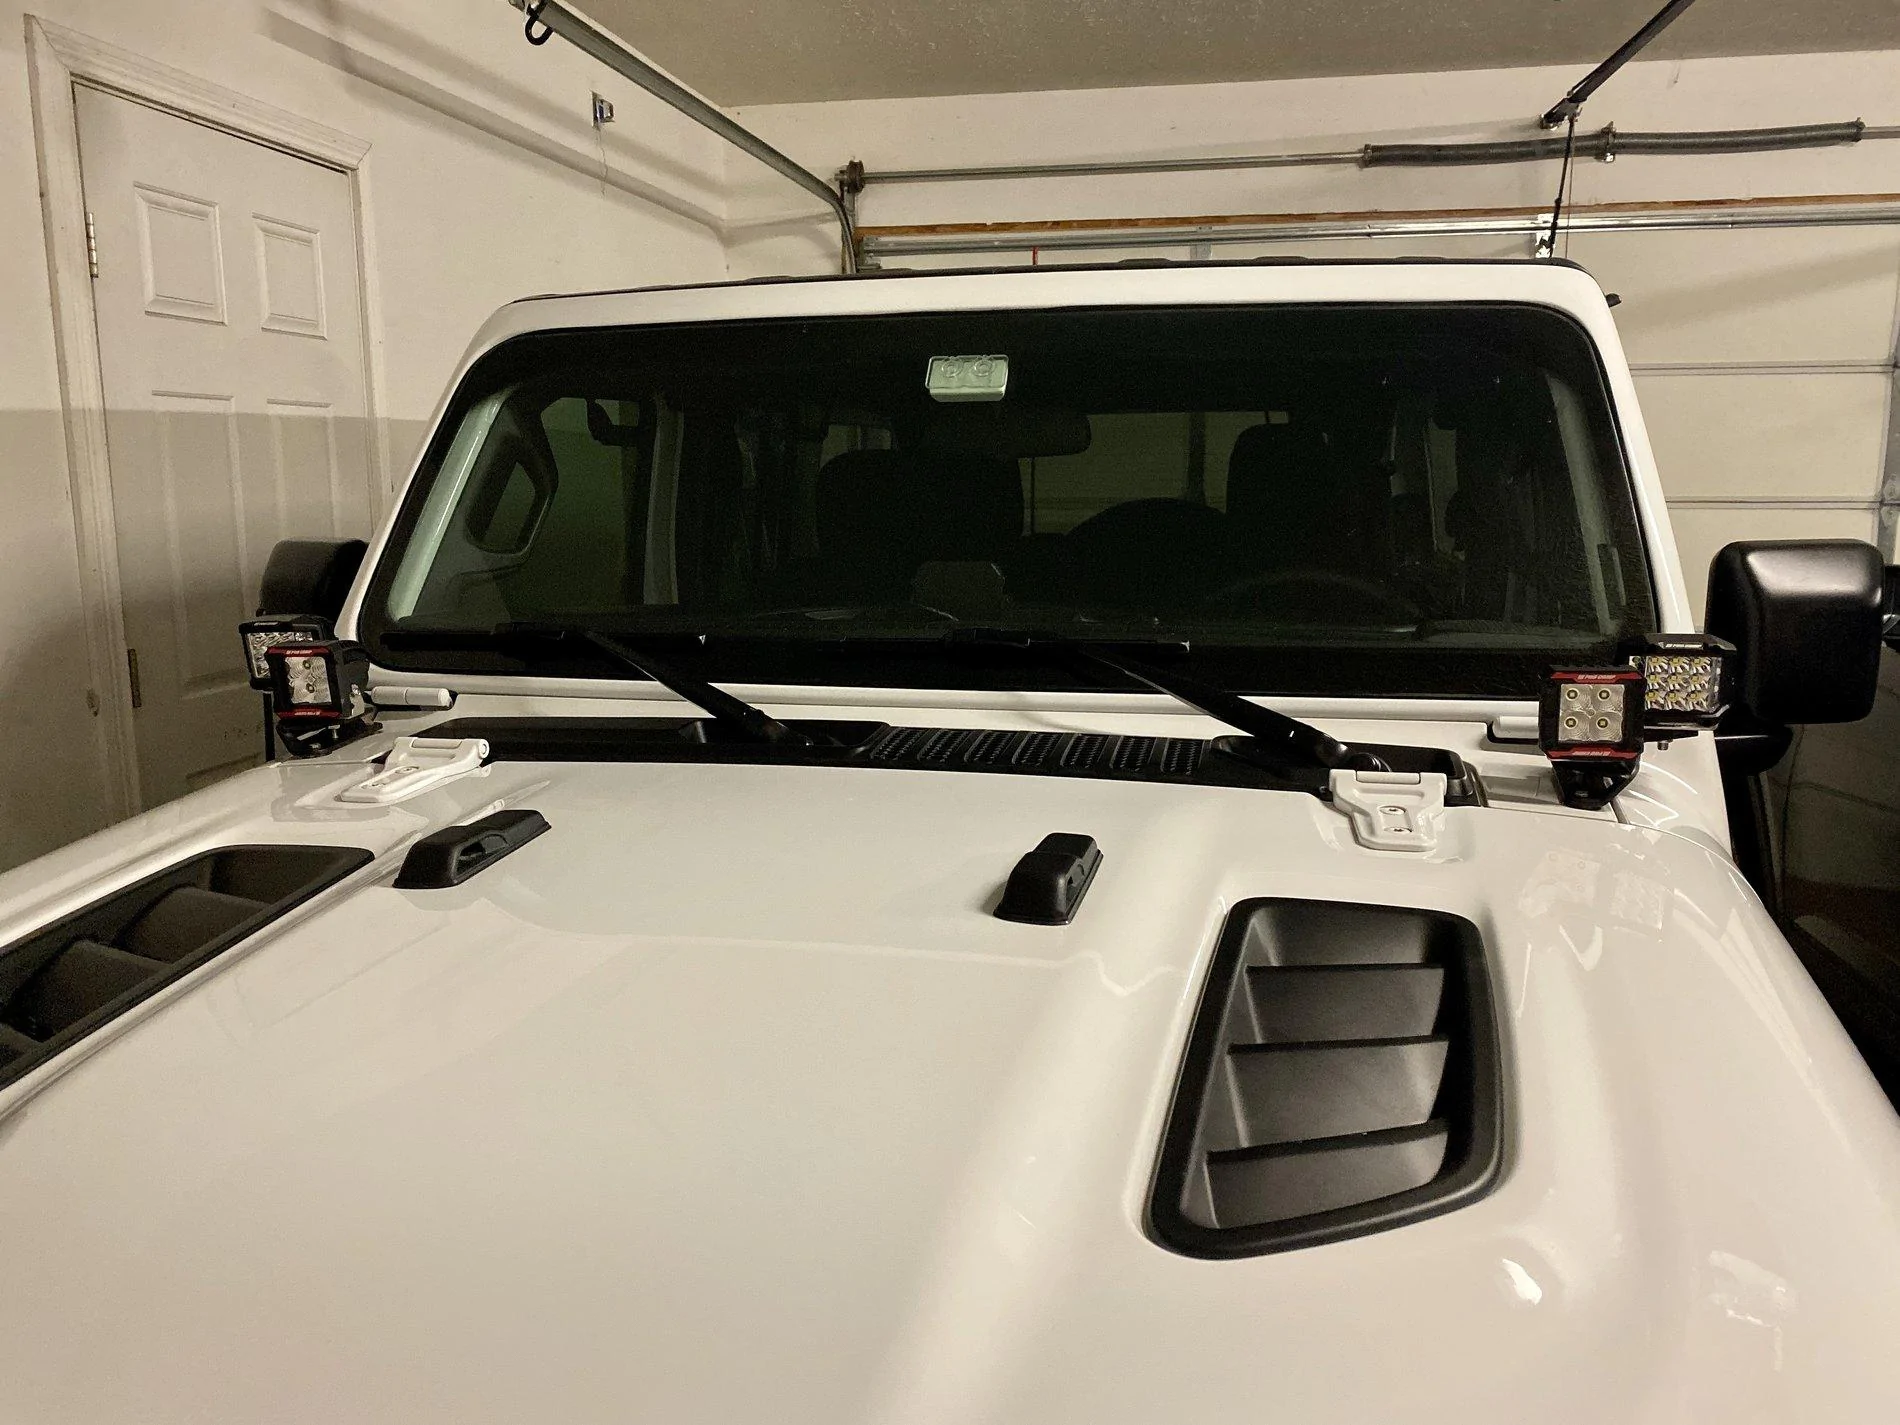
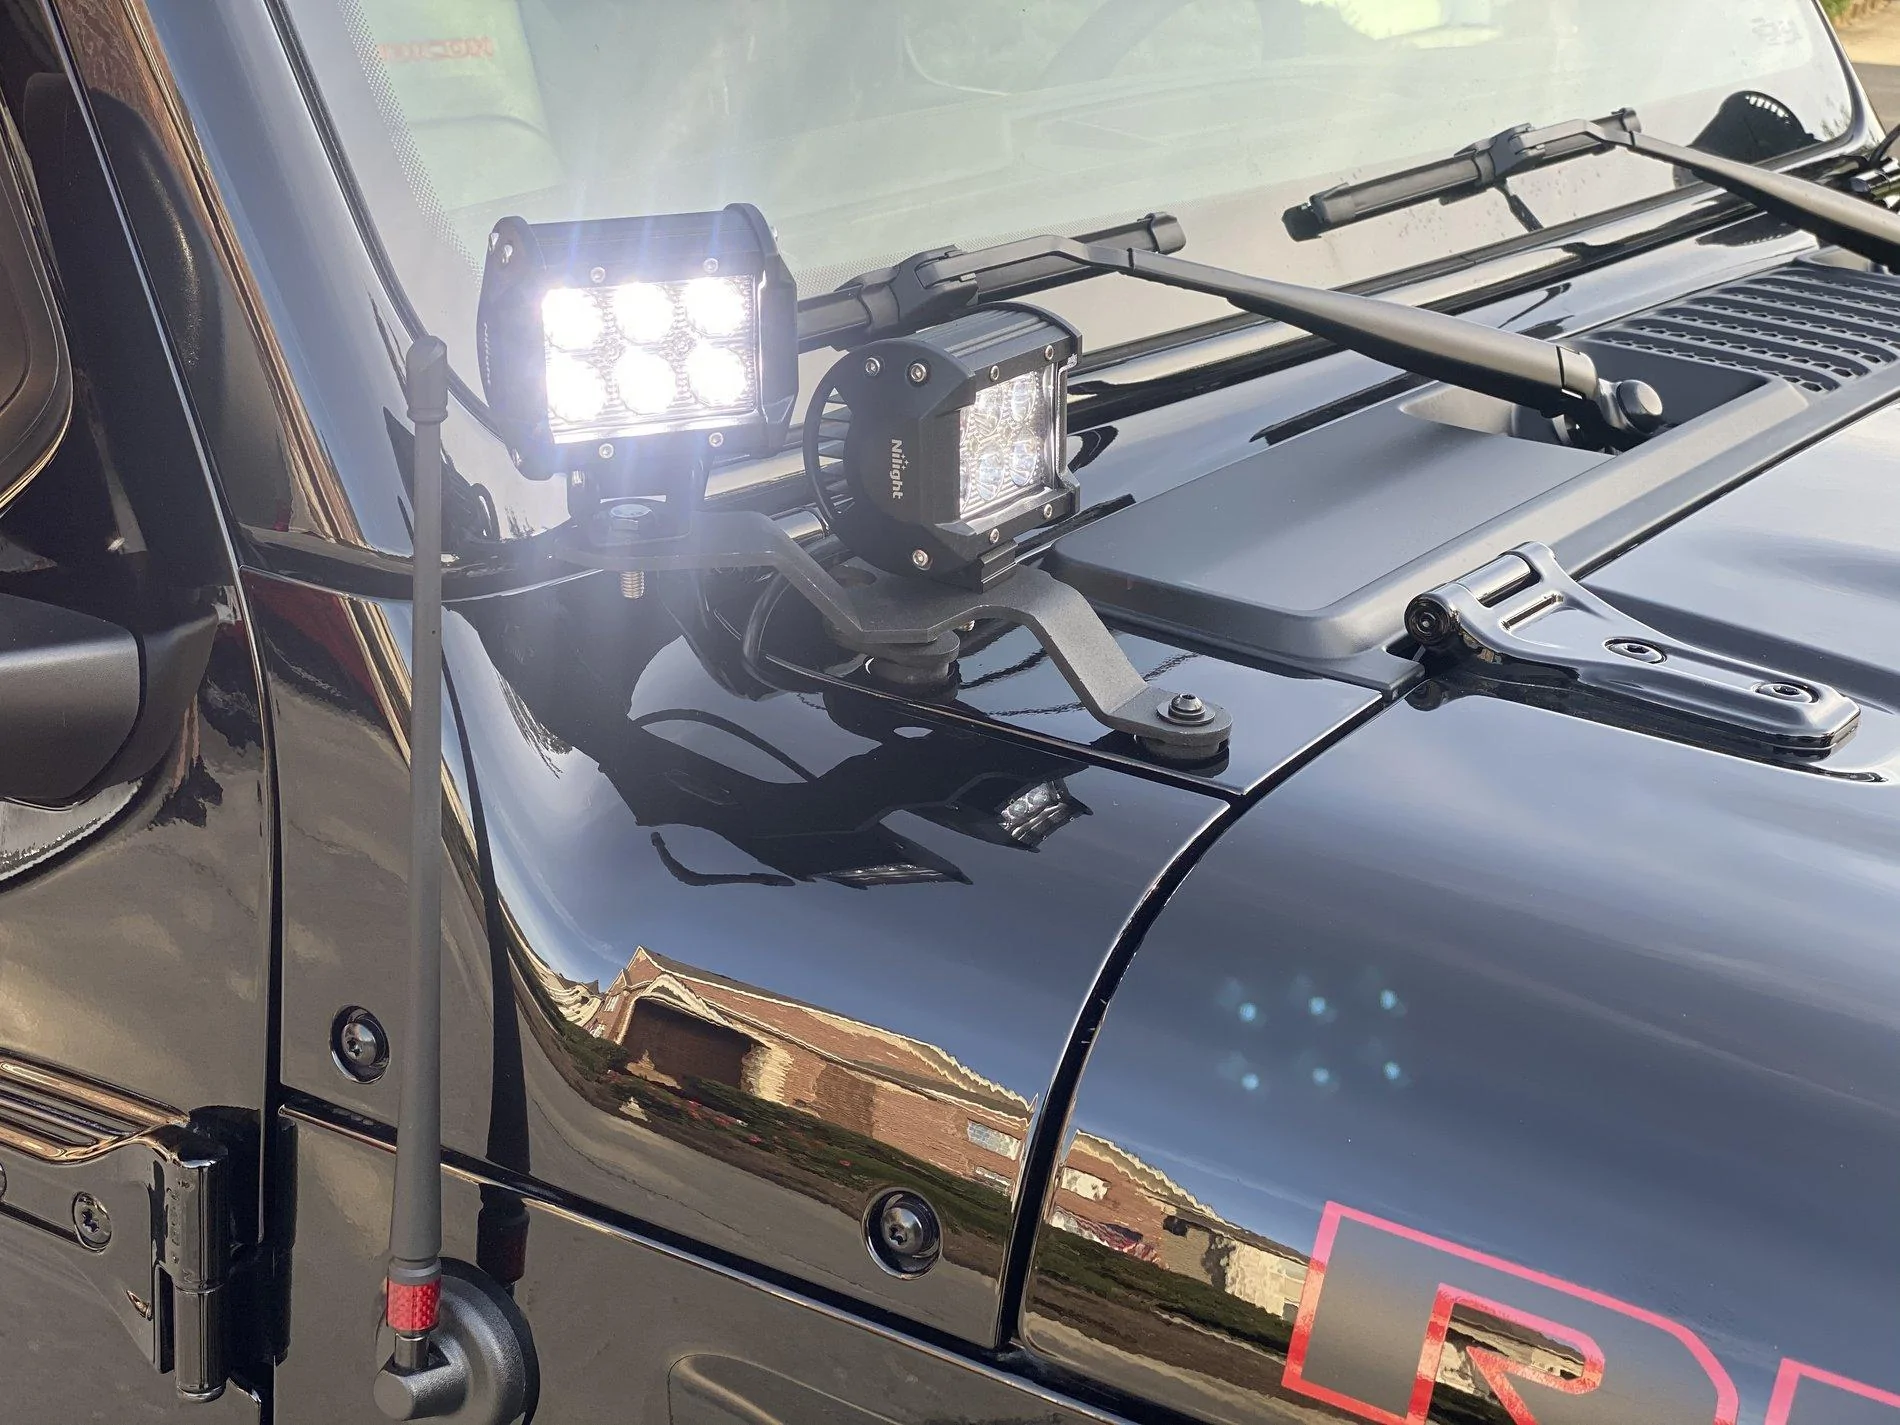
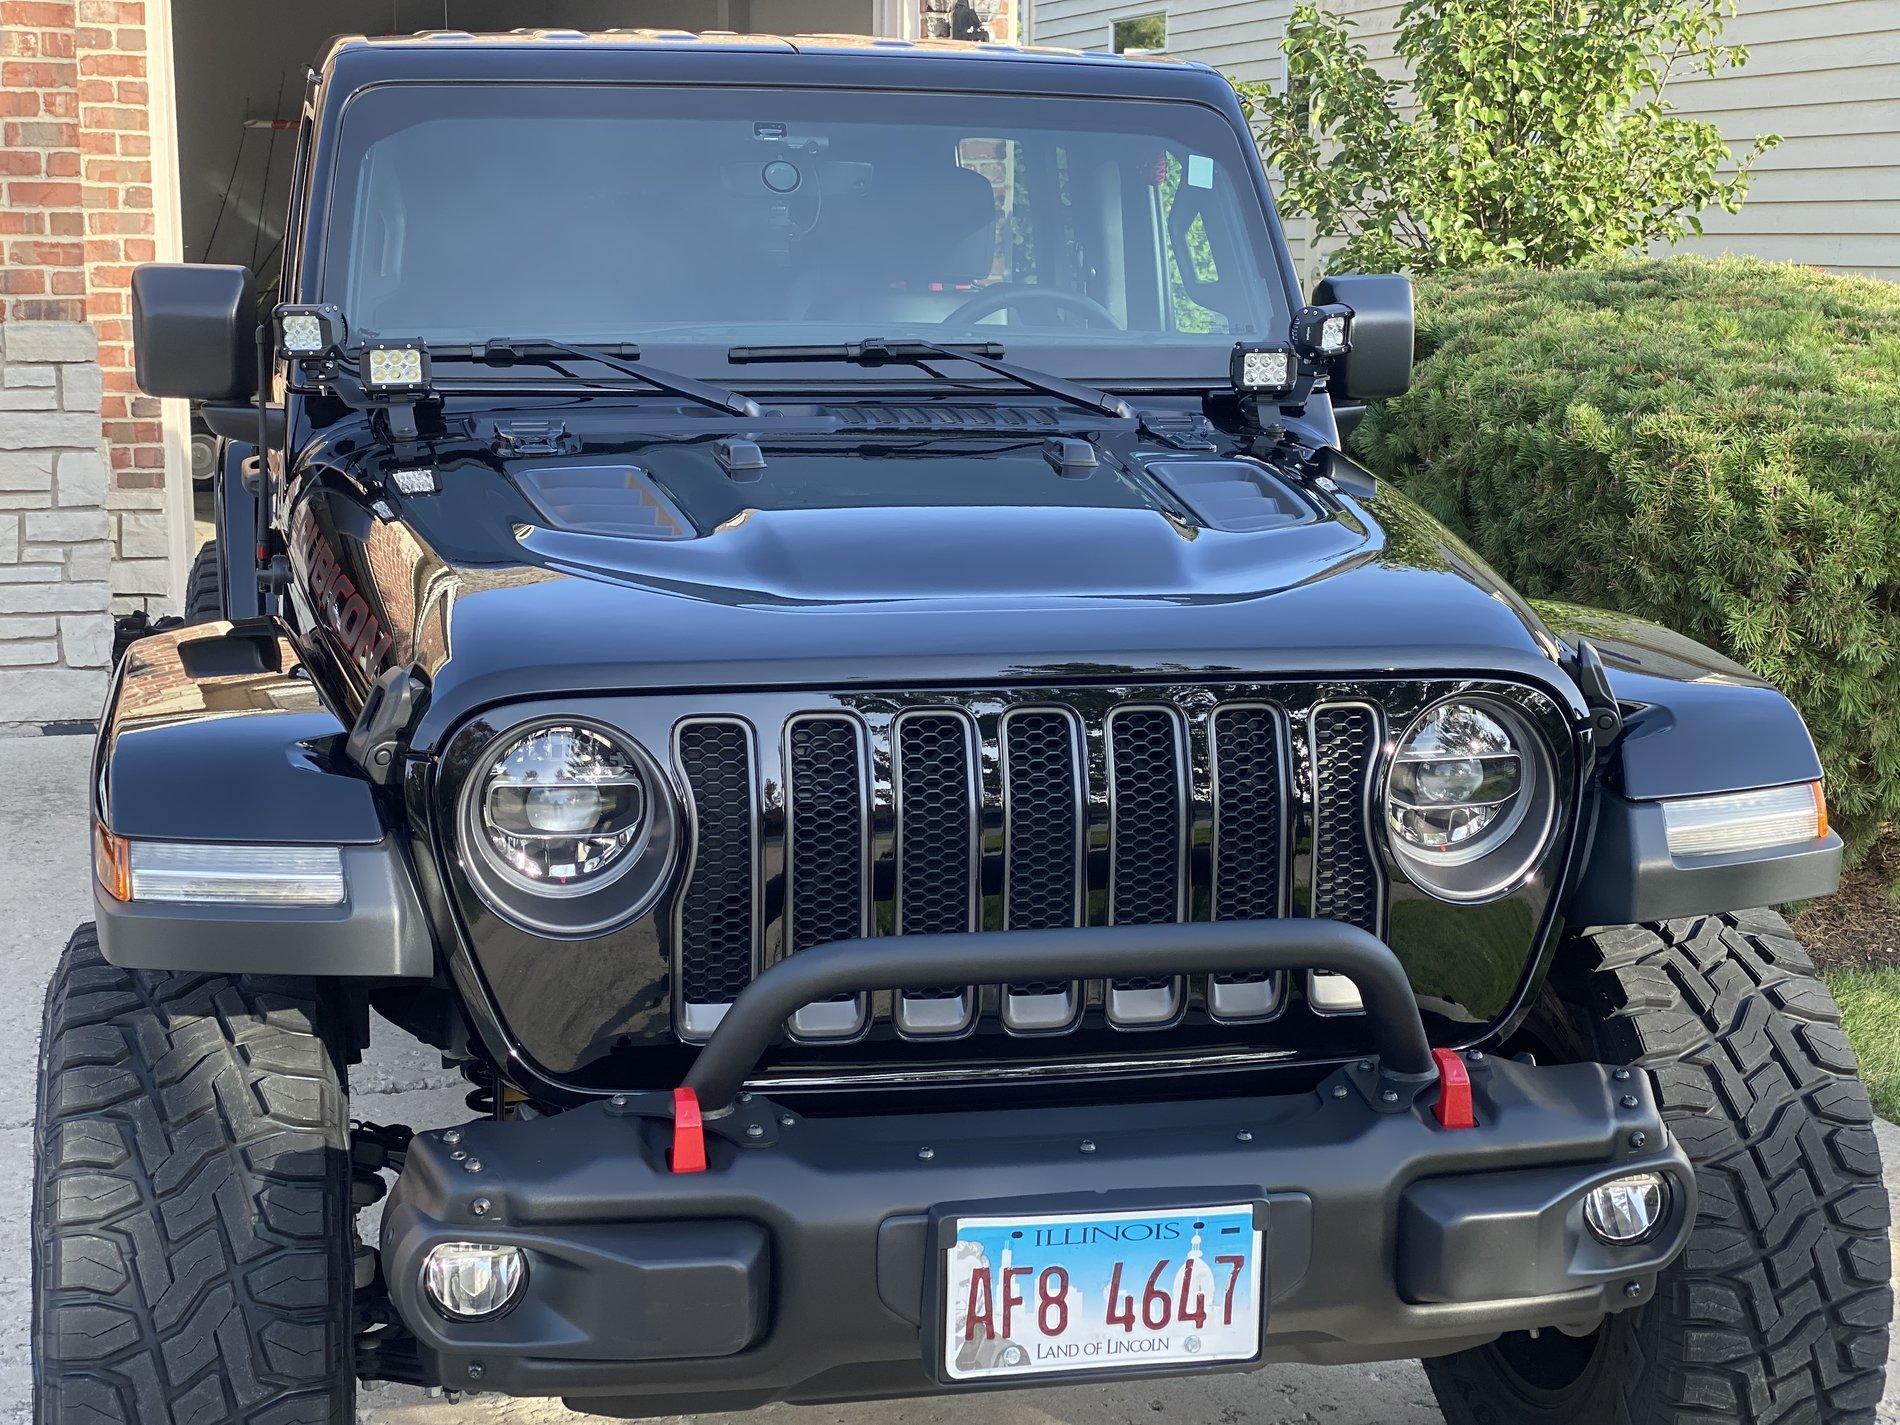
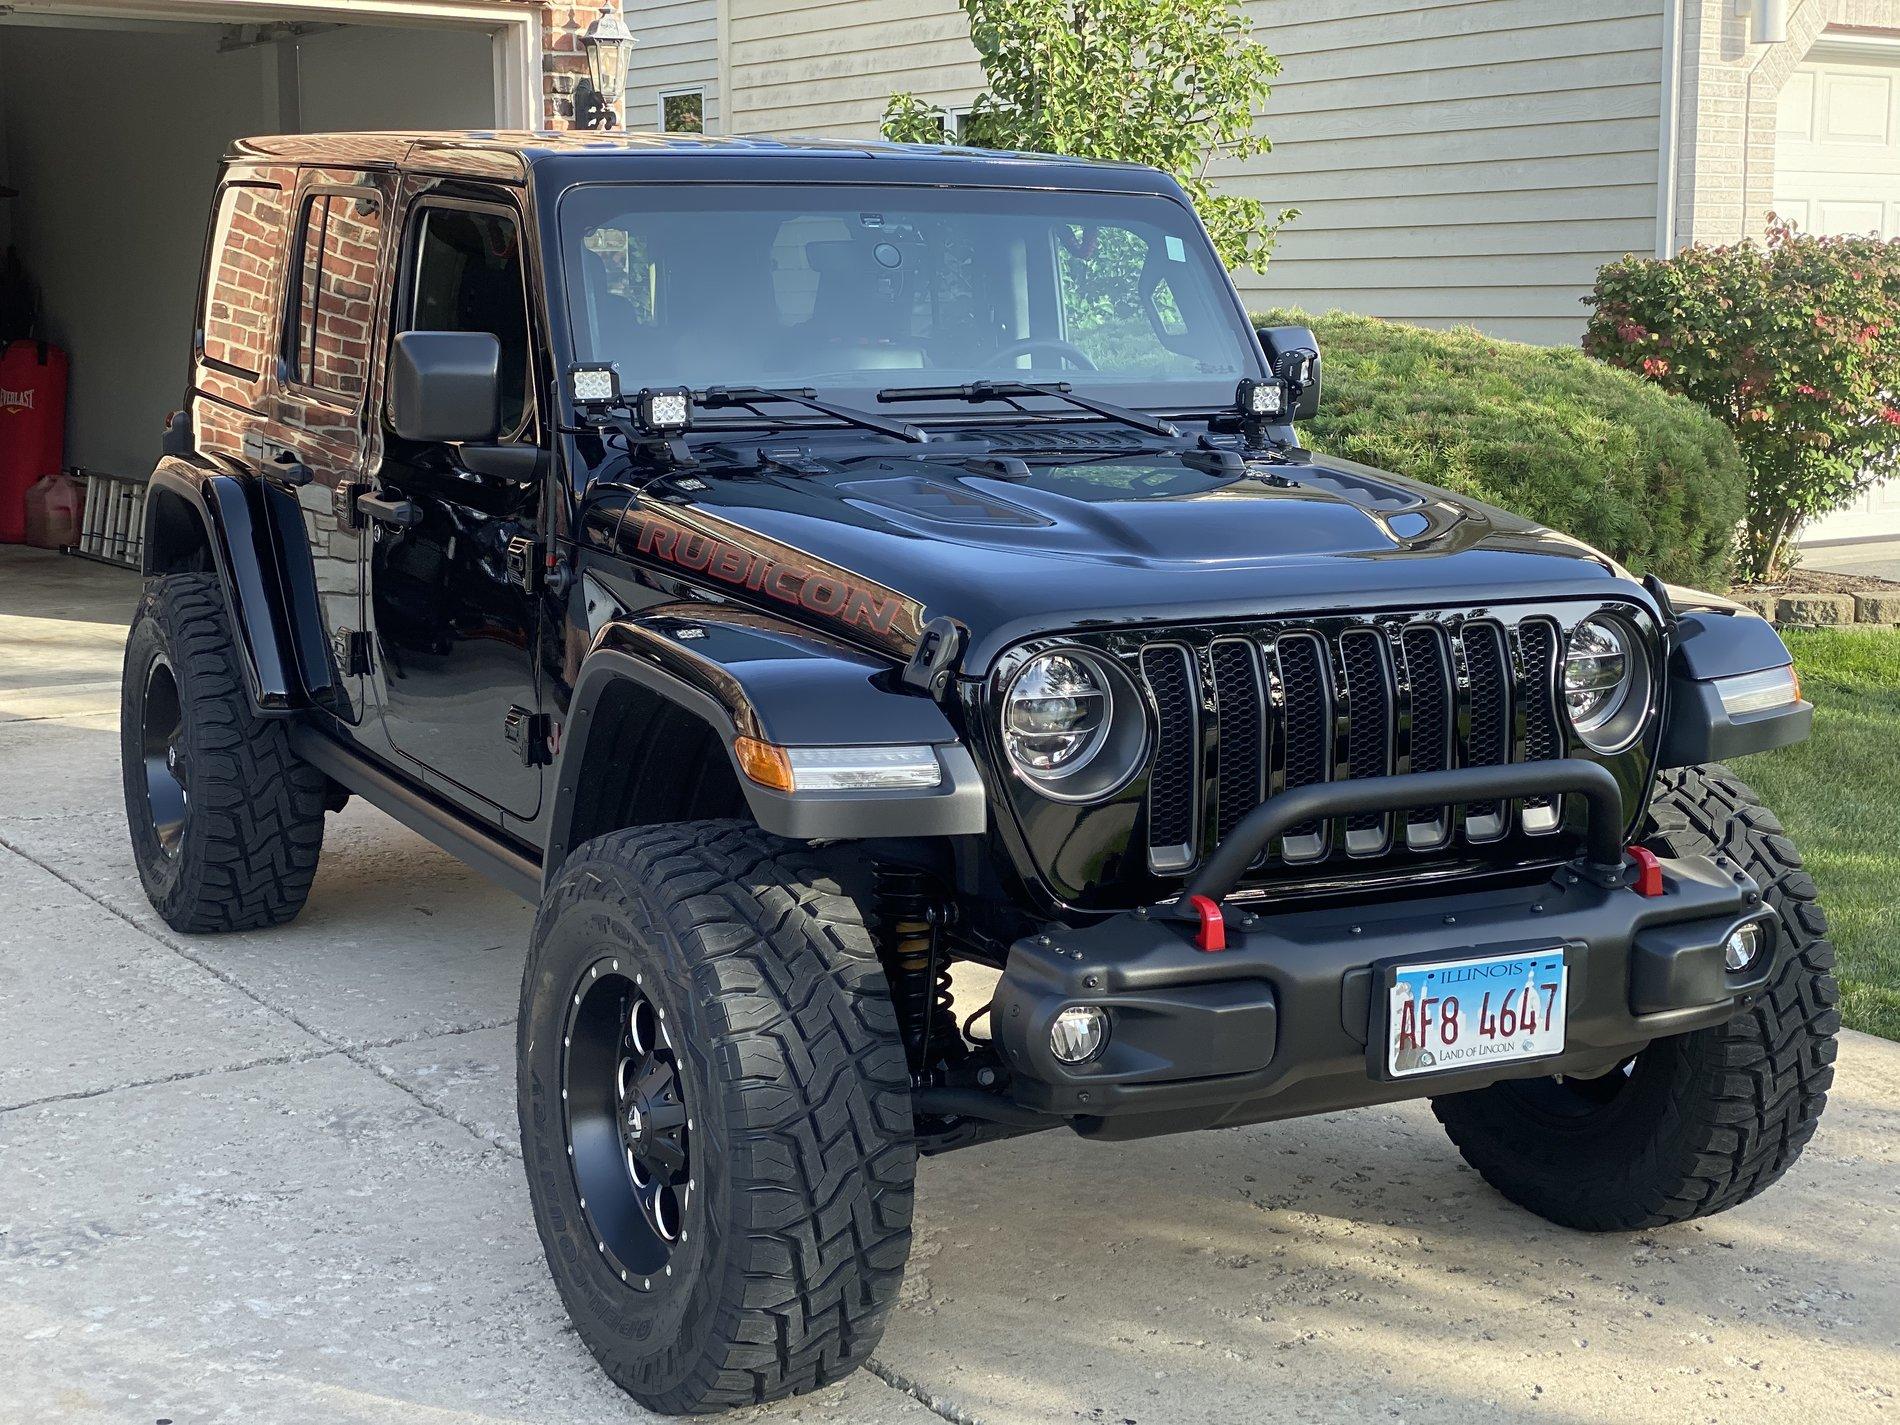
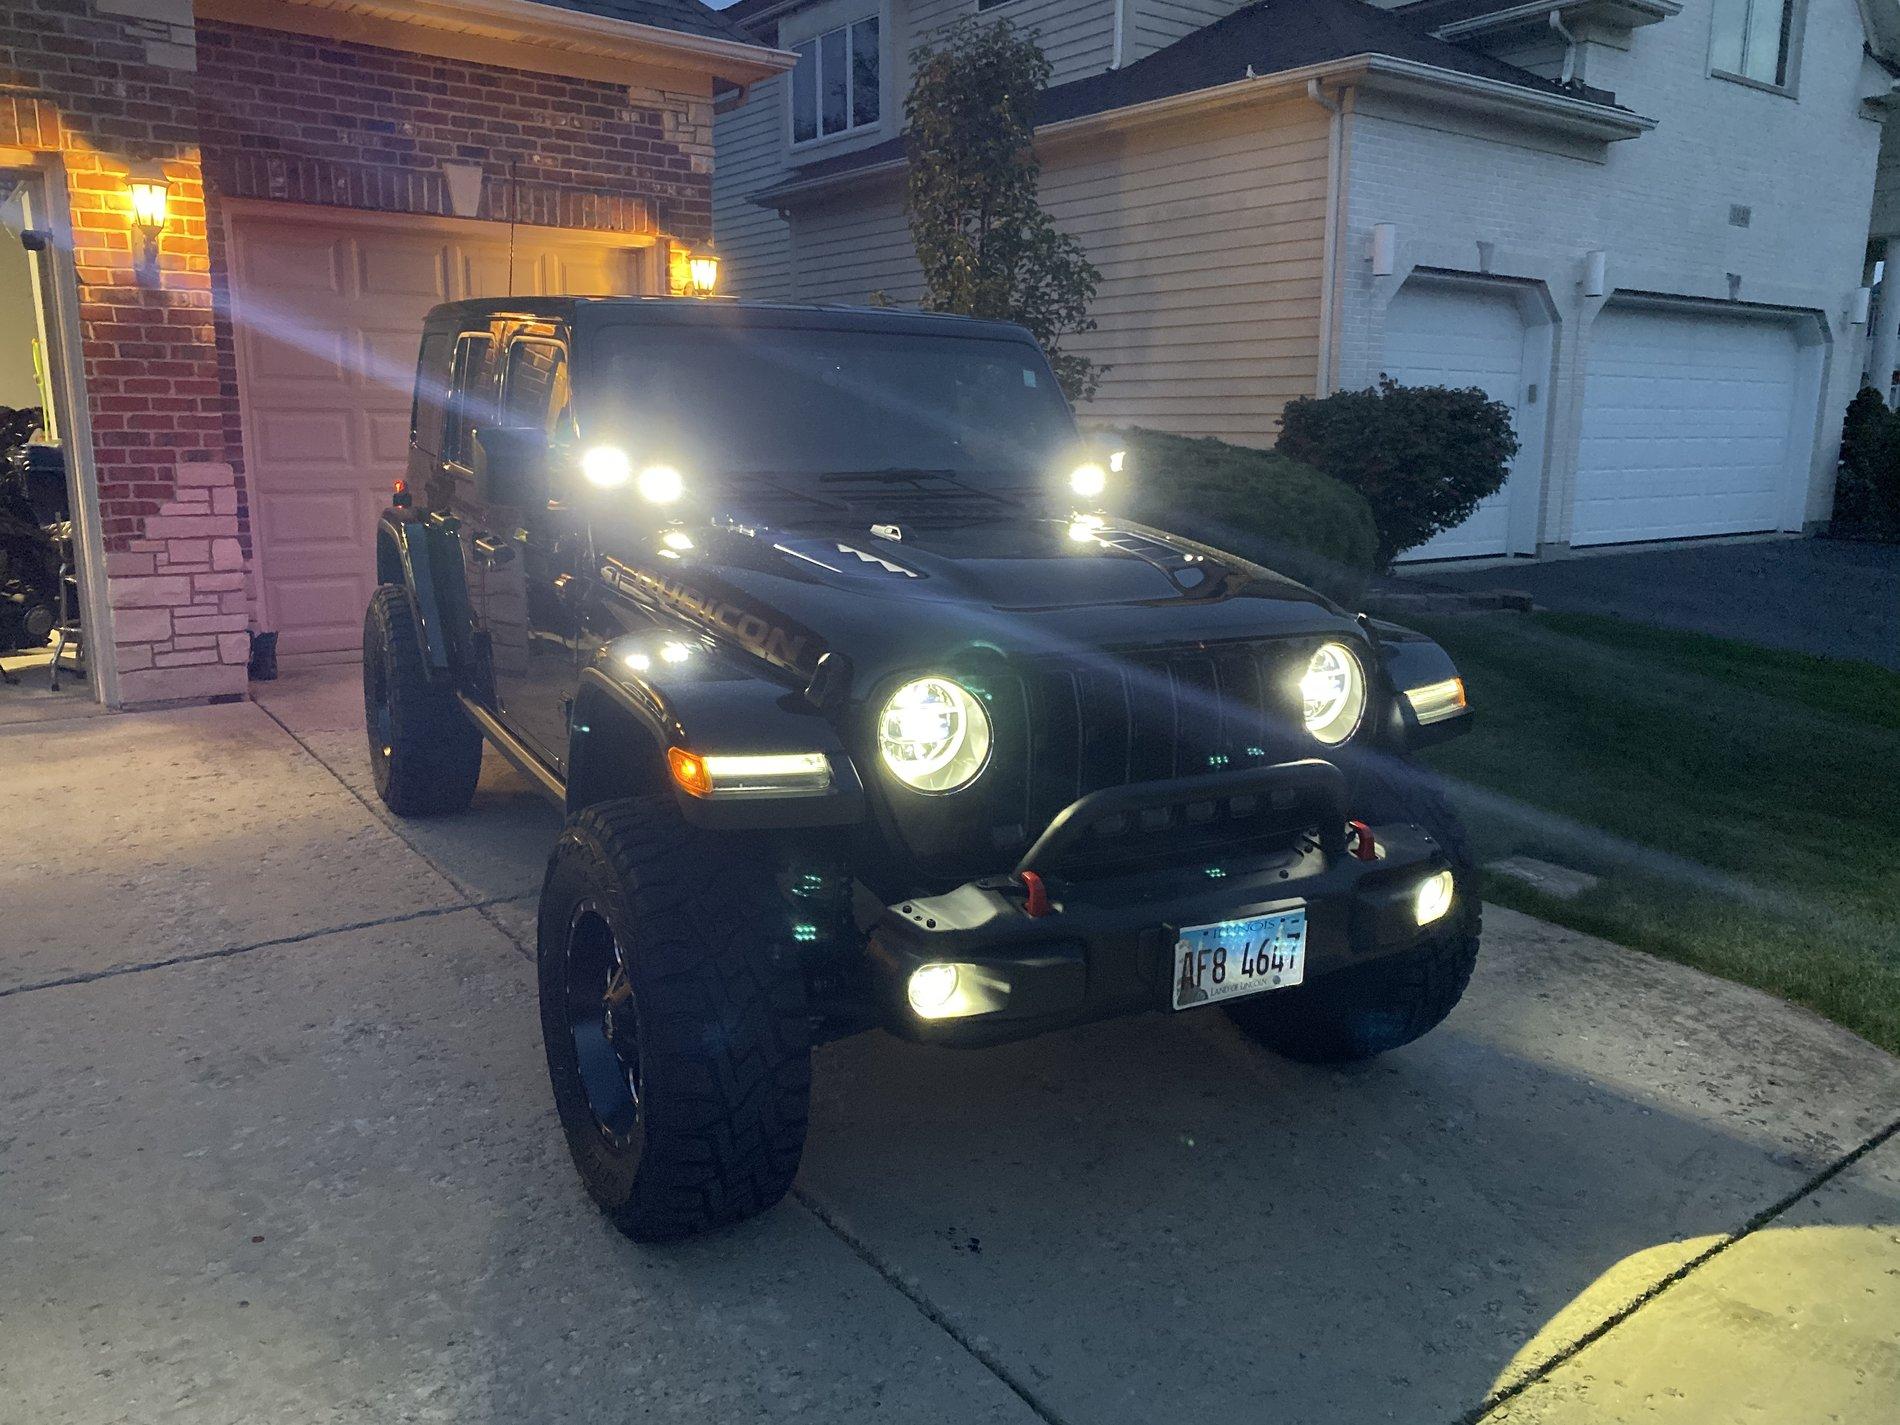
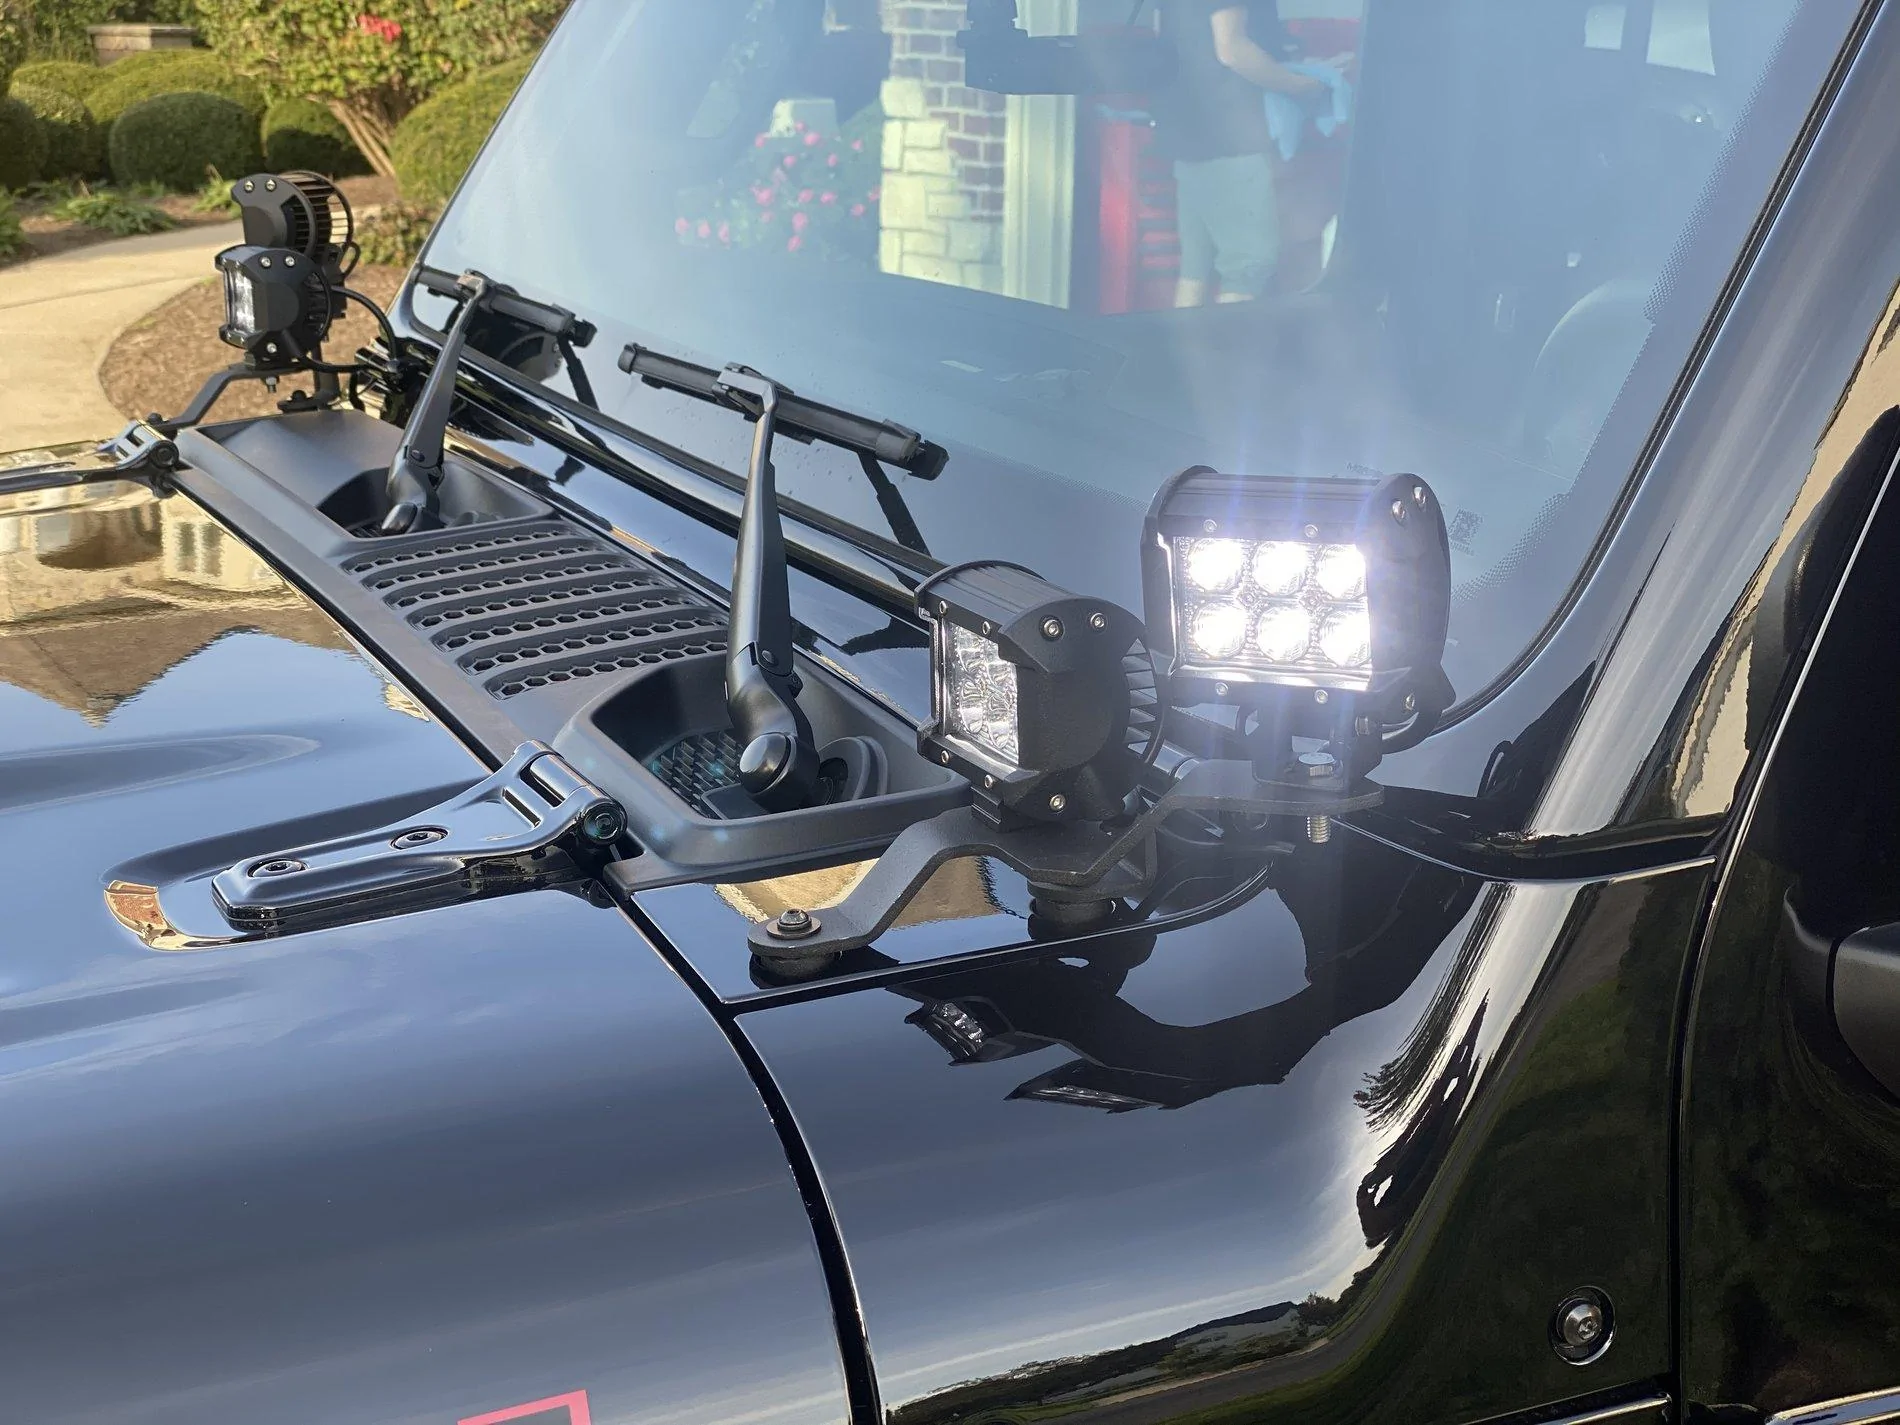
I was just reading where someone said make sure you tighten all the Screws on the lights and you won’t have any problems with leaks.Since I've never been on a trail, I was told on the forum to pass on the roof light bar because of wind noise and get some pod lights instead. Wanted the lights just in case I ever needed them, so I got some cheap ones. eBay for the mount and Amazon for the lights.
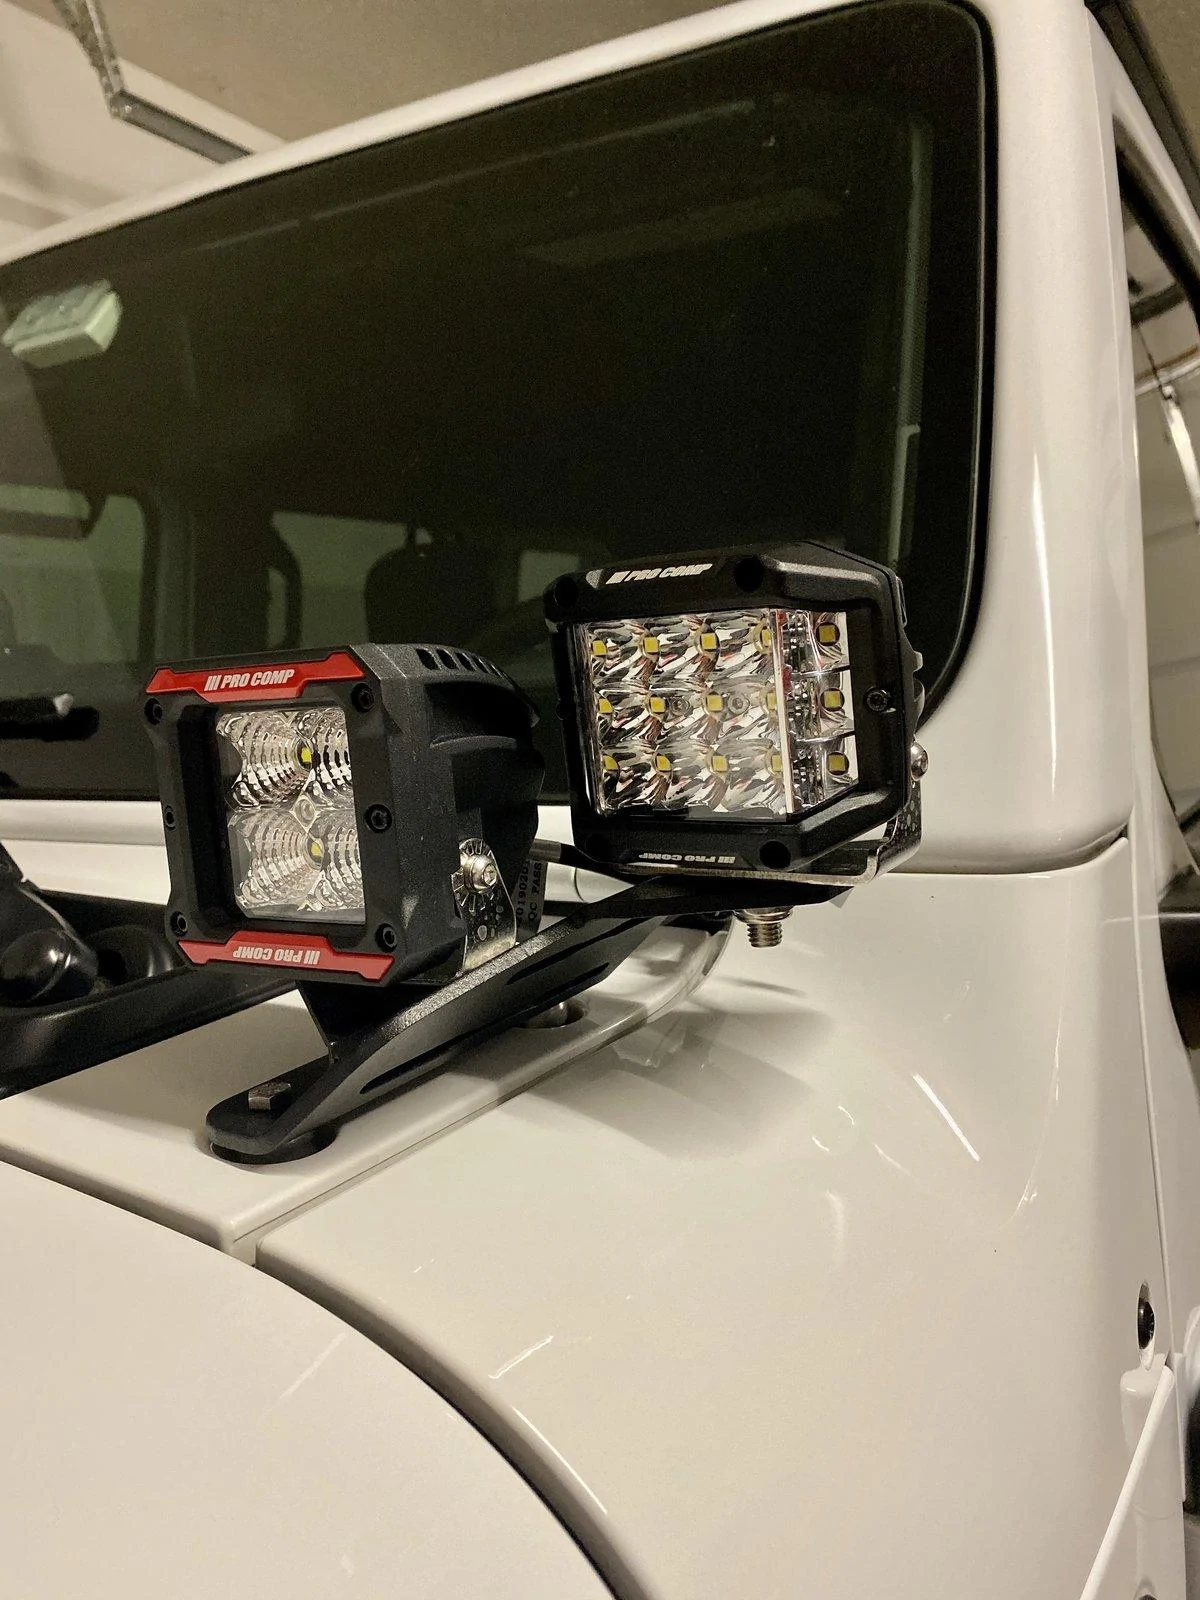
About $25 for two floods and two spot lights. Mount was $32, but I suggest putting some foam tape underneath. It came with two thin little foam pieces.
https://www.amazon.com/gp/product/B00IY3YLCI/ref=ppx_yo_dt_b_asin_title_o02_s00?ie=UTF8&psc=1
https://www.amazon.com/gp/product/B00G620ZVU/ref=ppx_yo_dt_b_asin_title_o02_s00?ie=UTF8&psc=1
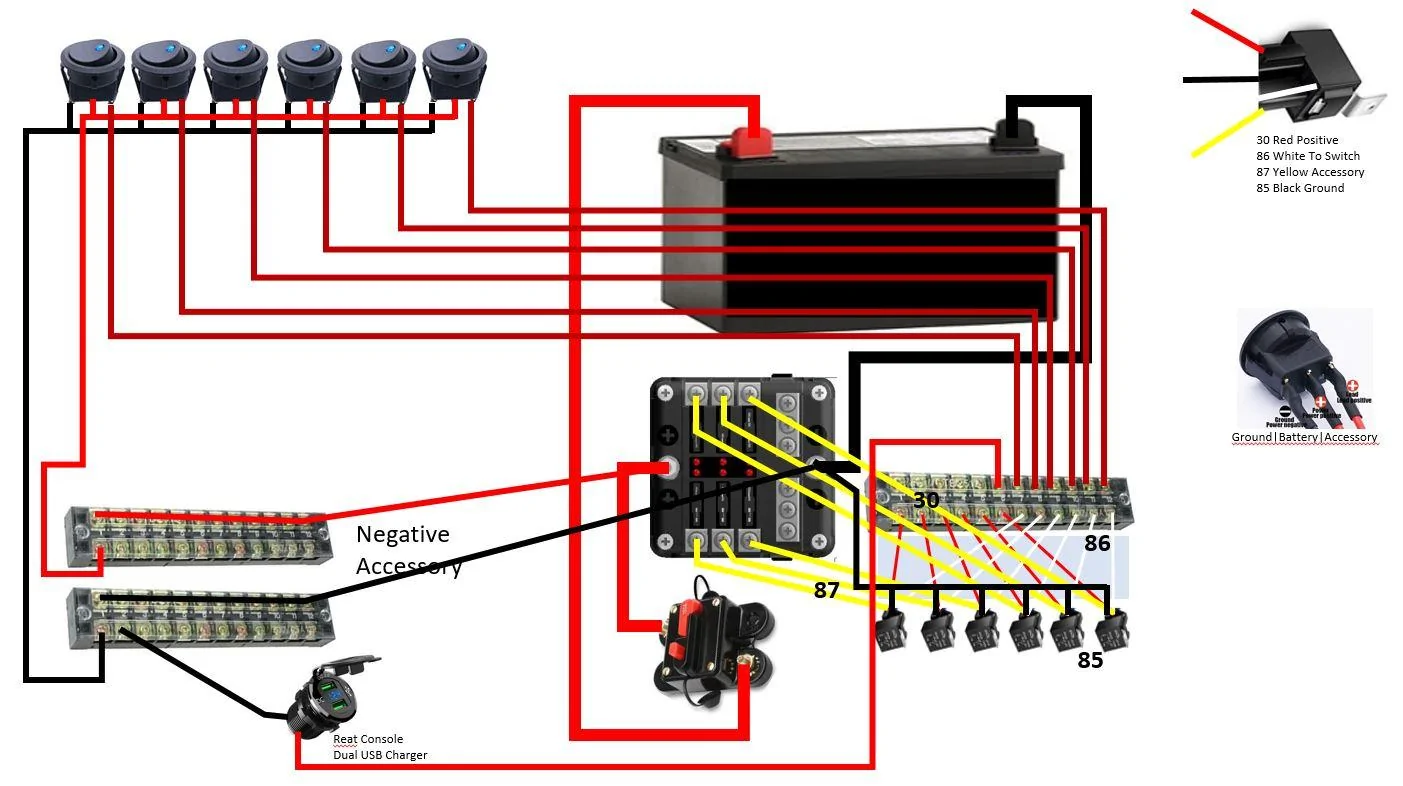
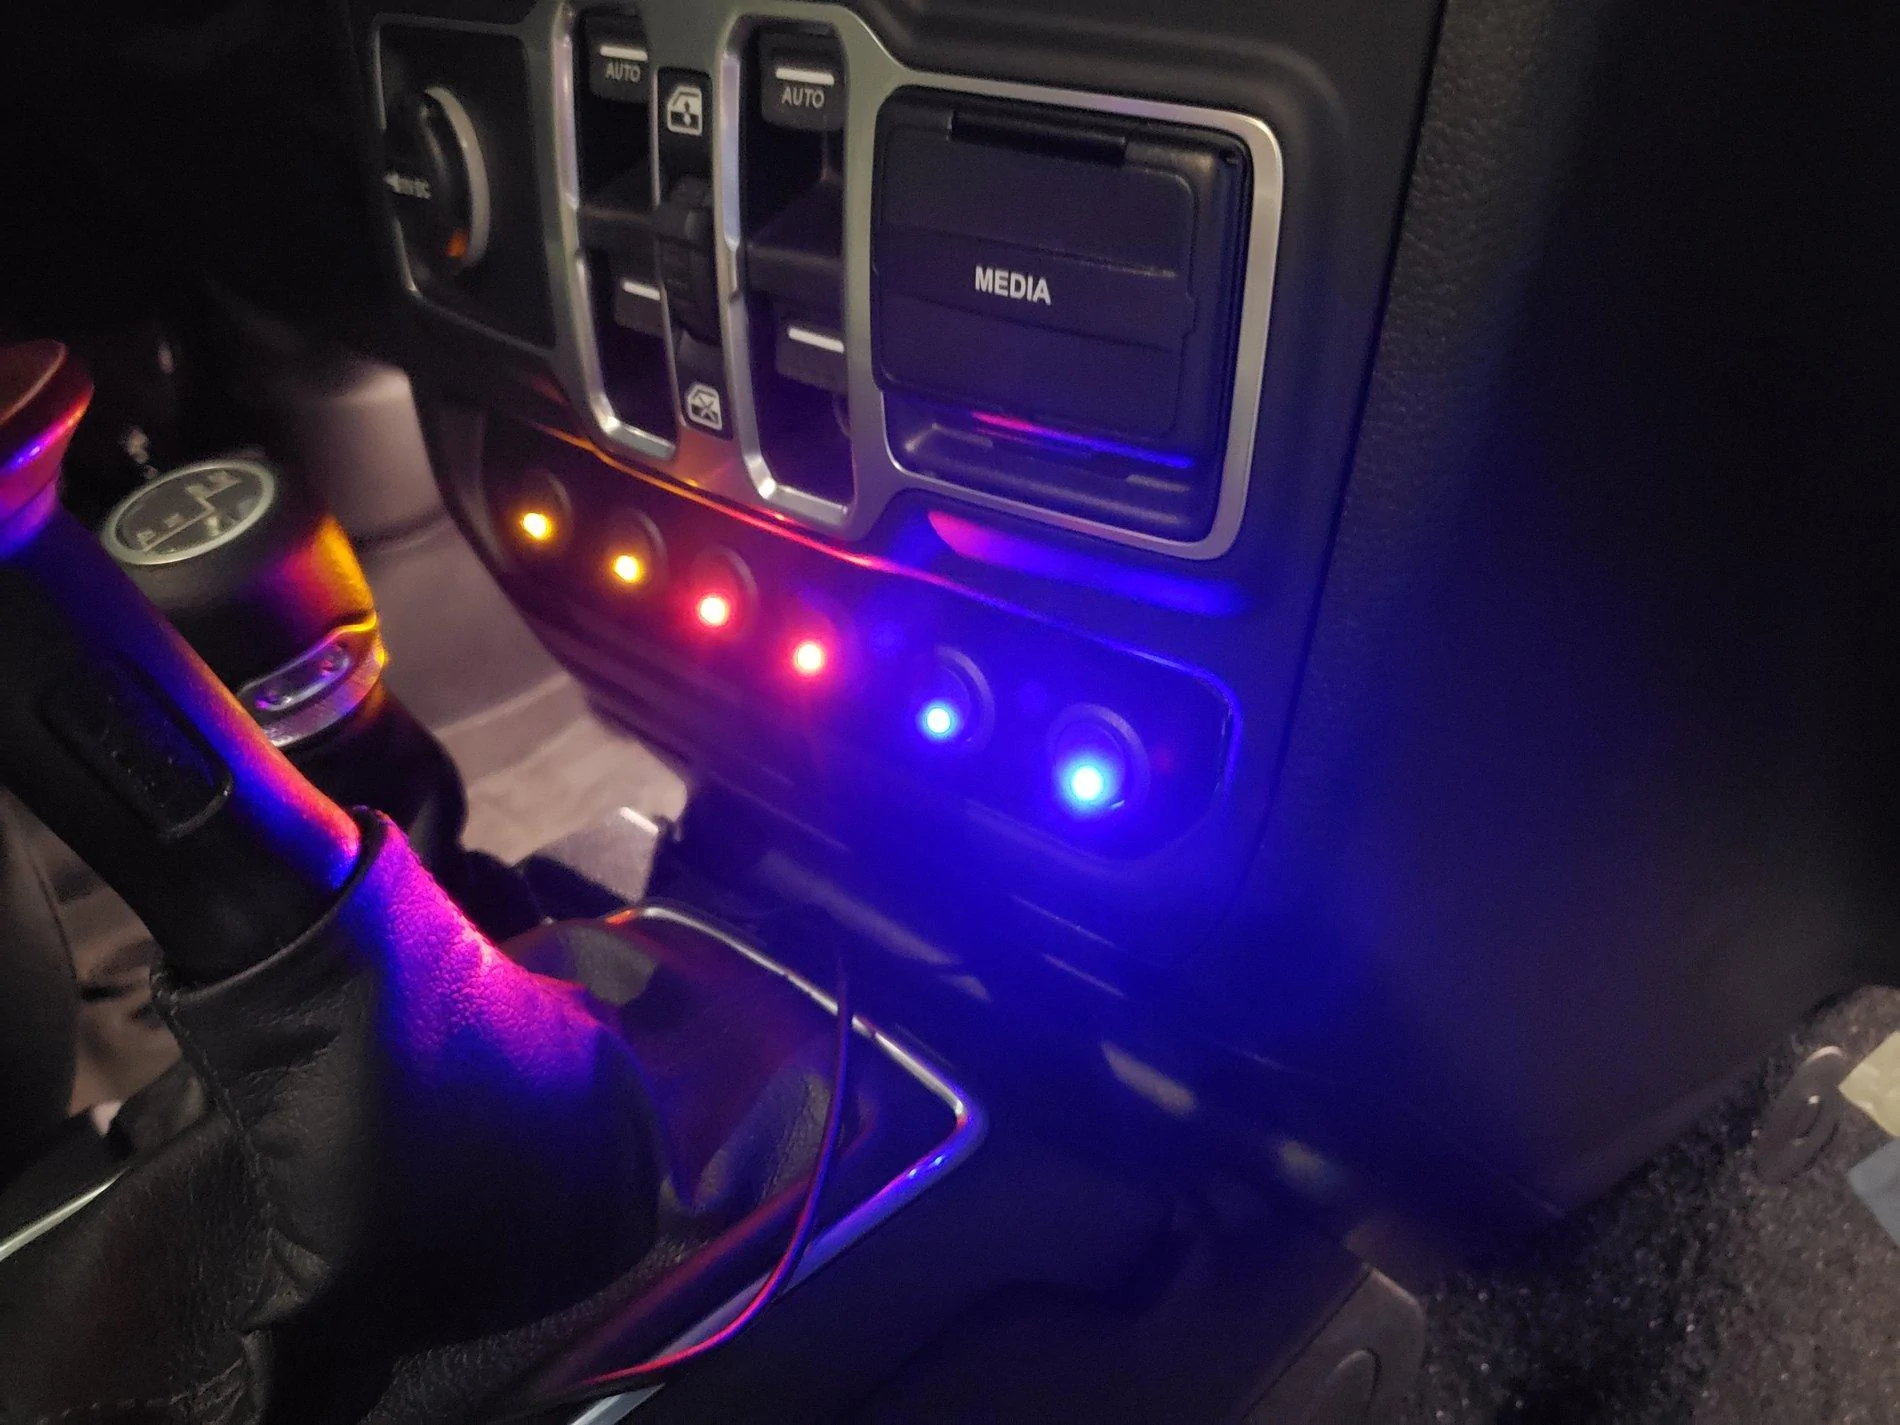
Oh and I made a DIY switch panel a week ago and hooked up the lights to it.


Sponsored