CJ26
Well-Known Member
- First Name
- Connor
- Joined
- Aug 18, 2024
- Threads
- 14
- Messages
- 77
- Reaction score
- 161
- Location
- South Florida
- Vehicle(s)
- 2024 Jeep Wrangler 4Dr Sahara
- Thread starter
- #1
I've been dealing with this issue ever since we bought our 2024 Jeep Wrangler Sahara. It was evident at some point that it was hit by a sprinkler on the front fascia as well as the passenger front wheel. I finally got around to finding a solution that I thought I would share with anyone that is interested or is undergoing this very issue. Full disclaimer, please be kind in the comments. I'll probably come off as a pretty boy by not getting his Jeep dirty. I know they're made to go off-road and get filthy in the process but that still doesn't mean we shouldn't take care of them either.
I watched a tutorial on Youtube that specifically demonstrates how to remove water etching off of plastic trim. Finding this type of video is tricky considering there's countless videos on removing it from paint but not on plastic.

This is the magic stuff. Thankfully I happened to have a full bottle under the sink. You soak the product on a microfiber pad and do not let it sit for more than a minute. Then, rinse it off with water, dry, and the etching should come off. Although it worked, it does make the finish look a little dull. So I went ahead and put a coat of this on shortly after...
I've experimented with many products over the years and this is by far the best trim restorer I've ever used. It applies evenly and easily, doesn't feel oily to the touch and it doesn't run/wash off after heavy rain. Just as advertised. To anyone who has the full plastic fender flares, which I know is a lot of you, I would seriously give this a try if you haven't already. It'll do wonders for your Jeep's appearance. It'll make it look almost new again. Here's some before and after shots, using the plastic trim under the parking lights as an example.
Before:
After:
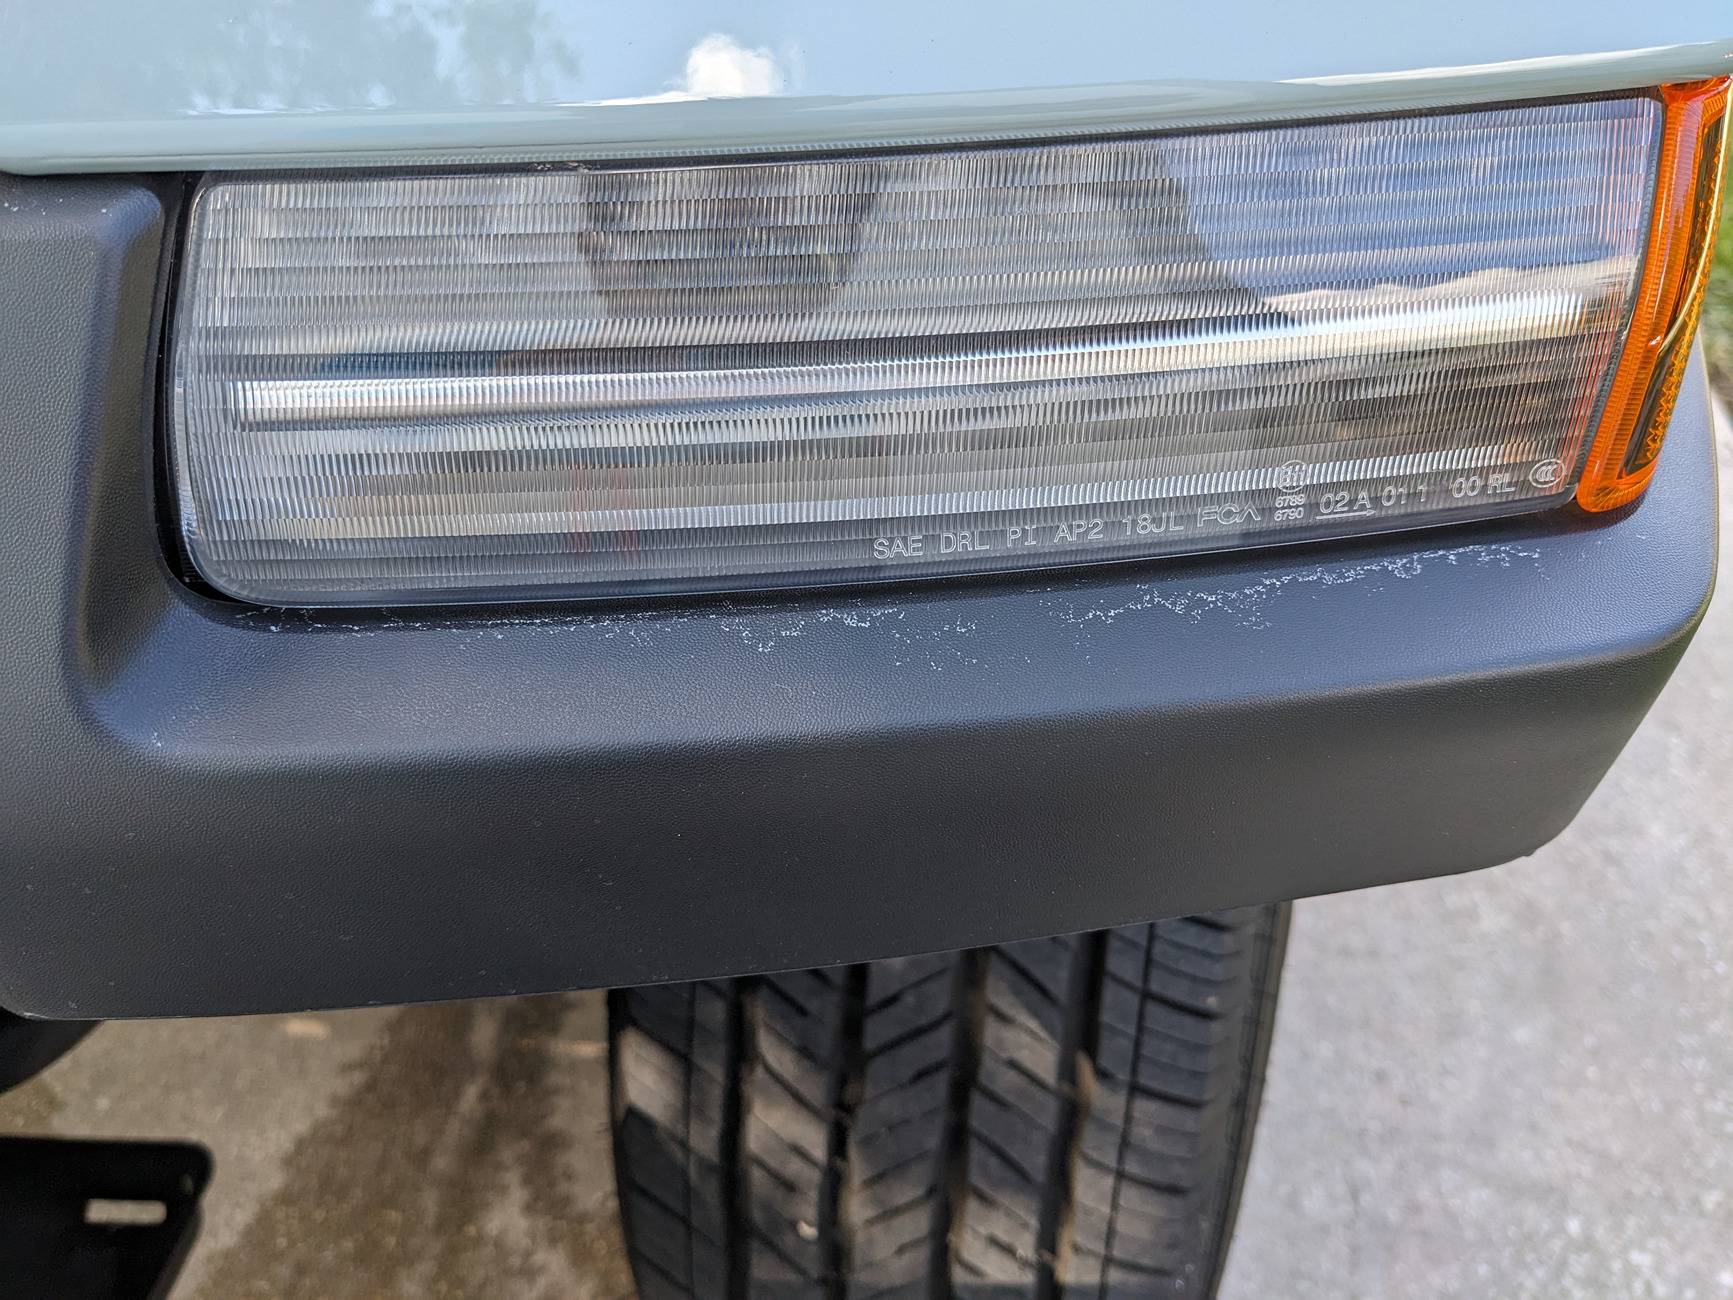
This is after applying it to the front bumper. I forgot to take a pic of the before but imagine what you saw under the parking lights but all over the front bumper.
Then after hitting it with the 303 Aerospace...
It's still not perfect by any means but a drastic improvement. There's still some noticeable etching tucked in the very back of the bumper underneath the grille as shown above. It was a bit stubborn under there but I didn't want to obsess too much over it. I was more concerned with the very front of the bumper and fender flares. I'm very happy with the results.
I have this video to thank...
I watched a tutorial on Youtube that specifically demonstrates how to remove water etching off of plastic trim. Finding this type of video is tricky considering there's countless videos on removing it from paint but not on plastic.
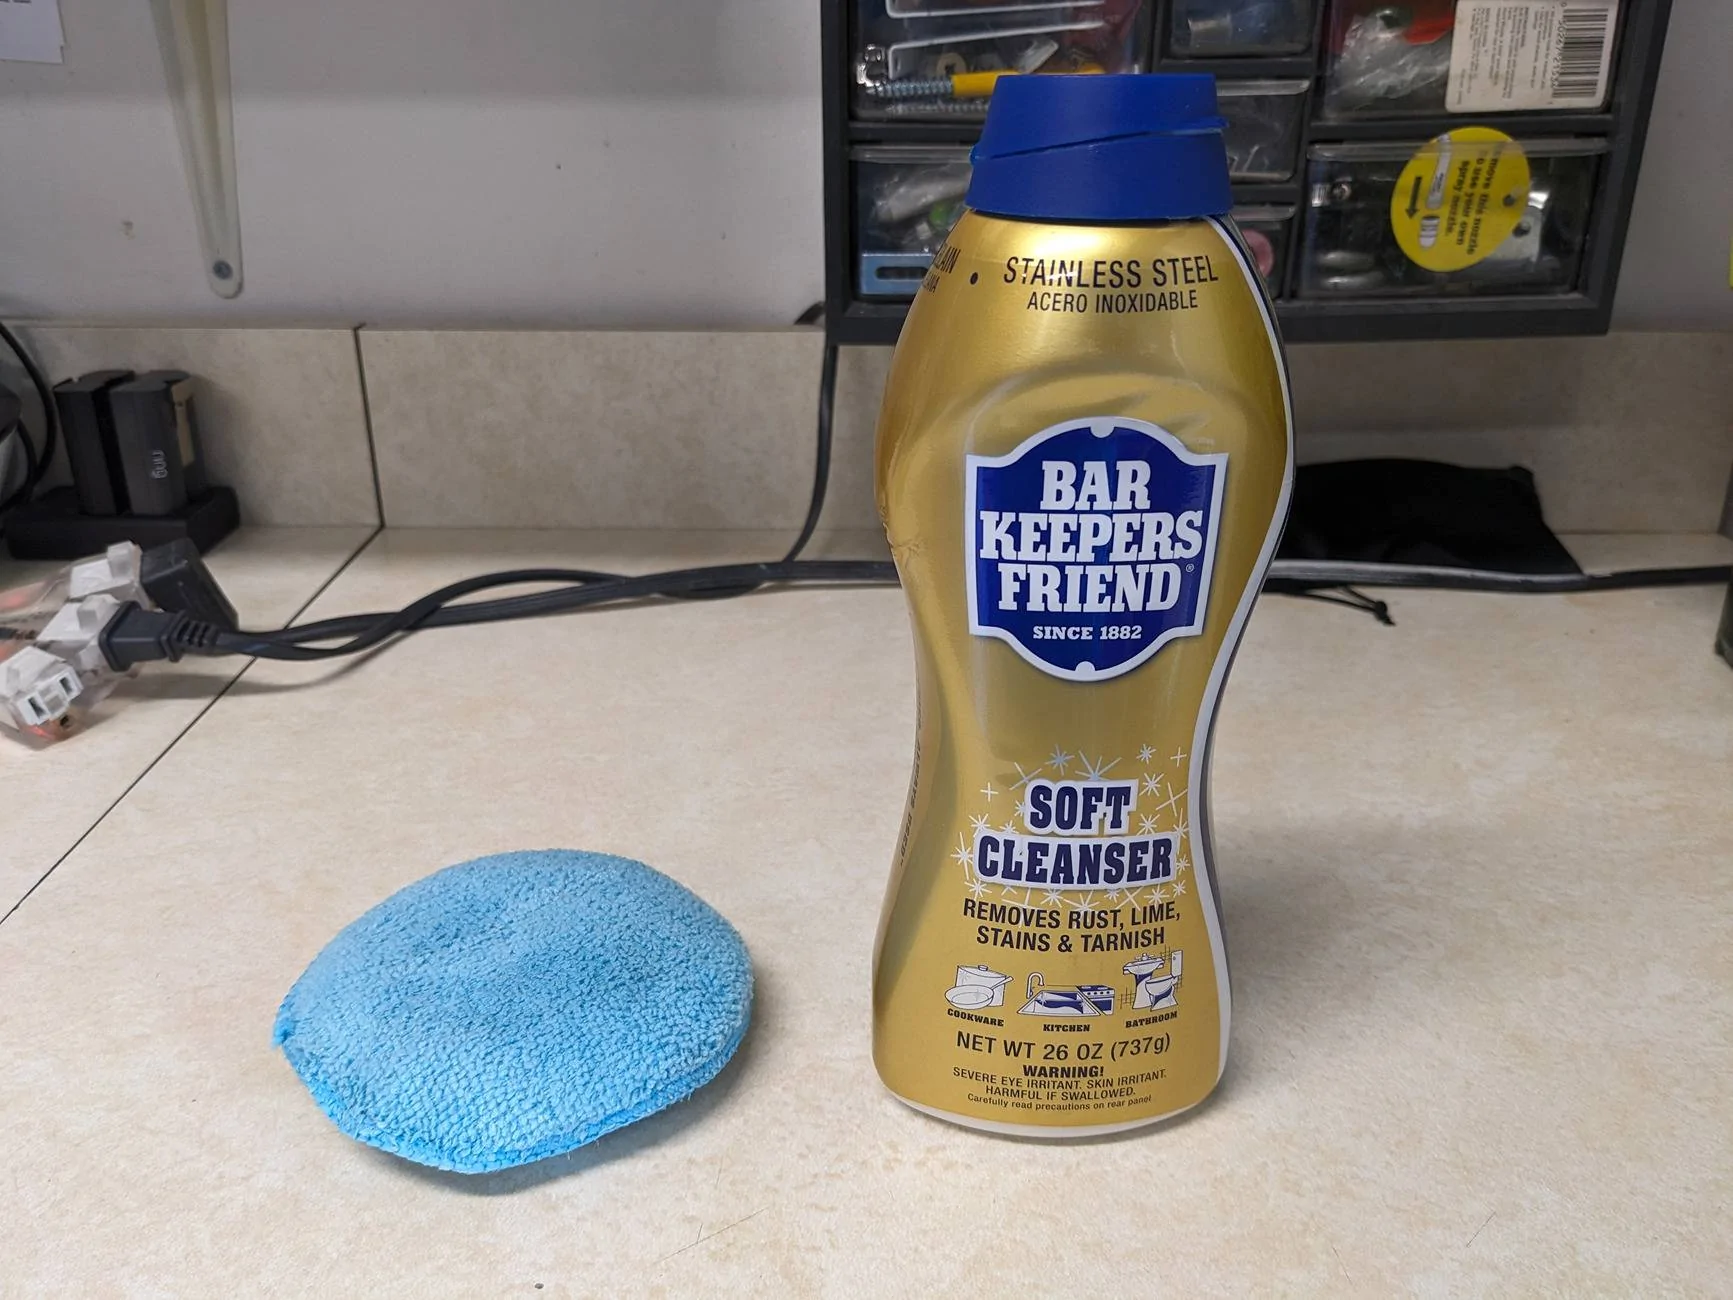
This is the magic stuff. Thankfully I happened to have a full bottle under the sink. You soak the product on a microfiber pad and do not let it sit for more than a minute. Then, rinse it off with water, dry, and the etching should come off. Although it worked, it does make the finish look a little dull. So I went ahead and put a coat of this on shortly after...
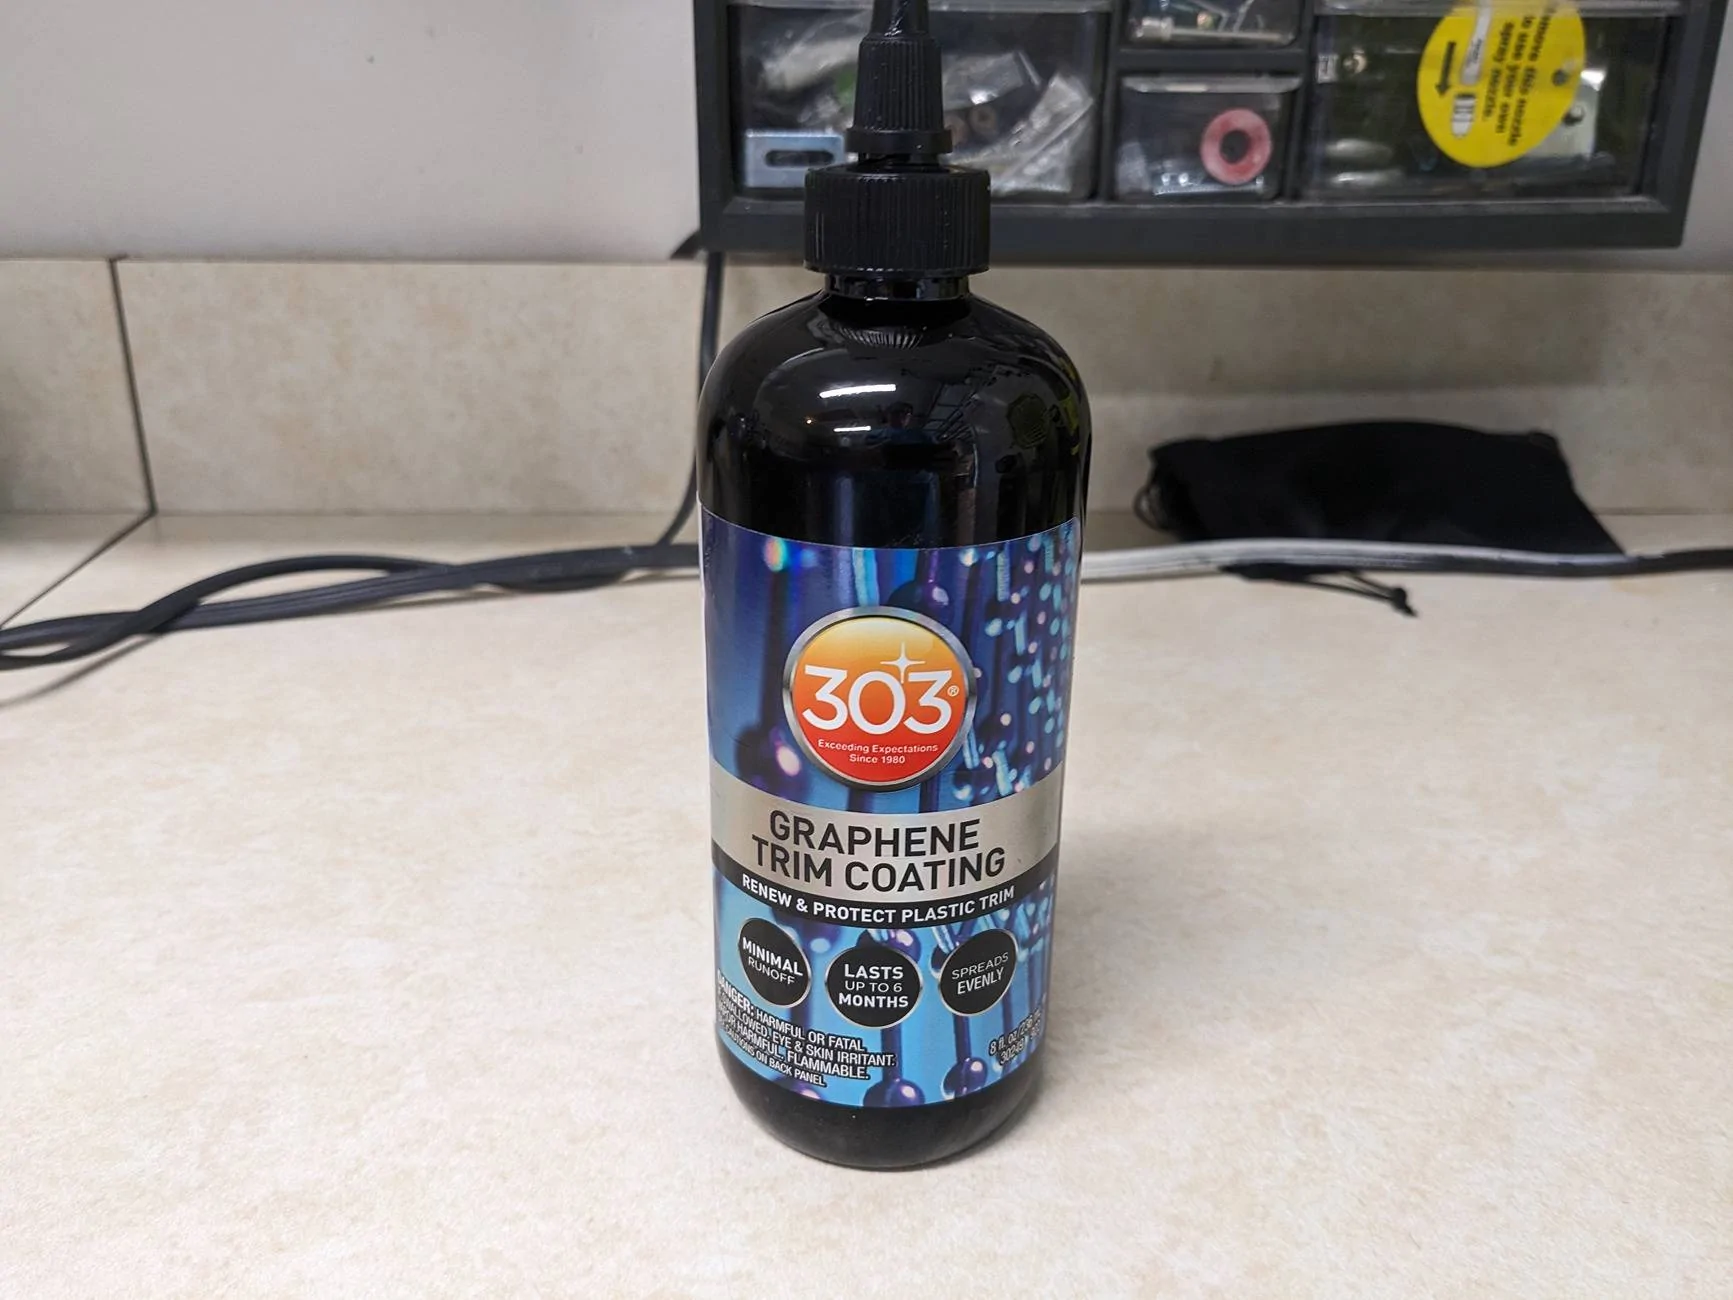
I've experimented with many products over the years and this is by far the best trim restorer I've ever used. It applies evenly and easily, doesn't feel oily to the touch and it doesn't run/wash off after heavy rain. Just as advertised. To anyone who has the full plastic fender flares, which I know is a lot of you, I would seriously give this a try if you haven't already. It'll do wonders for your Jeep's appearance. It'll make it look almost new again. Here's some before and after shots, using the plastic trim under the parking lights as an example.
Before:
After:

This is after applying it to the front bumper. I forgot to take a pic of the before but imagine what you saw under the parking lights but all over the front bumper.

Then after hitting it with the 303 Aerospace...

It's still not perfect by any means but a drastic improvement. There's still some noticeable etching tucked in the very back of the bumper underneath the grille as shown above. It was a bit stubborn under there but I didn't want to obsess too much over it. I was more concerned with the very front of the bumper and fender flares. I'm very happy with the results.
I have this video to thank...
Sponsored
Last edited:
 you taking the time to capture your experience.
")

