F800
Well-Known Member
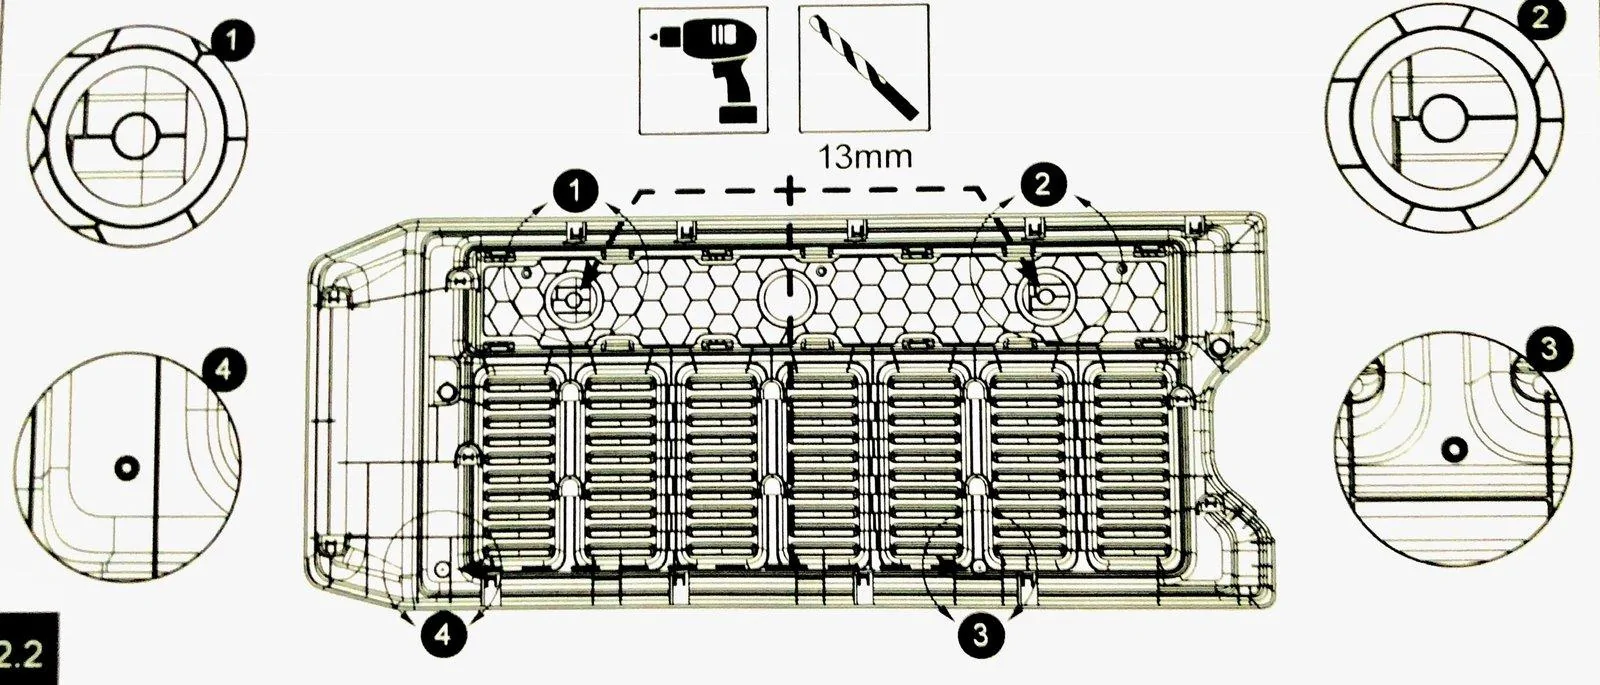
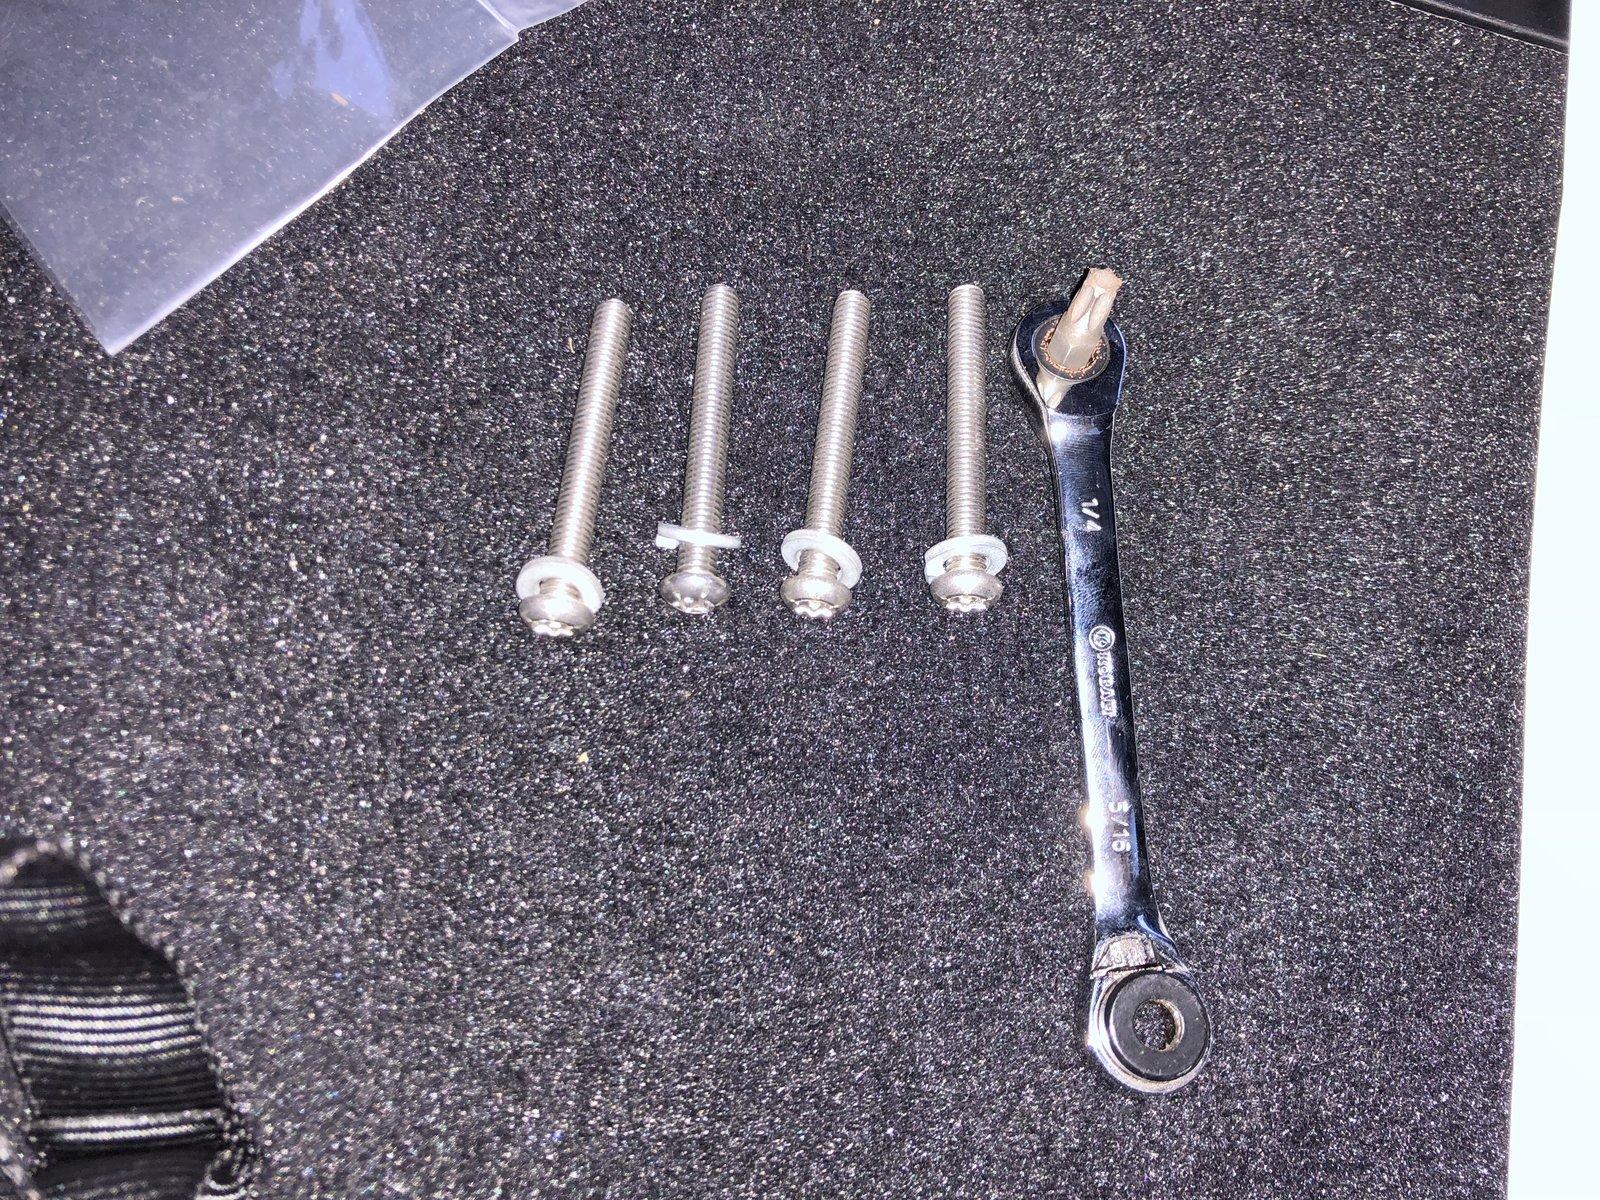
Thank you!There are 25.4 mm in an inch so a 1/2 inch is 12.7 mm. So the short answer is yes, a 13mm is the same as 1/2 inch. You'll also notice that with wrenches where a 13 will fit a 1/2 in bolt head and the other way around.
Sponsored
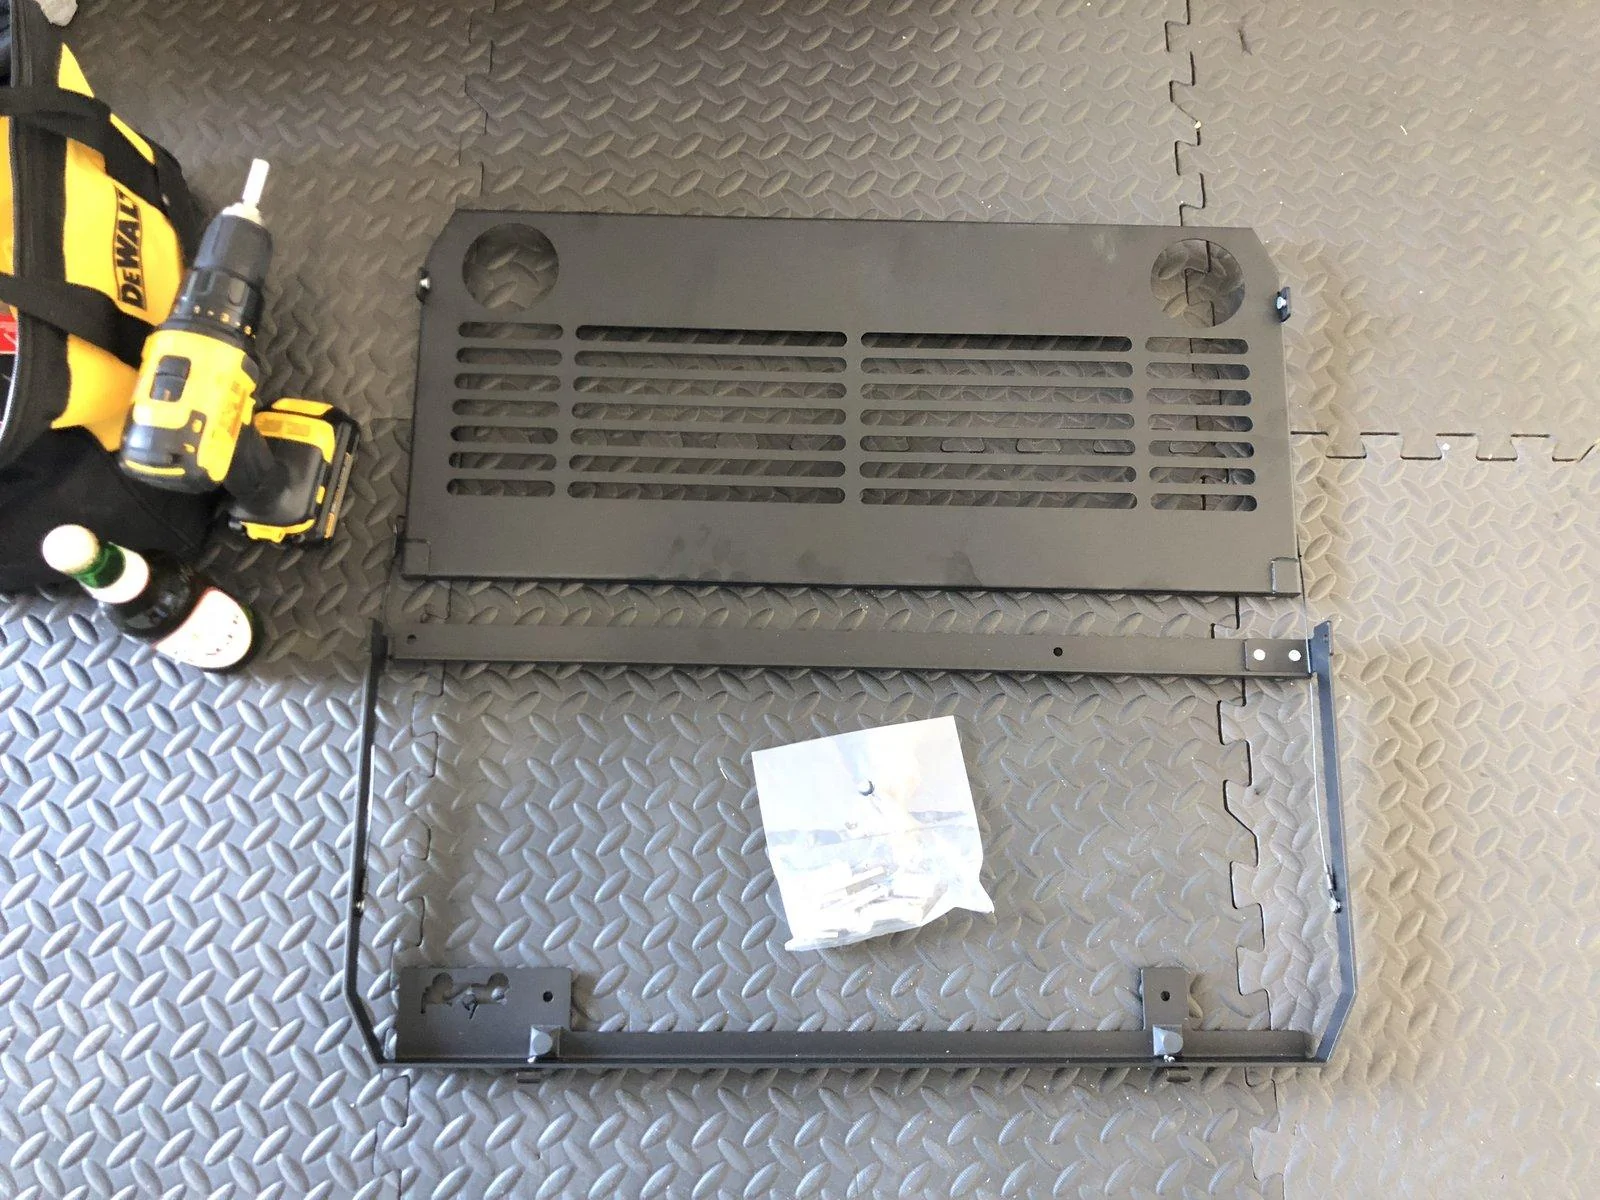
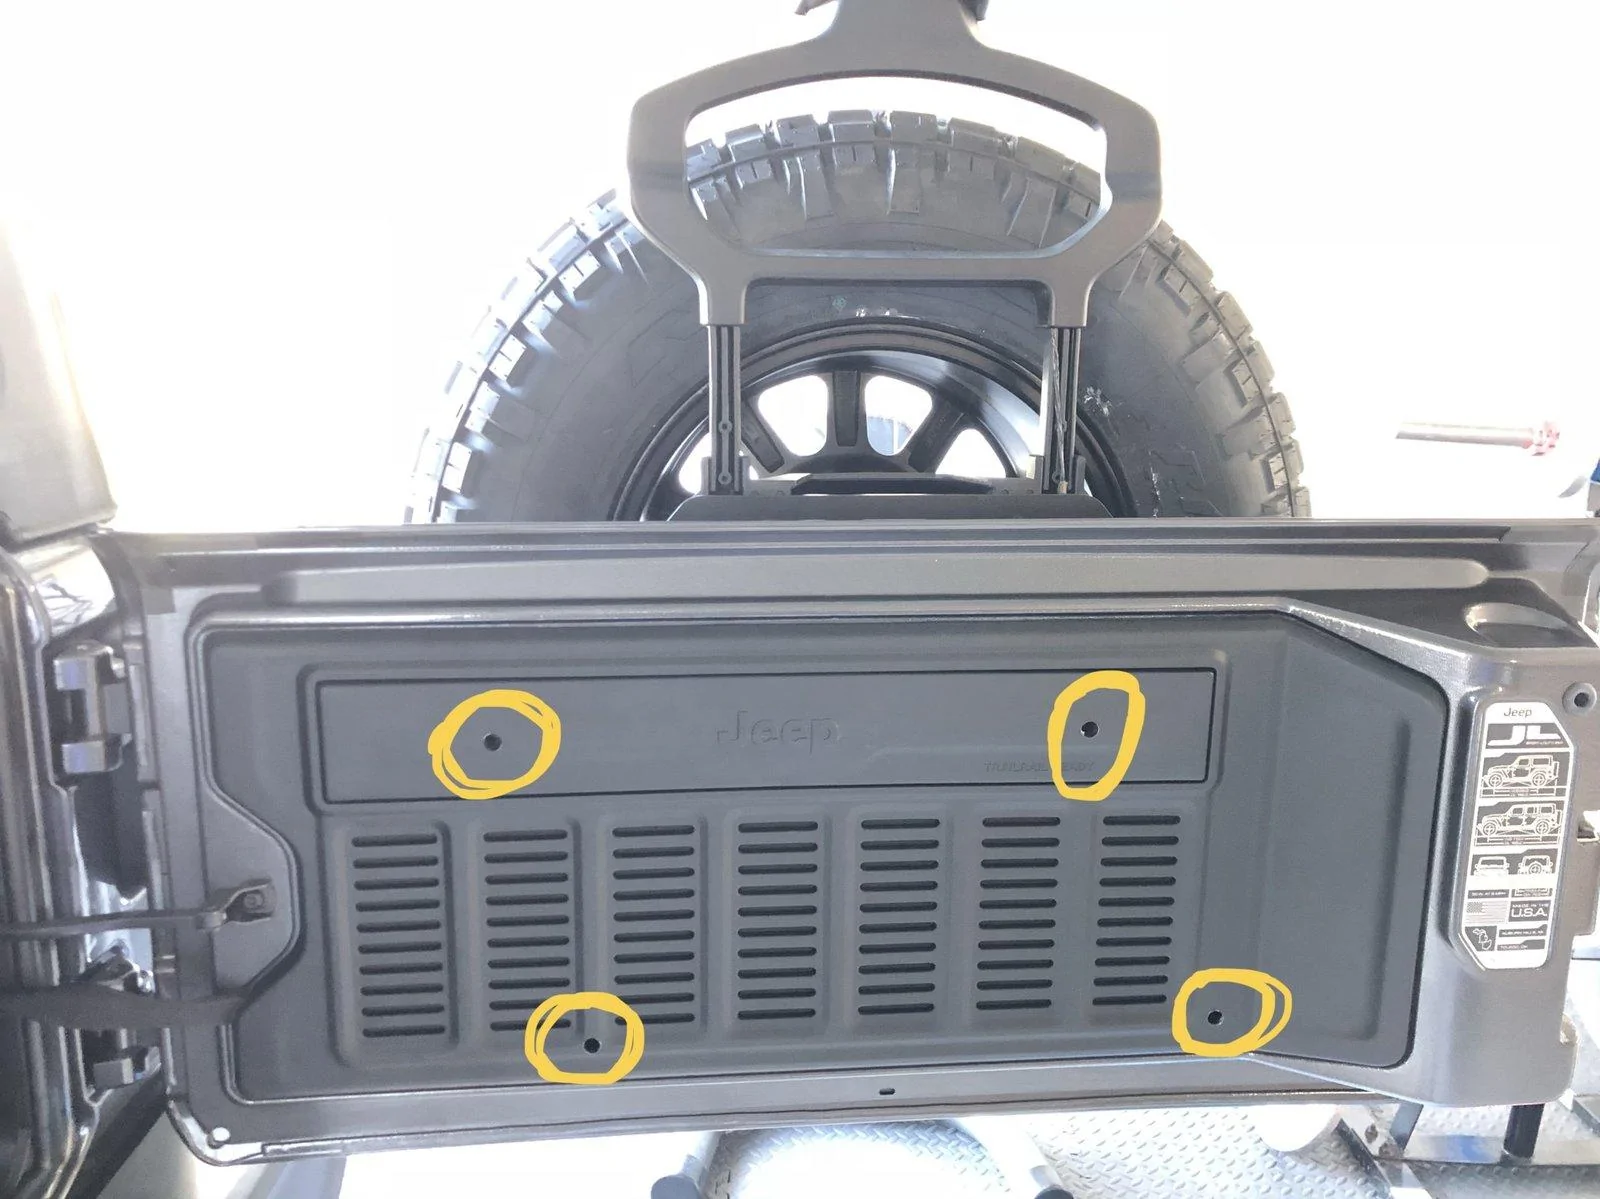
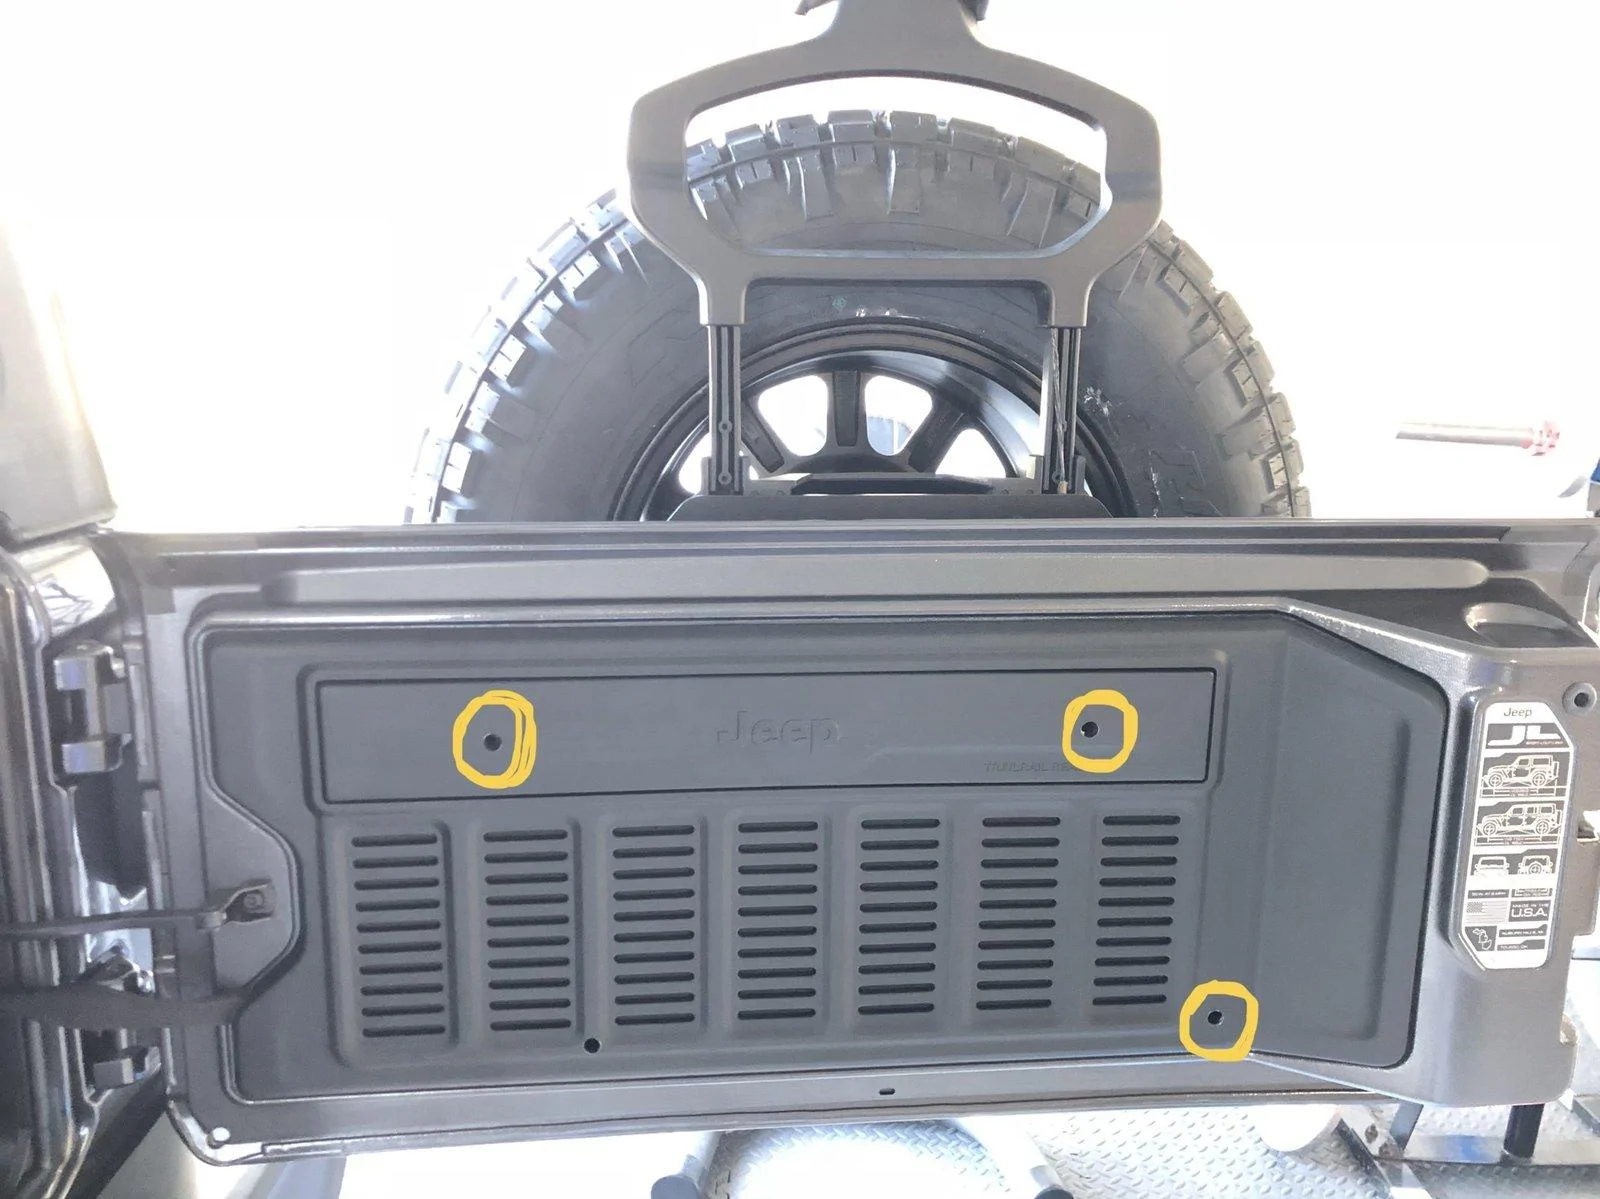

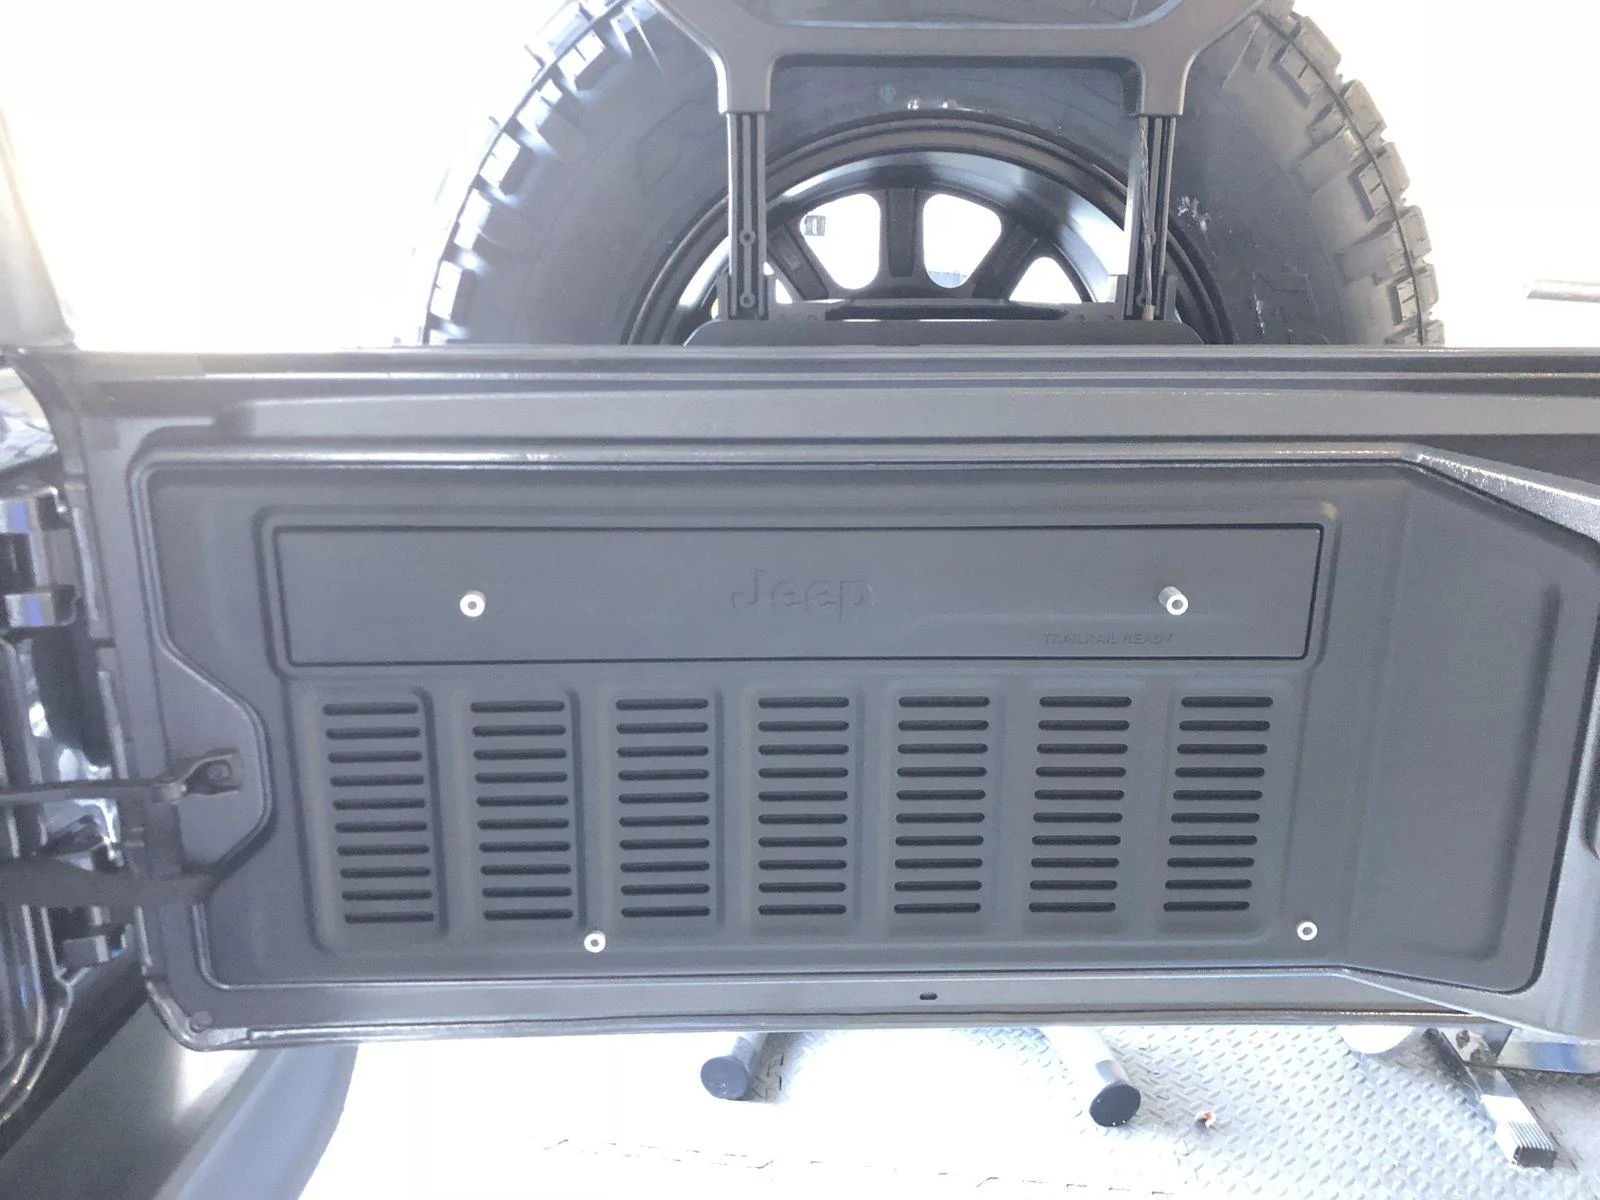
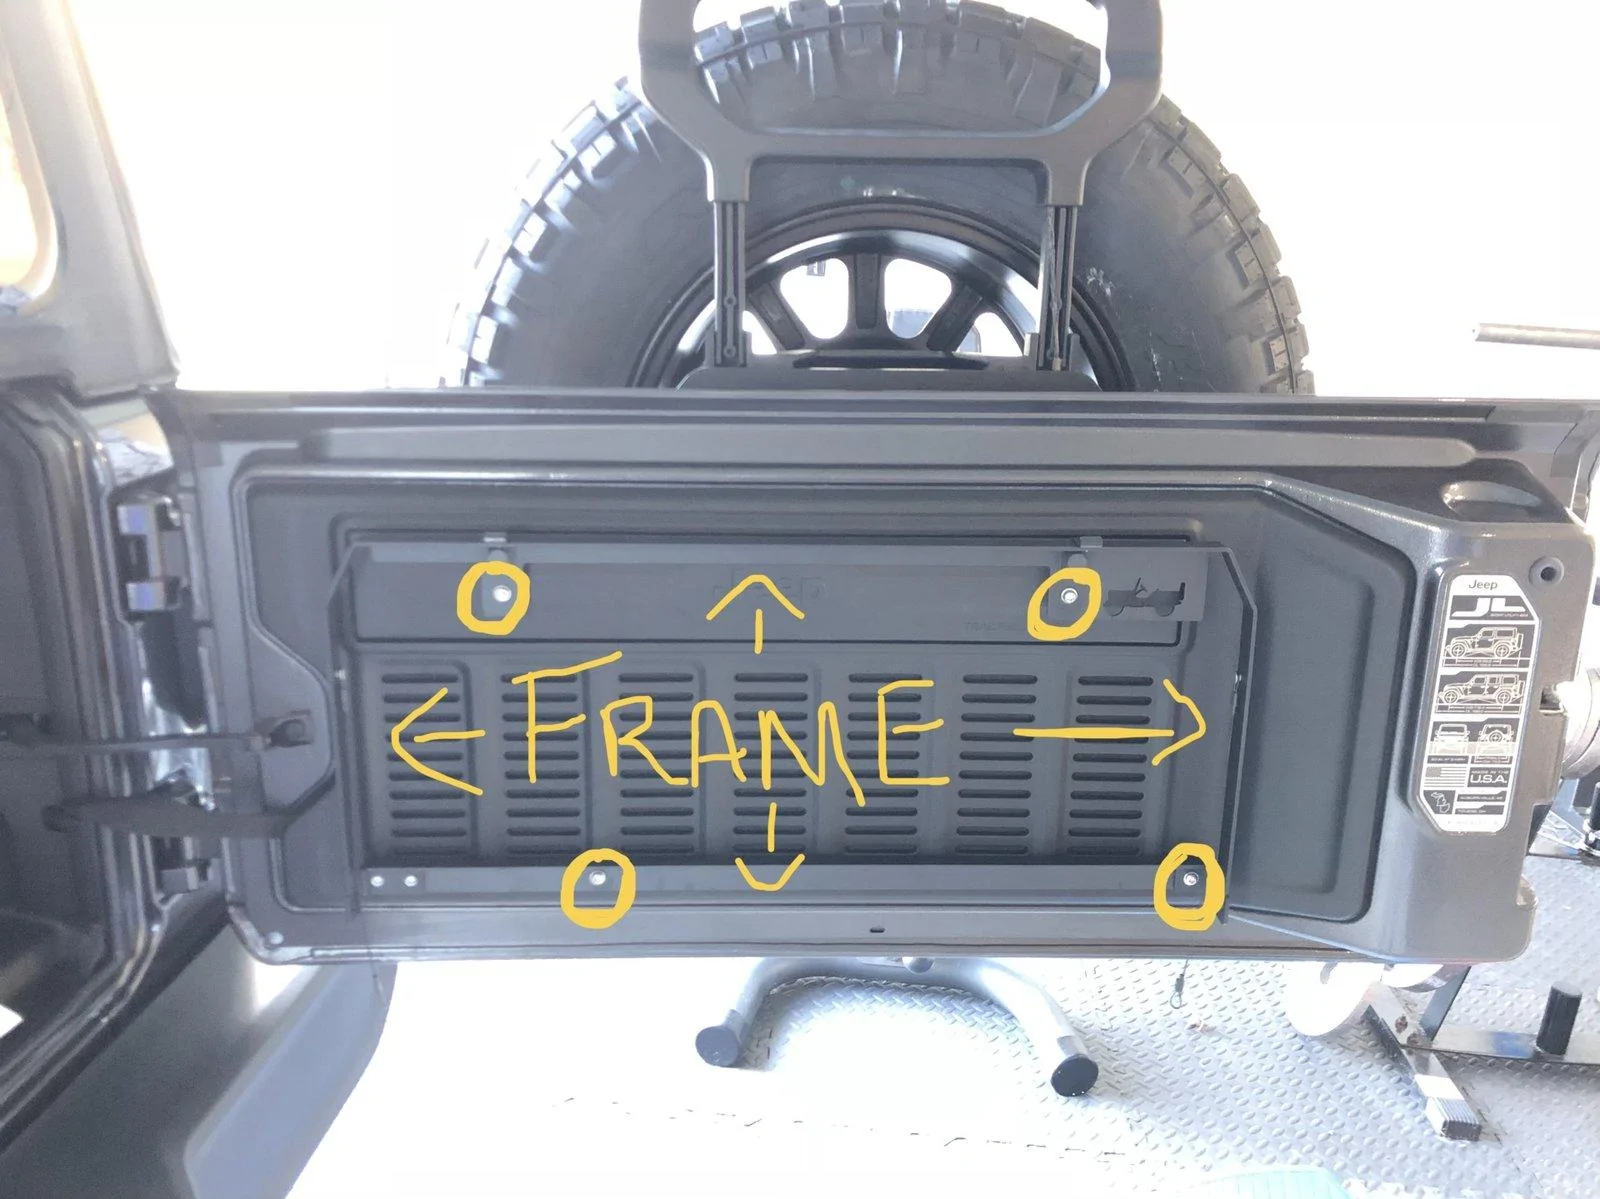
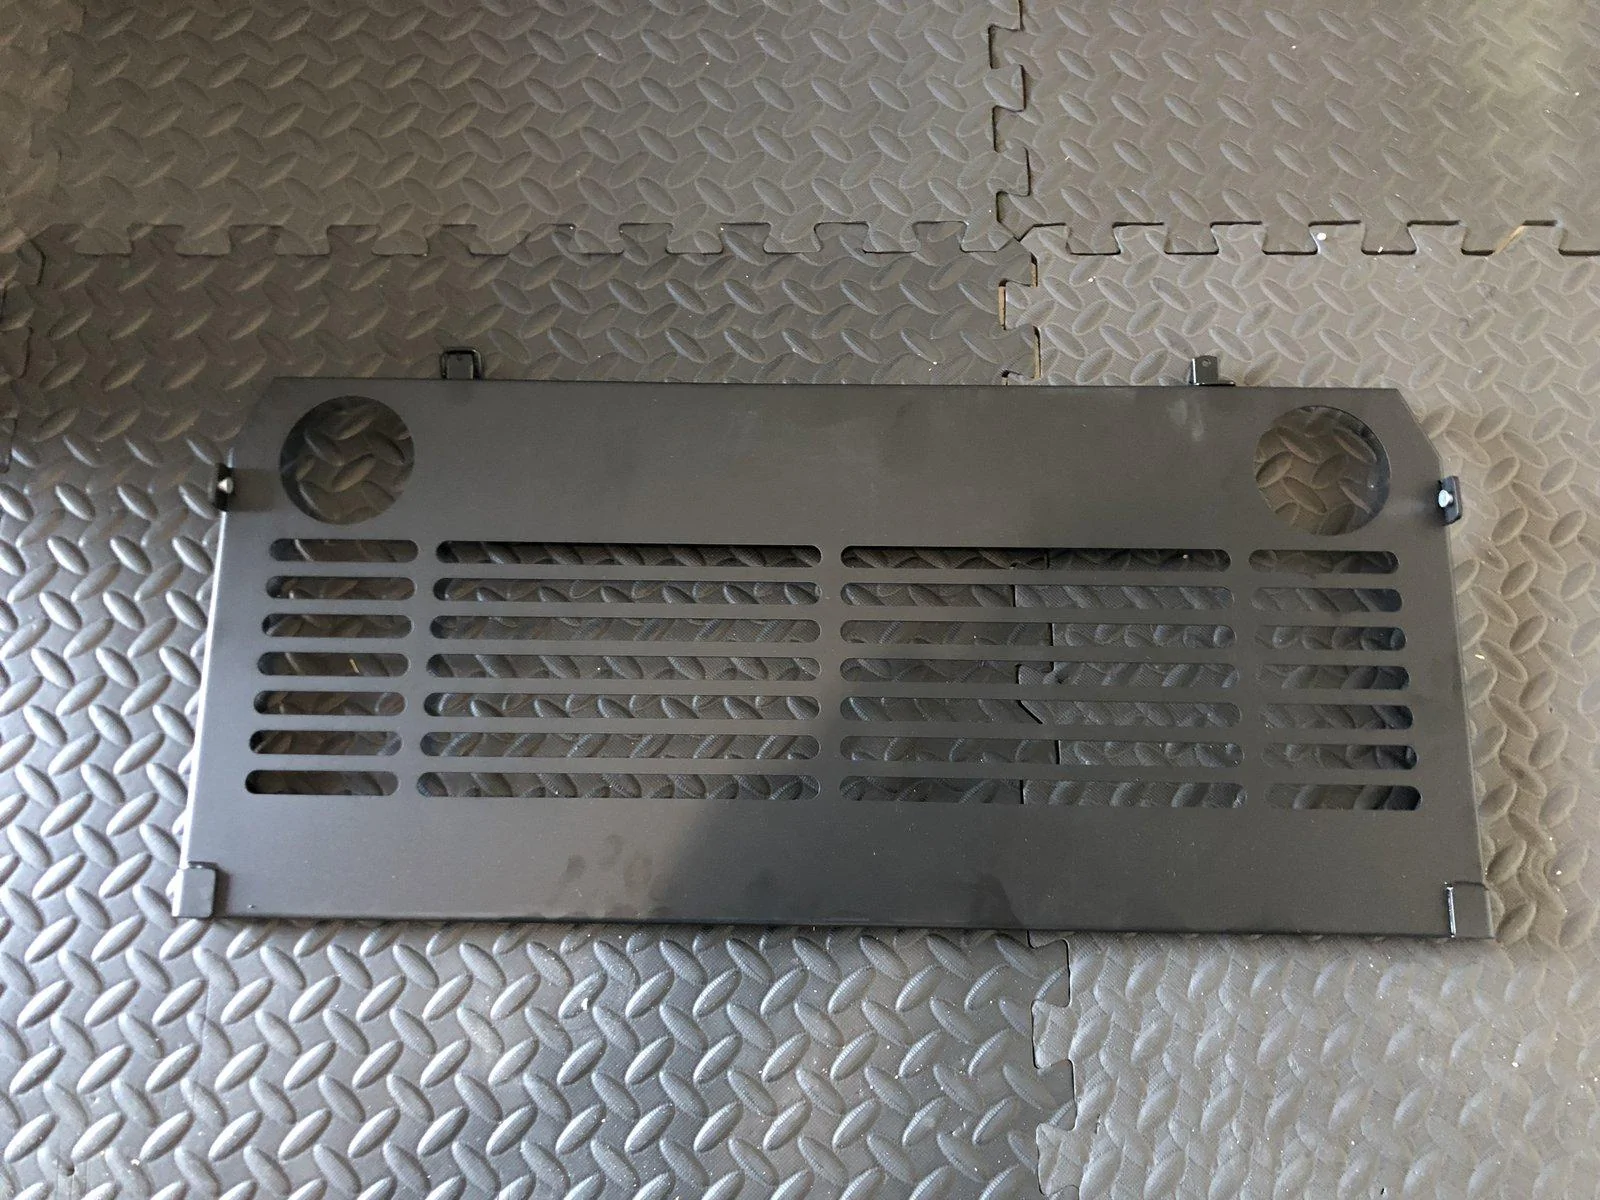

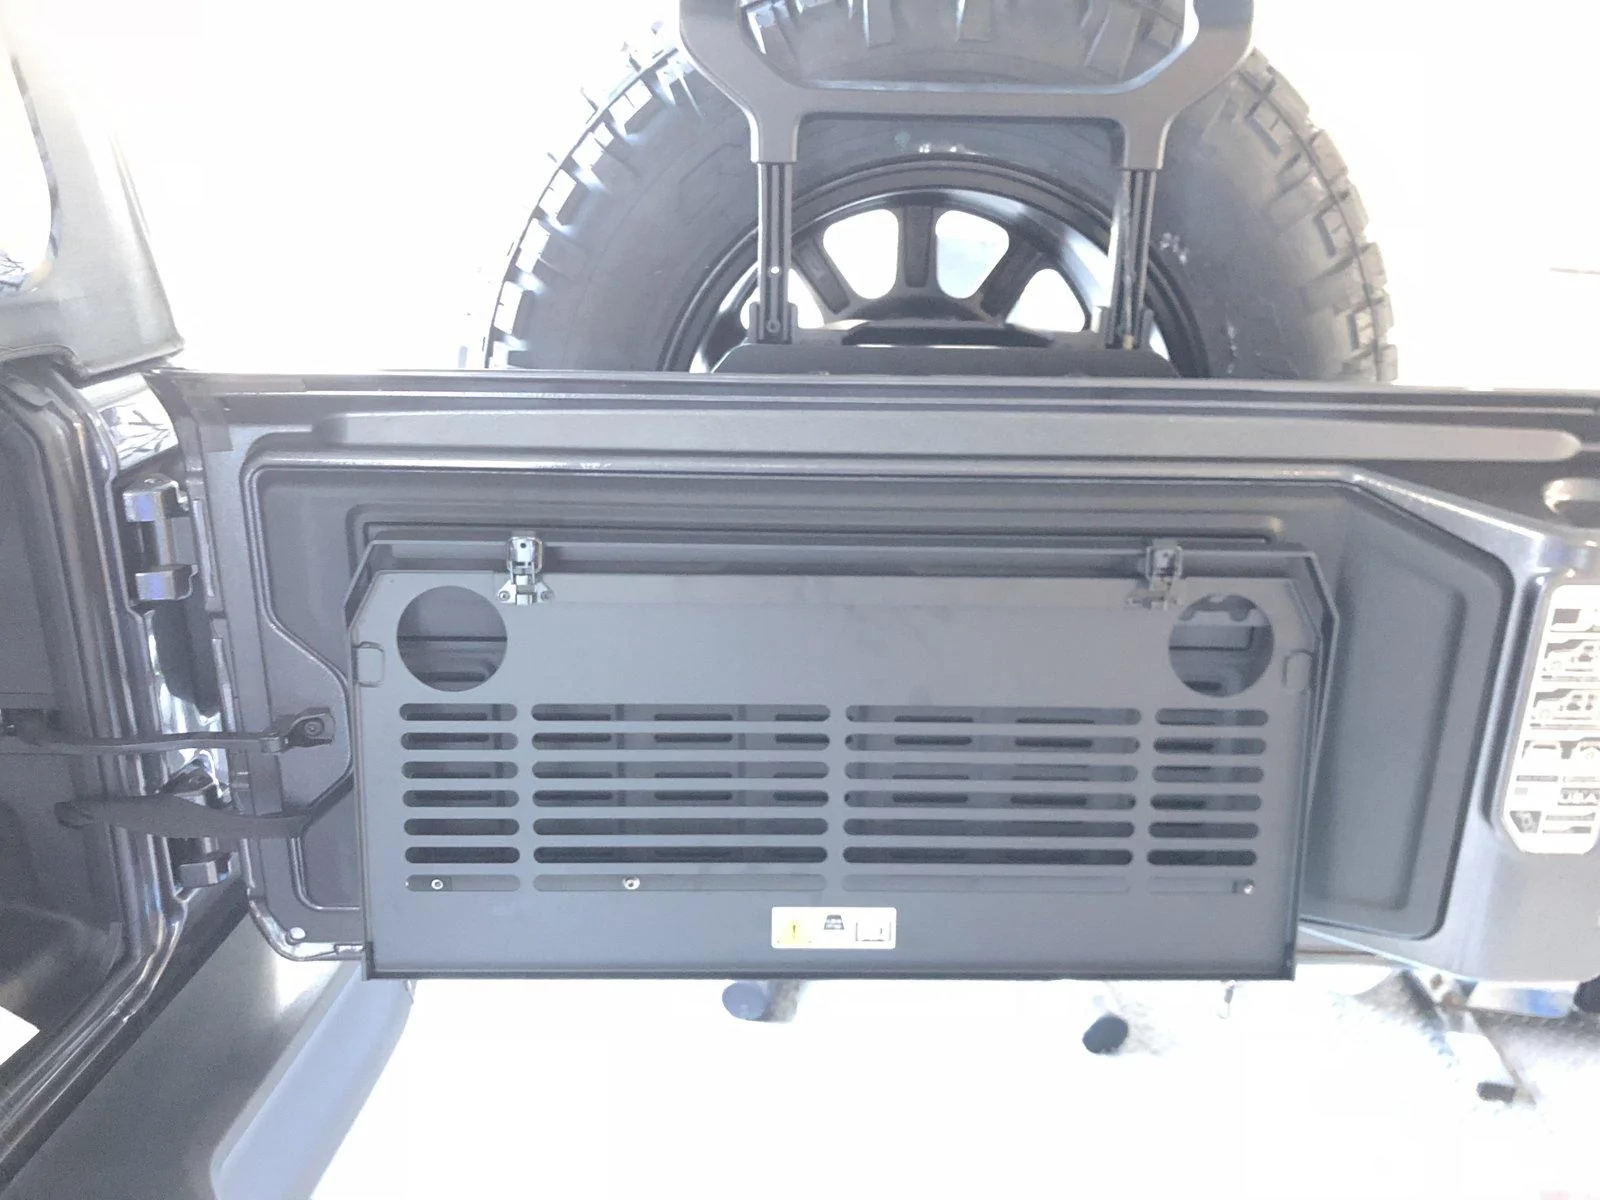
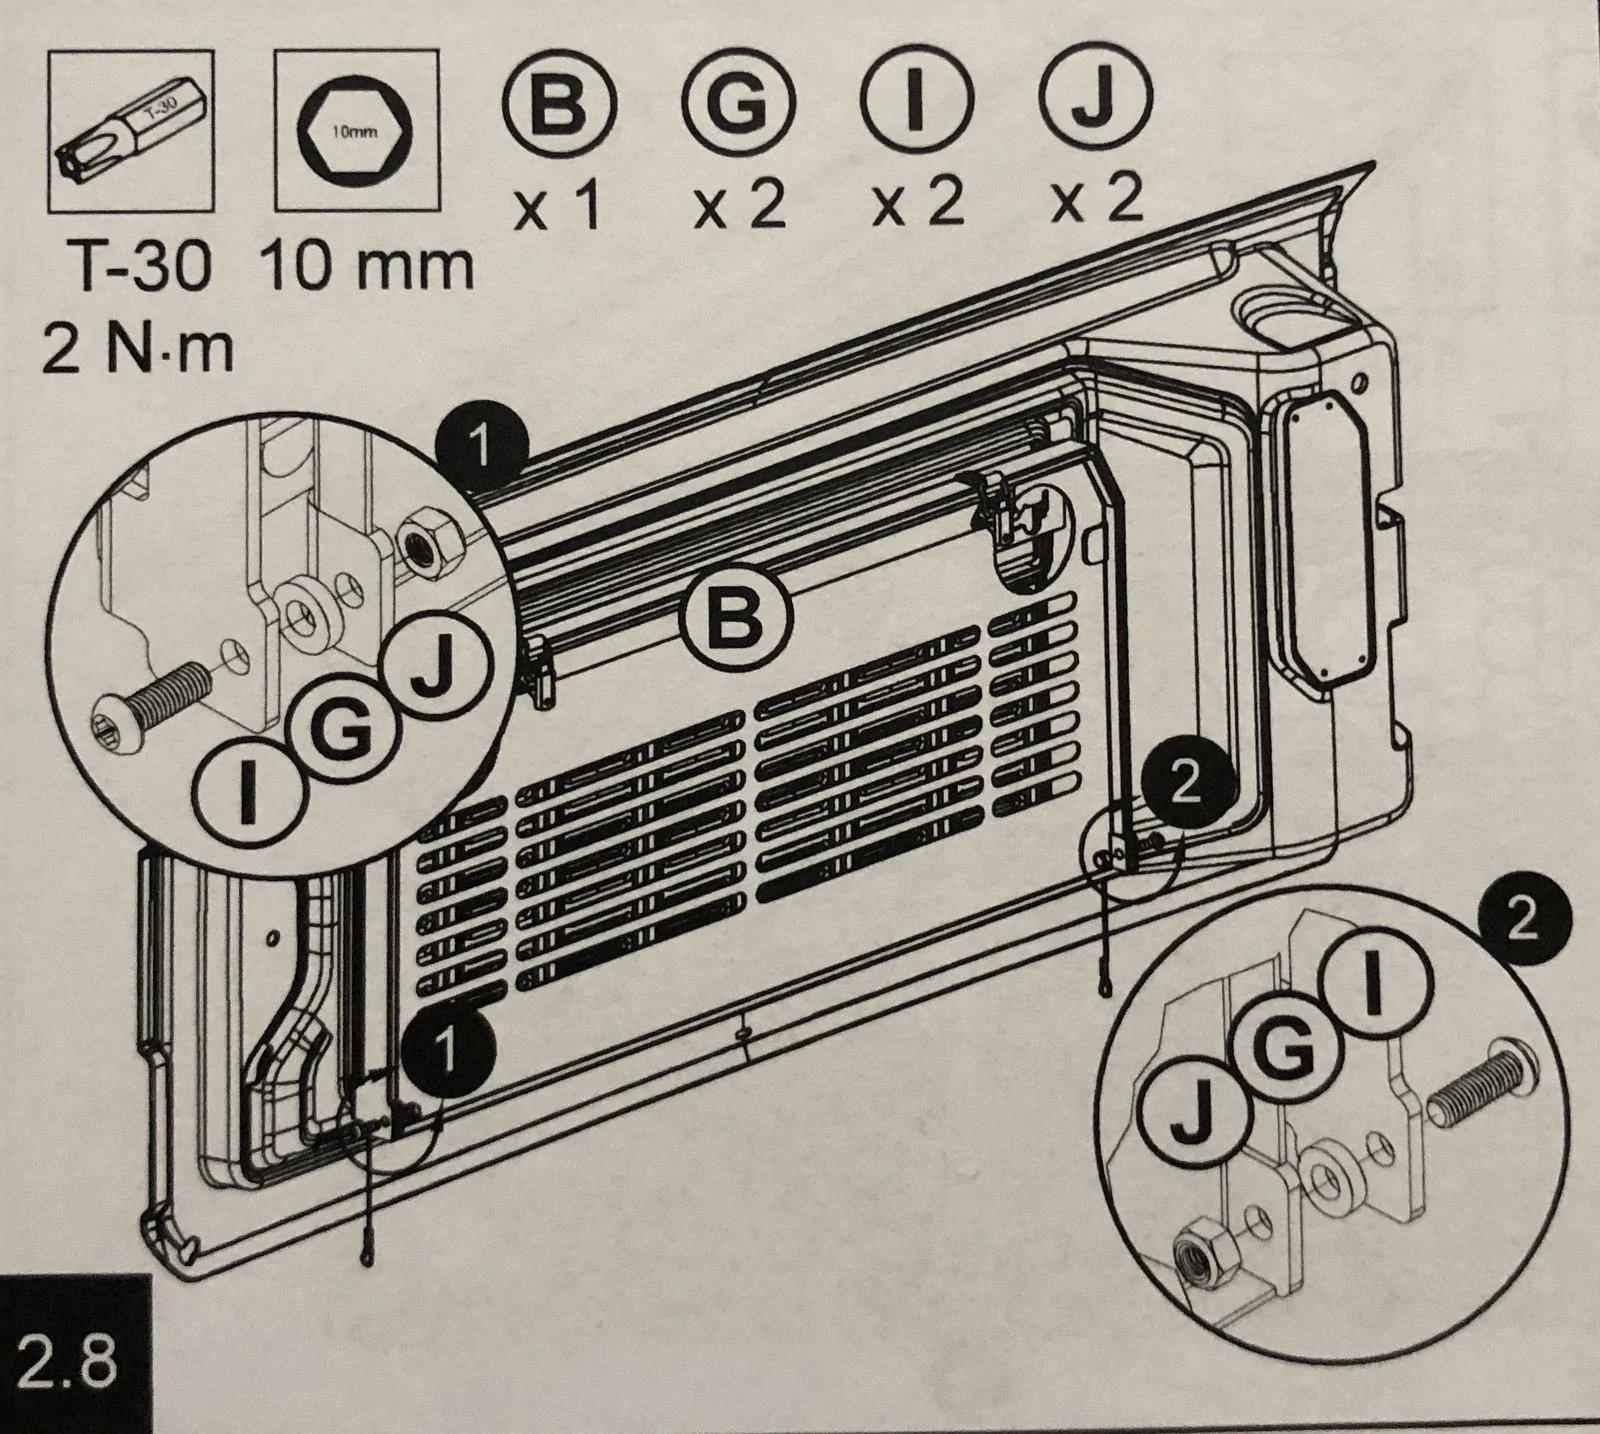
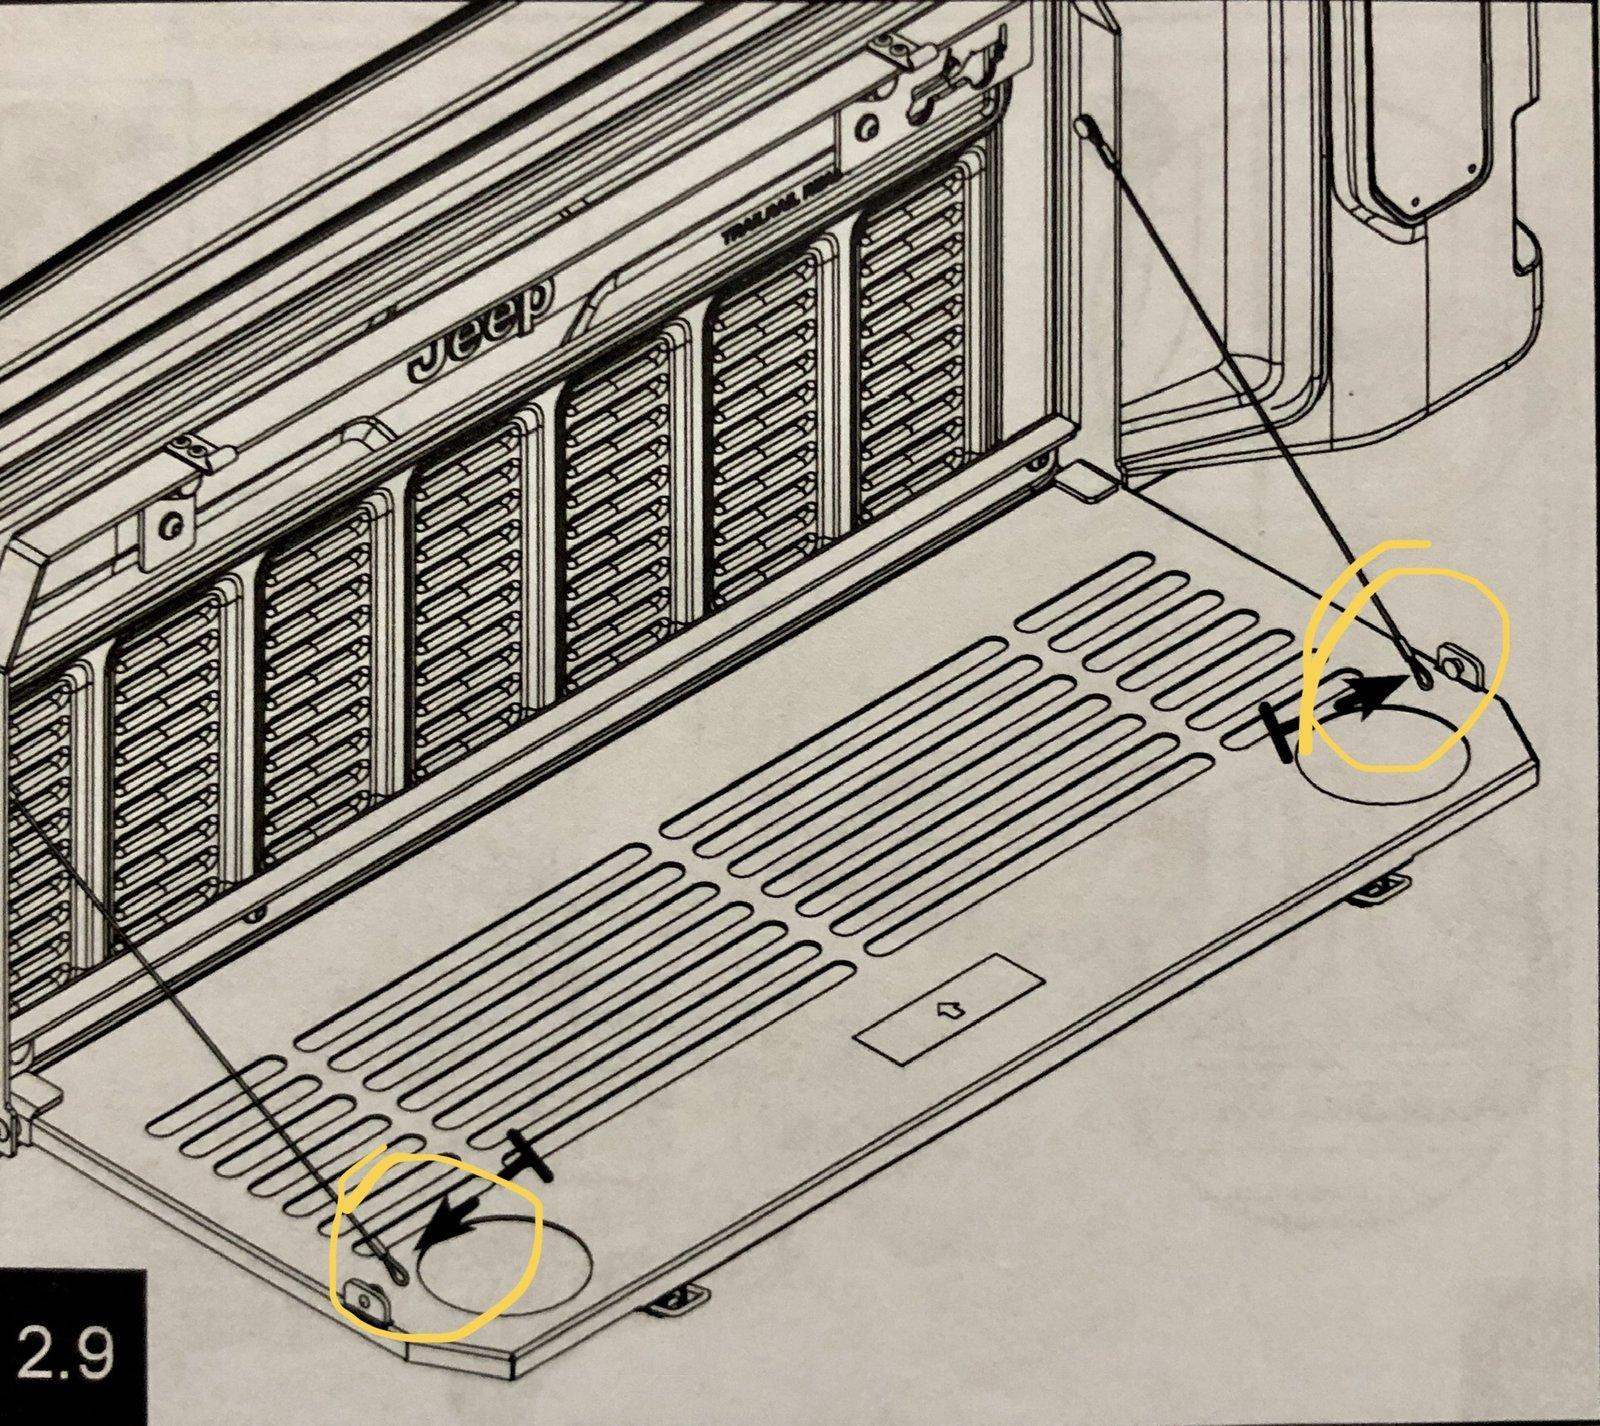
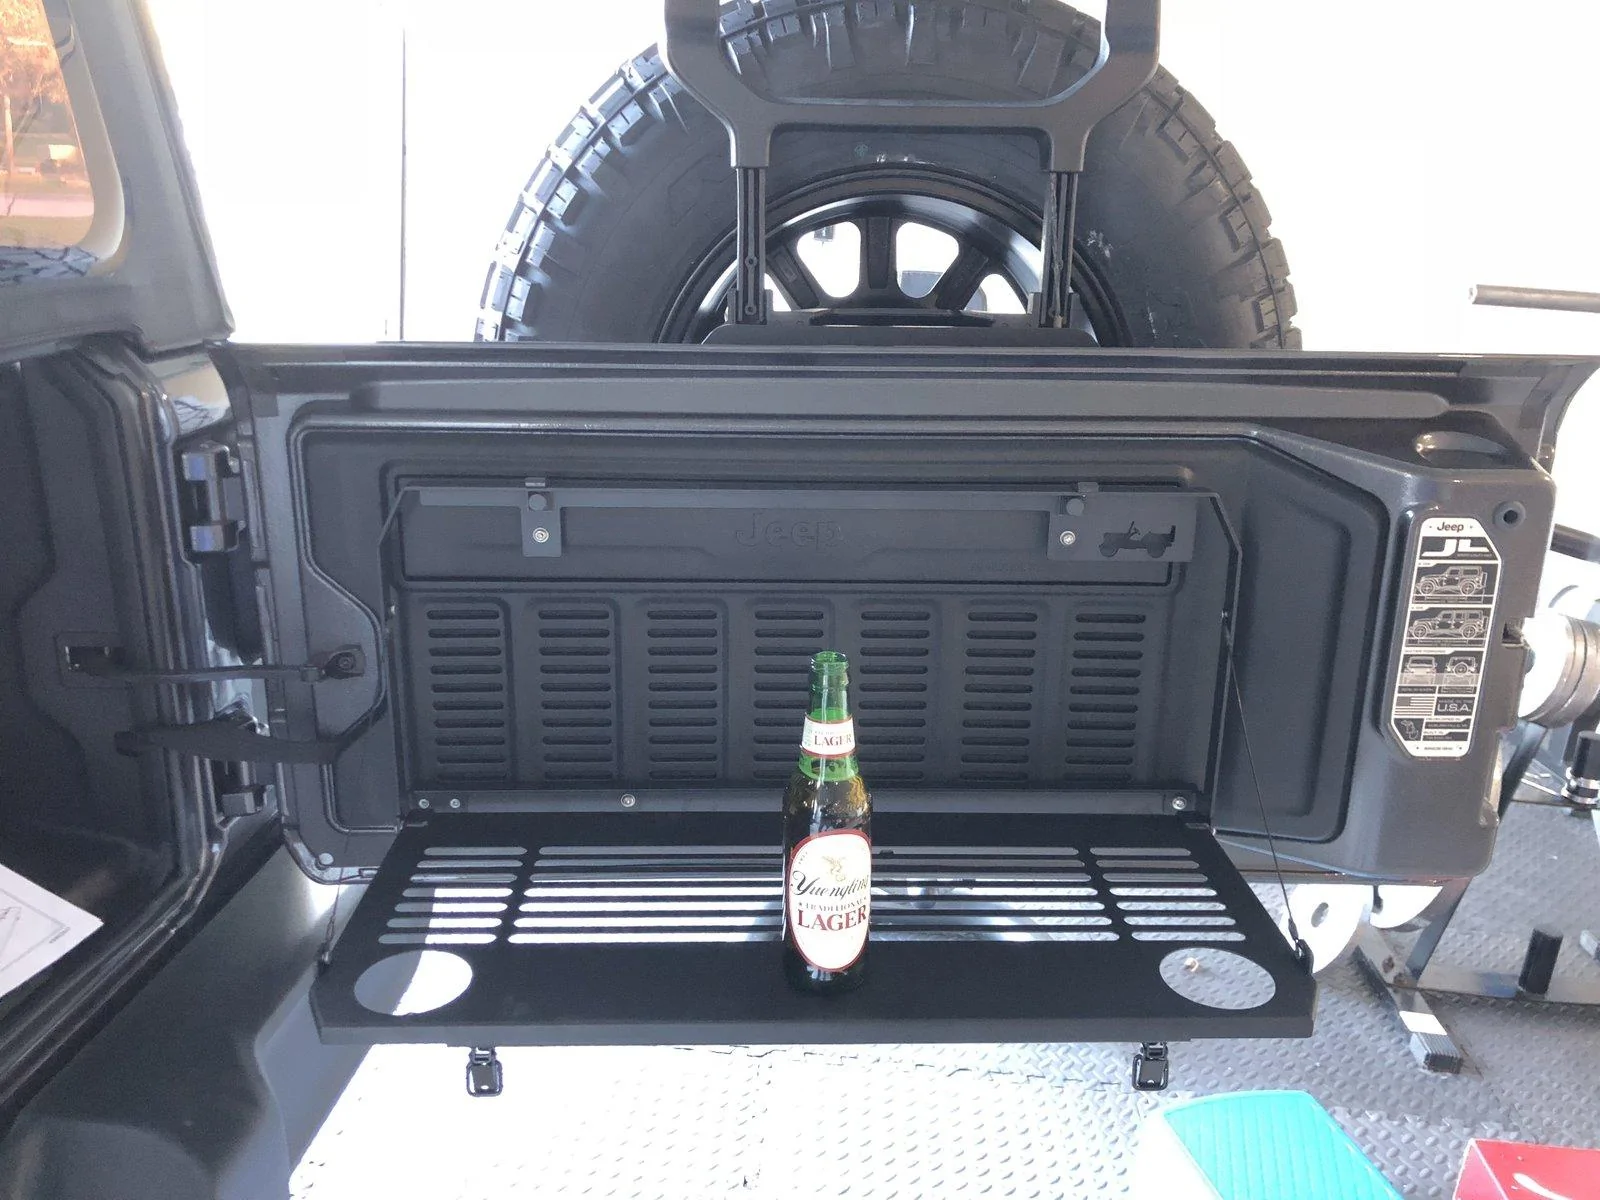
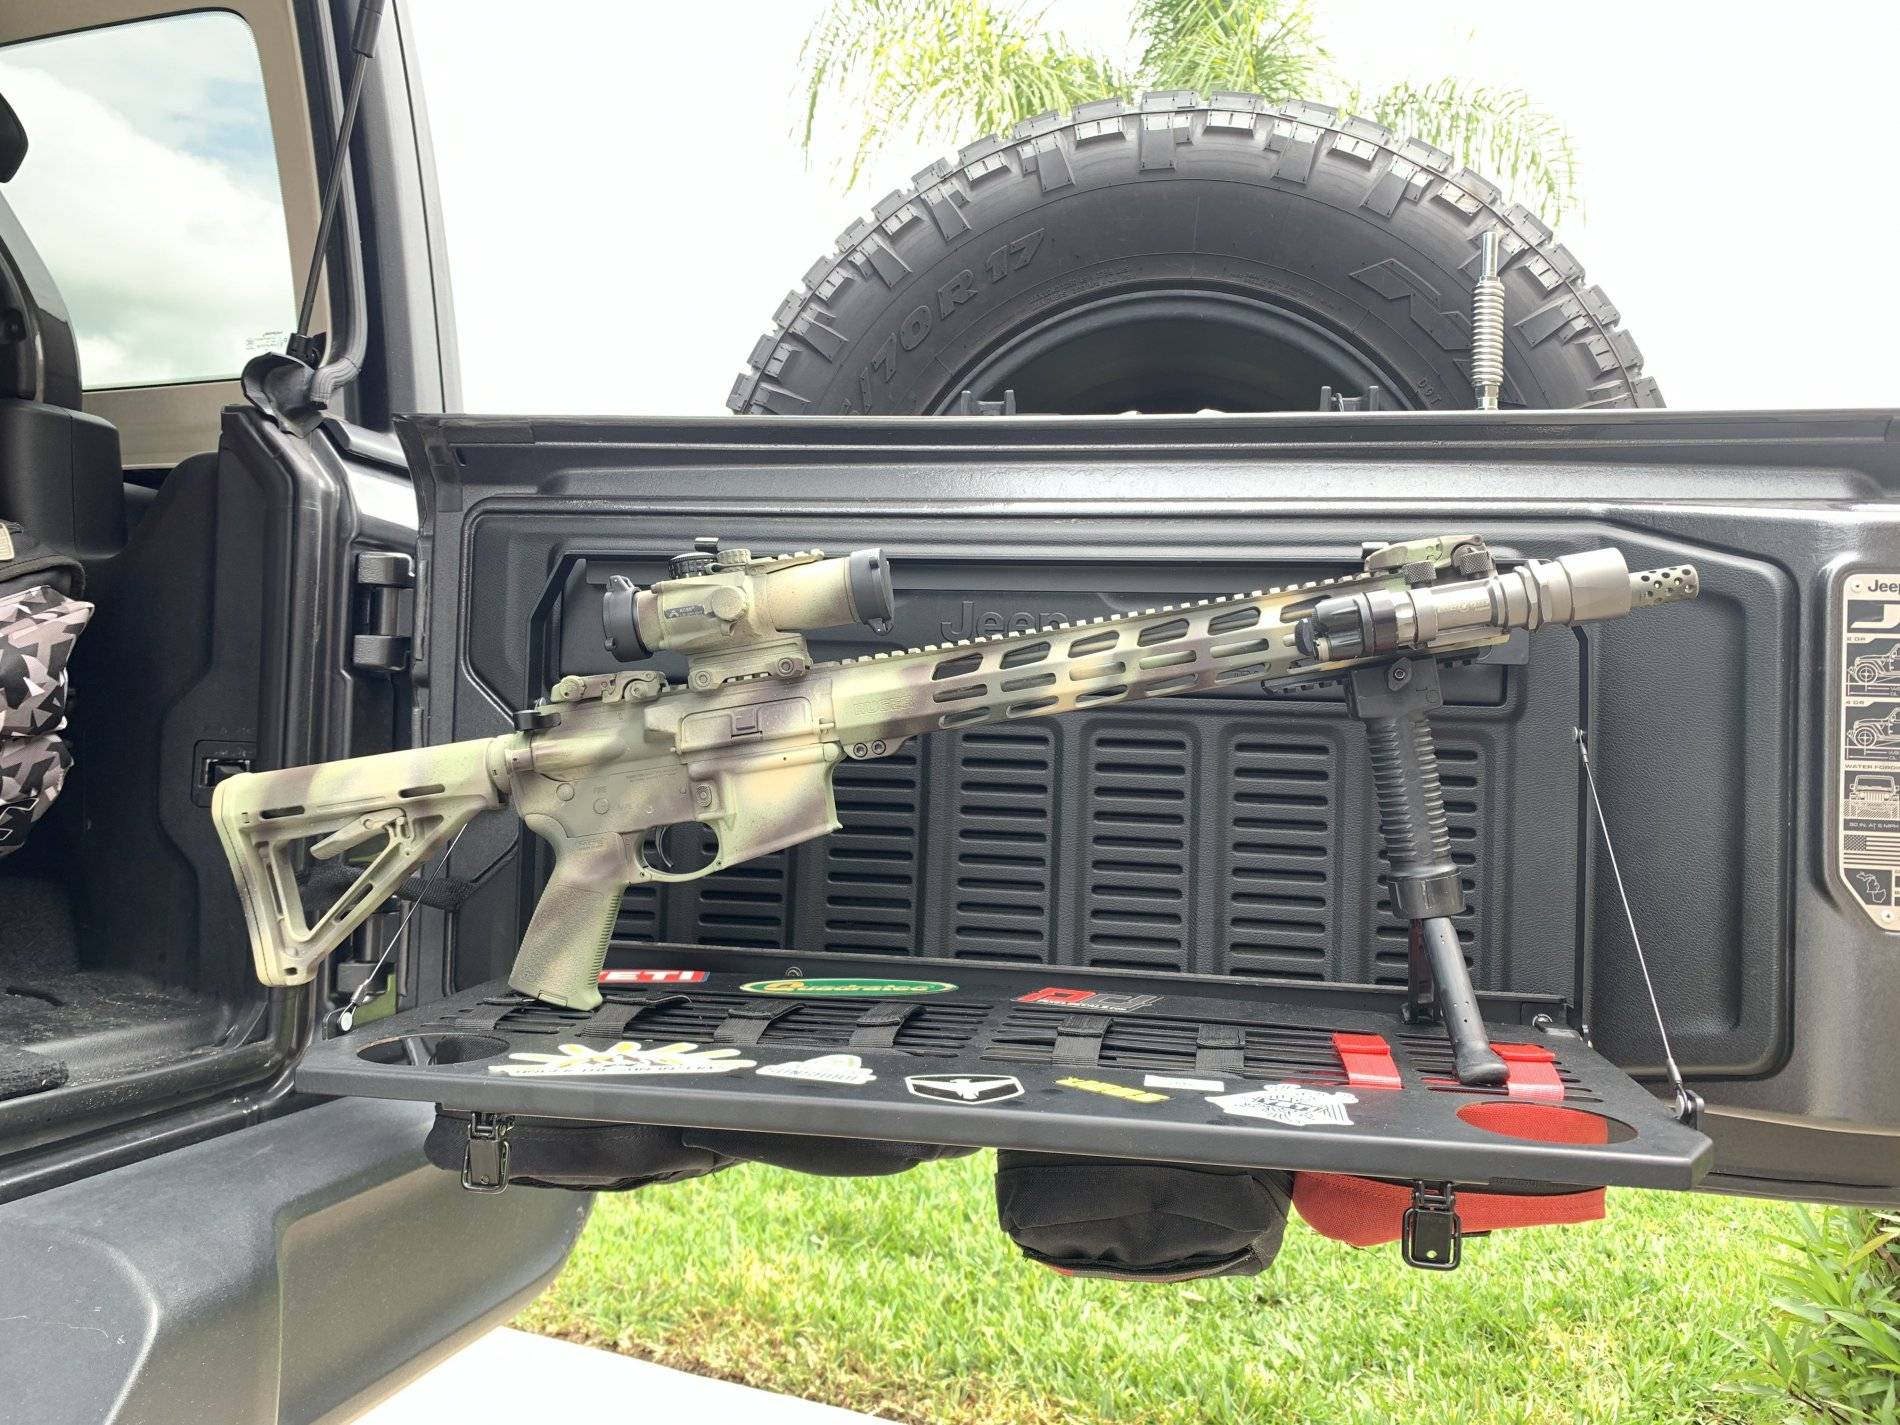
 so this definitely helped! Had to take a whole beer off though b/c I put the tabletop on upside down