Trail__Raiders
Member
- First Name
- Sonny
- Joined
- Dec 8, 2024
- Threads
- 2
- Messages
- 12
- Reaction score
- 16
- Location
- Los Angeles
- Vehicle(s)
- 2019 Jeep JLUR
- Thread starter
- #1
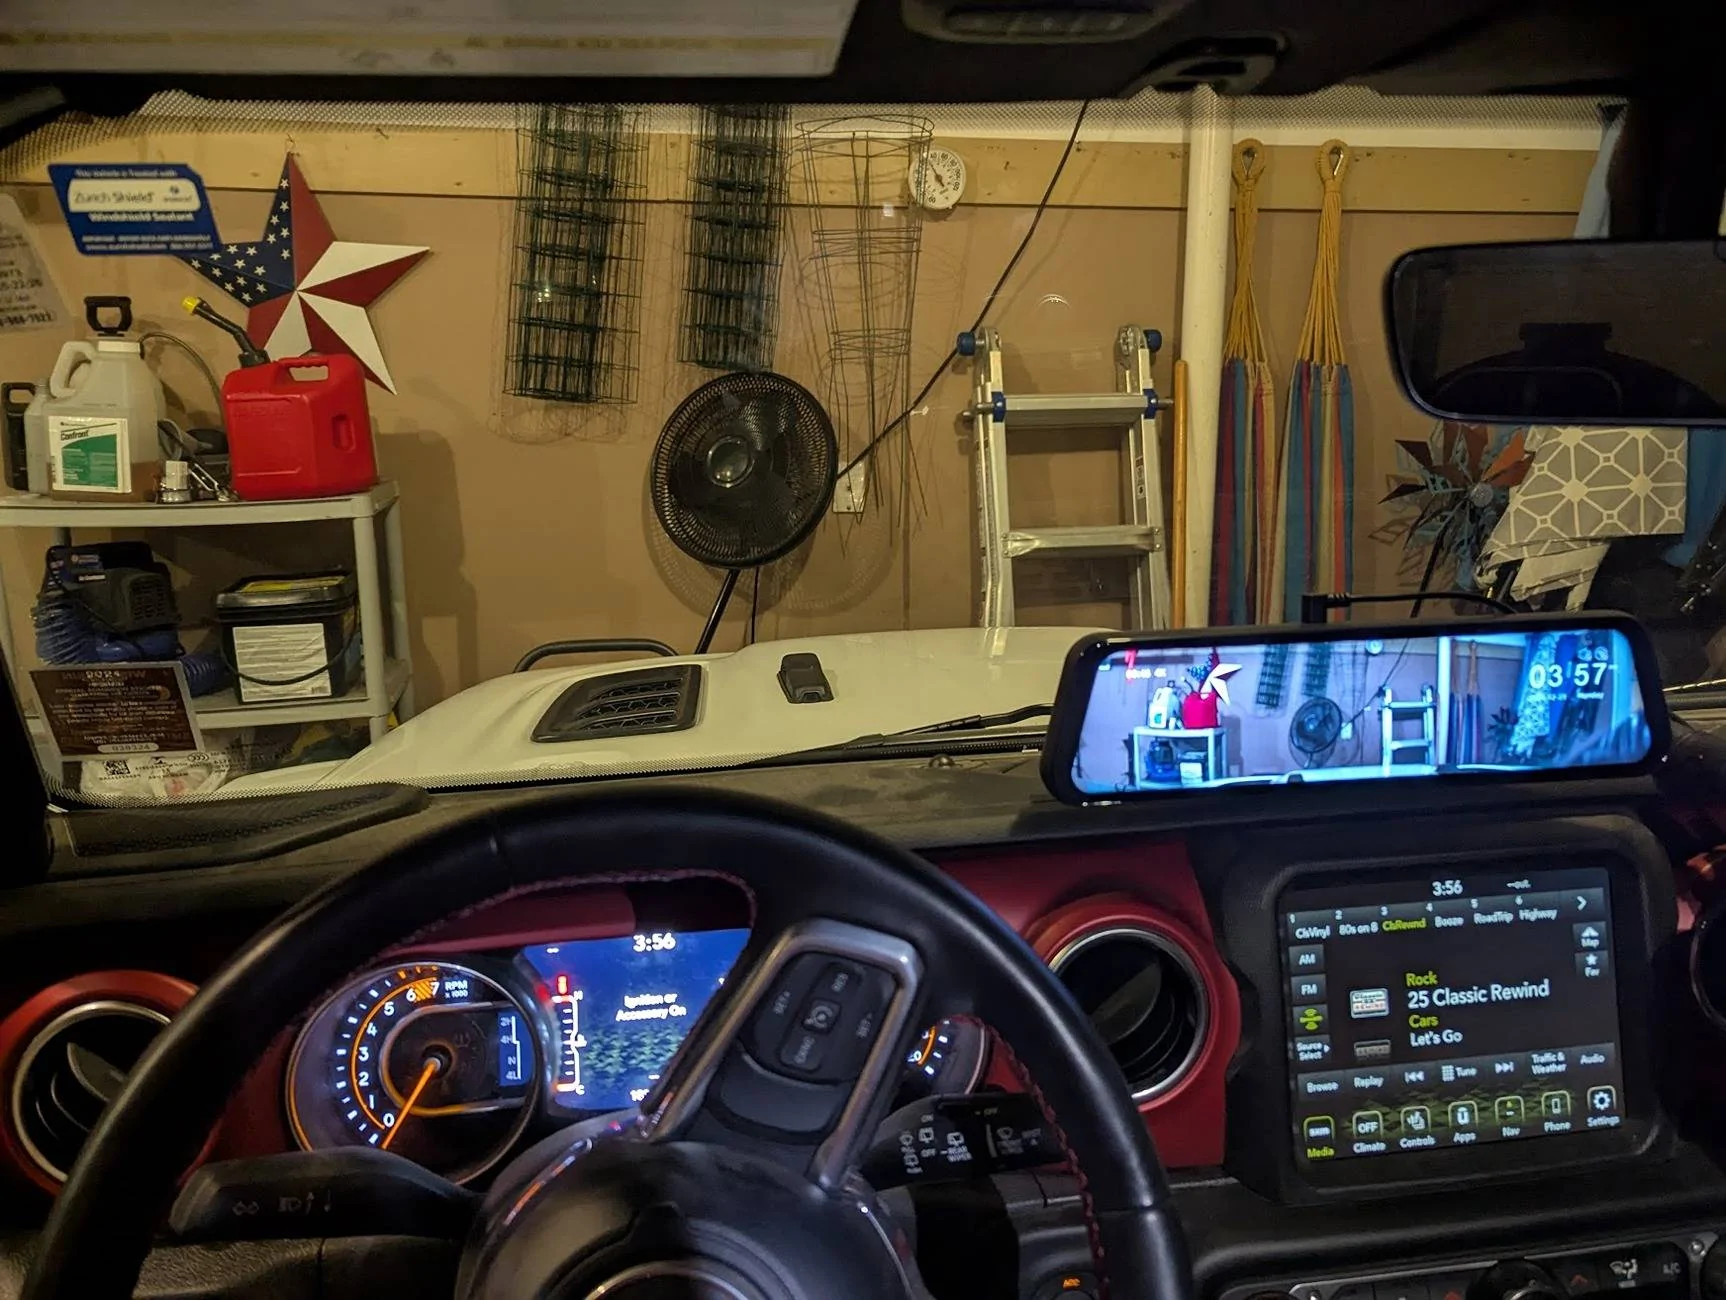
I recently installed the Wolfbox G900 PRO dash/rear cam on my 2019 JLUR. I have to say it's really worth it. The video quality is top notch. I love the functionality of the whole unit. I love the fact that the front and rear camera records video at the same time no matter what's on the the screen (front, split or rear). Took me about 3 hrs to install.
The basic kit comes with the G900 PRO plus 4 fuse Hardwire kit. Wolfbox also has other accessories like OEM bracket for mirror dash camera if you want to remove your stock rear view mirror and replace it with the Wolfbox mirro/dash cam. They also have longer rear camera wire/cord if you are installing it on longer wheelbase vehicles like pick up trucks.
Installation can be done with the cigarette lighter power cord or with hardwire kit. I opted for the hardwire kit to reduce the clutter on my dash. Before the installation, I tested the unit by using the cigarette lighter power cord. I connected the power cord and rear cam cord to the mirror and put the ignition to on without running the engine and the unit started right up. The front, rear and split screen worked without any issues. Please see attached link of the installation video:
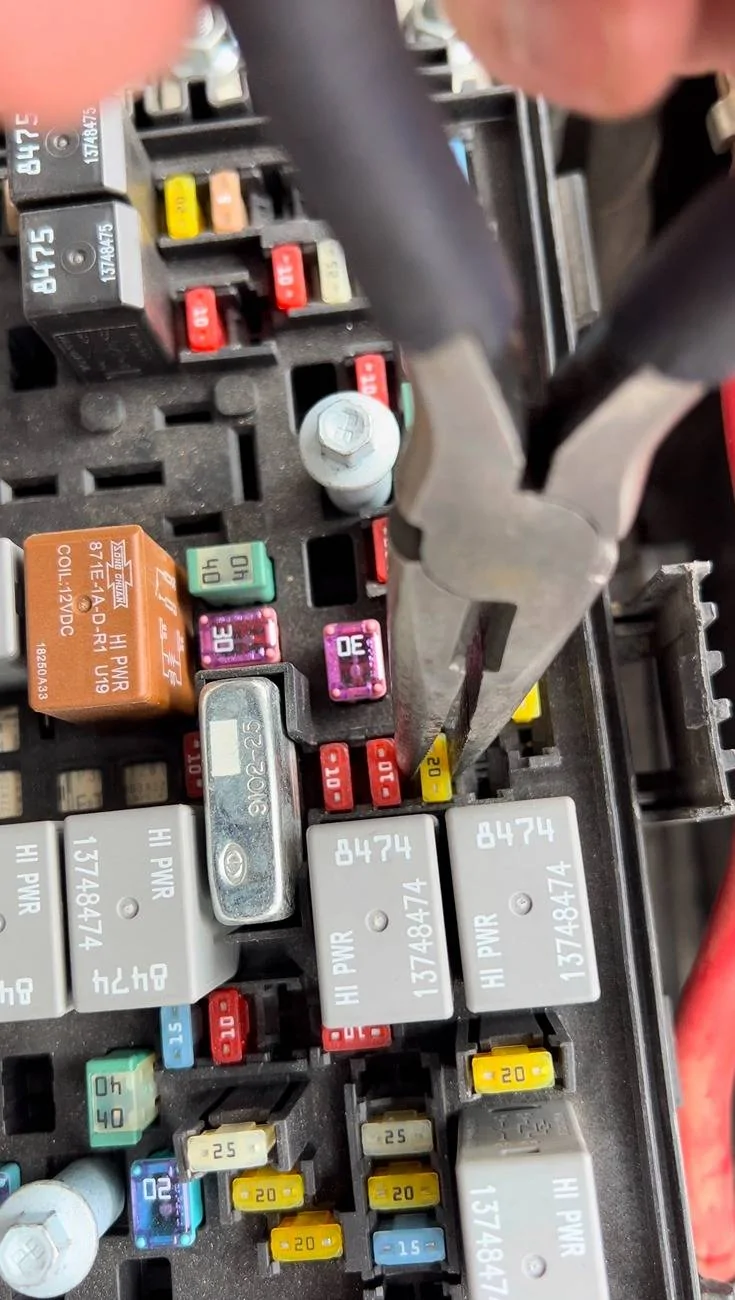
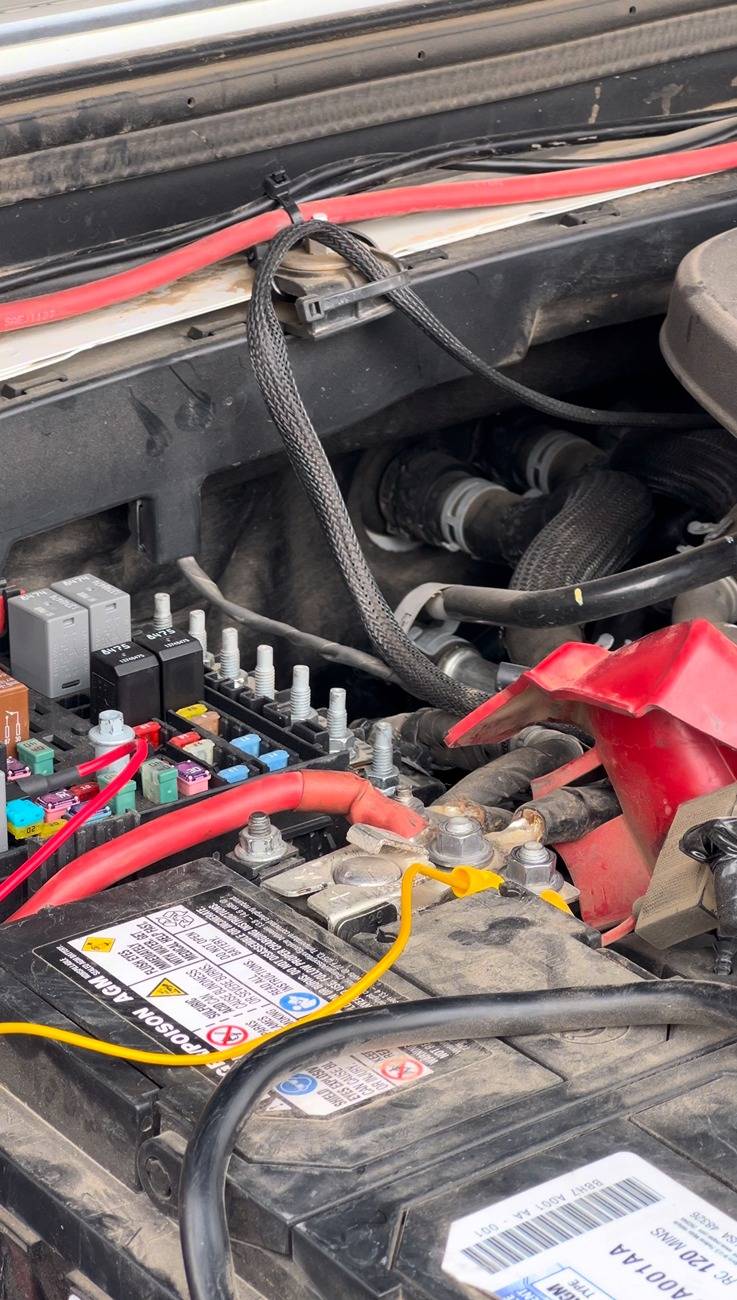
I started the installation by wiring the hardwire kit. The distributor box is located underneath the hood, passenger side. It's a black box that contains all kinds of fuses and relays.

I couldn't find the ACC fuse so I decided to use the cigarette lighter fuse #F52 which only supplies power when the engine is running or if the push button ignition is at "on" position. It's a yellow 20amp micro fuse.

I used the micro fuse tap/adapter that came with the hardwire kit. There are 2 slots for fuse, one for the dash cam and the other for the cigarette lighter.
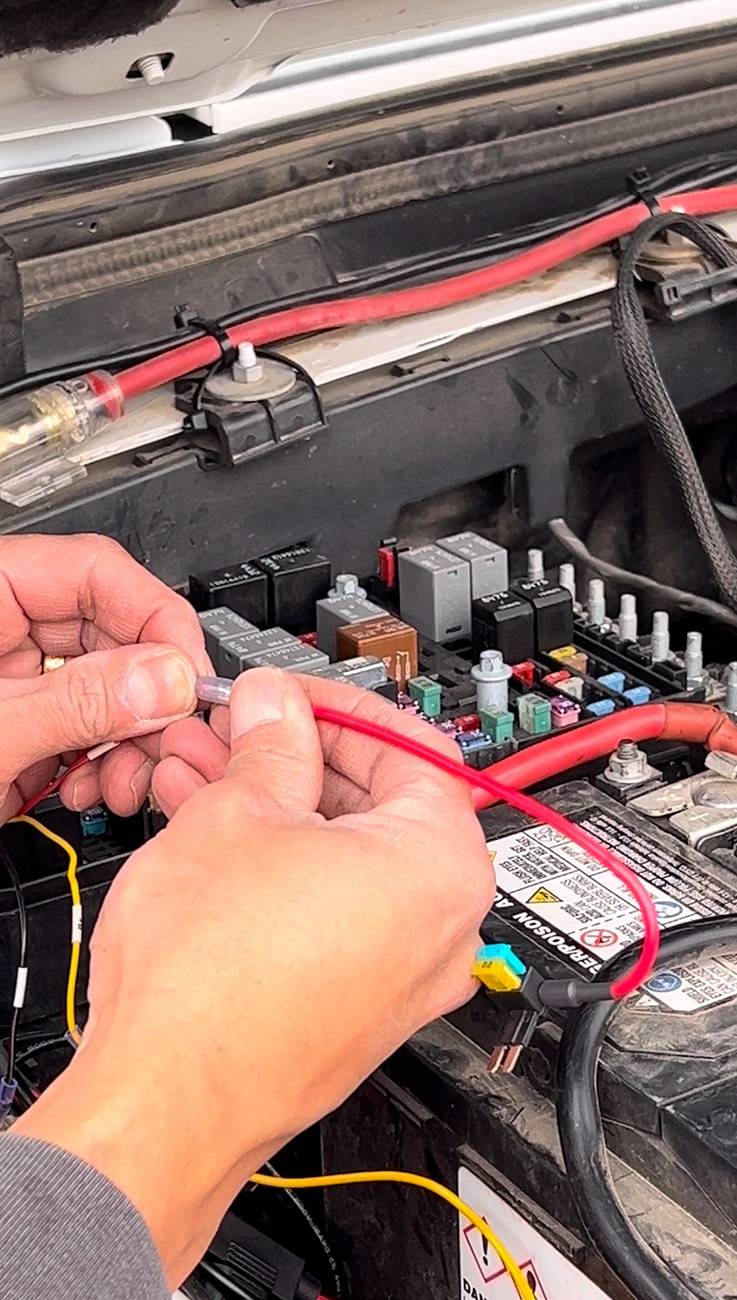
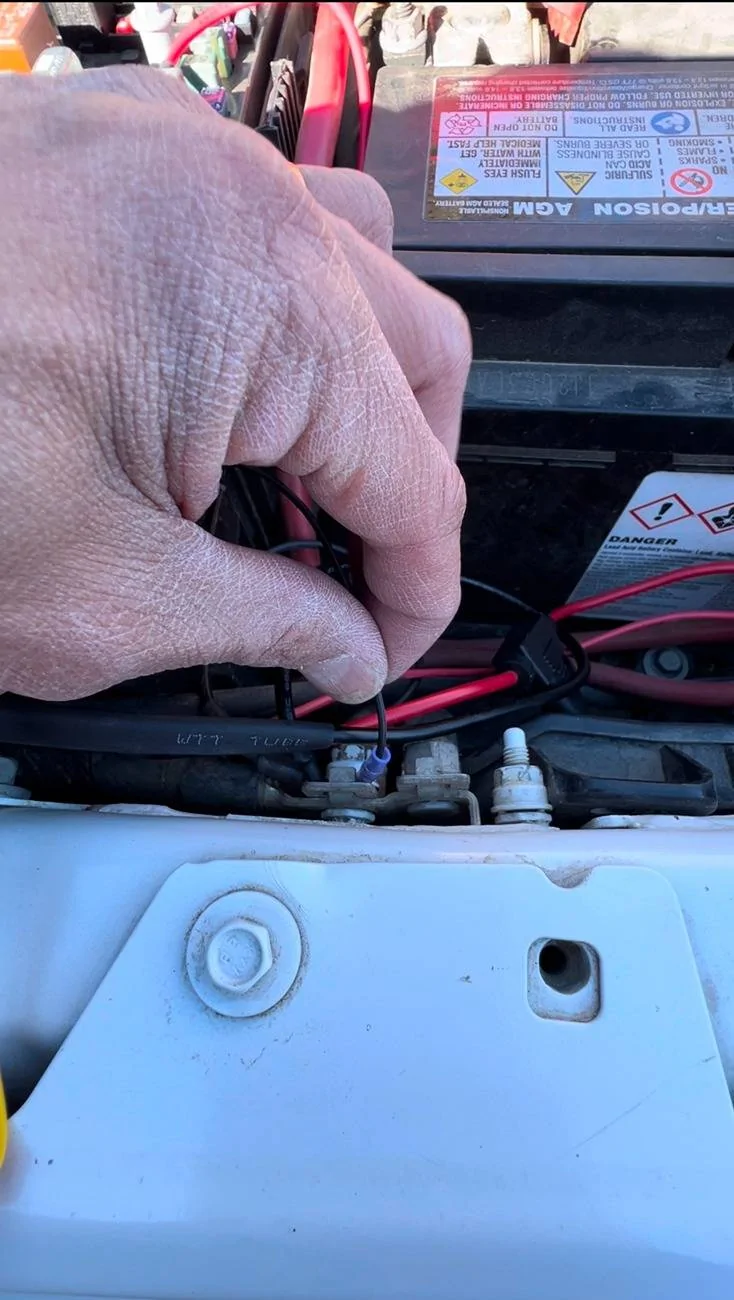
I connected the red wire of the hardwire kit to the micro fuse adapter, the yellow wire to the positive terminal of the battery and black wire to the existing ground bolt which located right next to the battery.

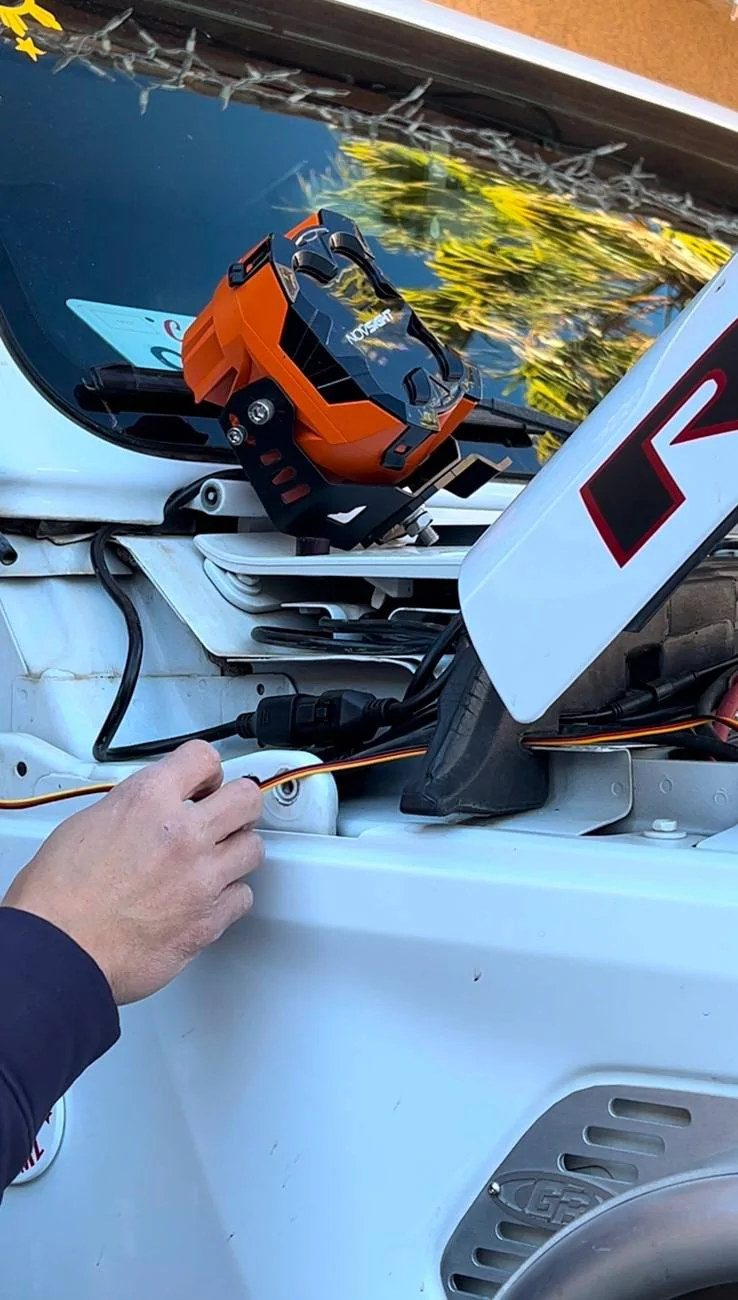
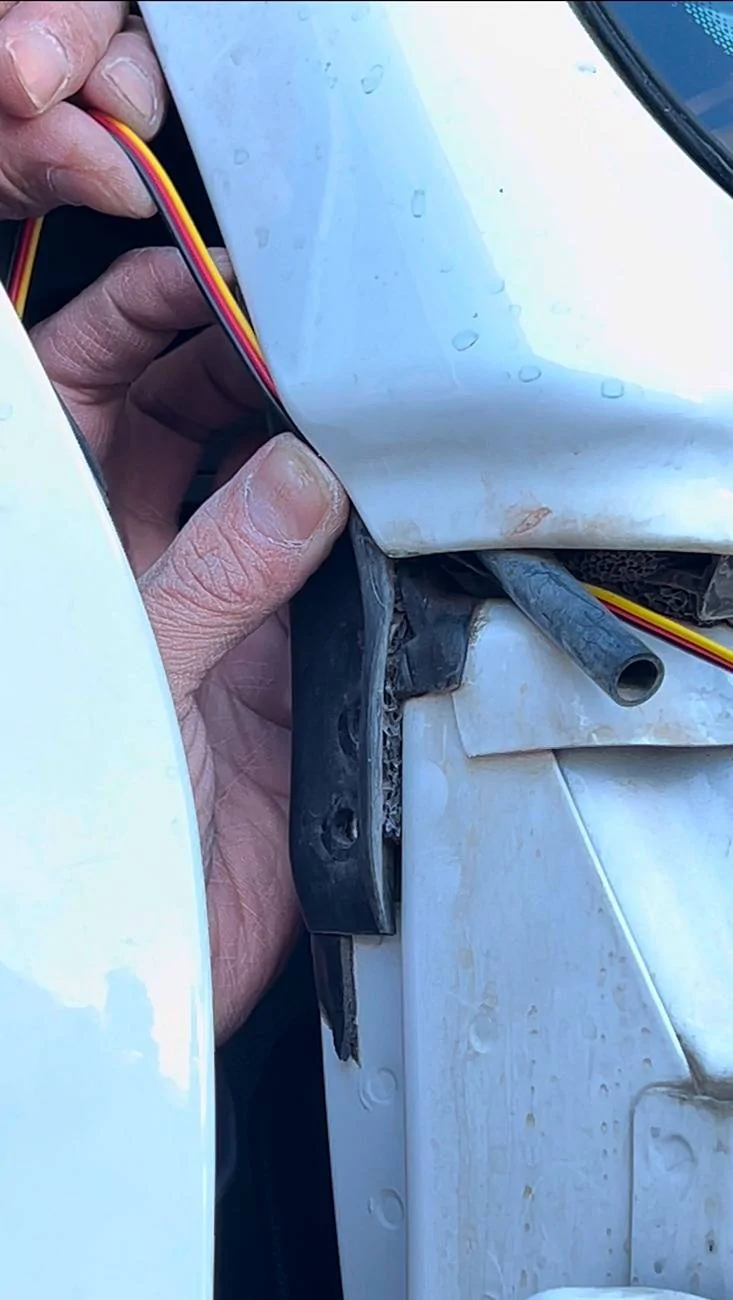
I had to remove the driver side cowl cover so I could run the power cord behind the cover and under the rubber trim inside the passenger door, just right bellow the windshield.


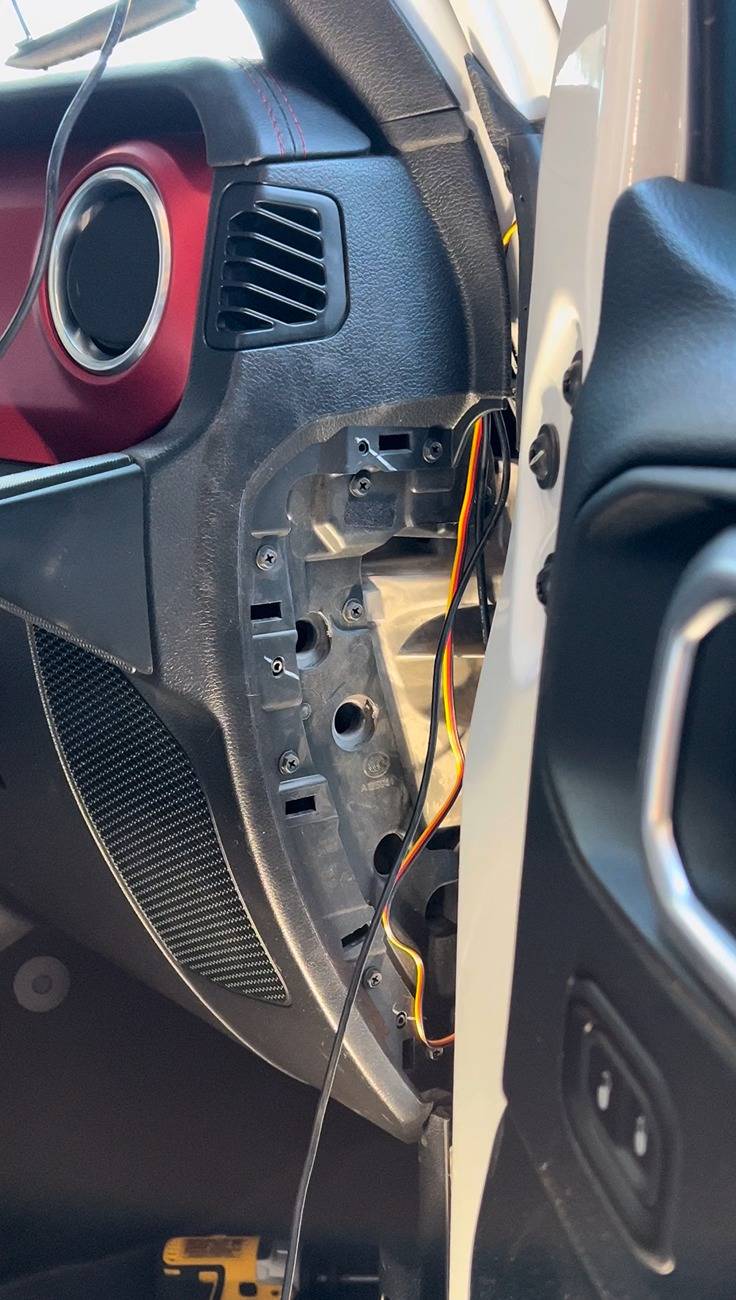
Then using the supplied tool, I removed the dash trim panel below the grab handle so and secured the power cord.

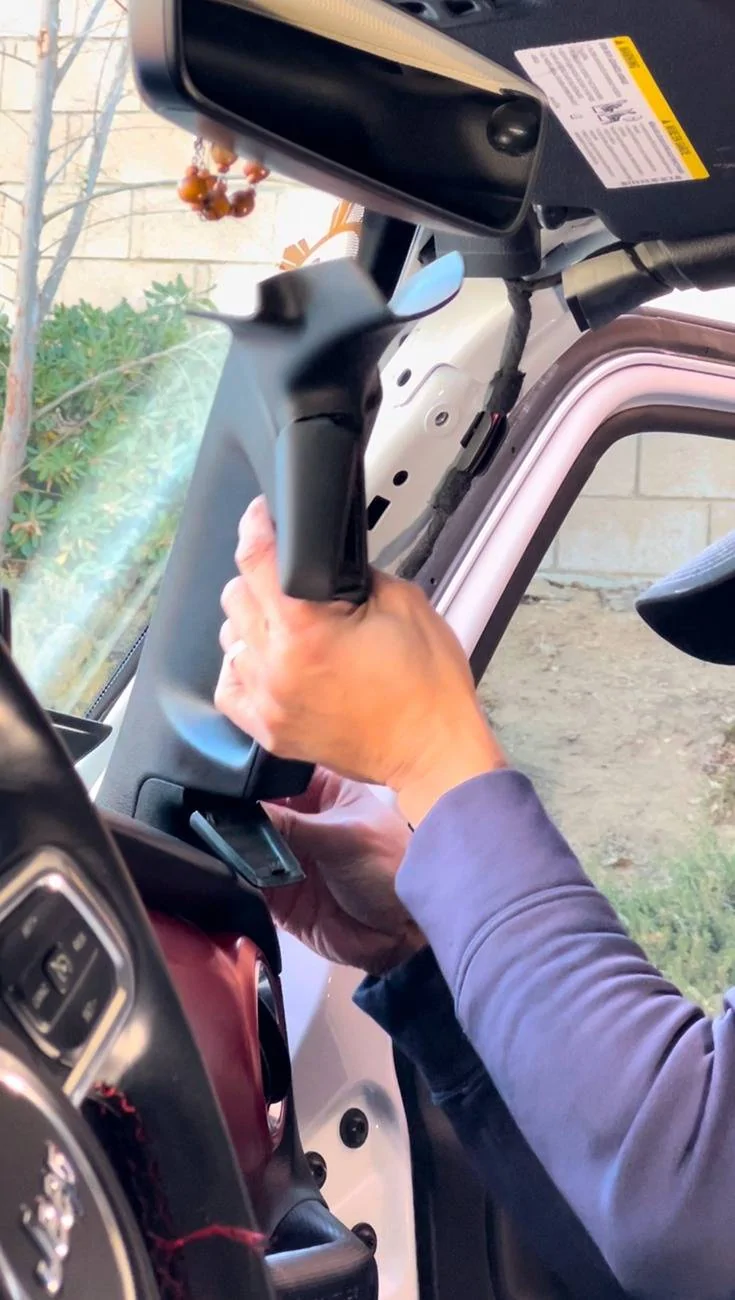
Then using 10mm socket, I removed the grab handle bolts, only held by 2 bolts, top and bottom. You have to pry the covers to access the bolts. After removing the 2 bolts, gently pull the grab handle.
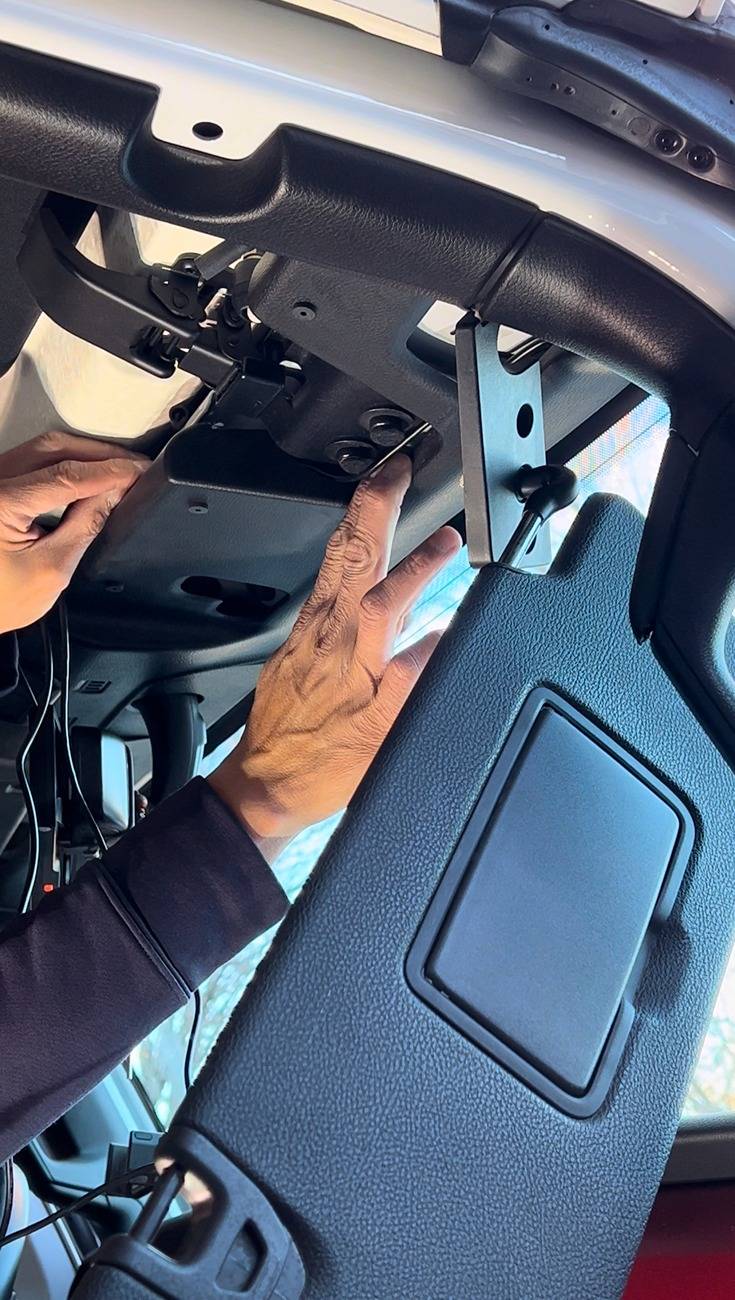
Remove the passenger visor by using T25 torx bit then gently pull down the upper trim then guide the power, GPS and rear camera wires under the grab handle and upper trim leaving the end about 4-5 inches exposed right above the stock rear view mirror. Then tuck the rear camera wire under the front and back floor trim.
Then remove the passenger taillight using T40 torx bit and disconnect it from the harness. Remove the jack compartment cover then the passenger side cargo hook panel using T40 torx bit (3 bolts).
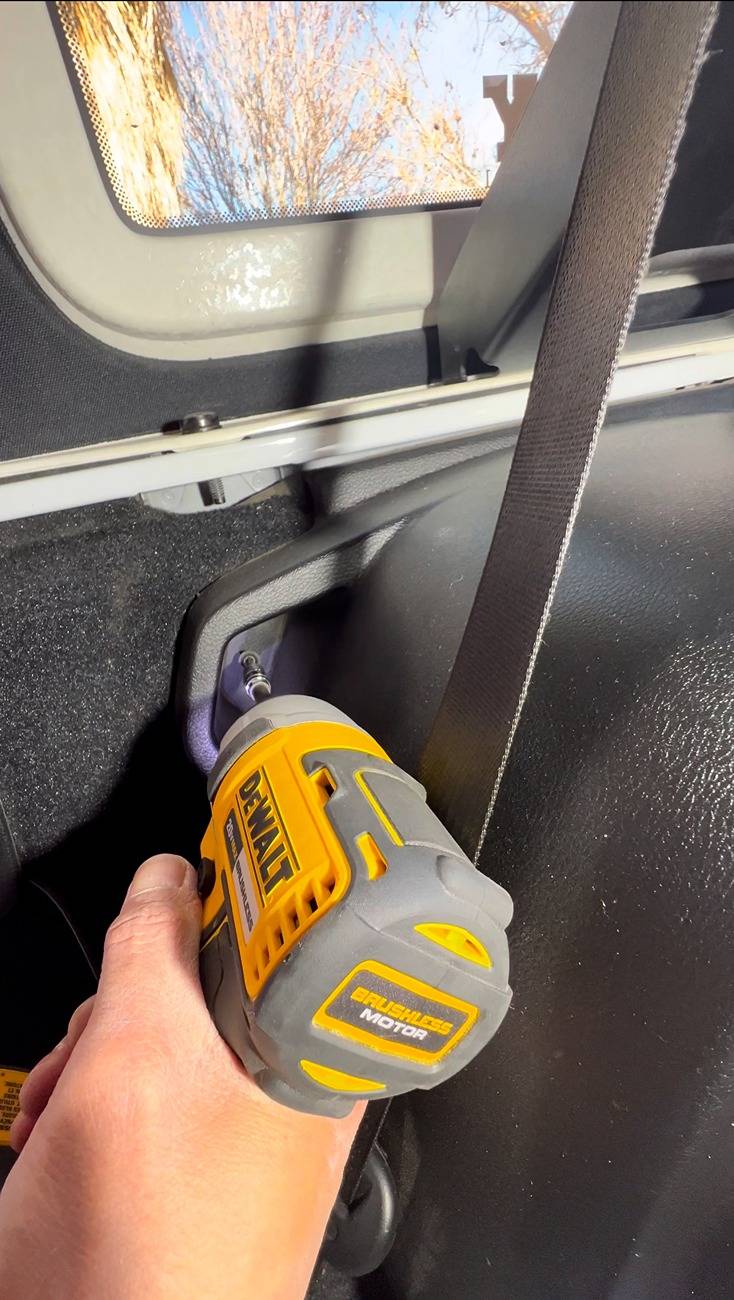
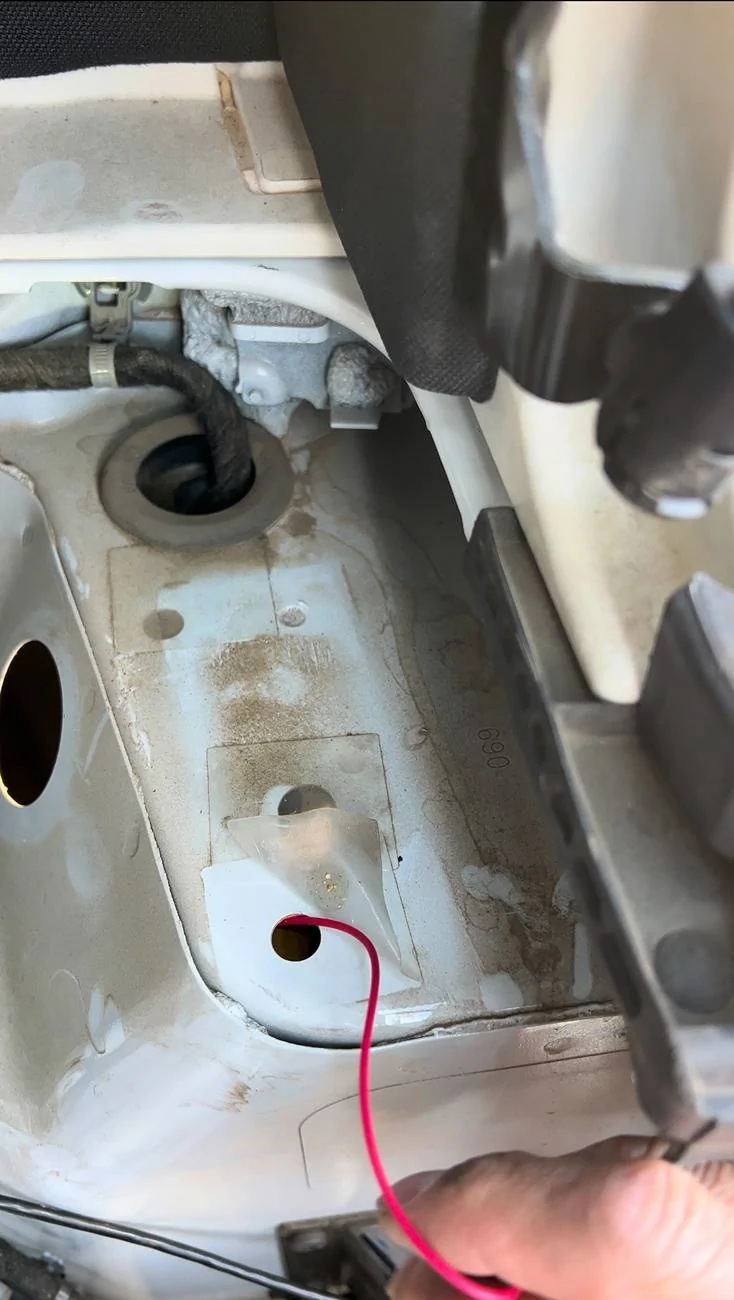
Using T25 torx bit, remove the ONLY bolt right above the sub-woofer panel. Pry off the seat belt guide cover. Then gently pull the subwoofer panel away from the body. Then ran the camera wife behind.
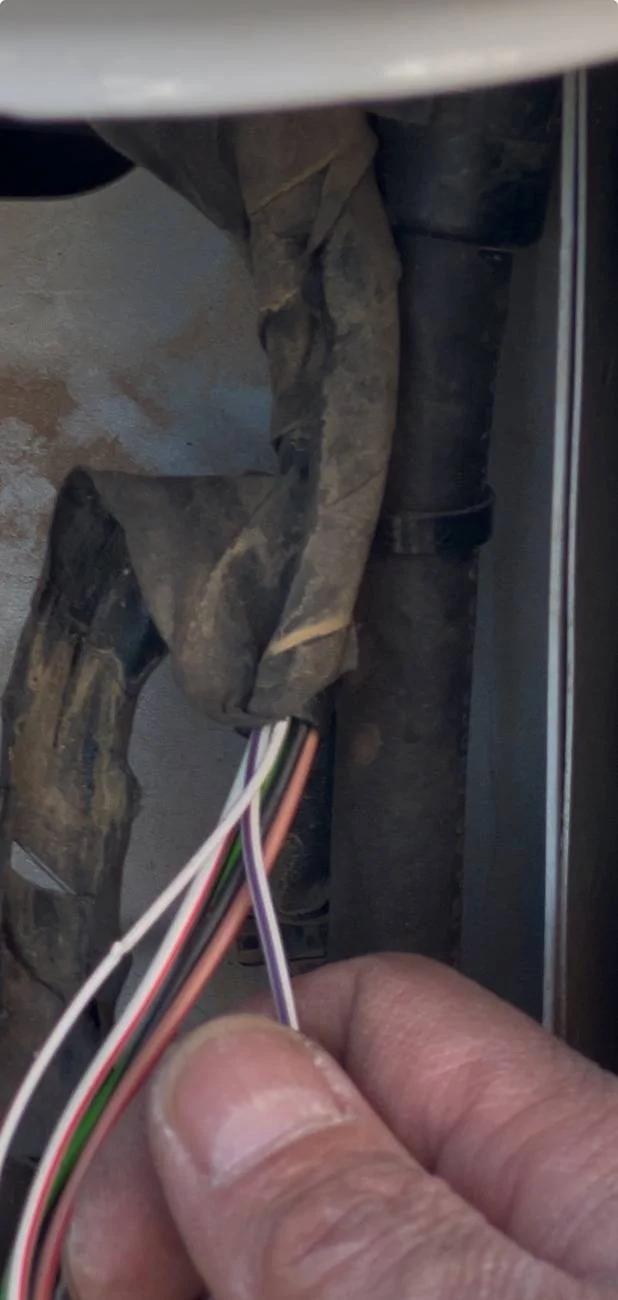
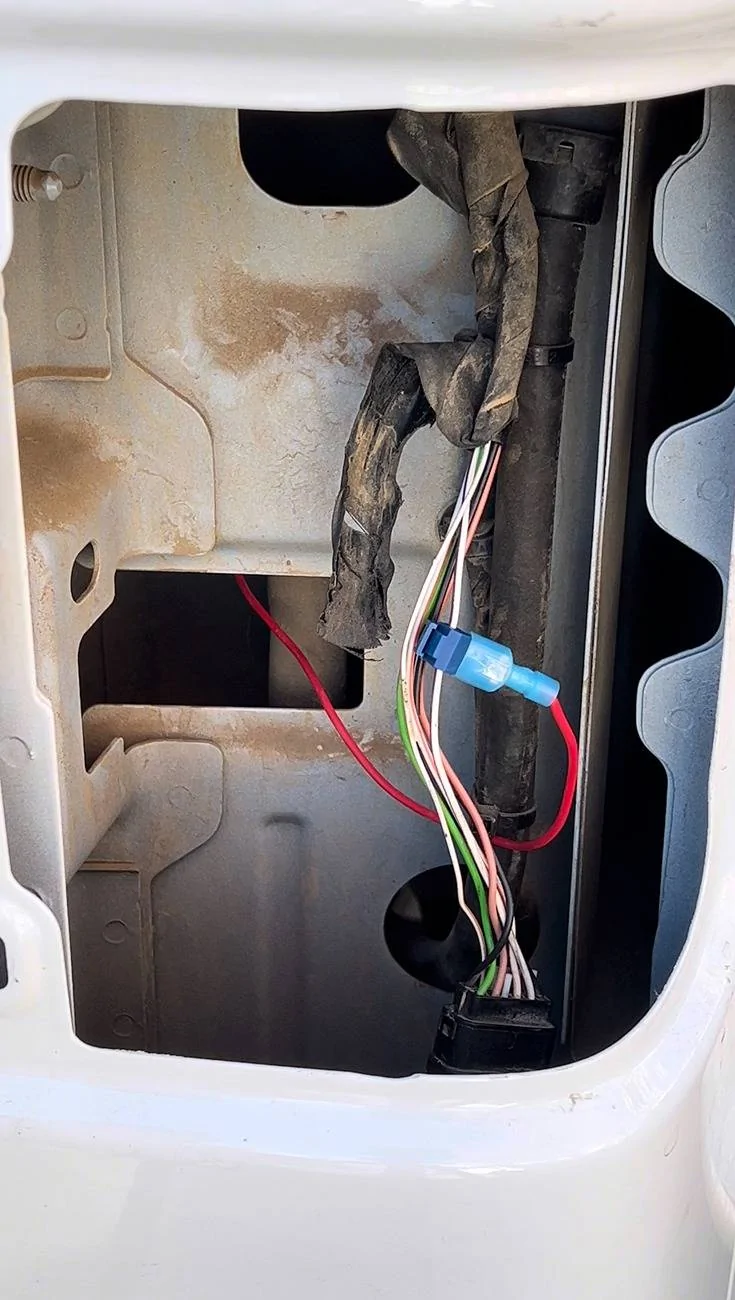
Right underneath the subwoofer panel, at the rear end, the are 2 small holes covered with transparent tape. Feed the end of the red wire (reverse/back up light wire) of the camera wire thru one of the small holes then connect it to the WHITE-PURPLE wire of the taillight harness using your preferred tapping connectors. I bought mine from Amazon.

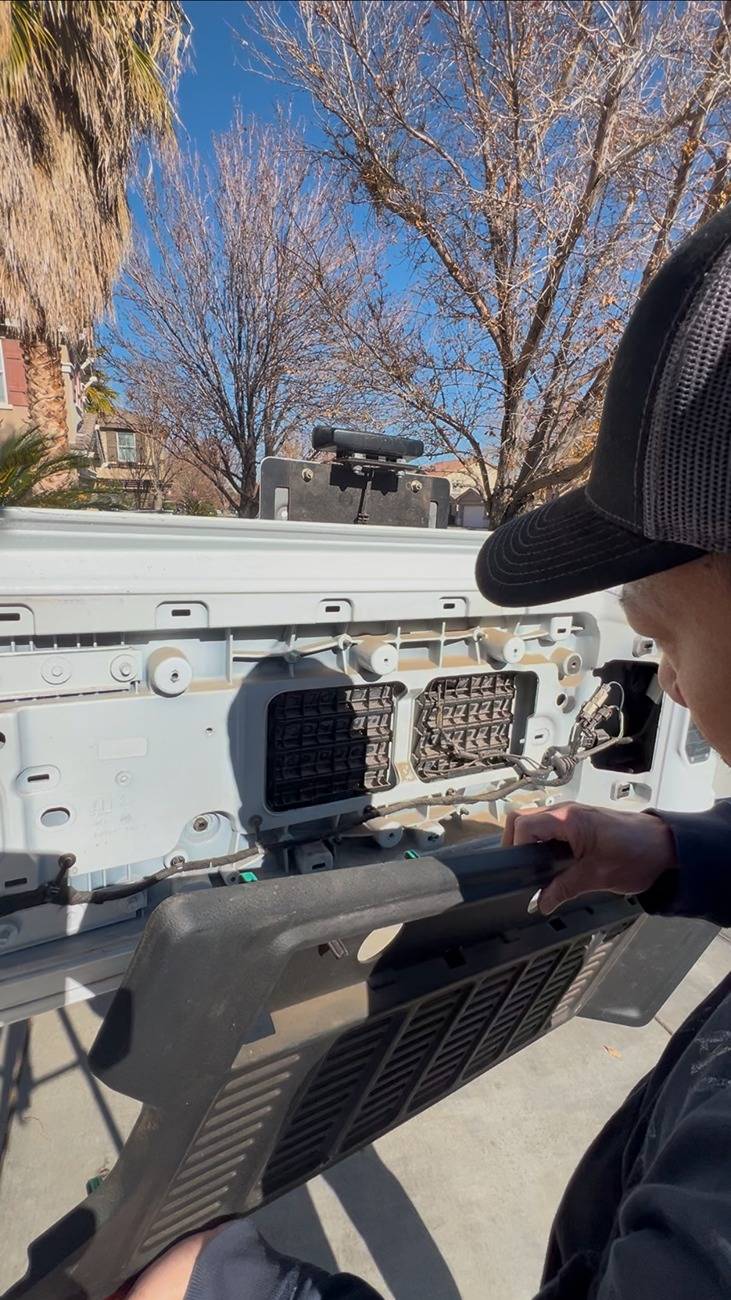
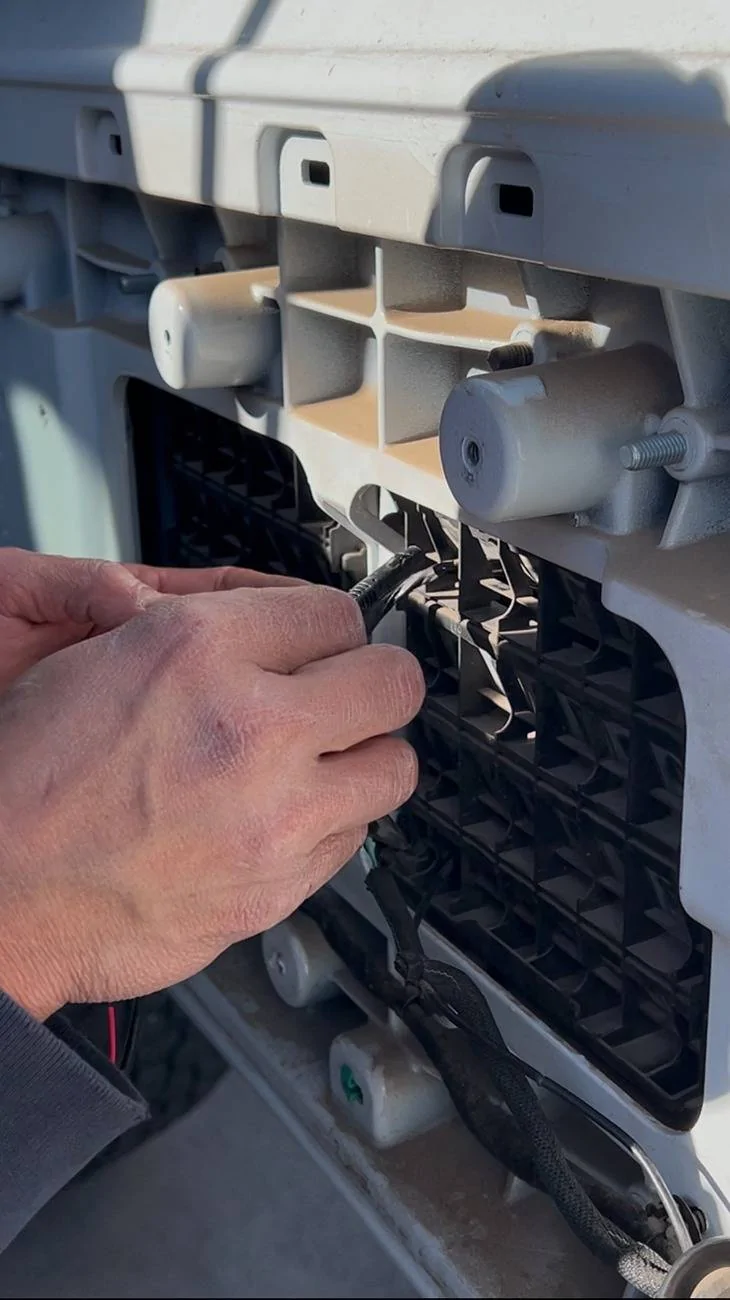
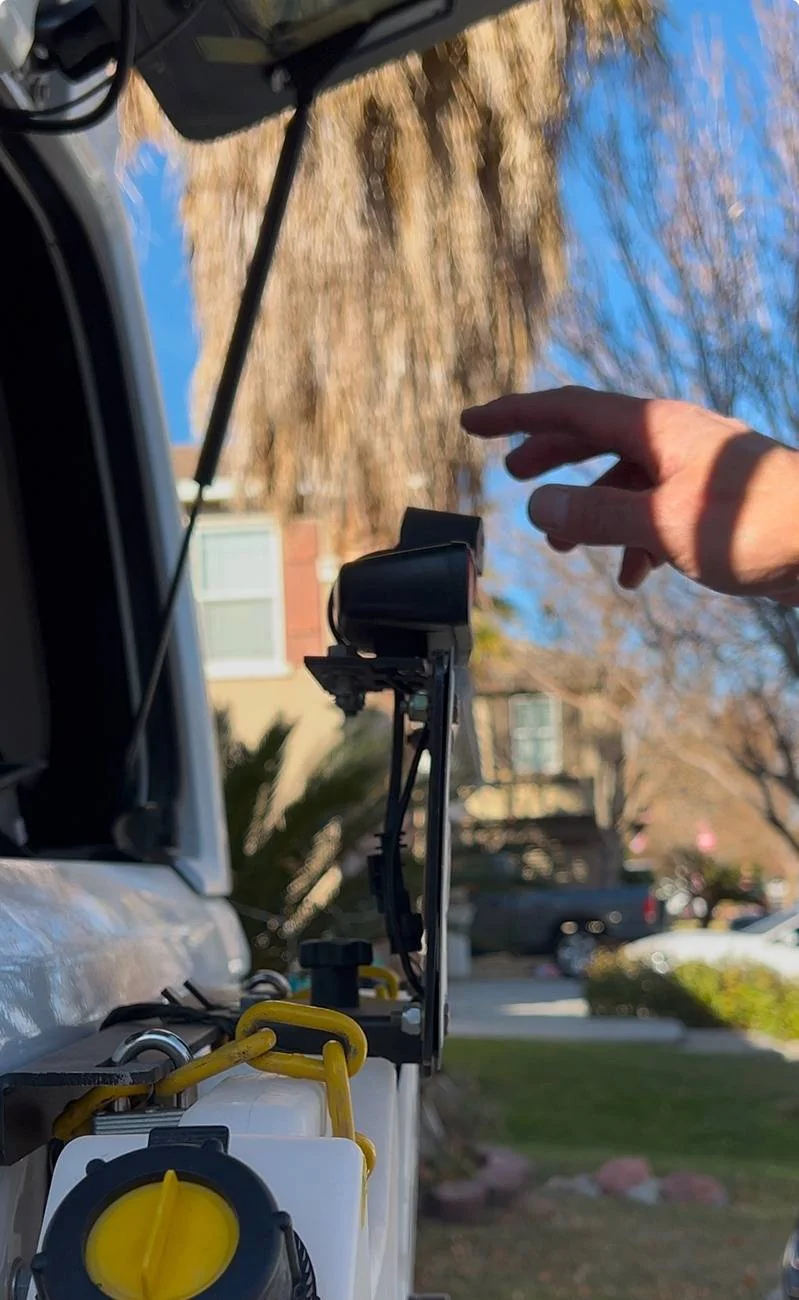
Then using remove the 3 bolts holding the tailgate panel. Feed the end of the camera wire through the vent panel and connect it to the rear camera. I secured the camera on top of my stop light using the 3M 2 sided tape that came with the kit.


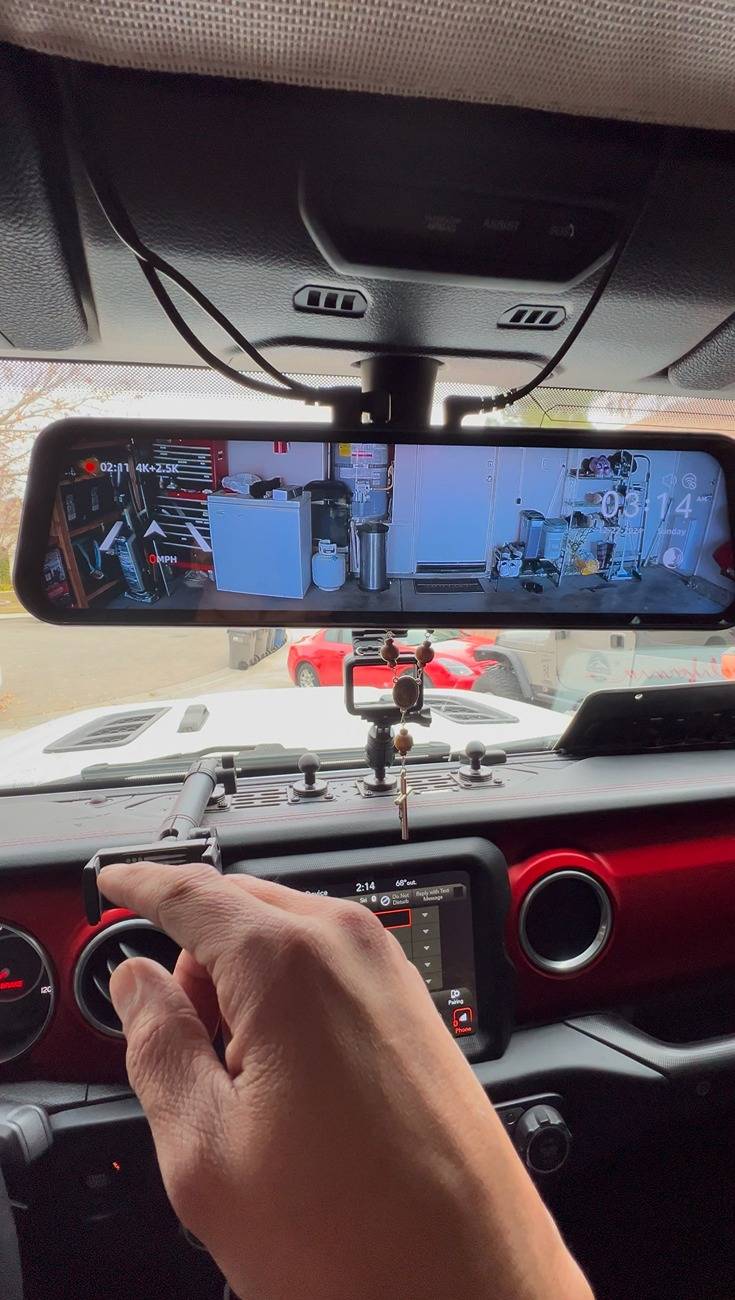
Using the short elastic fasteners (2 pcs), I attached the Wolfbox G900 PRO to the stock rear view mirror and connected the power, GPS and rear camera wires to the unit. Installation is complete.

Hope this helps. Please let me know if you have any questions.
The basic kit comes with the G900 PRO plus 4 fuse Hardwire kit. Wolfbox also has other accessories like OEM bracket for mirror dash camera if you want to remove your stock rear view mirror and replace it with the Wolfbox mirro/dash cam. They also have longer rear camera wire/cord if you are installing it on longer wheelbase vehicles like pick up trucks.
Installation can be done with the cigarette lighter power cord or with hardwire kit. I opted for the hardwire kit to reduce the clutter on my dash. Before the installation, I tested the unit by using the cigarette lighter power cord. I connected the power cord and rear cam cord to the mirror and put the ignition to on without running the engine and the unit started right up. The front, rear and split screen worked without any issues. Please see attached link of the installation video:
I started the installation by wiring the hardwire kit. The distributor box is located underneath the hood, passenger side. It's a black box that contains all kinds of fuses and relays.

I couldn't find the ACC fuse so I decided to use the cigarette lighter fuse #F52 which only supplies power when the engine is running or if the push button ignition is at "on" position. It's a yellow 20amp micro fuse.
I used the micro fuse tap/adapter that came with the hardwire kit. There are 2 slots for fuse, one for the dash cam and the other for the cigarette lighter.

I connected the red wire of the hardwire kit to the micro fuse adapter, the yellow wire to the positive terminal of the battery and black wire to the existing ground bolt which located right next to the battery.
I had to remove the driver side cowl cover so I could run the power cord behind the cover and under the rubber trim inside the passenger door, just right bellow the windshield.
Then using the supplied tool, I removed the dash trim panel below the grab handle so and secured the power cord.
Then using 10mm socket, I removed the grab handle bolts, only held by 2 bolts, top and bottom. You have to pry the covers to access the bolts. After removing the 2 bolts, gently pull the grab handle.
Remove the passenger visor by using T25 torx bit then gently pull down the upper trim then guide the power, GPS and rear camera wires under the grab handle and upper trim leaving the end about 4-5 inches exposed right above the stock rear view mirror. Then tuck the rear camera wire under the front and back floor trim.
Then remove the passenger taillight using T40 torx bit and disconnect it from the harness. Remove the jack compartment cover then the passenger side cargo hook panel using T40 torx bit (3 bolts).
Using T25 torx bit, remove the ONLY bolt right above the sub-woofer panel. Pry off the seat belt guide cover. Then gently pull the subwoofer panel away from the body. Then ran the camera wife behind.


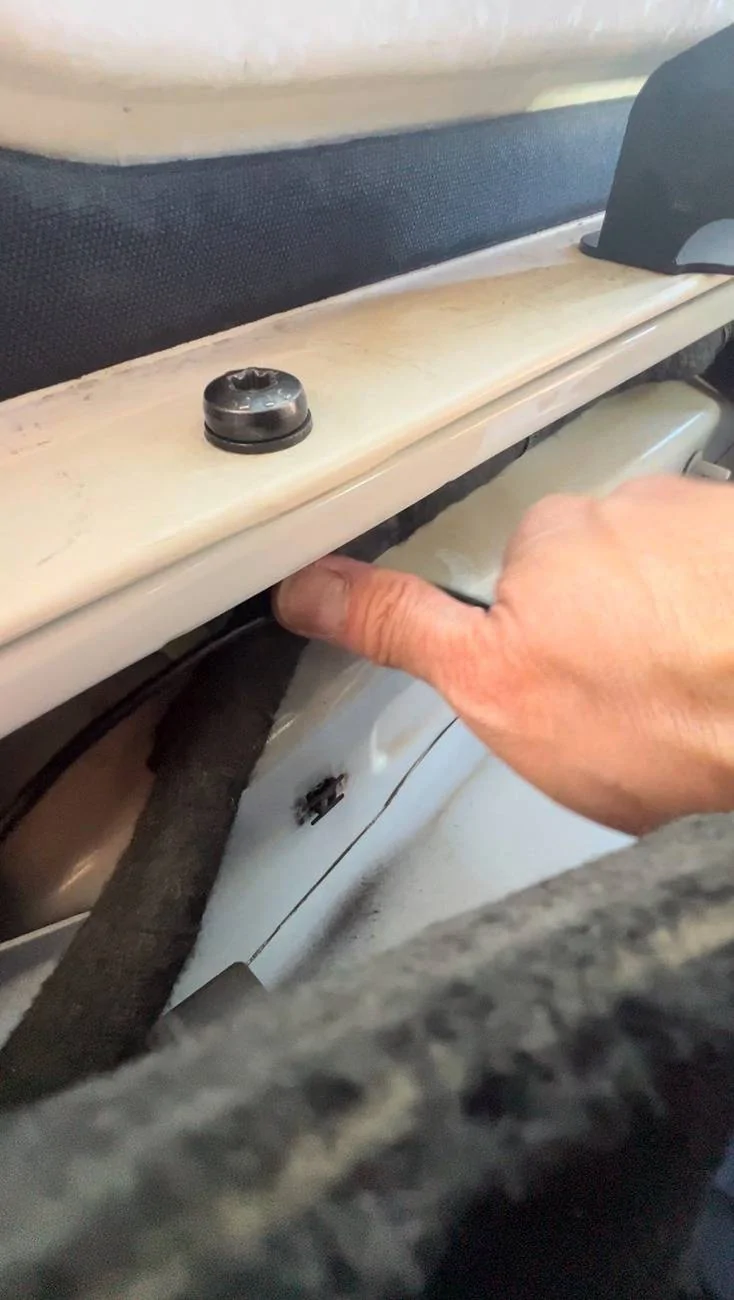
Right underneath the subwoofer panel, at the rear end, the are 2 small holes covered with transparent tape. Feed the end of the red wire (reverse/back up light wire) of the camera wire thru one of the small holes then connect it to the WHITE-PURPLE wire of the taillight harness using your preferred tapping connectors. I bought mine from Amazon.
Then using remove the 3 bolts holding the tailgate panel. Feed the end of the camera wire through the vent panel and connect it to the rear camera. I secured the camera on top of my stop light using the 3M 2 sided tape that came with the kit.
Using the short elastic fasteners (2 pcs), I attached the Wolfbox G900 PRO to the stock rear view mirror and connected the power, GPS and rear camera wires to the unit. Installation is complete.


Hope this helps. Please let me know if you have any questions.
Sponsored
Last edited: