RubenZ
Well-Known Member
- First Name
- Ruben
- Joined
- Jun 24, 2018
- Threads
- 64
- Messages
- 1,831
- Reaction score
- 1,707
- Location
- Deep South Texas
- Website
- cyberrube.com
- Vehicle(s)
- 2018 Silverado 2500HD Duramax, 18’ Toyota 4Runner
- Thread starter
- #1
About
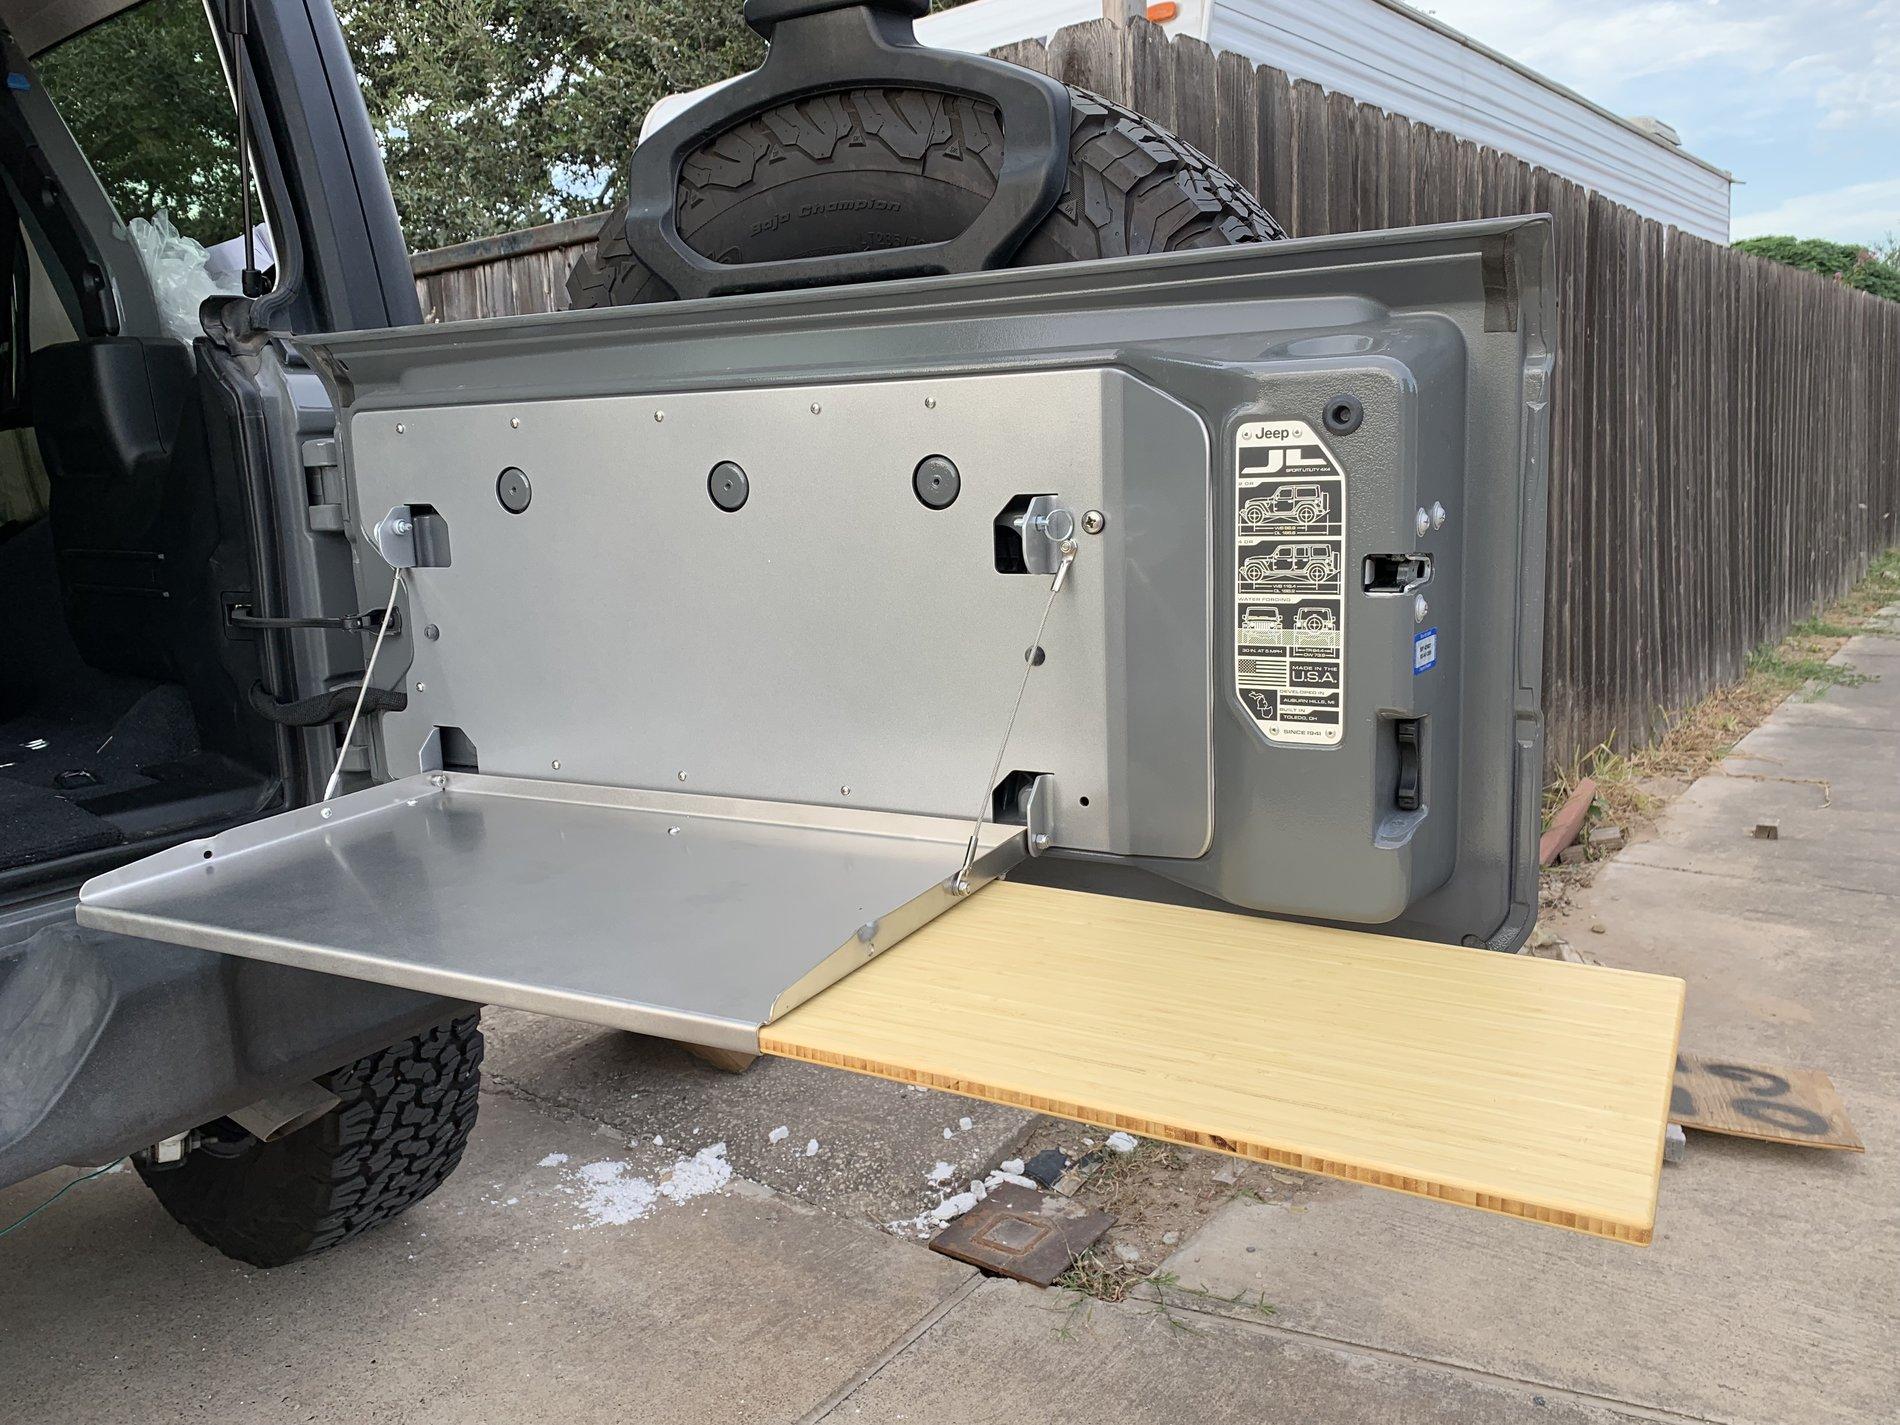
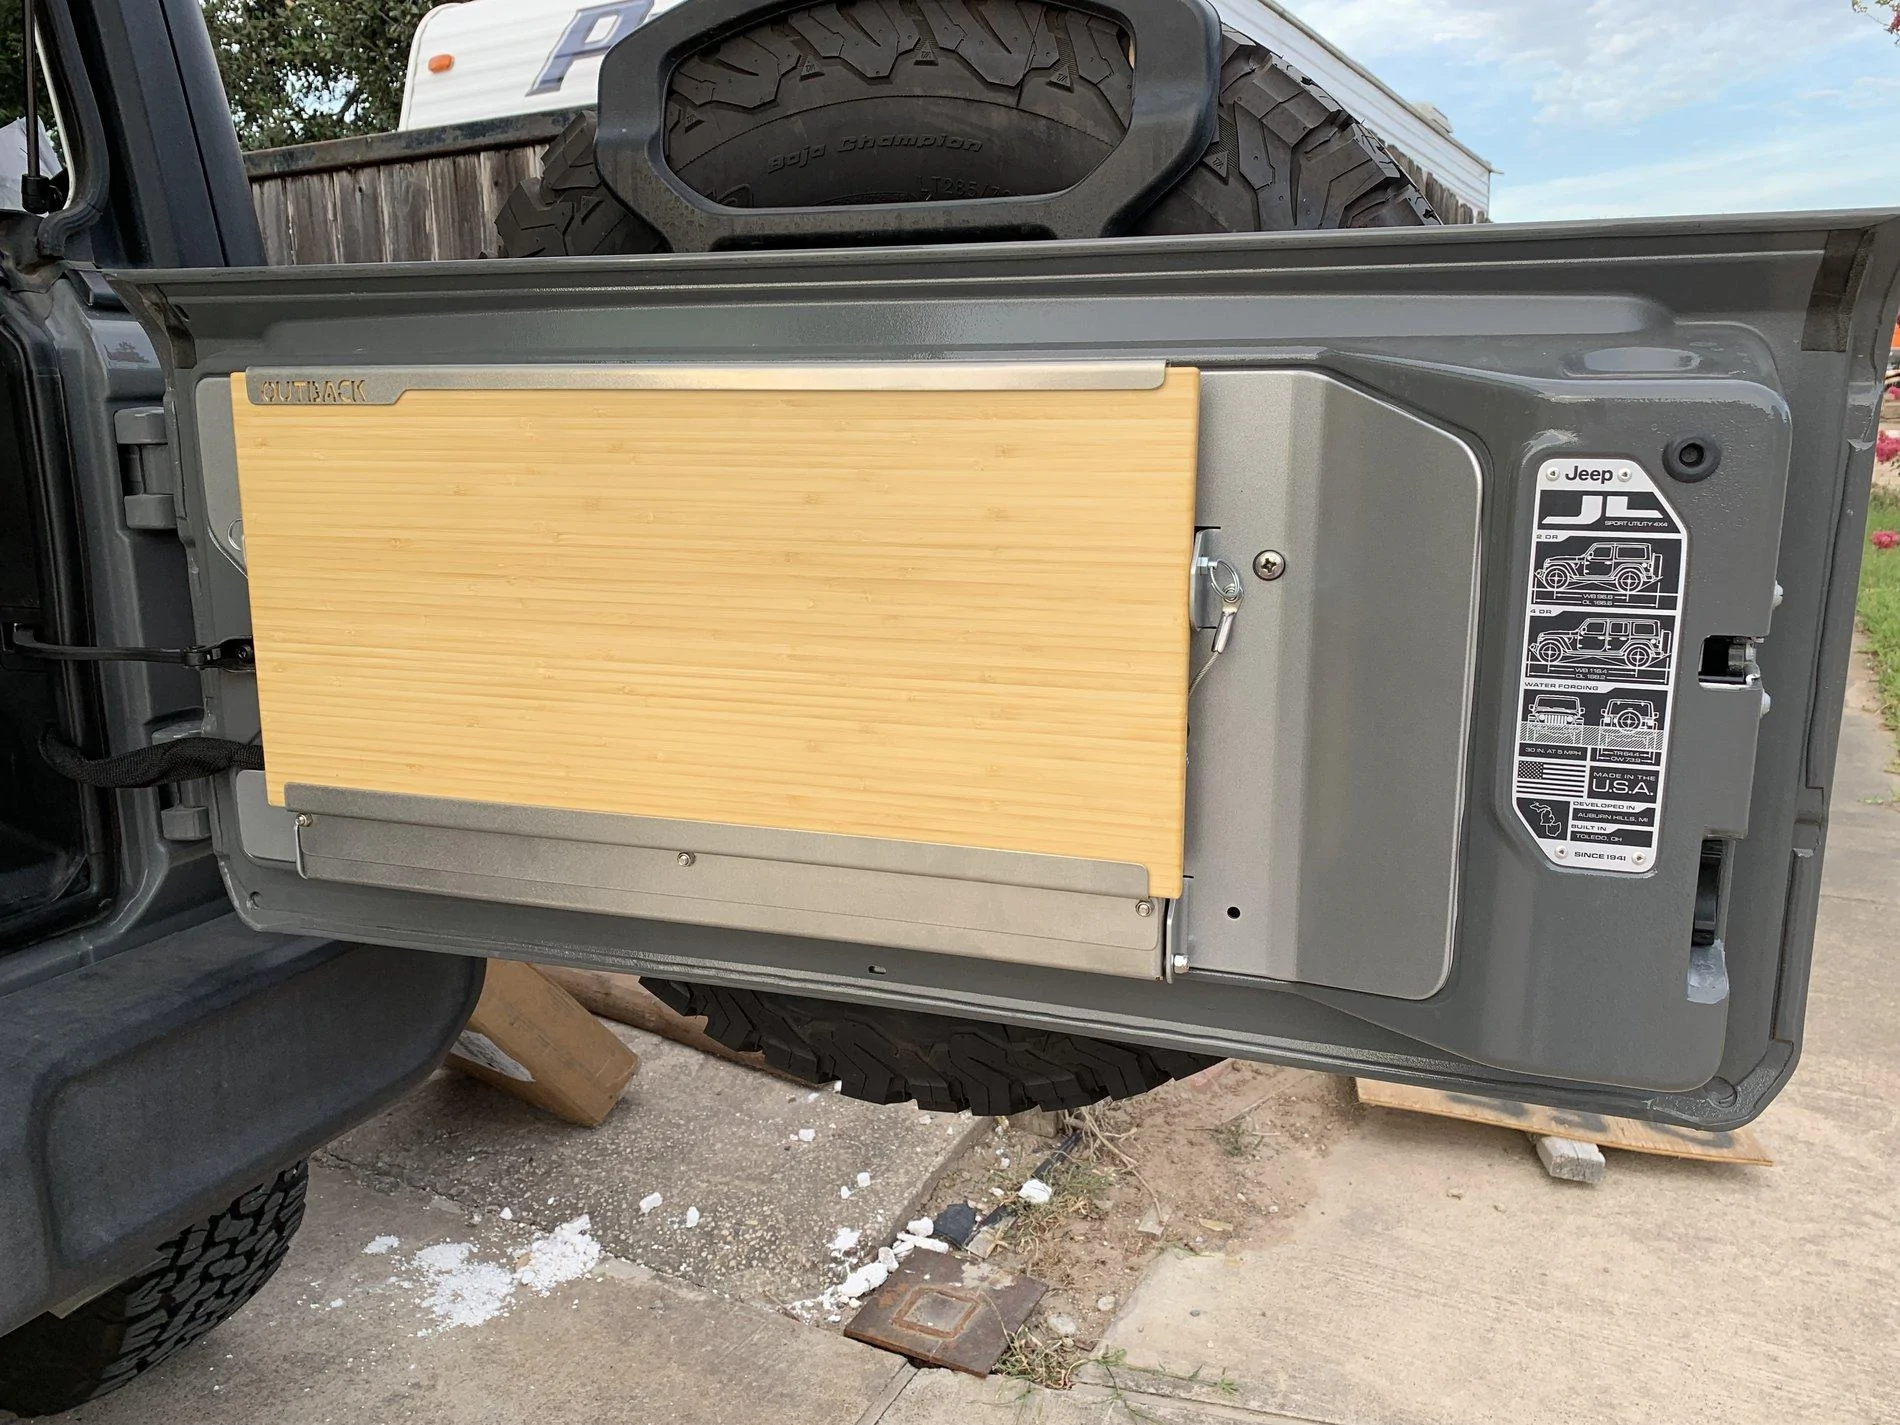
The JL Trailgater®is engineered specifically for the 2018-19 Jeep JL Wrangler and replaces the whole plastic inside tailgate cover. It utilizes the same proven design used for our JK Trailgater, has a larger table and cutting board and mounts to the JL tailgate using 9 proprietary injection molded blind nuts. The JL Trailgater also keeps available the 3 mounting points in the center of the tailgate.
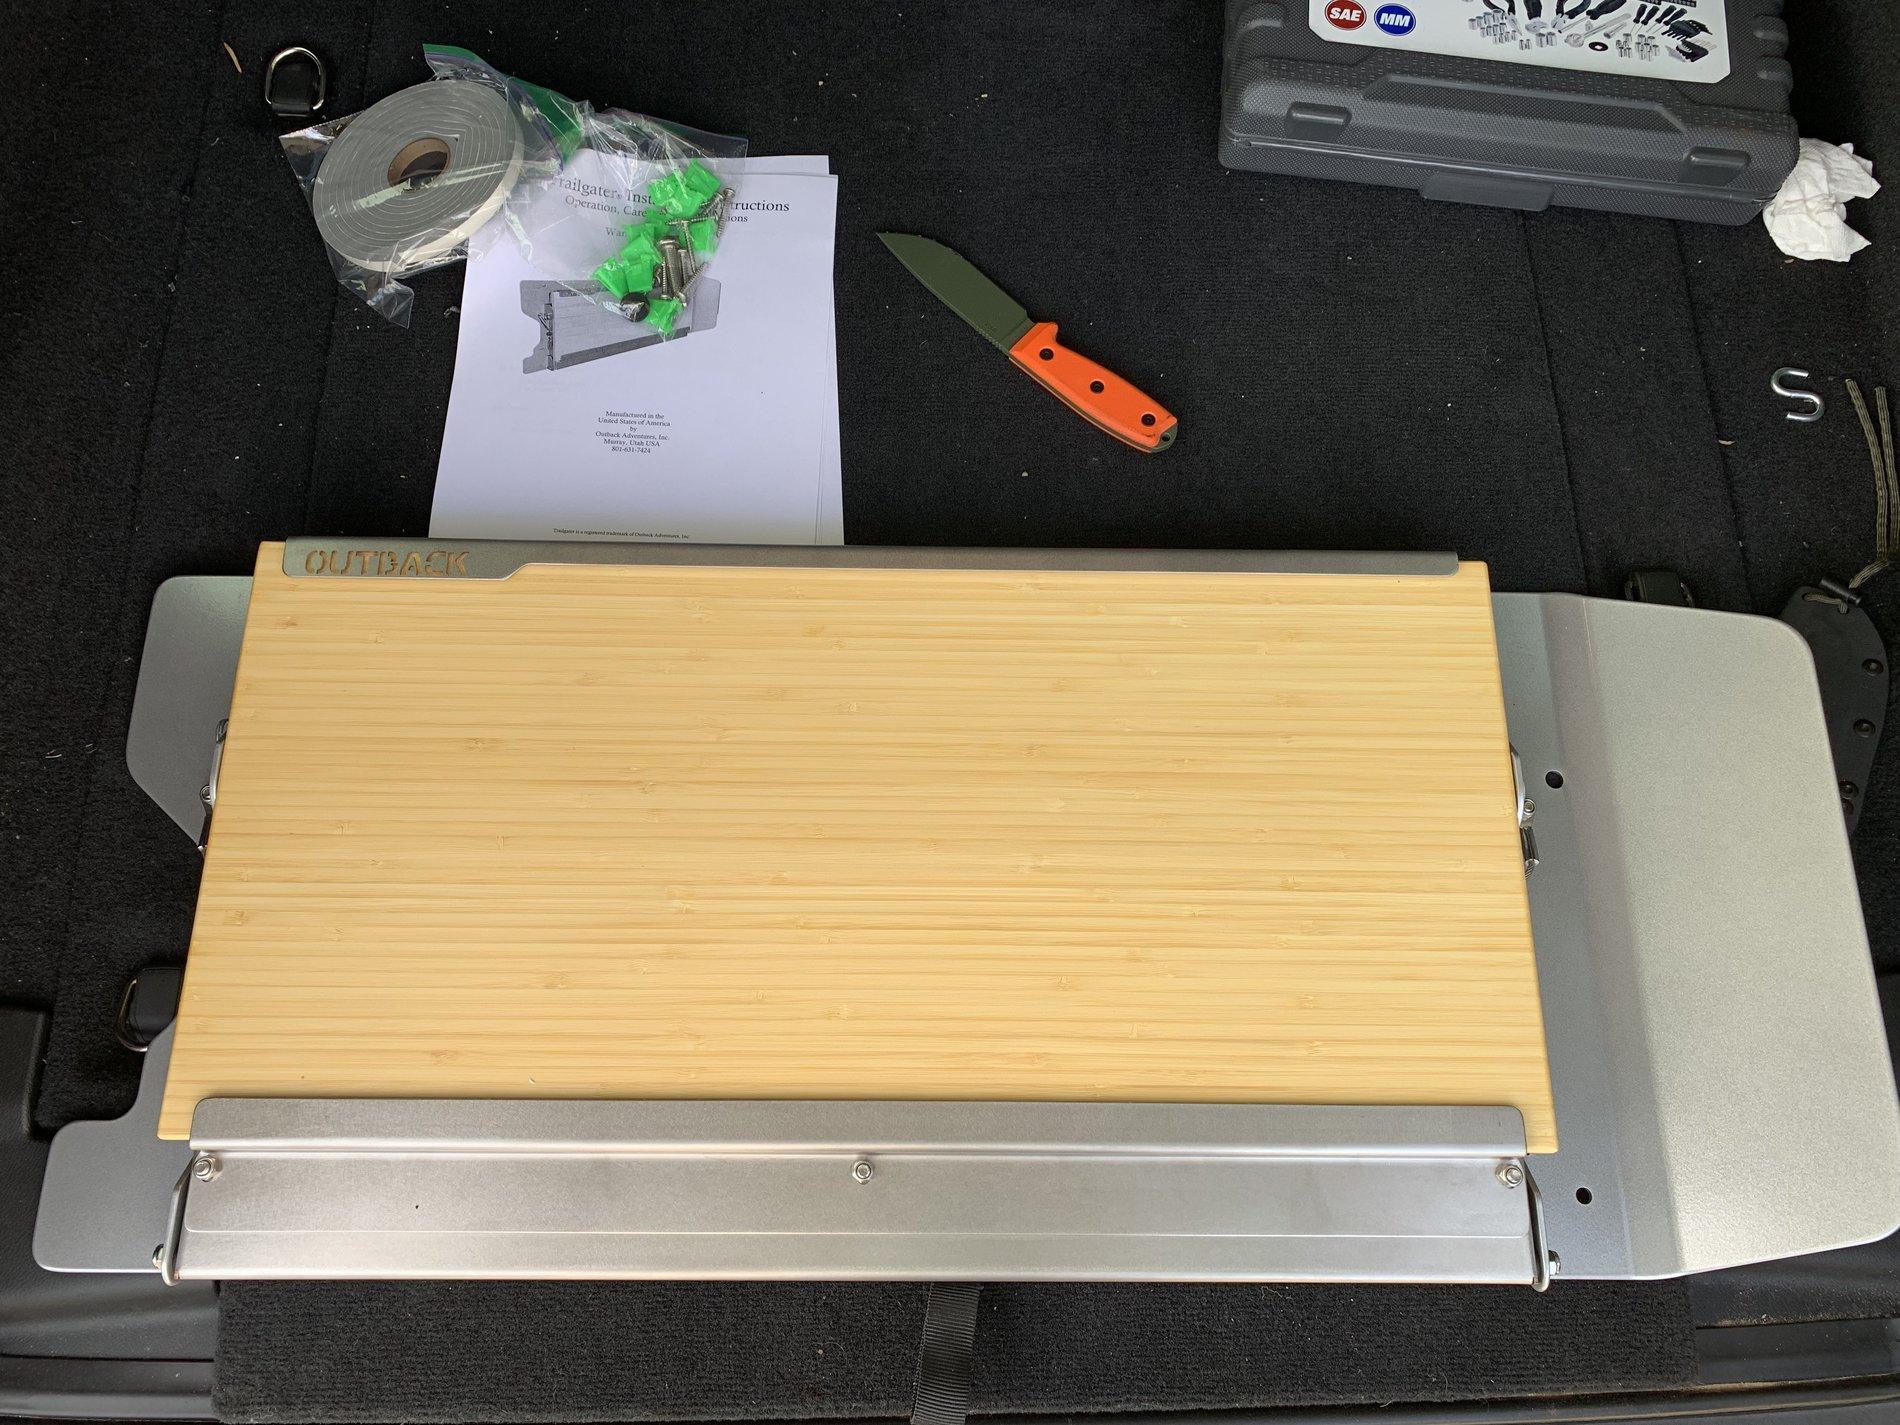
Pretty much out of the box you get the Trailgater Table, a set of instructions and a zip lock bag with the screws, washers and clip inserts needed for the Installation.

Installation
Step 1:
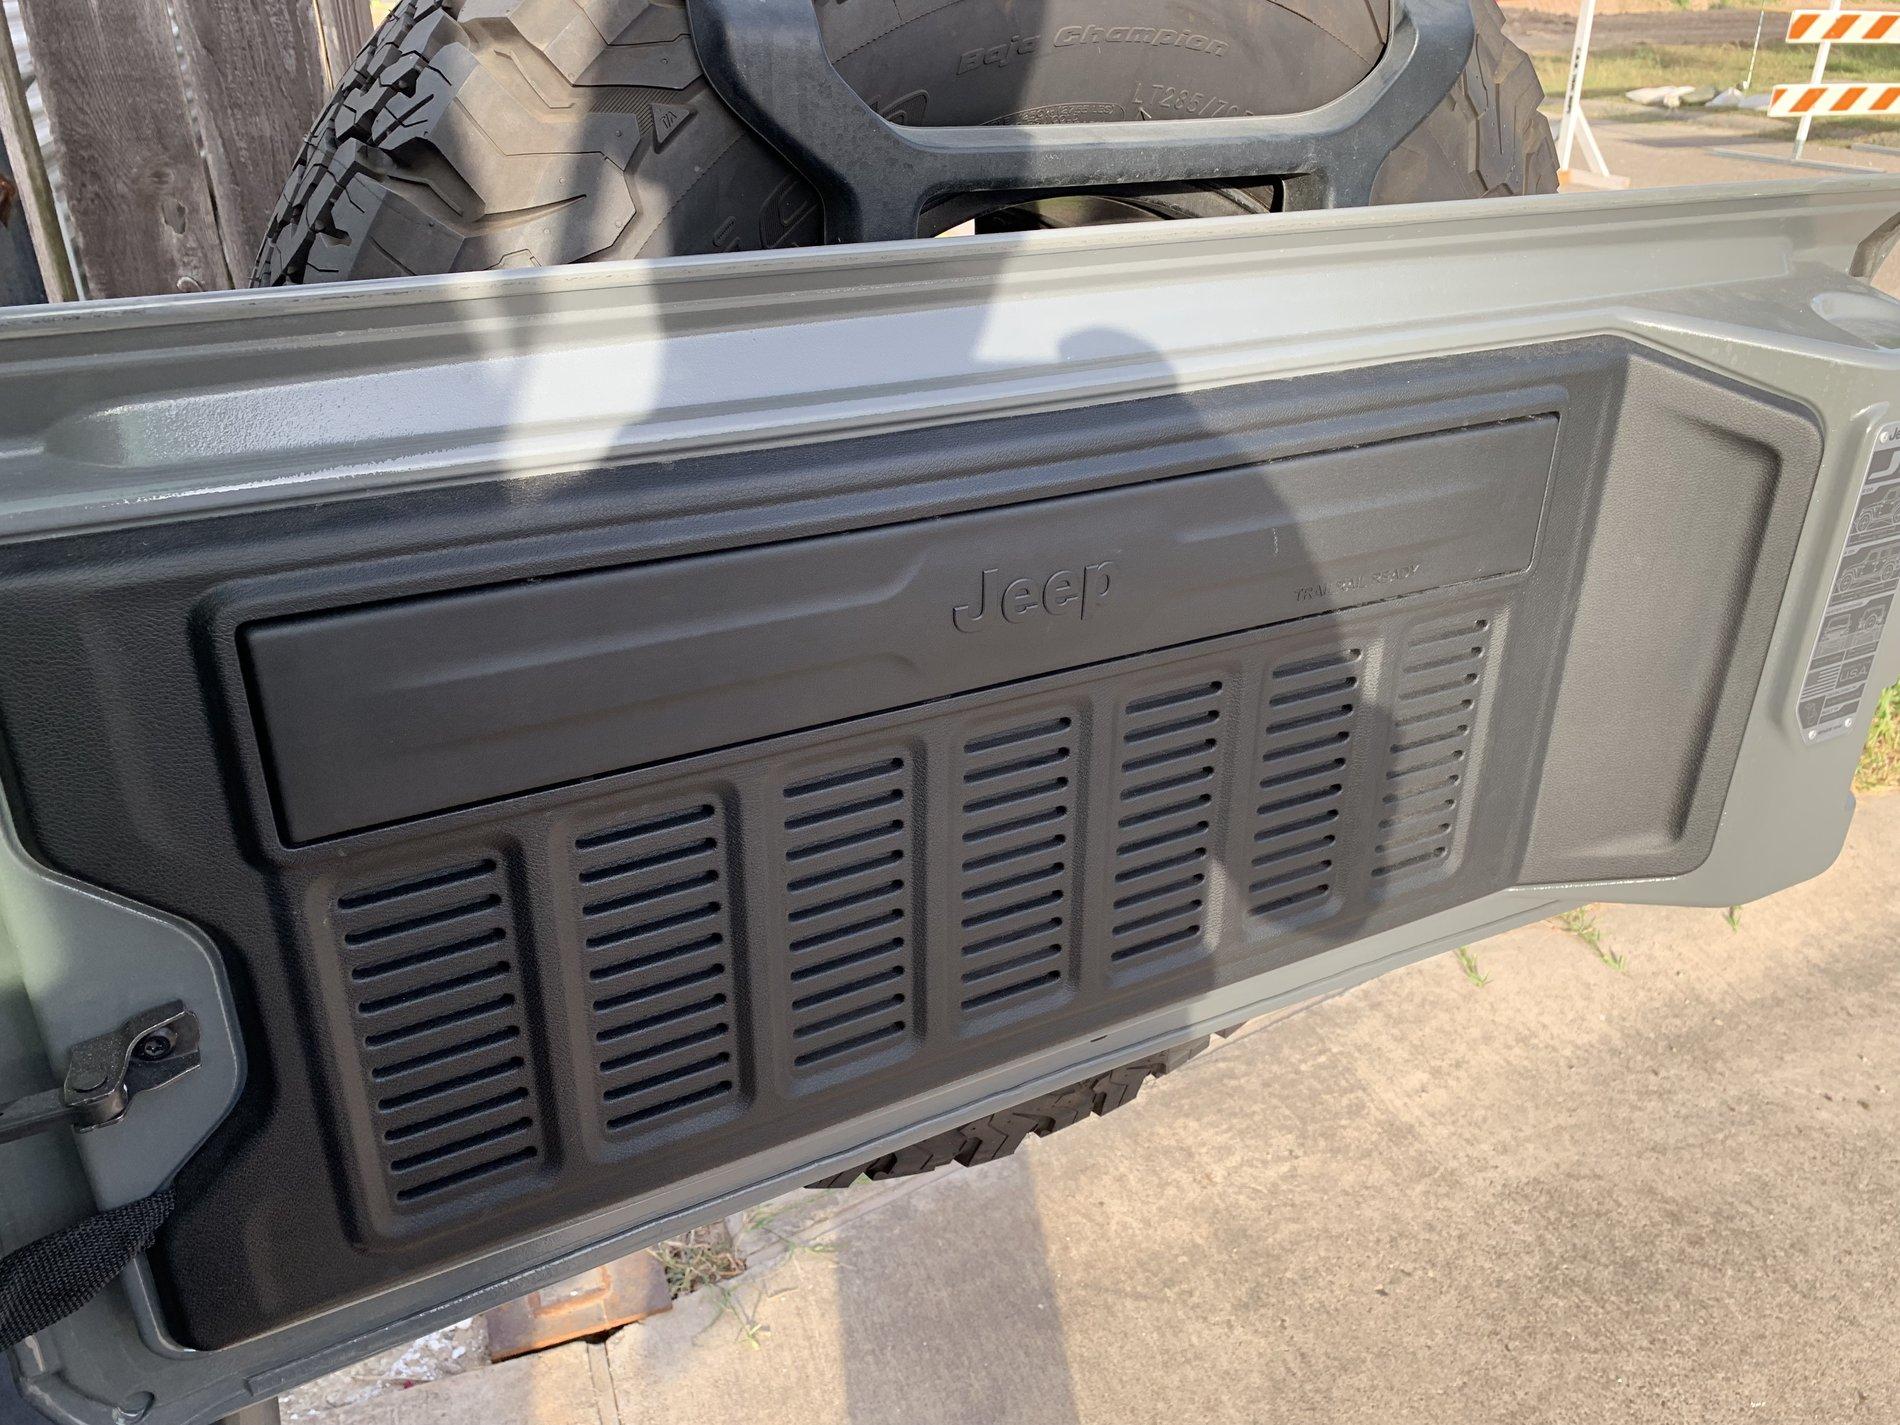
Remove the Plastic Cover from the Tailgate. I find it easiest to pull it out where the wiring harness goes through the plastic trim panel.
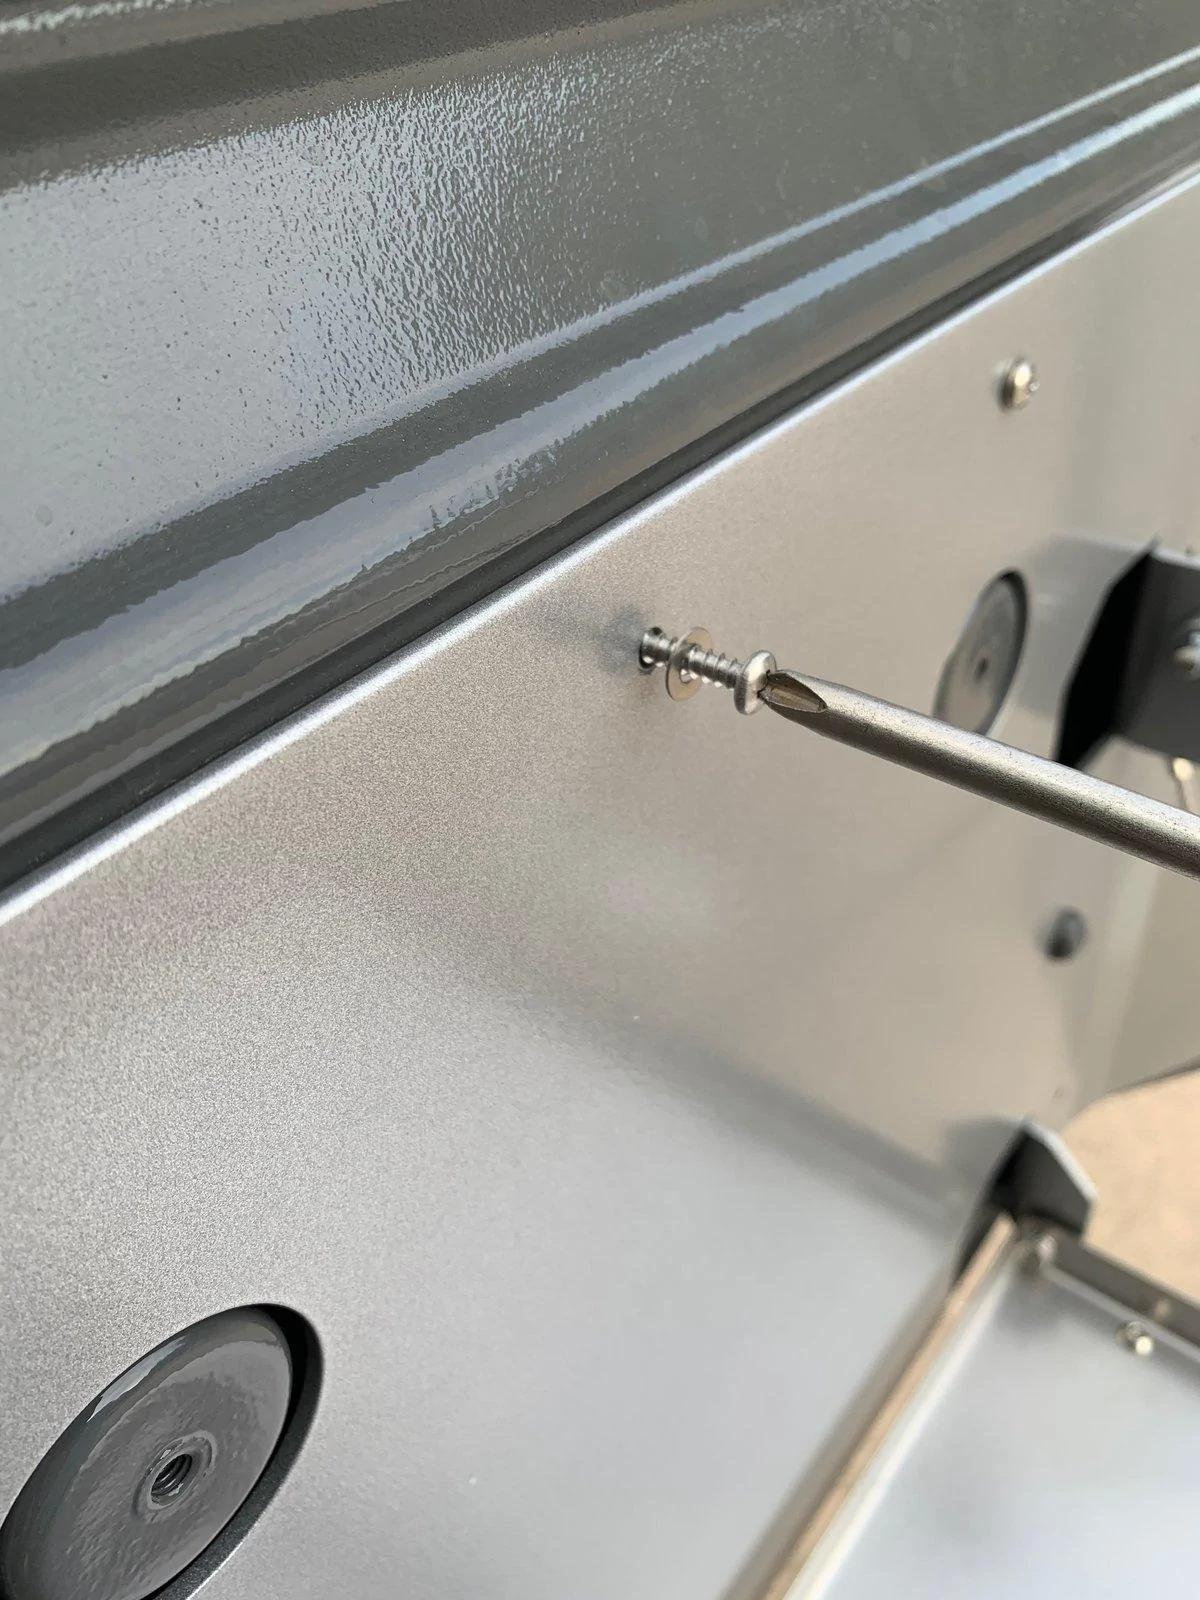
Step 2:
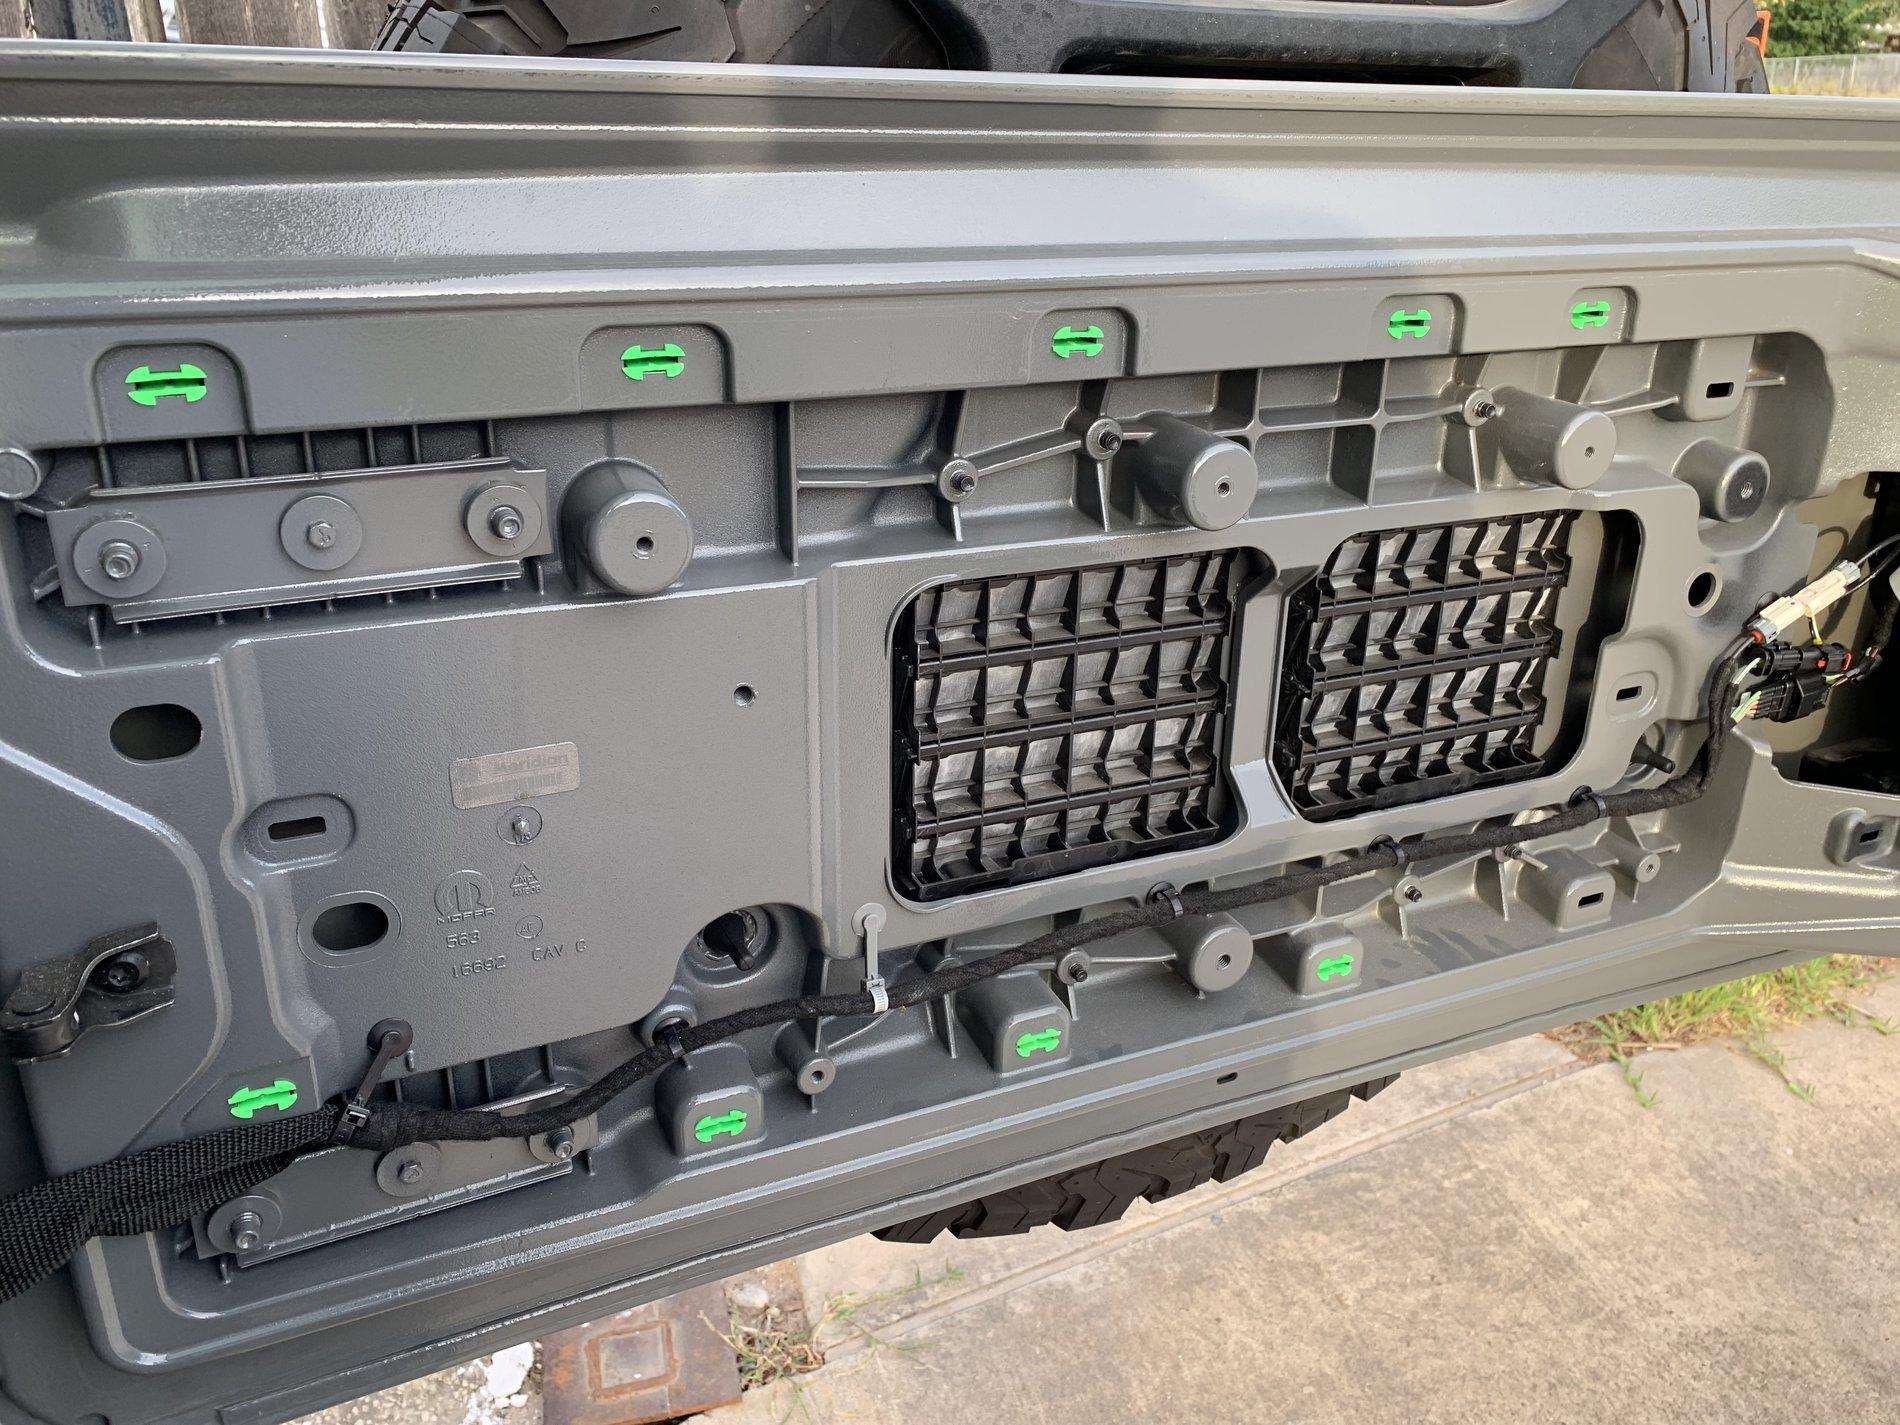
Insert the 9 Green Plastic Clips in the locations shown below. You can also reference the instructions for the locations as well. At first I thought I missed a spot but they give you one extra.
Step 3:
Prepare the back of the cutting board by putting the foam as close to the edge as possible.
You need to remember to cut out a section with the wiring loom passes to the tailgate. See the image below.
The JL Trailgater®is engineered specifically for the 2018-19 Jeep JL Wrangler and replaces the whole plastic inside tailgate cover. It utilizes the same proven design used for our JK Trailgater, has a larger table and cutting board and mounts to the JL tailgate using 9 proprietary injection molded blind nuts. The JL Trailgater also keeps available the 3 mounting points in the center of the tailgate.
- 10 minute or less installation. No drilling required!
- 1.8″ of depth from the tailgate when stowed.
- Stainless Steel hardware used throughout
- The bamboo cutting board conveniently slides under the table and the assembly folds up and is held in place with two rattle free spring latch pins.
- The table is 25″ x 14.5″ and the slide out cutting board is 12″ x 20″ for a combined 600 square inches of surface area.
- 14 gauge (0.075″) food-grade Stainless Steel, the backsplash is 0.120″ powder coated Aluminum, both are CAD designed, laser cut, CNC bent, and deburred.
- Max weight capacity is set at 40 lbs.
Pretty much out of the box you get the Trailgater Table, a set of instructions and a zip lock bag with the screws, washers and clip inserts needed for the Installation.
Installation
Step 1:
Remove the Plastic Cover from the Tailgate. I find it easiest to pull it out where the wiring harness goes through the plastic trim panel.
Step 2:
Insert the 9 Green Plastic Clips in the locations shown below. You can also reference the instructions for the locations as well. At first I thought I missed a spot but they give you one extra.
Step 3:
Prepare the back of the cutting board by putting the foam as close to the edge as possible.
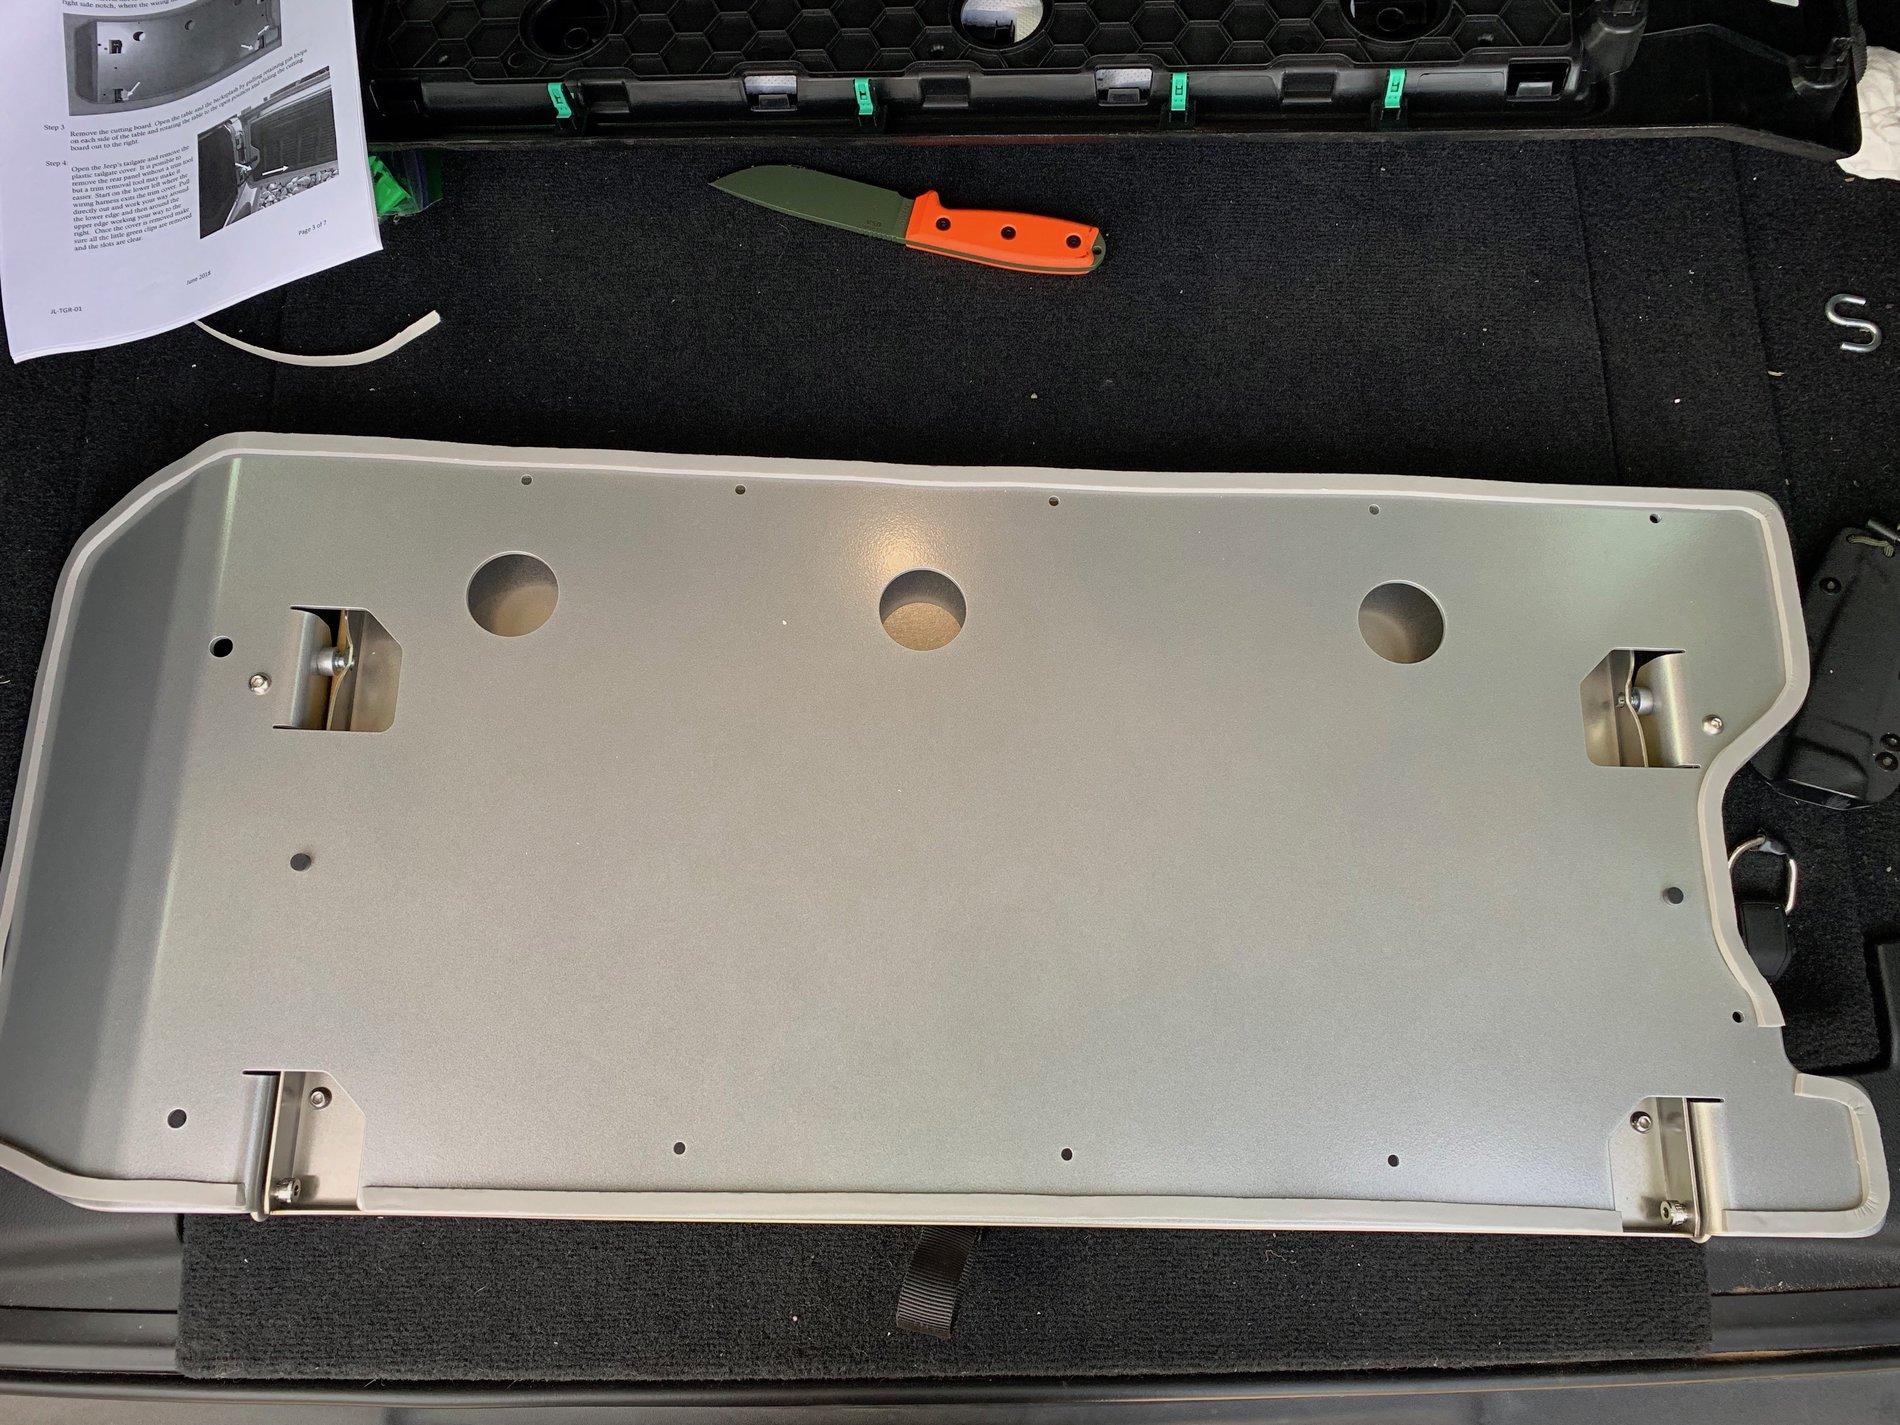
You need to remember to cut out a section with the wiring loom passes to the tailgate. See the image below.
Sponsored