Sponsored

"Joyride" Hydro JLUSA Build Thread

OP
OP
rcadden

rcadden

Well-Known Member
First Name
Ricky
Joined
May 4, 2021
Threads
85
Messages
2,699
Reaction score
5,708
Location
Fort Worth, TX
Vehicle(s)
2021 Hydro Blue Sahara Altitude
Build Thread
Link
Occupation
Marketing
Clubs
 
I enjoyed reading thru this. Nice Jeep build so far. Did you happen to upgrade the control arms when you did the lift? If not i'd recommend the mopar extended ones. GREAT upgrade for about $60-$70 and really helps with the caster/steering feel.
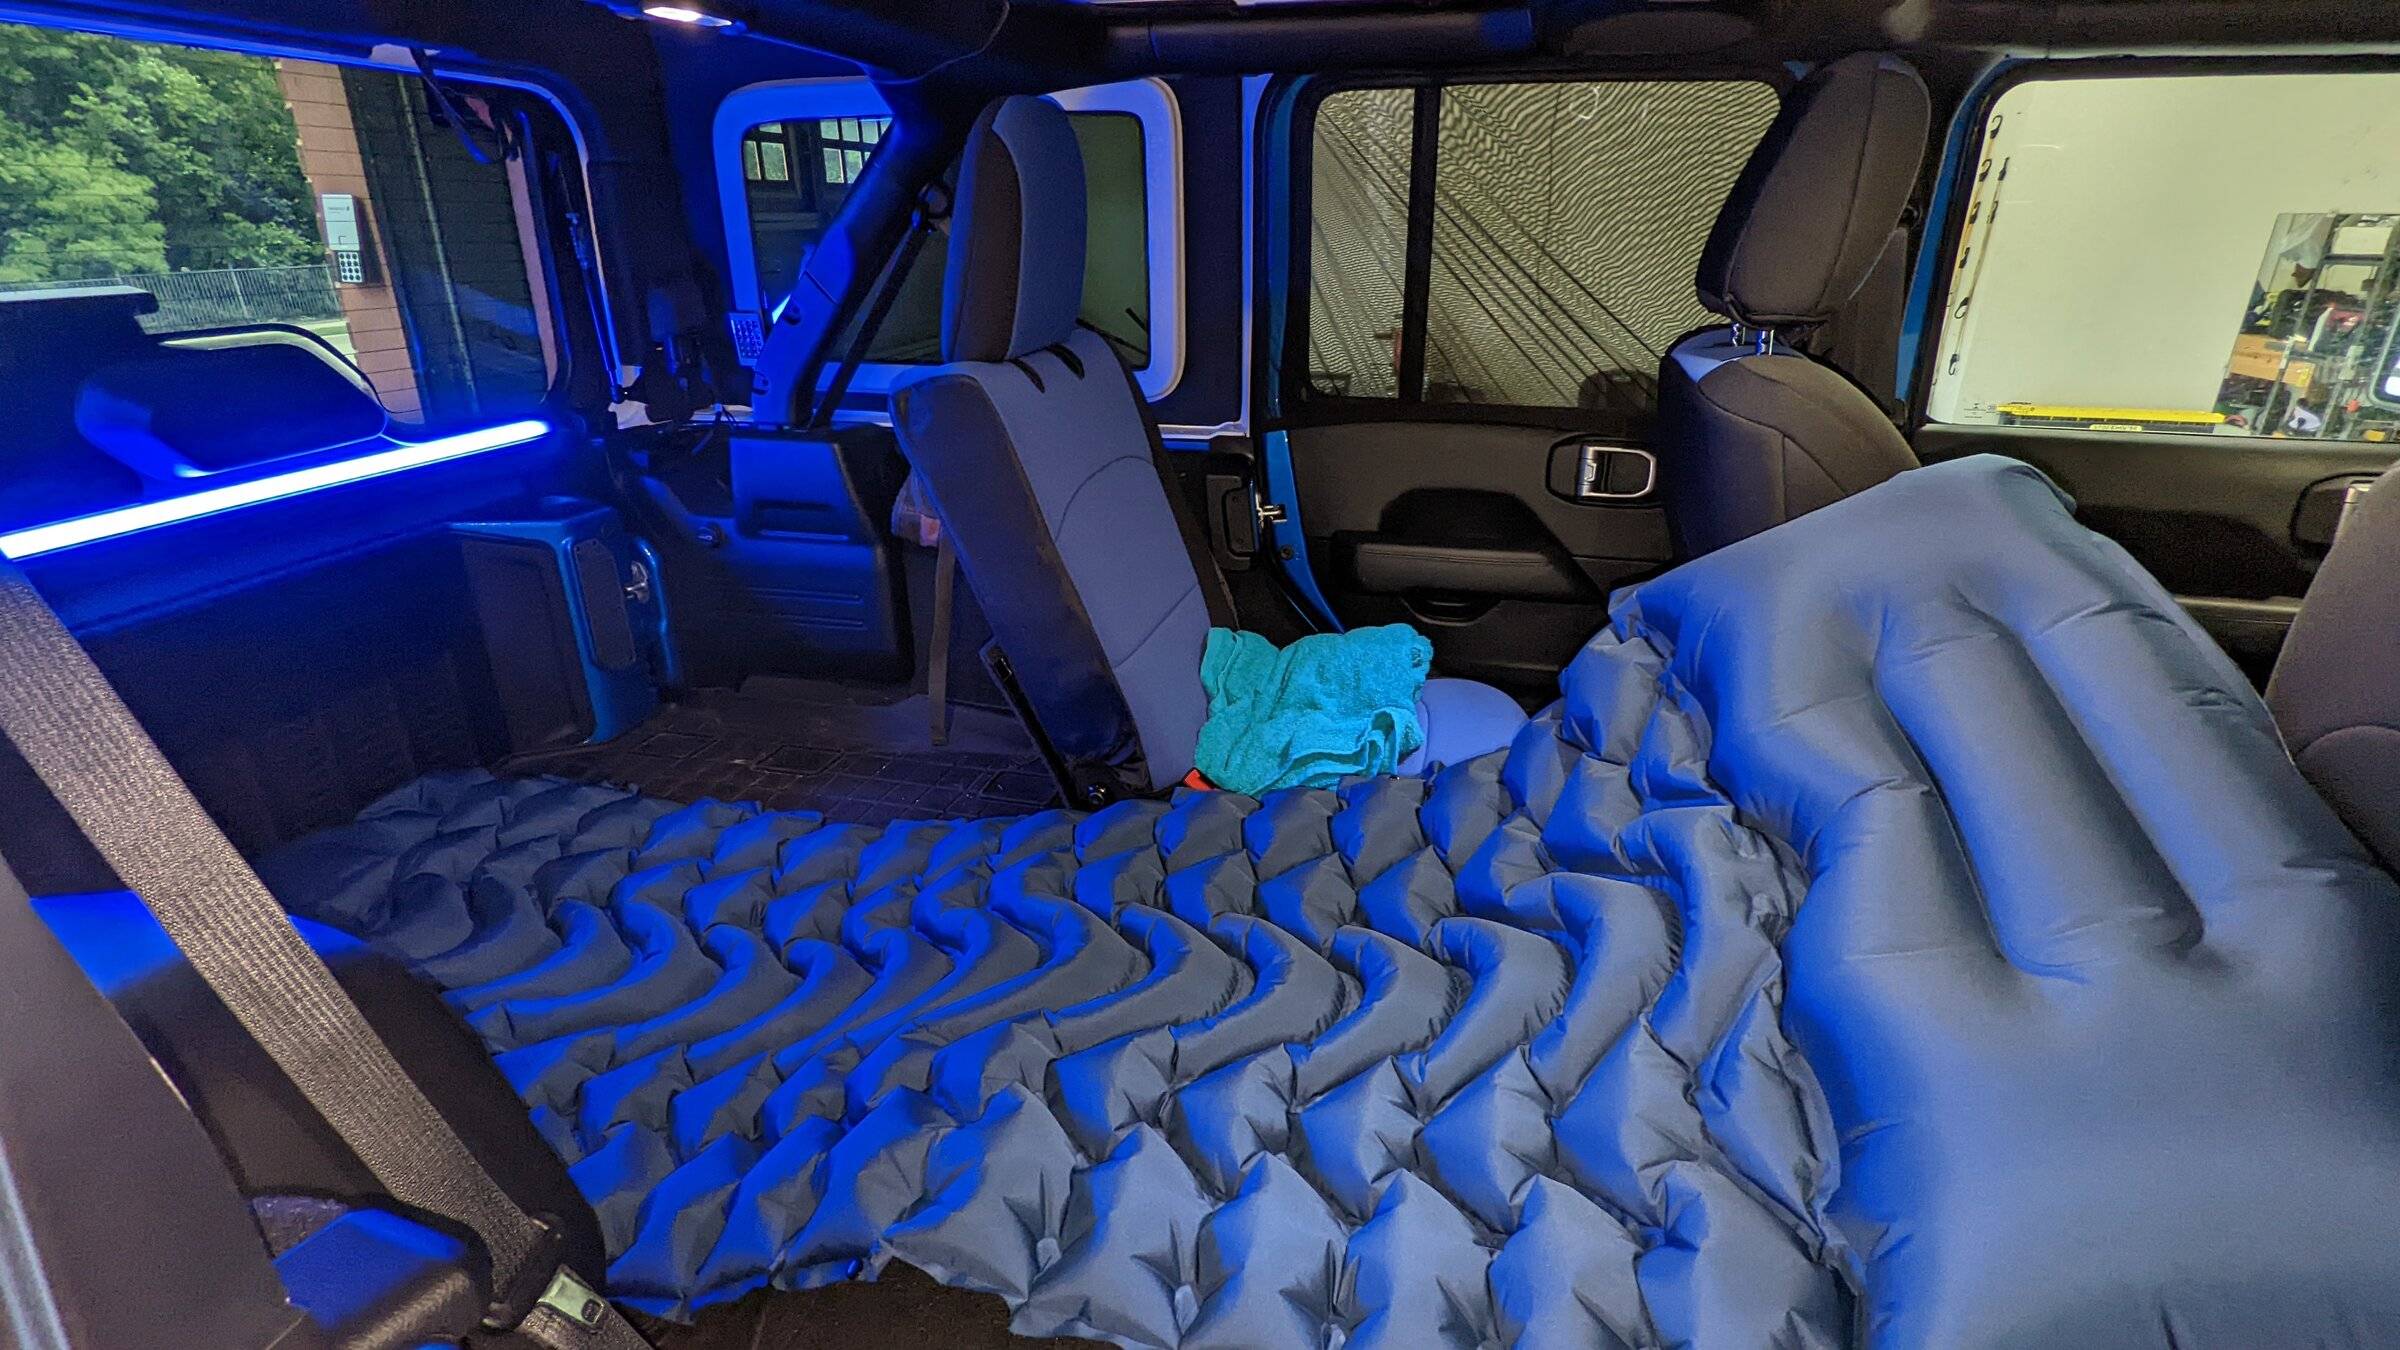
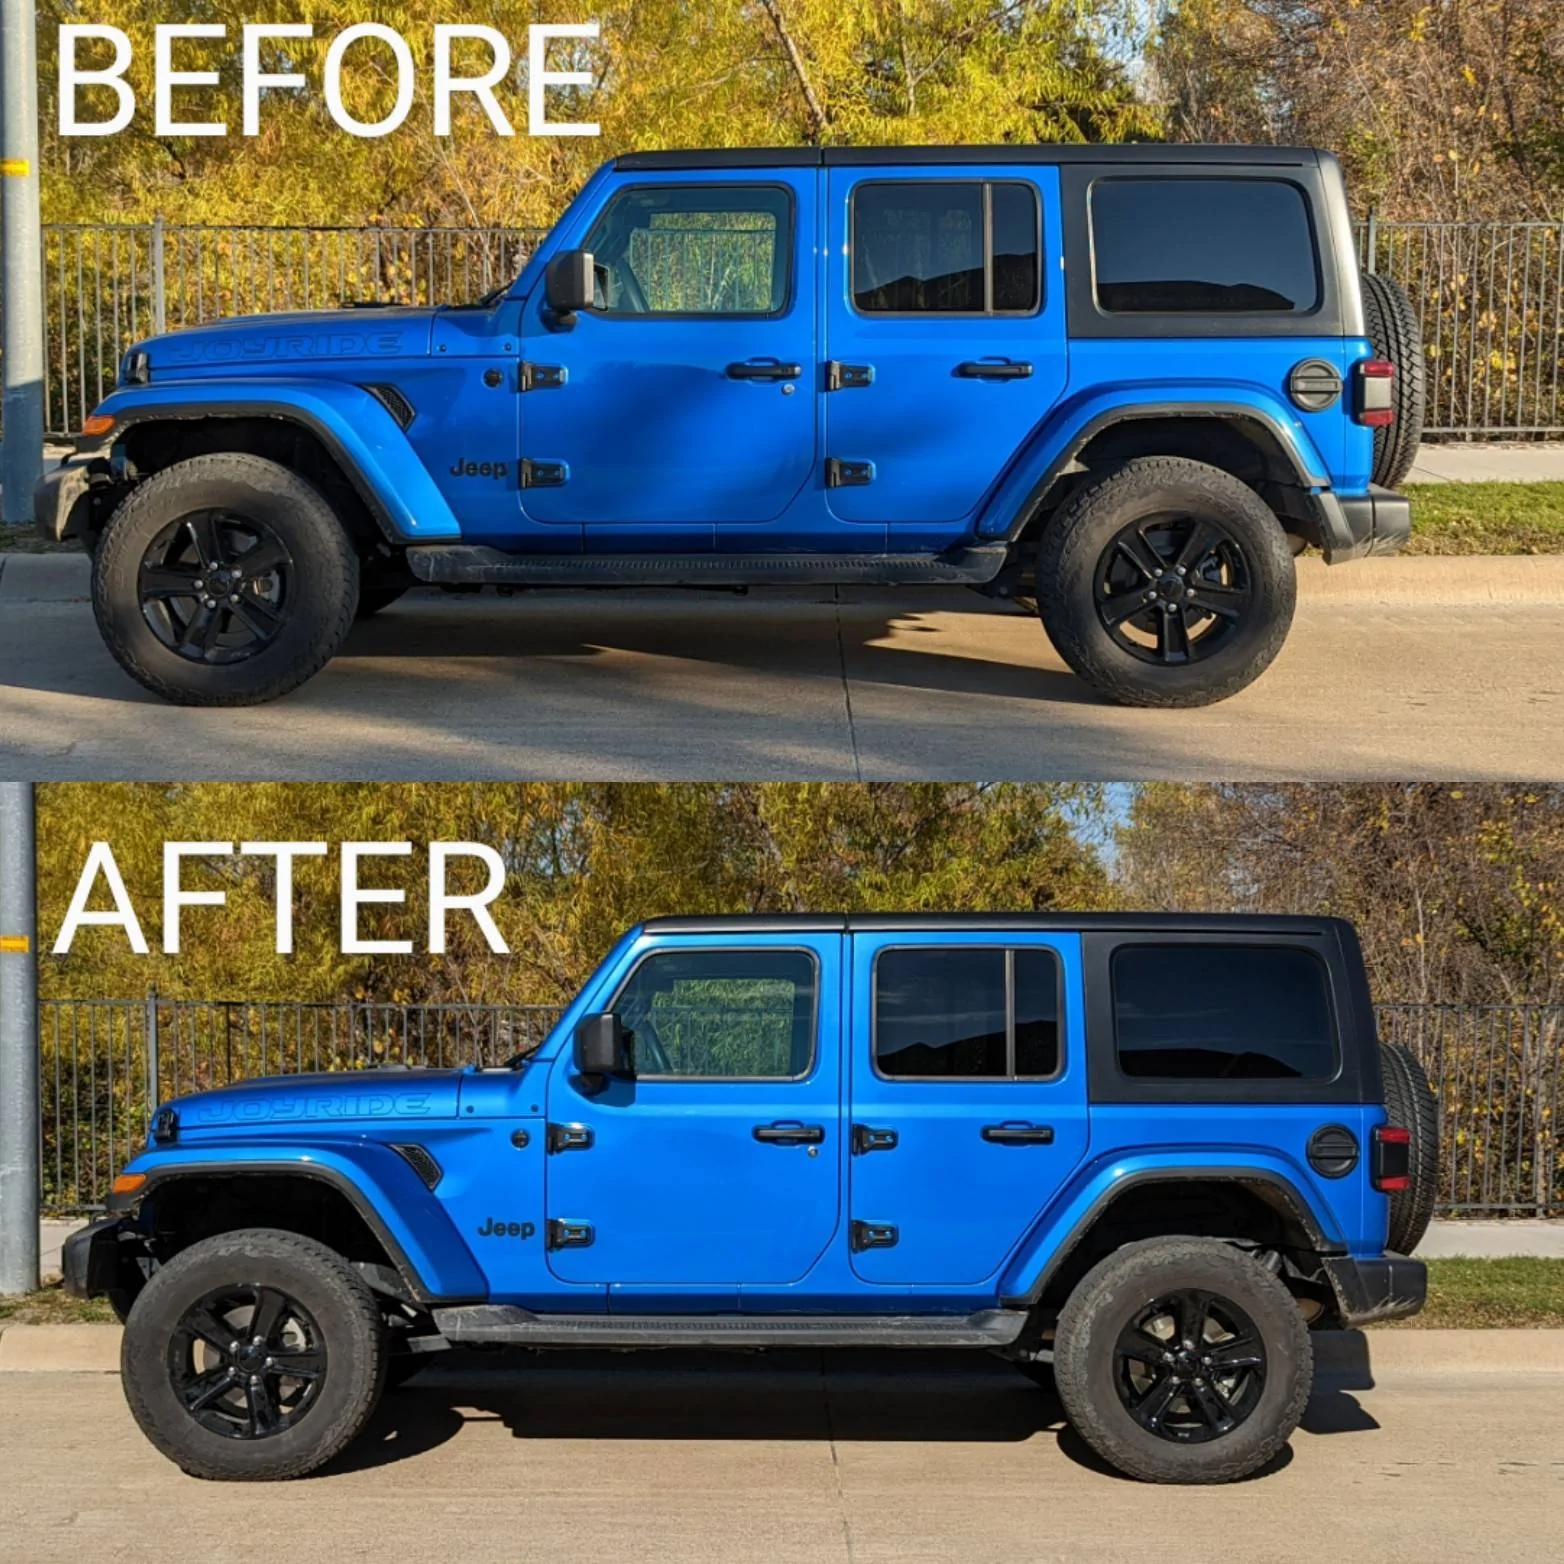
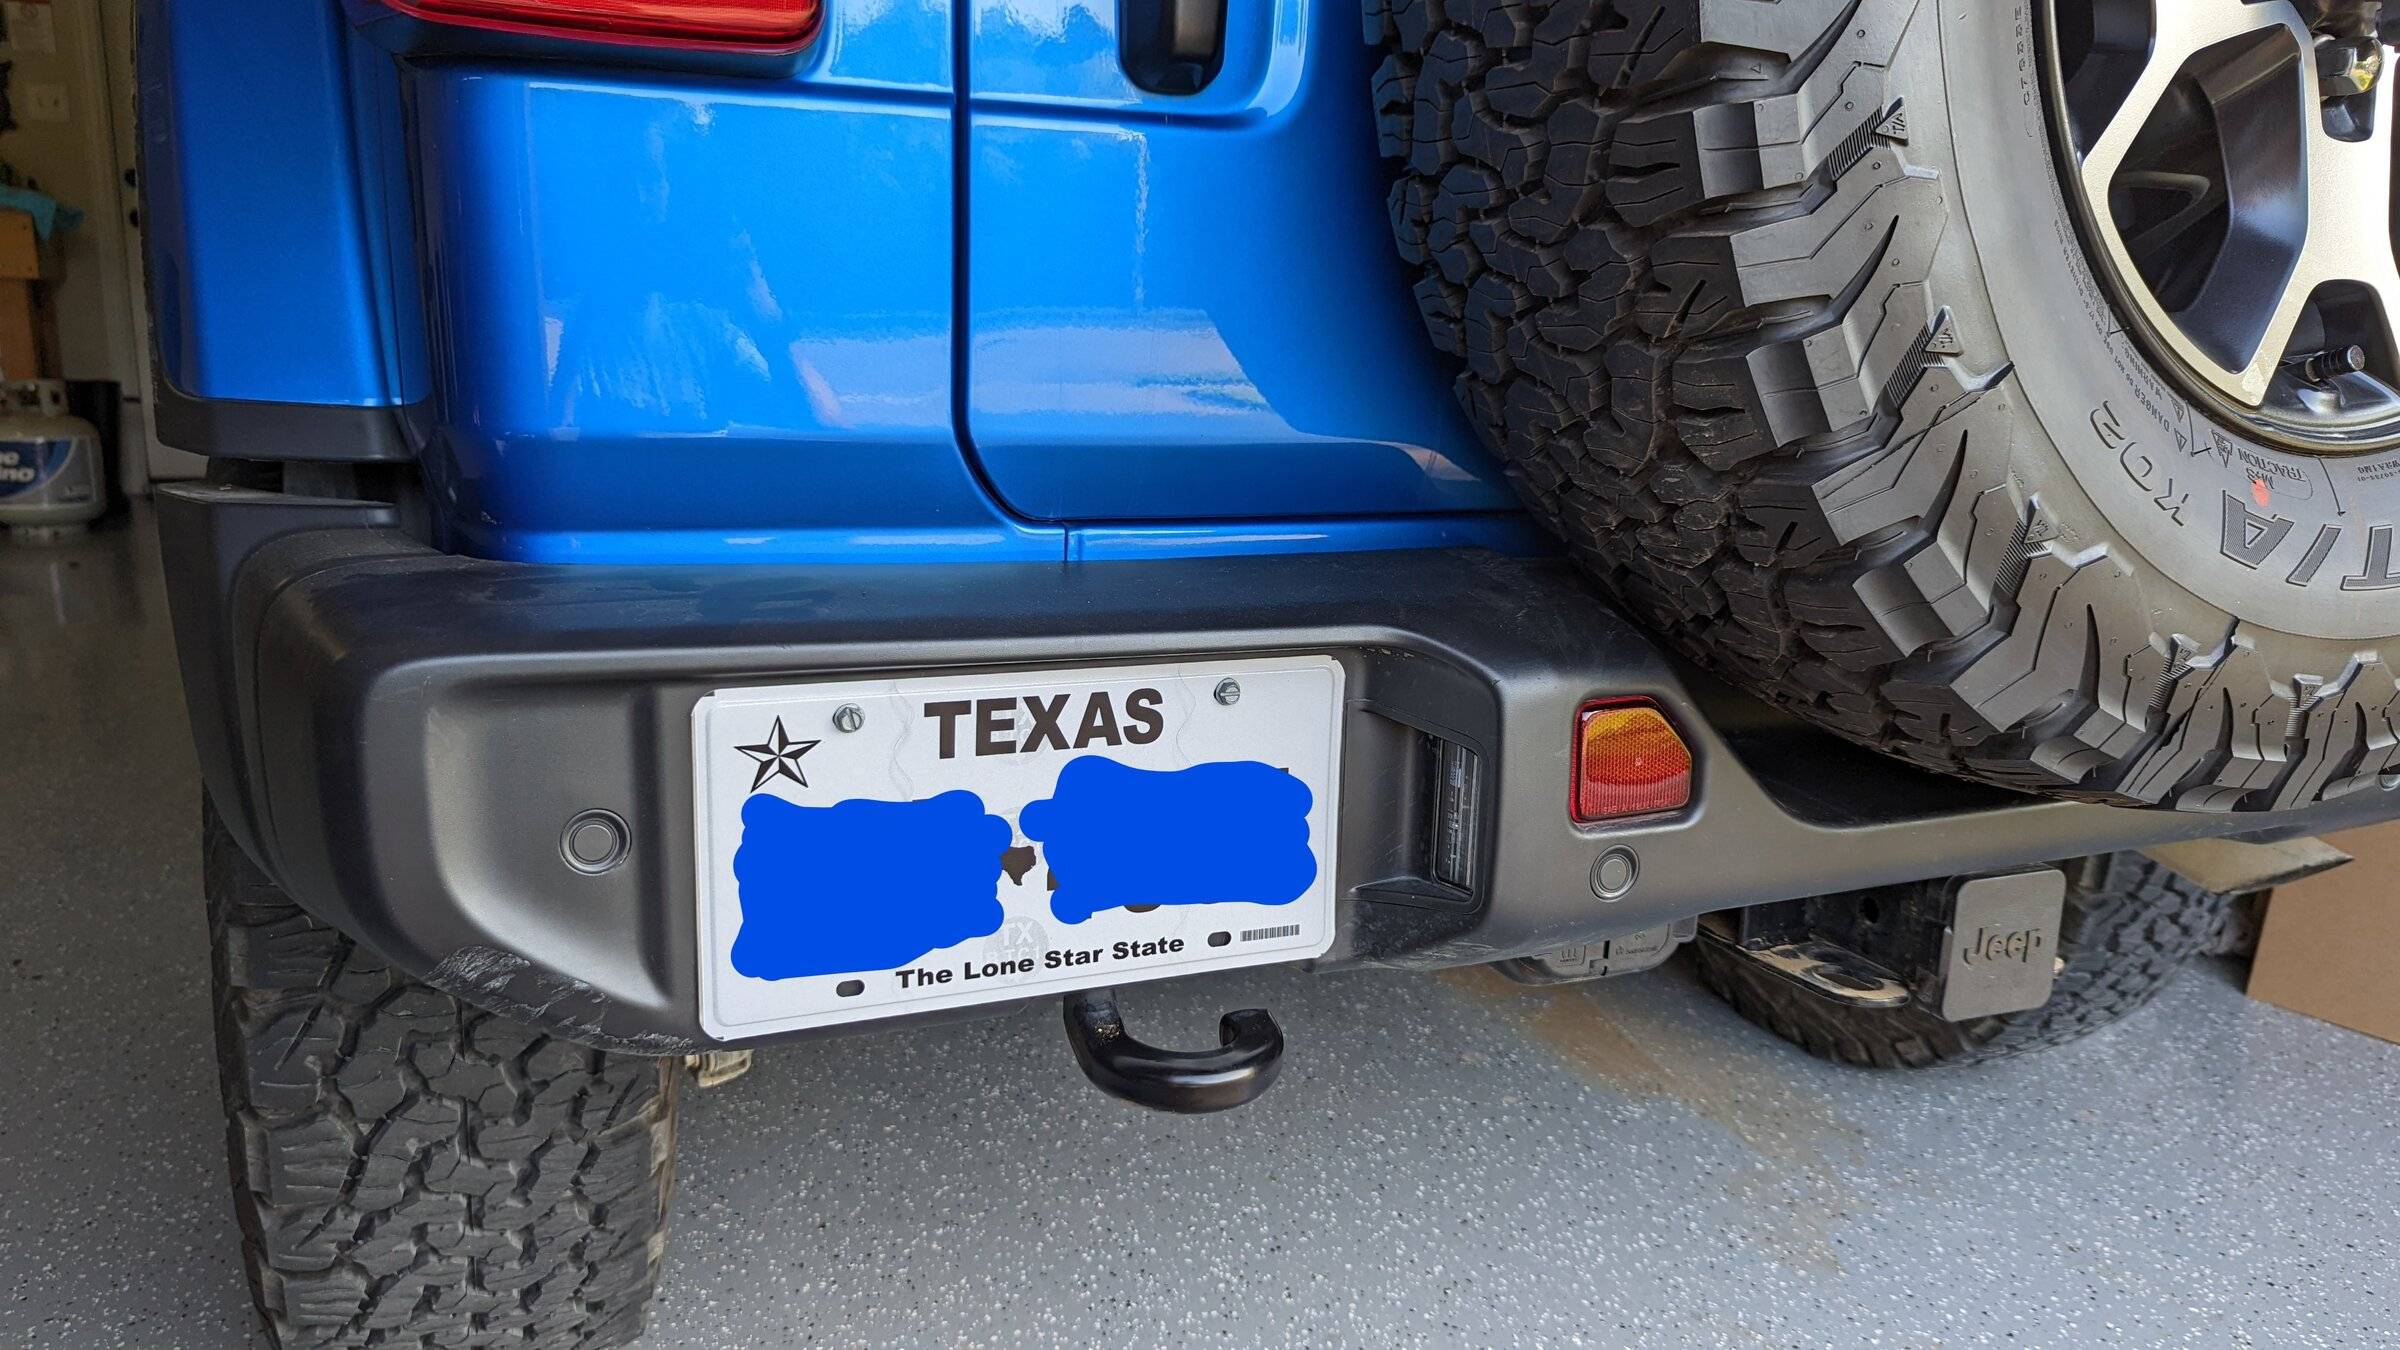
Thanks! It's not as "hefty" of a build as others, but I really like the stock look so just wanted to make minor improvements. I'm also pretty limited budget-wise, so trying to go slowly and be conscious has been the trick.

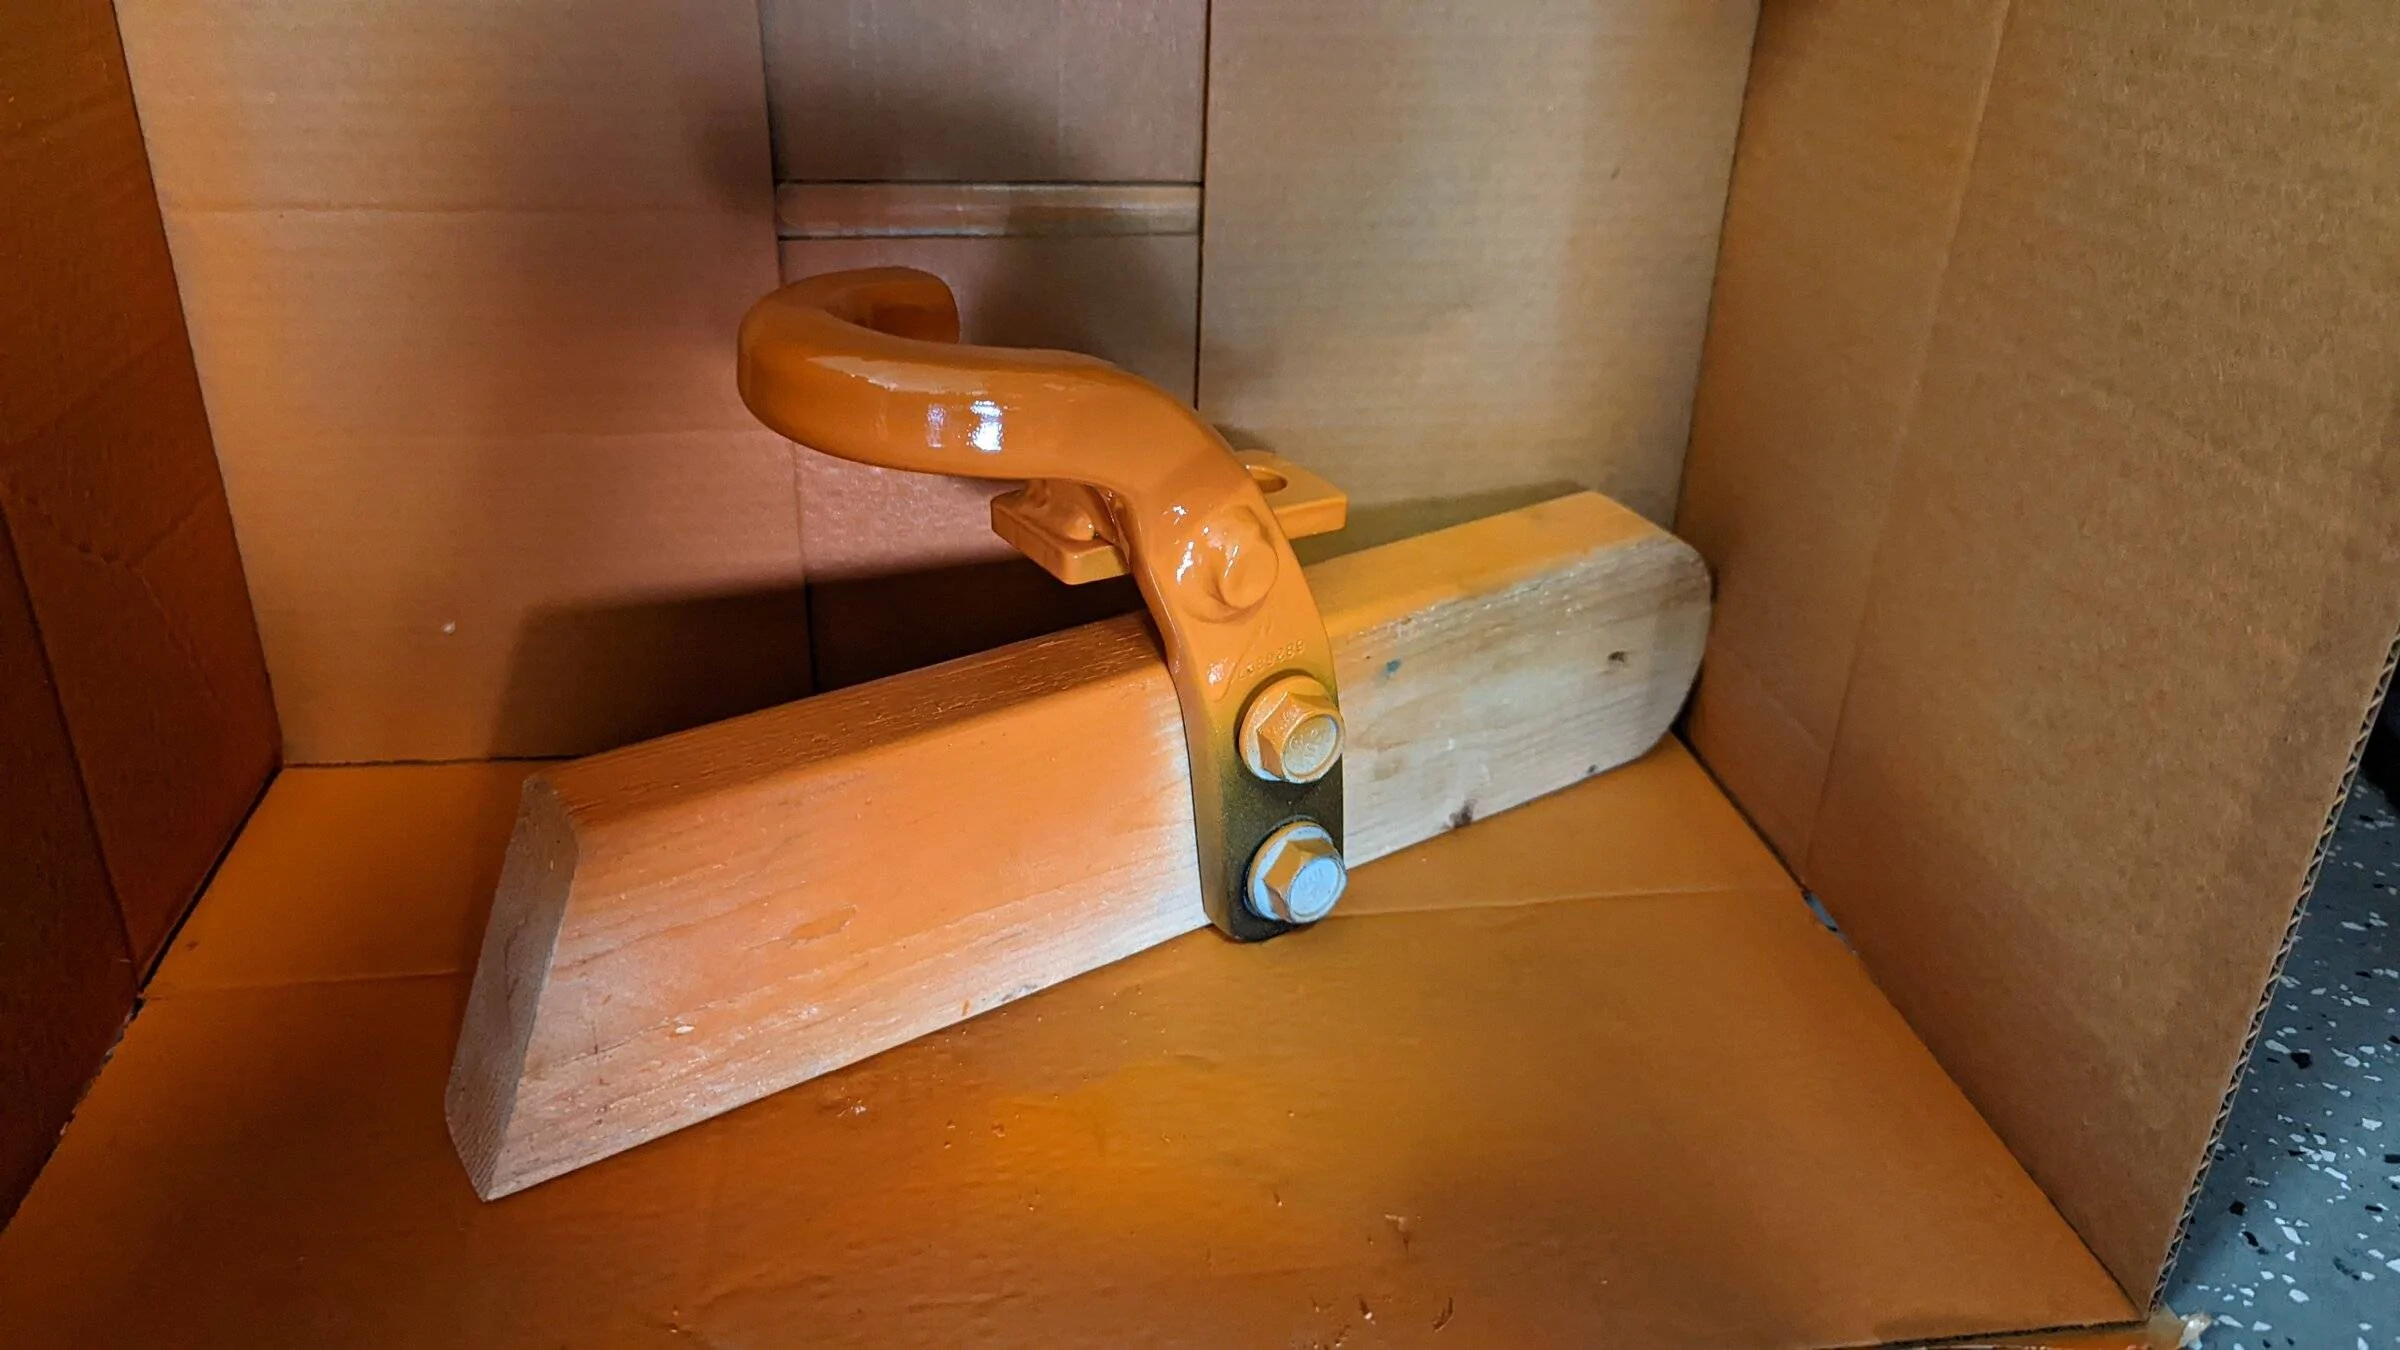
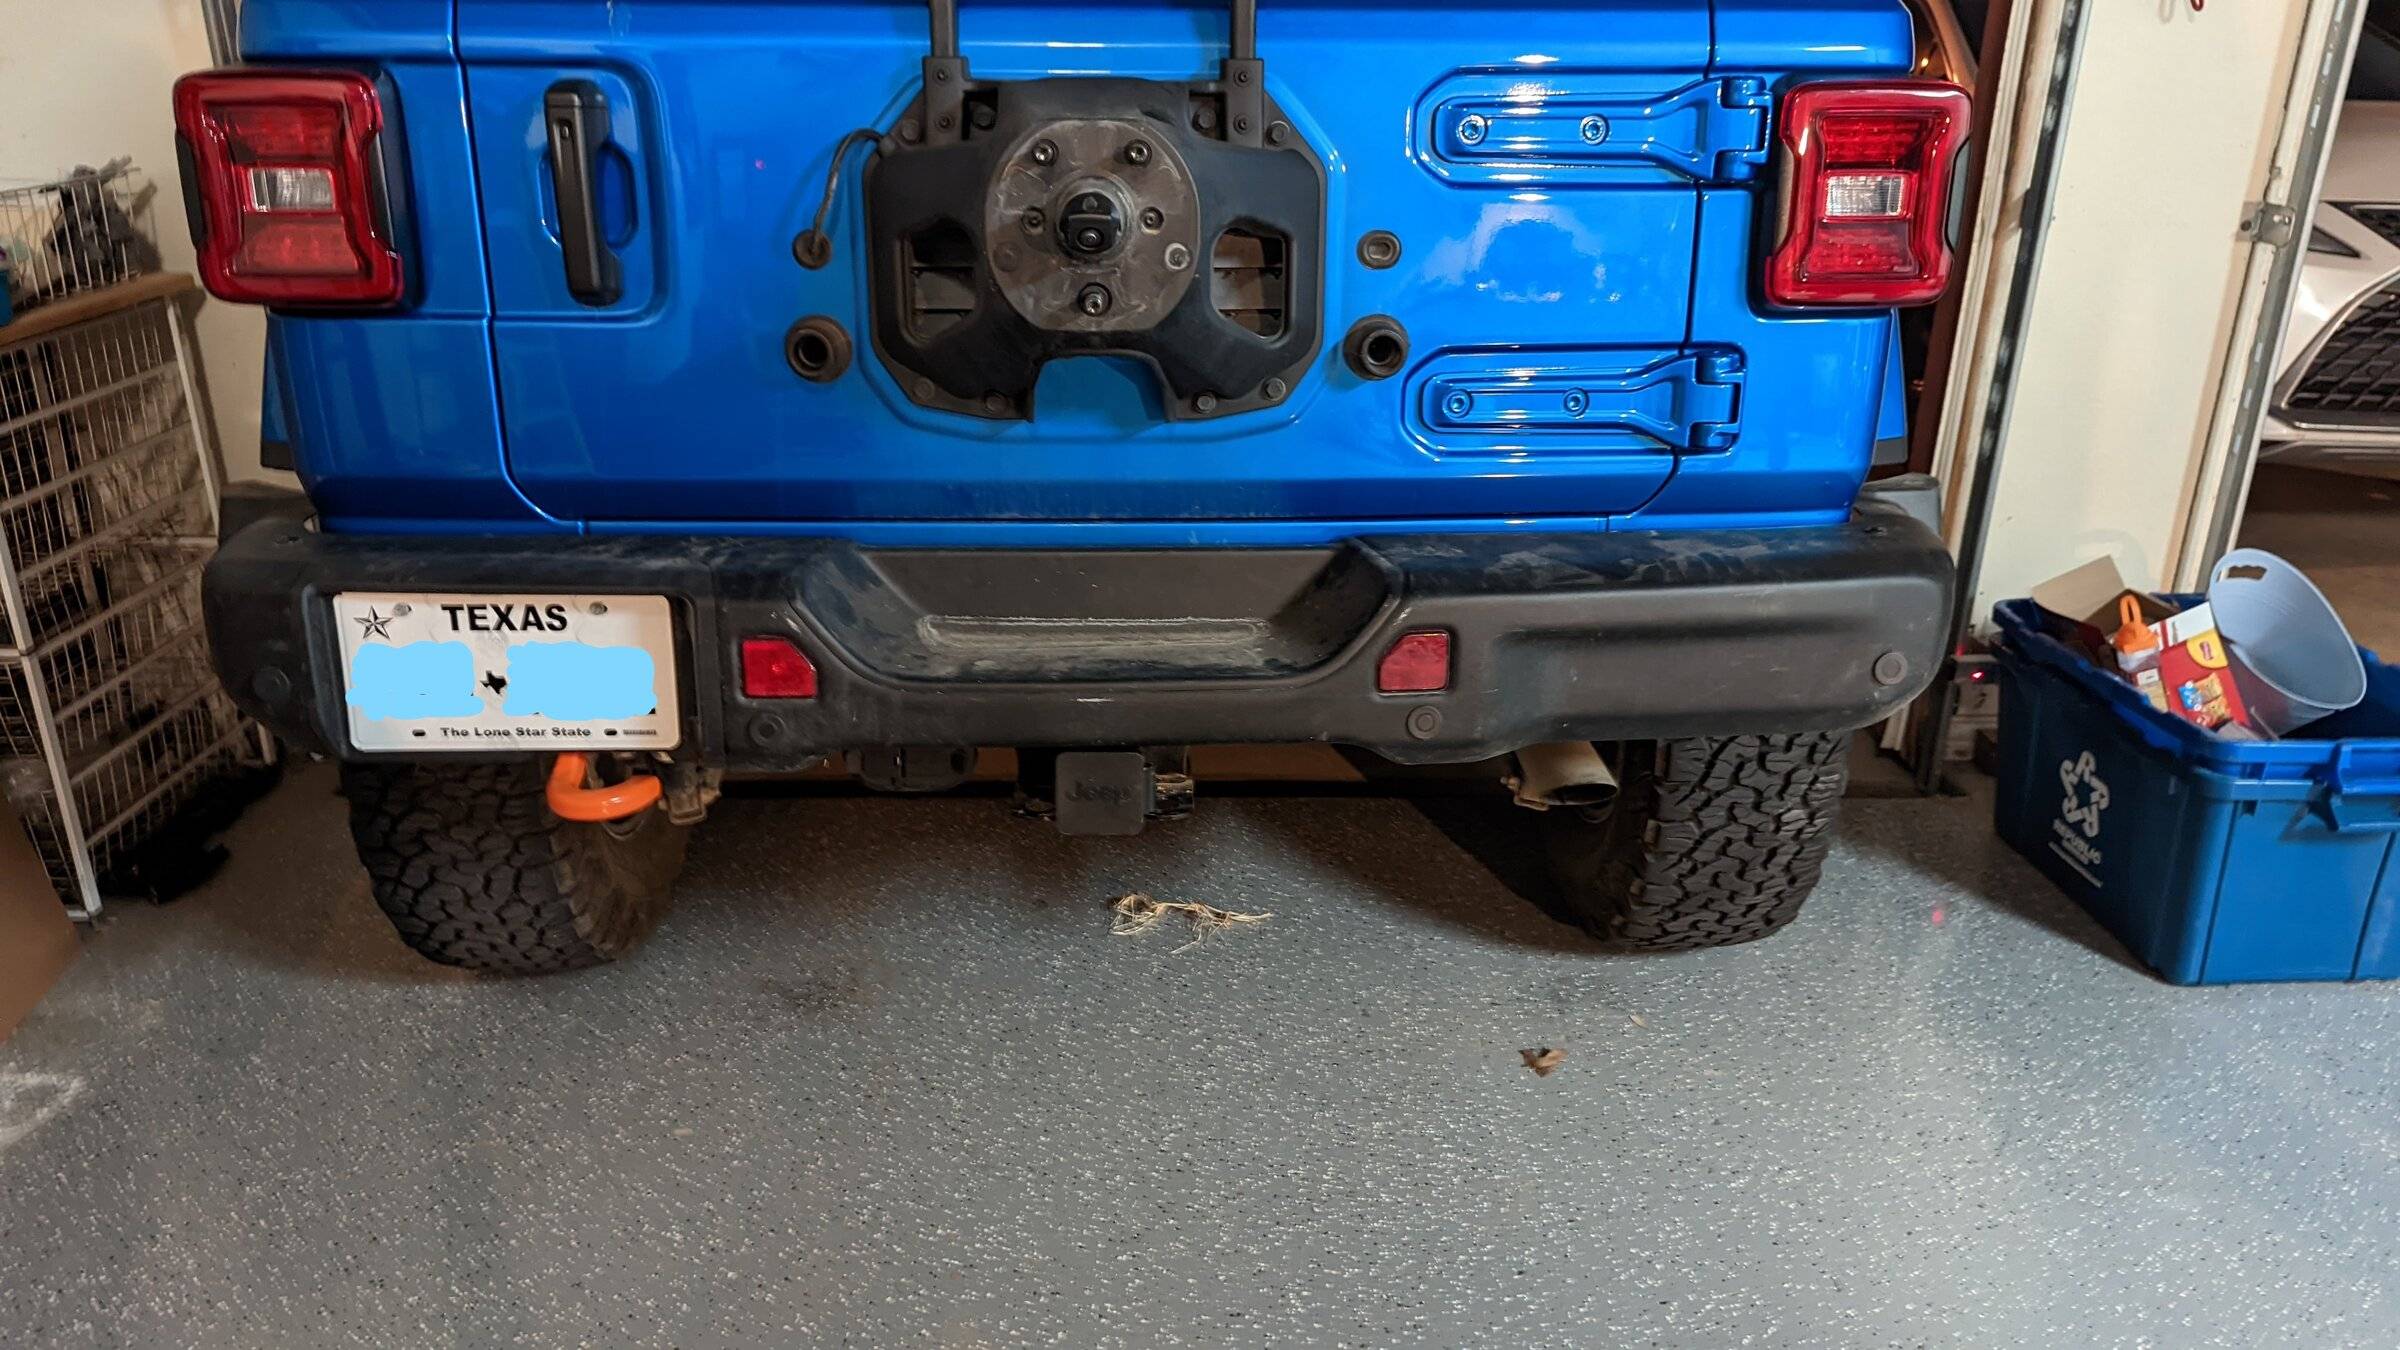
I did not do the MOPAR control arms, but I've got them earmarked. I haven't measured my caster properly, but tbh, it already felt like it improved quite a bit after the spacers went in. I just got the front steel bumper and am picking up a rear steel bumper tonight. Once I have those installed, plus a winch later this year, my next "big" purchase will be a proper suspension kit, which should include new control arms and other geometry-correction things.
Sponsored


Storm Cloud

Well-Known Member
Joined
Mar 3, 2022
Threads
11
Messages
341
Reaction score
586
Location
Huntington Beach, CA
Vehicle(s)
2023 JLUR 4xe
Build Thread
Link
Occupation
Lawyer
  1. Electric Ratchet. Really wanted the Ryobi one, since that's what all my other tools are so I have batteries, etc, but the tool alone is ~$100, whereas this one came with 2 batteries, a bunch of spare sockets, plenty of positive reviews, and cost $55. This is primarily to make it less of a headache to remove my hardtop and swap the Sunrider/Freedom Panels, but will surely come in handy elsewhere. If you go shopping for these, there's quite a bit of variation, so I focused on the RPM and Torque ability. This has the top end of both of those. https://www.amazon.com/gp/product/B08GXDW7YX/ref=ppx_yo_dt_b_asin_title_o00_s00?ie=UTF8&psc=1
Love reading about your build. I could have sworn that Ratchet said Schlong...:giggle:
 
OP
OP
rcadden

rcadden

Well-Known Member
First Name
Ricky
Joined
May 4, 2021
Threads
85
Messages
2,699
Reaction score
5,708
Location
Fort Worth, TX
Vehicle(s)
2021 Hydro Blue Sahara Altitude
Build Thread
Link
Occupation
Marketing
Clubs
 
Going to be camping twice in the next ~month, so wanted to see how I like sleeping *in* the Jeep before I go through the hassle of building a proper sleeping platform.

Also gives me a chance to test these things out while I'm still under the Amazon return policy. :)

  1. Self-inflating sleeping pad - as with most of my purchases, this seemed to be a good balance between cost and reviews. It's also one of the wider options, though you'll see that may not be a good thing.
  2. Window screens so I can get some airflow without inviting all the bugs in.
Total: $65. Plus, they're *super* small. Would be easy to just keep these in my Jeep at all times as a backup, or to throw in without sacrificing room for other necessities.

Jeep Wrangler JL "Joyride" Hydro JLUSA Build Thread PXL_20220503_192153624


The screens fit mostly well - I went with the "Large" size. My problem is that the elastic along the bottom isn't very tight, and I wish they went down another ~1-2 inches. Could easily just not roll the window down all the way as a solution. I'm also thinking if I could get a 1-2" thick strap of elastic with the rubber exposed on one side, I could put that on top of these, to better hold the bottom against the sides of the Jeep.
Jeep Wrangler JL "Joyride" Hydro JLUSA Build Thread PXL_20220503_191528777

Jeep Wrangler JL "Joyride" Hydro JLUSA Build Thread PXL_20220503_191423203


The mat is easy to inflate - just stomp gently on the end for about 30 seconds. Super easy, and you could do it *inside* the Jeep if necessary.

If I slide the passenger's seat up all the way, it fits well, length-wise. There's about a 6" gap between the top of the rear seat (that's laying down) and the back of the front seat.

The built-in pillow actually does a good job of not falling into this gap, but you can see that it gets hung up on the center console sticking out, so it doesn't really lay "flat". I also have the Diver Down neoprene seat covers on, which prevent my rear seat from laying *completely* flat - there's about an inch of incline due to the thicker seat material.

I'm 6'1", and I fit back here without the mat without having to bend my legs, but only just. With this mat, I lose about an inch or two length-wise. It's still comfy, but I do need to bend my legs a bit to fit. Not a big deal, just an observation.

The pillow is the part I'm most concerned about. I might've over-inflated, but it's pretty solid, and several inches thick. I tried flipping the mat around, so that the pillow was against the tailgate, but then the foot fell into that gap mentioned above.

I did *not* try laying with my head against the tailgate - that might actually work better, come to think of it.

Jeep Wrangler JL "Joyride" Hydro JLUSA Build Thread PXL_20220503_190957775

Jeep Wrangler JL "Joyride" Hydro JLUSA Build Thread PXL_20220503_191019227


The Brawlee RGB light gives a really nice ambiance, though.

I could see this mat being *awesome* in conjuction with a sleeping platform like the one CheaperJeeper designed, as it would be totally flat and elevated slightly.

I'll be testing the setup out this weekend, and then again over Memorial Day, but I'm glad to answer any questions you may have between now and then.
 
OP
OP
rcadden

rcadden

Well-Known Member
First Name
Ricky
Joined
May 4, 2021
Threads
85
Messages
2,699
Reaction score
5,708
Location
Fort Worth, TX
Vehicle(s)
2021 Hydro Blue Sahara Altitude
Build Thread
Link
Occupation
Marketing
Clubs
 
UPDATE: had a chance to test out the sleeping solution at my little brother's new land this weekend and it actually worked out quite well, with a few notes:
  • Airing up the mattress *in* the Jeep was a little snug. This one, in particular, is about 5 inches longer than I'd like (all of the ones on Amazon are about the same). It's possible, just a bit unwieldy
  • The nets on the doors actually worked quite well - no bugs got in with the windows ~halfway down. I also didn't really get as much breeze as I'd hoped. A small 12v fan would probably have helped quite a bit. I was also a bit "in the woods" so there might not've been that much breeze.
  • The remote start with the keyfob works when you're inside the vehicle, so I was able to start it up with the AC on full blast to cool it off, and then it automatically shuts down at 15min, which was just about perfect.
  • It won't lay flat, so if you're a flat sleeper, you'd probably need to turn the mat around so that the pillow is at the tailgate.
  • Teardown was SUPER easy. Had the whole thing packed up in 5-10min
  • I need to vastly improve my packing skills. You can see in the pic below, I had crap stashed everywhere, lol. My camping gear, in particular, is just in a few of these big plastic totes. I had a pickup truck before this, so I got spoiled having a whole truck bed to just throw a few totes in the back and call it "packing". I need to sort through my camping gear and work at getting things more compact.
  • I'd lose ~9" of headspace, but a DIY sleeping platform like the one that CheaperJeeper designed would solve alot of these issues, so that's probably next on my list.

I also decided to bring the dog along somewhat last minute, and it was ... cozy ... back there. It worked, but there wasn't much spare room.

Jeep Wrangler JL "Joyride" Hydro JLUSA Build Thread PXL_20220507_114505204
 

SoCal JLUS

Well-Known Member
First Name
David
Joined
Jul 20, 2021
Threads
27
Messages
366
Reaction score
289
Location
Inland Empire (Greater Los Angeles)
Vehicle(s)
2021 JLU Sahara 2.0T
Clubs
 
@SoCal JLUS @blink9cd quick update after a few weeks of driving - definitely digging these seat covers. They're pretty comfy, and the neoprene+padding adds just a touch more cushion than the factory leather has.

As far as sweat goes, I think I'm approximately as sweaty with these as I was with the factory leather, maybe *slightly* less. I'm not a heavy sweater, though.

To be frank, having dealt with Texas summers for 39 years, I don't understand people's attempts to avoid sweating in the car. It's just part of summer, IMO. Even in my wife's Lexus with the seat coolers, when it's triple digits outside, you're fighting a losing battle.
My Diver Downs to cover the cloth seats arrived today. I only had time to play around with the driver upper cover and the headrest. @rcadden , do you see the same thing I am seeing (at least for now)? The upper seat cover doesn't exactly mold to the seat below where your back would go. It seems a little..."airy" like there is some air trapped between the cover and the seat. What is your take on that section?
 

Sponsored

OP
OP
rcadden

rcadden

Well-Known Member
First Name
Ricky
Joined
May 4, 2021
Threads
85
Messages
2,699
Reaction score
5,708
Location
Fort Worth, TX
Vehicle(s)
2021 Hydro Blue Sahara Altitude
Build Thread
Link
Occupation
Marketing
Clubs
 
My Diver Downs to cover the cloth seats arrived today. I only had time to play around with the driver upper cover and the headrest. @rcadden , do you see the same thing I am seeing (at least for now)? The upper seat cover doesn't exactly mold to the seat below where your back would go. It seems a little..."airy" like there is some air trapped between the cover and the seat. What is your take on that section?
Yes, I had that air pocket at first as well. It settles down after a bit
 

SoCal JLUS

Well-Known Member
First Name
David
Joined
Jul 20, 2021
Threads
27
Messages
366
Reaction score
289
Location
Inland Empire (Greater Los Angeles)
Vehicle(s)
2021 JLU Sahara 2.0T
Clubs
 
FINALLY got my lift in. Decided on just a small spacer lift for my current needs, so I did the 1.5" Teraflex pucks. Install only took ~3hrs, not too bad. You definitely want an impact wrench.

They're actually 2" up front and 1.5" in the back to fix the factory rake, but I didn't have any rake to begin with, so I may have to add their little 0.5" pucks to level it out.

Overall, though, I love it. Next up: 285/75R18s and bumpers (Dec/Jan). I think I've decided to stick with my factory wheels for now. When I wear out the new tires, I'll probably go down to 17s, but for now I'd rather put the budget on bumpers to finish out my initial look.

Jeep Wrangler JL "Joyride" Hydro JLUSA Build Thread PXL_20220507_114505204
Ricky, it seems that every time I reread your build thread, I find something else that catches my eye. Like you, I also do not want a big lift because then, my 33" Rubicon takeoff wheels and tires might look puny and I don't want to go to 35". Based on this pic and your other pic with the Rubi tires and wheels, I might go your route. I am between a spacer and Rubicon take off springs and shocks, however, there are so many type of spring numbers it mind-numbing! lol. If you still like your spacers, do you have a link to what you purchased? Spacers have their own world to navigate!
 
OP
OP
rcadden

rcadden

Well-Known Member
First Name
Ricky
Joined
May 4, 2021
Threads
85
Messages
2,699
Reaction score
5,708
Location
Fort Worth, TX
Vehicle(s)
2021 Hydro Blue Sahara Altitude
Build Thread
Link
Occupation
Marketing
Clubs
 
Ricky, it seems that every time I reread your build thread, I find something else that catches my eye. Like you, I also do not want a big lift because then, my 33" Rubicon takeoff wheels and tires might look puny and I don't want to go to 35". Based on this pic and your other pic with the Rubi tires and wheels, I might go your route. I am between a spacer and Rubicon take off springs and shocks, however, there are so many type of spring numbers it mind-numbing! lol. If you still like your spacers, do you have a link to what you purchased? Spacers have their own world to navigate!
This is the set that I put on:

https://teraflex.com/jl-4dr-1-5-performance-spacer-lift-kit-no-shocks.html

Note that it's 1.5" up front, but only 1" in the rear, as it's designed to also fix the factory rake. However, I didn't have a factory rake, so I had to add the 0.5" rear spacers - they're ~$40 and just stack on top. Super easy to install.
 

SoCal JLUS

Well-Known Member
First Name
David
Joined
Jul 20, 2021
Threads
27
Messages
366
Reaction score
289
Location
Inland Empire (Greater Los Angeles)
Vehicle(s)
2021 JLU Sahara 2.0T
Clubs
 

Sponsored

OP
OP
rcadden

rcadden

Well-Known Member
First Name
Ricky
Joined
May 4, 2021
Threads
85
Messages
2,699
Reaction score
5,708
Location
Fort Worth, TX
Vehicle(s)
2021 Hydro Blue Sahara Altitude
Build Thread
Link
Occupation
Marketing
Clubs
 
Thanks! And i take it you didn't have to make any adjustments to the shocks? Extensions, new shocks, etc?
I did not, but I also do not wheel "hardcore", so full flex isn't a top concern for me. I also kinda viewed this as a bandaid solution. When I got it, I had plastic bumpers. I now have a steel front with a bull bar, and am putting the steel rear on this weekend (both OEM steel) - that'll cost me ~0.5". Later this year I plan to get a winch, which will likely cost me a little more height.

At that point, I'd feel comfortable doing a proper 2" suspension kit, because I'll likely get closer to that 2" in reality. In my earlier research, I discovered that most 2" suspension kits will give a Sahara closer to 3", which I didn't want. Having the extra weight should keep that in line, if that makes sense.

40-41" at the fender is my ideal height.
 

SoCal JLUS

Well-Known Member
First Name
David
Joined
Jul 20, 2021
Threads
27
Messages
366
Reaction score
289
Location
Inland Empire (Greater Los Angeles)
Vehicle(s)
2021 JLU Sahara 2.0T
Clubs
 
I did not, but I also do not wheel "hardcore", so full flex isn't a top concern for me. I also kinda viewed this as a bandaid solution. When I got it, I had plastic bumpers. I now have a steel front with a bull bar, and am putting the steel rear on this weekend (both OEM steel) - that'll cost me ~0.5". Later this year I plan to get a winch, which will likely cost me a little more height.

At that point, I'd feel comfortable doing a proper 2" suspension kit, because I'll likely get closer to that 2" in reality. In my earlier research, I discovered that most 2" suspension kits will give a Sahara closer to 3", which I didn't want. Having the extra weight should keep that in line, if that makes sense.

40-41" at the fender is my ideal height.
Good to know! I have a steel front and rear bumper but no winch planned. I also do not rock crawl, yet I like to go on fire roads and mountain dirt roads which have ruts and small rocks. I also just purchased (but not yet put on) the Apex Autolynx so I don't have to lay in the dirt for 30 minutes a trip disconnecting links, lol. I am hesitant to get a full lift because I do not want my Rubicon takeoff 33" to look...small. I just want it a little higher , maybe an inch or inch an a half. This is why I am curious about the Rubicon springs and shocks as a possibility. Thanks for listening!

EDIT: With those teraflex spacers, you didn;t have to worry about any wheel spacers or adapters like Teraflex says on their website?
 
OP
OP
rcadden

rcadden

Well-Known Member
First Name
Ricky
Joined
May 4, 2021
Threads
85
Messages
2,699
Reaction score
5,708
Location
Fort Worth, TX
Vehicle(s)
2021 Hydro Blue Sahara Altitude
Build Thread
Link
Occupation
Marketing
Clubs
 
UPDATE: So I woke up and tried to put my spare back on - recall it's a 33" Rubi take off. Doesn't fit.

Apparently the OEM steel bumper sits ~0.5" higher than the plastic one. On a Rubicon, this doesn't matter, as the Rubicon spare tire carrier is taller (since it comes with 33" from the factory). On a Sahara, though, it matters.

So...after spending $50 on sensor housings, needing to spend another $50 on side brackets, I'd need to spend MORE $$ to relocate my spare. This could be anywhere from free to $400+.

This "free" bumper is turning out like a free puppy, lol.

So this morning I reverted back to the plastic while I sort things out. If I'm going to drop ~$300, I might as well hold out a little longer and get one that doesn't push up into the body on a rock, like the Rugged Ridge HD I'd originally planned on.

The good news is that I was careful dismantling the plastic one last night so I was able to move the sensors back over and put it back on.

Bummer.


So....it's rear bumper time.

I had previously decided on the full Rugged Ridge HD front/rear, but then eventually sold myself on the MOPAR OEM Steel front bumper. Got a stupid good deal on it. Kinda wanted the matching rear steel, but have heard horror stories of it damaging the Jeep if it hangs on a rock. Figured I could wait - don't really need steel on the back when you're moving forward.

...then I was offered a *FREE* one from a member in one of the Jeep Clubs I'm in on Facebook - figured what the hell, for free, I could do it, right?

Also, since getting the orange tow hooks up front, I'd been wanting to remove and paint the tow hook in the back to match.

Removing the rear tow hook is stupid easy - just 4 bolts (believe they were 18mm) and it's off. I sanded it with a 120/180 sponge to rough it up a bit, then gave it 4 coats of rattle can, 2 at a time, 24 hours apart.

Before
Jeep Wrangler JL "Joyride" Hydro JLUSA Build Thread InkedPXL_20220512_001729097_LI


While removing the hook, I noticed that it's quite heavy, and awkwardly shaped. Looking around the garage, I saw a random bit of 2x4, so I bored some holes and used the bolts from the hook to attach it to the block (*this is an important detail for later.....)

This worked *awesome* for being able to pick it up and spray it from different angles to get a consistent coat all around. Nothing below that little horizontal plate on the back is seen when it's installed, so I didn't bother painting the rest.
Jeep Wrangler JL "Joyride" Hydro JLUSA Build Thread PXL_20220512_005925798


After (both hook and bumper)
Jeep Wrangler JL "Joyride" Hydro JLUSA Build Thread InkedPXL_20220514_015249427_LI


Turned out better than I had hoped. I really like the small splash of orange. I was a bit annoyed that it doesn't *exactly* match the Mojave hooks on the front, but I figure no one (myself included) will ever be able to compare them side-by-side, so it's close enough.

NOTES FROM THE BUMPER INSTALL:

I used this video to walk me through it.


For the parking sensors, I bought these parts from my local dealership. $50 for 12 bits of plastic is highway robbery, but they all fit perfectly. To note, on the plastic bumper, all of the bezels were flat, while these new ones stick out a bit so that the sensors themselves are pointing straight back. I think they look a bit like nipples, but I'm sure I'll get over it.

Sensor Mounting Bracket (center right)- Mopar (68295600AC)
Sensor Mounting Bracket (center left)- Mopar (68295601AC)
Sensor Mounting Bracket (outer right)- Mopar (68295602AC)
Sensor Mounting Bracket (outer left) - Mopar (68295603AC)

Park Distance Bezel - Mopar (6MH82RXFAB)
Park Distance Bezel - Mopar (6MH83RXFAB)
Park Distance Bezel - Mopar (6MH84RXFAB)
Park Distance Bezel - Mopar (6MH85RXFAC)

4x Decoupler Ring - Mopar (68289851AA)

I also didn't discover until the end of the install that I needed new side brackets, which I'm 95% sure are part #68295574AA.

Also, and I'll add pics of this once I get the brackets on tomorrow, the end pieces don't quite match up with my Sahara fenders. They're not off enough to bother me much, but we'll see.

All told, assuming the brackets are $50 for the pair, I'm in for $100 on an OEM steel bumper. Not too shabby.

*So....I had removed my tow hook a few days ago so that I could paint it, etc. Totally forgot about it drying in the corner of the garage (attached to the 2x4...). Got the old bumper pulled off and decided to just kinda hang the the new one on to see if it worked....and discovered that the driver's side bracket wasn't attached to the frame! It was missing two very heavy duty bolts.

My first thought was that I had removed them, but we didn't even have any sockets around that could fit these bolts. I could see that bolts *had* been there, but they weren't there now, and they weren't in our work area. Maybe the factory forgot them? My assistant thought maybe someone had stolen them while I was parked somewhere. Really blew both of our minds, but whatever.

Local dealership parts counters were closed.
Ace Hardware had none.
O'Reilly had none.
Tractor Supply Co had none.

We figured oh well, let's continue with moving the wiring harness, sensors, etc. We decided to take one of the bolts from the other side and put it in the top slot on the bracket that was missing its bolts, just to get it done so I could drive up to the dealership in the morning and buy the missing bolts.

Got it all done and I remembered my tow hook, so I ran over to get it and as soon as I picked it up, I saw those two big bolt heads on the side holding it onto the 2x4....

Yep. Those bolts.

So if you take your tow hook off before you do the install (which is completely unnecessary unless you're painting it), just remember that THOSE are the bolts that also hold the bracket to the frame.
 
Last edited:

SoCal JLUS

Well-Known Member
First Name
David
Joined
Jul 20, 2021
Threads
27
Messages
366
Reaction score
289
Location
Inland Empire (Greater Los Angeles)
Vehicle(s)
2021 JLU Sahara 2.0T
Clubs
 
UPDATE: So I woke up and tried to put my spare back on - recall it's a 33" Rubi take off. Doesn't fit.

Apparently the OEM steel bumper sits ~0.5" higher than the plastic one. On a Rubicon, this doesn't matter, as the Rubicon spare tire carrier is taller (since it comes with 33" from the factory). On a Sahara, though, it matters.

So...after spending $50 on sensor housings, needing to spend another $50 on side brackets, I'd need to spend MORE $$ to relocate my spare. This could be anywhere from free to $400+.

This "free" bumper is turning out like a free puppy, lol.

So this morning I reverted back to the plastic while I sort things out. If I'm going to drop ~$300, I might as well hold out a little longer and get one that doesn't push up into the body on a rock, like the Rugged Ridge HD I'd originally planned on.

The good news is that I was careful dismantling the plastic one last night so I was able to move the sensors back over and put it back on.

Bummer.


So....it's rear bumper time.

I had previously decided on the full Rugged Ridge HD front/rear, but then eventually sold myself on the MOPAR OEM Steel front bumper. Got a stupid good deal on it. Kinda wanted the matching rear steel, but have heard horror stories of it damaging the Jeep if it hangs on a rock. Figured I could wait - don't really need steel on the back when you're moving forward.

...then I was offered a *FREE* one from a member in one of the Jeep Clubs I'm in on Facebook - figured what the hell, for free, I could do it, right?

Also, since getting the orange tow hooks up front, I'd been wanting to remove and paint the tow hook in the back to match.

Removing the rear tow hook is stupid easy - just 4 bolts (believe they were 18mm) and it's off. I sanded it with a 120/180 sponge to rough it up a bit, then gave it 4 coats of rattle can, 2 at a time, 24 hours apart.

Before
InkedPXL_20220512_001729097_LI.jpg


While removing the hook, I noticed that it's quite heavy, and awkwardly shaped. Looking around the garage, I saw a random bit of 2x4, so I bored some holes and used the bolts from the hook to attach it to the block (*this is an important detail for later.....)

This worked *awesome* for being able to pick it up and spray it from different angles to get a consistent coat all around. Nothing below that little horizontal plate on the back is seen when it's installed, so I didn't bother painting the rest.
PXL_20220512_005925798.jpg


After (both hook and bumper)
InkedPXL_20220514_015249427_LI.jpg


Turned out better than I had hoped. I really like the small splash of orange. I was a bit annoyed that it doesn't *exactly* match the Mojave hooks on the front, but I figure no one (myself included) will ever be able to compare them side-by-side, so it's close enough.

NOTES FROM THE BUMPER INSTALL:

I used this video to walk me through it.


For the parking sensors, I bought these parts from my local dealership. $50 for 12 bits of plastic is highway robbery, but they all fit perfectly. To note, on the plastic bumper, all of the bezels were flat, while these new ones stick out a bit so that the sensors themselves are pointing straight back. I think they look a bit like nipples, but I'm sure I'll get over it.

Sensor Mounting Bracket (center right)- Mopar (68295600AC)
Sensor Mounting Bracket (center left)- Mopar (68295601AC)
Sensor Mounting Bracket (outer right)- Mopar (68295602AC)
Sensor Mounting Bracket (outer left) - Mopar (68295603AC)

Park Distance Bezel - Mopar (6MH82RXFAB)
Park Distance Bezel - Mopar (6MH83RXFAB)
Park Distance Bezel - Mopar (6MH84RXFAB)
Park Distance Bezel - Mopar (6MH85RXFAC)

4x Decoupler Ring - Mopar (68289851AA)

I also didn't discover until the end of the install that I needed new side brackets, which I'm 95% sure are part #68295574AA.

Also, and I'll add pics of this once I get the brackets on tomorrow, the end pieces don't quite match up with my Sahara fenders. They're not off enough to bother me much, but we'll see.

All told, assuming the brackets are $50 for the pair, I'm in for $100 on an OEM steel bumper. Not too shabby.

*So....I had removed my tow hook a few days ago so that I could paint it, etc. Totally forgot about it drying in the corner of the garage (attached to the 2x4...). Got the old bumper pulled off and decided to just kinda hang the the new one on to see if it worked....and discovered that the driver's side bracket wasn't attached to the frame! It was missing two very heavy duty bolts.

My first thought was that I had removed them, but we didn't even have any sockets around that could fit these bolts. I could see that bolts *had* been there, but they weren't there now, and they weren't in our work area. Maybe the factory forgot them? My assistant thought maybe someone had stolen them while I was parked somewhere. Really blew both of our minds, but whatever.

Local dealership parts counters were closed.
Ace Hardware had none.
O'Reilly had none.
Tractor Supply Co had none.

We figured oh well, let's continue with moving the wiring harness, sensors, etc. We decided to take one of the bolts from the other side and put it in the top slot on the bracket that was missing its bolts, just to get it done so I could drive up to the dealership in the morning and buy the missing bolts.

Got it all done and I remembered my tow hook, so I ran over to get it and as soon as I picked it up, I saw those two big bolt heads on the side holding it onto the 2x4....

Yep. Those bolts.

So if you take your tow hook off before you do the install (which is completely unnecessary unless you're painting it), just remember that THOSE are the bolts that also hold the bracket to the frame.
This bracket from Teraflex has worked out well for my Rubicon takeoffs and steel bumper and the price is decent! The only thing I had to do was replace the two bolts that holds the bumpstops. These were too short.
Amazon.com: TeraFlex 1909200 JL: Spare Tire Relocation Bracket Kit : Automotive
Sponsored


Top