Sponsored

Rock Slide Engineering Gen 3 Step Install

InjectedCJ7

Well-Known Member
First Name
John
Joined
Nov 11, 2021
Threads
8
Messages
71
Reaction score
213
Location
Michigan
Vehicle(s)
2018 JLUR, 1978 CJ-7
And so it begins…

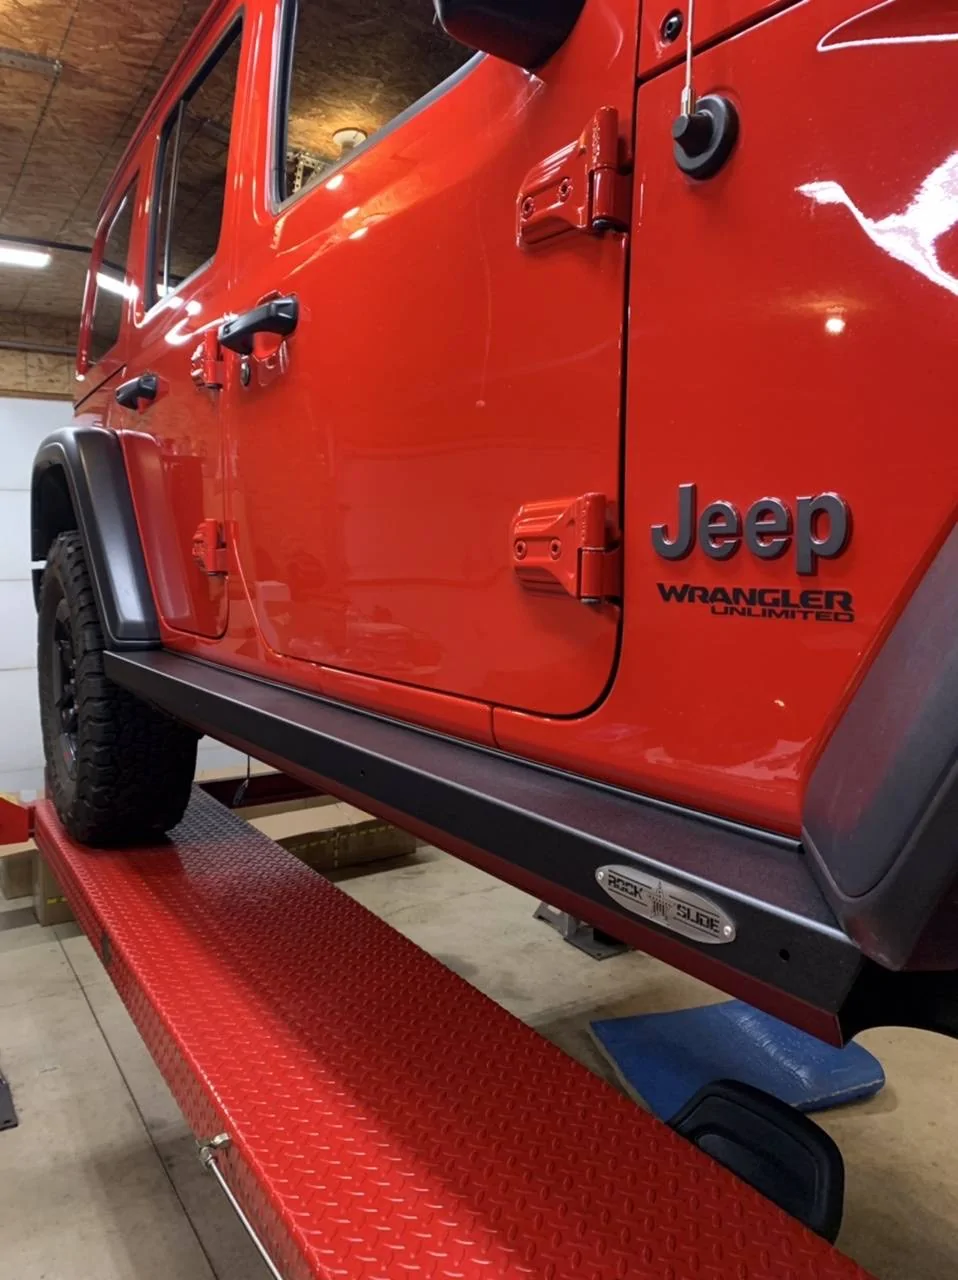
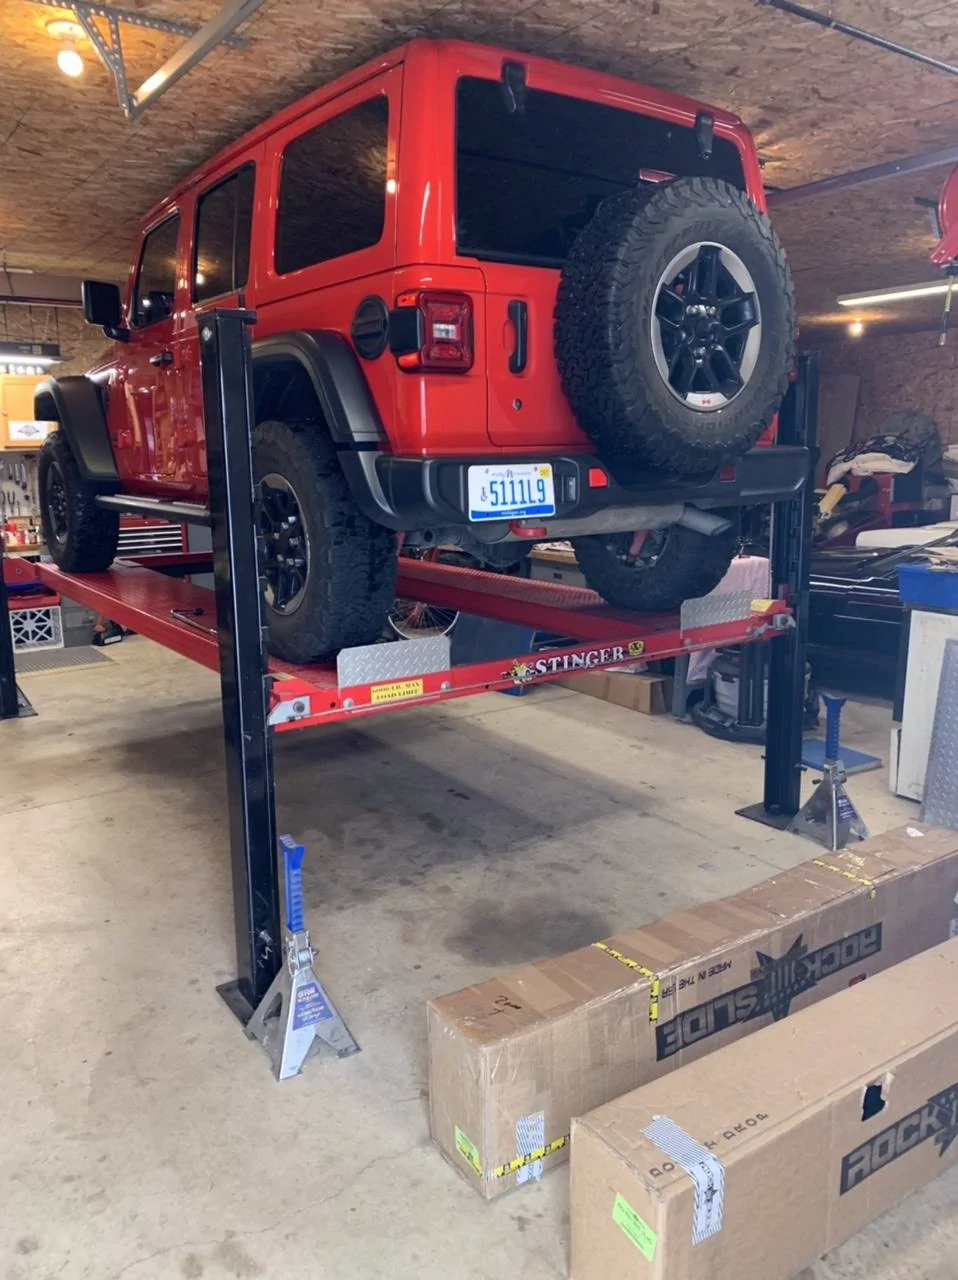
I’ve watched several YouTube videos to gain some level of confidence. I need to first remove my factory running boards, then I’ll be heating the body bolts prior to loosening, to soften the Loctite. I’m eternally thankful that I have a warm garage and a lift to help my old, tired body get this job done. Not to worry, the top of the Jeep is not hitting the garage ceiling, but it’s darn close…

After the steps, I have an AUX switch kit to install, as well as a trailer hitch and hitch wiring. It’s going to be a busy few days! Wish me luck…

John

Jeep Wrangler JL Rock Slide Engineering Gen 3 Step Install 8FF32BC1-665E-471C-9051-1C5FD4B01B3C
Sponsored

 
  • Like
Reactions: KNN
OP
OP
InjectedCJ7

InjectedCJ7

Well-Known Member
First Name
John
Joined
Nov 11, 2021
Threads
8
Messages
71
Reaction score
213
Location
Michigan
Vehicle(s)
2018 JLUR, 1978 CJ-7
Update!

RSE sliders are installed and working fine. Having just completed the install, I have a few comments that might be of benefit to someone preparing to put a set of these on.

I found the best YouTube video to be the one by Northridge 4X4,


However, please note that the latest Gen 3 kit has an updated wiring harness, which is significantly different from the one in the video. The new wiring harness is simpler, and it is easier to install it before the steps are installed, so you can access the passenger side frame rail to ziptie the RSE harness to the Jeep harness. I recommend watching the Northridge video (several times) to get a feel for the mechanical portion of the install. The instructions that came with the steps are pretty complete, but can be a bit confusing. For example, they begin by installing the wiring harness, before installing the steps. At the end of the wiring instructions, they tell you to only hook up one door trigger magnet at a time, and test the steps to make sure they open properly. Hard to do if the steps are still in the box… I actually called RSE and discussed the issues with a tech, who agreed with me. Perhaps they’ll make some changes in the next revision. Also, the motor wire connector from the harness, that plugs into the motor pigtail has the wire colors reversed. There is a yellow and red wire in each plug, but the plugs only connect one way, and the colors are reversed. The tech said he knew about that, but it doesn’t make any difference. I took his word for it, and all was fine. A bit disconcerting though.

The most nerve wracking part of the whole install is probably dealing with the body bolts. Much has been written in the forum about people breaking bolts, and I can say I was very concerned. I decided to use heat to soften the Loctite, especially on the front bolts, where red (high strength) is used. I experimented with a similar size bolt in my bench vise, using a propane torch and an infrared temperature gun, to determine how long to heat the bolt. I settled on 2 minutes, focusing the flame directly on the head of the bolt. I did this on each of the body bolts, prior to slowly loosening them. If the bolt seemed to be binding, a tightened it about a quarter turn, and then proceeded. On my Jeep, I had to remove the middle and rear bolts completely on each side, in order to grind down the washer retaining threads, which will allow the mounting brackets to slide under the bolt heads. On the front bolts, I was able to just loosen them enough to slide the bracket on. I did one side at a time, to ensure the body wouldn’t shift on the frame, although I thought that was highly unlikely. When it comes time to lift the steps into position, I would recommend you find a buddy to help. These suckers are HEAVY! Of course, I ended up doing it alone, don’t ask me why…

Lastly, when you get to the point of attaching the trigger magnets, use painters tape to stick them on the doors, to see if they are in the right position, before final install. I had to move mine around quite a bit to get them to trigger properly.

All in all, it wasn’t terribly difficult, but certainly required a bit of patience. The quality of the RSE kit seems to be excellent. Only time will tell how durable they are.

Stay tuned for updates on my hitch install and my AUX switch install.

John

Jeep Wrangler JL Rock Slide Engineering Gen 3 Step Install 00A3CC28-EB1A-4053-B5E3-7F5AF34FCB0A


AFD

Well-Known Member
Joined
Oct 13, 2021
Threads
14
Messages
3,155
Reaction score
5,697
Location
Northeastern US
Vehicle(s)
2023 JL Rubicon (2DR/V6)
Nice! What are the silver rails you previously had on in the first picture?
 
OP
OP
InjectedCJ7

InjectedCJ7

Well-Known Member
First Name
John
Joined
Nov 11, 2021
Threads
8
Messages
71
Reaction score
213
Location
Michigan
Vehicle(s)
2018 JLUR, 1978 CJ-7
Nice! What are the silver rails you previously had on in the first picture?
Hi AFD,
Those aren’t silver, that’s just the reflection. They are factory black running board/steps.

John
Sponsored

 
  • Like
Reactions: AFD


Top