OP
OP
4x4tographer
Well-Known Member
- First Name
- Ryan
- Joined
- Feb 2, 2019
- Threads
- 8
- Messages
- 76
- Reaction score
- 218
- Location
- Phoenix, AZ
- Vehicle(s)
- 2018 Jeep Wrangler Rubicon
- Thread starter
- #16
UPDATE on this project!
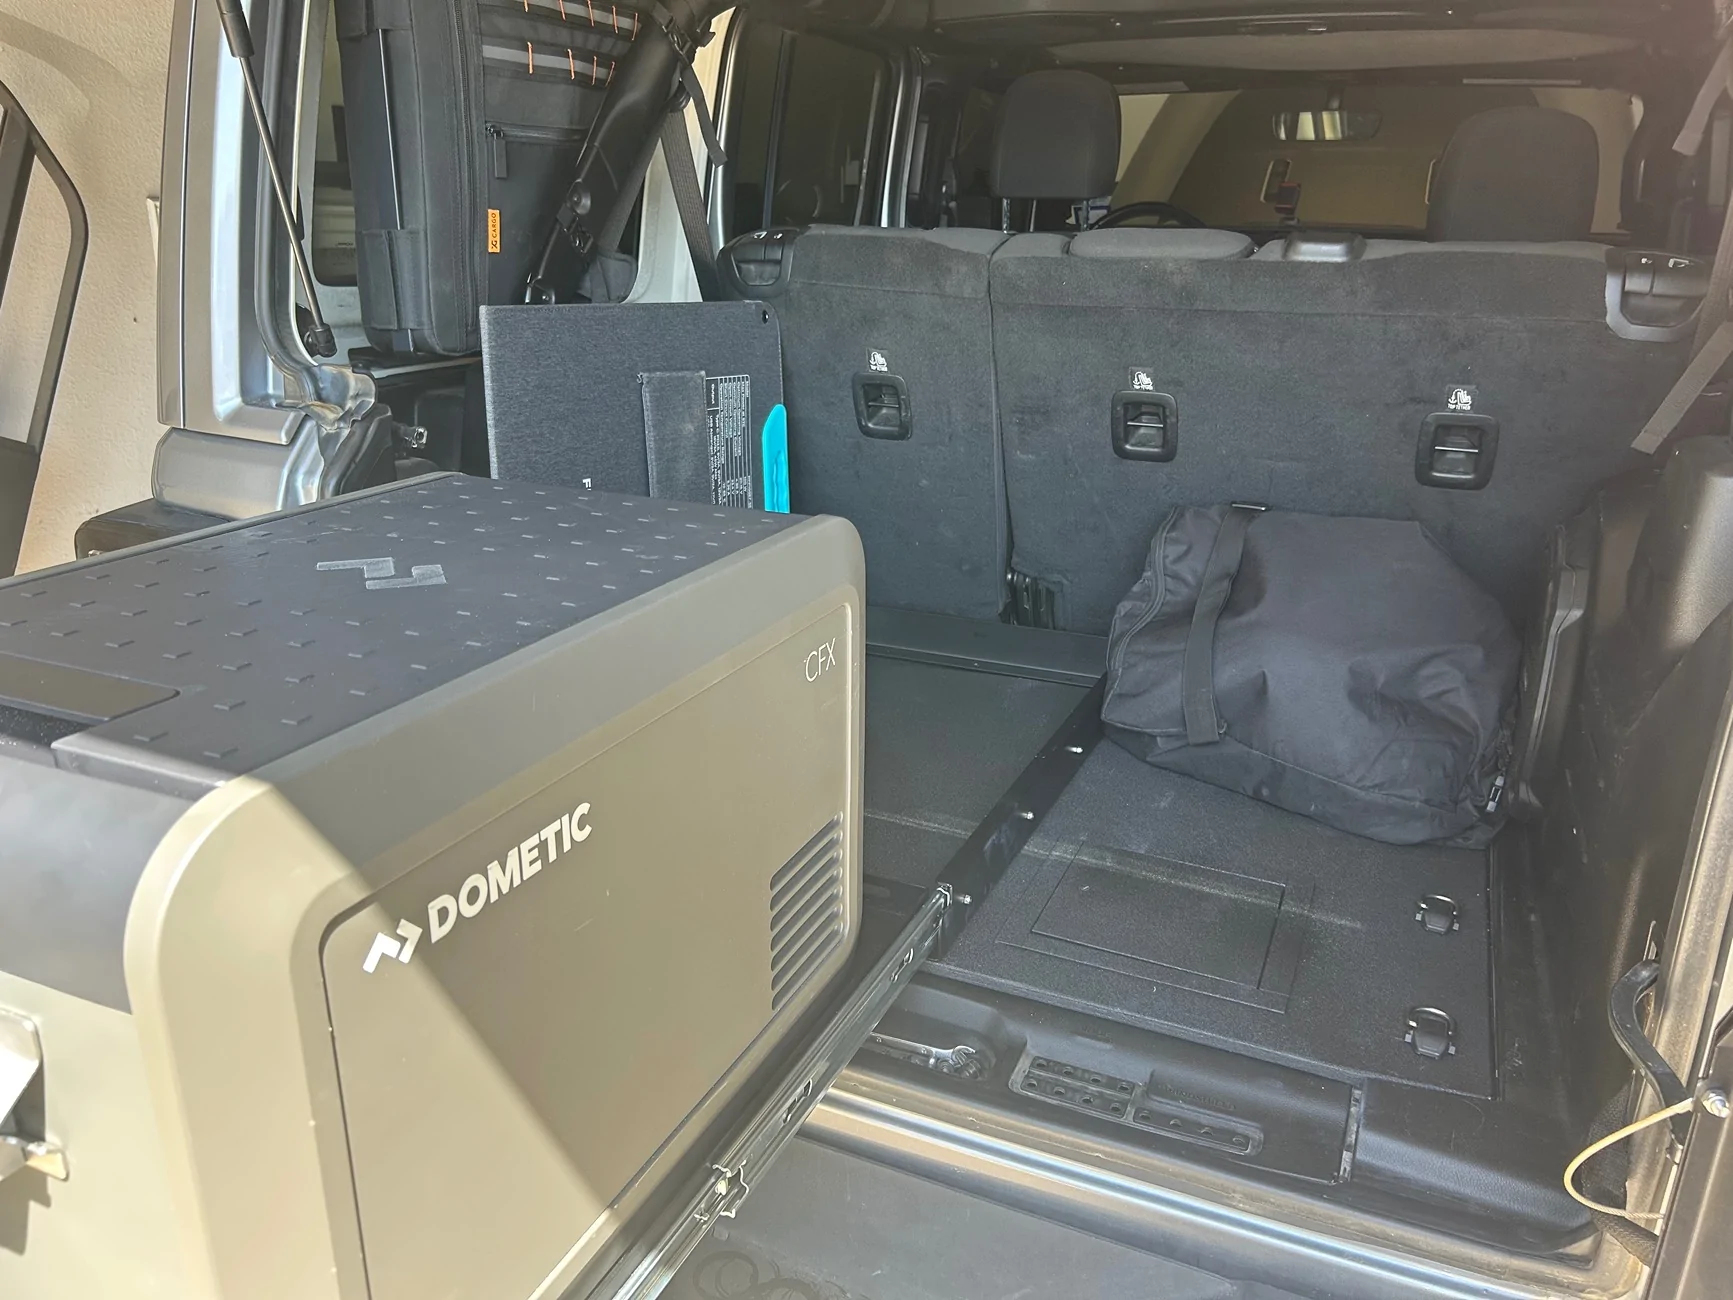
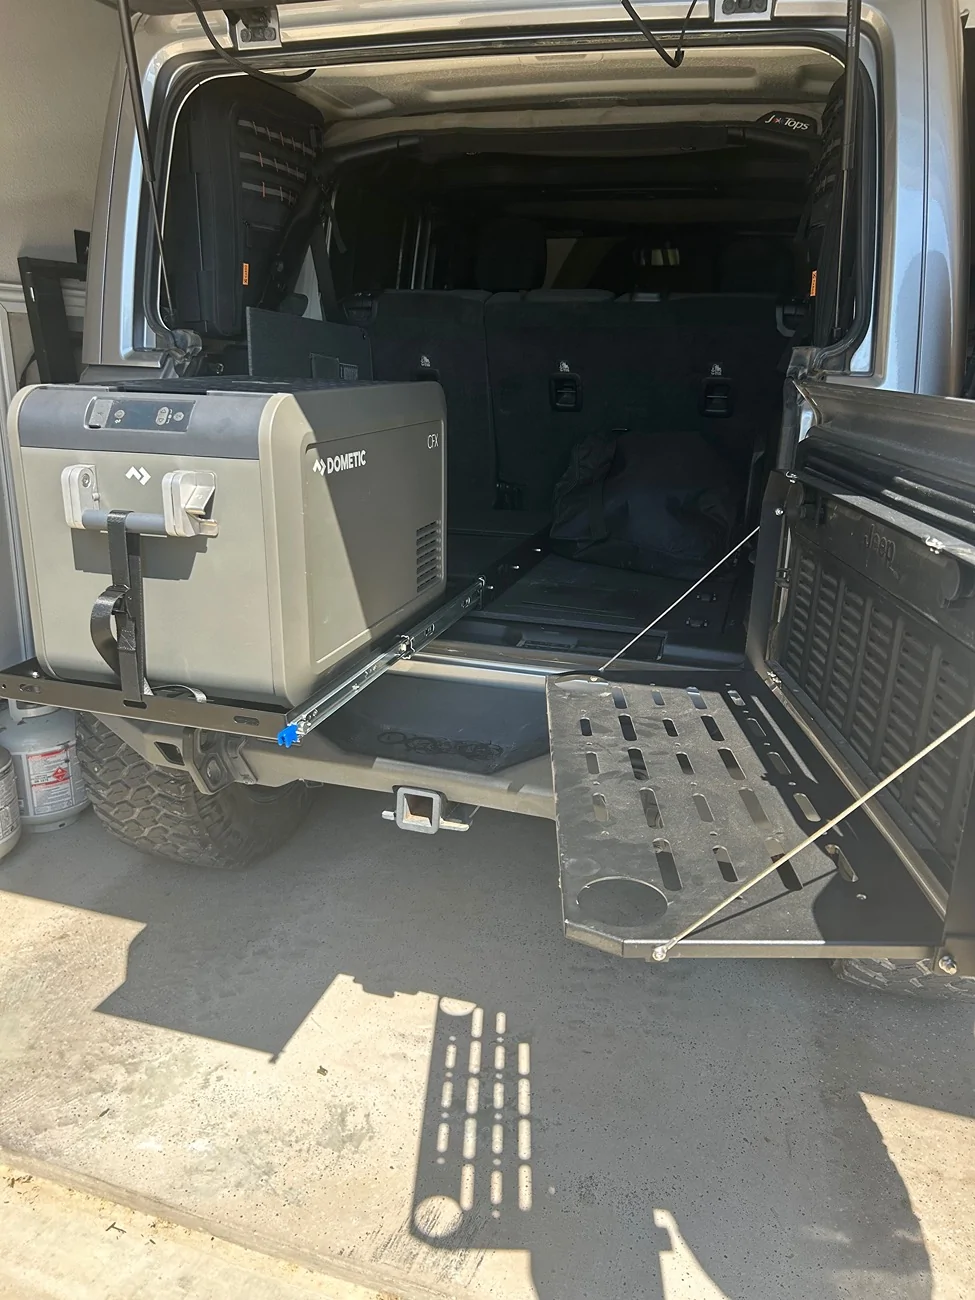
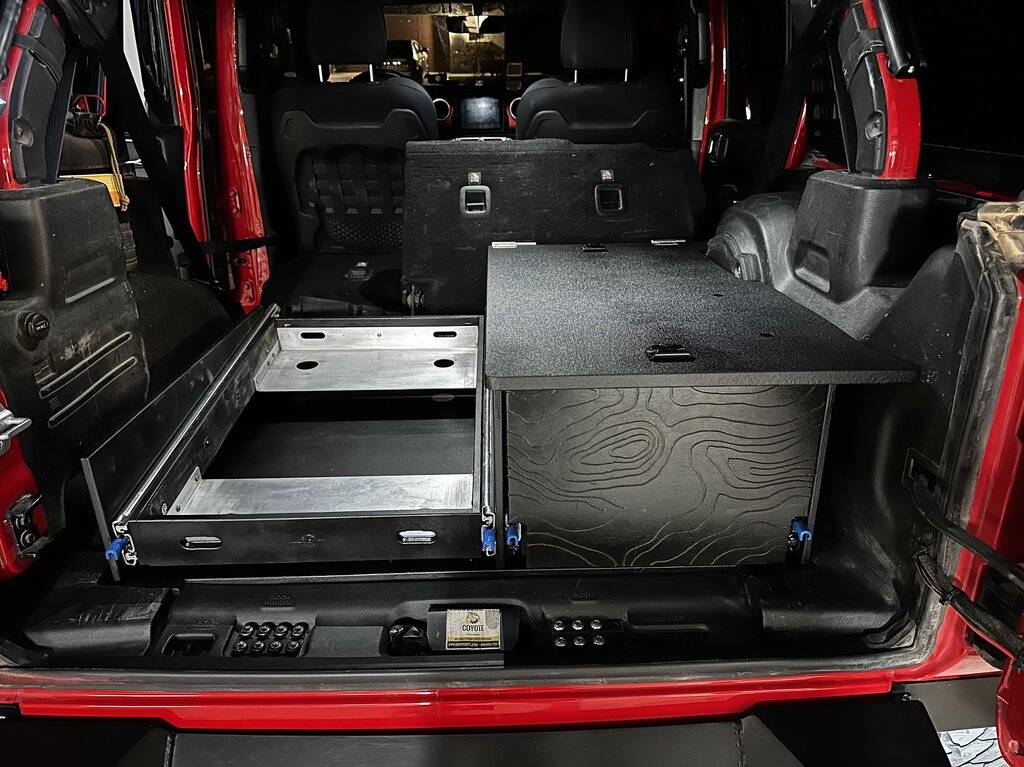
Lived with the slide system and sleeping platform for about 4 months now with a few camping trips on the books and several rough trails.
Even with all of the severe "swinging" back and forth on the trails, washboards, etc... the fridge slide is holding strong and my overloaded tool drawer is solid.

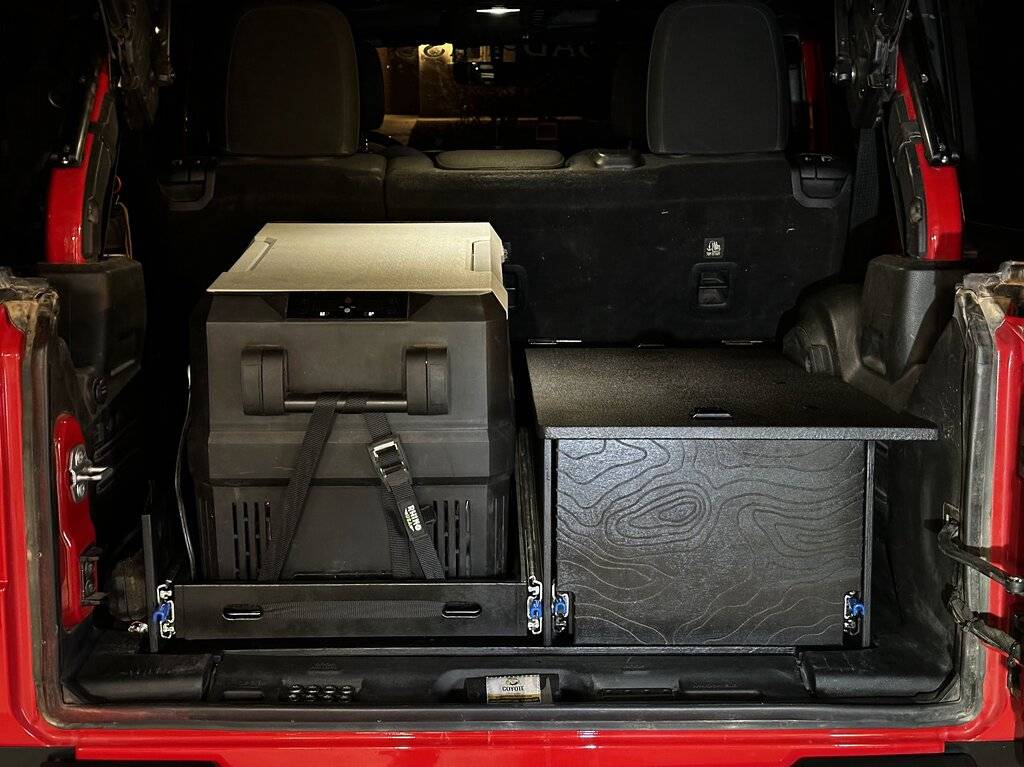
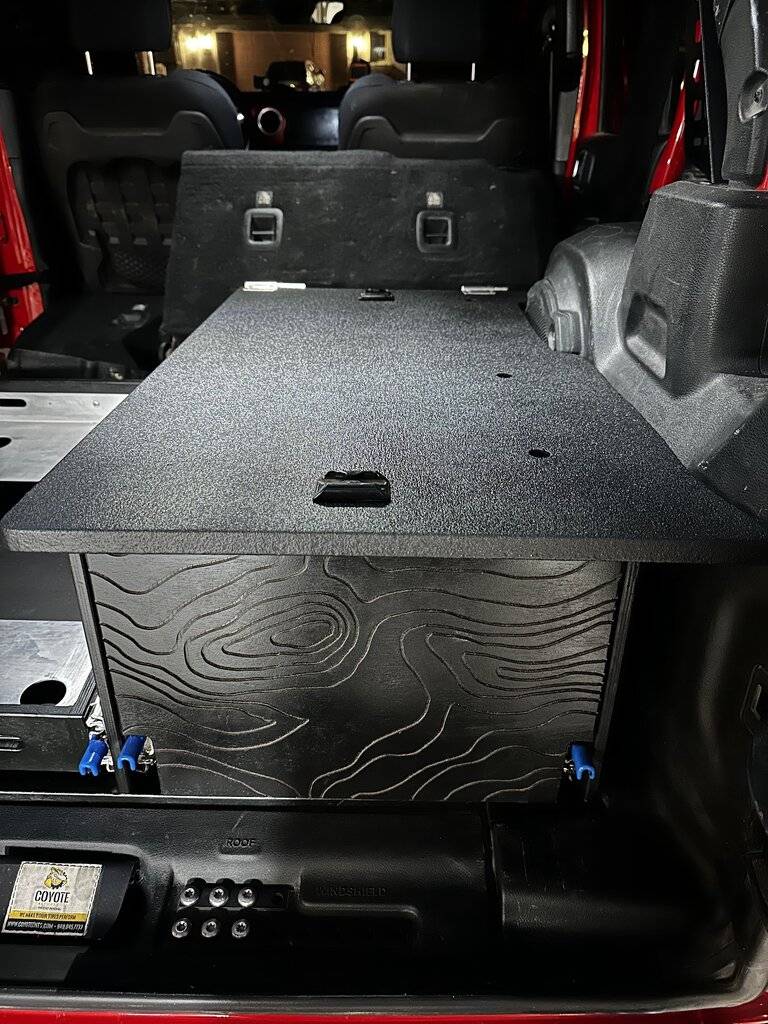
The next phase is "finishing" the look with some stain, polyurethane, and some Raptor Liner.

I had delusions of finishing the wood with a homemade ebonizing brew. I picked up some #0000 steel wool and some "cleaning grade" vinegar - also some tannin powder off of Amazon to help with the effectiveness of the brew.
It didn't work out the best. You can read up on this and see photos of the results over here.
I ended up using some leftover Varathane ebony stain from when I did the drawer front during the initial stage of the build. Probably should have just used that to begin with and saved some time - but you live and learn!
After allowing the stain to set, I applied multiple coats of polyurethane.
It was then time for Raptor Liner. My intent was to use the Raptor Liner on the deck surface, since it will see the most abuse out of all of the project's surfaces.
I picked up 2 cans of Raptor Liner on Amazon and masked off the box with trash bags and painters tape. The cans proved to be great for a small project like this - as opposed to going the spray gun path.
If you're interested in how the cans compare to a dedicated spray gun, check out this excellent write-up from my good friend theksmith.
To prep the surface, I taped everything off, wiped off any dust/debris and then applied a good coat of KILZ primer paint. The KILZ all-weather primer is a great, durable primer for projects like this and helps the bed liner adhere to the surface (or so the theory goes).
Below photo is before I applied the primer.
The Raptor Liner application process was smooth and simple. You need to be "on the minute" with it - after mixing up the chemicals, you have 60 minutes before it becomes unusable, and you have to wait 20 minutes between boats.
I had total coverage in 2 coats - top, sides, and under the lip. I ended up applying 4 total coats with a single can. I used the second can to line the interior of my drawer.
The spray cans are pretty powerful and coats very, very quickly - you need to hold the can about 2-3 feet back from the surface.
The below photo is after just 1 coat.
It almost has a "plastic" quality to it. It's roughly textured, but "smooth", if that makes any sense. It's not "gritty" or "sandy" like Rustoleum bed liner.
Here's a shot with the L-track mounts reinstalled.

And that's it! My final phase on this project is to coat the sleeping platform with Raptor as well to wrap it all up. I'll probably need 2-3 cans for the coverage.
I'll post an update once that process is completed.
Had the chance to test it out on a trip to Utah for the 2023 eclipse. Tripods, cases, etc tossed in the back, moving around - not a scratch in the Raptor Liner.
Ready for the next adventure!

Lived with the slide system and sleeping platform for about 4 months now with a few camping trips on the books and several rough trails.
Even with all of the severe "swinging" back and forth on the trails, washboards, etc... the fridge slide is holding strong and my overloaded tool drawer is solid.

The next phase is "finishing" the look with some stain, polyurethane, and some Raptor Liner.
I had delusions of finishing the wood with a homemade ebonizing brew. I picked up some #0000 steel wool and some "cleaning grade" vinegar - also some tannin powder off of Amazon to help with the effectiveness of the brew.
It didn't work out the best. You can read up on this and see photos of the results over here.
I ended up using some leftover Varathane ebony stain from when I did the drawer front during the initial stage of the build. Probably should have just used that to begin with and saved some time - but you live and learn!
After allowing the stain to set, I applied multiple coats of polyurethane.
It was then time for Raptor Liner. My intent was to use the Raptor Liner on the deck surface, since it will see the most abuse out of all of the project's surfaces.
I picked up 2 cans of Raptor Liner on Amazon and masked off the box with trash bags and painters tape. The cans proved to be great for a small project like this - as opposed to going the spray gun path.
If you're interested in how the cans compare to a dedicated spray gun, check out this excellent write-up from my good friend theksmith.
To prep the surface, I taped everything off, wiped off any dust/debris and then applied a good coat of KILZ primer paint. The KILZ all-weather primer is a great, durable primer for projects like this and helps the bed liner adhere to the surface (or so the theory goes).
Below photo is before I applied the primer.

The Raptor Liner application process was smooth and simple. You need to be "on the minute" with it - after mixing up the chemicals, you have 60 minutes before it becomes unusable, and you have to wait 20 minutes between boats.
I had total coverage in 2 coats - top, sides, and under the lip. I ended up applying 4 total coats with a single can. I used the second can to line the interior of my drawer.
The spray cans are pretty powerful and coats very, very quickly - you need to hold the can about 2-3 feet back from the surface.
The below photo is after just 1 coat.

It almost has a "plastic" quality to it. It's roughly textured, but "smooth", if that makes any sense. It's not "gritty" or "sandy" like Rustoleum bed liner.
Here's a shot with the L-track mounts reinstalled.
And that's it! My final phase on this project is to coat the sleeping platform with Raptor as well to wrap it all up. I'll probably need 2-3 cans for the coverage.
I'll post an update once that process is completed.
Had the chance to test it out on a trip to Utah for the 2023 eclipse. Tripods, cases, etc tossed in the back, moving around - not a scratch in the Raptor Liner.
Ready for the next adventure!

Sponsored