zouch
Well-Known Member
- Joined
- Sep 17, 2020
- Threads
- 39
- Messages
- 3,751
- Reaction score
- 3,841
- Location
- Berkeley, CA
- Vehicle(s)
- XJ, JLUWD
in a fraction of the energy it would take to deal with the logistics of getting the vehicle to the dealer and pay them to hopefully do it right, i did it myself using the same kit referenced in the TSB.
took far less time/money/effort, and even taking my time to try to do it as well as i could, was finished in relatively short order.
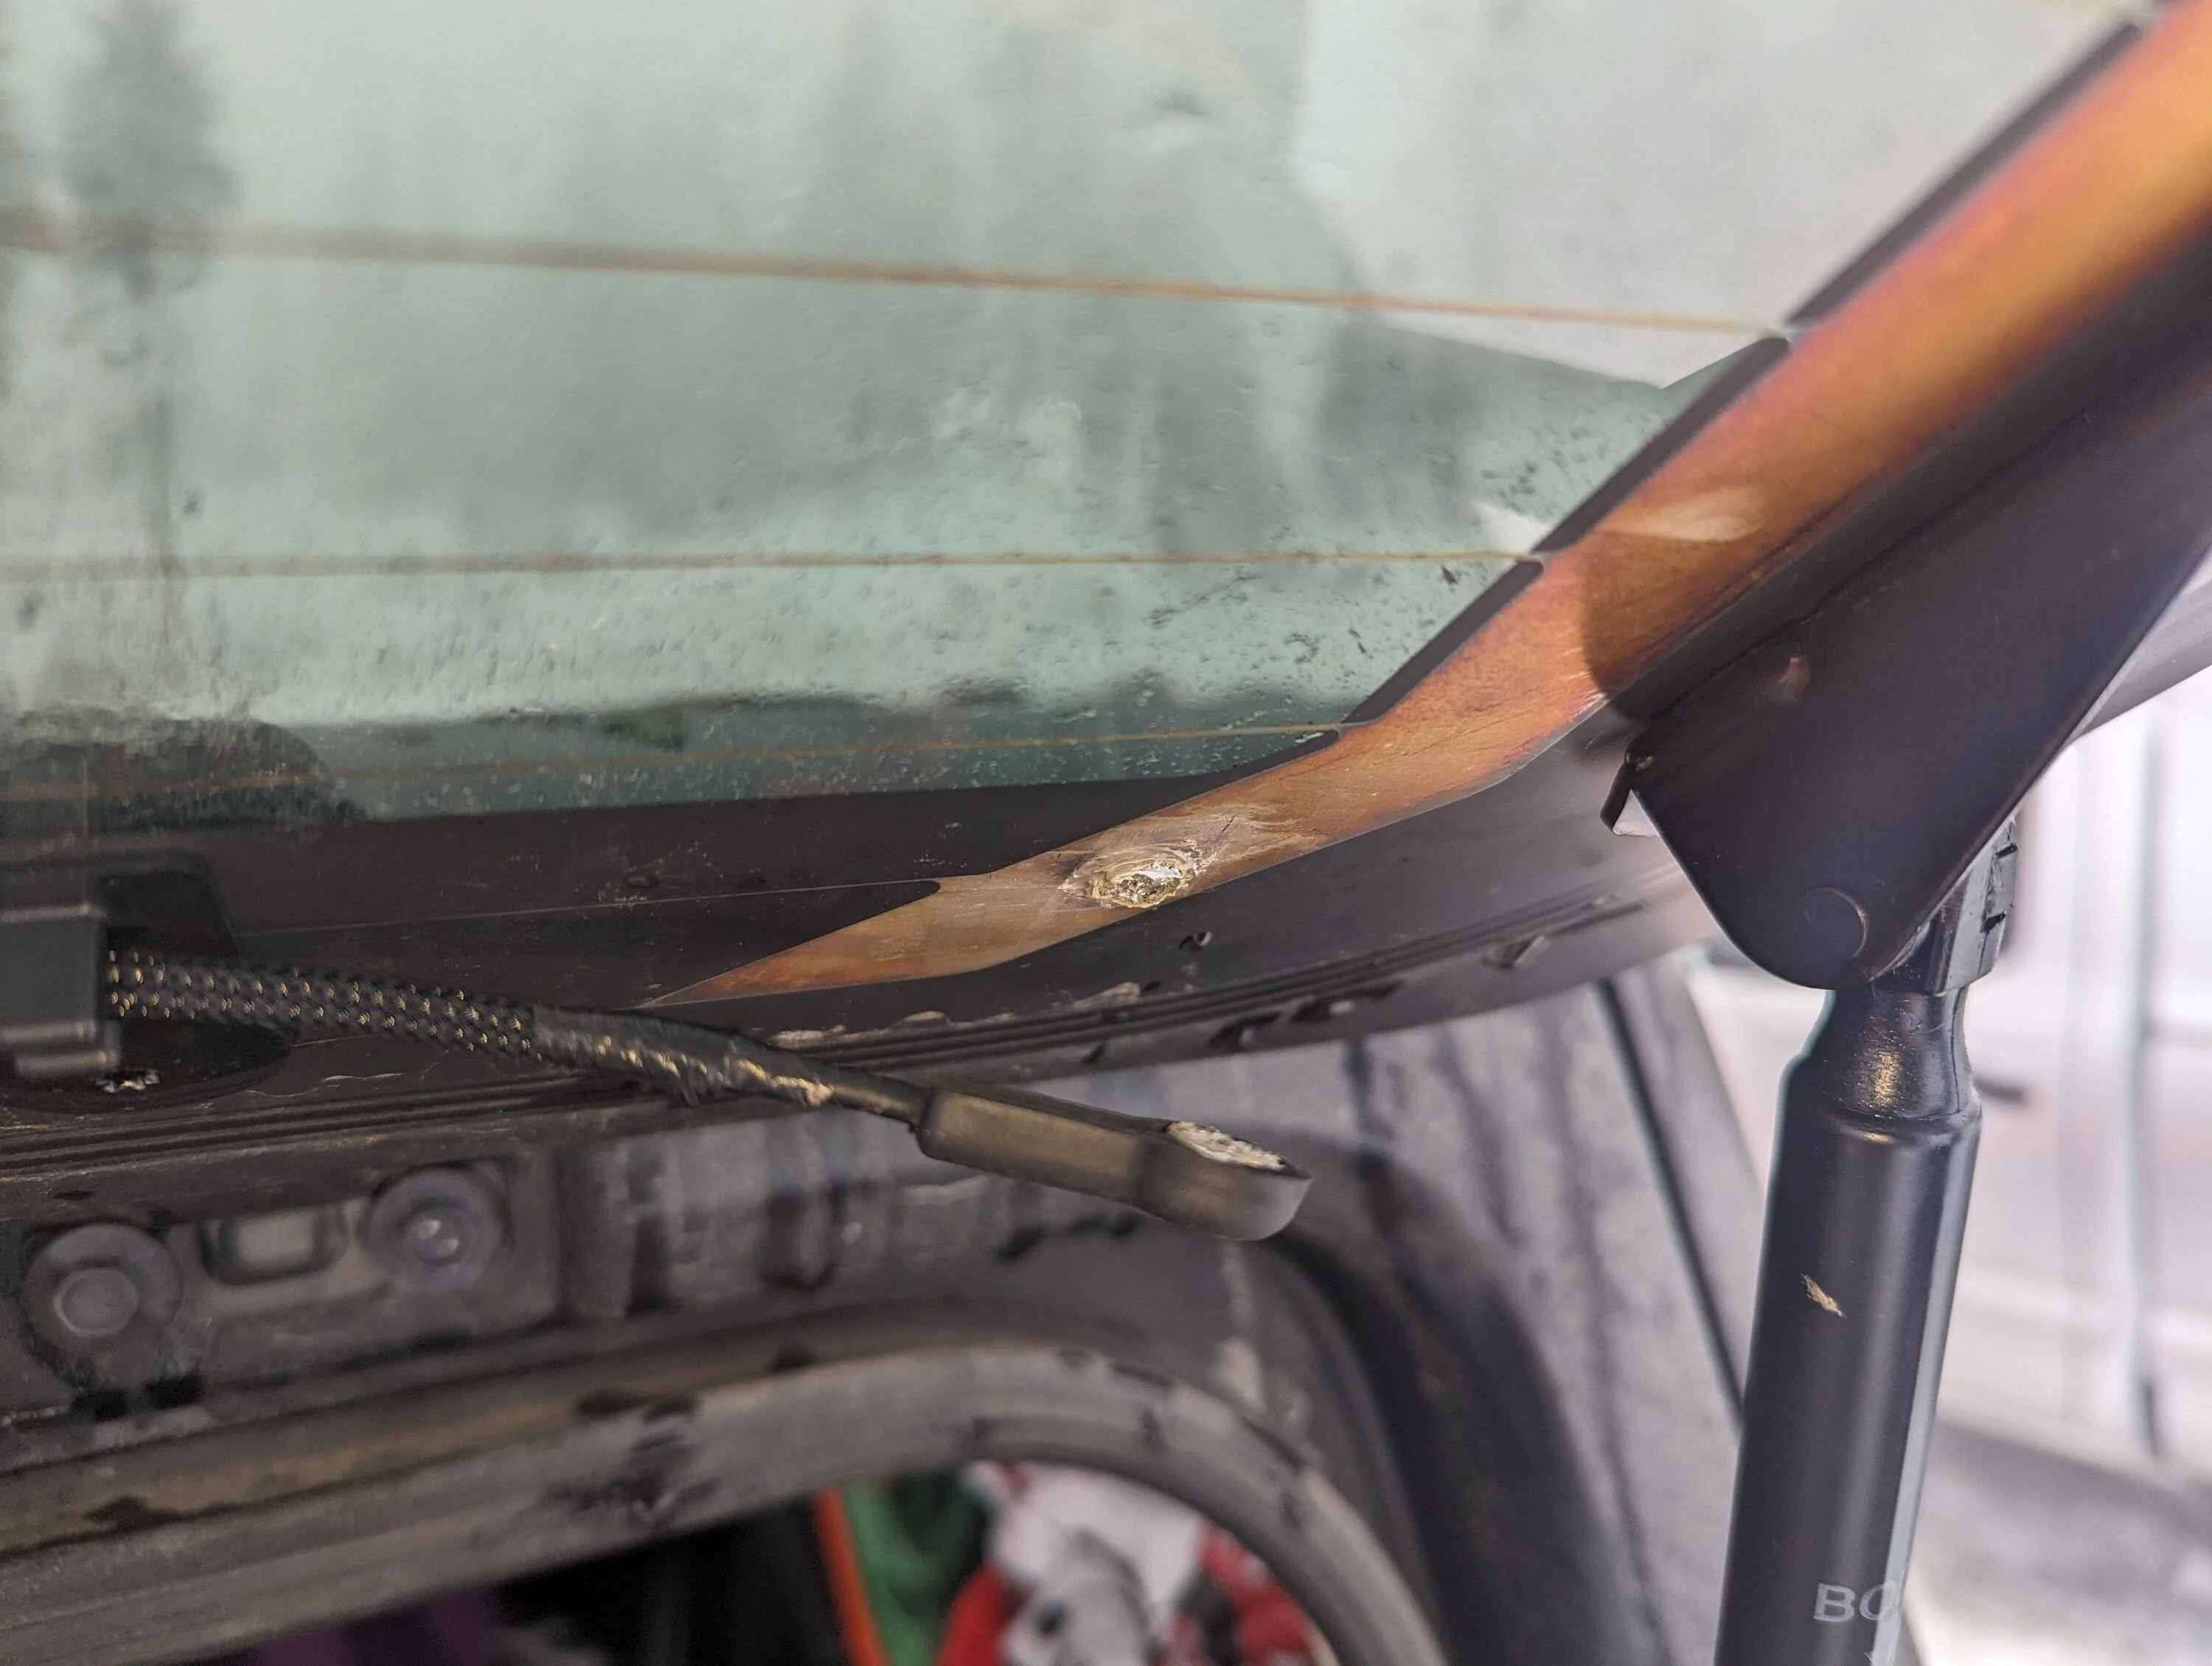
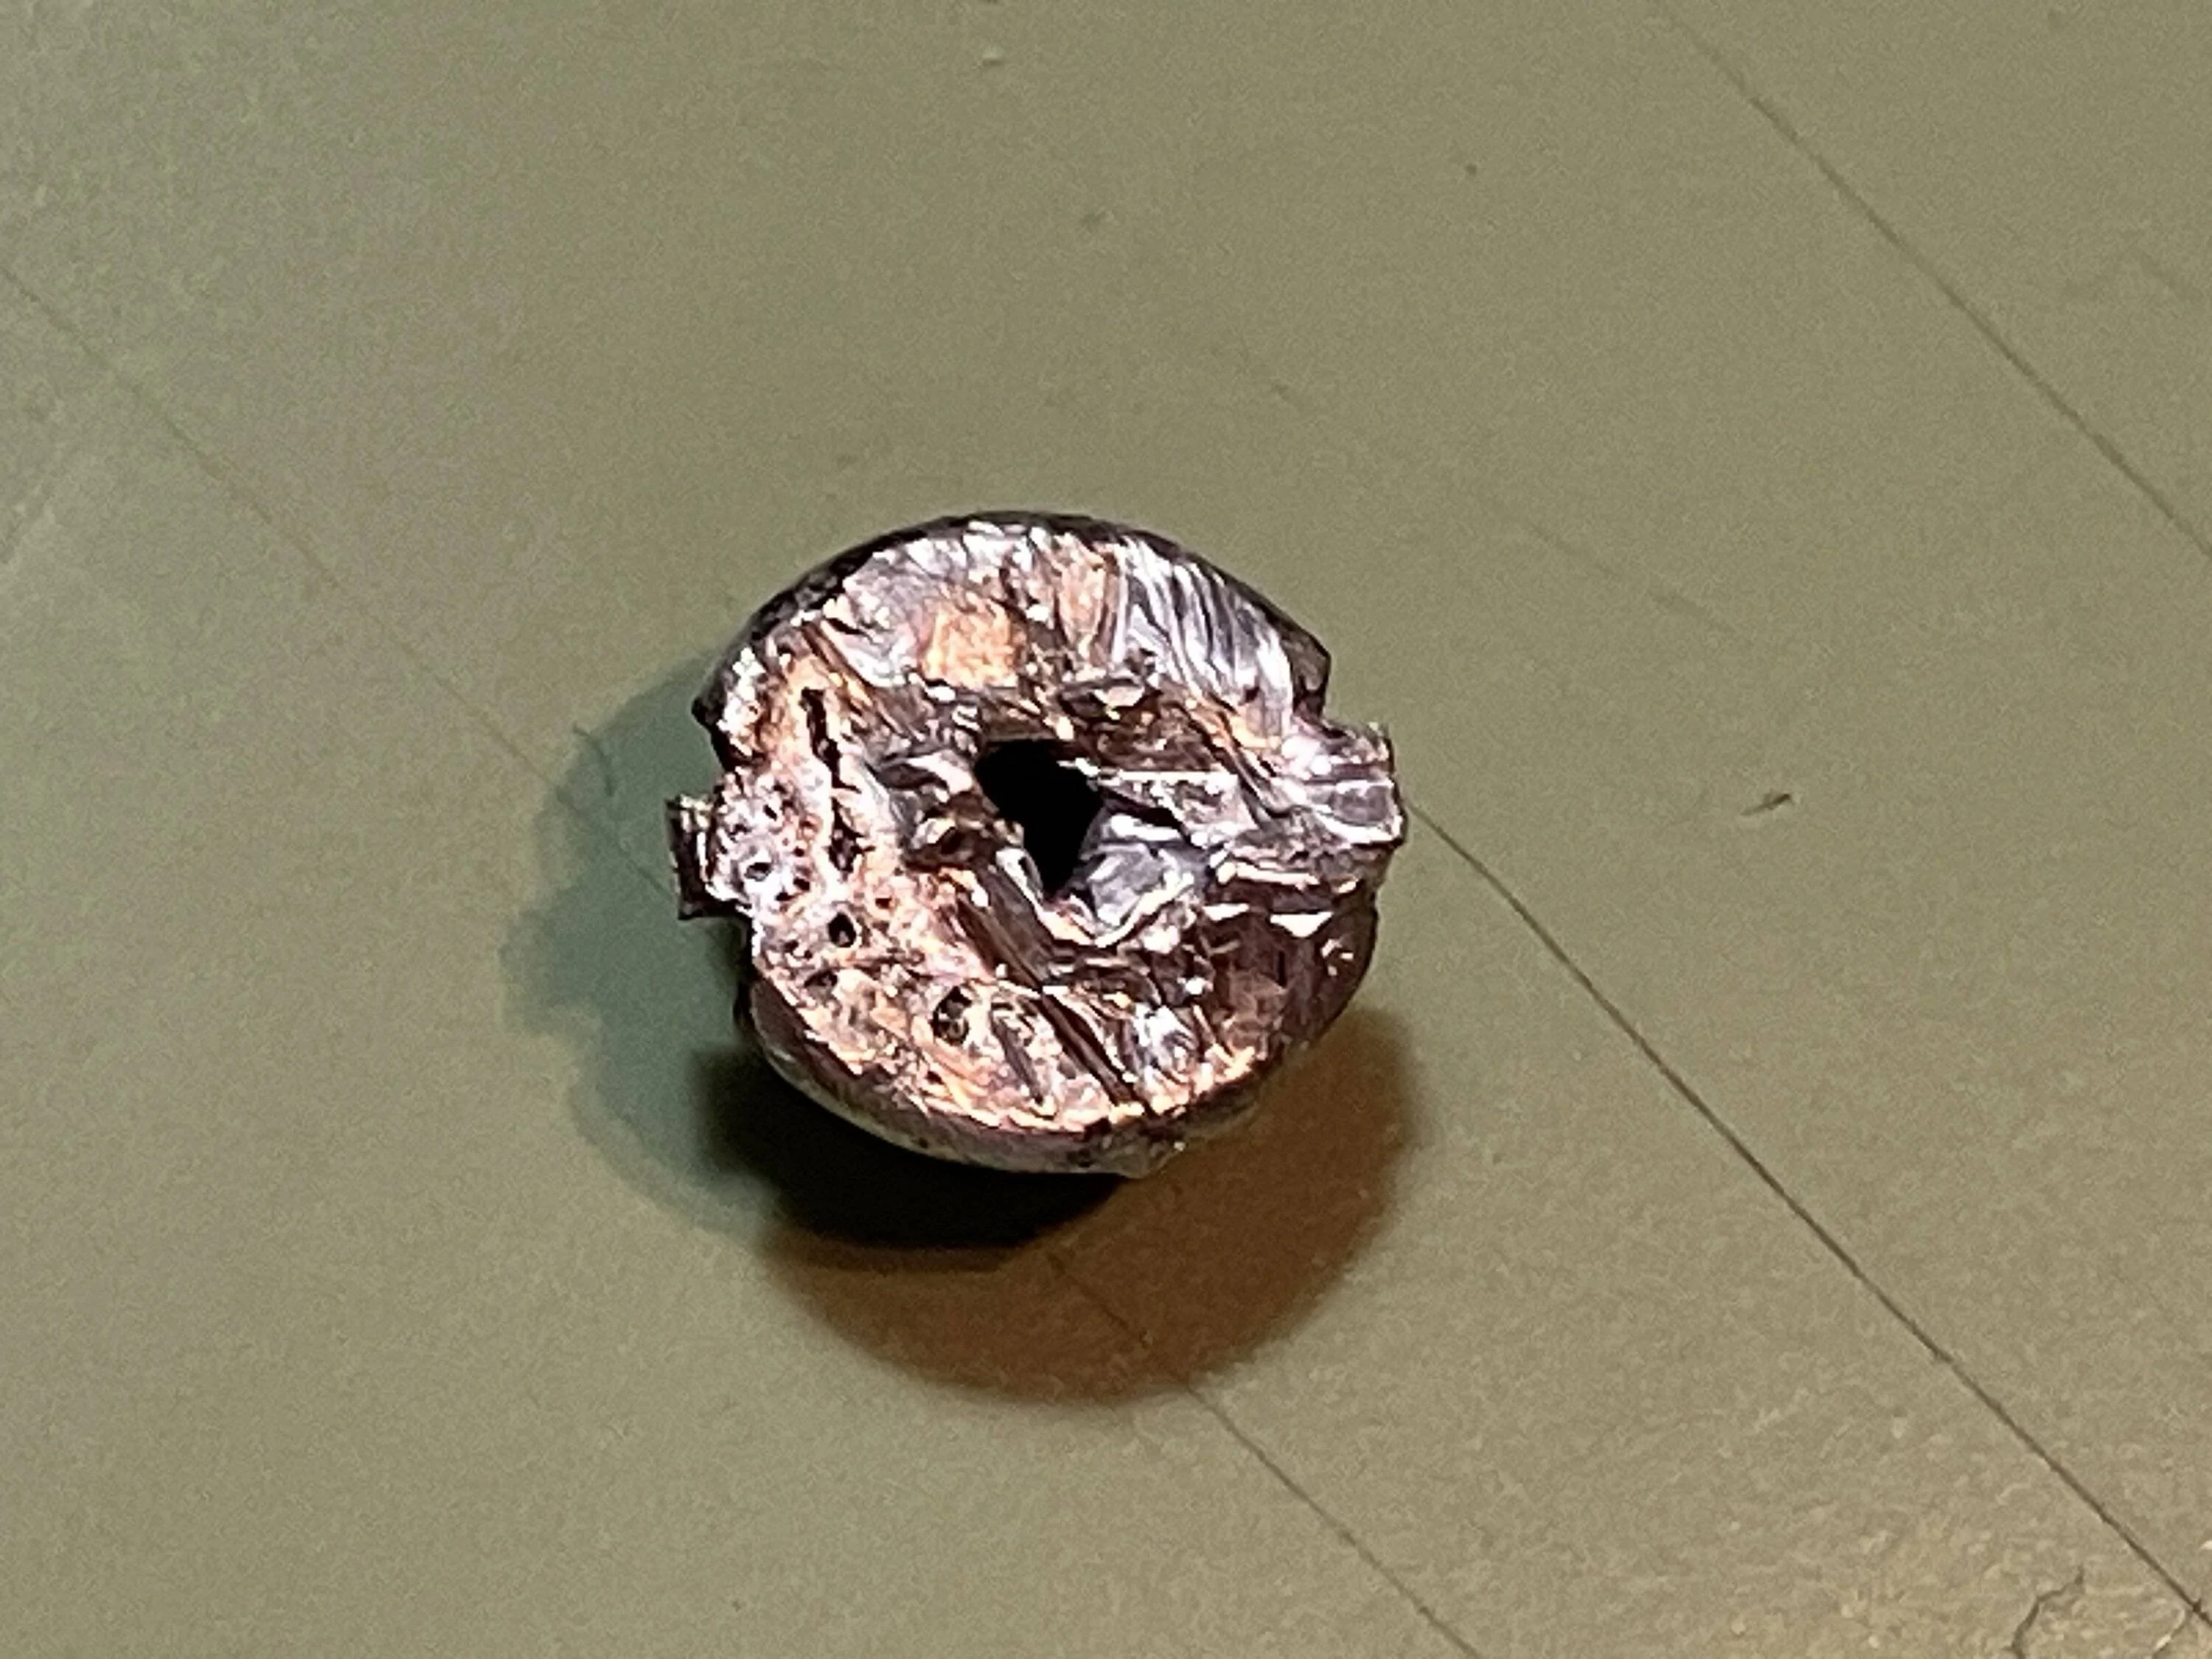
i got the Frost Fighter Rear Defroster Tab Bonding Kit from Amazon and after seeing how goobered up the button was, decided to splurge $11 and get their replacement button instead of trying to clean up the one i had.

(obviously, whoever/whatever did the soldering on these things when mine was built a few years ago was not doing a stellar job.)
looking at the state of the button makes me cringe thinking about how many other solder points in our vehicles might have been done this poorly.
i heeded the advice in the instructions to take advantage of heat to help cure the adhesive, using a heat gun to keep the window and button warm for about a half-hour; this took longer than the entire rest of the repair. trickiest part of the whole job was getting the old button out of the connector; i ended up having success using the tip of a pocket knife.
so far, so good!
took far less time/money/effort, and even taking my time to try to do it as well as i could, was finished in relatively short order.
i got the Frost Fighter Rear Defroster Tab Bonding Kit from Amazon and after seeing how goobered up the button was, decided to splurge $11 and get their replacement button instead of trying to clean up the one i had.
(obviously, whoever/whatever did the soldering on these things when mine was built a few years ago was not doing a stellar job.)
looking at the state of the button makes me cringe thinking about how many other solder points in our vehicles might have been done this poorly.
i heeded the advice in the instructions to take advantage of heat to help cure the adhesive, using a heat gun to keep the window and button warm for about a half-hour; this took longer than the entire rest of the repair. trickiest part of the whole job was getting the old button out of the connector; i ended up having success using the tip of a pocket knife.
so far, so good!
Sponsored