JLURD
Well-Known Member
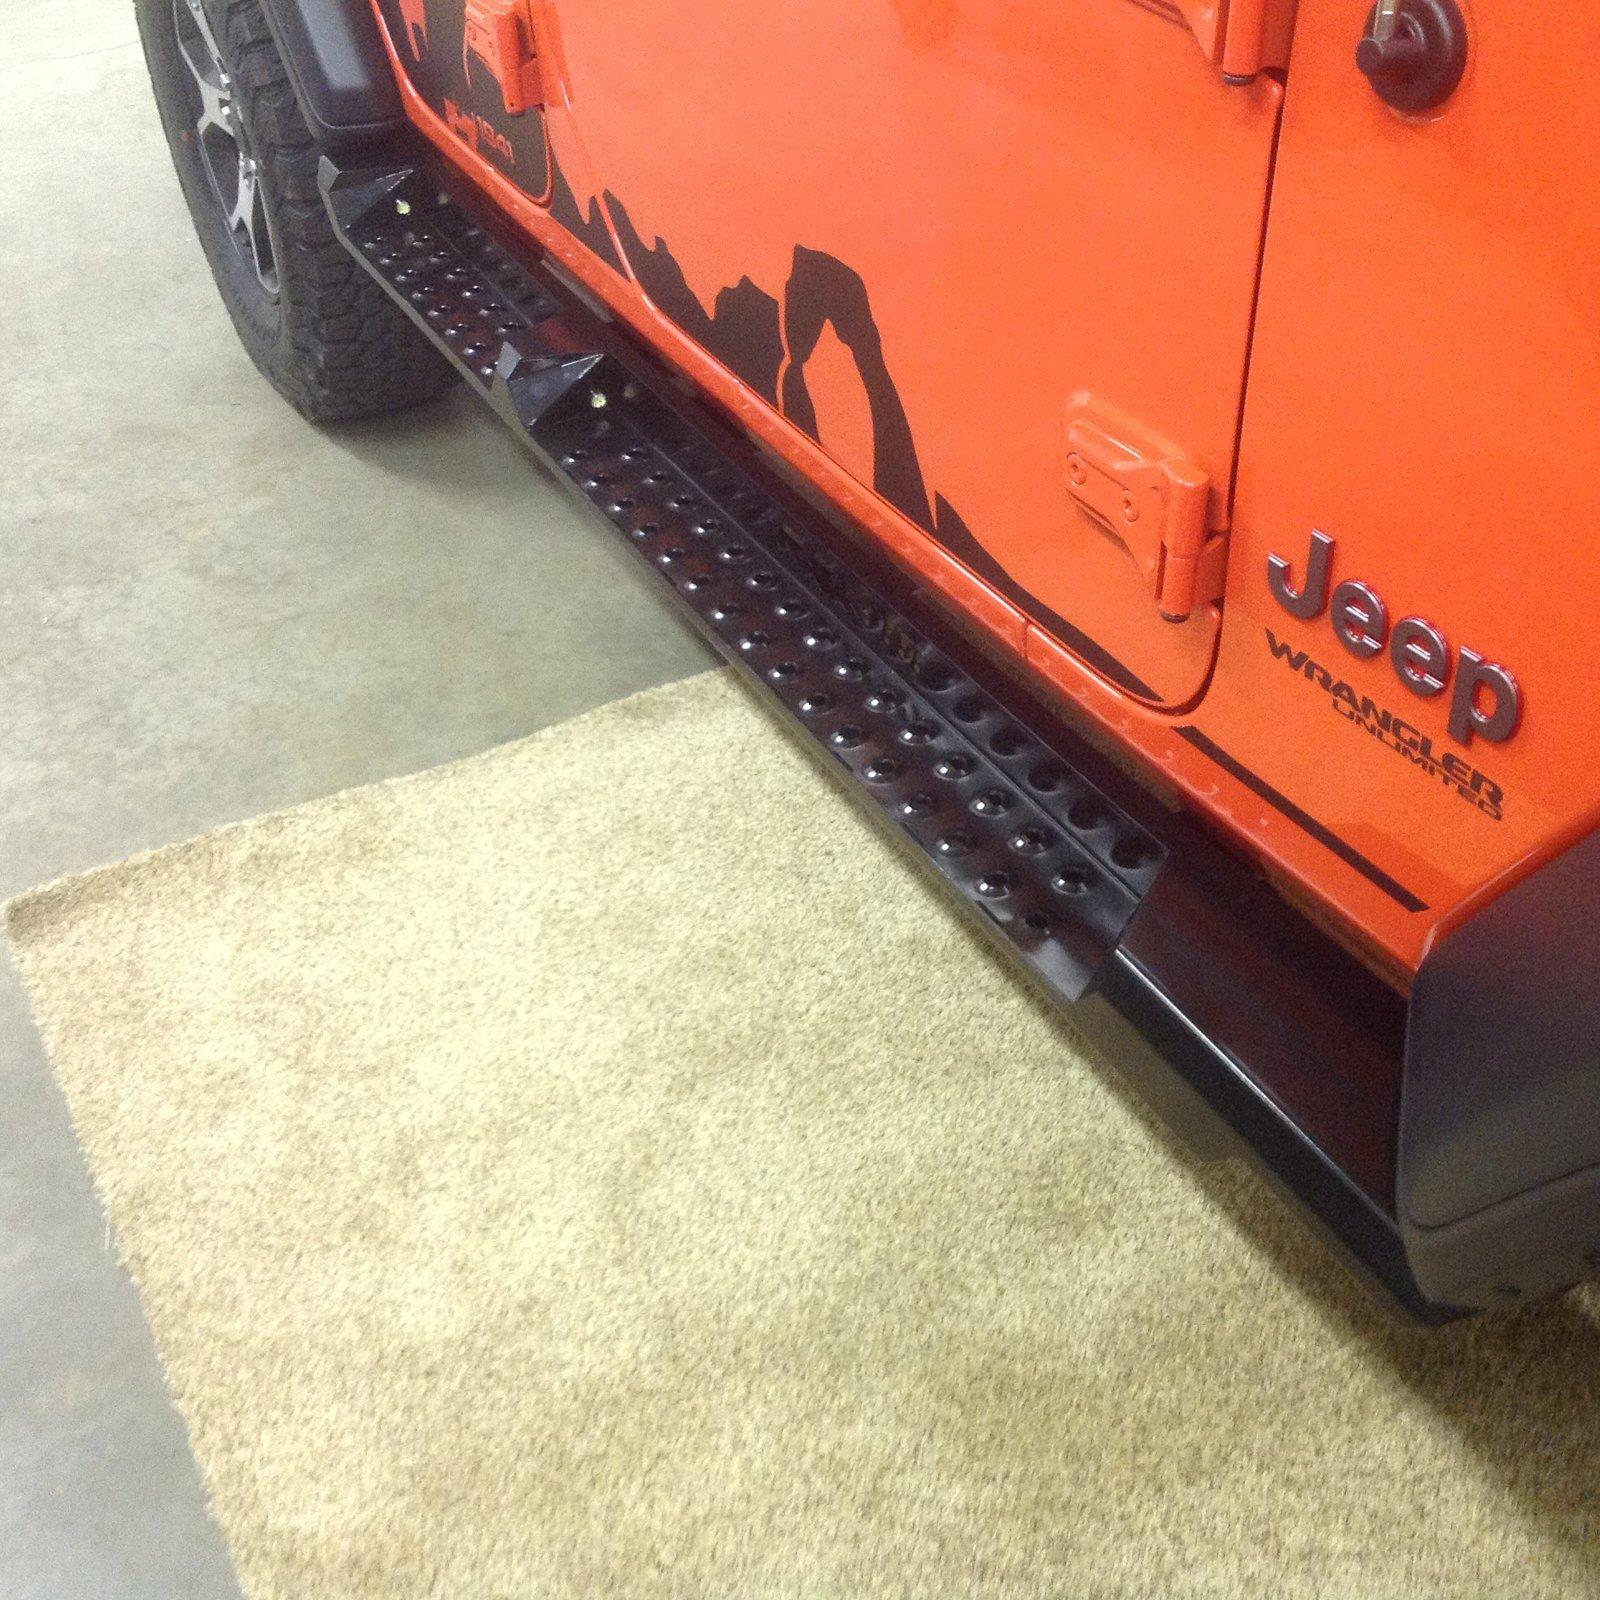
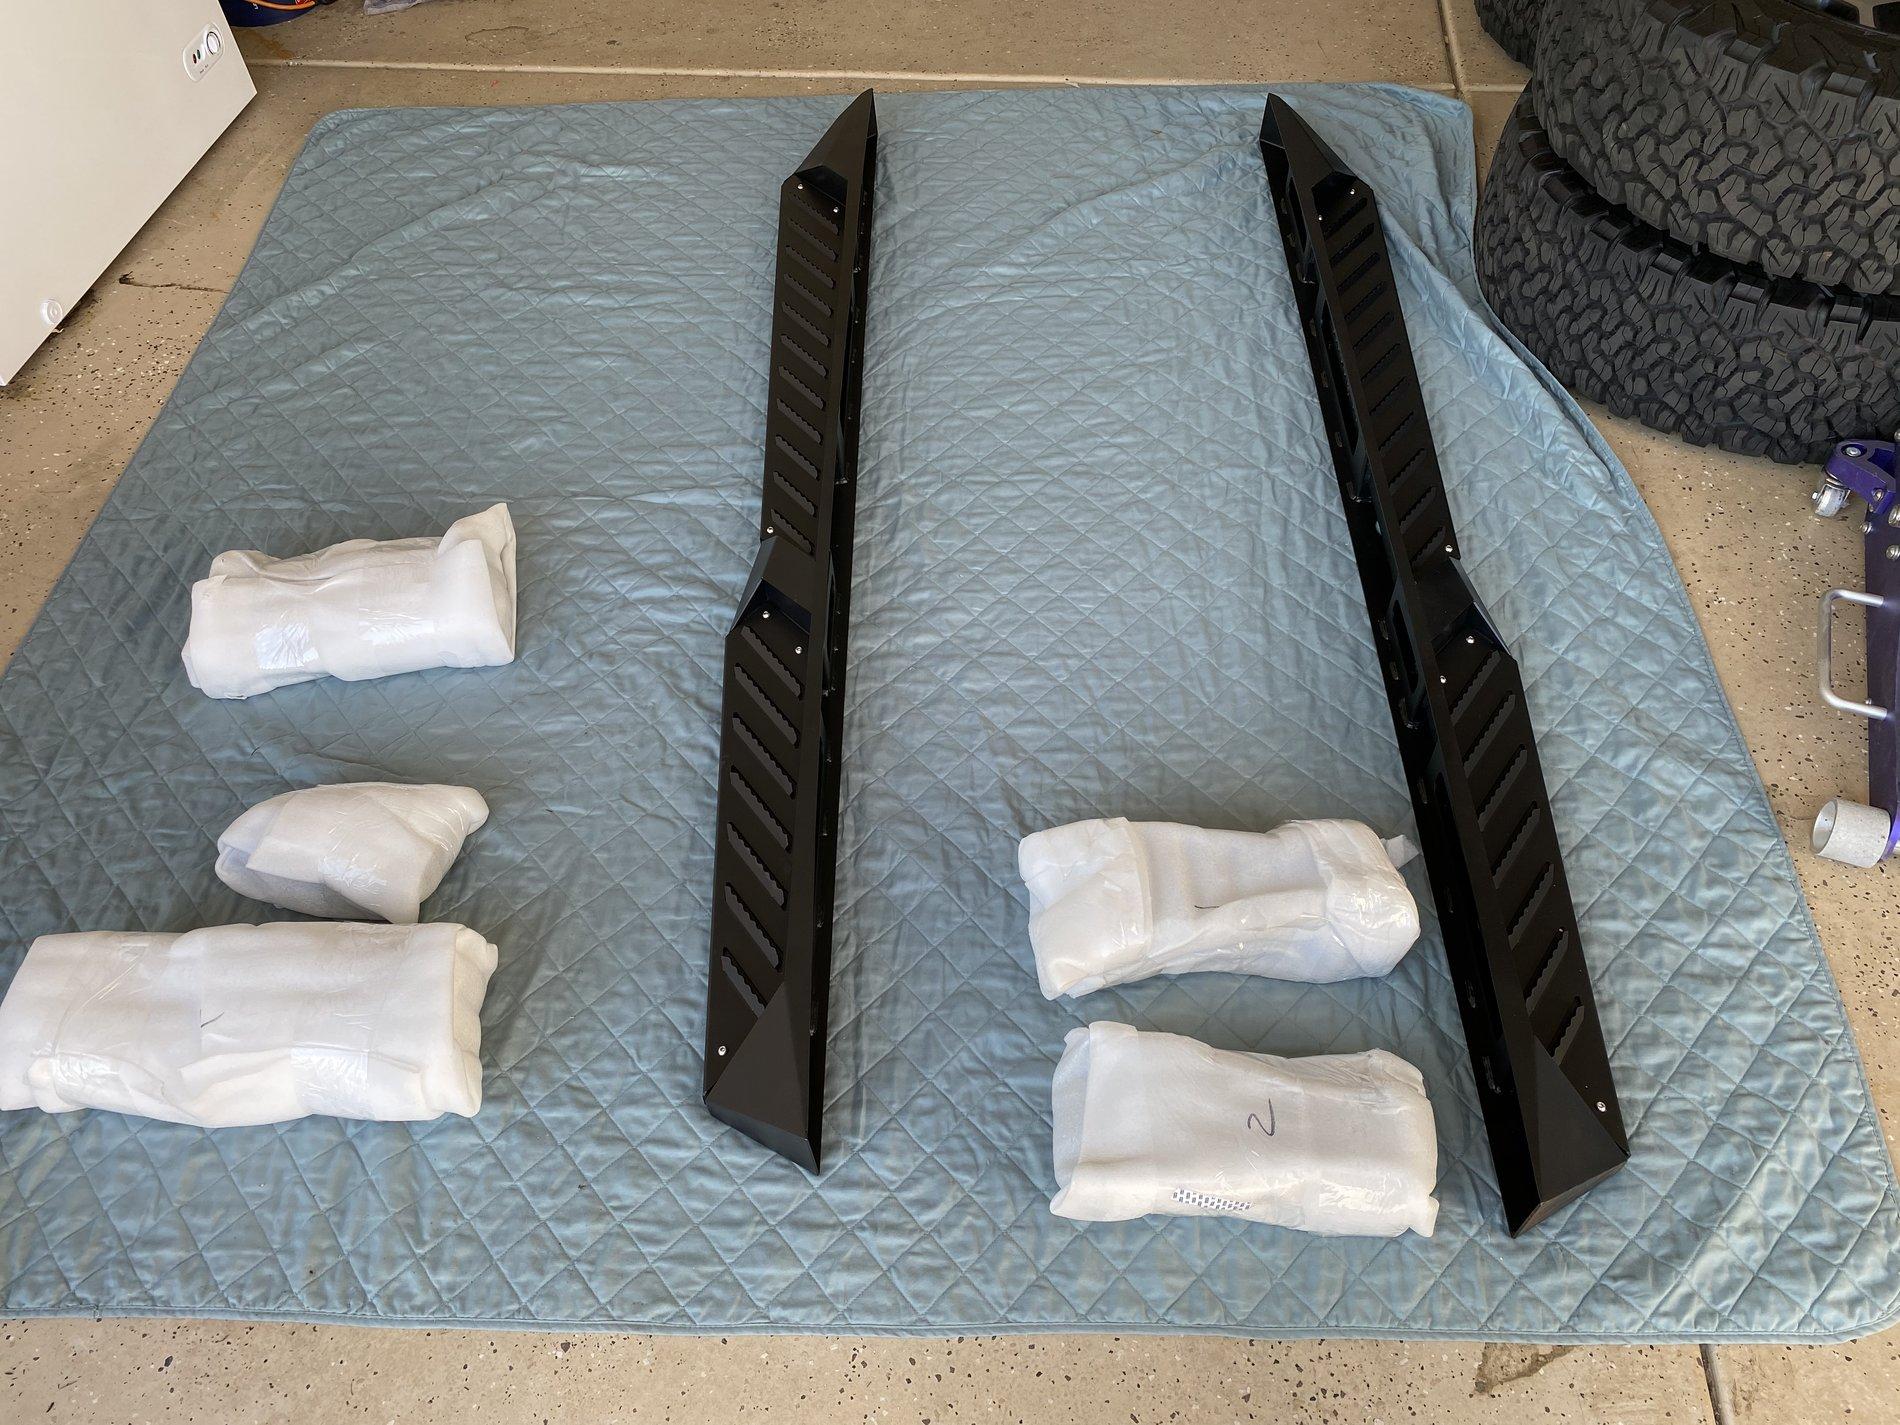
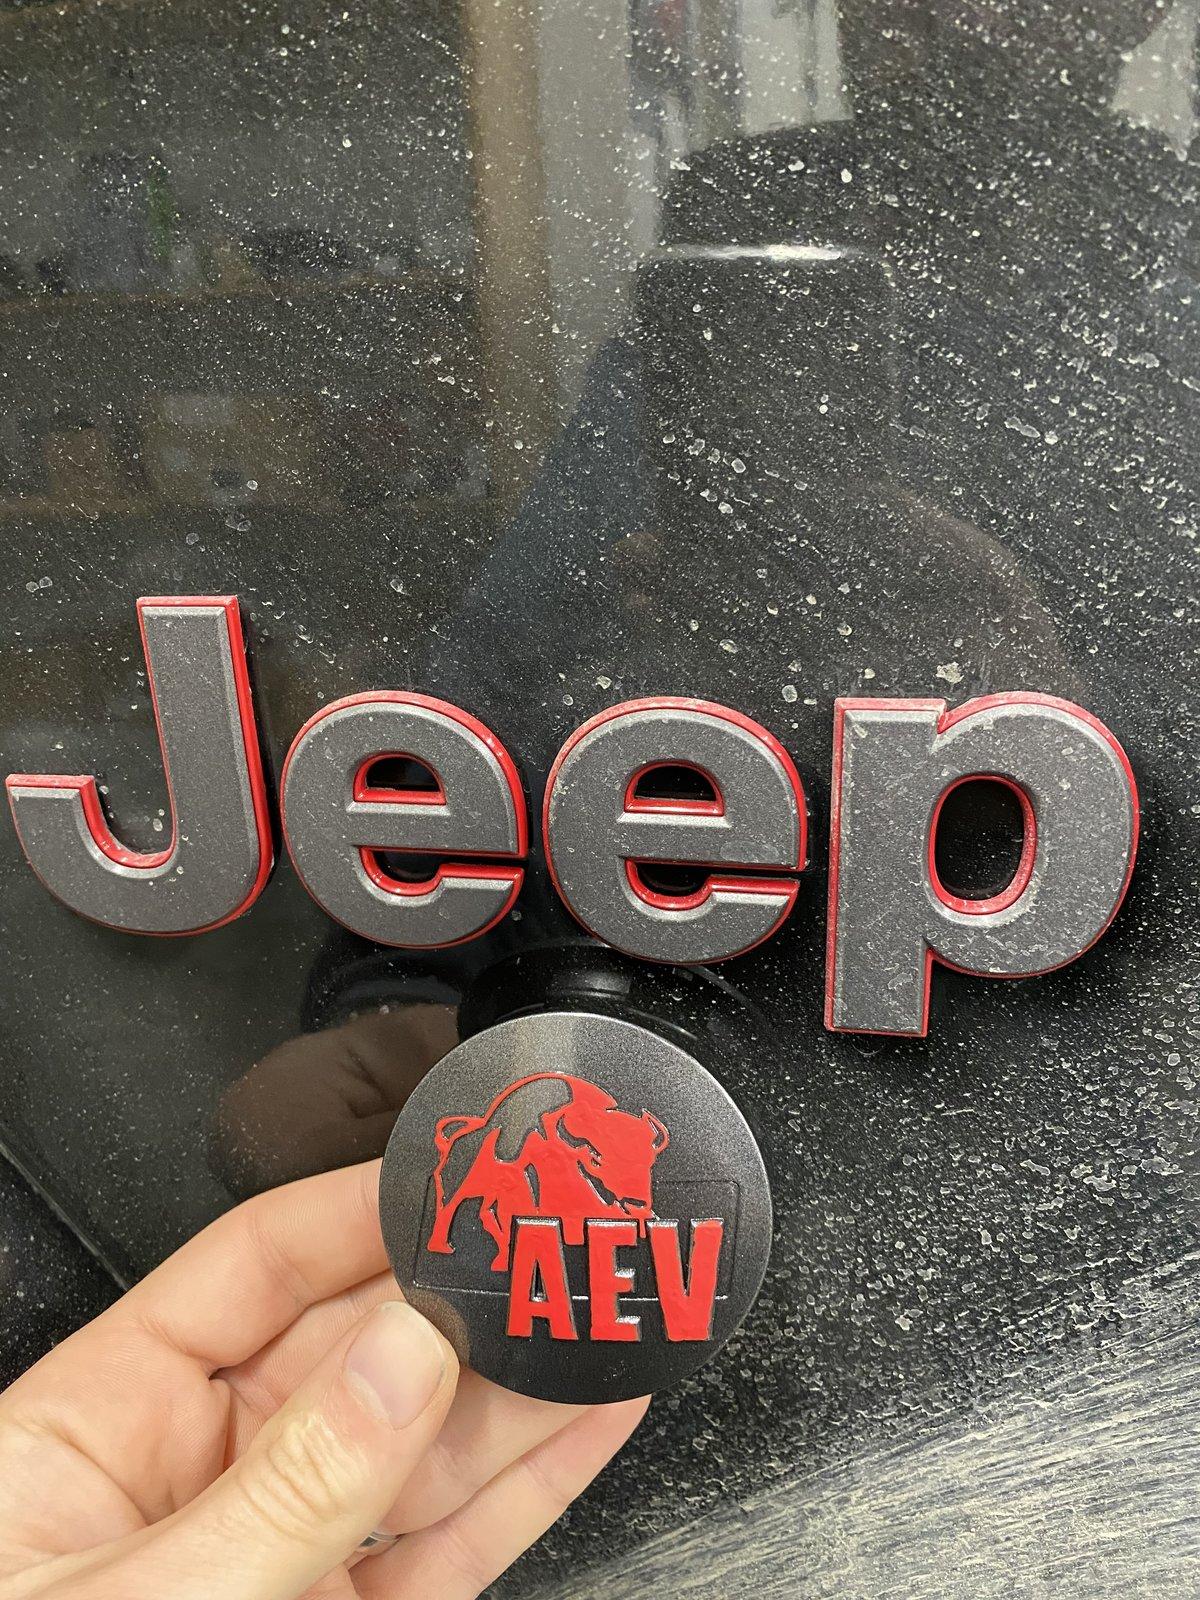
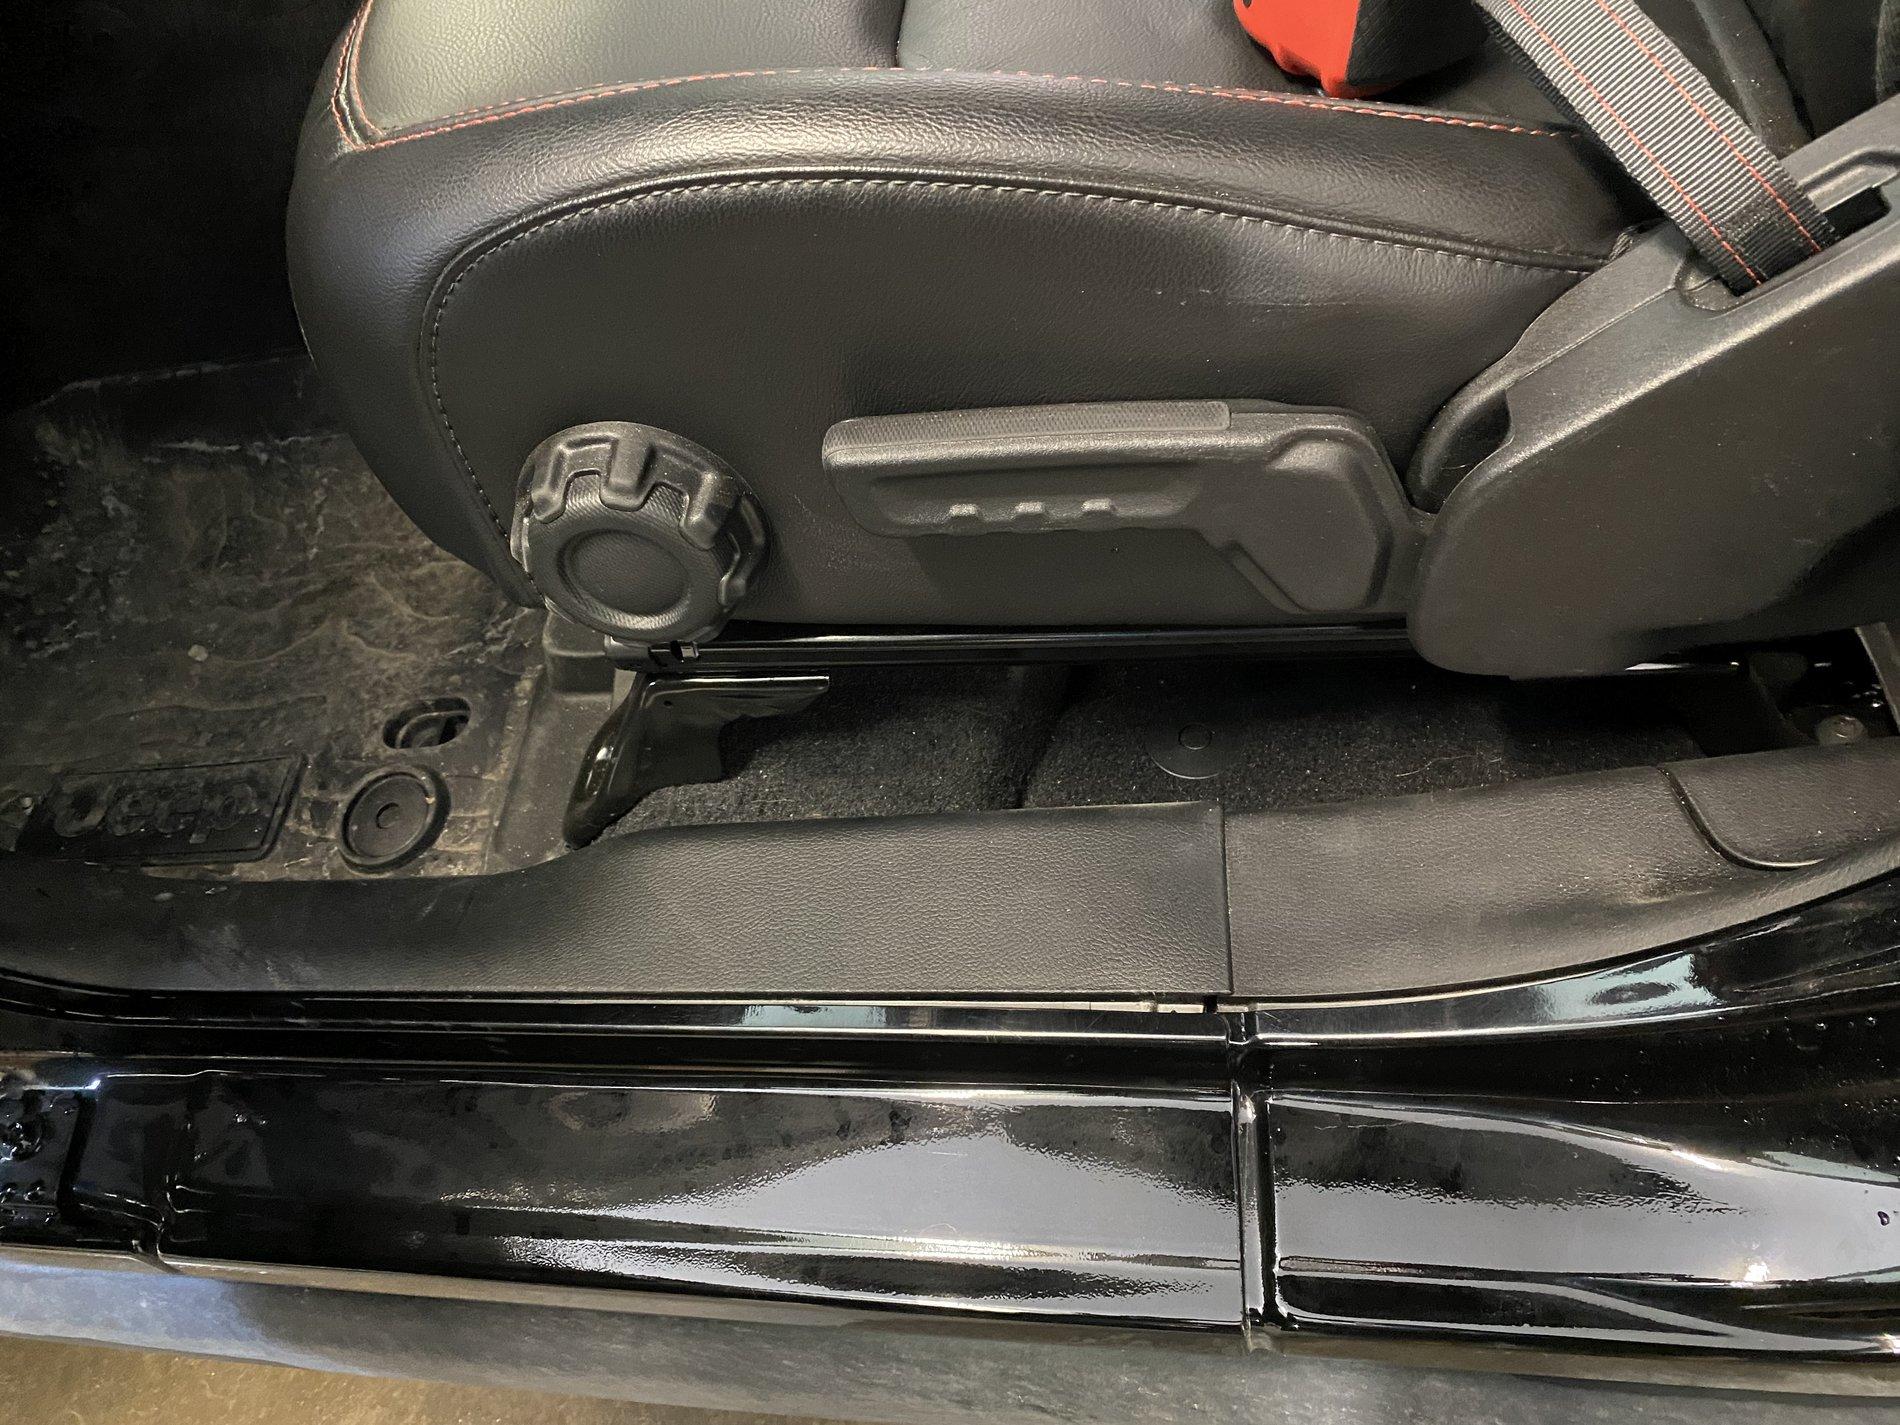
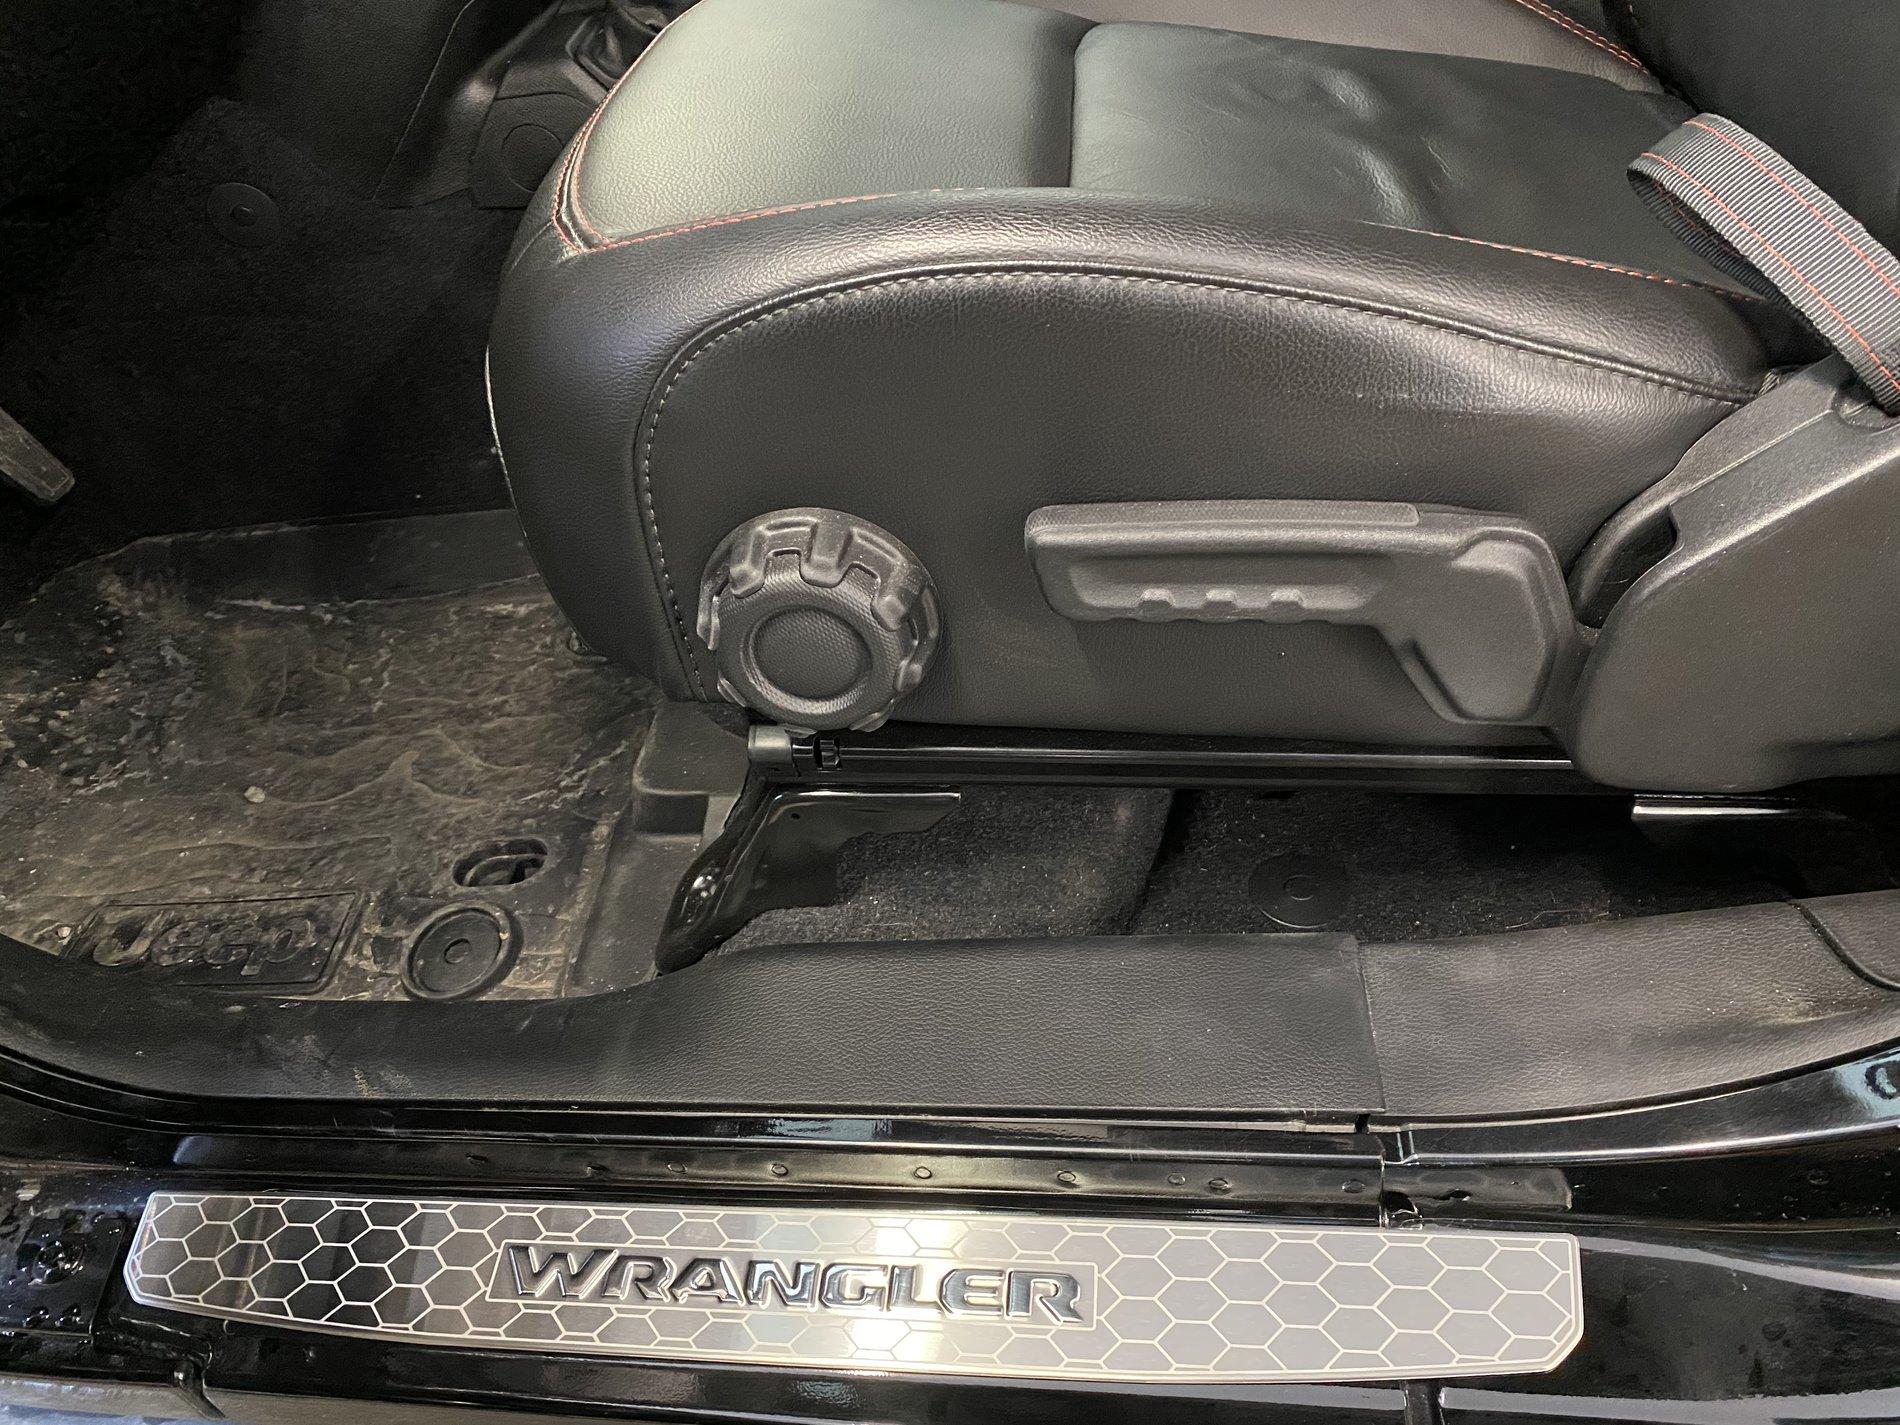
Had some credit card points that needed to be used at the dealer and didn’t need 100% sill coverage with the xpel in place so I threw these laser etched steel guards on.

Sponsored