Timmybung
Well-Known Member
- Thread starter
- #1
First off I'd like to thank user Fonzie for the inspiration; it was his original post that made me undertake this project. I'll try not to rehash things he covered on his thread since it got me most of the way into the project.
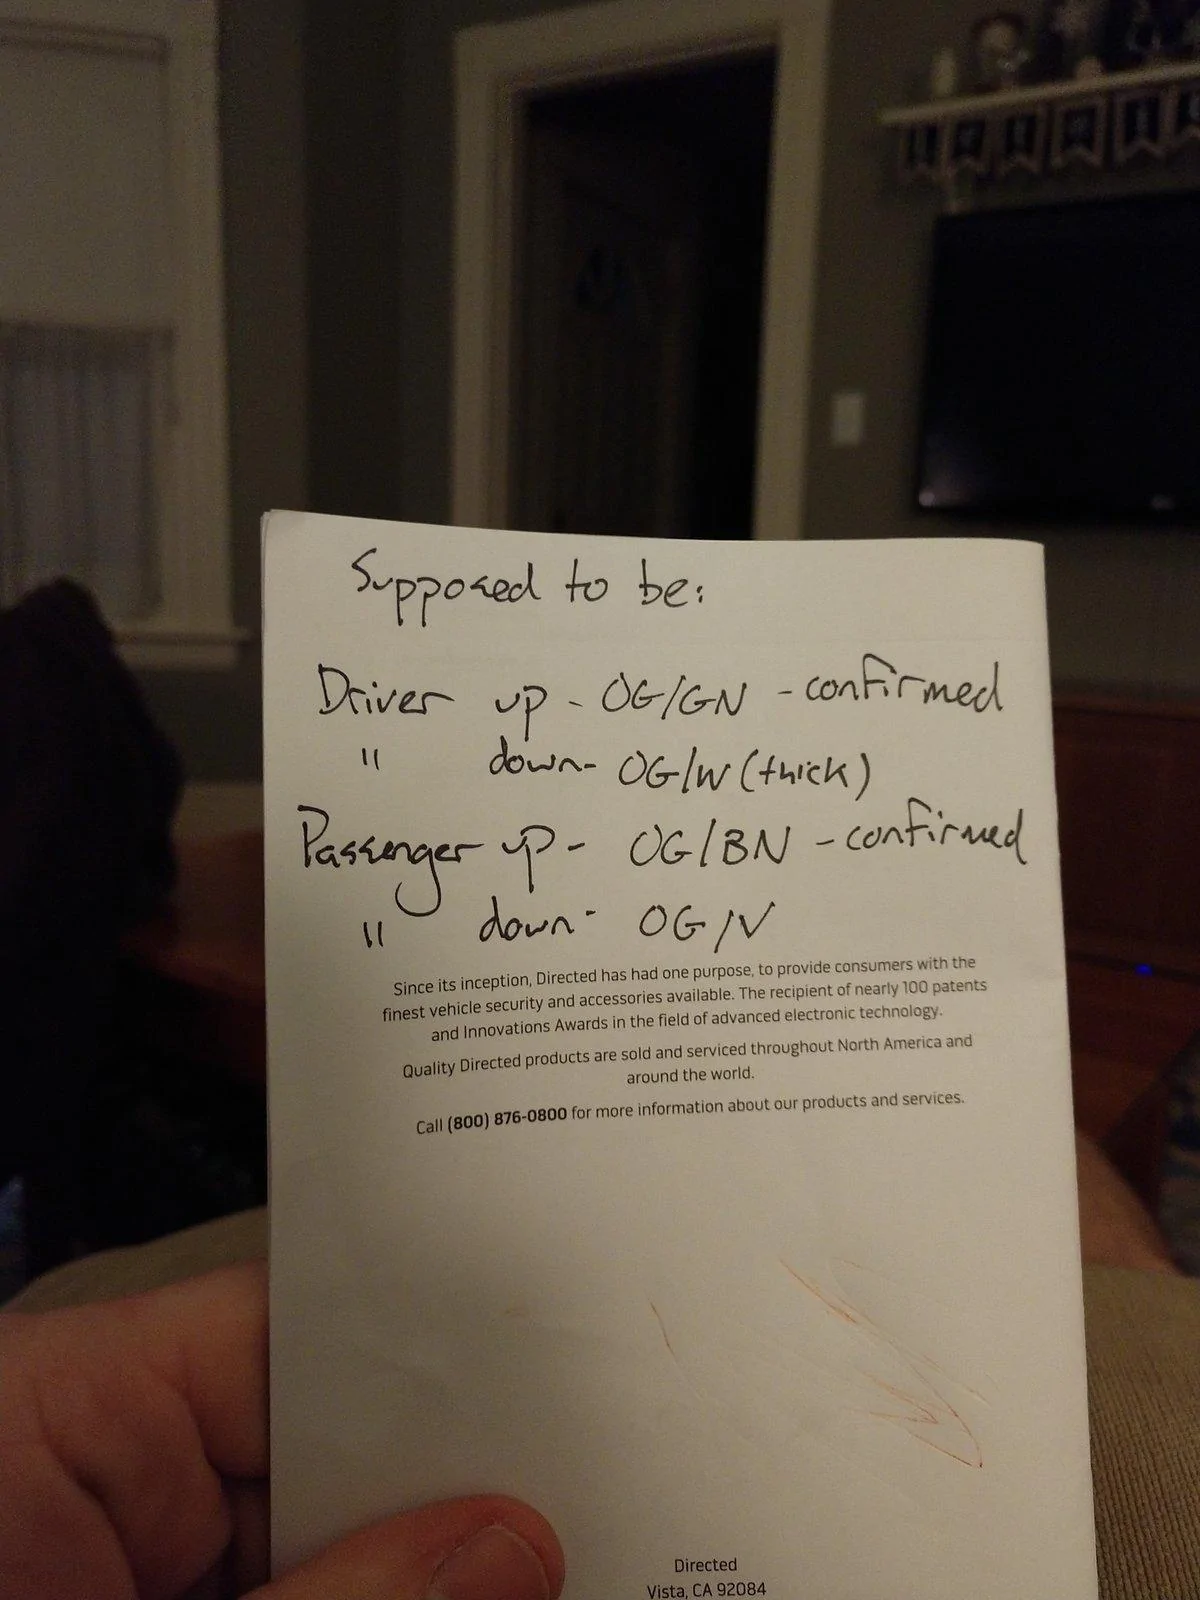
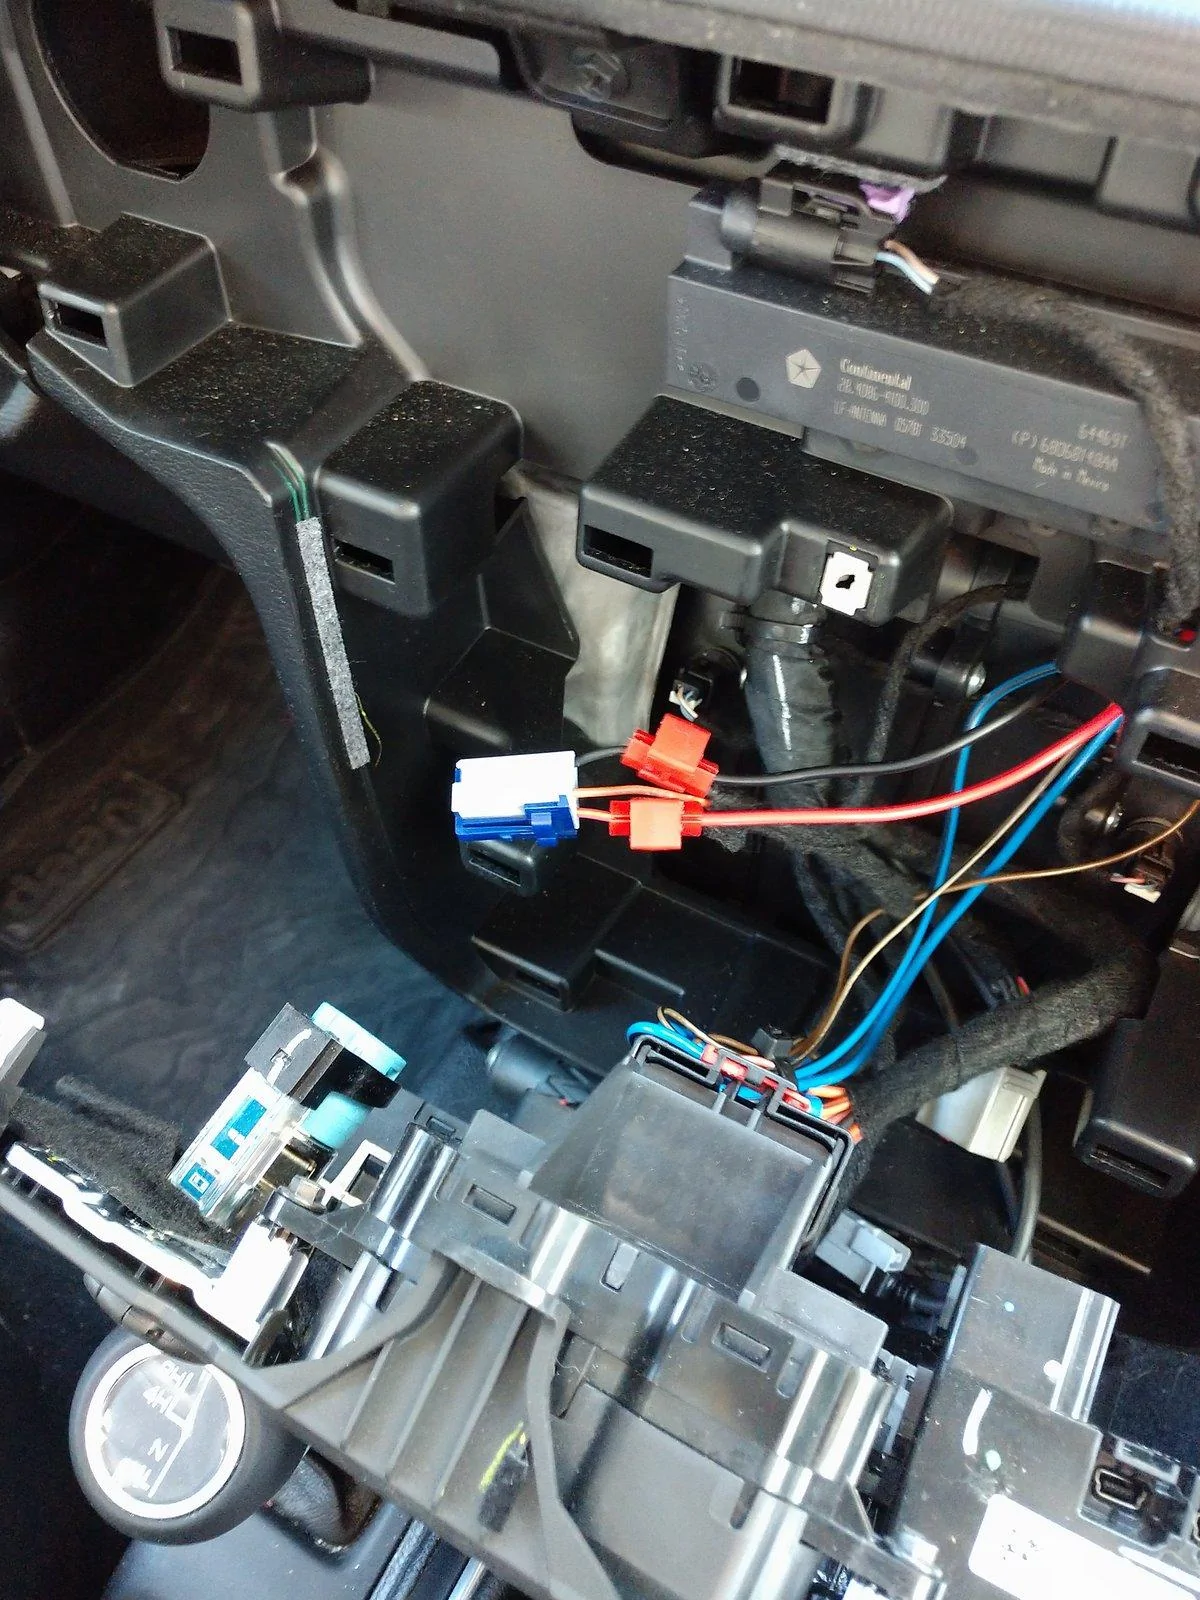
Once the dash was open all I did for the stock window wiring was confirm the two wires he'd identified as driver and passenger UP.

Once I had those identified I started sorting out the wiring on the 535T module. At first look the kit appears super intimidating given the sheer number of wires but several aren't used and several are common grounds that I twined together to a single ground which makes it way easier.
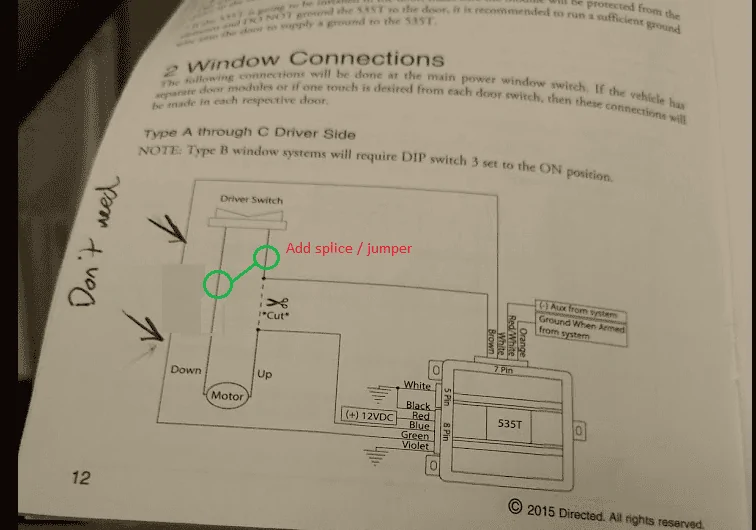
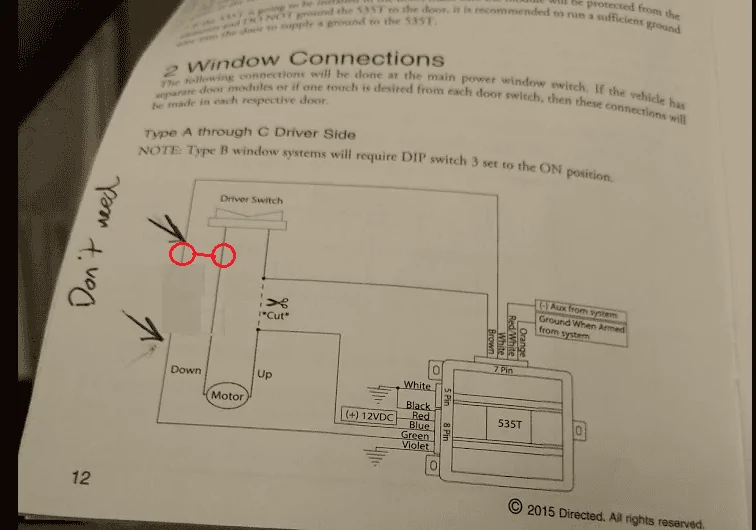
Above are the wiring diagrams from the manual. A couple notes: you won't use the "ground when armed from system" orange wire, and the red/white "(-) aux from system" wire is only connected to ground during programming; after that I taped up the lead and zip tied it out of the way.
There IS a programming step but it's super simple; more on that later.
A note about the dip switches on the module: all remain off (up position); no need to move any of them.
Regarding mounting location I also put it behind the glovebox; I basically zip tied it to a one of the silver AC tubes; there's a picture way below.
Regarding power and ground, both I got by tapping into the 12v port in the dash; it was easy and right there. Black was ground and 12v was the pink/yellow line. Obviously verify this for yourself.
You'll note I have what looks like a single ground; like I mentioned previously I spliced and the grounds into a single bunch and then connected them to a single black wire which I ran to ground.
Here are all the grounds twined together.
All connections I also wrapped in electrical tape and zip tied everything all over the place to help with strain relief.
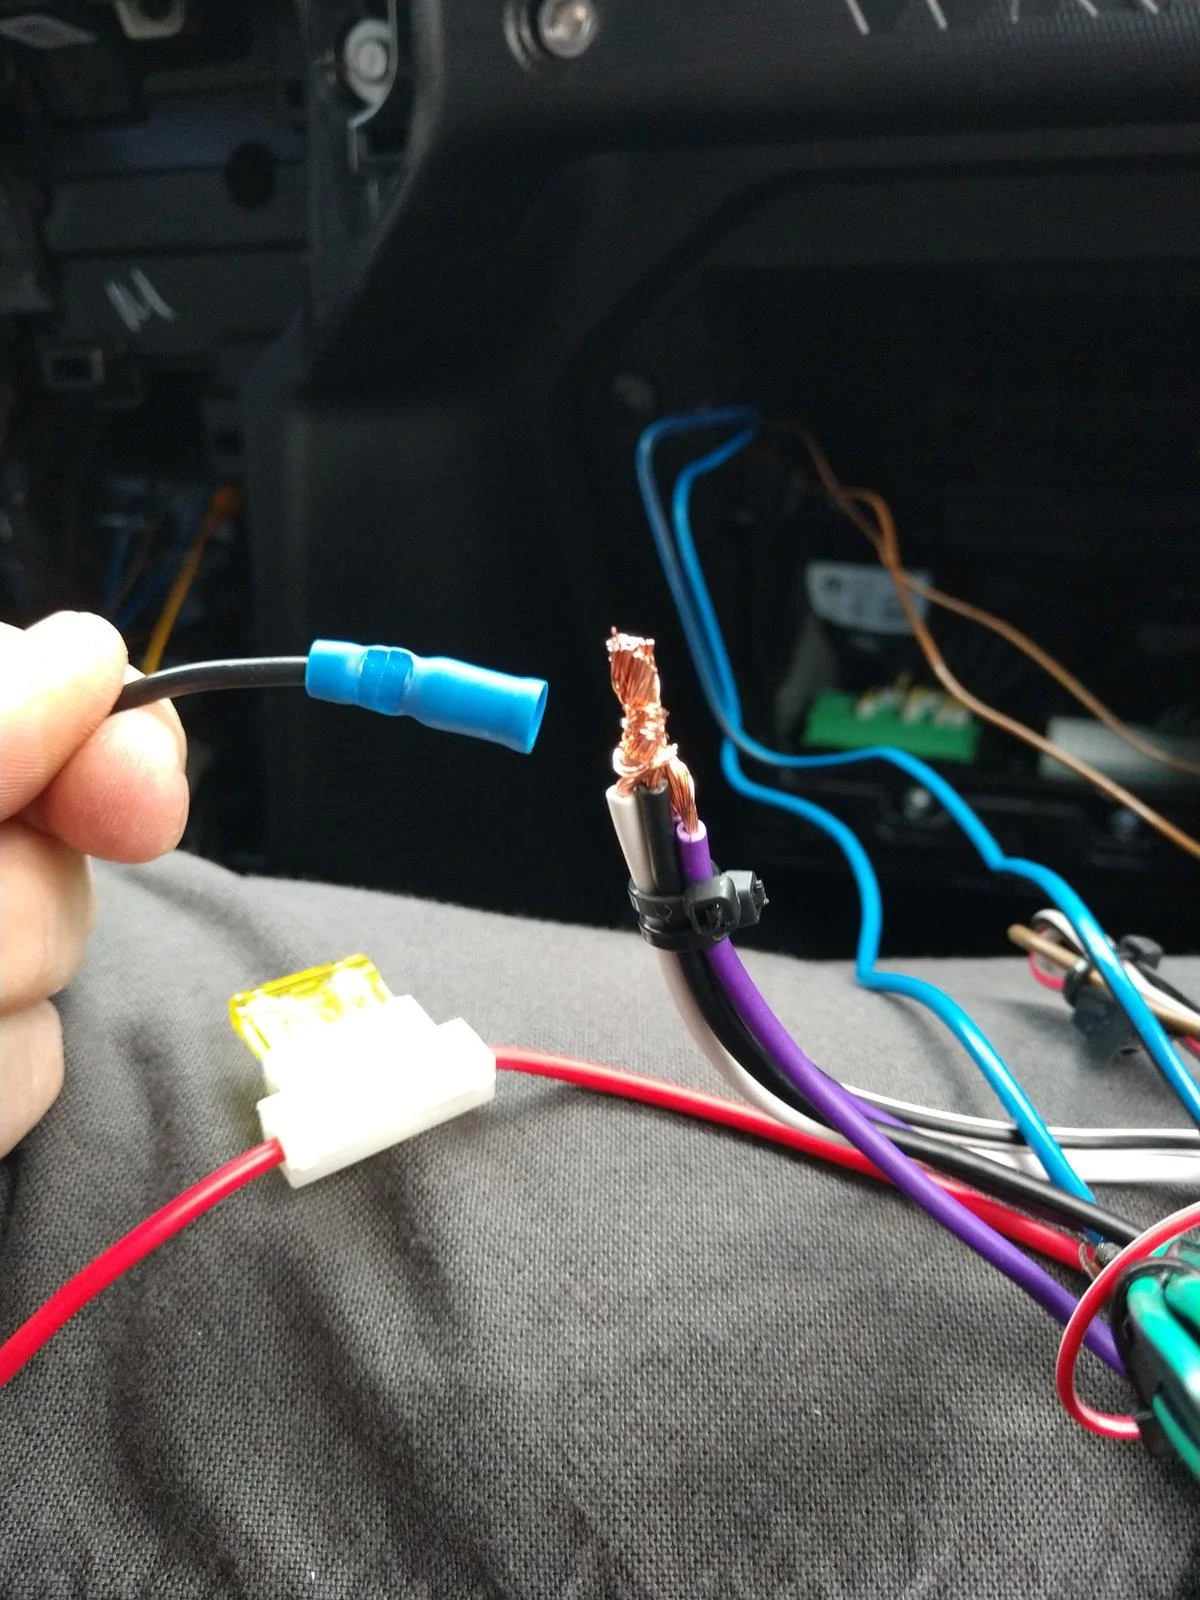
When it came to actually splicing into the window switch wires it was anticlimactic. I cut each one and added bullet connectors, such that if I wanted to return it to stock the original wire now has a male and a female so they could go together. Then I connected the wires from the module per the instructions (like the previous poster I only wired the UP wires since it had factory Auto down. )
This picture shows pretty much the whole thing wired but before I put the module behind the glovebox. There's room for the wires to easily run behind the dash between the glovebox and the window controls. I left all wires their full length so I could easily work with the module on my lap but you could easily trim them if you want less wire hanging out back there.
Note: the yellow wire going into the dash is a wire with alligator clips on both ends I used to connect that red/white wire to ground for programming.
Here you can see the wires not used on the 8 and 5 pin connectors.
Here's where the module lives now.
That's pretty much it, hopefully I covered enough to help the next guy. All in all it took me maybe two hours, and I took my time to keep wiring and connections relatively neat and tidy.
When it came to the programming step it was pretty straightforward. Connect that red/white wire to ground and turn on the Jeep. Hold the switch to put the drivers window up, then don't touch anything (this wasn't 100% clear from the instructions). It'll cycle both windows up and down at least once, and it took longer than you'd expect between when you let go of the switch and it does its thing. The first time I messed it up because I assumed it was finished and hit the button, exiting programming mode.
Good luck, and let me know if there are any questions.
Once the dash was open all I did for the stock window wiring was confirm the two wires he'd identified as driver and passenger UP.
Once I had those identified I started sorting out the wiring on the 535T module. At first look the kit appears super intimidating given the sheer number of wires but several aren't used and several are common grounds that I twined together to a single ground which makes it way easier.
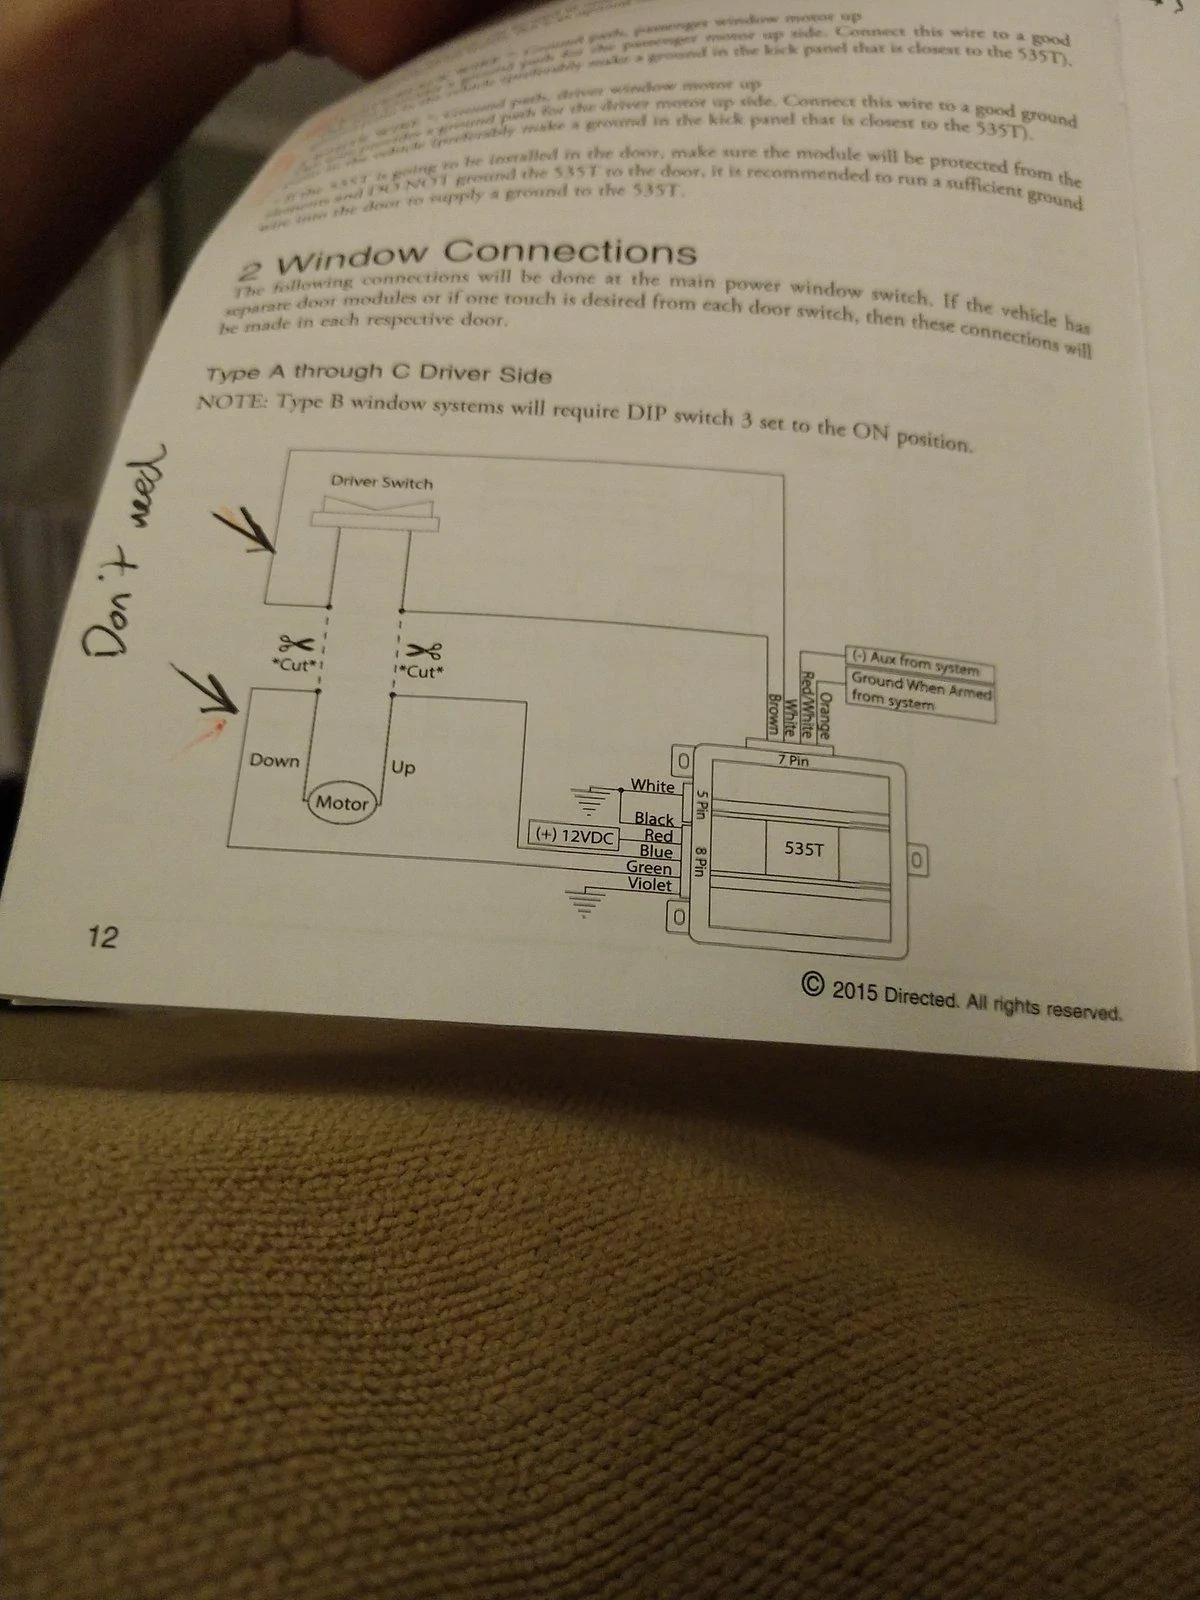
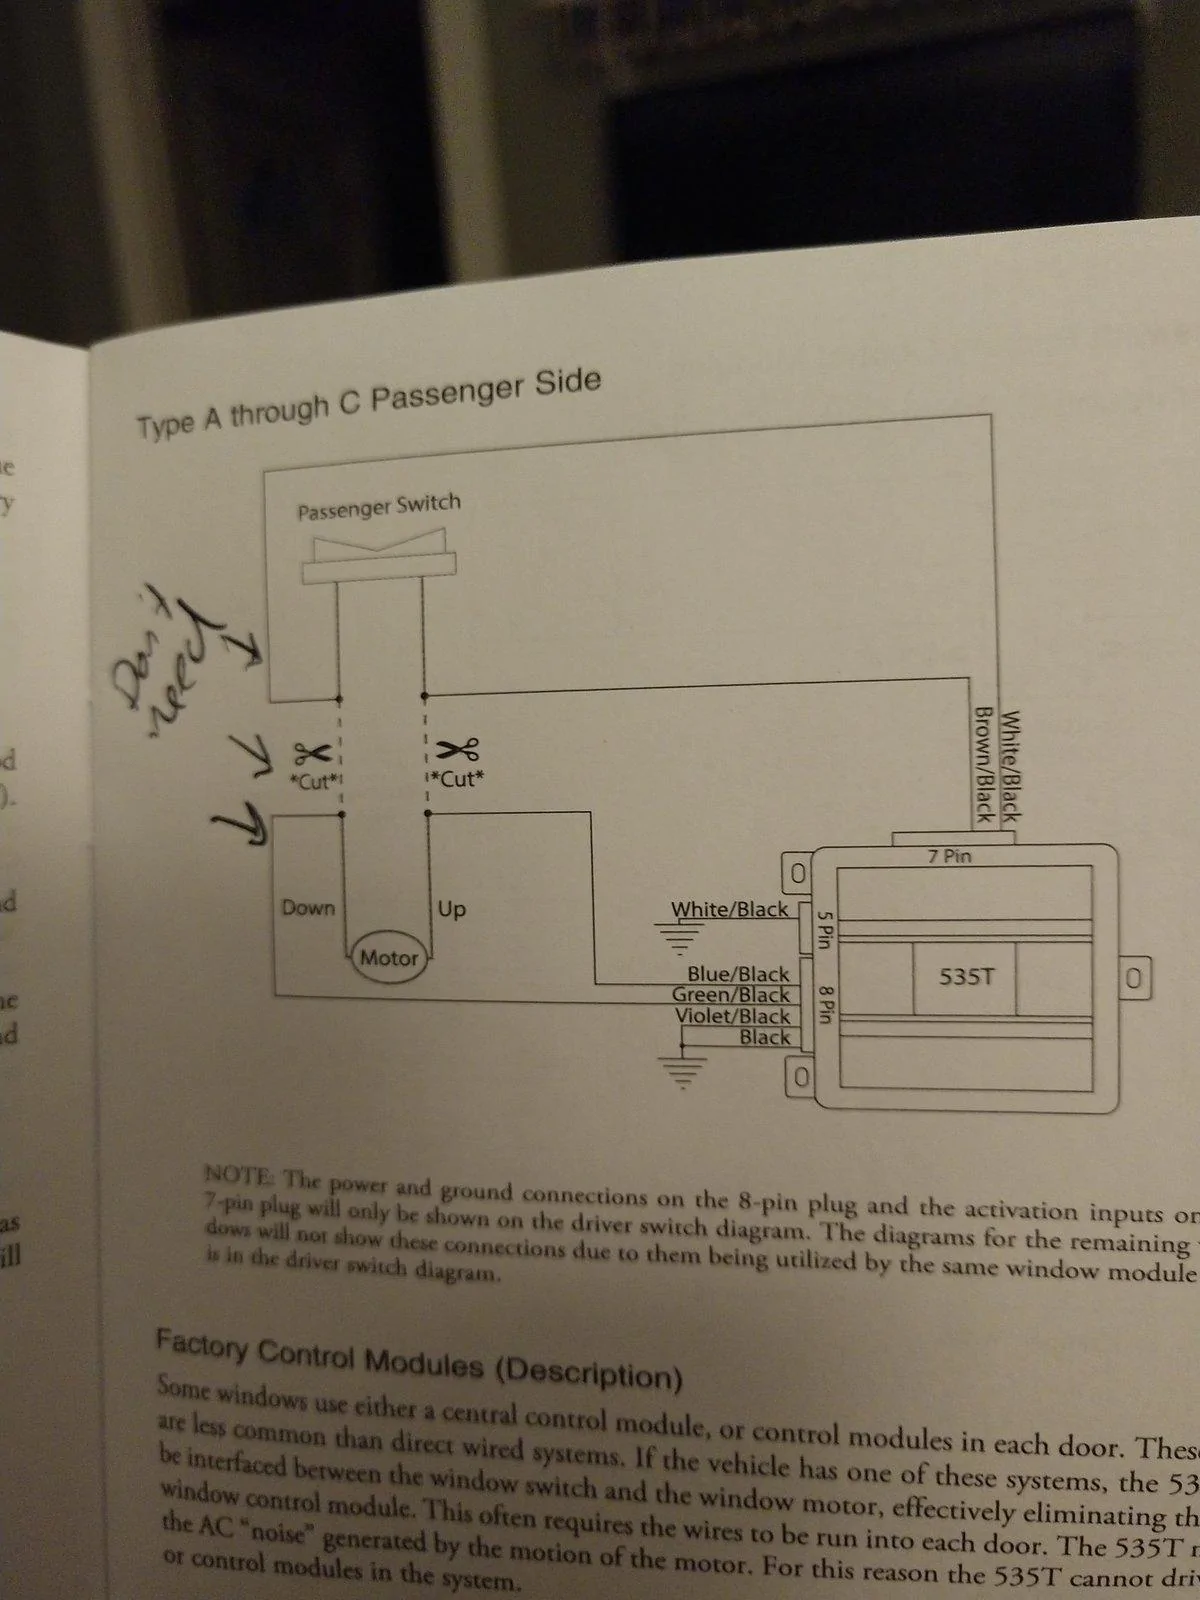
Above are the wiring diagrams from the manual. A couple notes: you won't use the "ground when armed from system" orange wire, and the red/white "(-) aux from system" wire is only connected to ground during programming; after that I taped up the lead and zip tied it out of the way.
There IS a programming step but it's super simple; more on that later.
A note about the dip switches on the module: all remain off (up position); no need to move any of them.
Regarding mounting location I also put it behind the glovebox; I basically zip tied it to a one of the silver AC tubes; there's a picture way below.
Regarding power and ground, both I got by tapping into the 12v port in the dash; it was easy and right there. Black was ground and 12v was the pink/yellow line. Obviously verify this for yourself.
You'll note I have what looks like a single ground; like I mentioned previously I spliced and the grounds into a single bunch and then connected them to a single black wire which I ran to ground.
Here are all the grounds twined together.
All connections I also wrapped in electrical tape and zip tied everything all over the place to help with strain relief.
When it came to actually splicing into the window switch wires it was anticlimactic. I cut each one and added bullet connectors, such that if I wanted to return it to stock the original wire now has a male and a female so they could go together. Then I connected the wires from the module per the instructions (like the previous poster I only wired the UP wires since it had factory Auto down. )

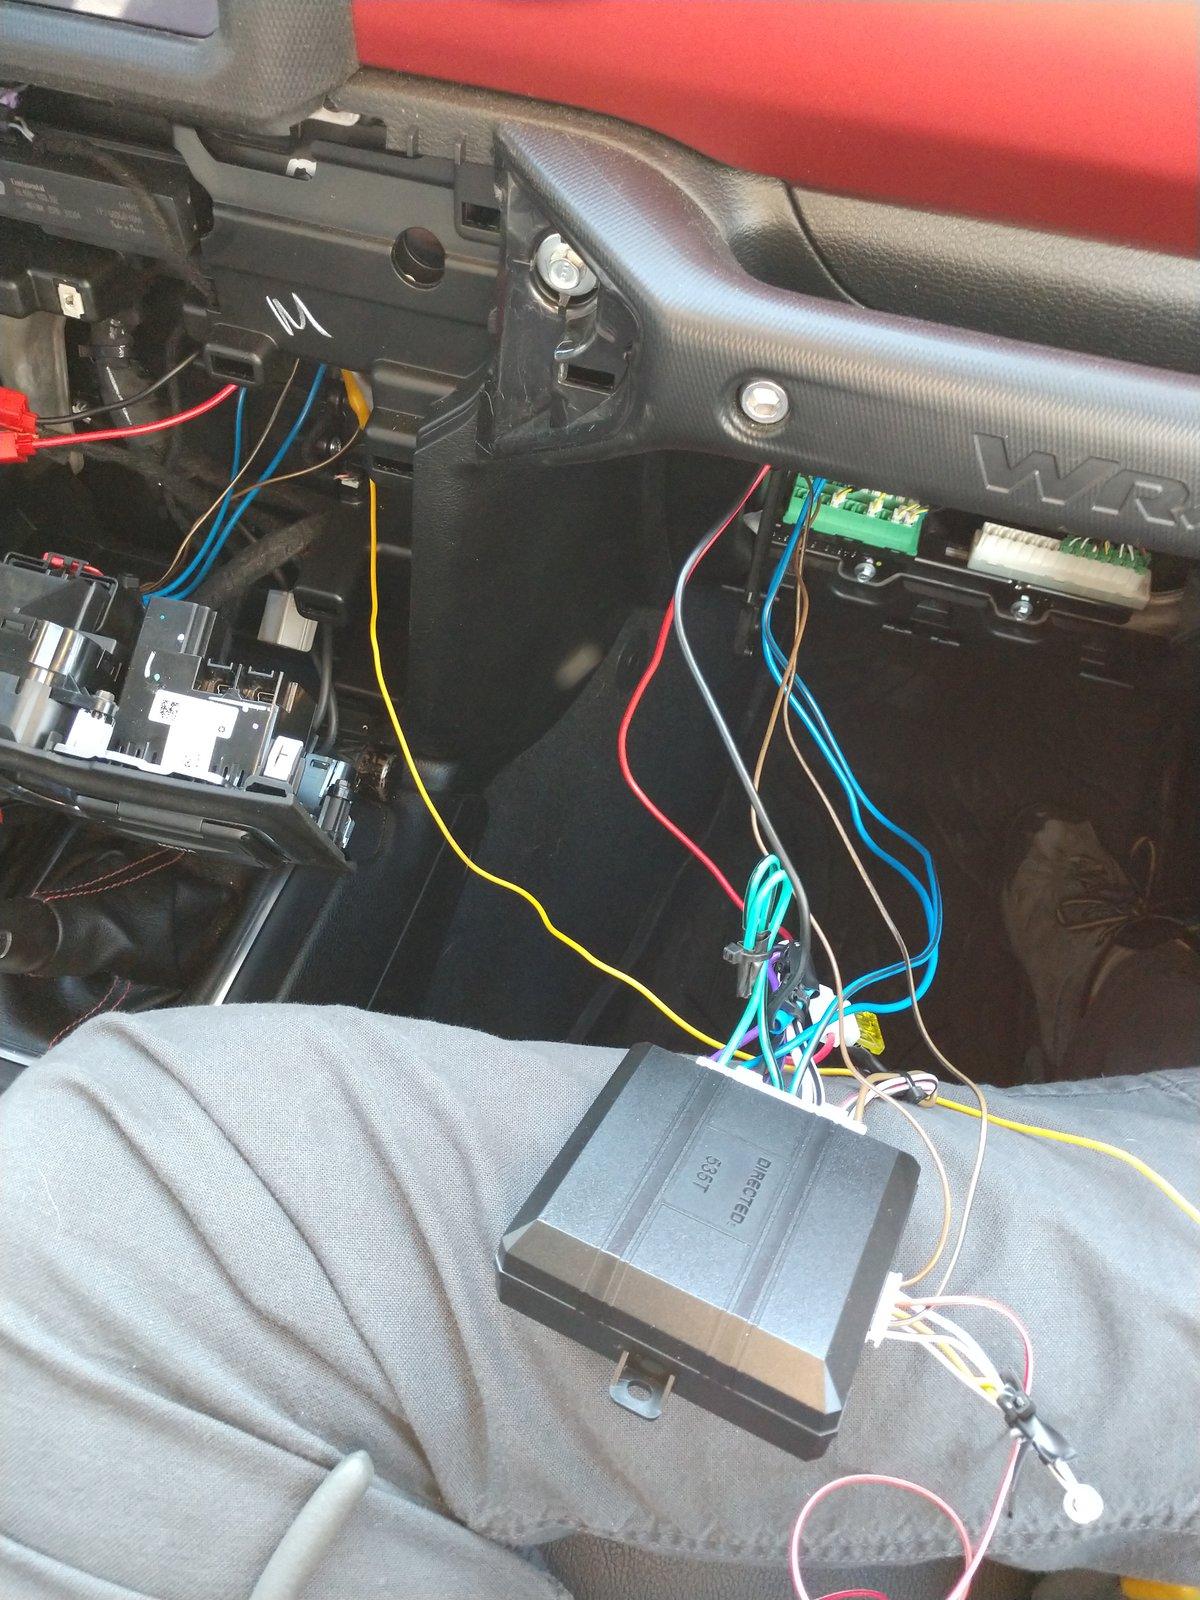
Note: the yellow wire going into the dash is a wire with alligator clips on both ends I used to connect that red/white wire to ground for programming.
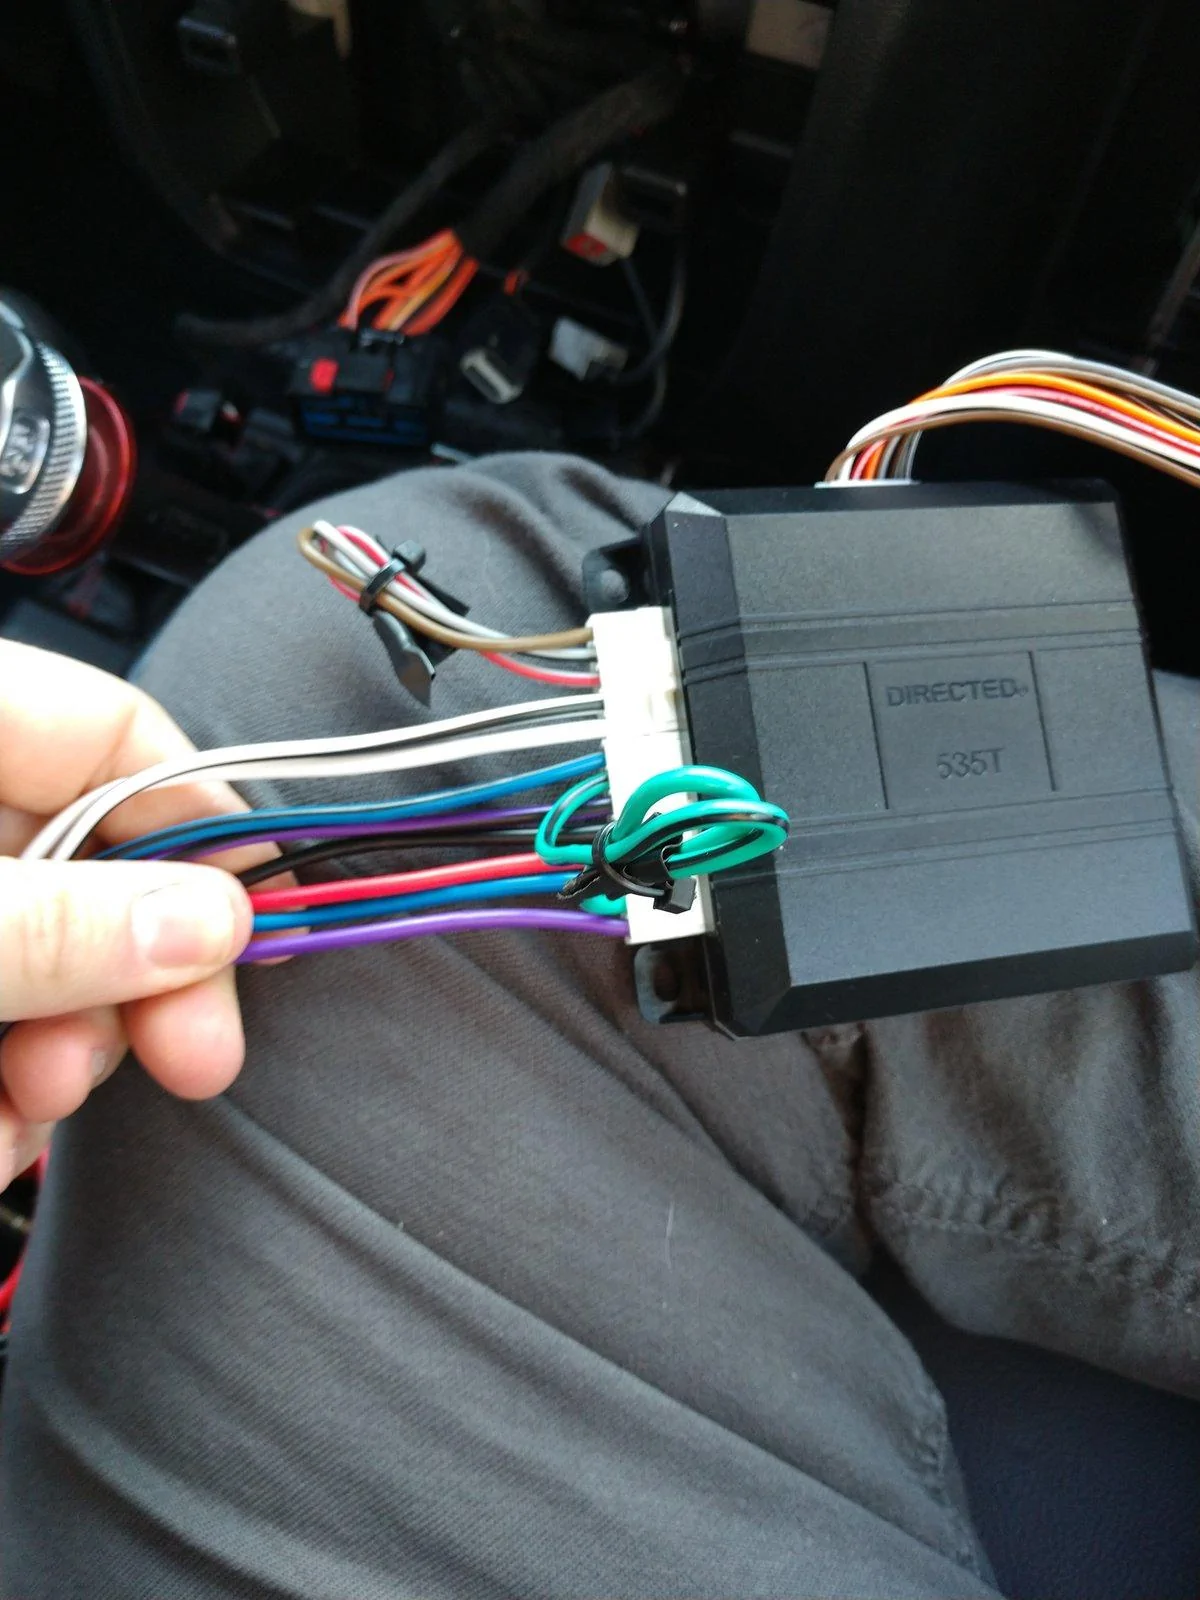
Here you can see the wires not used on the 8 and 5 pin connectors.

Here's where the module lives now.
That's pretty much it, hopefully I covered enough to help the next guy. All in all it took me maybe two hours, and I took my time to keep wiring and connections relatively neat and tidy.
When it came to the programming step it was pretty straightforward. Connect that red/white wire to ground and turn on the Jeep. Hold the switch to put the drivers window up, then don't touch anything (this wasn't 100% clear from the instructions). It'll cycle both windows up and down at least once, and it took longer than you'd expect between when you let go of the switch and it does its thing. The first time I messed it up because I assumed it was finished and hit the button, exiting programming mode.
Good luck, and let me know if there are any questions.
Sponsored
Last edited: