Mark Elliott
Well-Known Member
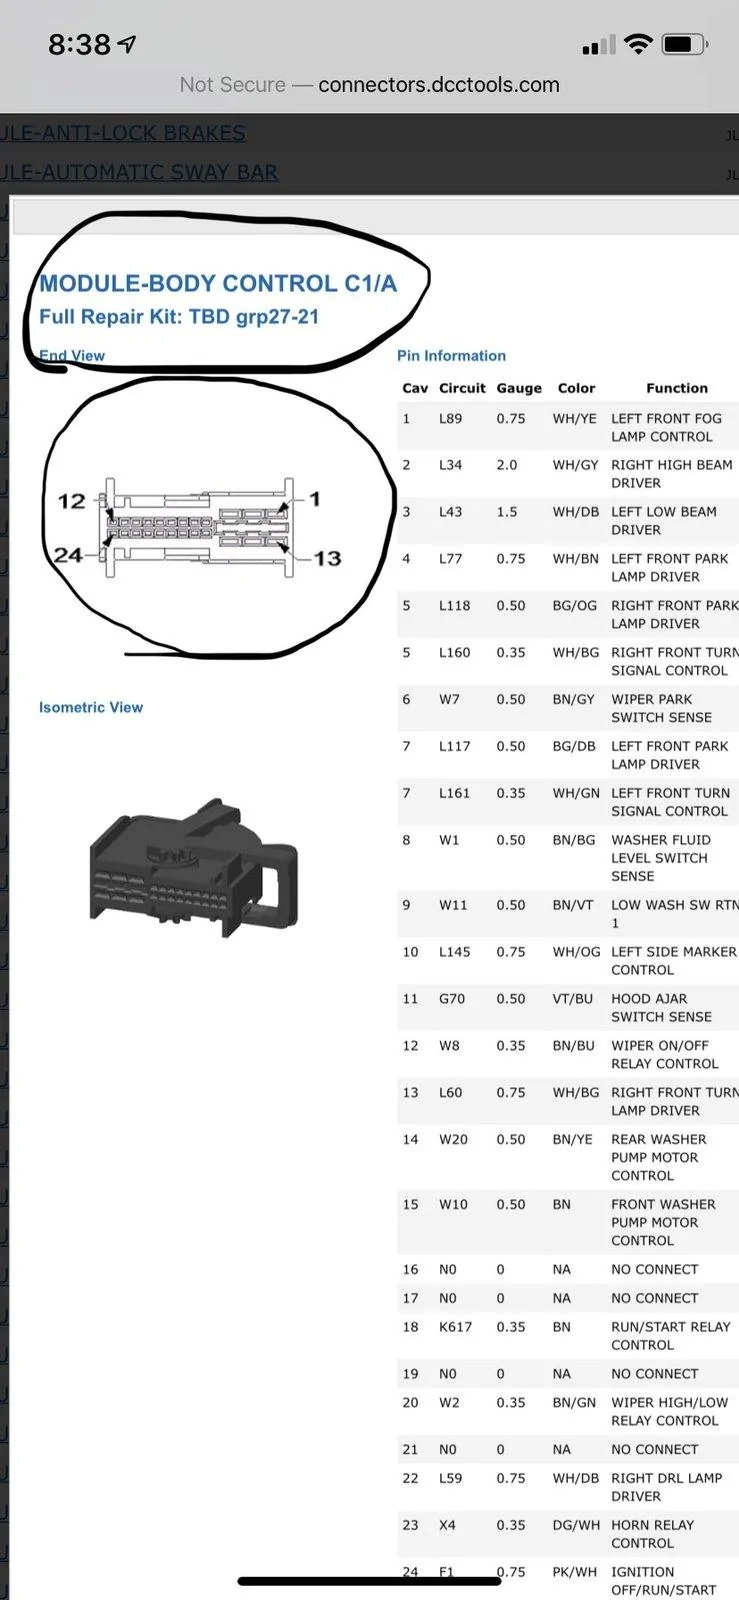
Alasek, could you maybe edit the photo of the BCM and circle the correct cavity for us about to attempt this. Thanks!
Sponsored
Should I say the diagram from the harness that I got from moparRight now it’s by the diagram in the instructions... I’m trying to figure out how to interpret the picture you posted...
Should I say the diagram from the harness that I got from mopar
Also if you disconnect the harness from the BCM and take the clip off you could see the numbers on the plugRight now it’s by the diagram in the instructions... I’m trying to figure out how to interpret the picture you posted...
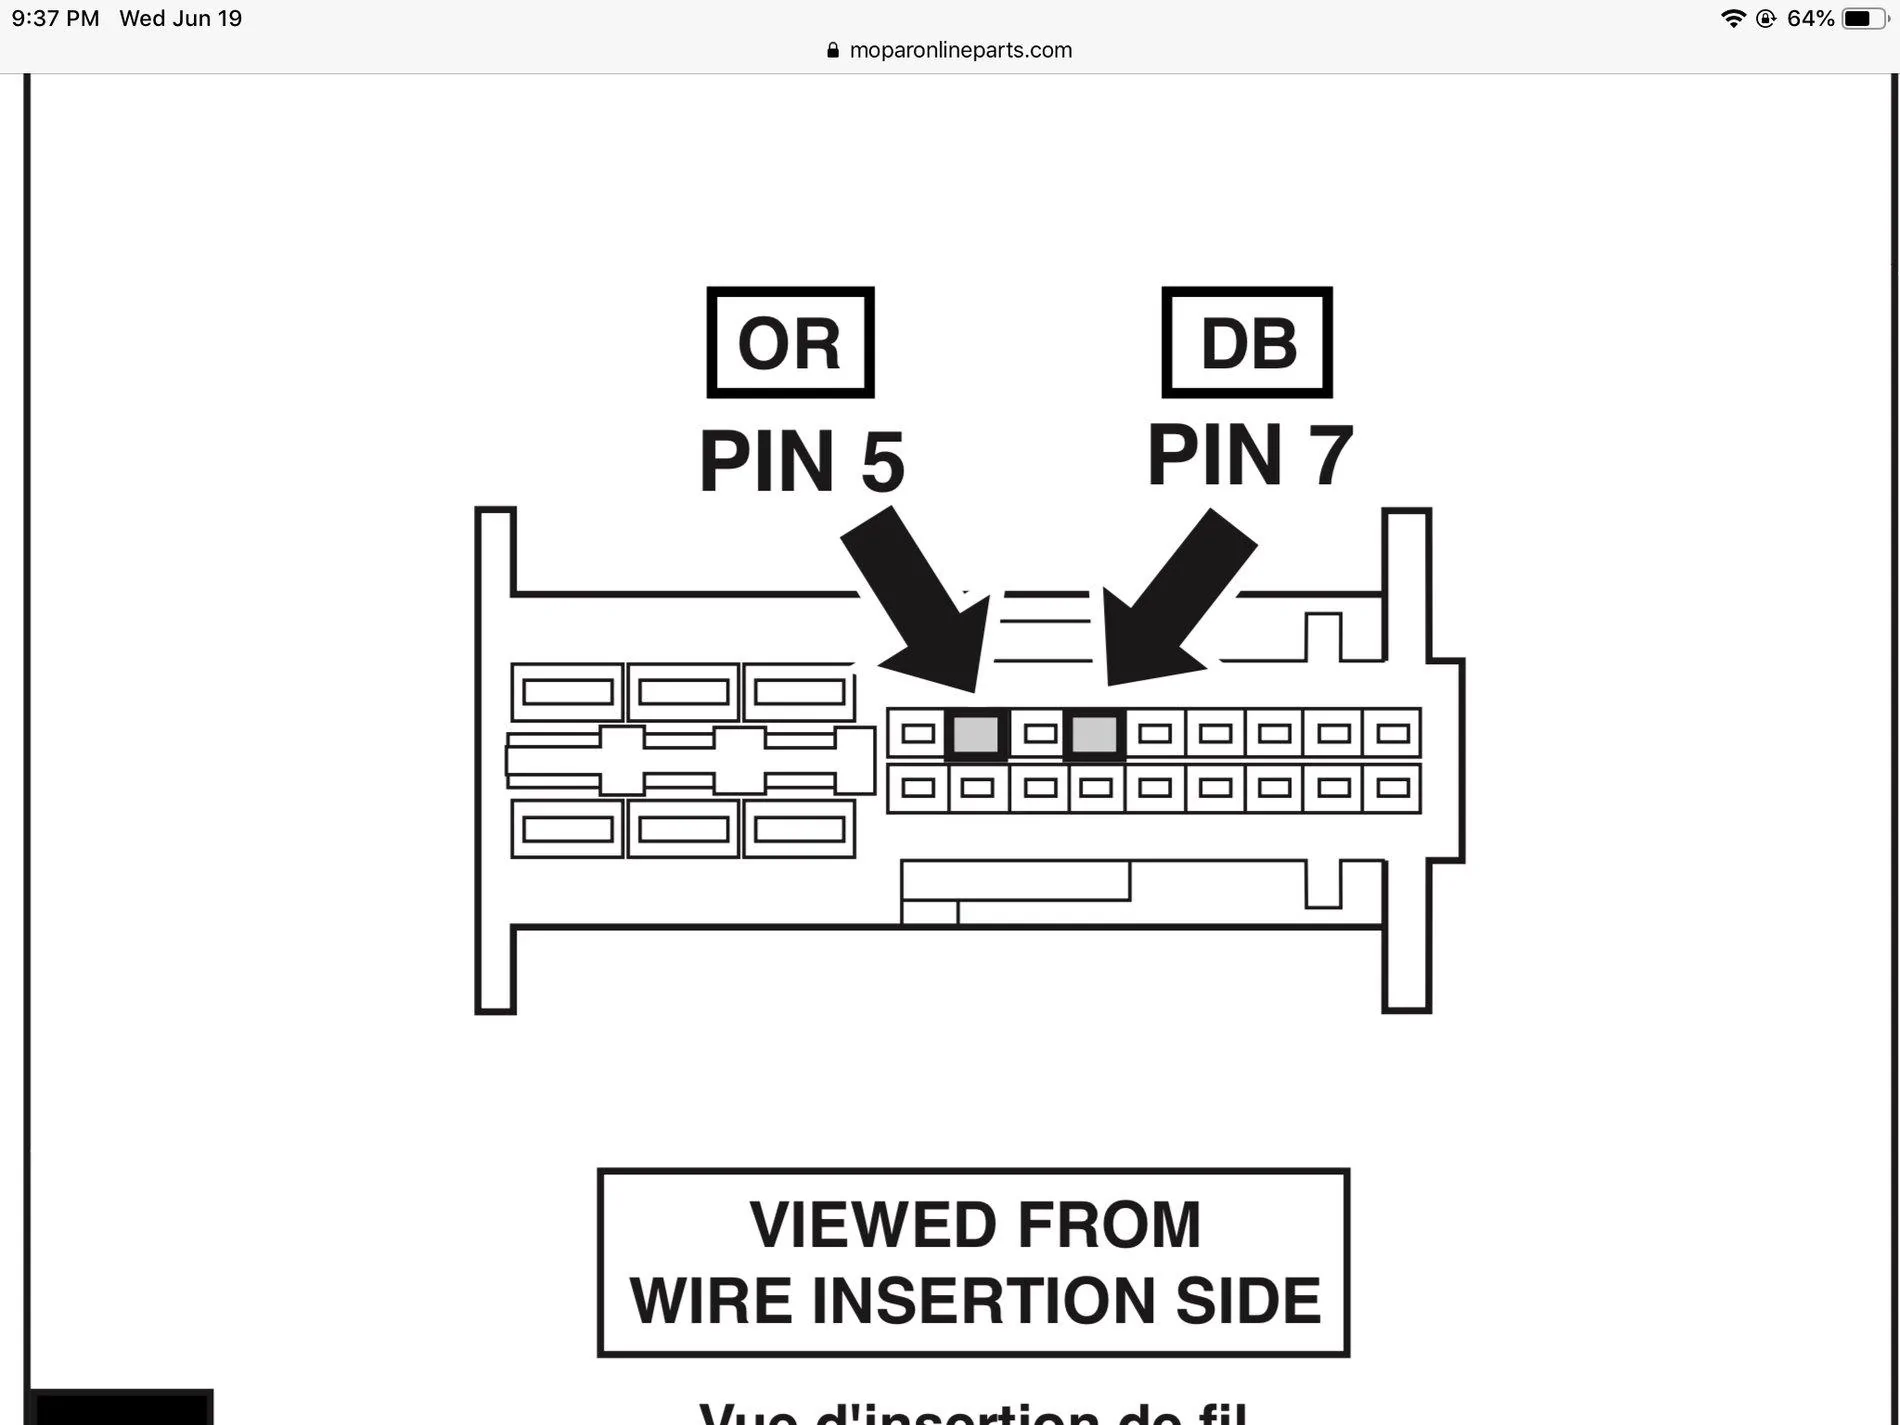
Right, I saw the numbers... I put the OG (orange-passenger) wire in the #5 spot, per the diagram and the numbers on the side, and the DB (dark blue - driver) in the #7 spot... but no halo’s working...Also if you disconnect the harness from the BCM and take the clip off you could see the numbers on the plug
I made an account as I spent all day installing mine just to answer this question. I believe what Alasek is referring to (and correct me if I'm wrong, please) is that the instructions have the module picture upside down and are pointing out the wrong connection points because of it.Right, I saw the numbers... I put the OG (orange-passenger) wire in the #5 spot, per the diagram and the numbers on the side, and the DB (dark blue - driver) in the #7 spot... but no halo’s working...
So did you do something different from that to get yours to work?
Go byI made an account as I spent all day installing mine just to answer this question. I believe what Alasek is referring to (and correct me if I'm wrong, please) is that the instructions have the module picture upside down and are pointing out the wrong connection points because of it.
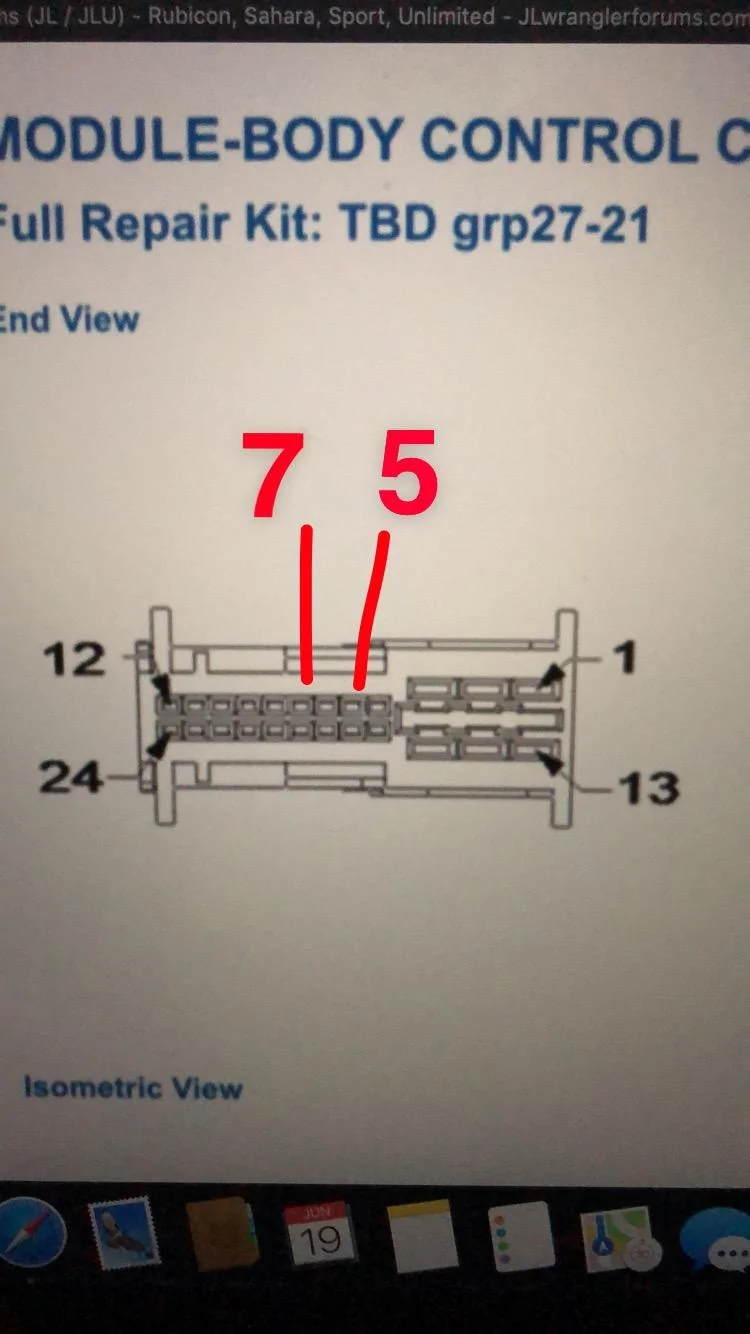
Here are some picture comparing the two.
First the manual.

Notice the orientation of the module (fat part to the left)
Now the online form that Alasek found with what should be #5 and #7 pointed out.

Again, notice the orientation of the module (fat part to the right). Could be a simple misprint on Mopar's part.
I have yet to actually test any of this as one of my lights was busted in the back (Steve Whites is coming to the rescue hopefully).
yeah follow the online form and like I said the harness or plug whatever you wanna call it there’s numbers tooI made an account as I spent all day installing mine just to answer this question. I believe what Alasek is referring to (and correct me if I'm wrong, please) is that the instructions have the module picture upside down and are pointing out the wrong connection points because of it.
Here are some picture comparing the two.
First the manual.
Notice the orientation of the module (fat part to the left)
Now the online form that Alasek found with what should be #5 and #7 pointed out.
Again, notice the orientation of the module (fat part to the right). Could be a simple misprint on Mopar's part.
I have yet to actually test any of this as one of my lights was busted in the back (Steve Whites is coming to the rescue hopefully).
I made an account as I spent all day installing mine just to answer this question. I believe what Alasek is referring to (and correct me if I'm wrong, please) is that the instructions have the module picture upside down and are pointing out the wrong connection points because of it.
Here are some pictures comparing the two.
First the manual.
Notice the orientation of the module (fat part to the left).
Now the online form that Alasek found with what should be #5 and #7 pointed out.
Again, notice the orientation of the module (fat part to the right). Could be a simple misprint on Mopar's part.
I have yet to actually test any of this as one of my lights was busted in the back (Steve Whites is coming to the rescue hopefully).