MikesMojito
Well-Known Member
- Thread starter
- #1
Got around to a small lunch project today and replaced my stock plastic "open" fuel fill with the MOPAR fuel door.
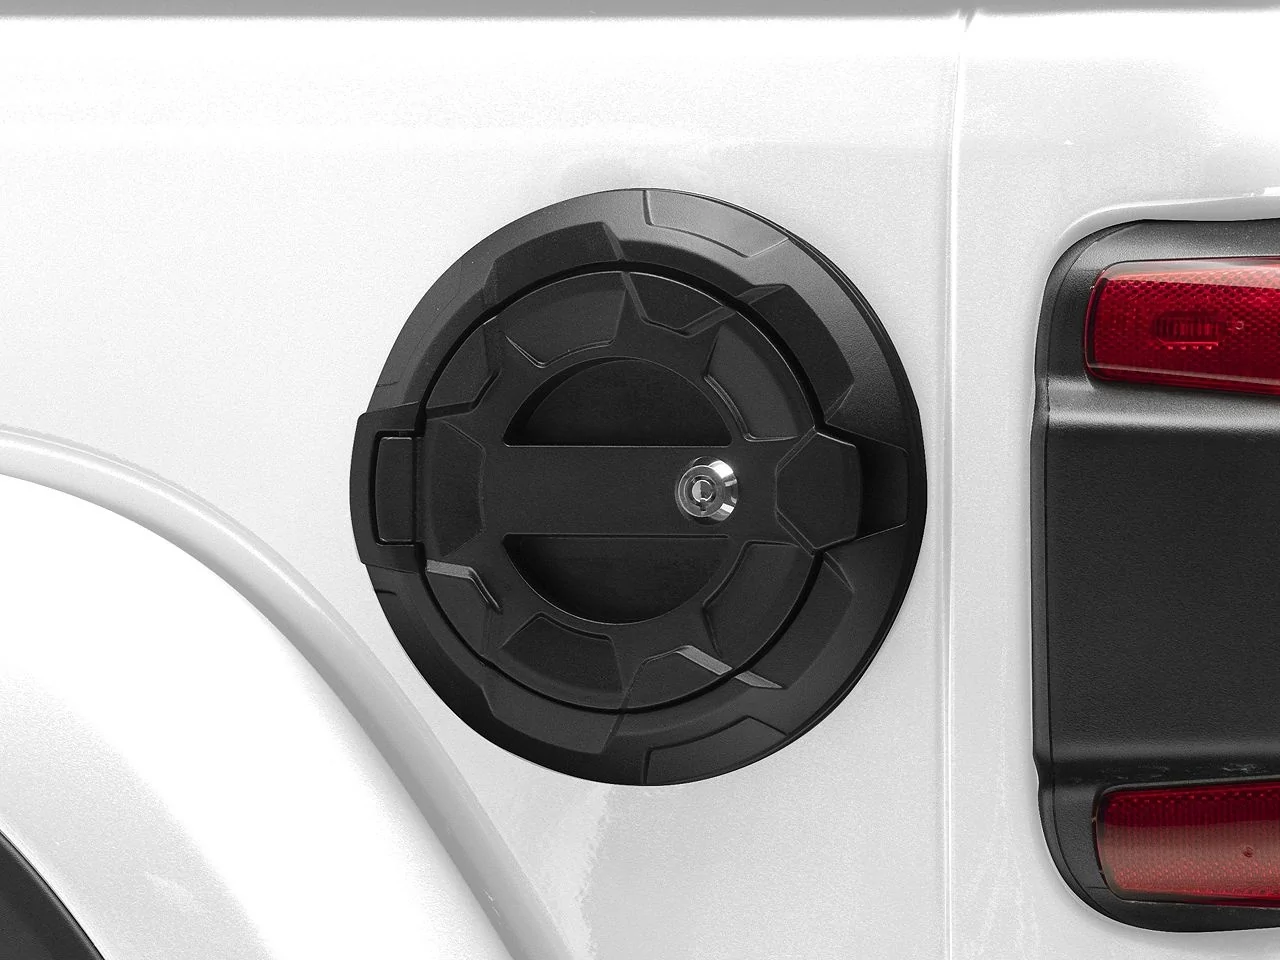
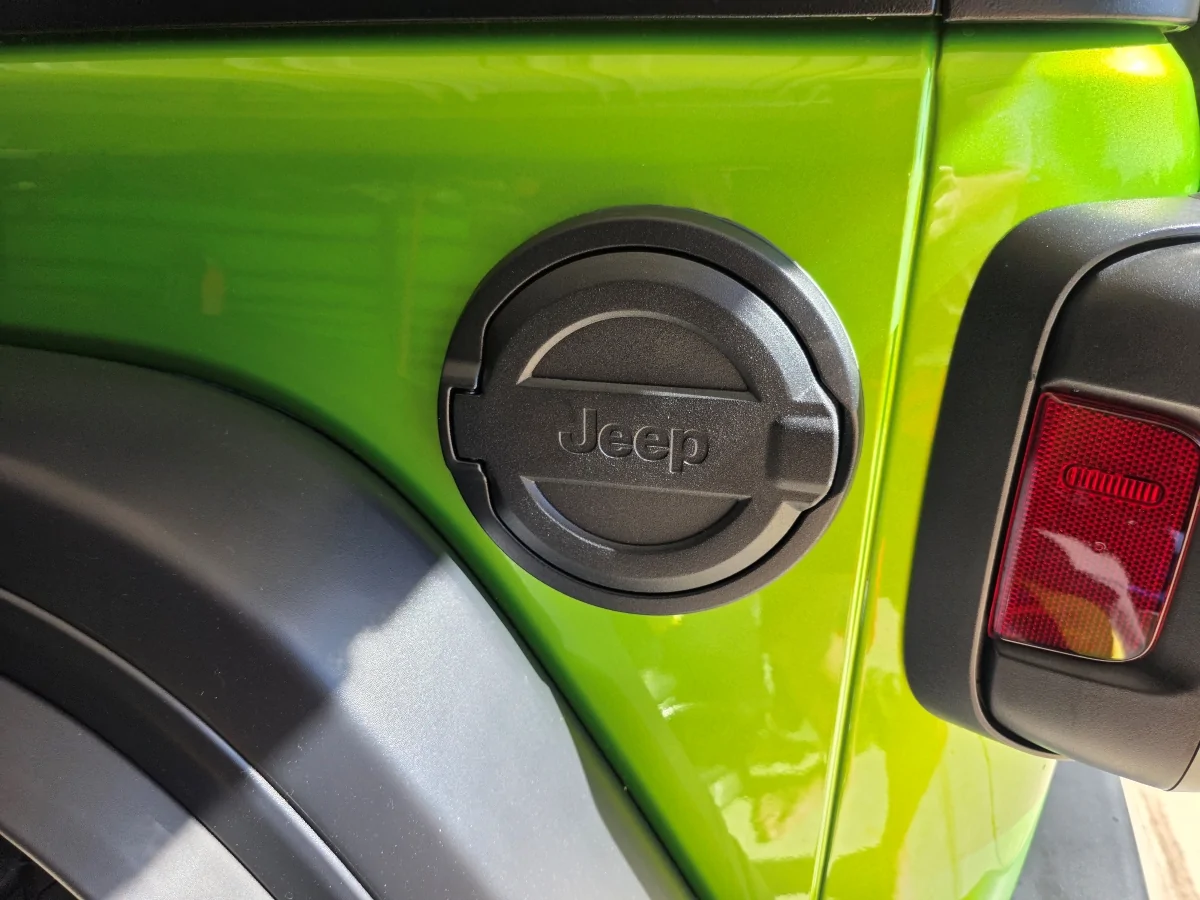
Here's the finished product, which I'm loving. If you need any tips, I've put what I learned below!

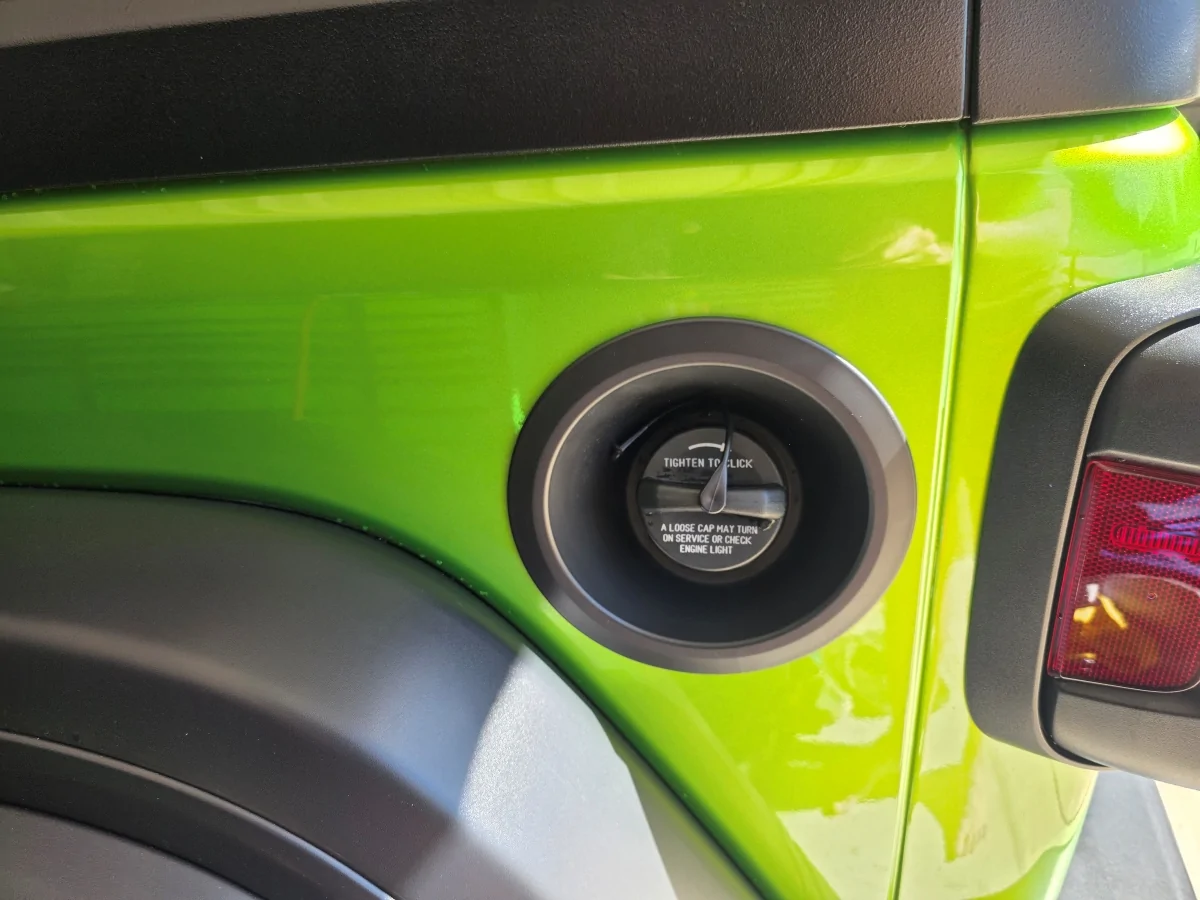
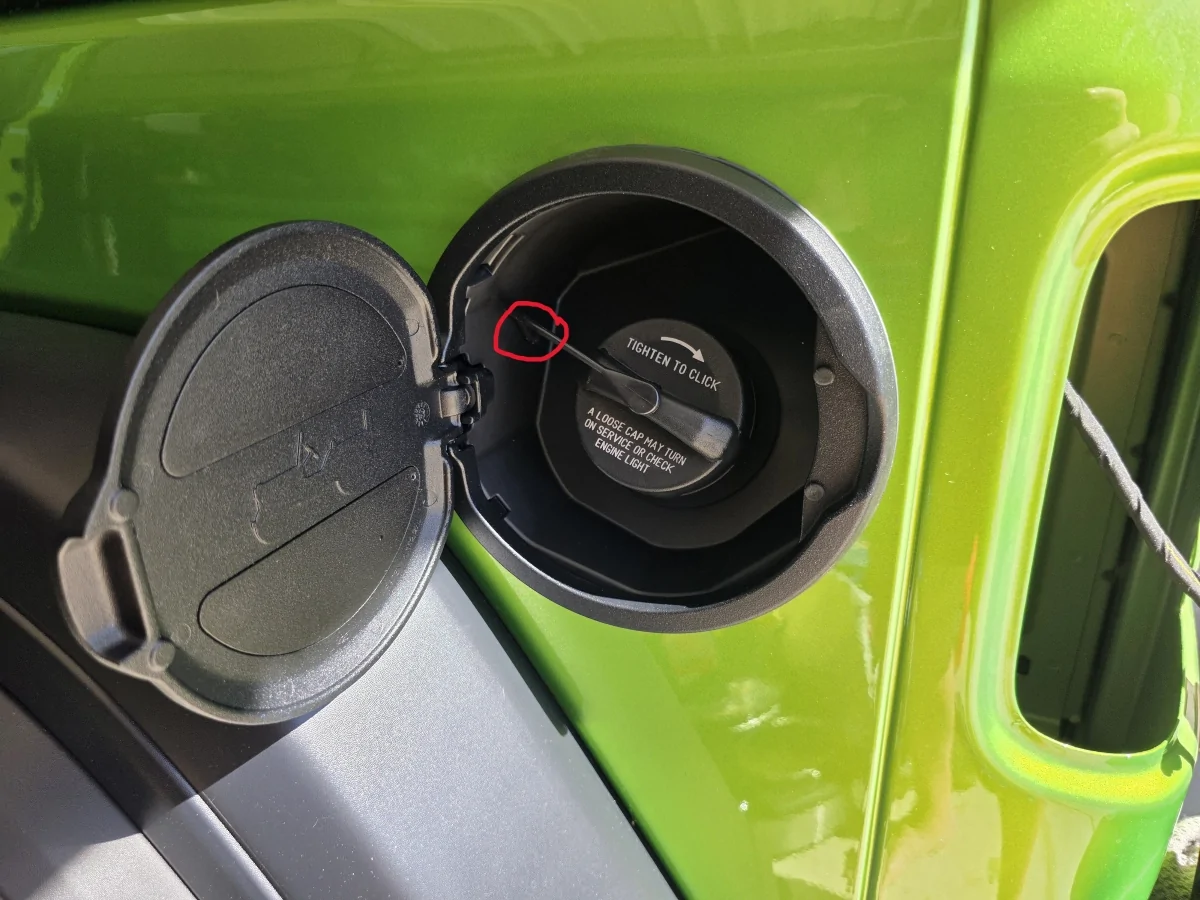
Old stock fill area:
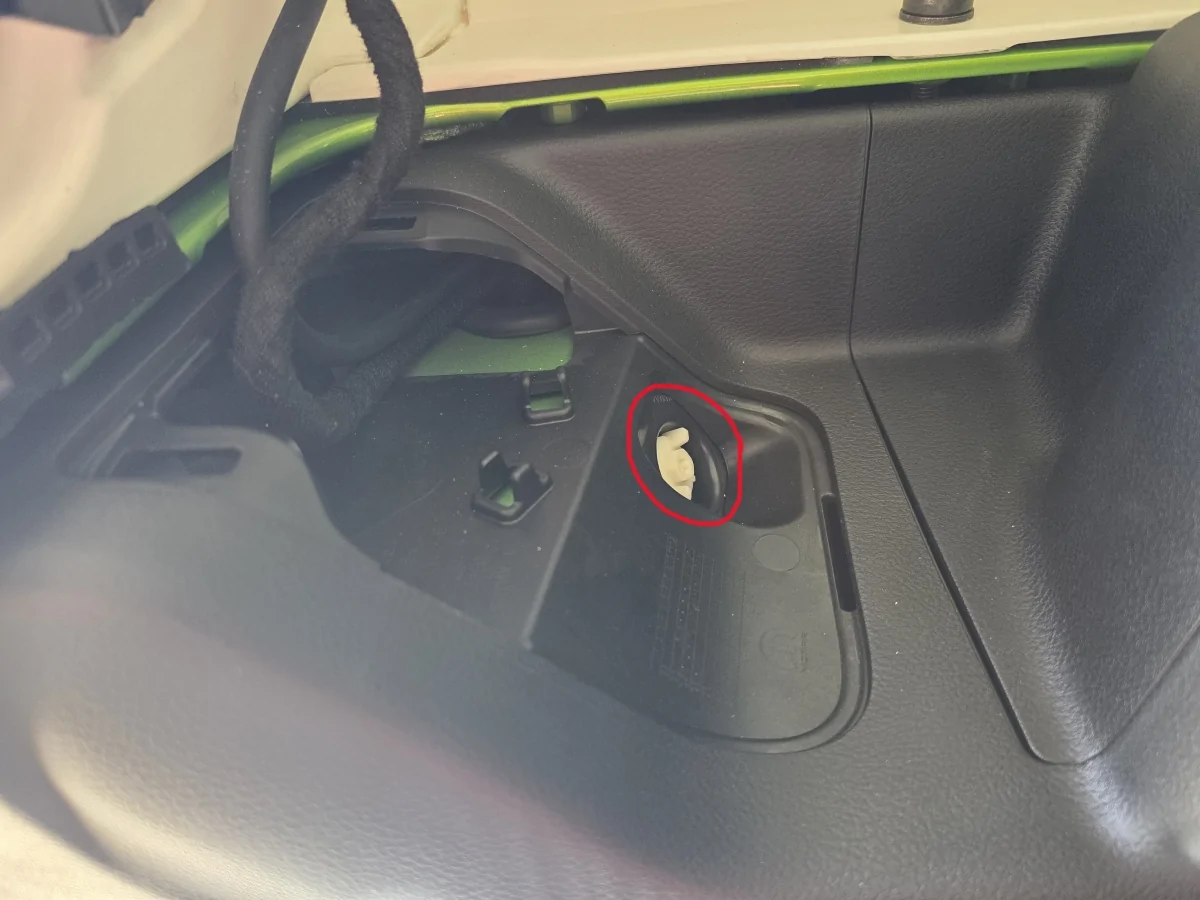
First, you need to remove the trim panel from the fuel door side. I found a flat head screwdriver, and a little persuasion worked great.
There are two tabs that pop from the top and a lip that tucks in the bottom. Lift the top, then it eases out at an angle.
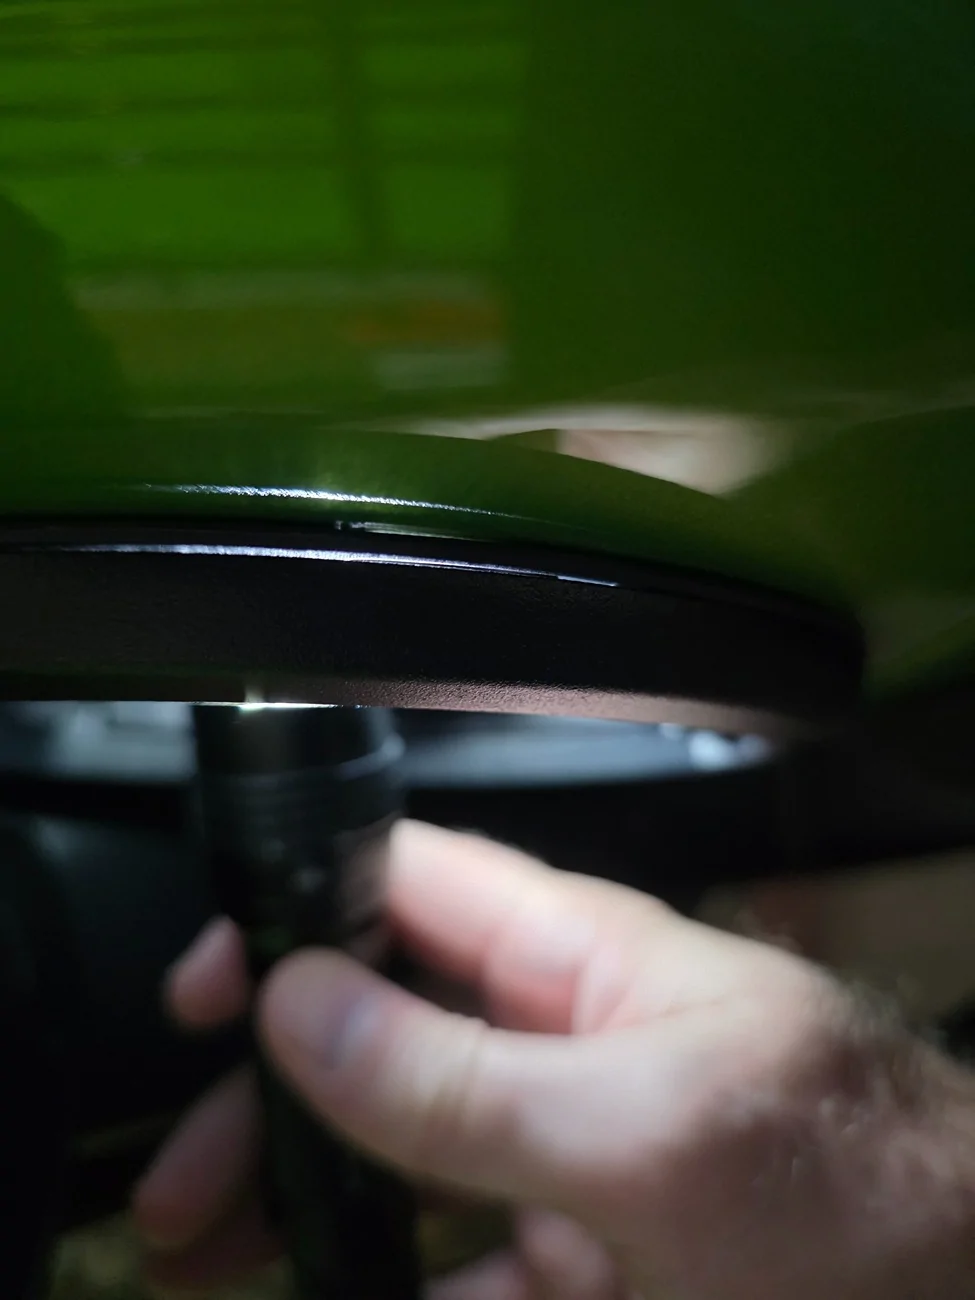
Once the trim is removed, a nylon bolt is exposed. I used a 10mm socket and ratchet and gently got it started. I was able to back it out the rest of the way with the finger tabs.

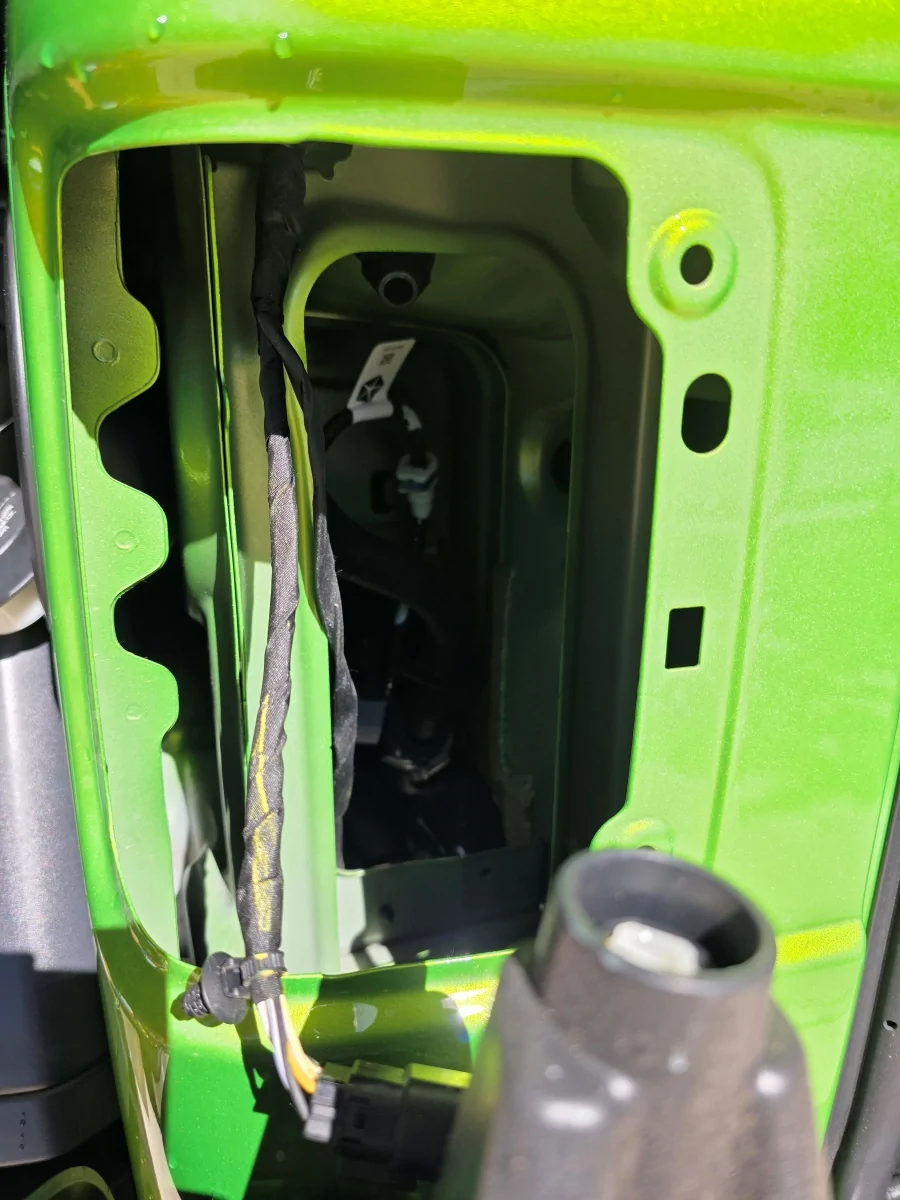
After the bolt is free, the taillight can be removed by some gentle tugging. Make sure to have something ready to assist in holding the taillight so it isn't just hanging by the wire, or just disconnect it.

After doing some reaching inside and depressing the tabs on the stock filler, it will pop out. I ended up breaking a tab, but I also don't think I'll be returning to the old part.
The fill neck pops out of a rubber or silicone sleeve; you will need to align and push it through the new sleeve on the fuel door.
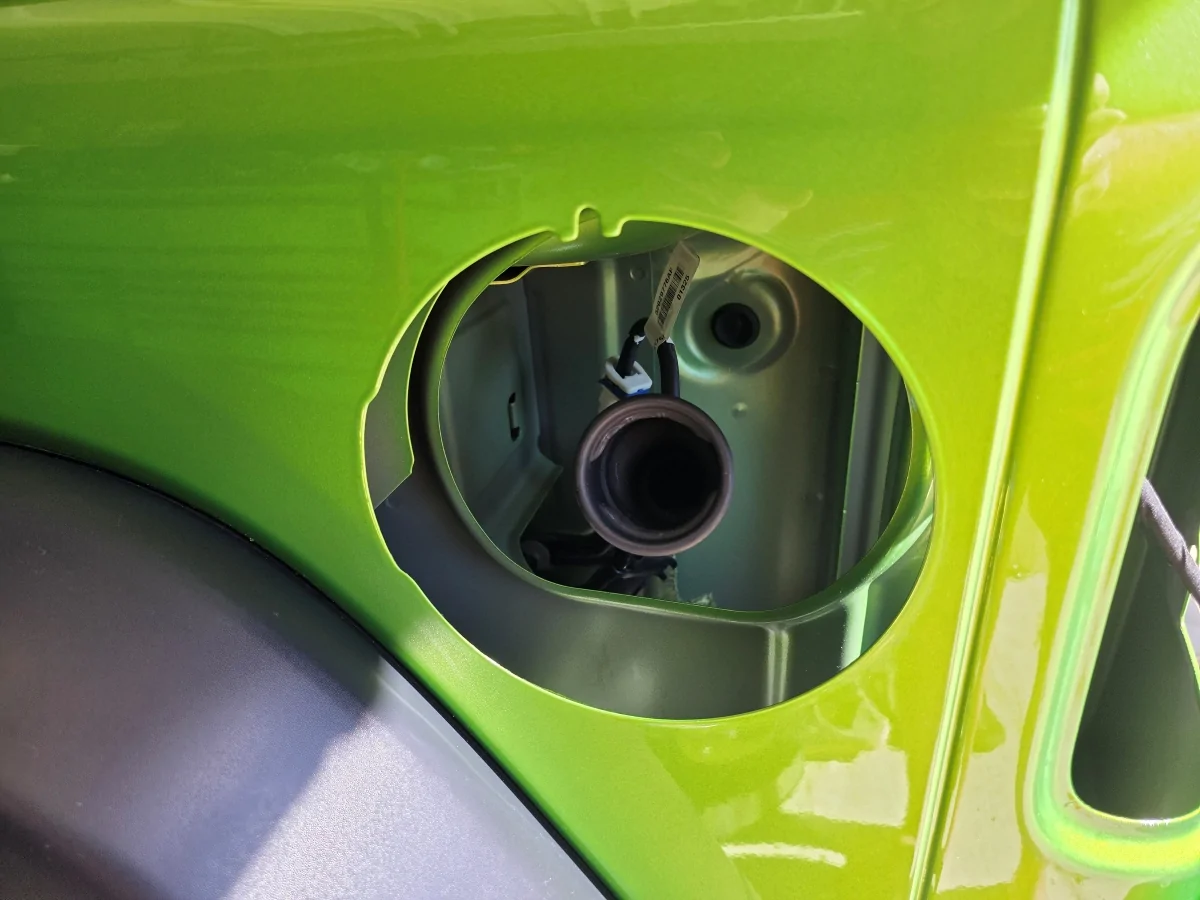
Once the new fuel door is properly aligned with the body panel using a tab on the top and popping the filler neck through, the assembly should snap right in.
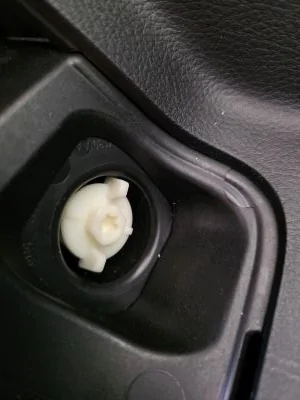
You can press the fuel cap catch into the small hole designated and reinstall the cap.
Next, in reverse order of the above, reconnect your brake light, hand align it, reinsert the nylon screw, finger-tighten, then just barely tighten with the ratchet.
Reinstall the trim bottom lip first, align your wires, and depress the top.
Test your brake lights!
Now you should be good to go and looking better to boot.
Here's the finished product, which I'm loving. If you need any tips, I've put what I learned below!

Old stock fill area:
First, you need to remove the trim panel from the fuel door side. I found a flat head screwdriver, and a little persuasion worked great.
There are two tabs that pop from the top and a lip that tucks in the bottom. Lift the top, then it eases out at an angle.
Once the trim is removed, a nylon bolt is exposed. I used a 10mm socket and ratchet and gently got it started. I was able to back it out the rest of the way with the finger tabs.

After the bolt is free, the taillight can be removed by some gentle tugging. Make sure to have something ready to assist in holding the taillight so it isn't just hanging by the wire, or just disconnect it.
After doing some reaching inside and depressing the tabs on the stock filler, it will pop out. I ended up breaking a tab, but I also don't think I'll be returning to the old part.
The fill neck pops out of a rubber or silicone sleeve; you will need to align and push it through the new sleeve on the fuel door.
Once the new fuel door is properly aligned with the body panel using a tab on the top and popping the filler neck through, the assembly should snap right in.
You can press the fuel cap catch into the small hole designated and reinstall the cap.
Next, in reverse order of the above, reconnect your brake light, hand align it, reinsert the nylon screw, finger-tighten, then just barely tighten with the ratchet.
Reinstall the trim bottom lip first, align your wires, and depress the top.
Test your brake lights!
Now you should be good to go and looking better to boot.
Sponsored