Sheepjeep
Well-Known Member
- Thread starter
- #1
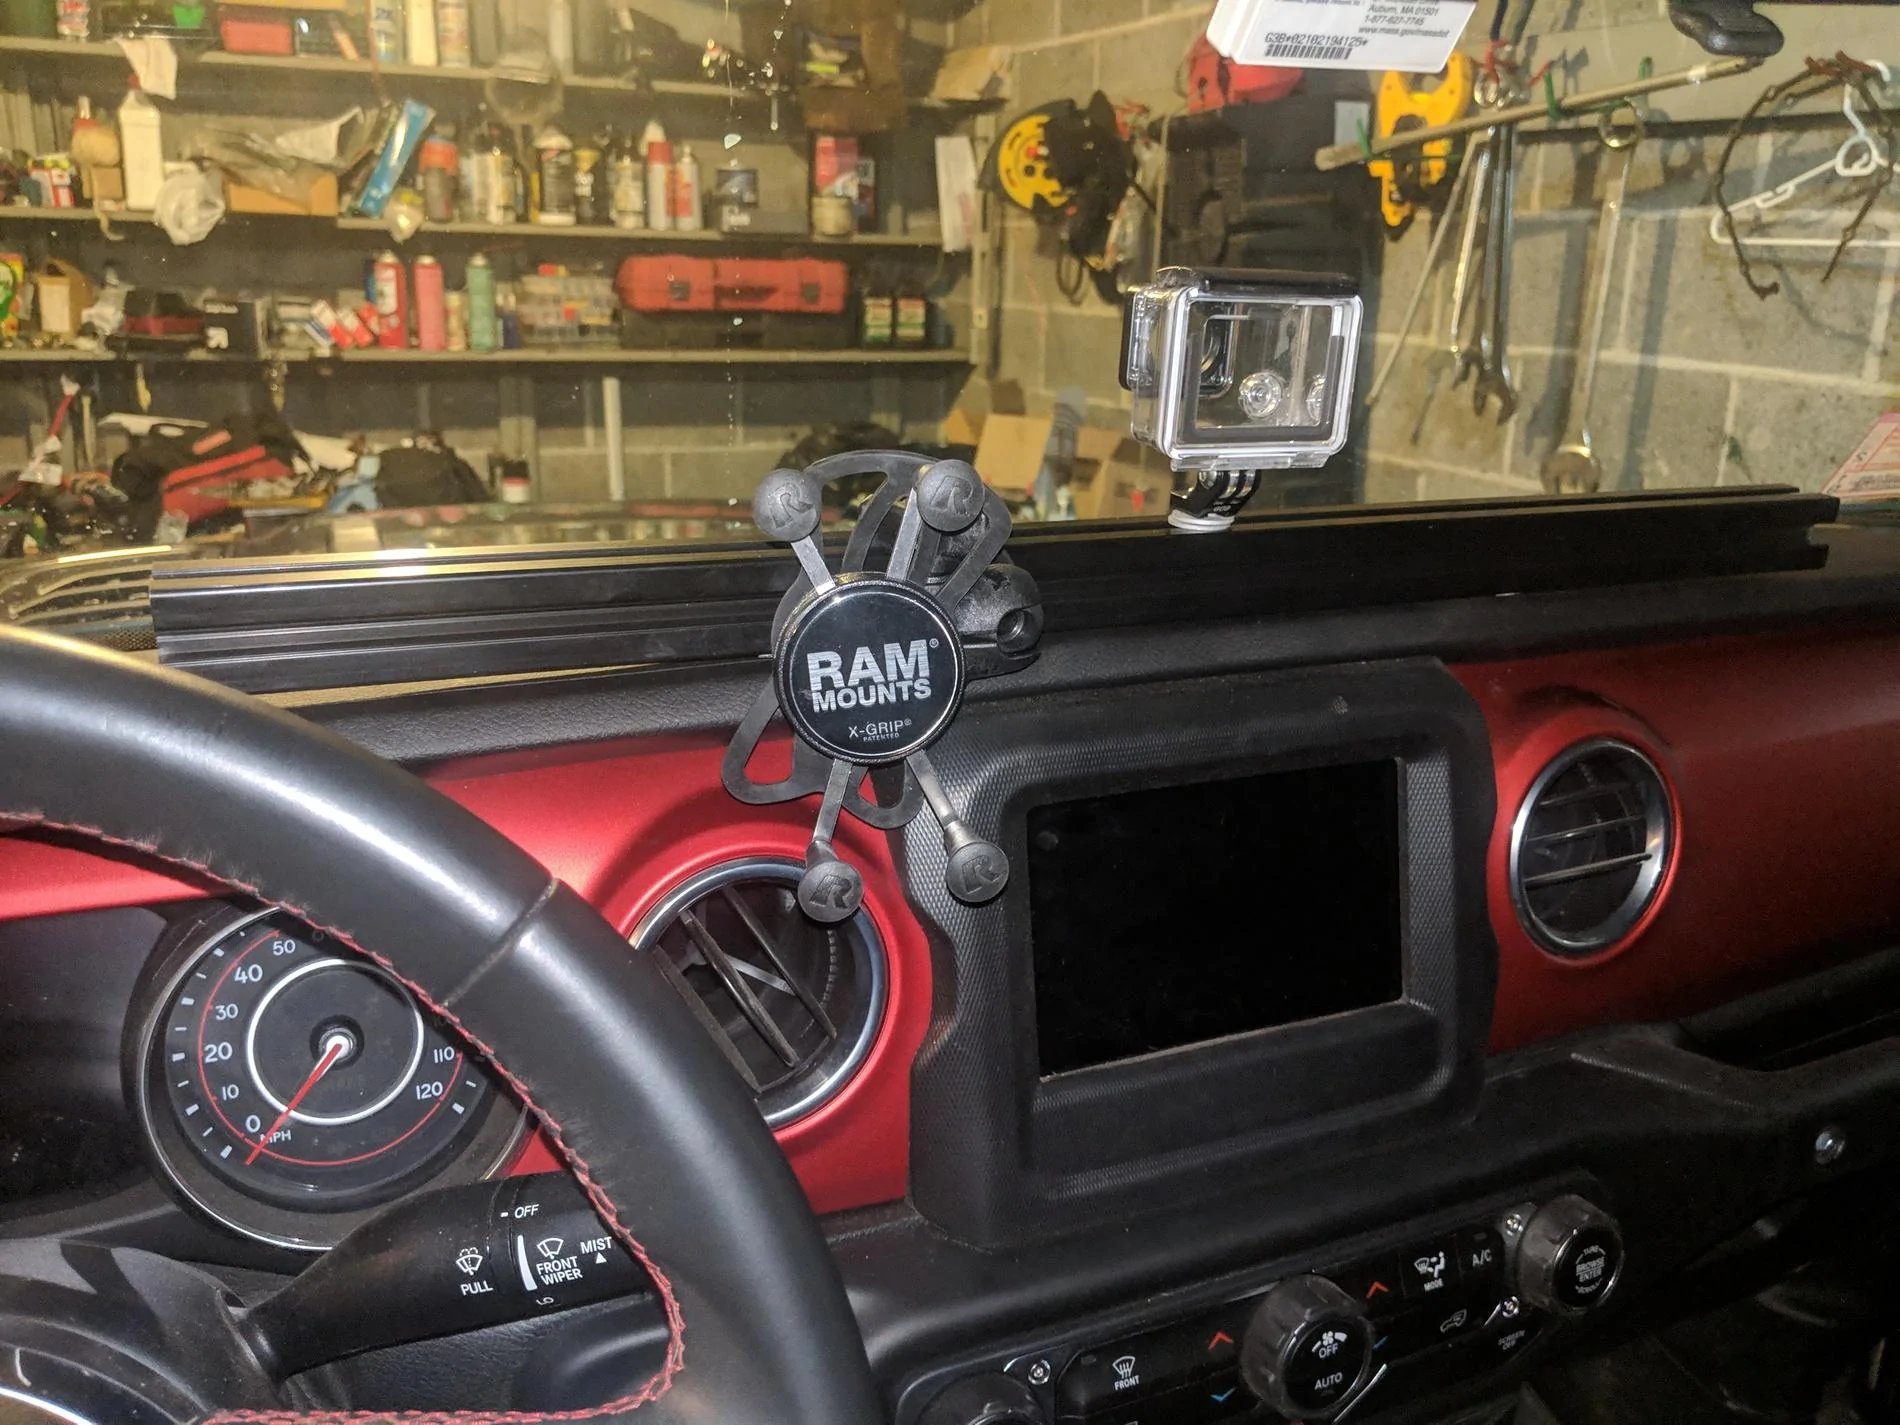
So I wanted a dash rail system but I didn't want to pay the prices that they are selling for so I made my own, still a bit f a refinement in progress but I am pretty happy with how it came out.

The heart of the system is aluminum t slotted framing that is commonly used in industrial and commercial settings for building fixtures, tools, and machines among other uses. https://www.mcmaster.com/t-slotted-framing
BOM:
The rail
1 30mm x 30mm x 24in black rail https://www.mcmaster.com/5537T511 (i did see it when i ordered that they sold by the inch as well if i was to reorder i would do about 18", the gap between the mounts its ~11 inches)
1 4 pack of m6 x 1mm t-nuts with screws https://www.mcmaster.com/5537T867
2 m6 x 1mm x 8mm screw from local hardware store
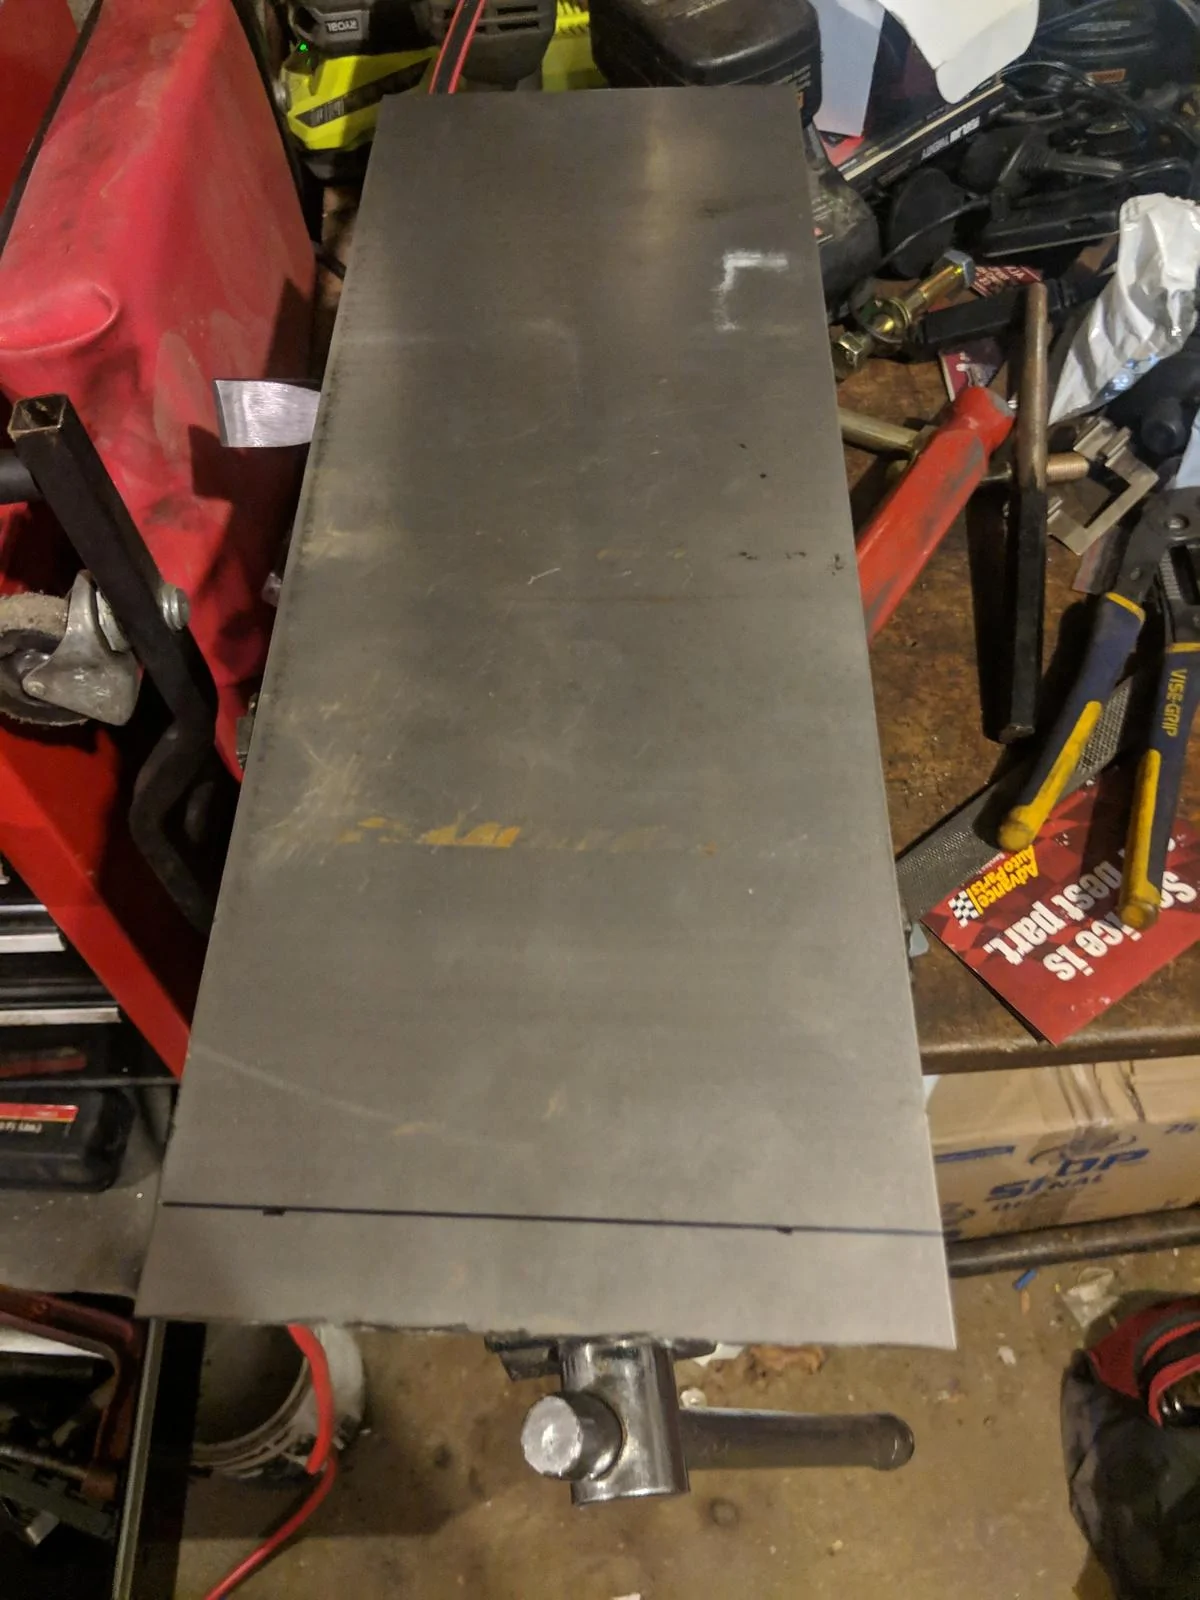
2 strips of metal about 20mm wide and about 8 inches or so long I got a sheet of 22 gauge weldable steel at the local hardware store and cut it into strips would have like to use 18 gauge but they didn't have any in stock
Cost for rail:
mcmaster - $14 + $11 tax & ship = $25
hardware store - $8
Total $33
Mounts
1 RAM t bolt 1" ball https://www.amazon.com/gp/product/B00FE66K86/ref=ppx_yo_dt_b_asin_title_o02_s00?ie=UTF8&psc=1
1 RAM short double socket arm 1" ball https://www.amazon.com/gp/product/B005KWPJ04/ref=ppx_yo_dt_b_asin_title_o03_s00?ie=UTF8&psc=1
1 RAM cell phone mount 1" ball https://www.amazon.com/gp/product/B0055PH0XA/ref=ppx_yo_dt_b_asin_title_o02_s00?ie=UTF8&psc=1
1 Go Pro Camera Mount https://www.amazon.com/gp/product/B07CWR1ZML/ref=ppx_yo_dt_b_asin_title_o01_s00?ie=UTF8&psc=1
Cost for mounts:
Phone - $44
Go Pro - $15
Total - $59
All In $92
Instructions
Build and install time ~1 hour
Tools Used:
Hammer
Bench Vice
Angle Grinder
Phillips head screw driver
Allen Key set
Set of punches
Pliers
3/16" Drill bit
1/4" Drill bit
Electric Drill
Flat files
Marker
Calipers
Straight edge
Steps
Note easier to fold down windshield before starting
1. Cut the steel sheet into 20 mm wide strips and deburr the edged using the angle grinder and file to make mounting brackets

2. Remove center dash pad and the two phillips head screws
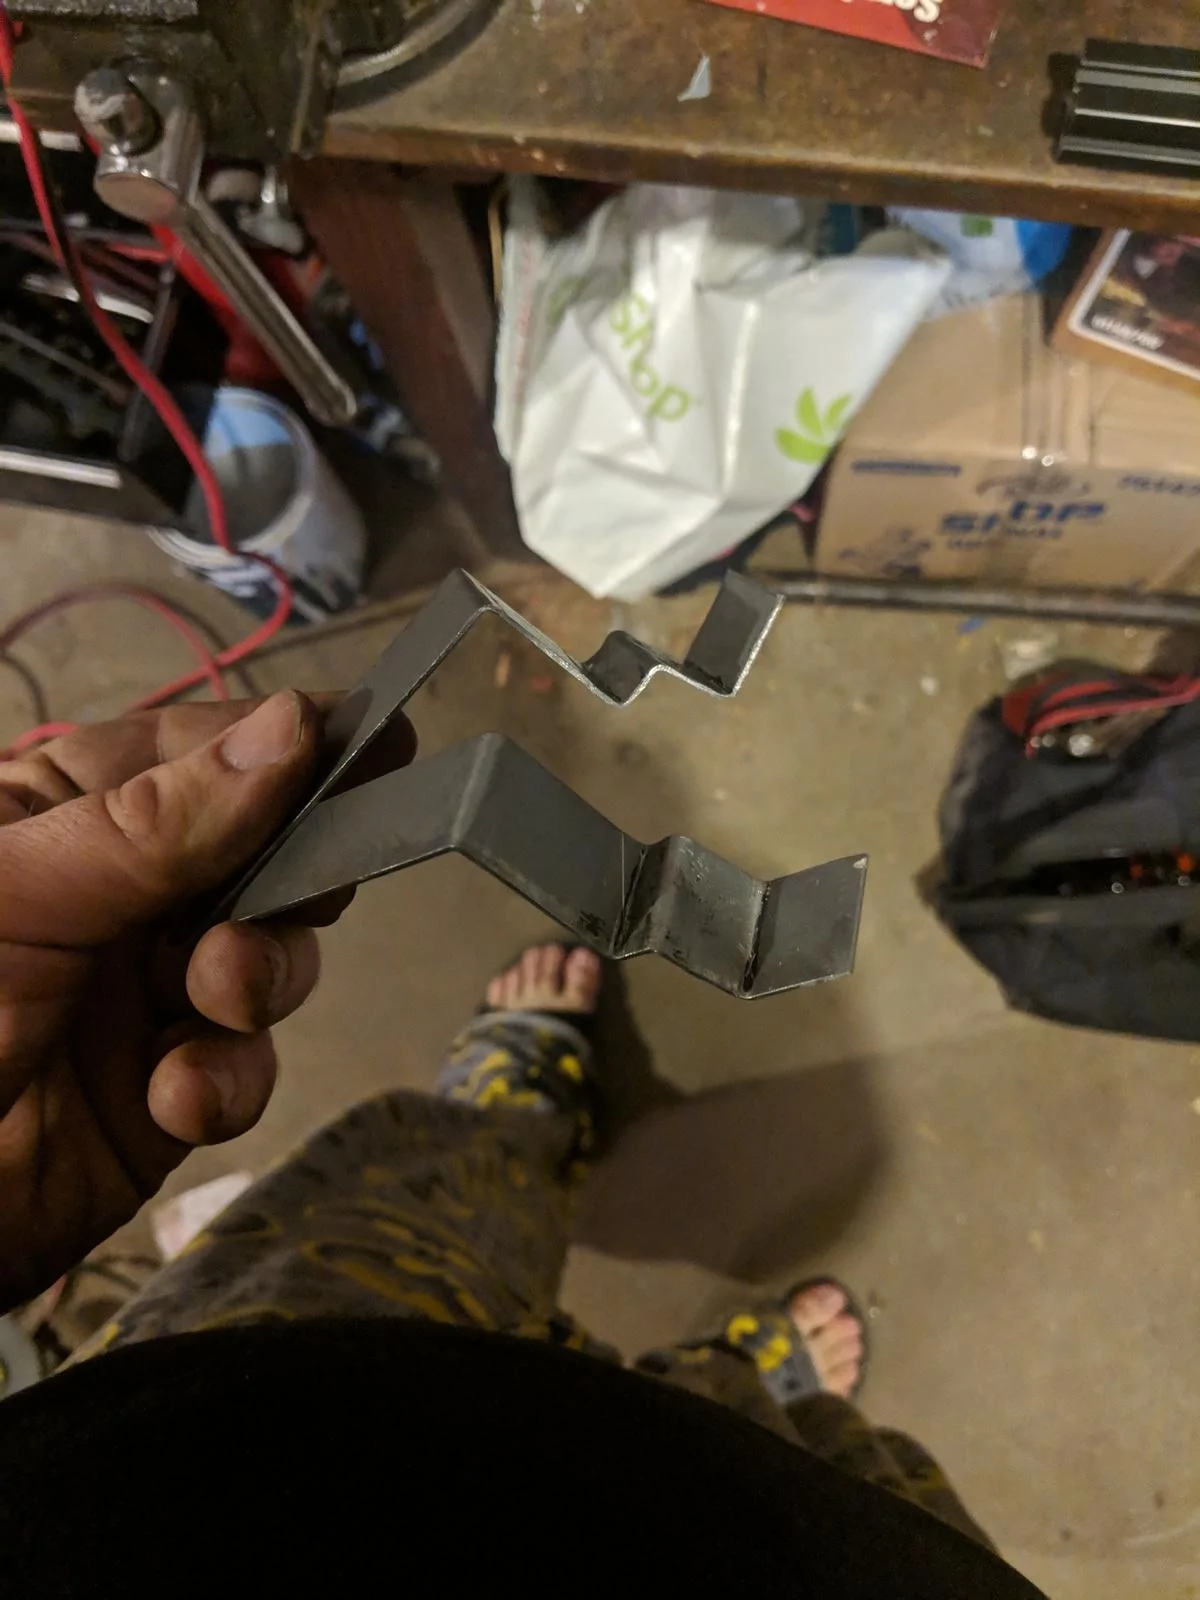
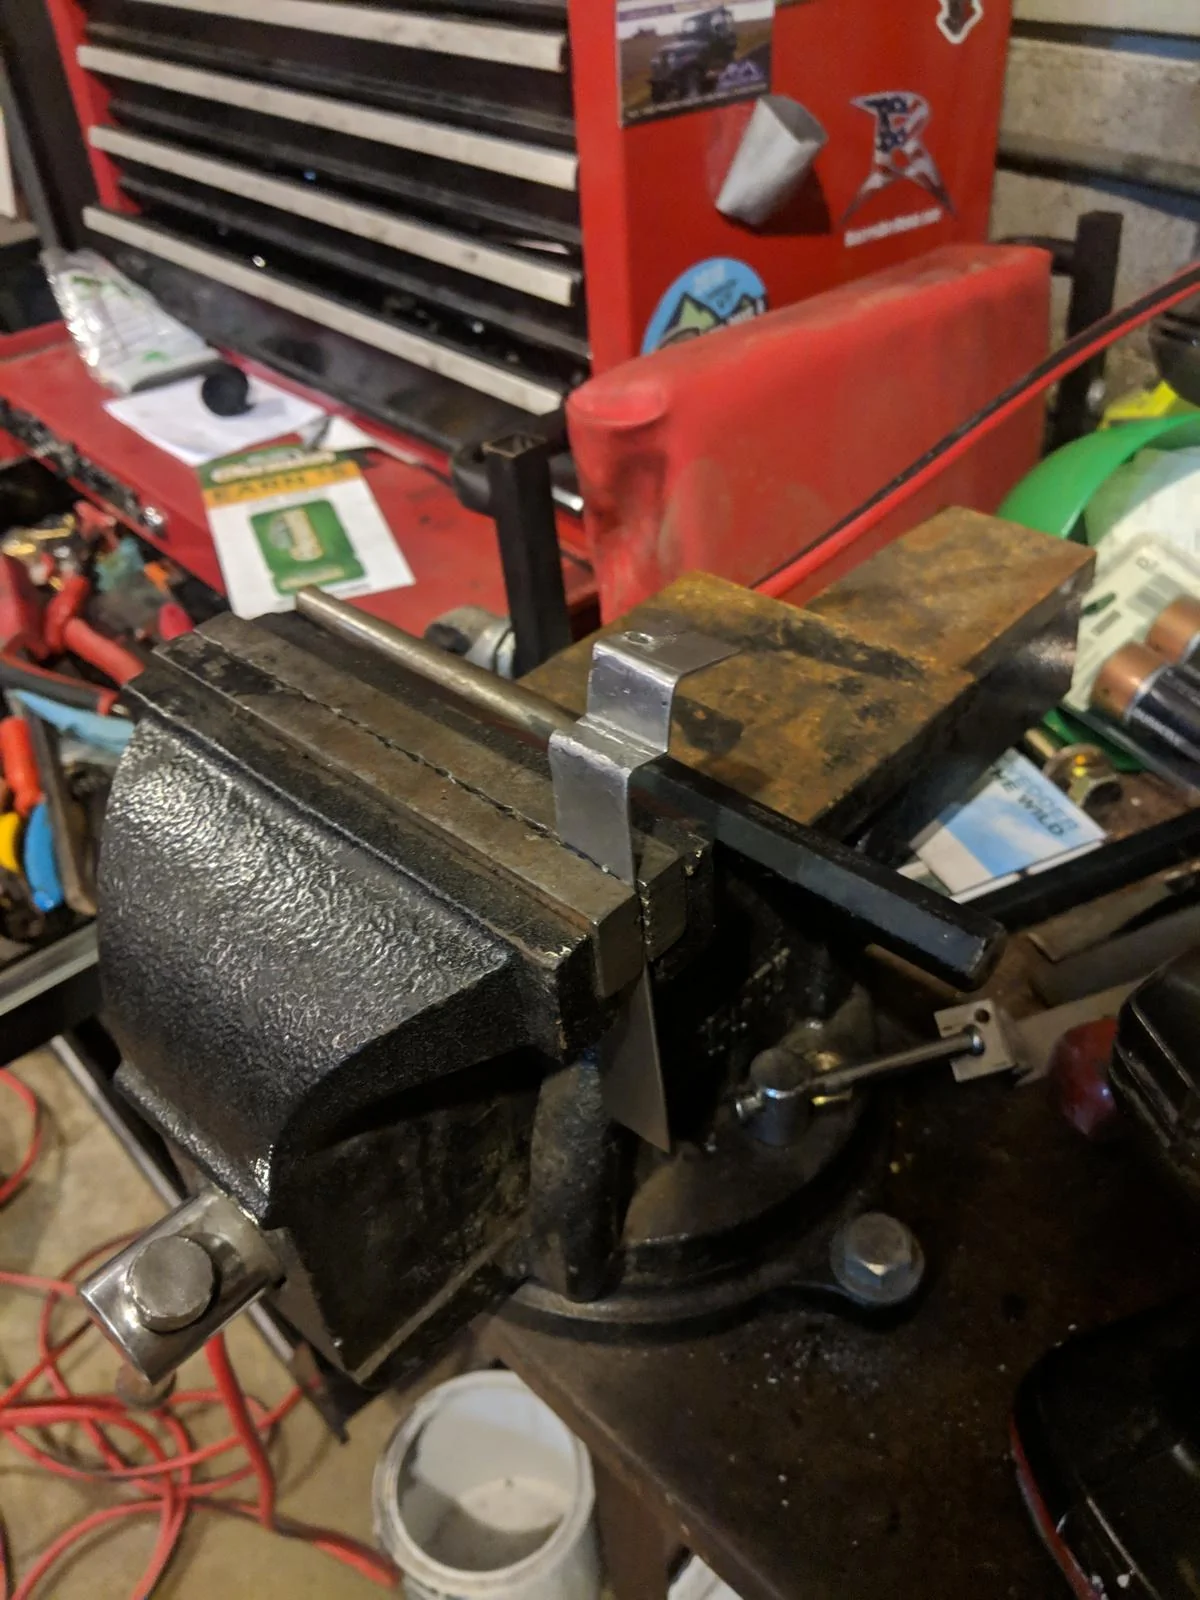
3. Measure and bend the steel brackets to fit the profile of the dash
should end up looking something like this
Using a bench vice and a hammer makes the job much easier as well as some large punches and pliers to help make the small bends
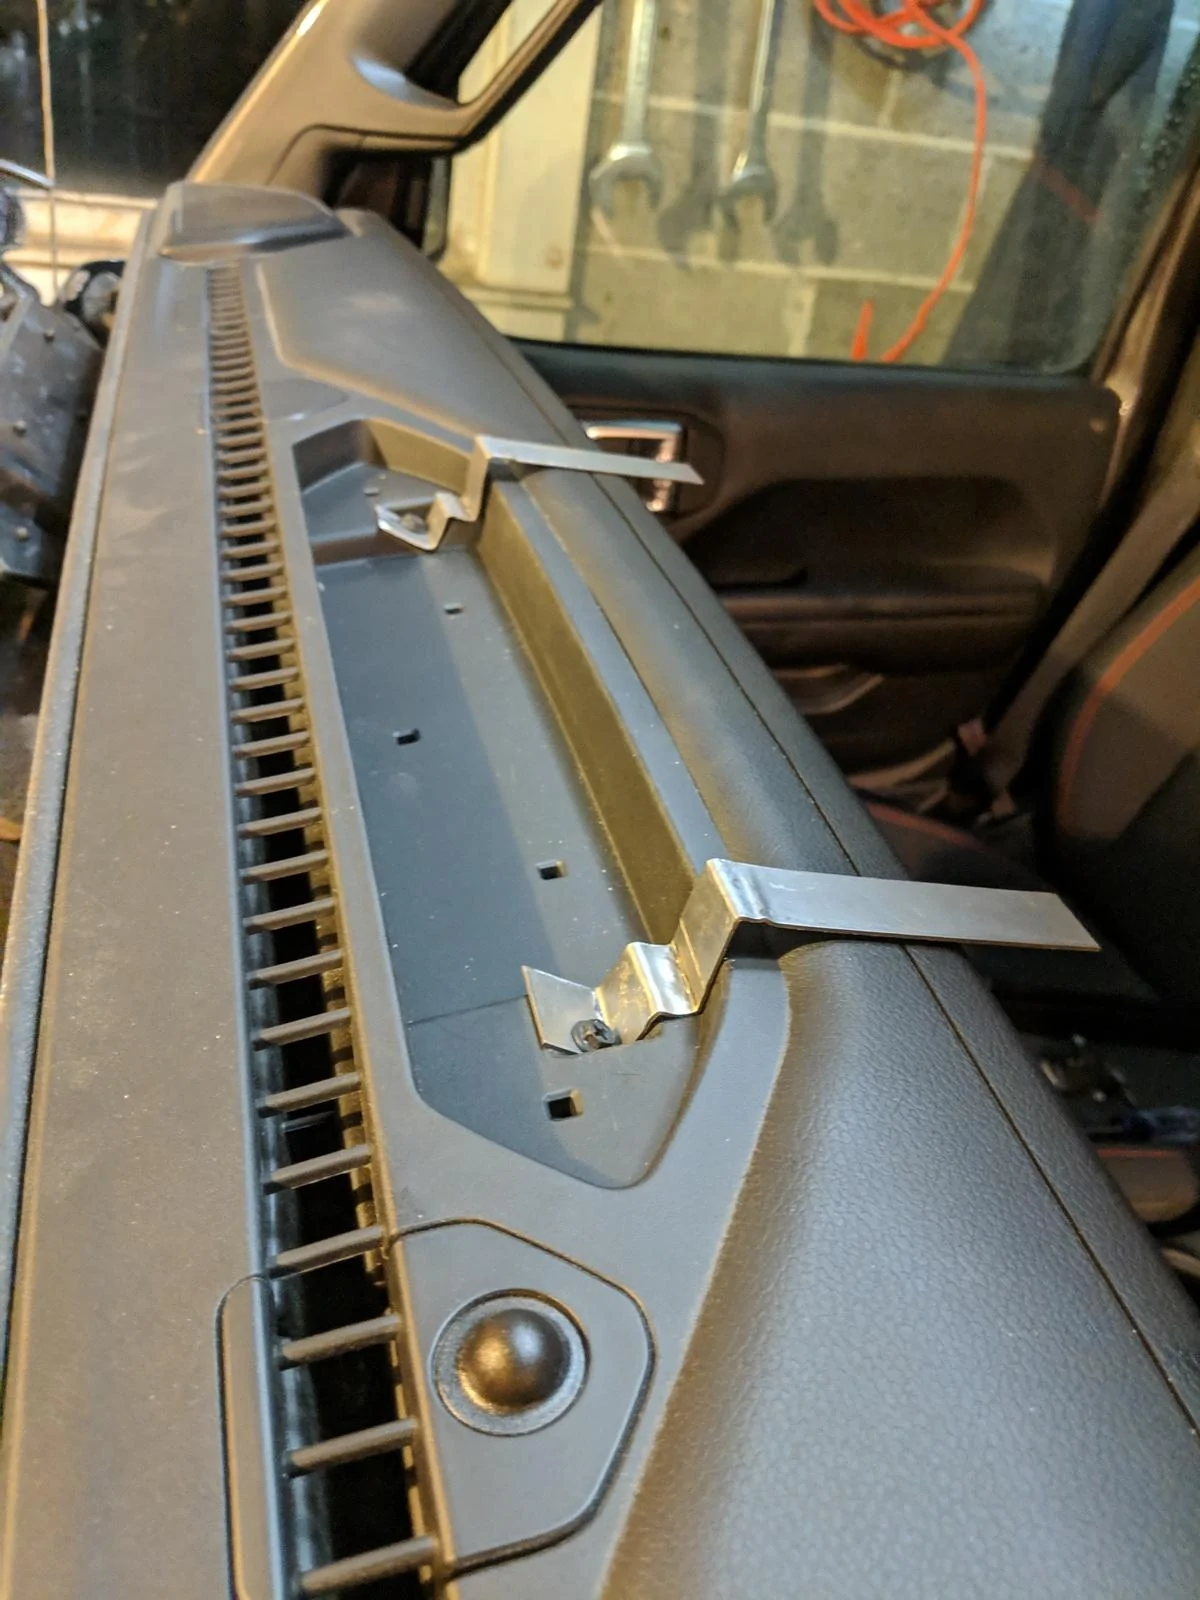
4. Mark holes on the steel brackets for the dash screws and use the 3/16" bit to drill the hole
5. Install the metal brackets and place the rail on top where you like it to be seated and mark on the bracket the rail position
6. Drill a 1/4" hole on each bracket half the width of the rail away from the marked rail position and then trim off any excesses bracket using the angle grinder and file to deburr
7. slide in 2 t nuts int he bottom of the rail and thread the shorter m6 screws through the bracket and into the t nut, position the brackets to be gaped about ~11 in (measure between dash screw mounts) an positioned equidistant from the ends of the rail tighten to snug but can still move things around
8. Screw to dash and adjust as needed remove and crank down t nut screws and reattach
Then you are done with the rail
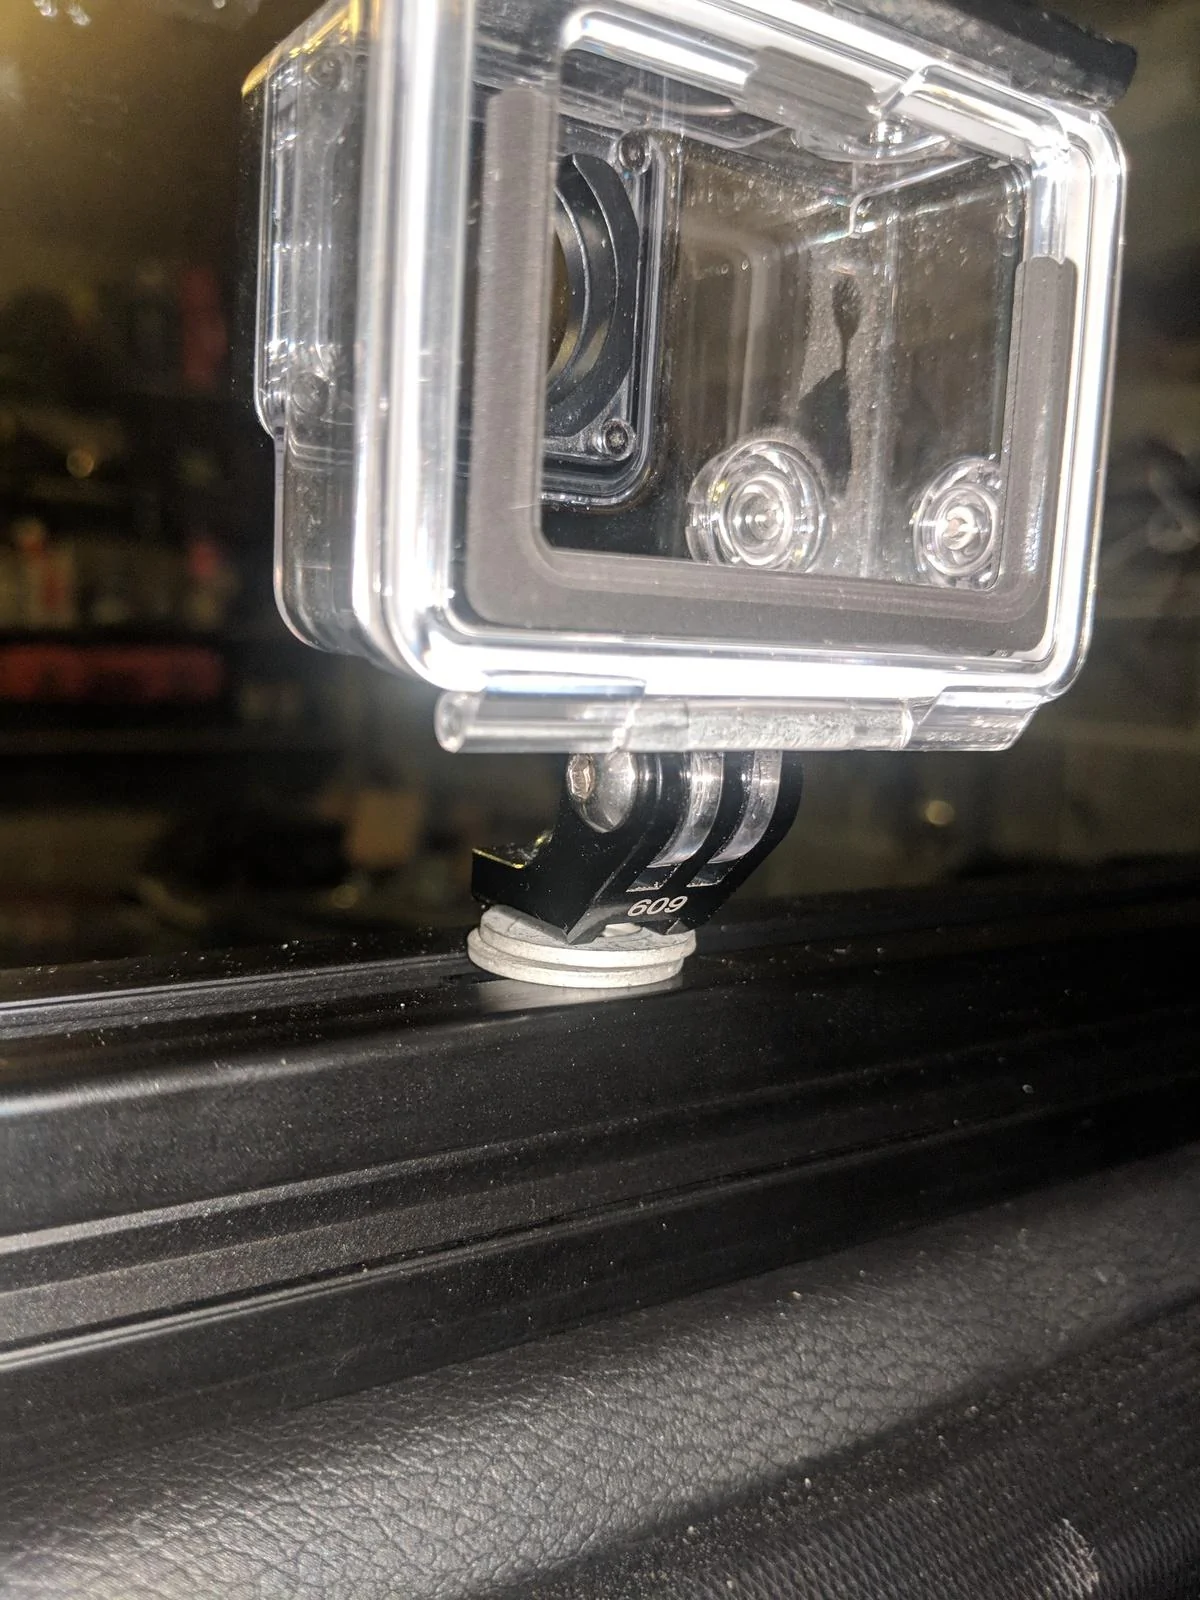
For the go pro mount I unscrewed the the handle bar mount from the go pro mount and just drilled out the base screw hole for the go pro mount to 1/4" and used a left over t-nut and longer screw and stacked a few washers to fill the gap
The heart of the system is aluminum t slotted framing that is commonly used in industrial and commercial settings for building fixtures, tools, and machines among other uses. https://www.mcmaster.com/t-slotted-framing
BOM:
The rail
1 30mm x 30mm x 24in black rail https://www.mcmaster.com/5537T511 (i did see it when i ordered that they sold by the inch as well if i was to reorder i would do about 18", the gap between the mounts its ~11 inches)
1 4 pack of m6 x 1mm t-nuts with screws https://www.mcmaster.com/5537T867
2 m6 x 1mm x 8mm screw from local hardware store
2 strips of metal about 20mm wide and about 8 inches or so long I got a sheet of 22 gauge weldable steel at the local hardware store and cut it into strips would have like to use 18 gauge but they didn't have any in stock
Cost for rail:
mcmaster - $14 + $11 tax & ship = $25
hardware store - $8
Total $33
Mounts
1 RAM t bolt 1" ball https://www.amazon.com/gp/product/B00FE66K86/ref=ppx_yo_dt_b_asin_title_o02_s00?ie=UTF8&psc=1
1 RAM short double socket arm 1" ball https://www.amazon.com/gp/product/B005KWPJ04/ref=ppx_yo_dt_b_asin_title_o03_s00?ie=UTF8&psc=1
1 RAM cell phone mount 1" ball https://www.amazon.com/gp/product/B0055PH0XA/ref=ppx_yo_dt_b_asin_title_o02_s00?ie=UTF8&psc=1
1 Go Pro Camera Mount https://www.amazon.com/gp/product/B07CWR1ZML/ref=ppx_yo_dt_b_asin_title_o01_s00?ie=UTF8&psc=1
Cost for mounts:
Phone - $44
Go Pro - $15
Total - $59
All In $92
Instructions
Build and install time ~1 hour
Tools Used:
Hammer
Bench Vice
Angle Grinder
Phillips head screw driver
Allen Key set
Set of punches
Pliers
3/16" Drill bit
1/4" Drill bit
Electric Drill
Flat files
Marker
Calipers
Straight edge
Steps
Note easier to fold down windshield before starting
1. Cut the steel sheet into 20 mm wide strips and deburr the edged using the angle grinder and file to make mounting brackets
2. Remove center dash pad and the two phillips head screws
3. Measure and bend the steel brackets to fit the profile of the dash
should end up looking something like this
Using a bench vice and a hammer makes the job much easier as well as some large punches and pliers to help make the small bends
4. Mark holes on the steel brackets for the dash screws and use the 3/16" bit to drill the hole
5. Install the metal brackets and place the rail on top where you like it to be seated and mark on the bracket the rail position
6. Drill a 1/4" hole on each bracket half the width of the rail away from the marked rail position and then trim off any excesses bracket using the angle grinder and file to deburr
7. slide in 2 t nuts int he bottom of the rail and thread the shorter m6 screws through the bracket and into the t nut, position the brackets to be gaped about ~11 in (measure between dash screw mounts) an positioned equidistant from the ends of the rail tighten to snug but can still move things around
8. Screw to dash and adjust as needed remove and crank down t nut screws and reattach

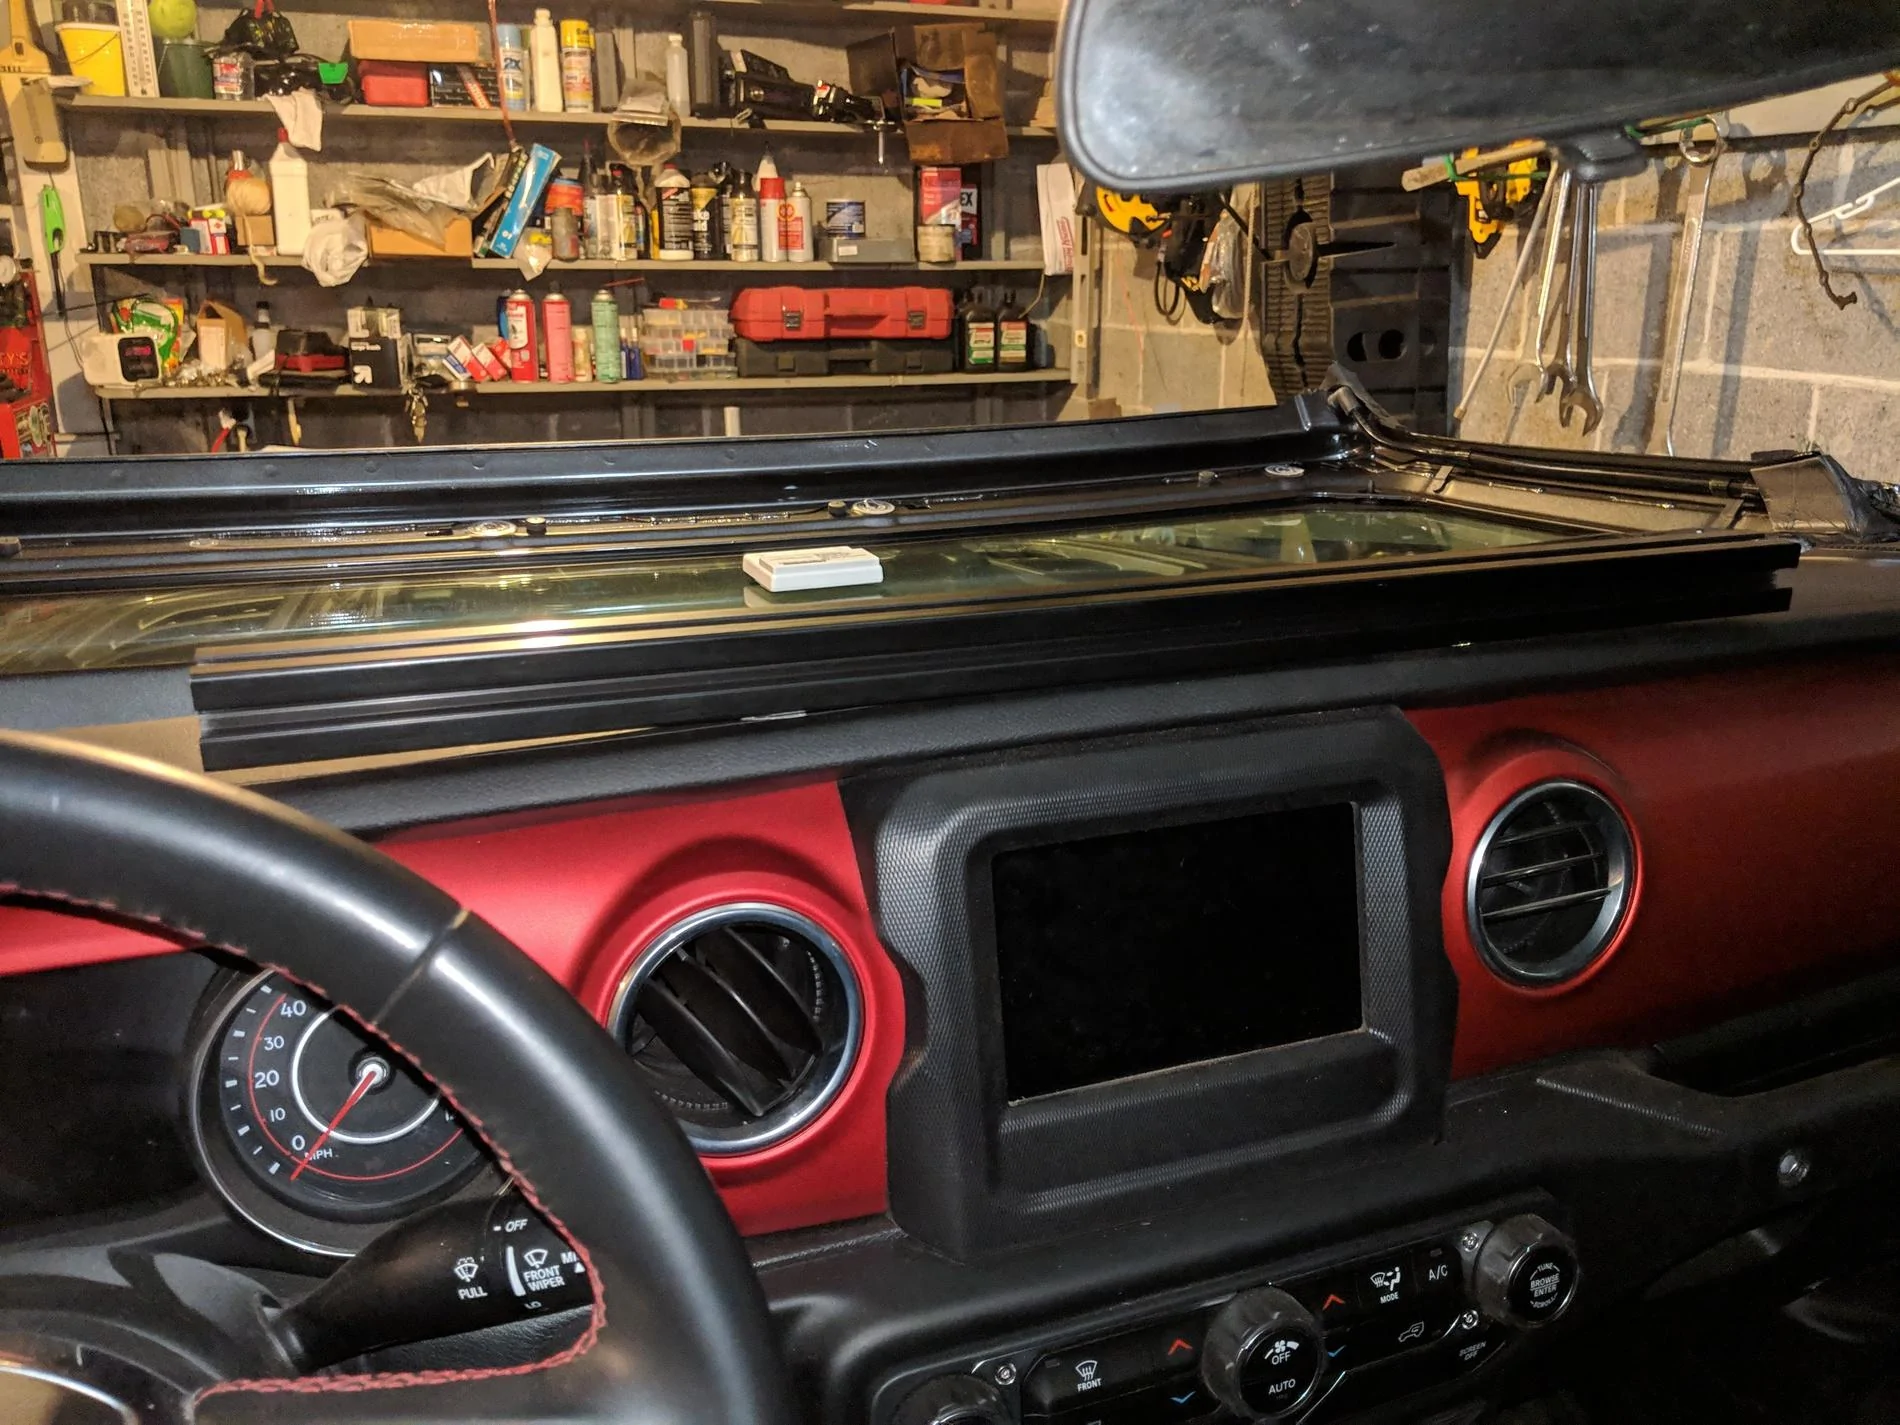
Then you are done with the rail
For the go pro mount I unscrewed the the handle bar mount from the go pro mount and just drilled out the base screw hole for the go pro mount to 1/4" and used a left over t-nut and longer screw and stacked a few washers to fill the gap
Sponsored