surferbandit
Well-Known Member
- First Name
- James
- Joined
- Jul 6, 2018
- Threads
- 18
- Messages
- 92
- Reaction score
- 97
- Location
- Atlanta Georgia
- Vehicle(s)
- 2018 Jeep Wrangler JLU Sport
- Thread starter
- #1
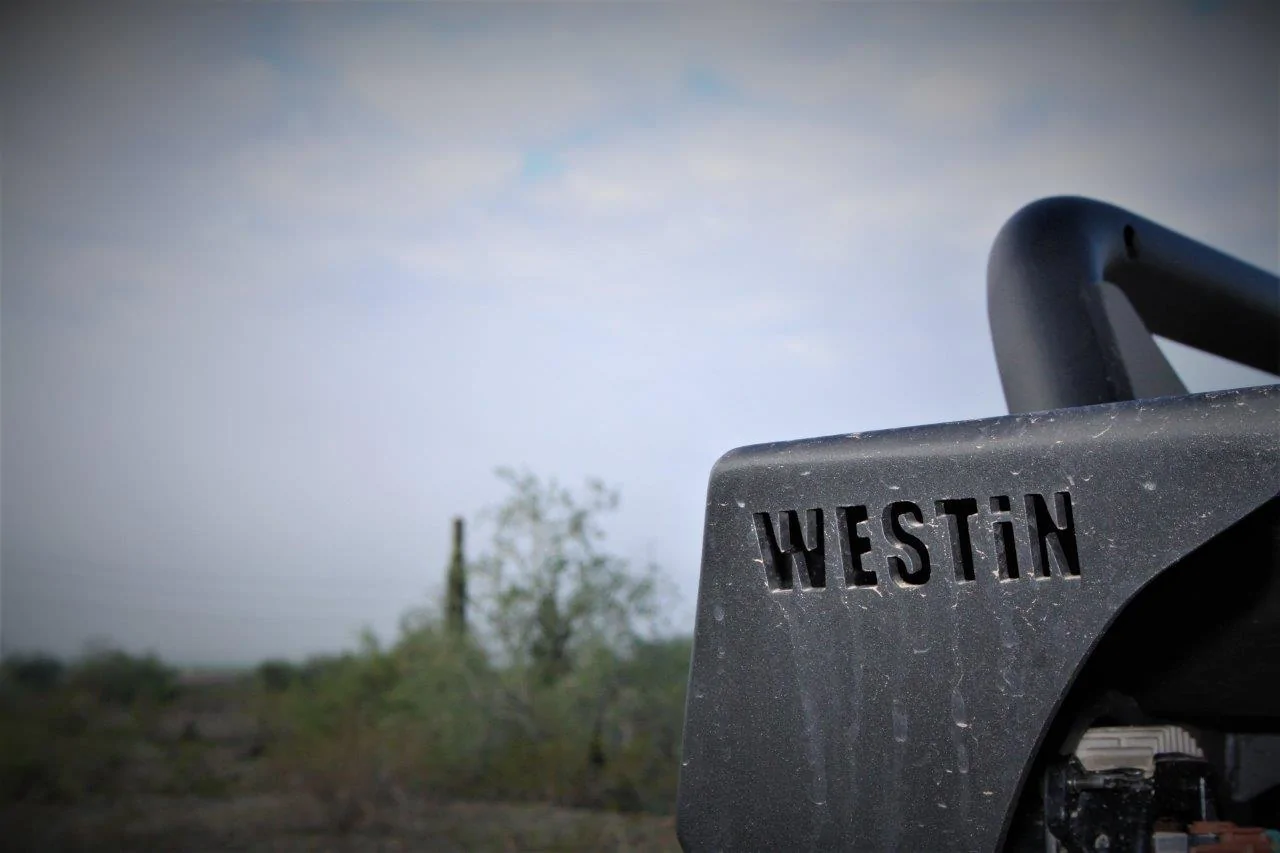
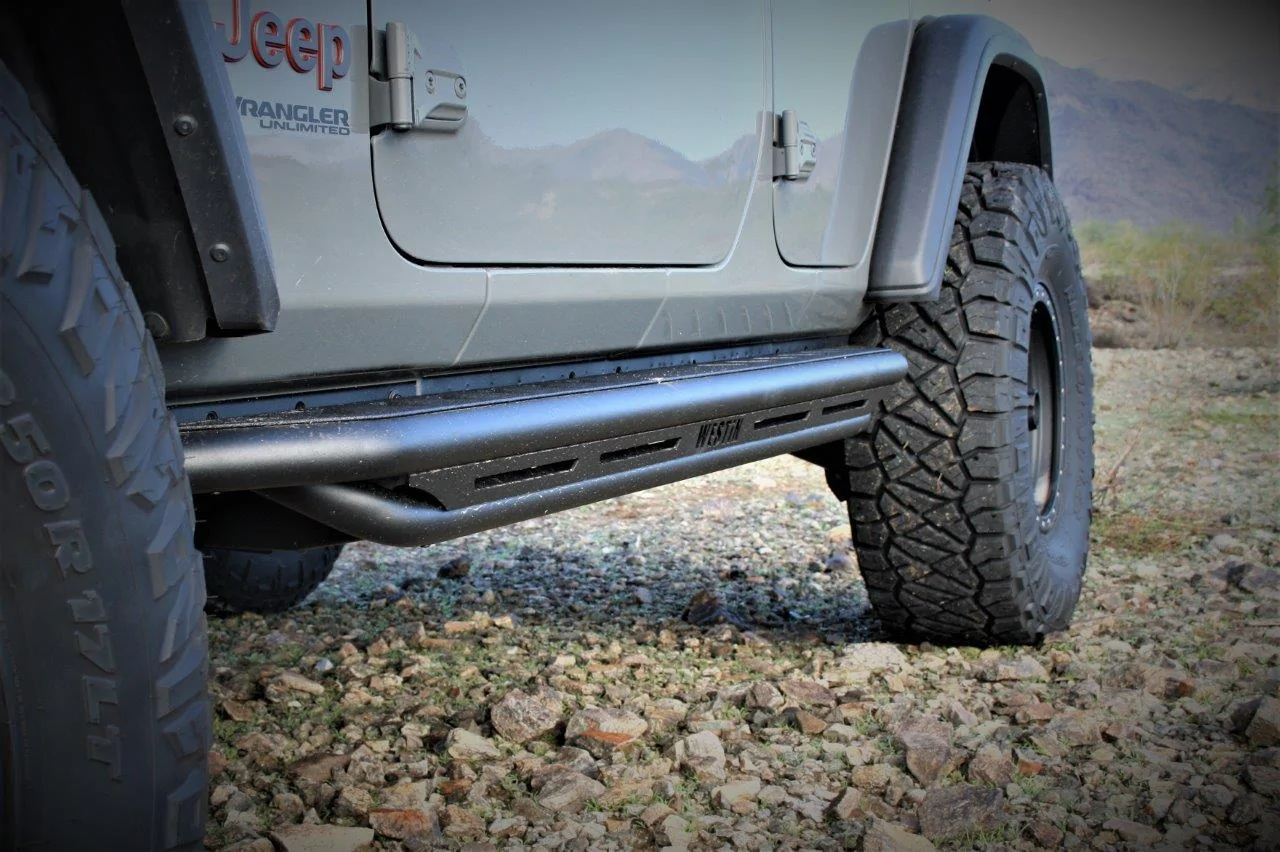
I bought a set of Westin bumpers and finally got around to putting them on this past week. I’ve put Jeep bumpers on before but this was seriously a pain in the ass. The instructions were kind of like Ikea instructions if you’ve ever bought anything there… very brief instructions and the picture doesn't show you everything you need to know. I liked how it turned out though. Thought I’d share…
What I bought:
WJ2 Stubby Front Bumper - 59-80075
WJ2 Rear Bumper w/ Tire Carrier - 59-82035
Skid plate
Westin Synthetic winch
Lights for rear bumper
KC 6 inch fog lights
Mopar light relocation kit
Shackles
Taking off the stock bumpers off was pretty easy. Getting the rear bumper on was pretty easy as well.

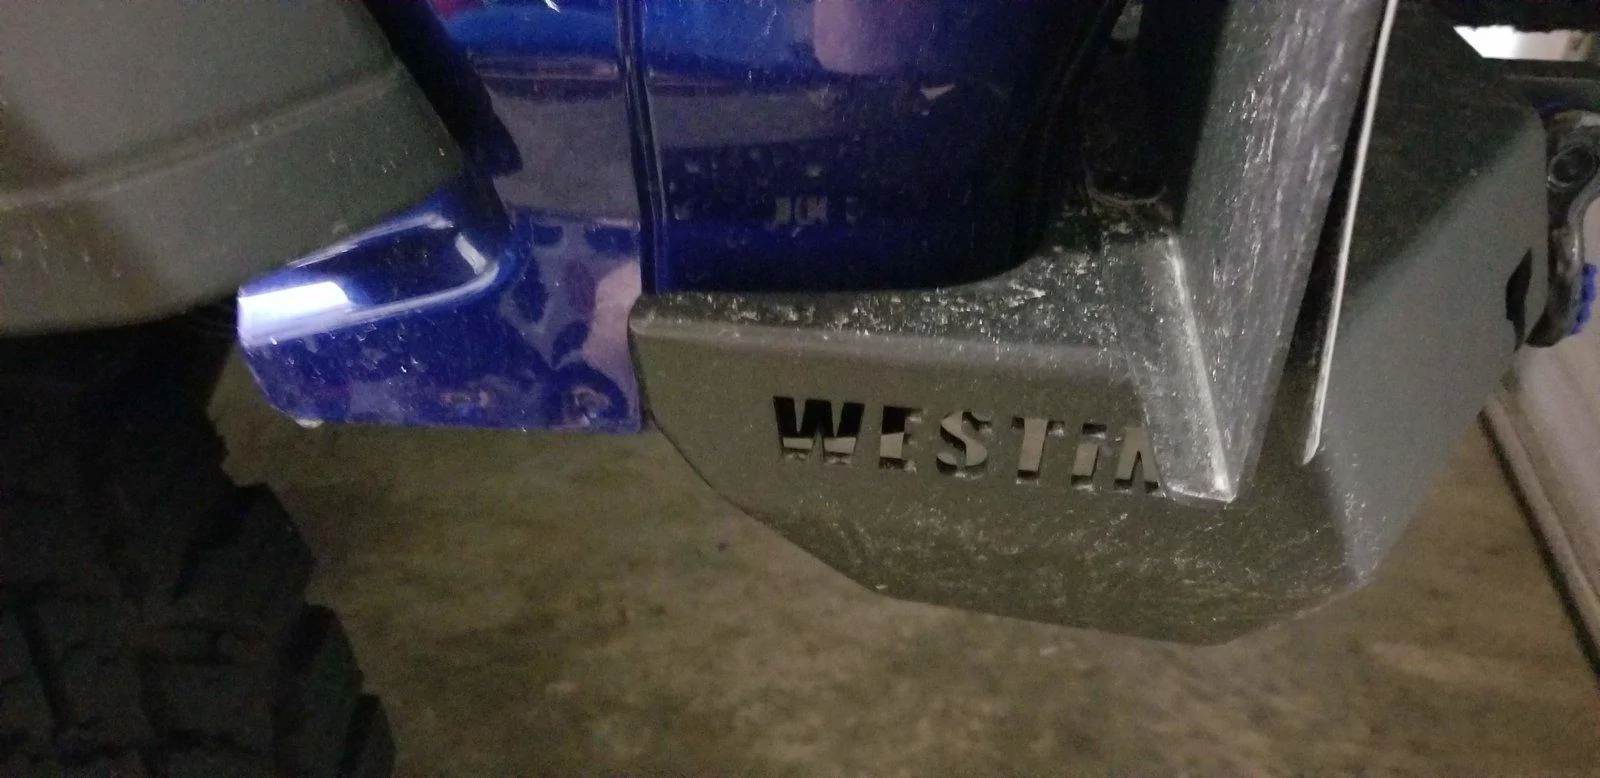
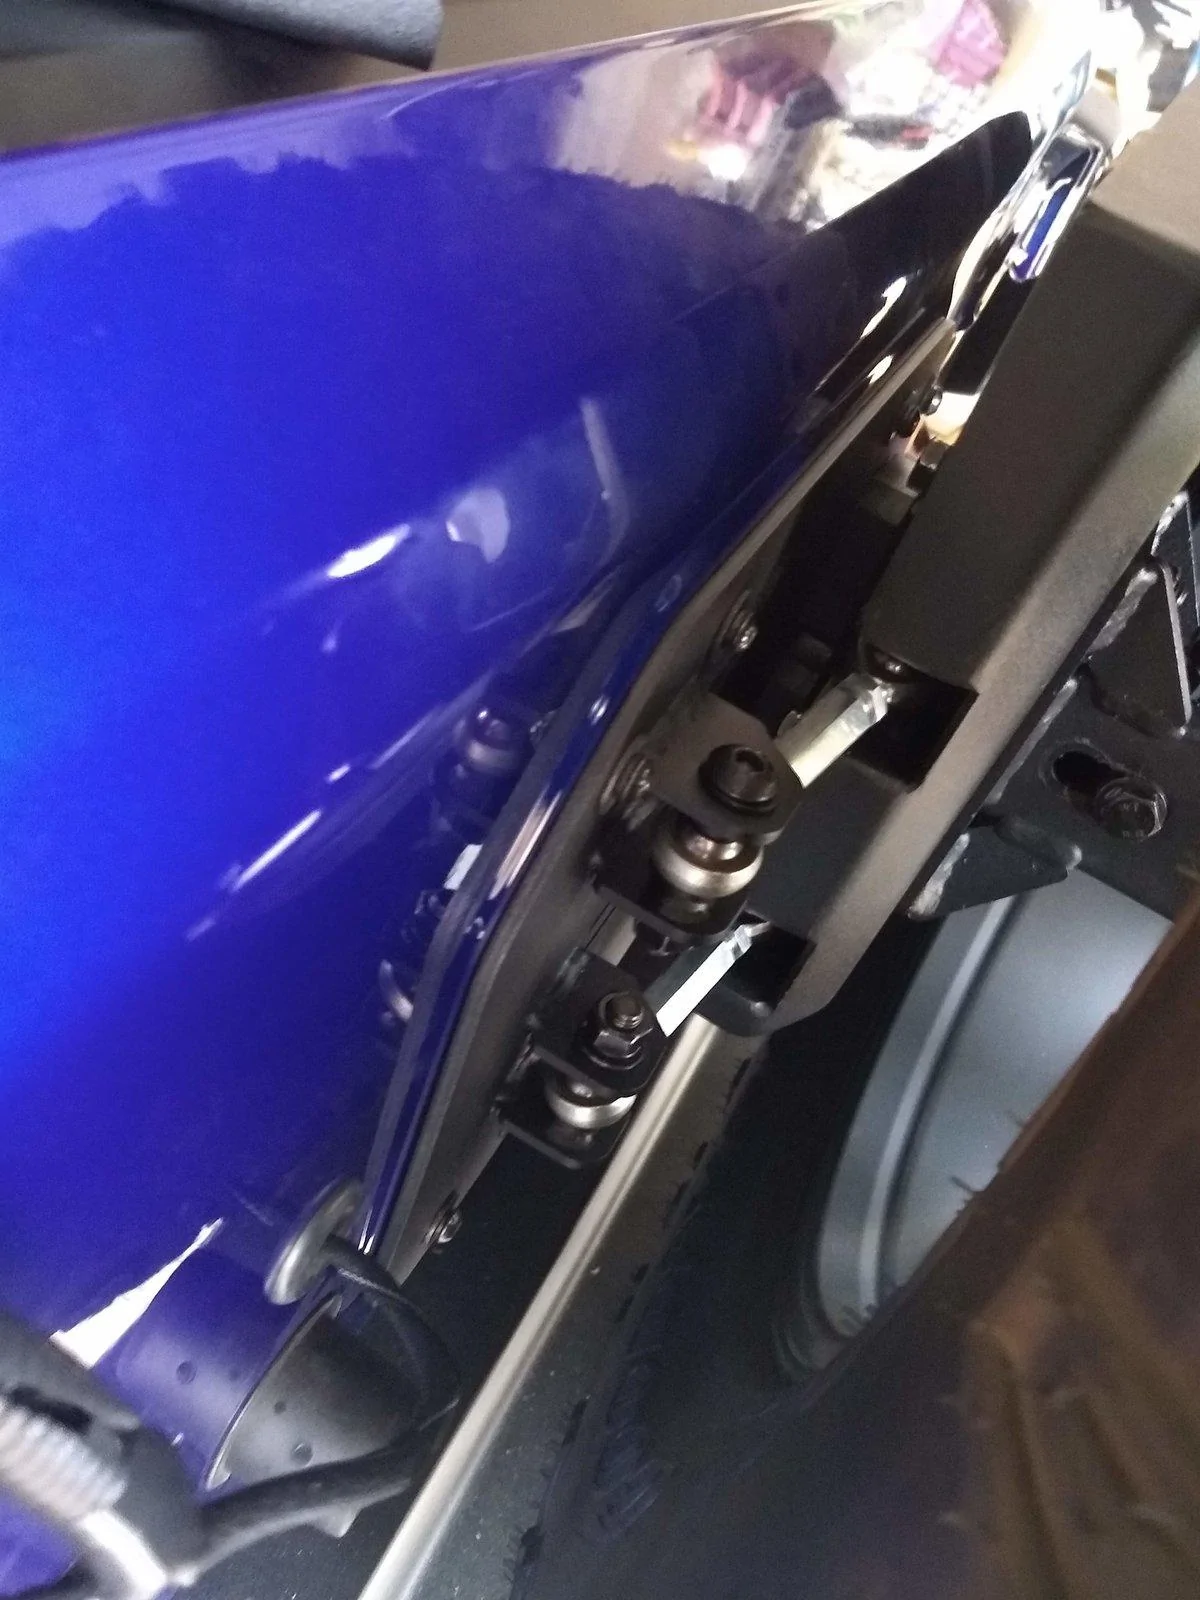
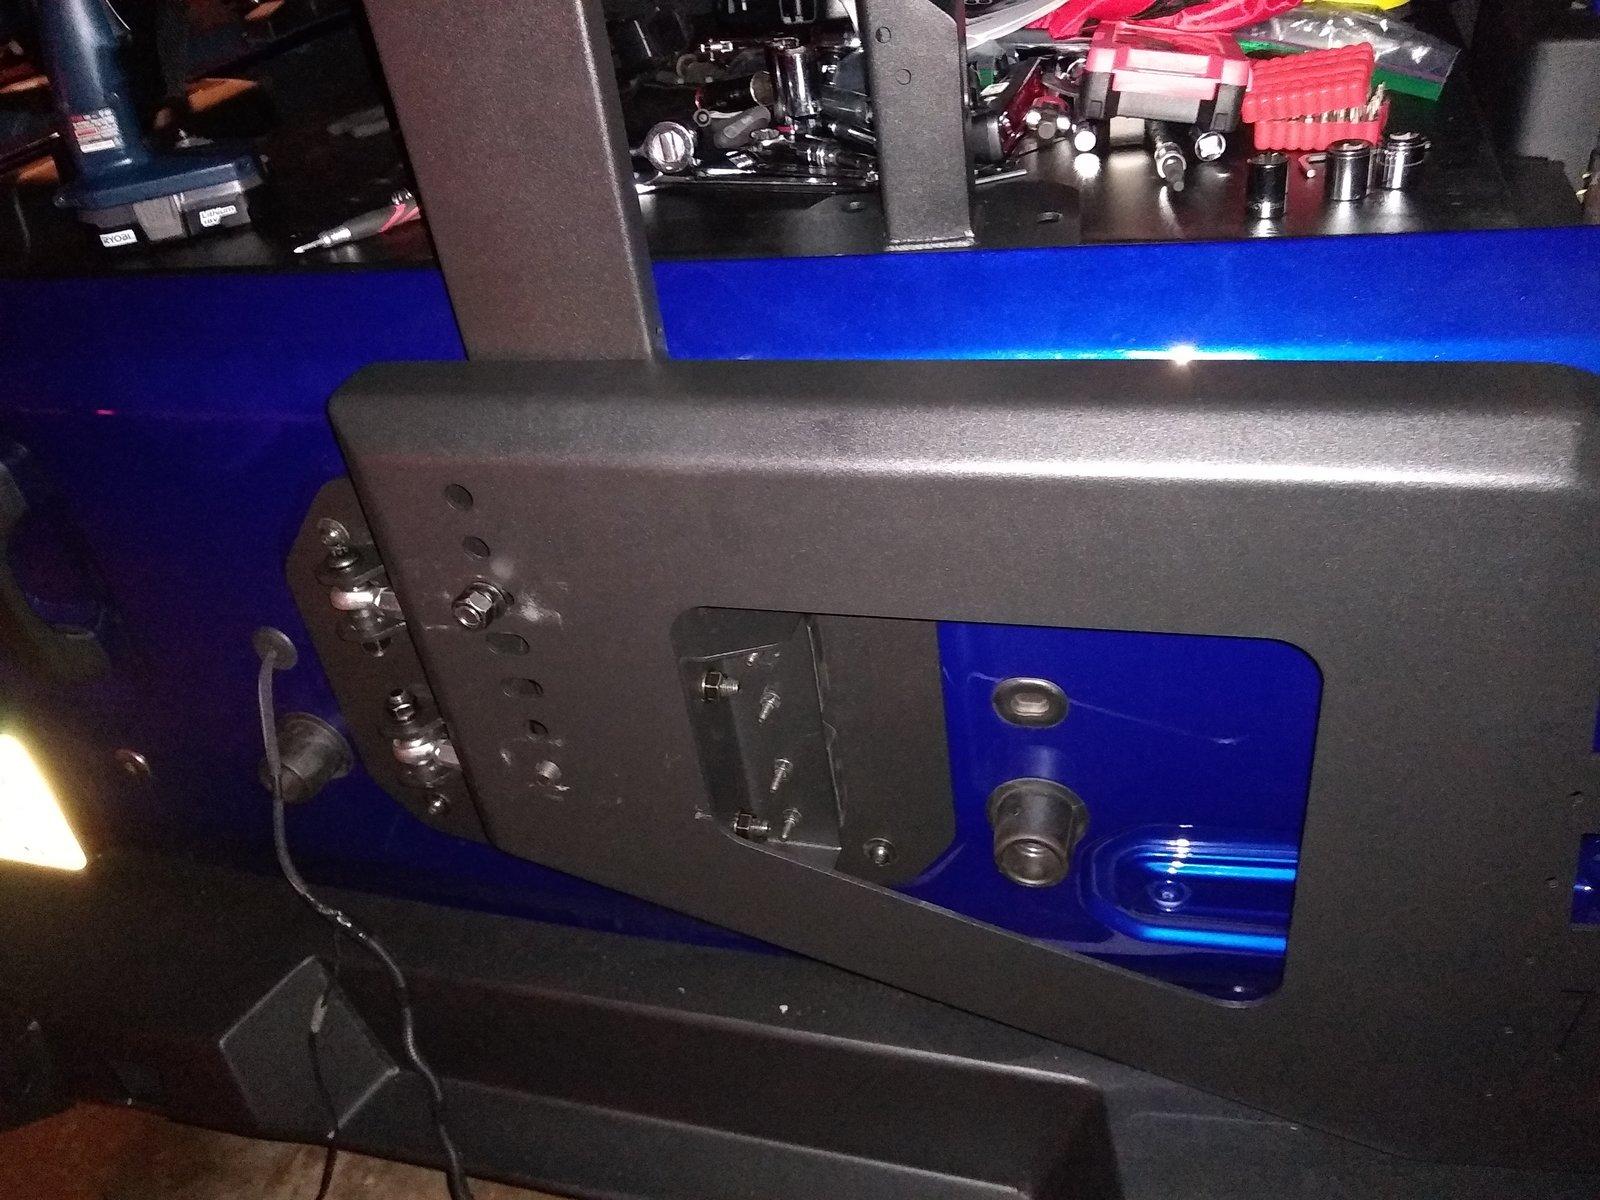
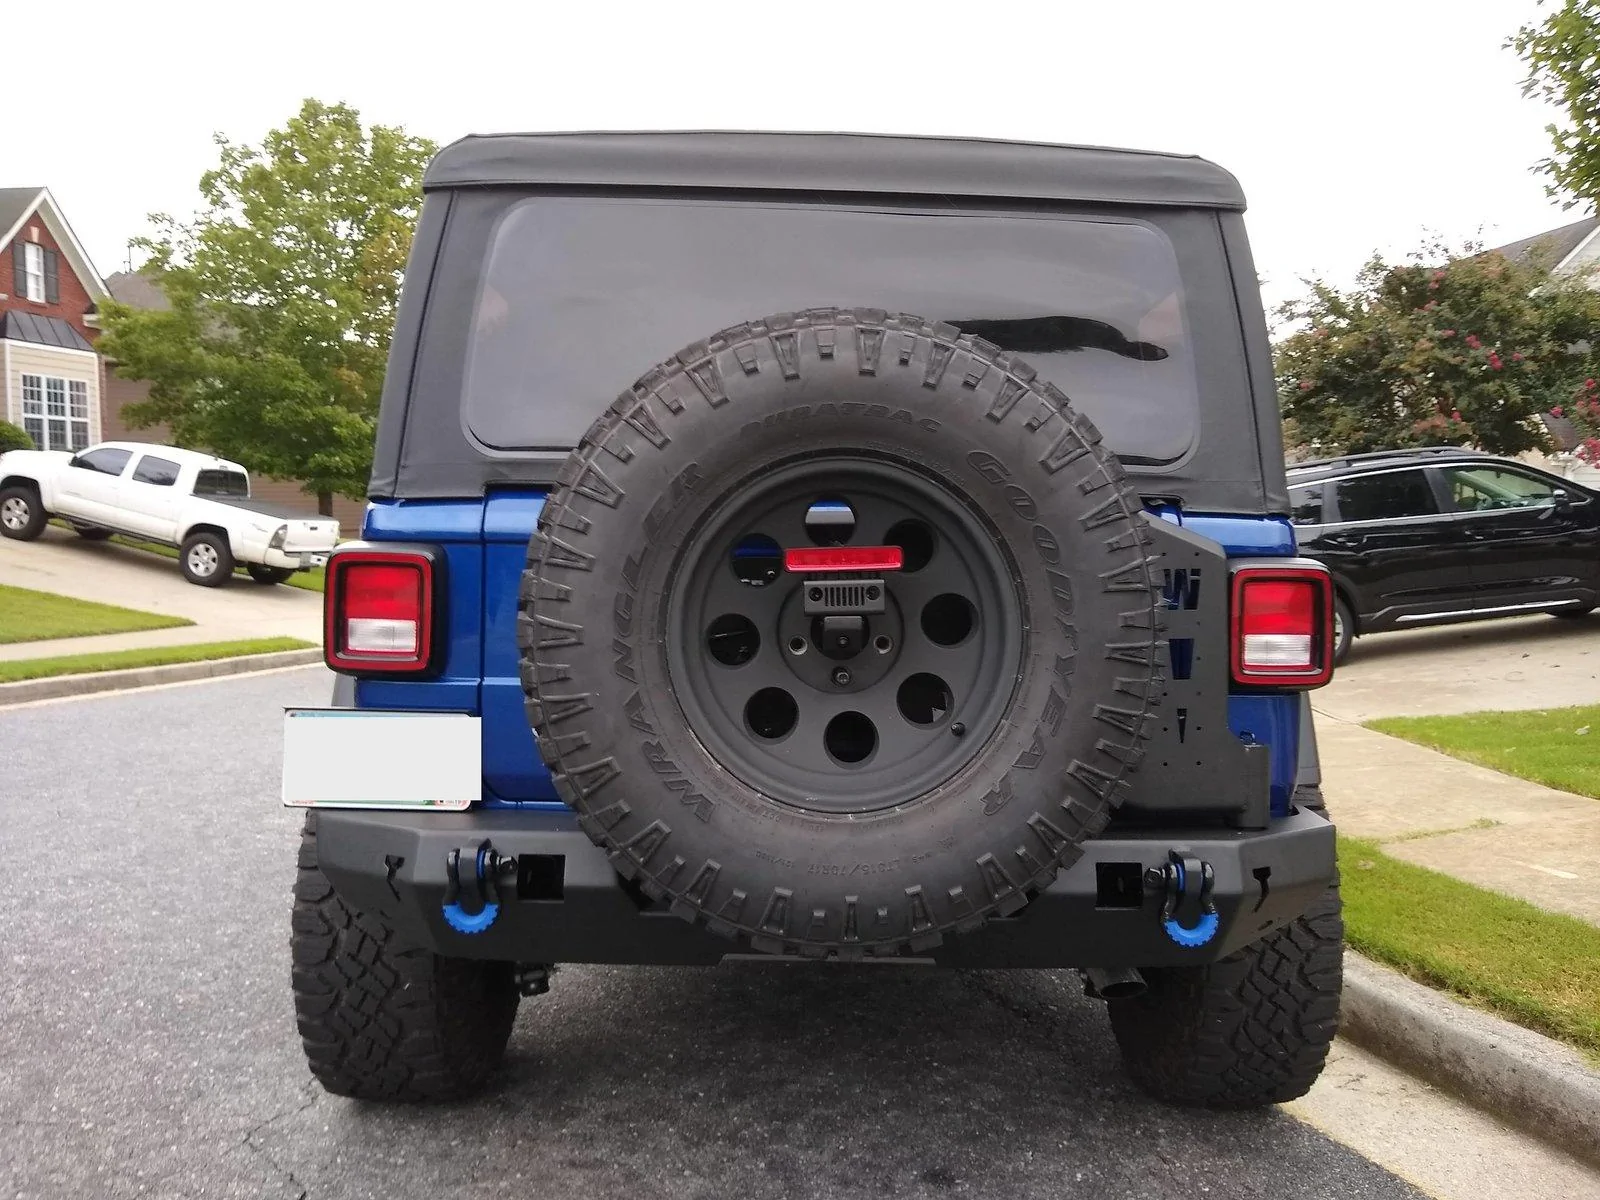
The tire carrier however was a pain… I made several attempts at install only to take it off and try something different. When I finally got it on, level and attached to the tailgate I realized it wasn't tight enough against the tailgate and the tire bounced a little too much. I collapsed the turnbuckle assemblies as far as they went and it put the rubber pad against the tailgate… just not tight. Not sure if you can see it in this picture but this was before we fixed it.

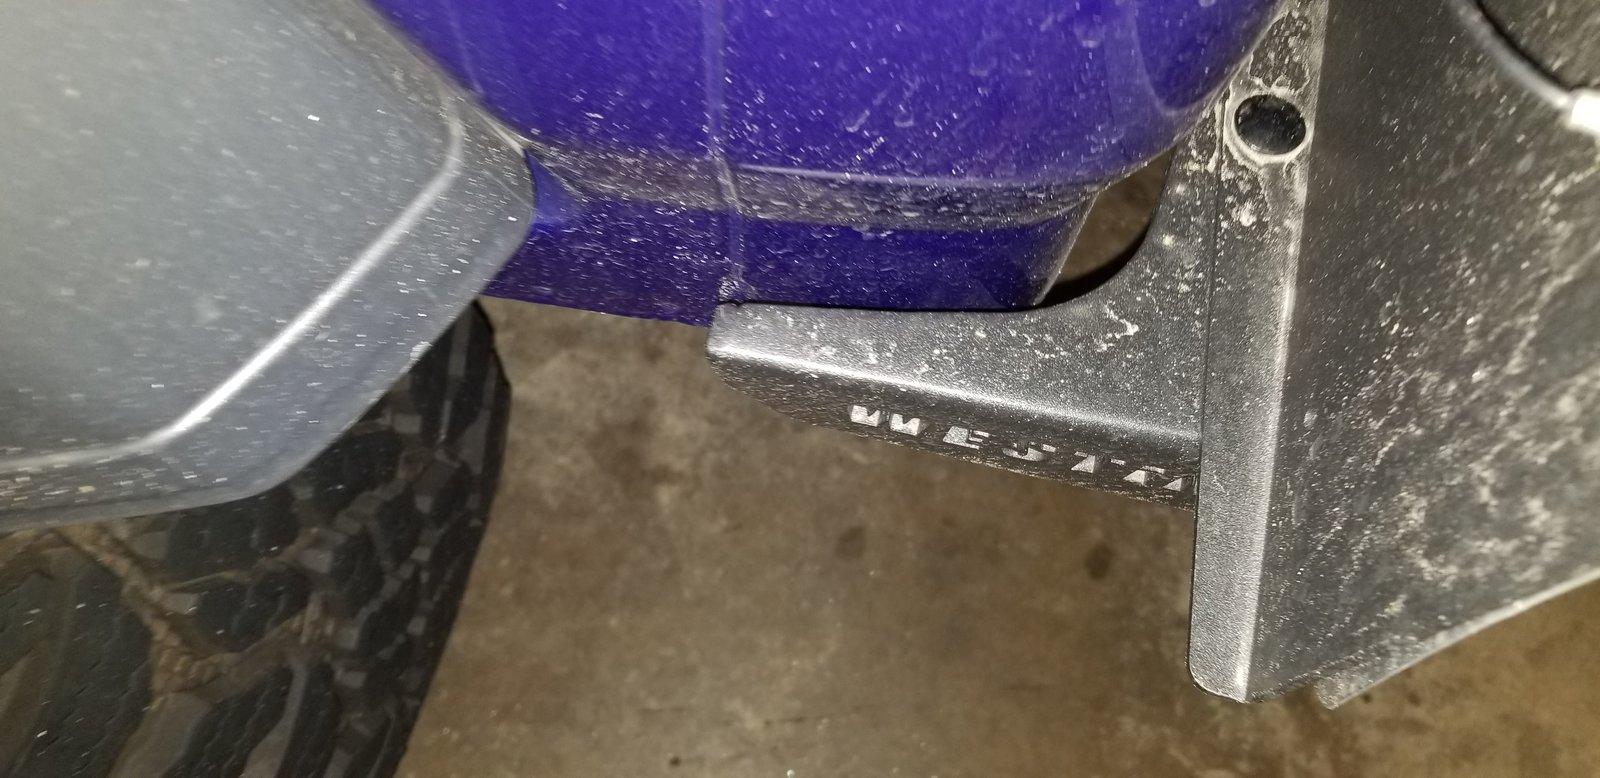
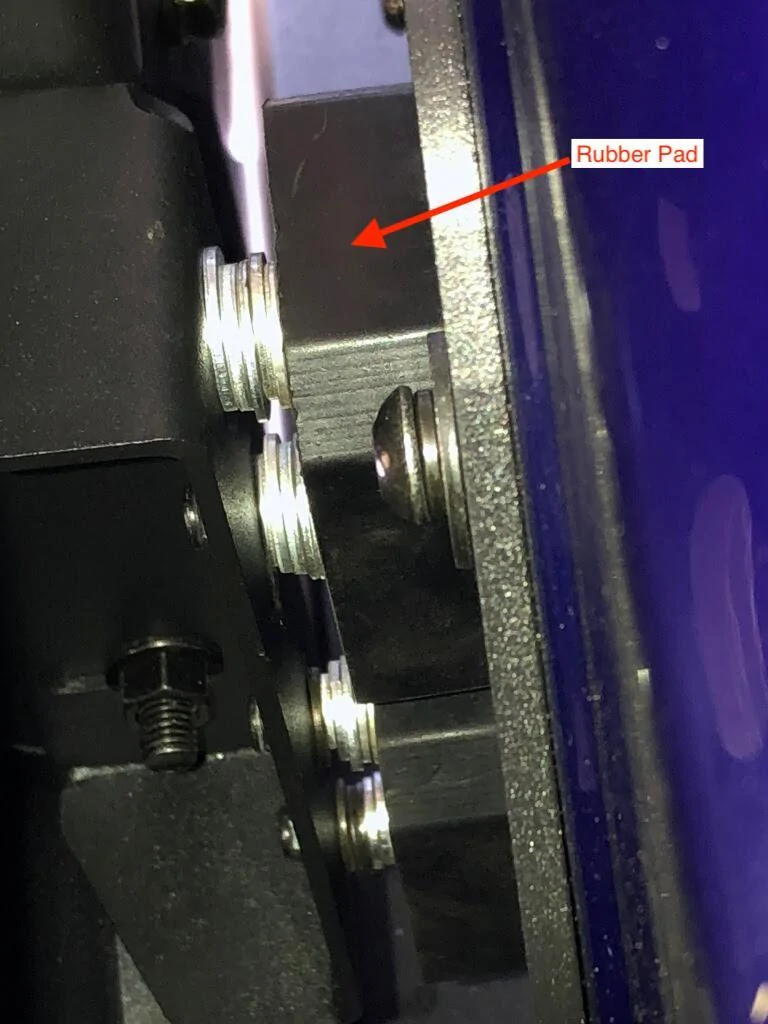
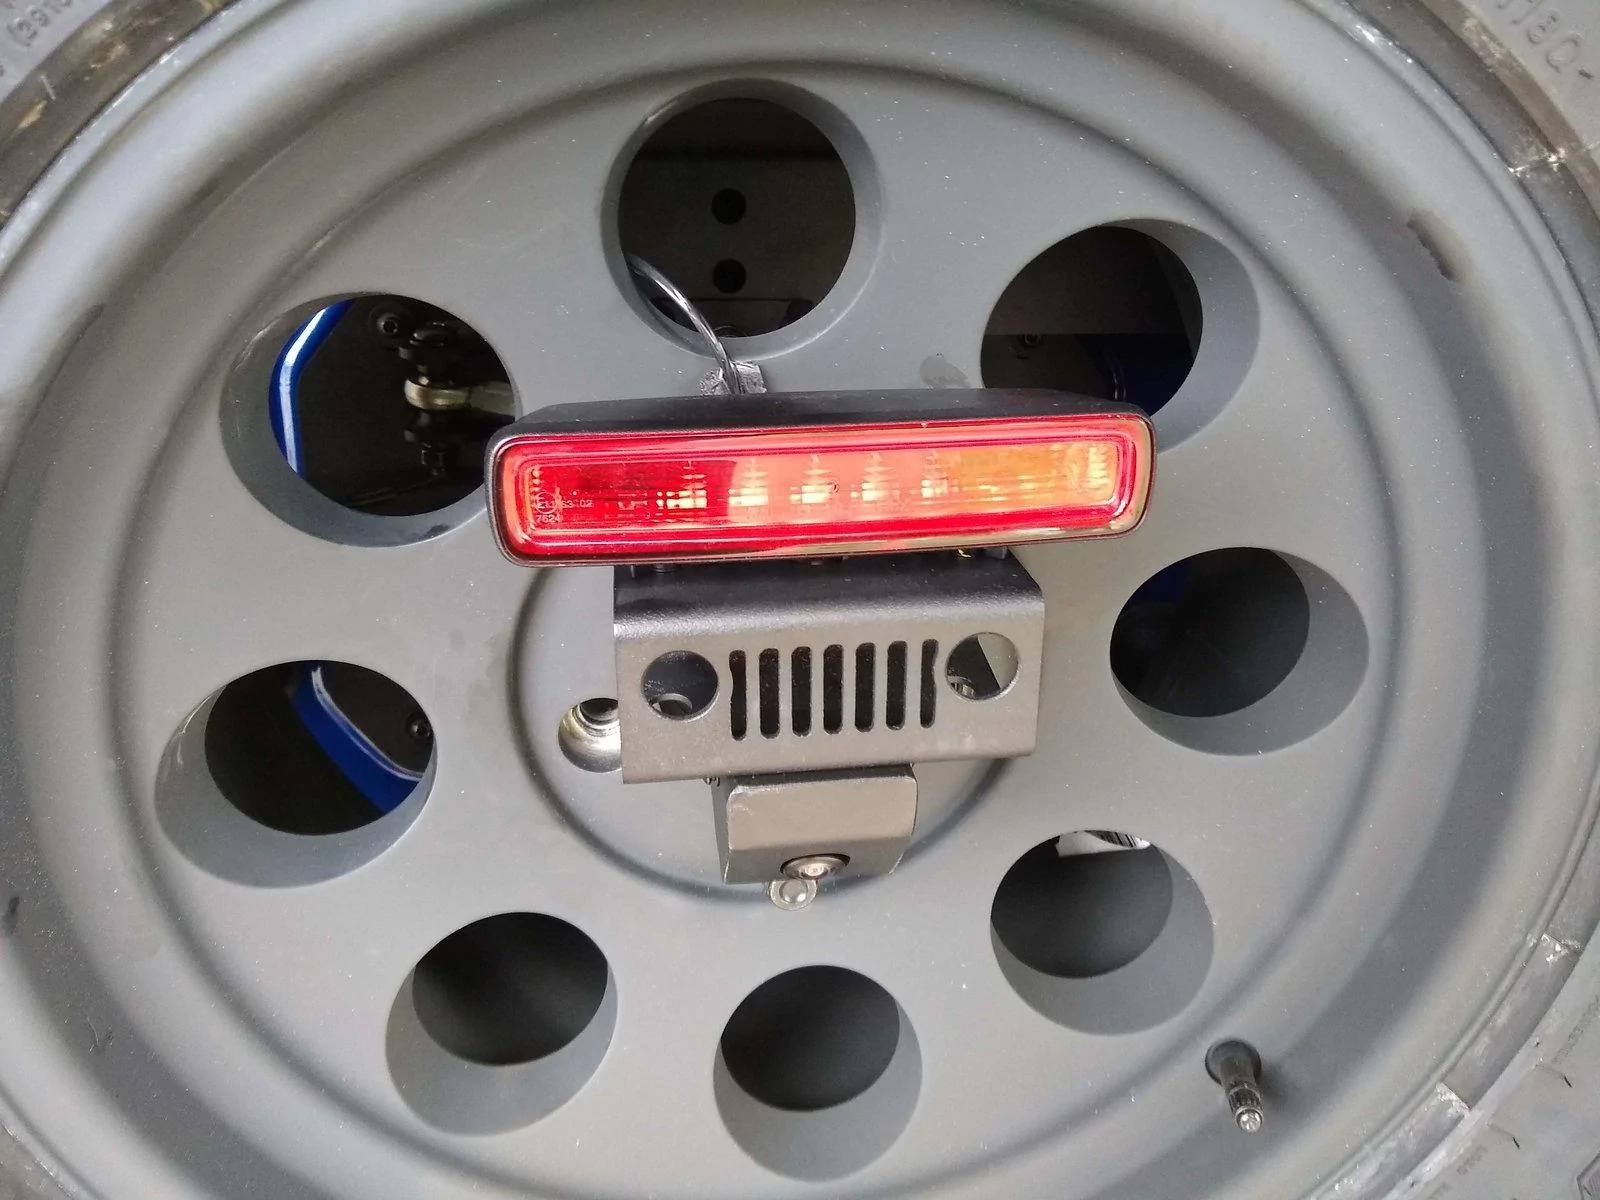
I took it over to Oconee Offroad and had them take a look at it… realizing i might be out of my depth here. Come to find out it wasn't how I installed it… the pad just isn't thick enough. They put 5 washers behind the pads to make them stick out a lot more, and that made it tight enough. Here is a picture of the washers.

I have been in contact with Westin about a few things on this install and they’ve been very helpful. I figured I’d send them these pics and some feedback and hope that they make a bracket that looks better than these washers.
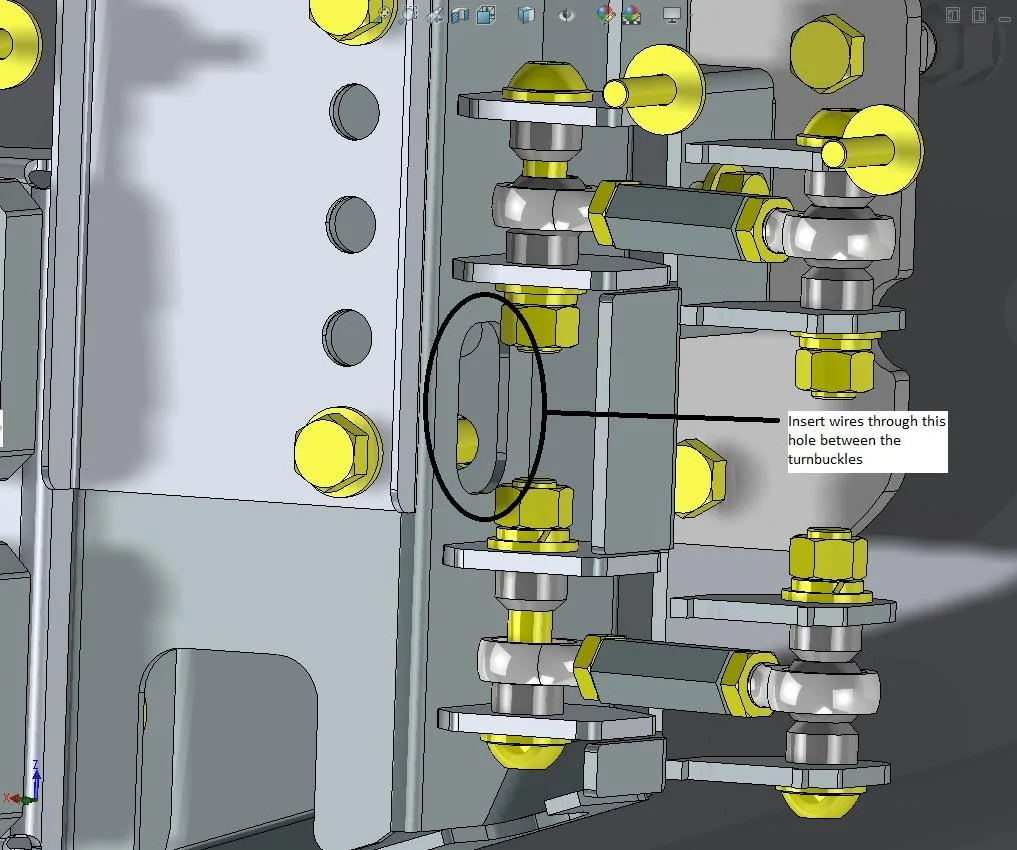
The other area that I had an issue was the camera wire. It didn’t seem to be long enough… and that was totally my mistake. I was putting the wire through the wrong hole. I’ve attached the pic they sent me in the event that it helps someone else trying to install this. BTW, you can still see the rim in the back up camera but not nearly as bad as it was on the stock carrier.


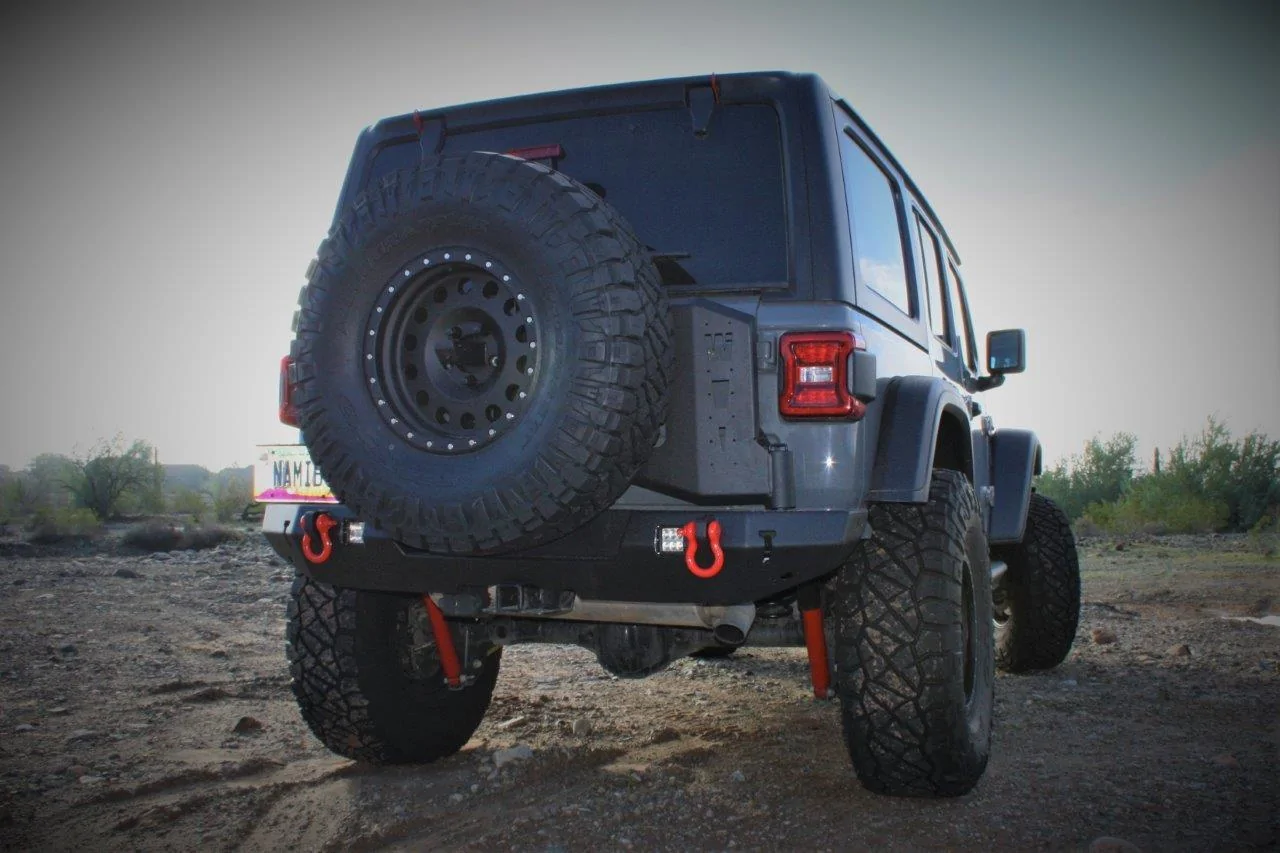
I had spent a lot of time looking for a license plate solution because none of the pictures or descriptions on westin’s site say anything about a plate holder (and the JL’s plate is on the stock bumper). I was just about to buy one but when I opened the box it had a plate holder that mounts to the top of the bumper and two LED lights. It does stick out from the side of the bumper but it’s not not wider than the fender. Maybe one day i’ll move to a tire mounted one but I’m happy with this one for now.
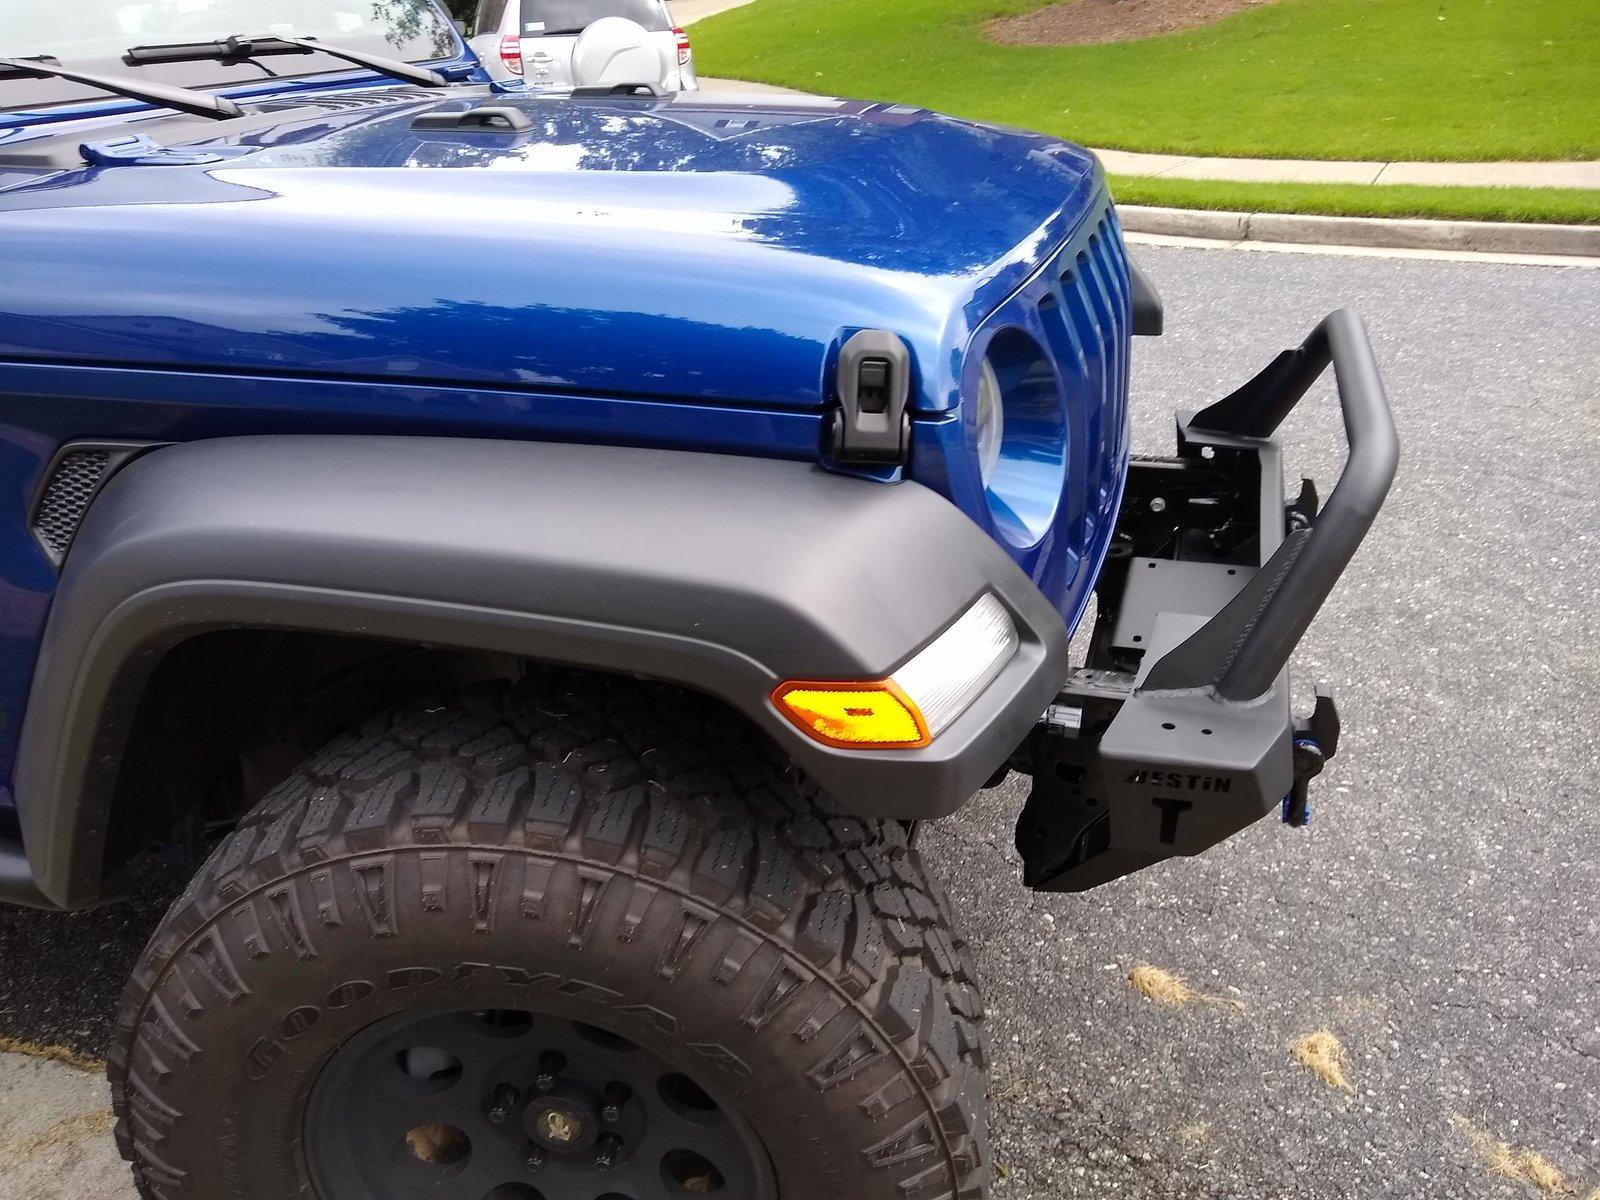
The front bumper should have been easy… it’s 8 bolts. But… I could not get the holes to line up right. One bolt would just not go in so I took the bumper off again only to realize there was a drip from the welding in the opening. I dremeled it out and swapped the bolts to one that had a tapered tip and finally got it on.
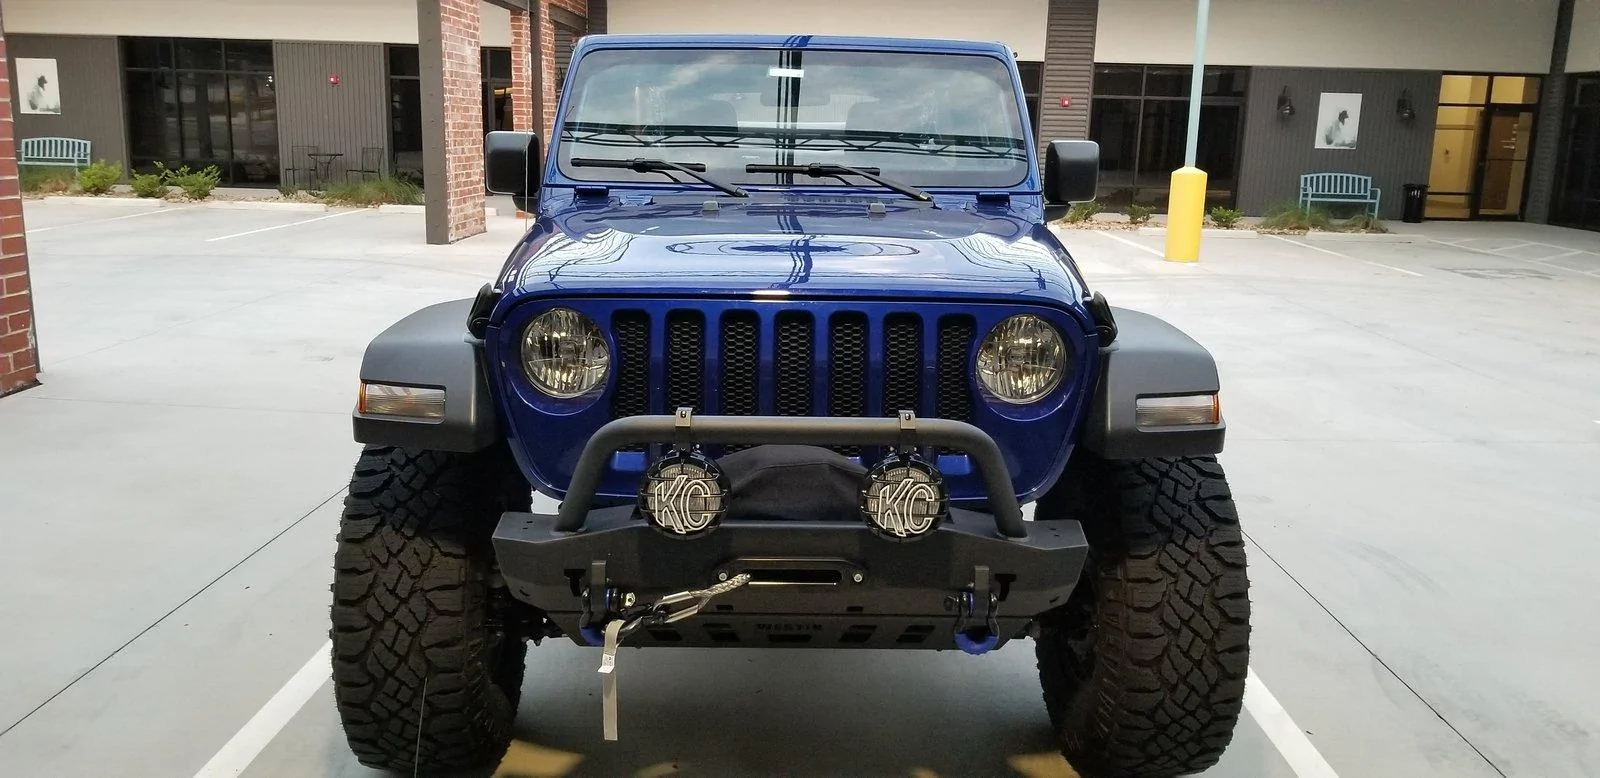
When I bought this I originally committed to the full size bumper which has fog light holes. At the last minute I realized the front full size bumper was wider than the rear bumper (the rear does not go to the edge of the fenders). Call it OCD but that would bug me to no end so I did a last minute swap for the stubby. I didn’t realize there were no fog light holes until I went to install. Dumb, I know… So I bought 6 inch KC fog lights and spliced it into the wires from the OEM lights. It worked great and my stock fog light switch turns them on.
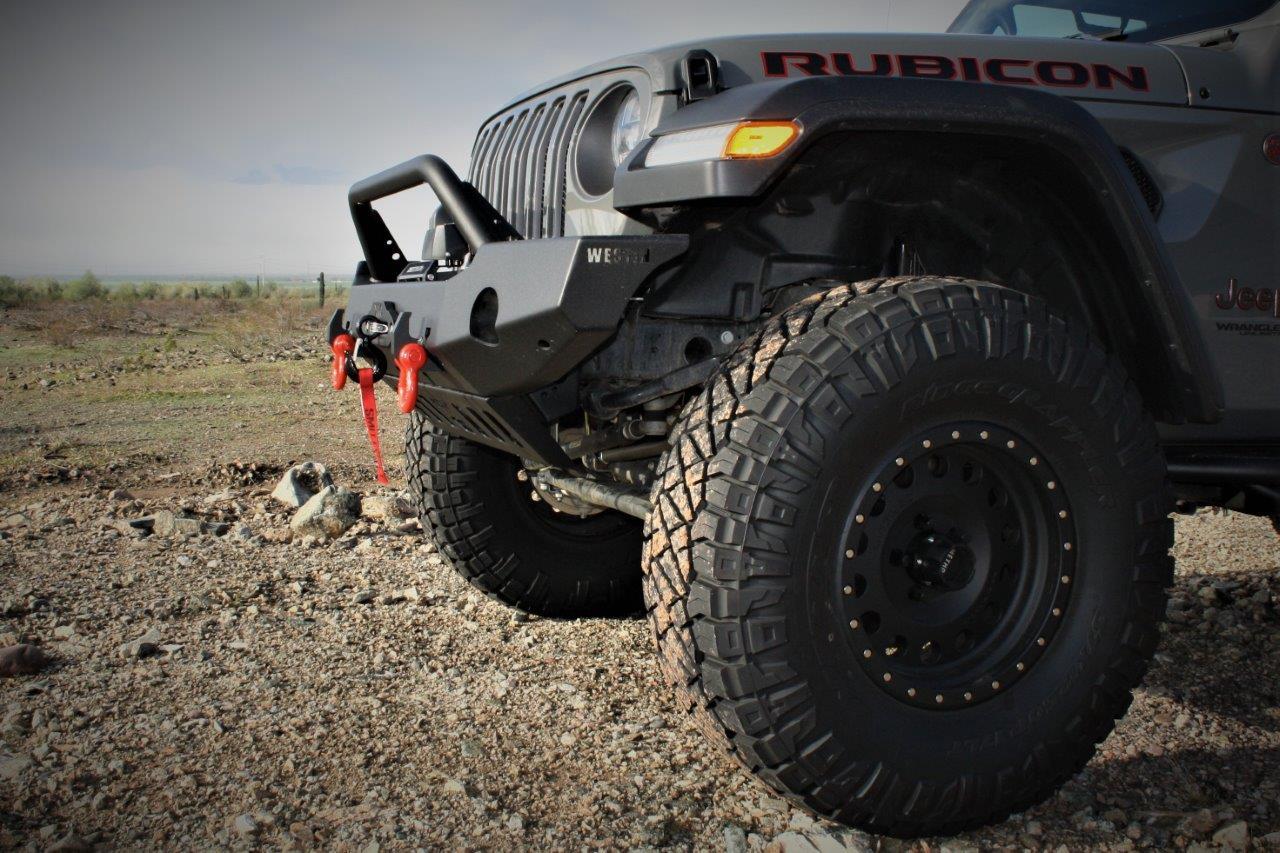
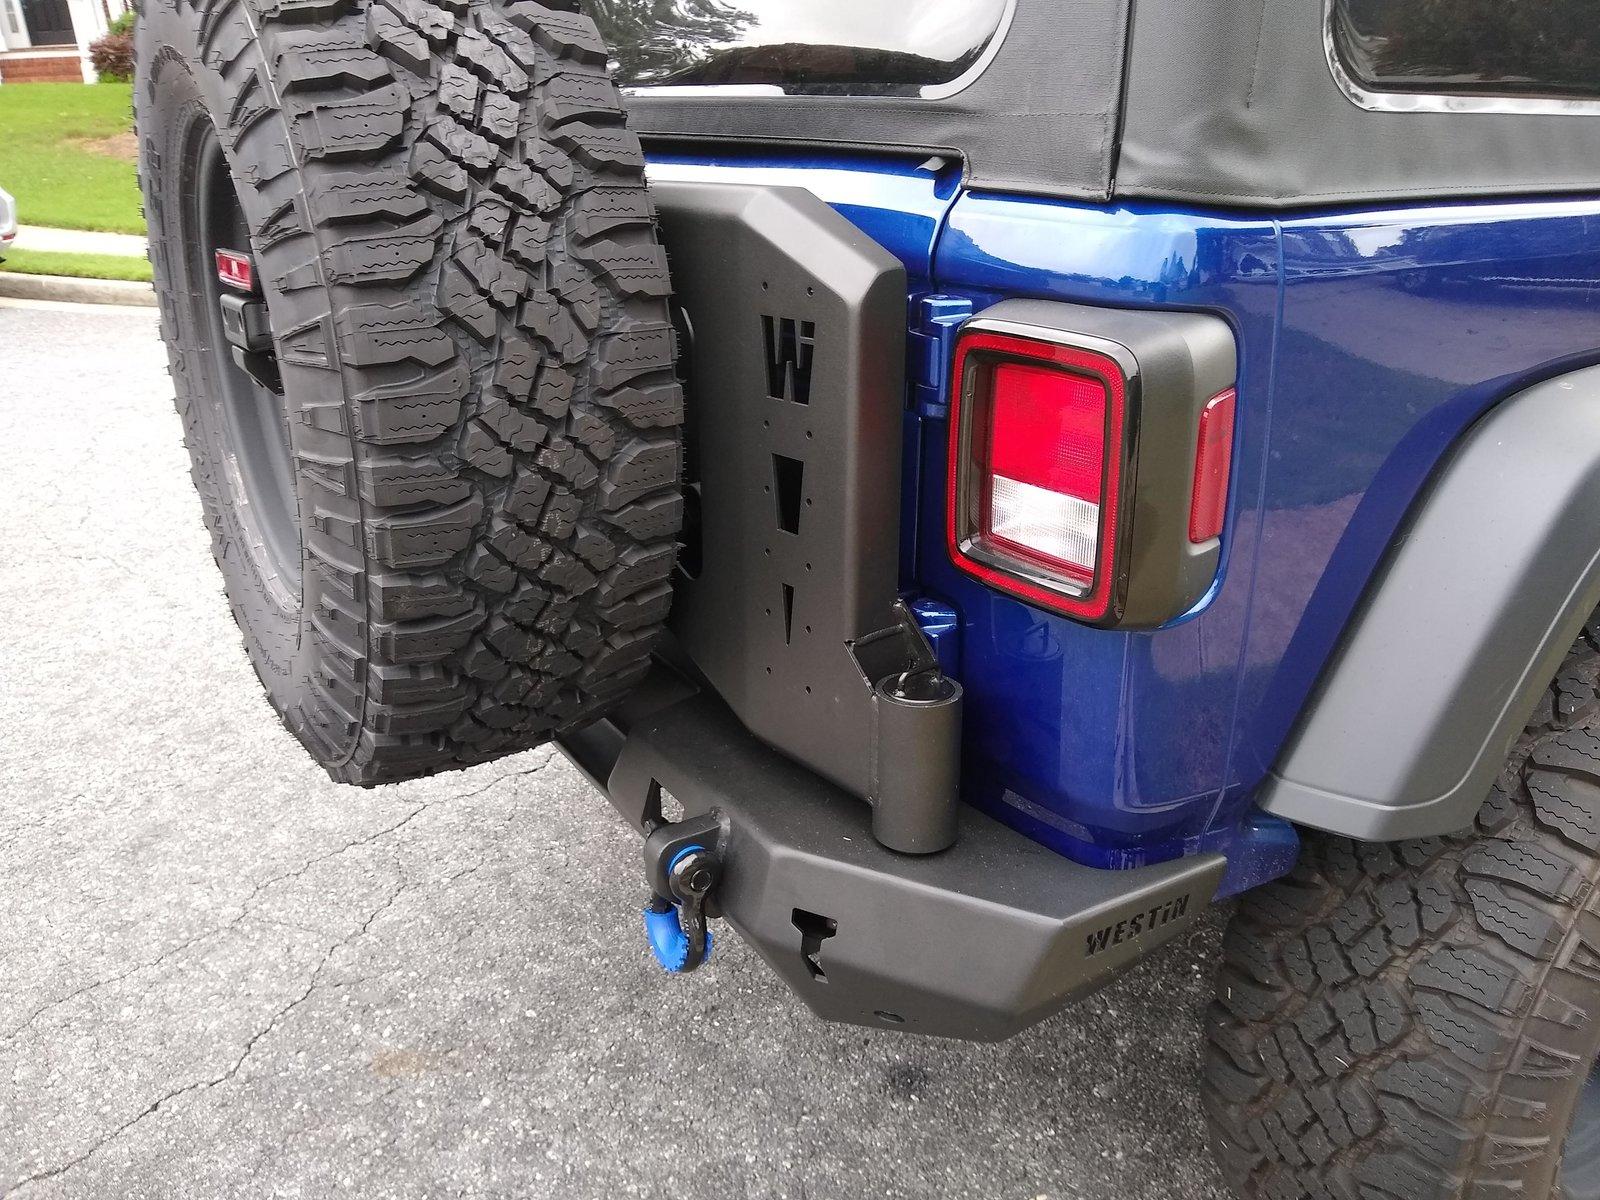
Here’s the final product. I also swapped out my RC spacer lift for a Rubicon express full lift kit. I still need to wire the rear lights and install the auxiliary buttons (bought the mopar kit) and then I’m done. At least for a little while")
What I bought:
WJ2 Stubby Front Bumper - 59-80075
WJ2 Rear Bumper w/ Tire Carrier - 59-82035
Skid plate
Westin Synthetic winch
Lights for rear bumper
KC 6 inch fog lights
Mopar light relocation kit
Shackles
Taking off the stock bumpers off was pretty easy. Getting the rear bumper on was pretty easy as well.

The tire carrier however was a pain… I made several attempts at install only to take it off and try something different. When I finally got it on, level and attached to the tailgate I realized it wasn't tight enough against the tailgate and the tire bounced a little too much. I collapsed the turnbuckle assemblies as far as they went and it put the rubber pad against the tailgate… just not tight. Not sure if you can see it in this picture but this was before we fixed it.
I took it over to Oconee Offroad and had them take a look at it… realizing i might be out of my depth here. Come to find out it wasn't how I installed it… the pad just isn't thick enough. They put 5 washers behind the pads to make them stick out a lot more, and that made it tight enough. Here is a picture of the washers.
I have been in contact with Westin about a few things on this install and they’ve been very helpful. I figured I’d send them these pics and some feedback and hope that they make a bracket that looks better than these washers.
The other area that I had an issue was the camera wire. It didn’t seem to be long enough… and that was totally my mistake. I was putting the wire through the wrong hole. I’ve attached the pic they sent me in the event that it helps someone else trying to install this. BTW, you can still see the rim in the back up camera but not nearly as bad as it was on the stock carrier.
I had spent a lot of time looking for a license plate solution because none of the pictures or descriptions on westin’s site say anything about a plate holder (and the JL’s plate is on the stock bumper). I was just about to buy one but when I opened the box it had a plate holder that mounts to the top of the bumper and two LED lights. It does stick out from the side of the bumper but it’s not not wider than the fender. Maybe one day i’ll move to a tire mounted one but I’m happy with this one for now.
The front bumper should have been easy… it’s 8 bolts. But… I could not get the holes to line up right. One bolt would just not go in so I took the bumper off again only to realize there was a drip from the welding in the opening. I dremeled it out and swapped the bolts to one that had a tapered tip and finally got it on.
When I bought this I originally committed to the full size bumper which has fog light holes. At the last minute I realized the front full size bumper was wider than the rear bumper (the rear does not go to the edge of the fenders). Call it OCD but that would bug me to no end so I did a last minute swap for the stubby. I didn’t realize there were no fog light holes until I went to install. Dumb, I know… So I bought 6 inch KC fog lights and spliced it into the wires from the OEM lights. It worked great and my stock fog light switch turns them on.
Here’s the final product. I also swapped out my RC spacer lift for a Rubicon express full lift kit. I still need to wire the rear lights and install the auxiliary buttons (bought the mopar kit) and then I’m done. At least for a little while

Sponsored