Crusifix
Well-Known Member
- First Name
- Jeff
- Joined
- Mar 8, 2019
- Threads
- 20
- Messages
- 727
- Reaction score
- 1,318
- Location
- West Virginia
- Vehicle(s)
- 2019 JLU Rubicon 2.0T Hurricane
- Thread starter
- #1
I'm slowly upgrading the Alpine system so that it has a bit more scream to it. I appreciate that the system isn't horrible, but sometimes when out camping, it would be nice to have a portable party in the back of Bruce, haha. (I named my Jeep Bruce, after the shark in Finding Nemo...My kids helped..smh). The goal is to do a little bit at a time so that I can experience where the differences come from. I am not going to be amplifying anything other than the sub at first, but I will slowly add two separate amps that will drive the fronts and rears. If it isn't obvious, I like Kicker for everything except for the sub. I am not trying to win any competitions, but I really want to HEAR the audio clearly. Some of these images are stock images. As I get good photos throughout the build I will substitute them out.
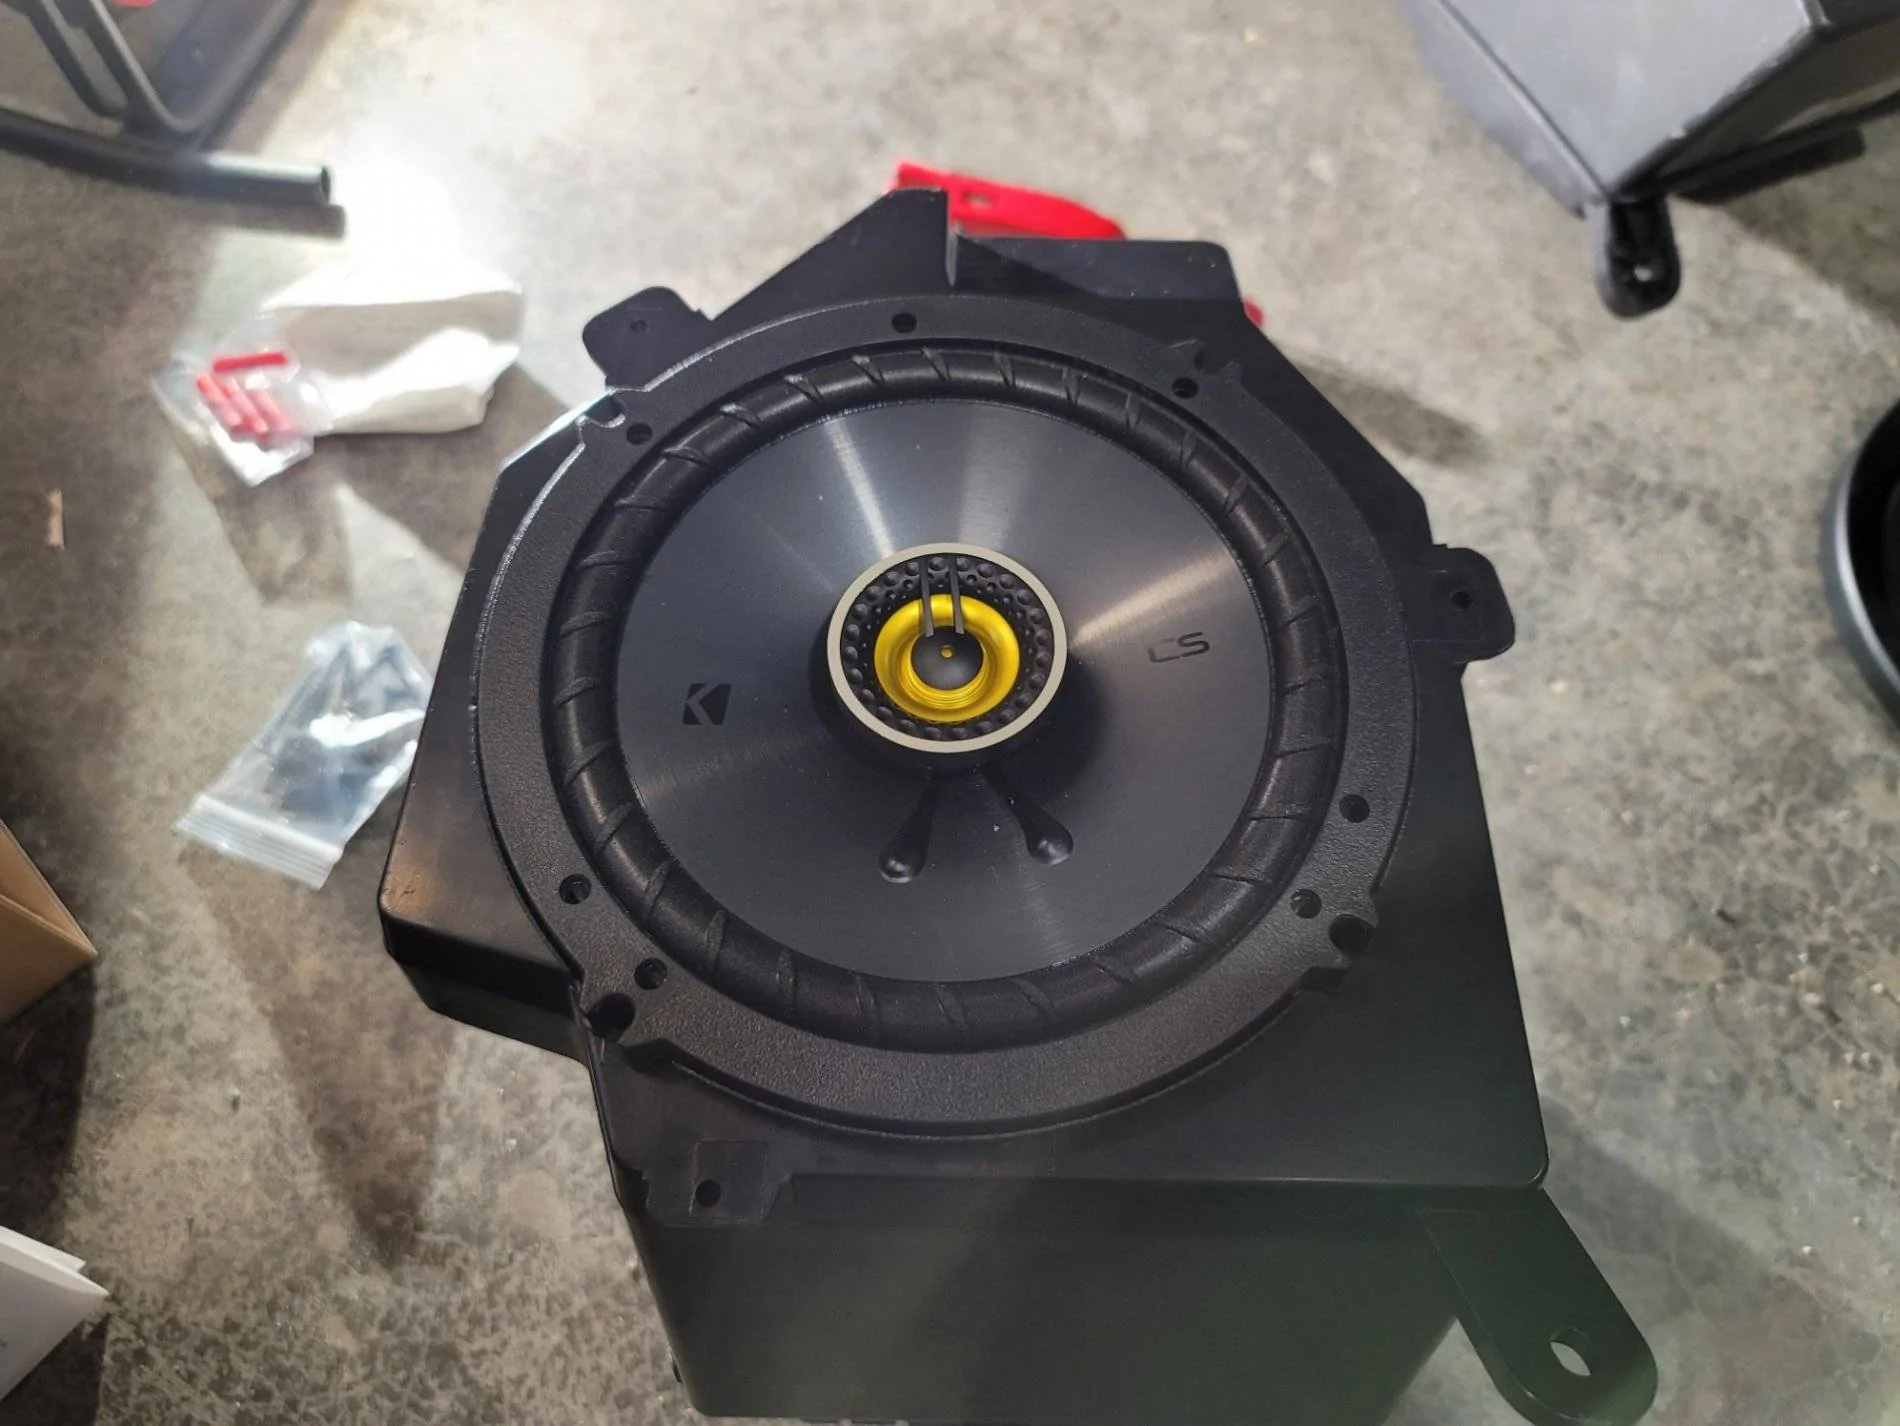
The first thing I did was replace the knee panel speakers with some Kicker 46CSC654 6.5 2 ways. Those were installed in the Metra boxes. I applied NICO sound deadening on the inside, as well as poly-fill.

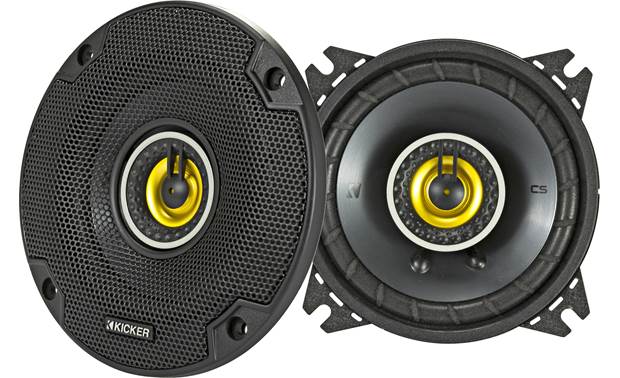
I have a set of Kicker 46CSC44, 4" 2-ways ready to go into the sound bar. I will be lining that box the same way as I did the knee boxes. I will be installing them this weekend.

I will be ordering a set of Kicker 47KSC3504 3.5" 2-ways to replace the dash tweeters and the sound bar tweeters, but first I want to get used to how everything sounds and see if it is even necessary. Upgrading the 4" woofers to 2-ways may make that a moot point as far as my ears are concerned, though I do think that the dash speakers definitely need help or the sound stage may fall a little flat. I may even change my mind on those and go with straight up tweeters...who knows?

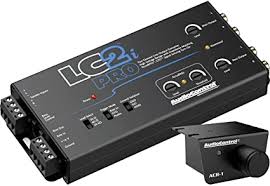
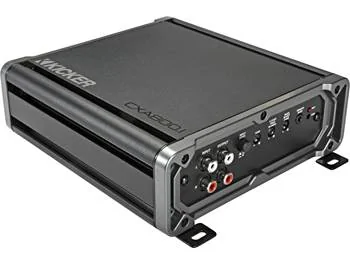
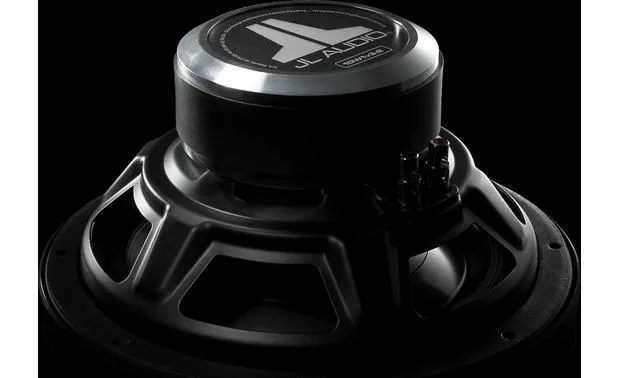
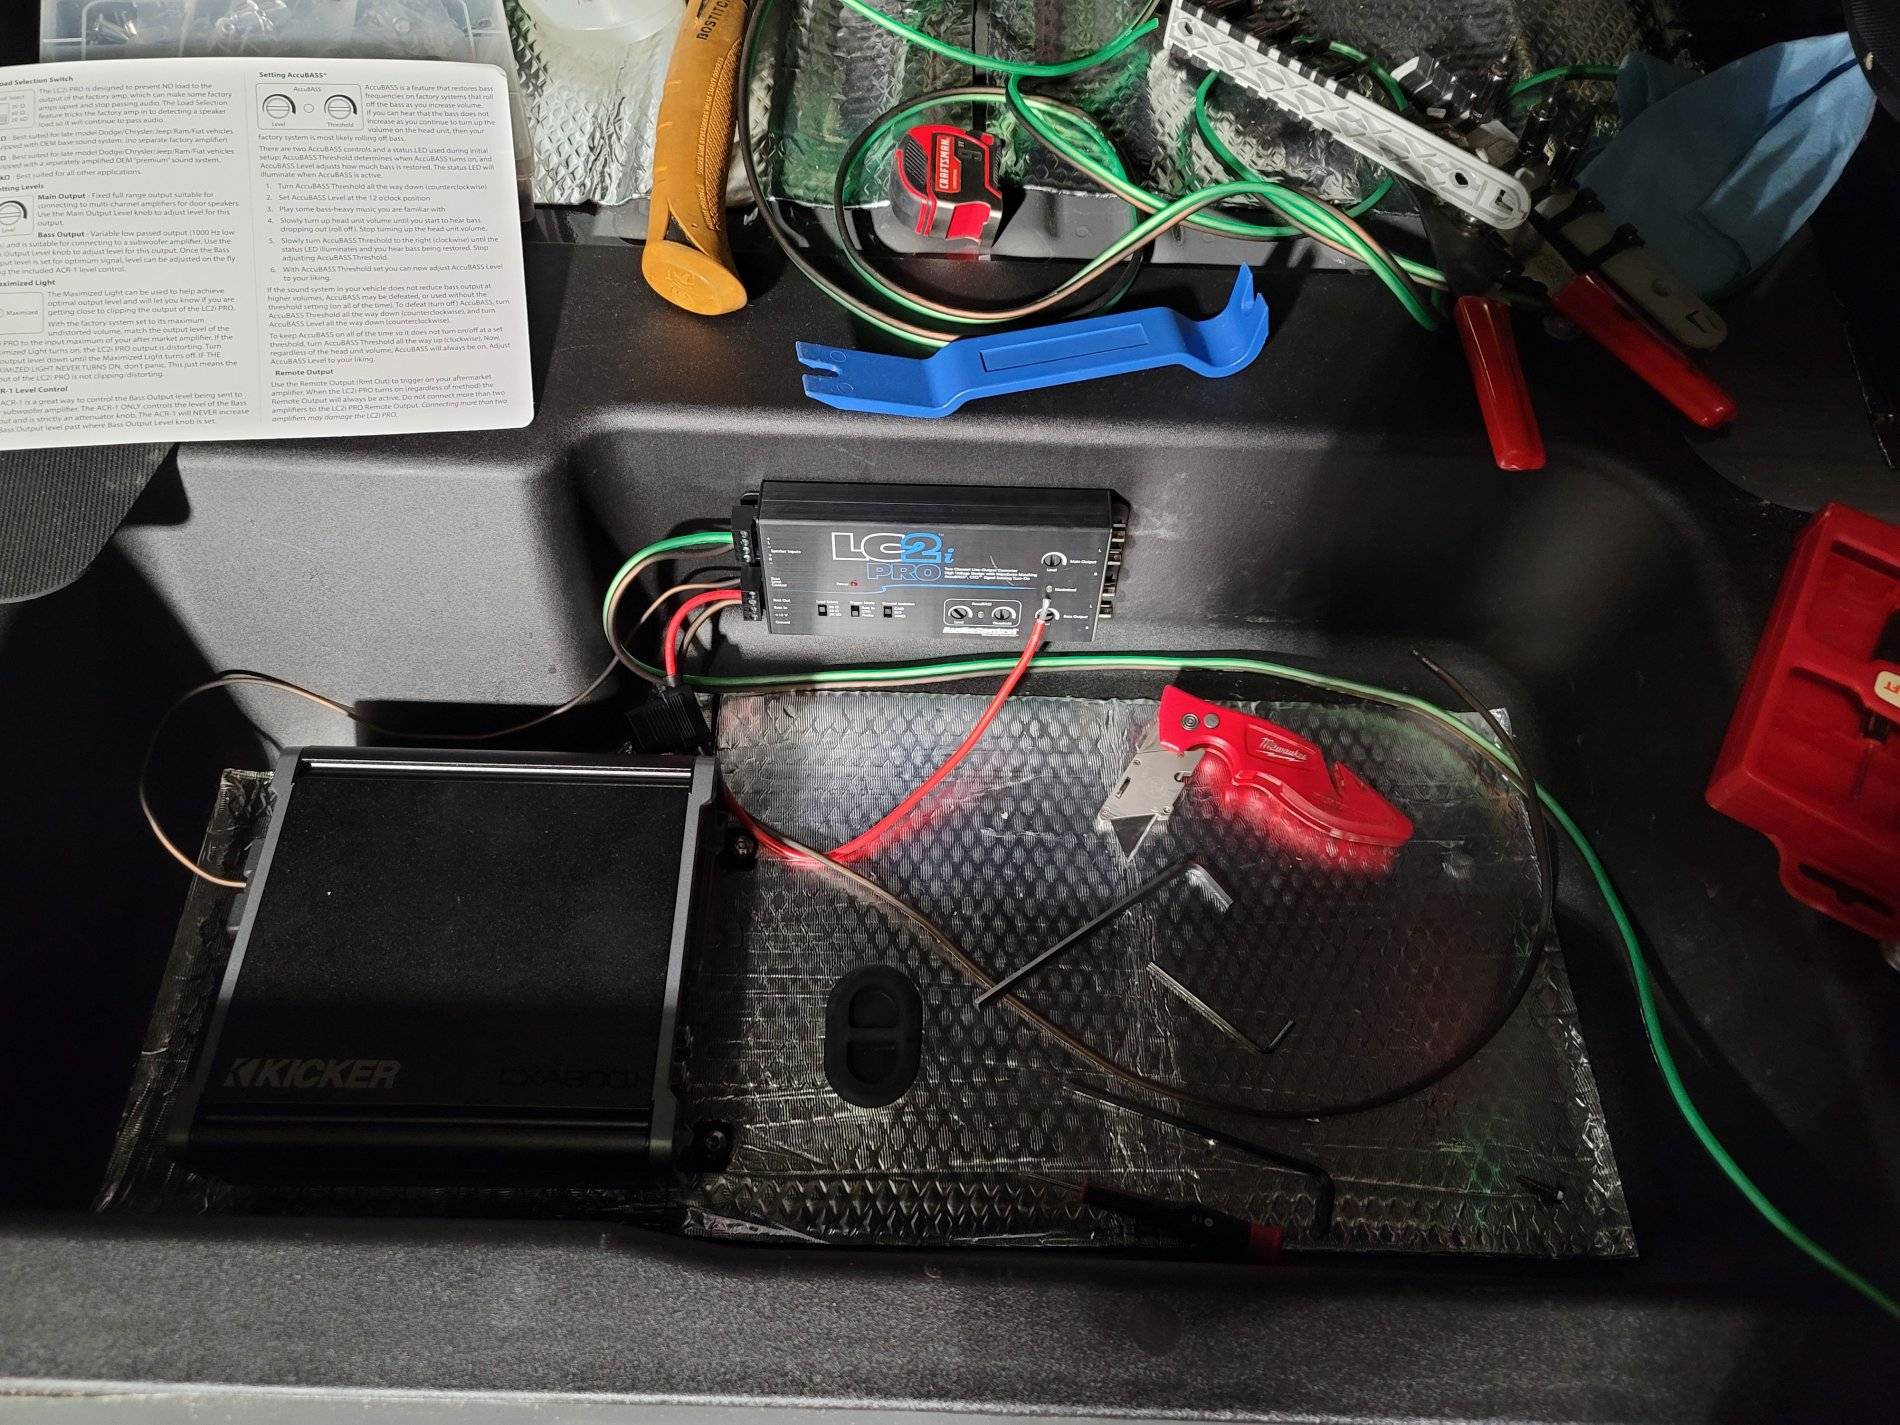
Now for the first of the amplified speakers. The JL Audio 10W1V3-2, is a two ohm woofer that is being fed by a LC2i-pro for signal and a Kicker 46CXA800.1 amplifier. I want plenty of overhead and I think this mono amp is probably the best on the market for the amount of watts I need, which is only half of what it can put out RMS at 2 ohms. It should run well and cool.


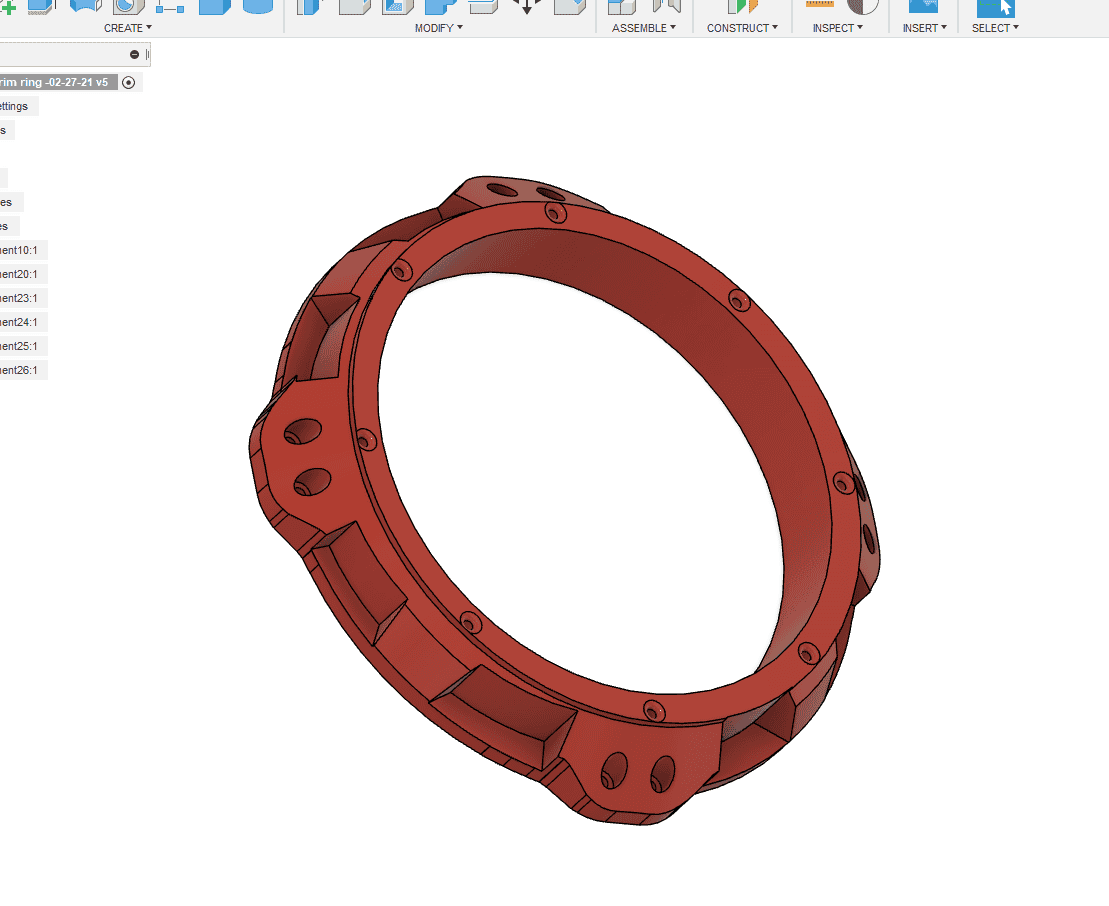
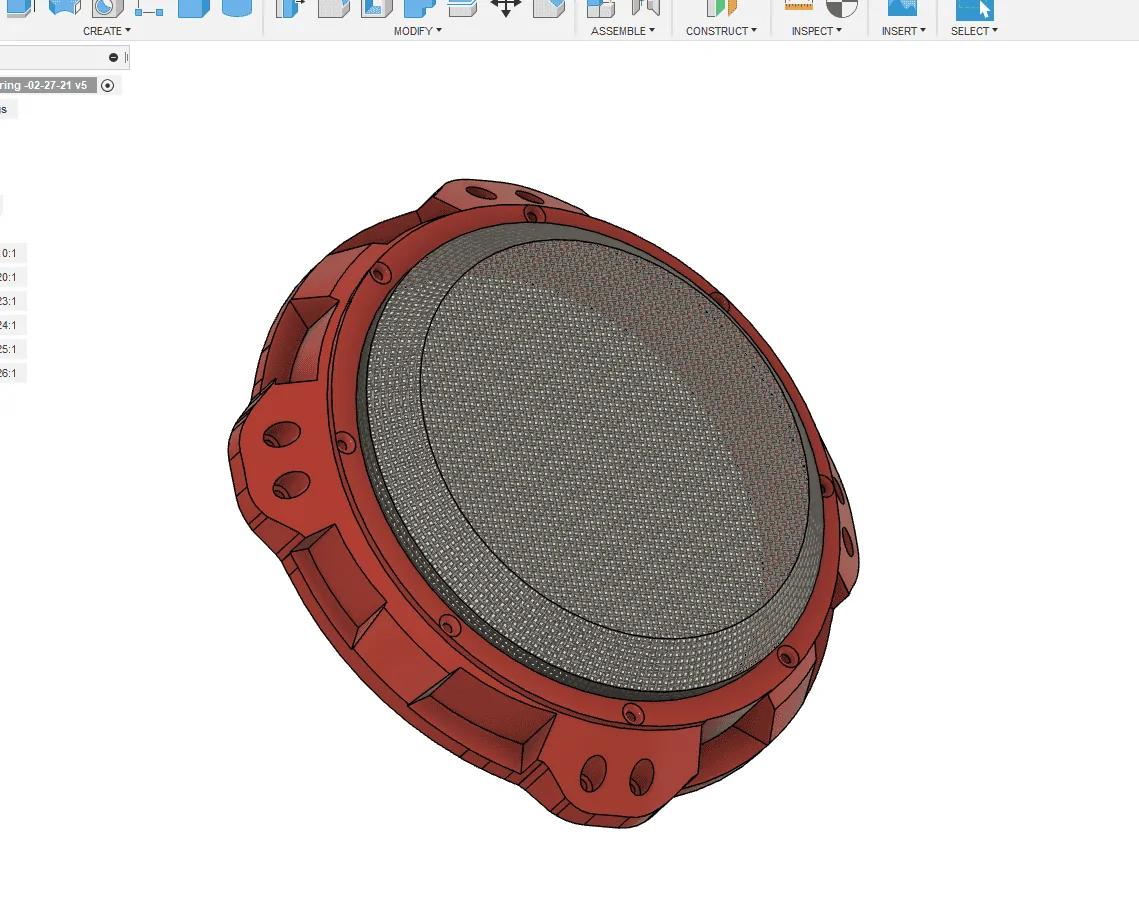
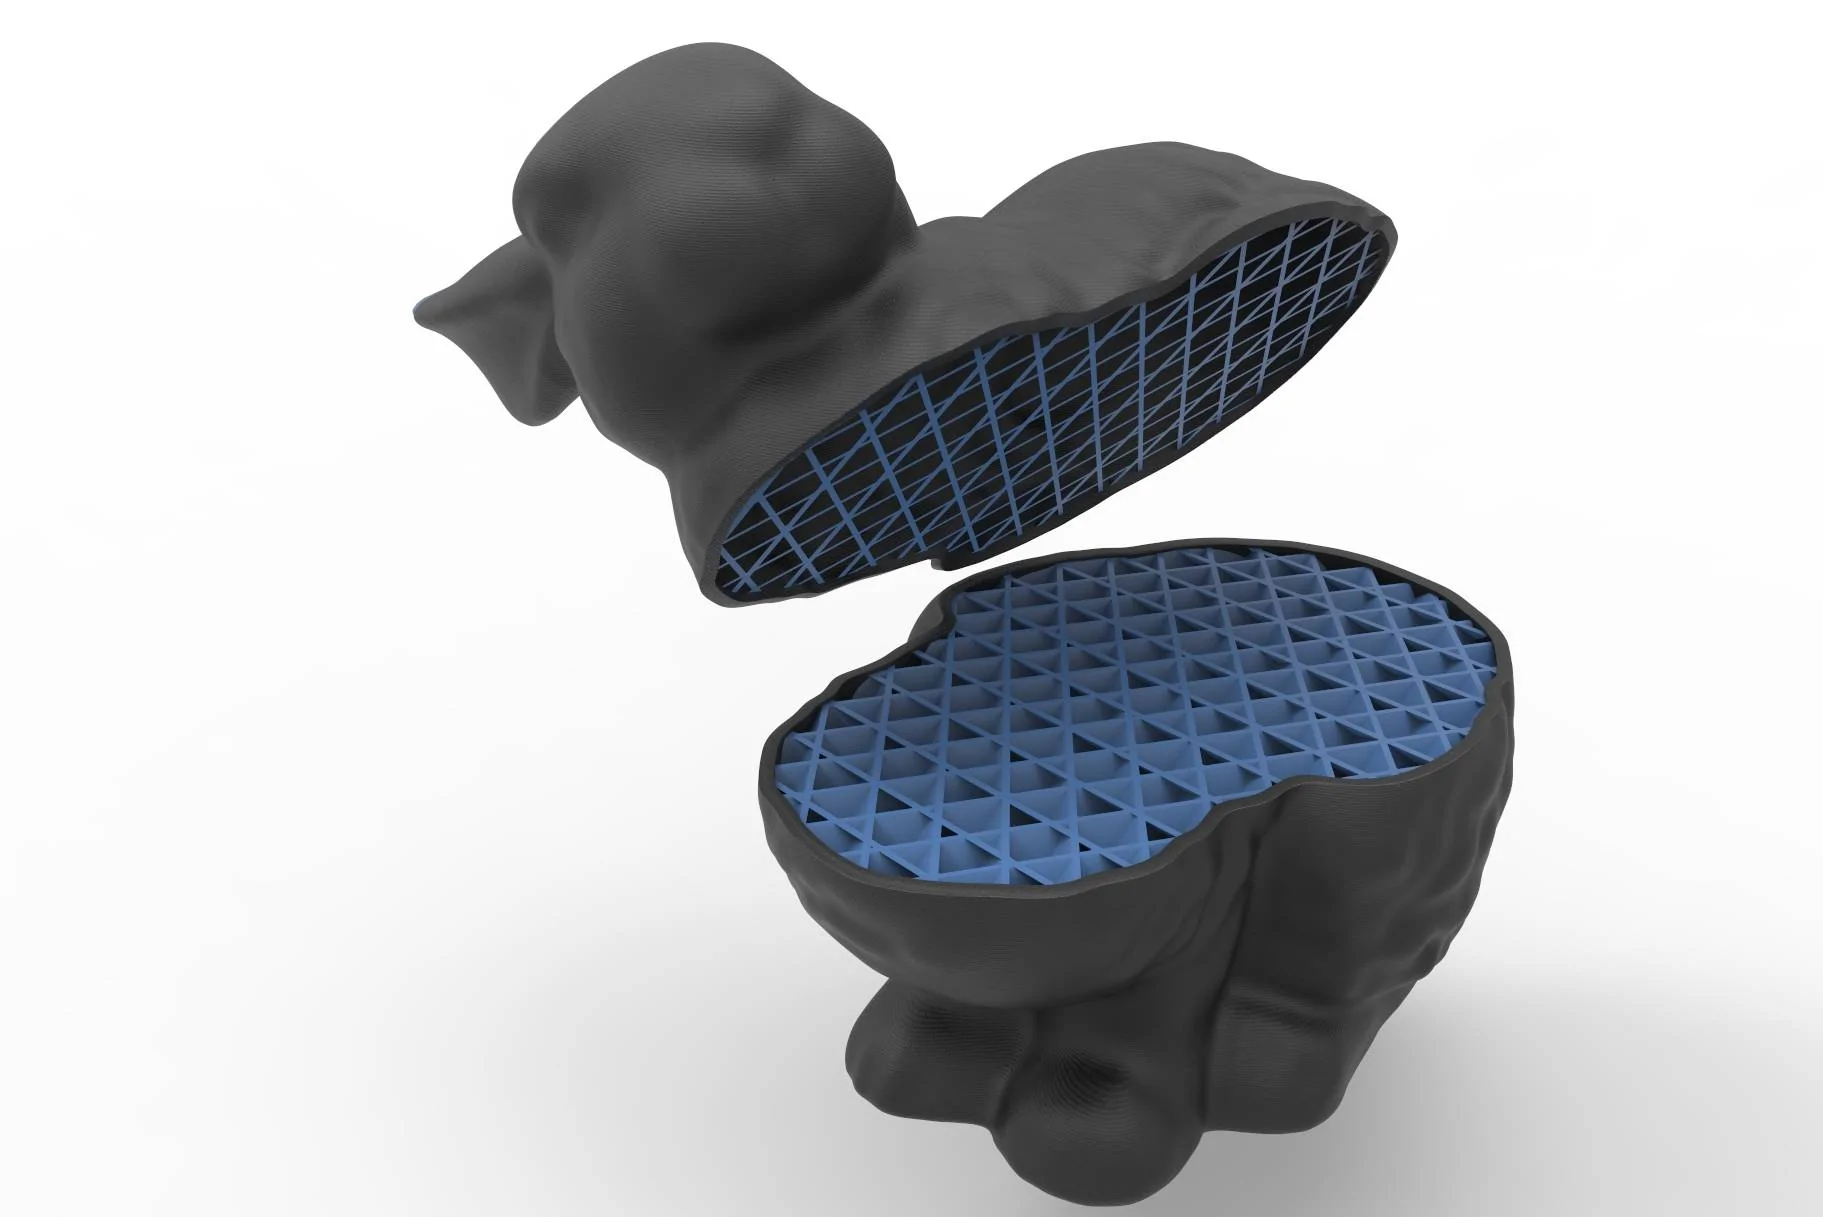
Now to the fun...getting the sub to fit into the stock enclosure. It has been a bit tricky coming up with an adapter, but I was finally able to design something that is ridged and should take any abuse that I throw at it. I printed the adapter ring out of PETG, which is known for being tough and resistant to high and low temperatures. It is printed, but I have not yet take a photo of it. Here is the final cad drawing of it.


Now on to the enclosure. I am going to be doing a fair amount of cleaning it up and strengthening, as well as also covering the whole inside and rear of it with more sound deadening material. I will know more once I have it remove and can inspect it for any flimsy areas that need reinforcement. That is nothing that some epoxy and custom printed bulkheads can't take care of.
I am feeding everything with a 4-guage homerun power supply cable from the battery, that will be tied to a 100amp waterproof breaker mounted 12 inches off of the battery terminal. From that I will branch to everything else that needs power. The LOC will have a 1-amp inline fuse running to it, and the Amp will have a 80-amp inline feeding into it.
As I get more photos and info, this page will be updated. I am open to any suggestions or moral support..haha!
--------Update #1
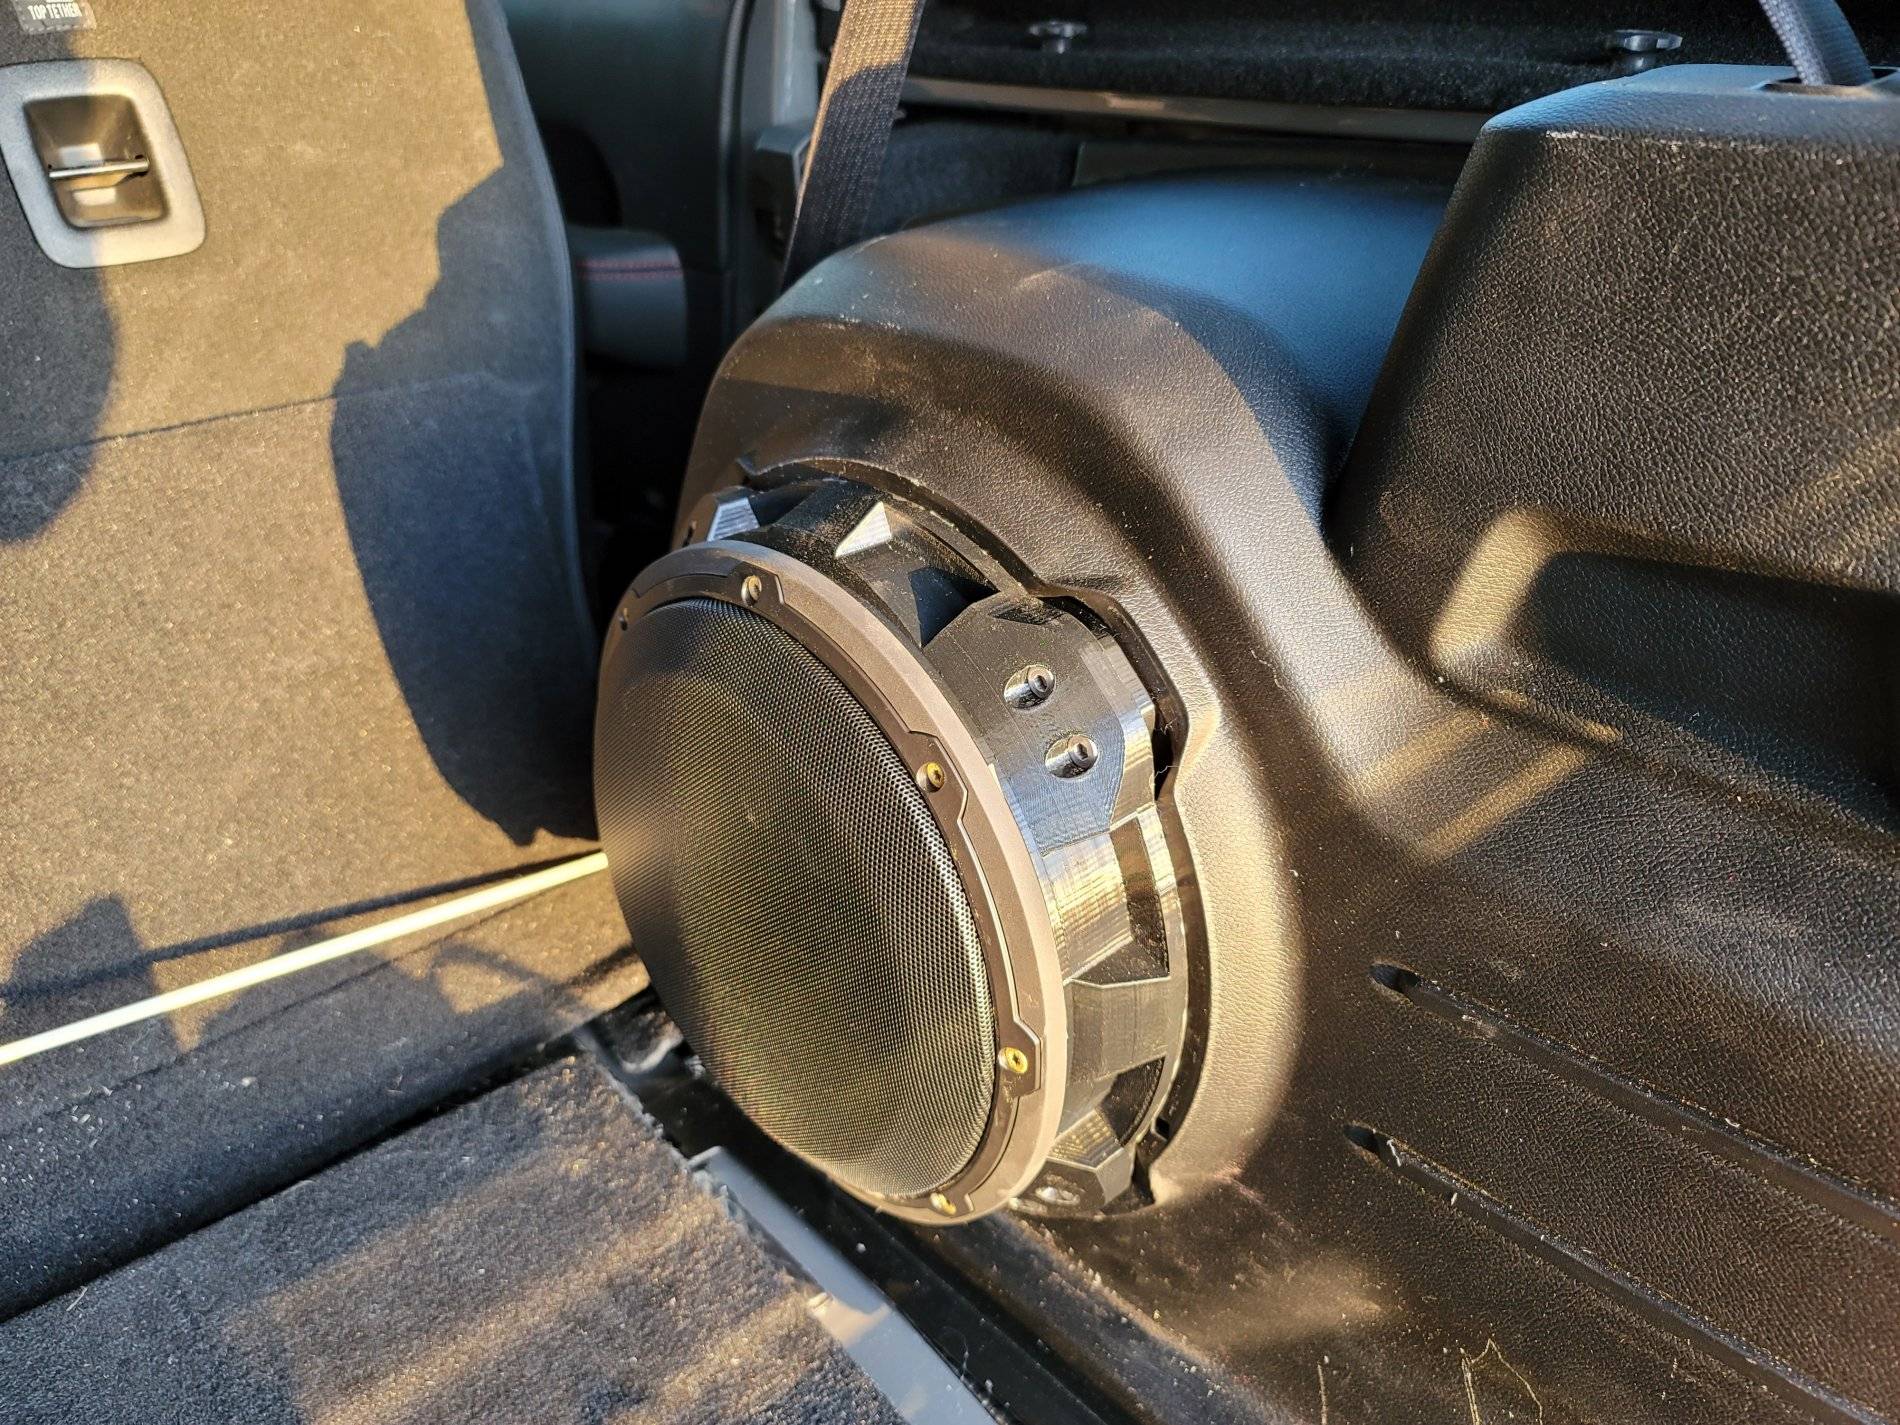
I was busy after work this evening. I pulled the enclosure and went to town beefing it up, and laying some sound deadening inside of it. I also laid some NICO matt inside the whole back end of the jeep. That actually went rather quick. Any way, Here are some updated photos of the process. The good news is that the adapter fits like OEM.
I got a little further tonight. Running wire and bolting things down. I'm going to 3d print some wire separators..organizers... Sometime to clean it up.
The first thing I did was replace the knee panel speakers with some Kicker 46CSC654 6.5 2 ways. Those were installed in the Metra boxes. I applied NICO sound deadening on the inside, as well as poly-fill.
I have a set of Kicker 46CSC44, 4" 2-ways ready to go into the sound bar. I will be lining that box the same way as I did the knee boxes. I will be installing them this weekend.
I will be ordering a set of Kicker 47KSC3504 3.5" 2-ways to replace the dash tweeters and the sound bar tweeters, but first I want to get used to how everything sounds and see if it is even necessary. Upgrading the 4" woofers to 2-ways may make that a moot point as far as my ears are concerned, though I do think that the dash speakers definitely need help or the sound stage may fall a little flat. I may even change my mind on those and go with straight up tweeters...who knows?

Now for the first of the amplified speakers. The JL Audio 10W1V3-2, is a two ohm woofer that is being fed by a LC2i-pro for signal and a Kicker 46CXA800.1 amplifier. I want plenty of overhead and I think this mono amp is probably the best on the market for the amount of watts I need, which is only half of what it can put out RMS at 2 ohms. It should run well and cool.
Now to the fun...getting the sub to fit into the stock enclosure. It has been a bit tricky coming up with an adapter, but I was finally able to design something that is ridged and should take any abuse that I throw at it. I printed the adapter ring out of PETG, which is known for being tough and resistant to high and low temperatures. It is printed, but I have not yet take a photo of it. Here is the final cad drawing of it.
Now on to the enclosure. I am going to be doing a fair amount of cleaning it up and strengthening, as well as also covering the whole inside and rear of it with more sound deadening material. I will know more once I have it remove and can inspect it for any flimsy areas that need reinforcement. That is nothing that some epoxy and custom printed bulkheads can't take care of.
I am feeding everything with a 4-guage homerun power supply cable from the battery, that will be tied to a 100amp waterproof breaker mounted 12 inches off of the battery terminal. From that I will branch to everything else that needs power. The LOC will have a 1-amp inline fuse running to it, and the Amp will have a 80-amp inline feeding into it.
As I get more photos and info, this page will be updated. I am open to any suggestions or moral support..haha!
--------Update #1
I was busy after work this evening. I pulled the enclosure and went to town beefing it up, and laying some sound deadening inside of it. I also laid some NICO matt inside the whole back end of the jeep. That actually went rather quick. Any way, Here are some updated photos of the process. The good news is that the adapter fits like OEM.


I got a little further tonight. Running wire and bolting things down. I'm going to 3d print some wire separators..organizers... Sometime to clean it up.
Sponsored
Last edited:
")