Silent Panda
Well-Known Member
- First Name
- Jason
- Joined
- Jan 20, 2019
- Threads
- 22
- Messages
- 130
- Reaction score
- 235
- Location
- Salt Lake City
- Vehicle(s)
- 2018 JL Rubicon
- Thread starter
- #1
I got my Flex Era 4's installed this week. I was going to use a Switch-Pros PDM for power supply and switching but I won't have it in time for EJS. So...I did a standard install using the included switch and wire harness.
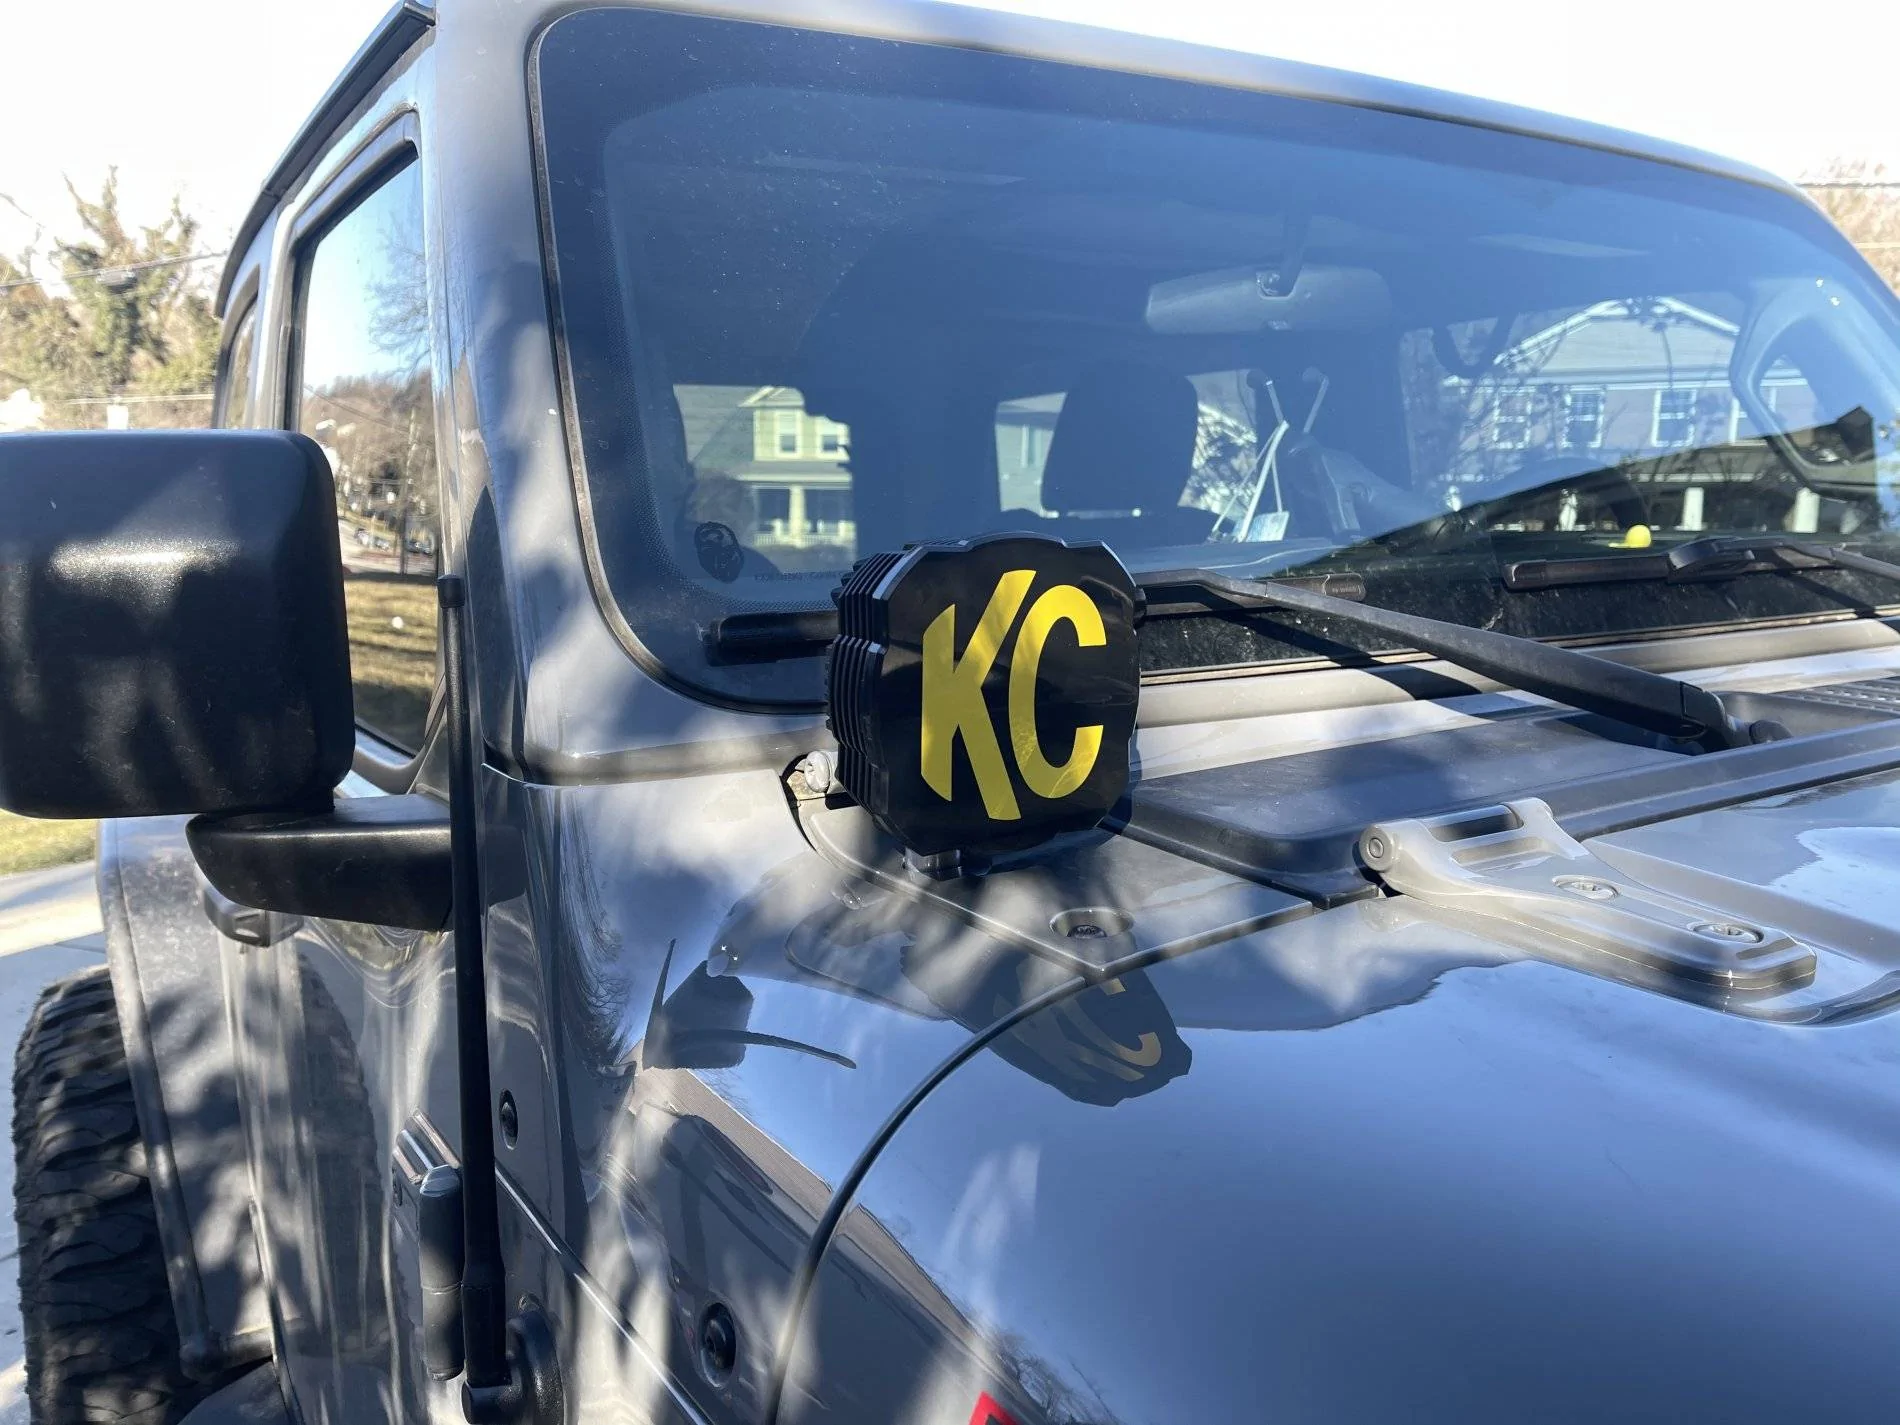
I went with a cowl location for my install and used the mount from Rock Hard 4x4. I liked that it wasn't some big ass bracket.
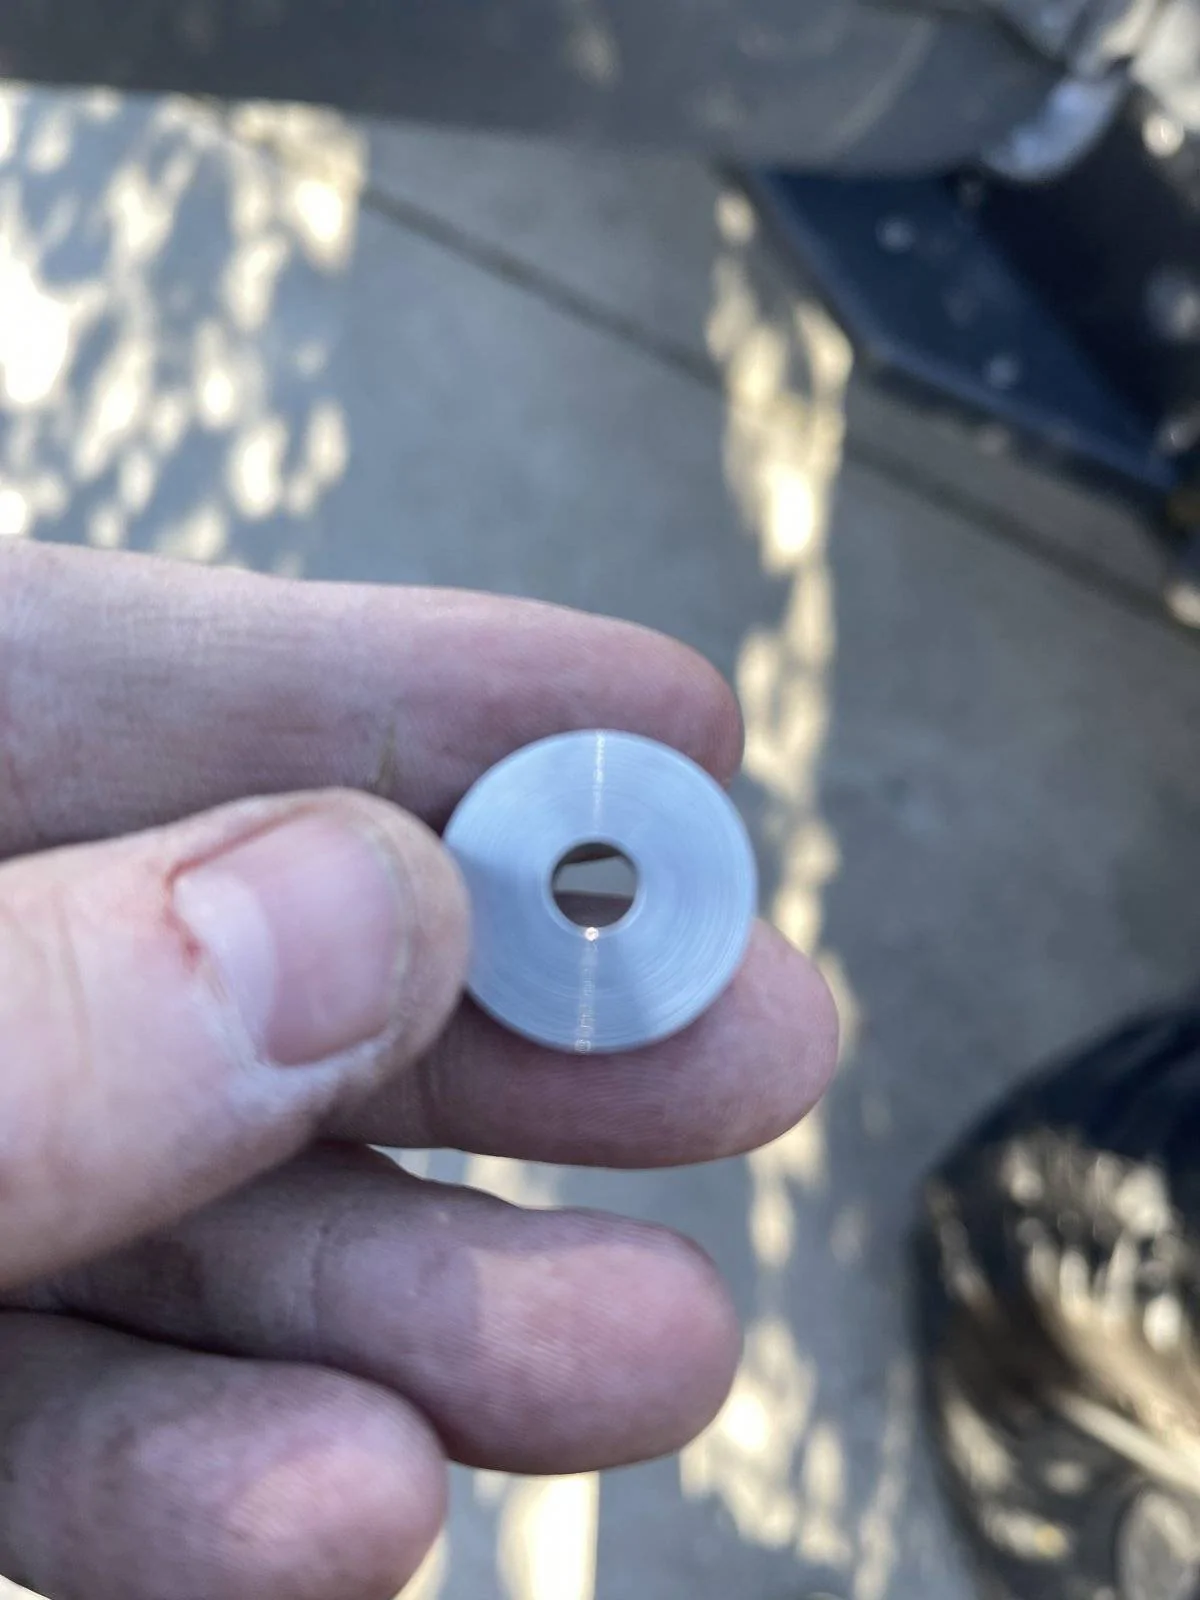
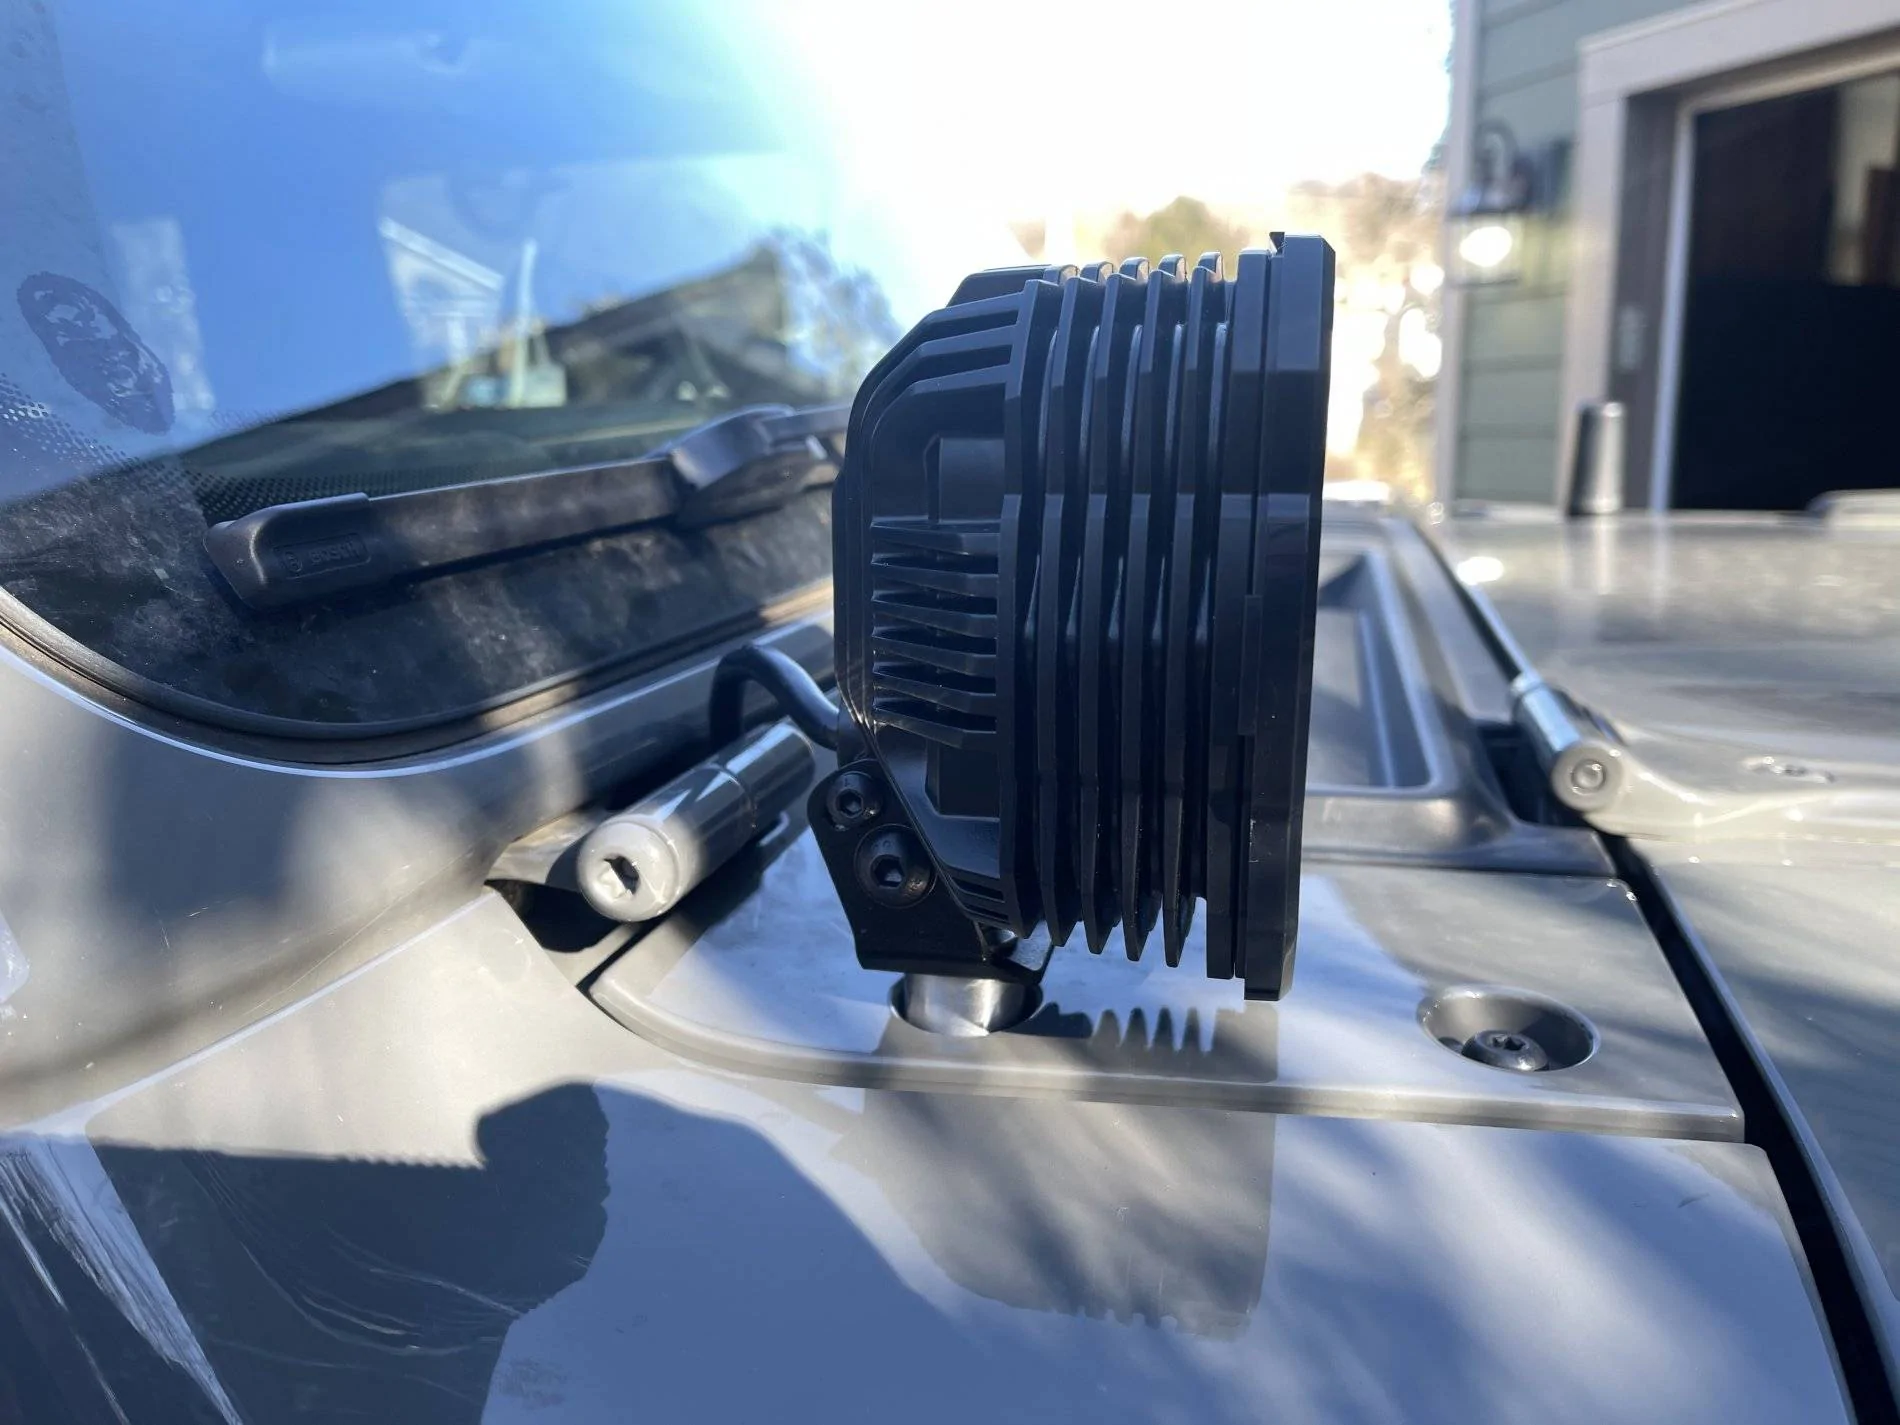
The adapter

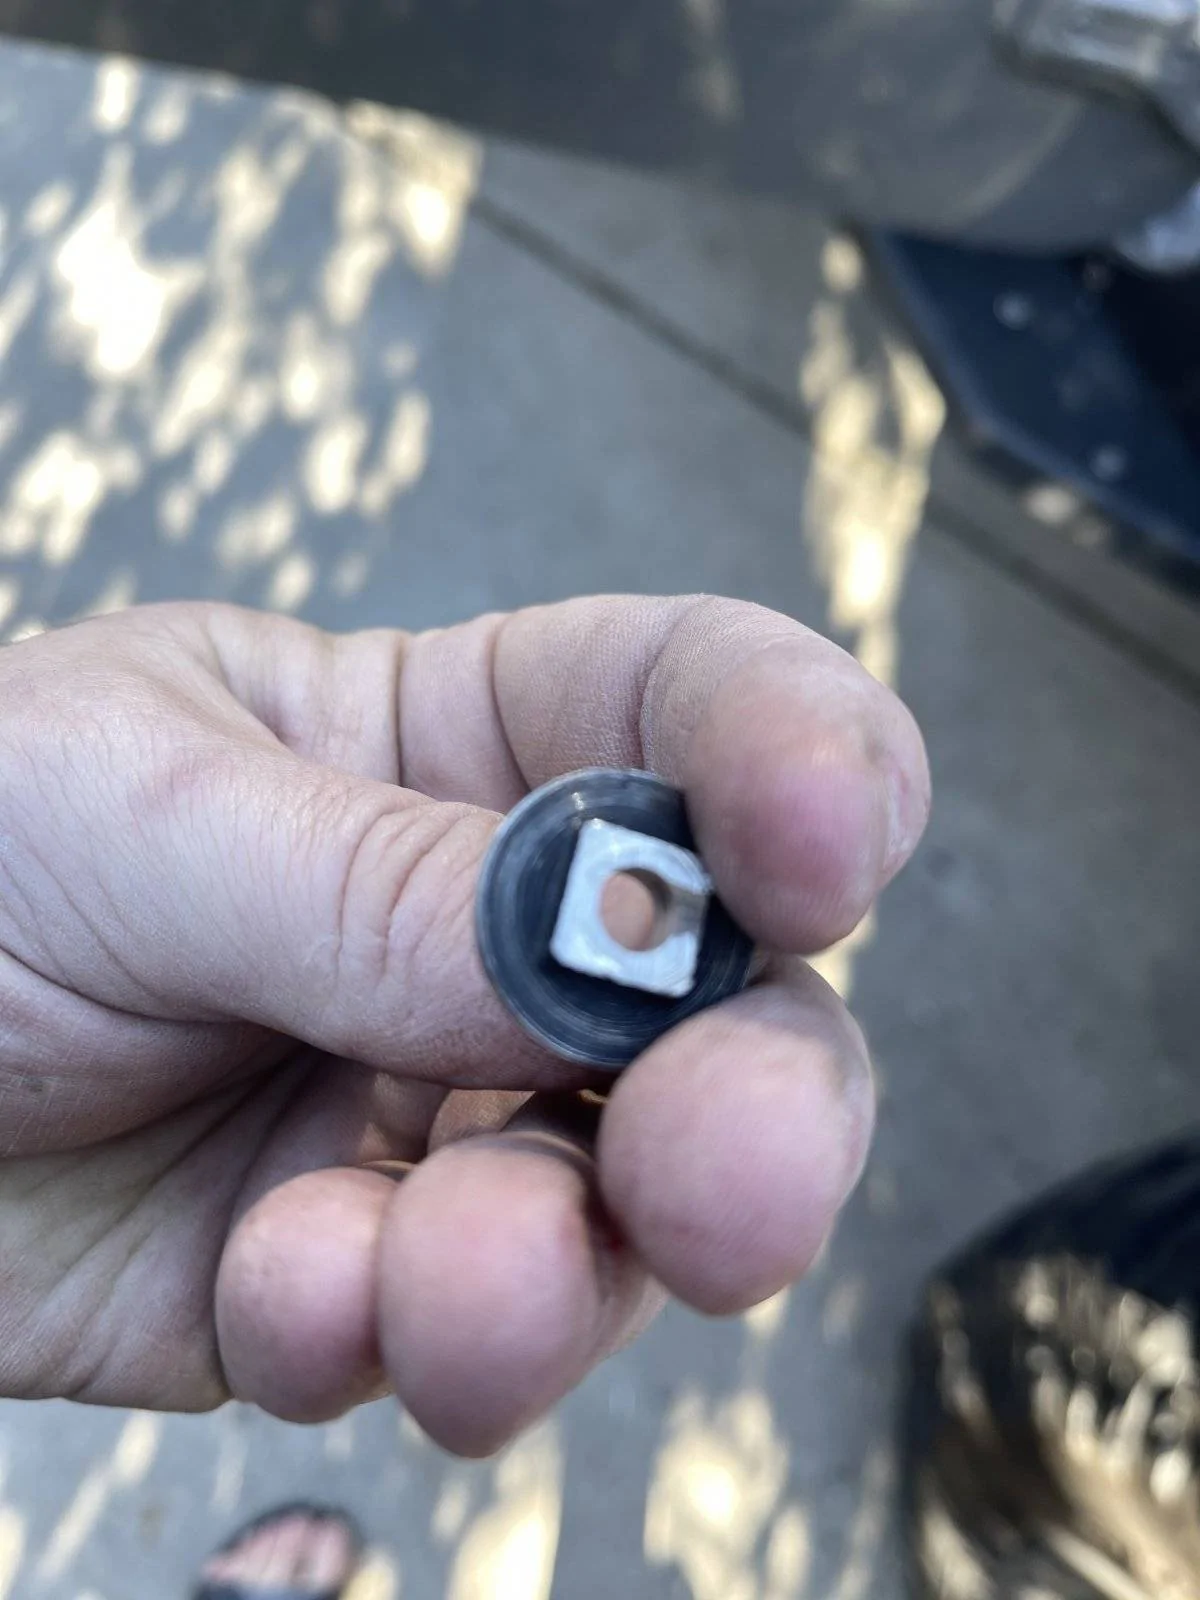
To use the adapter and have light bracket centered, I modified the carriage bolt that came with the lights by cutting a flat on the face, drilling a hole thru it and and cutting it off after the square.

On to the install...
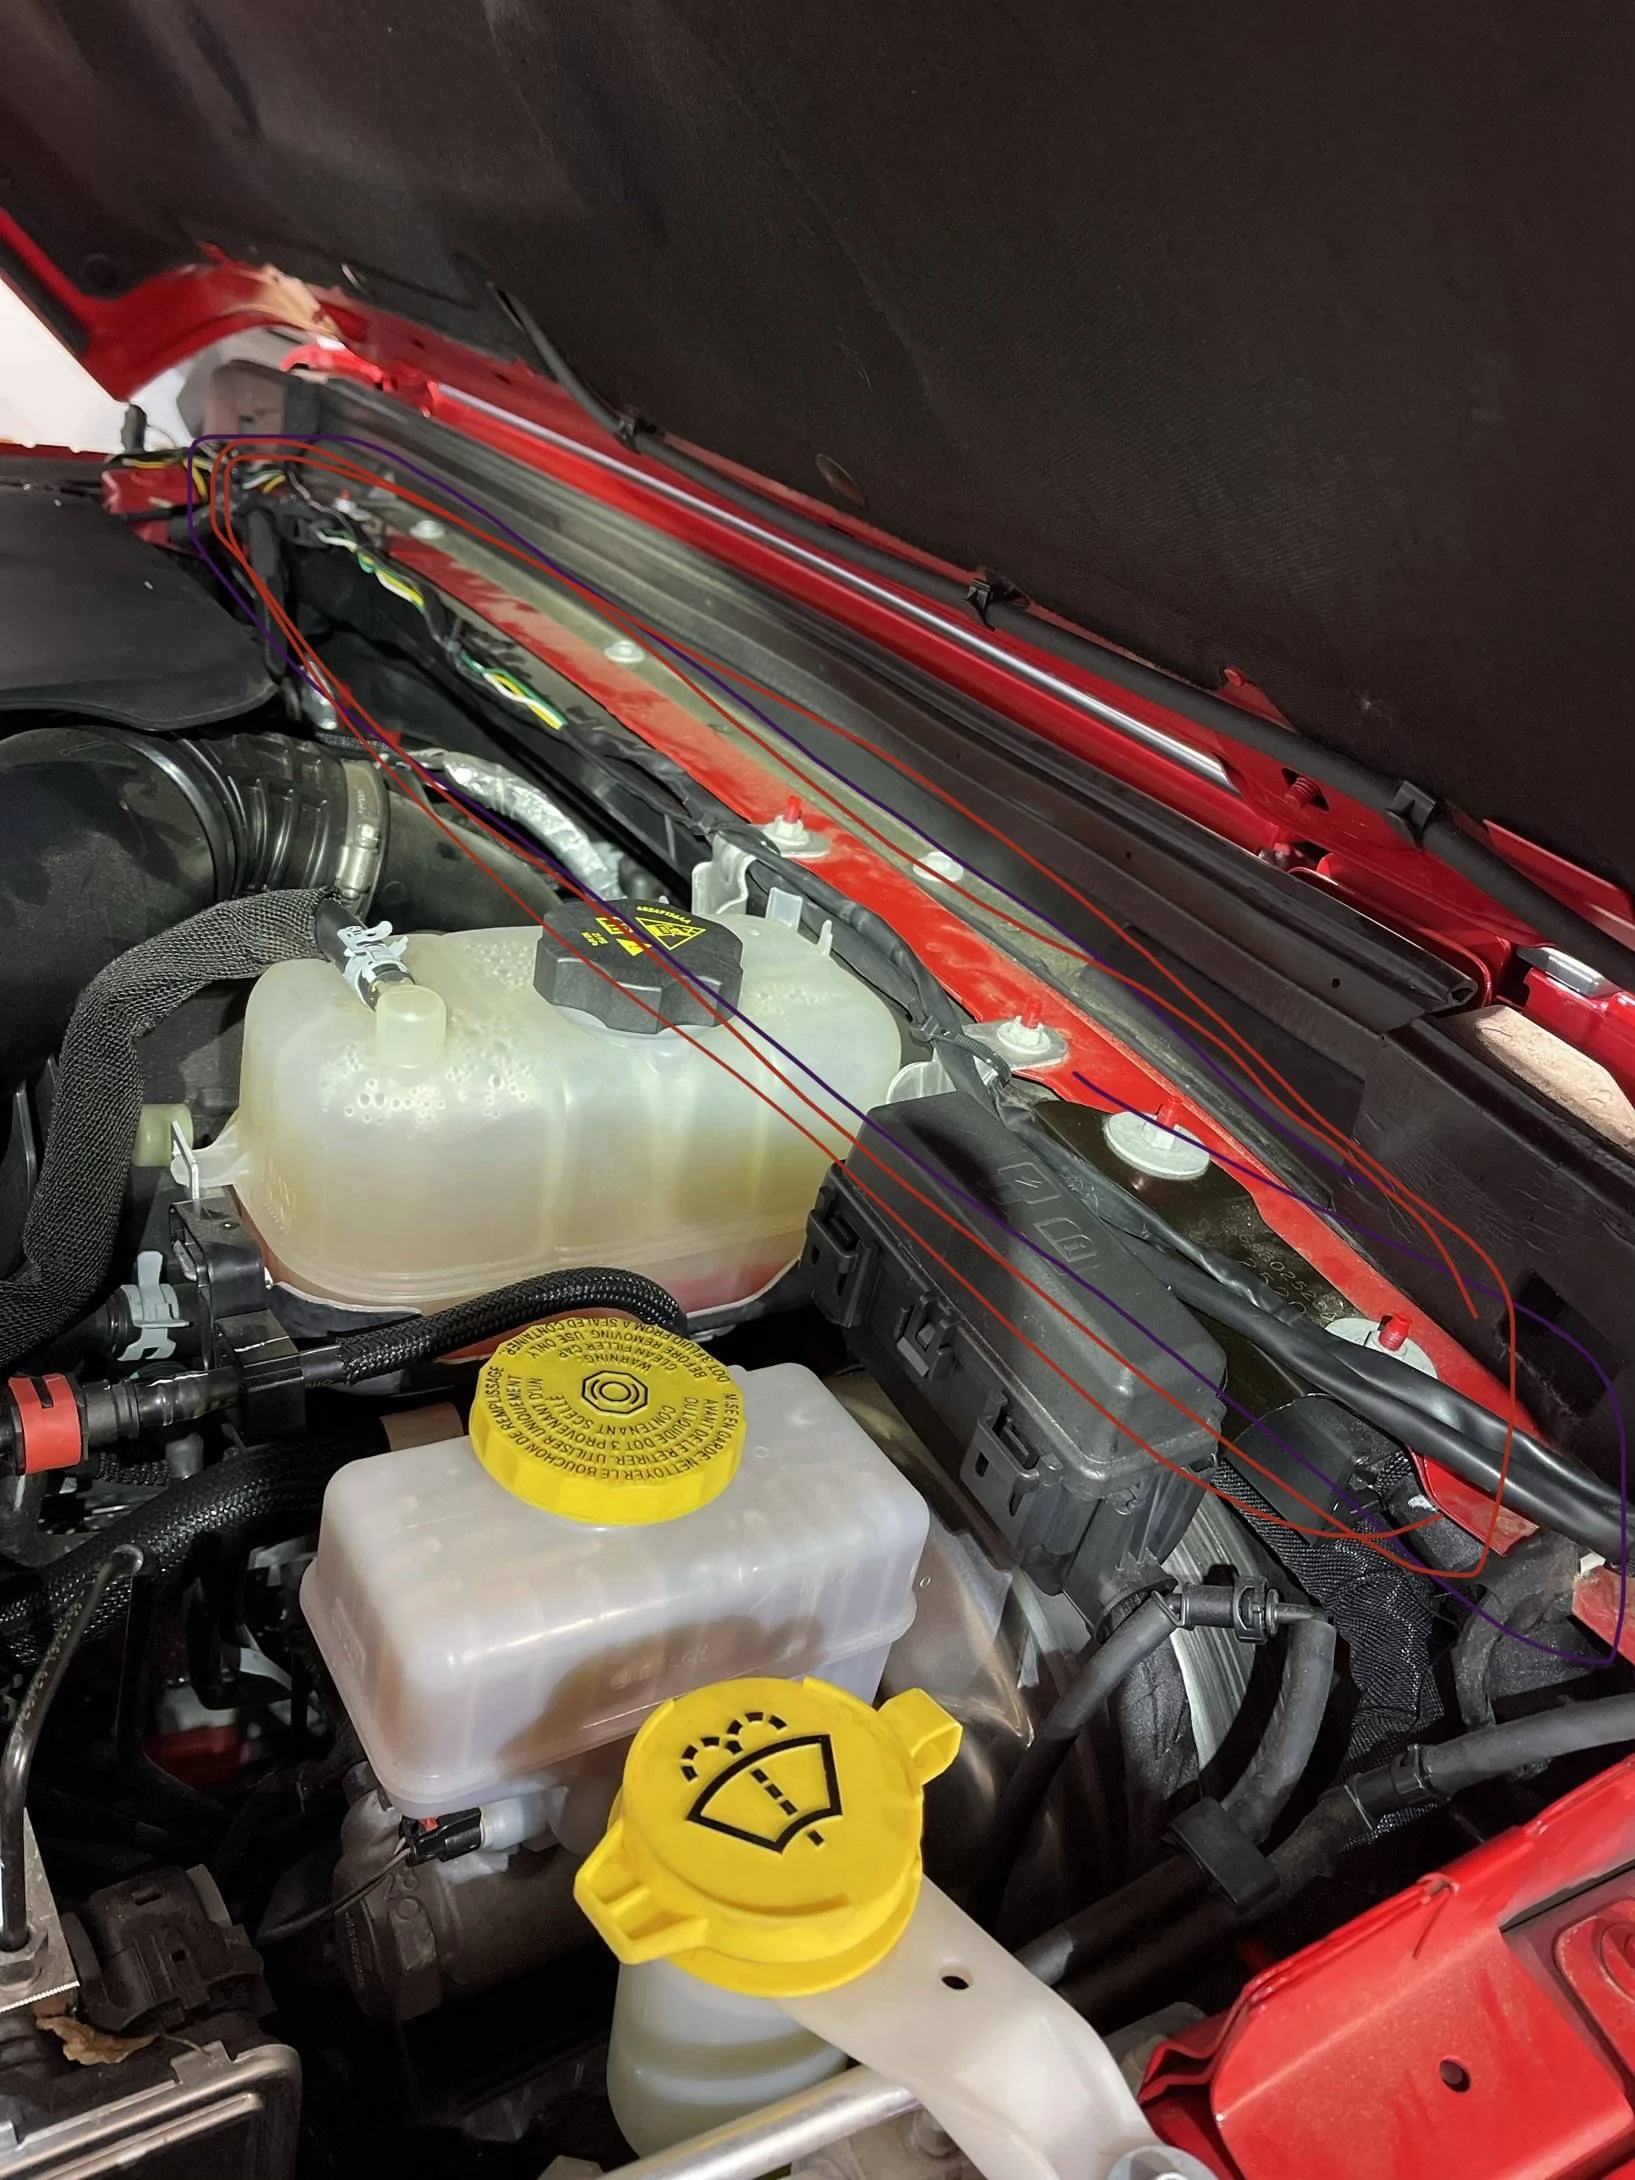
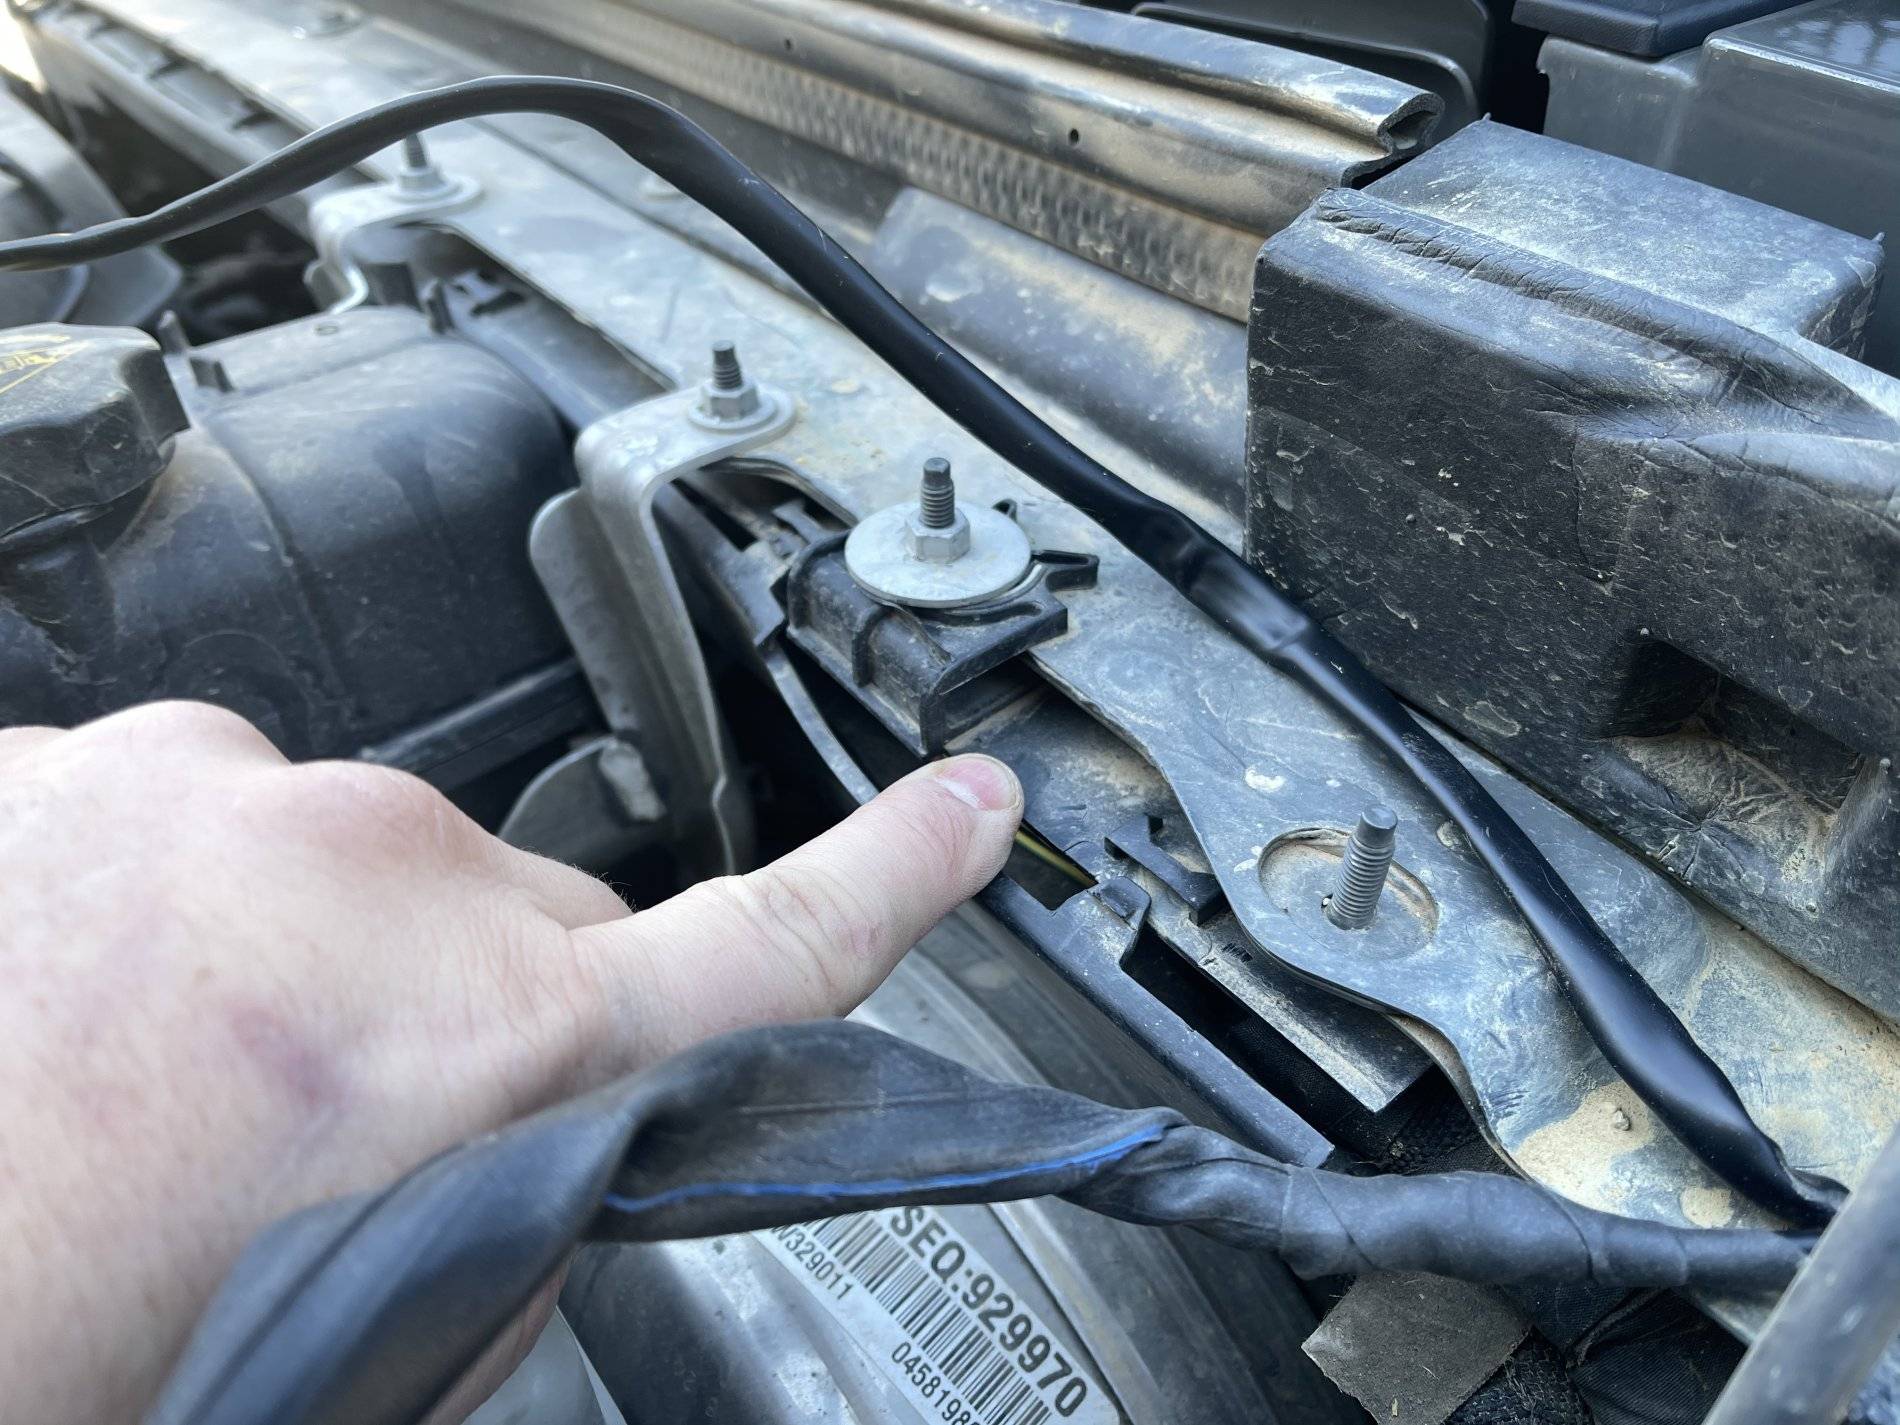
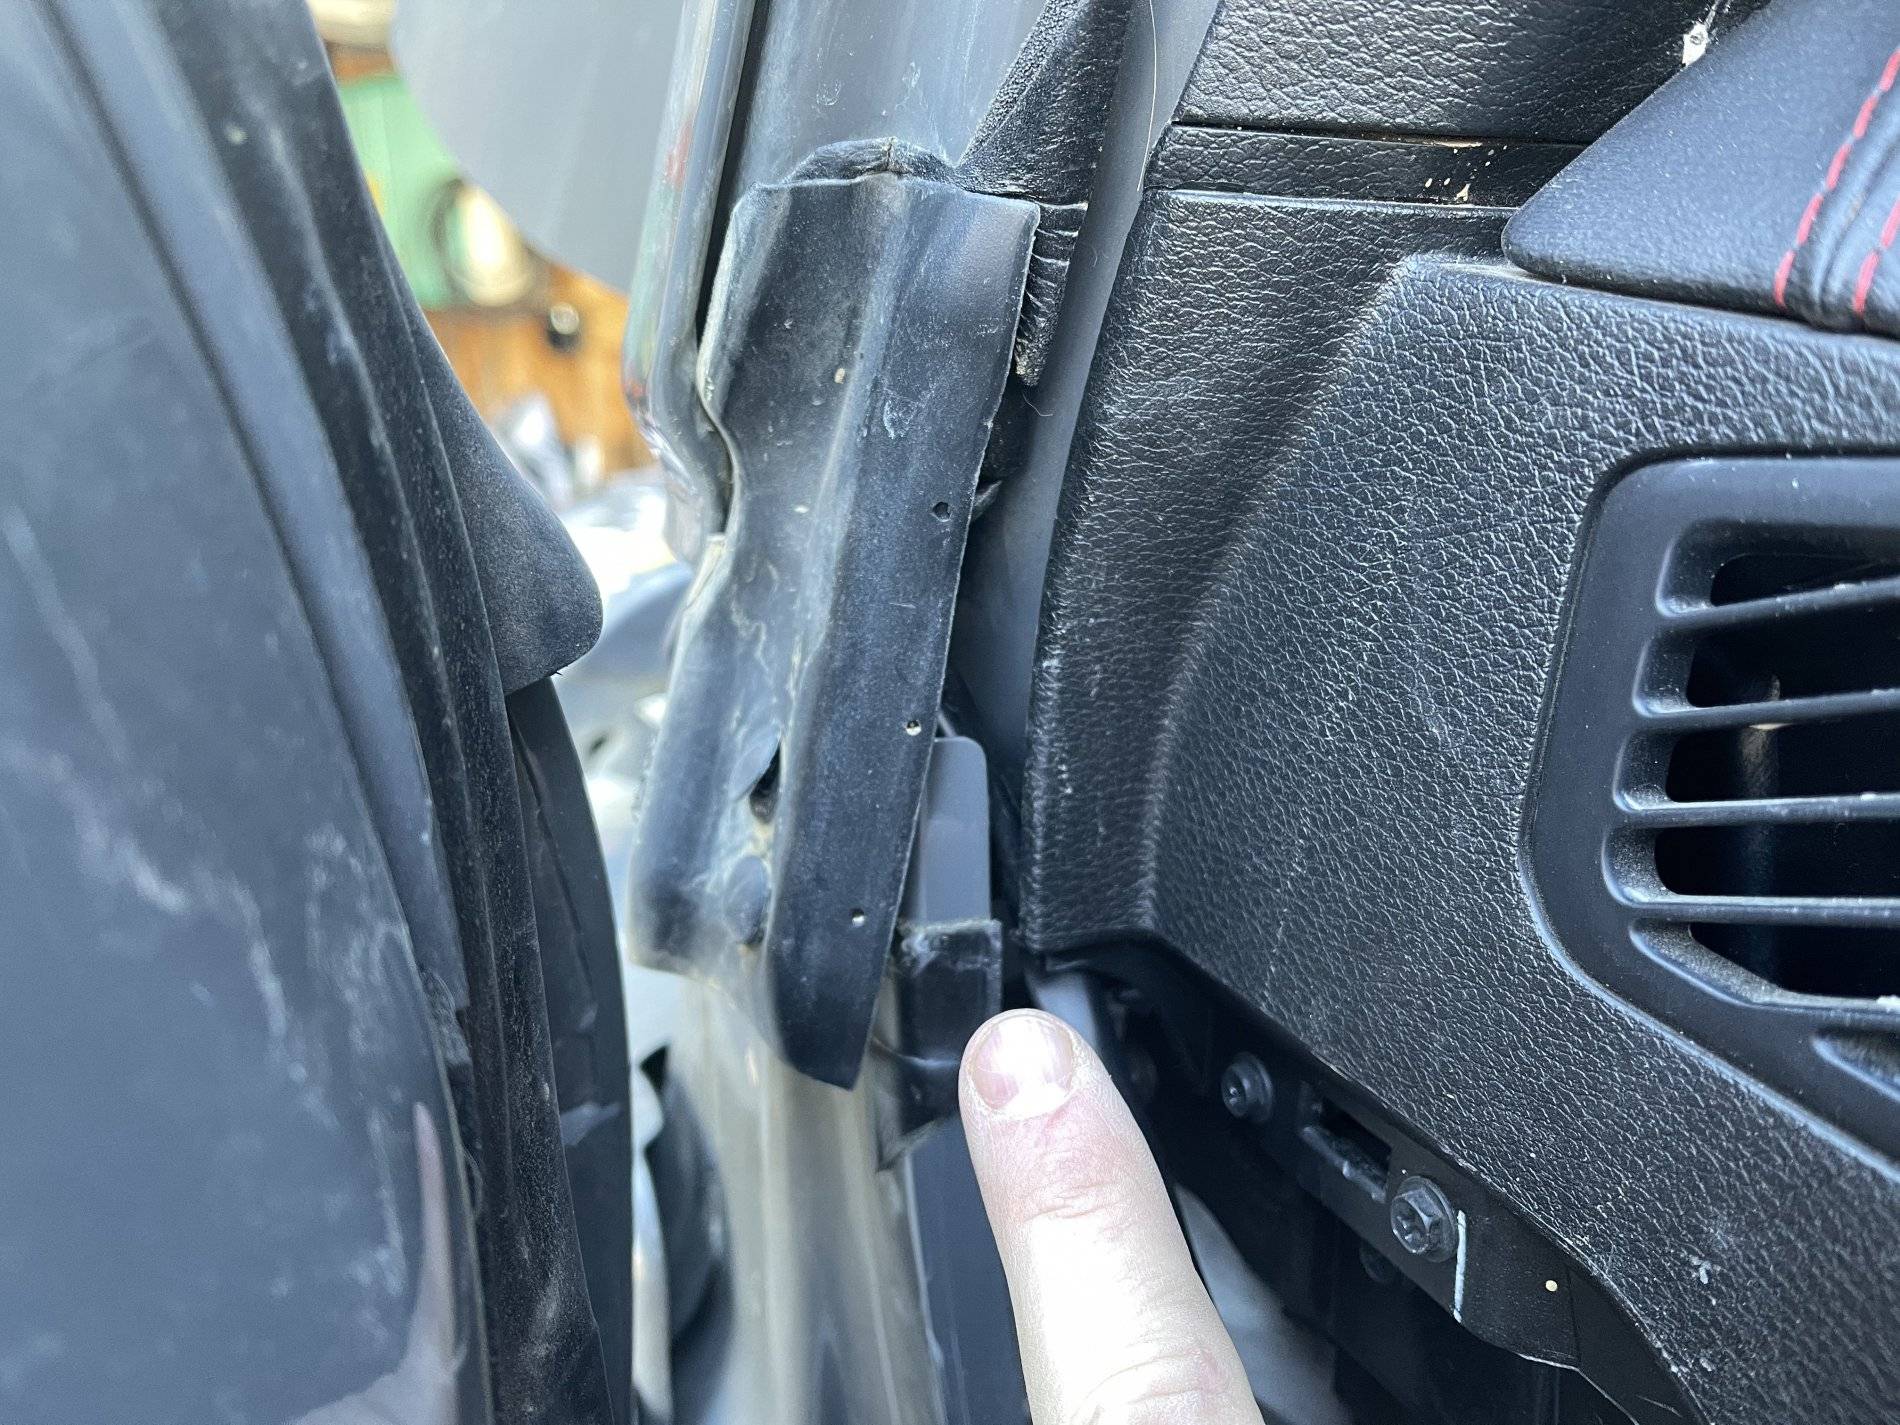
I ran the wires for the switch and the driver's side light through the plastic wire track on the firewall.
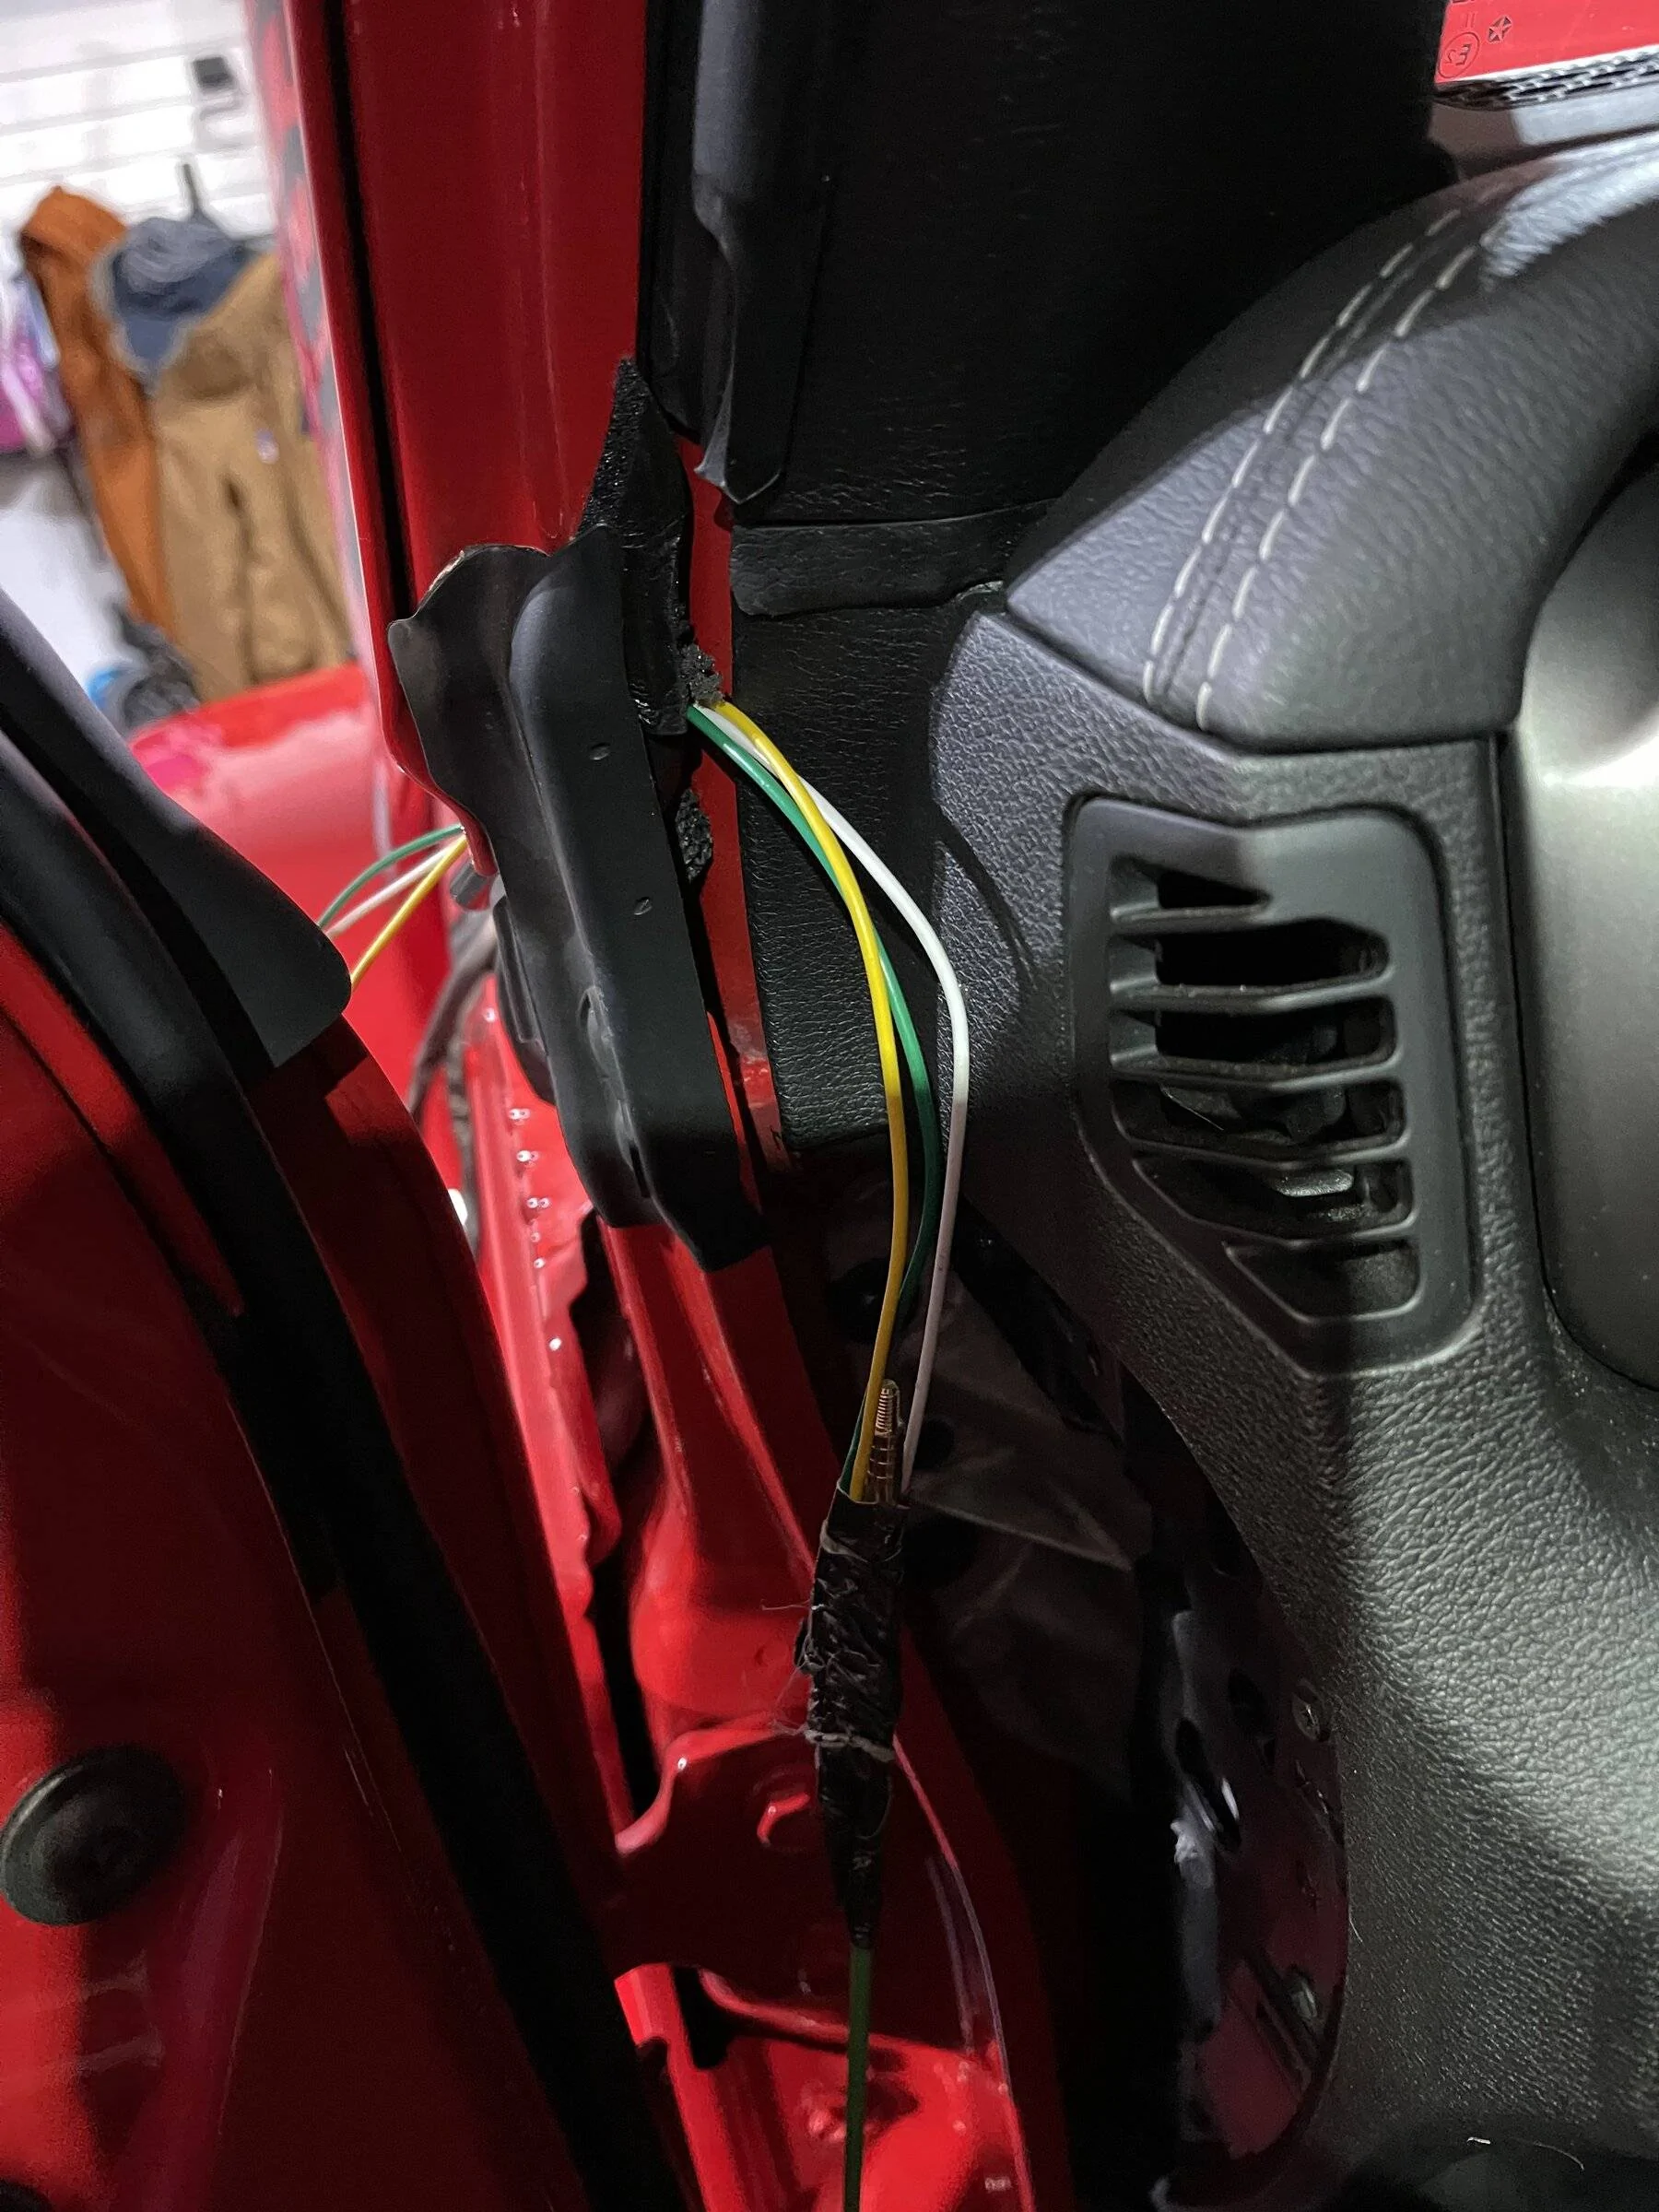
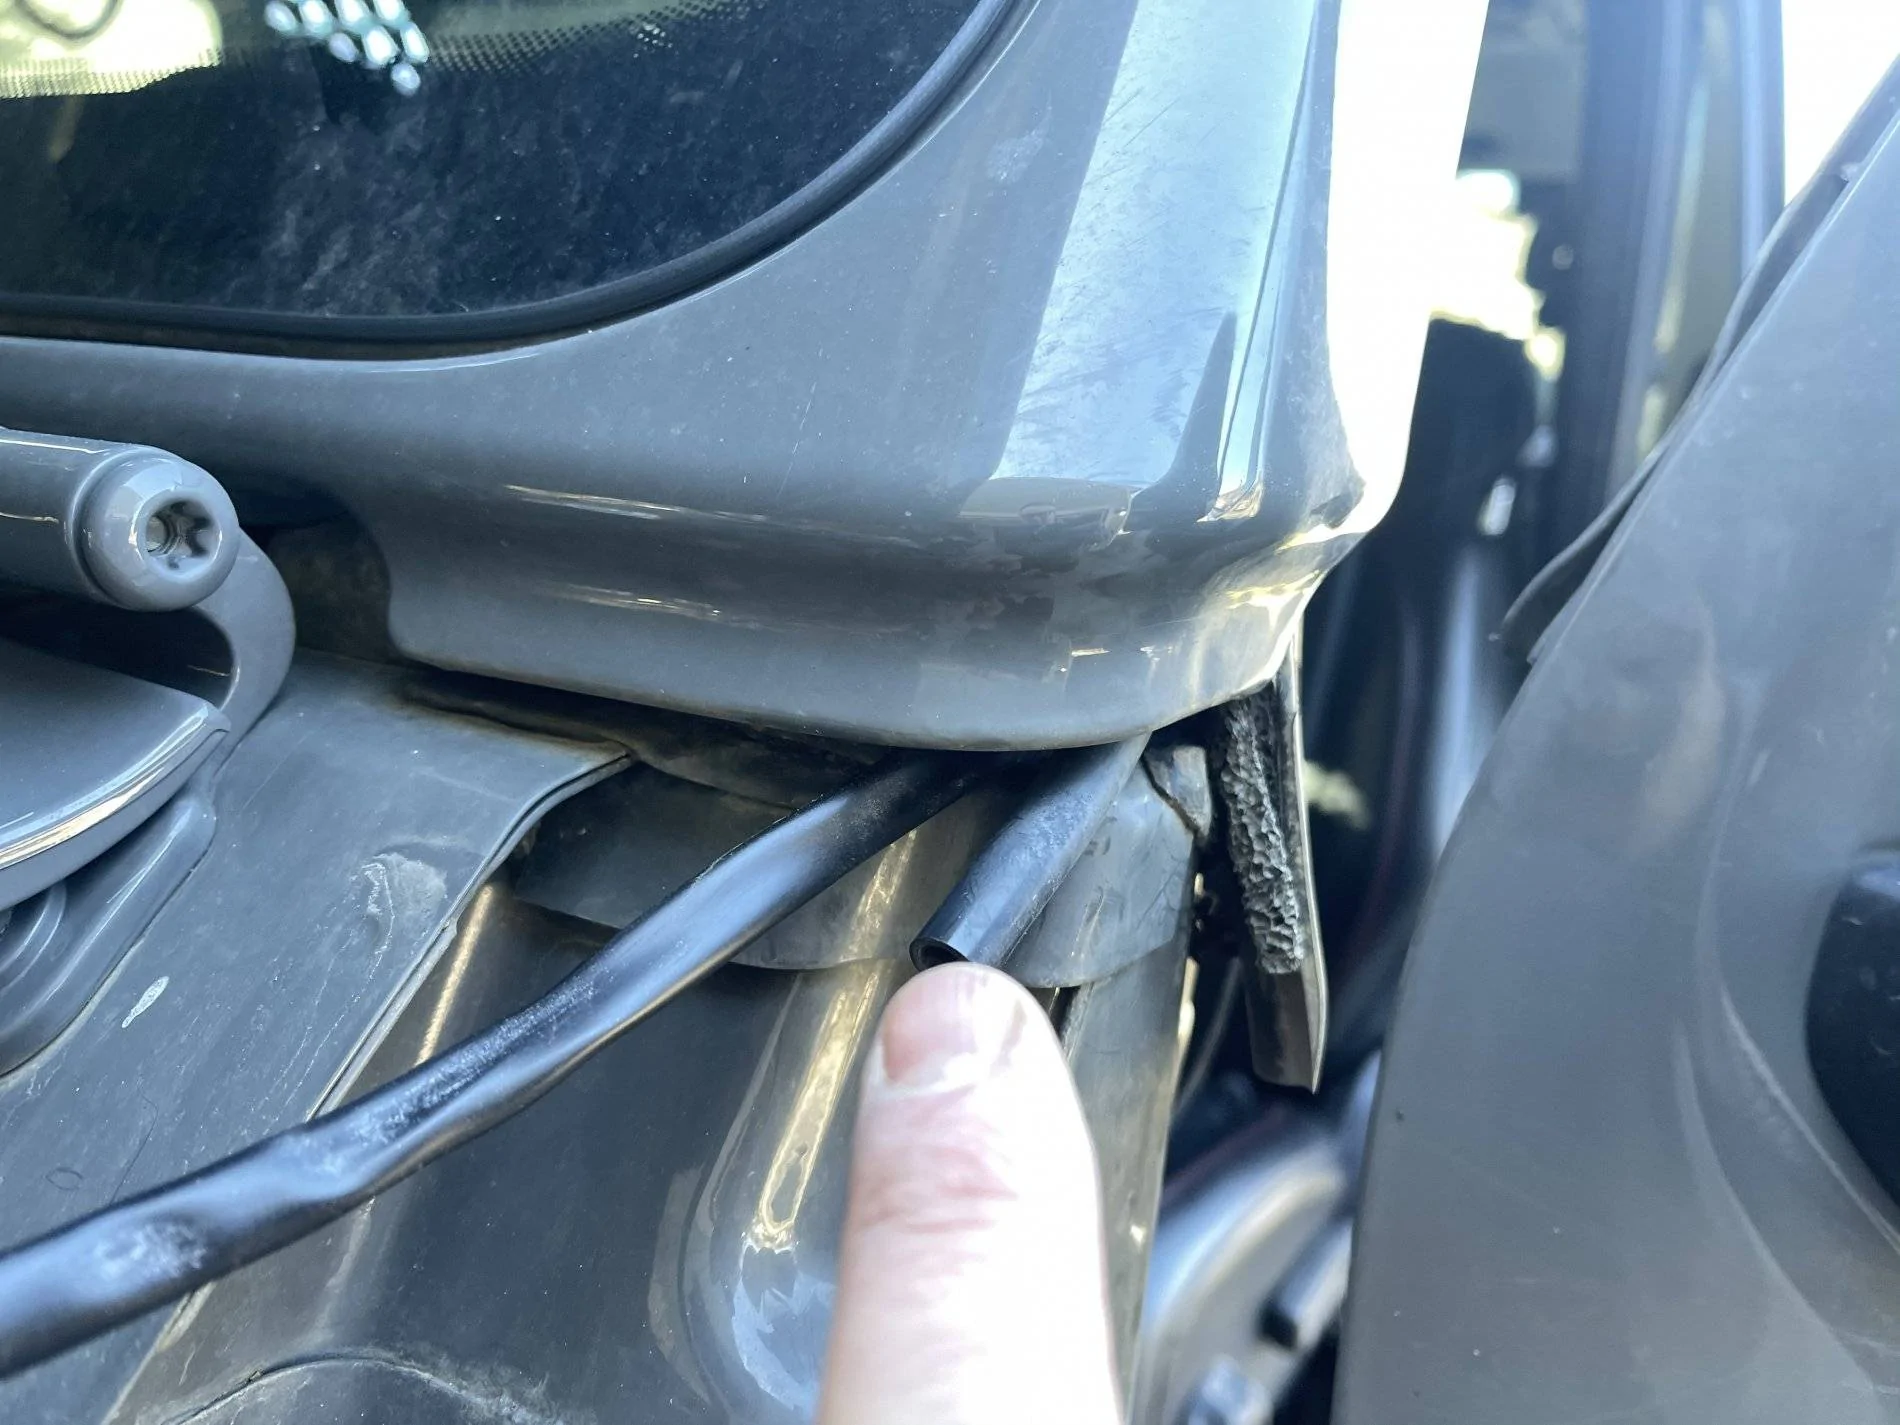
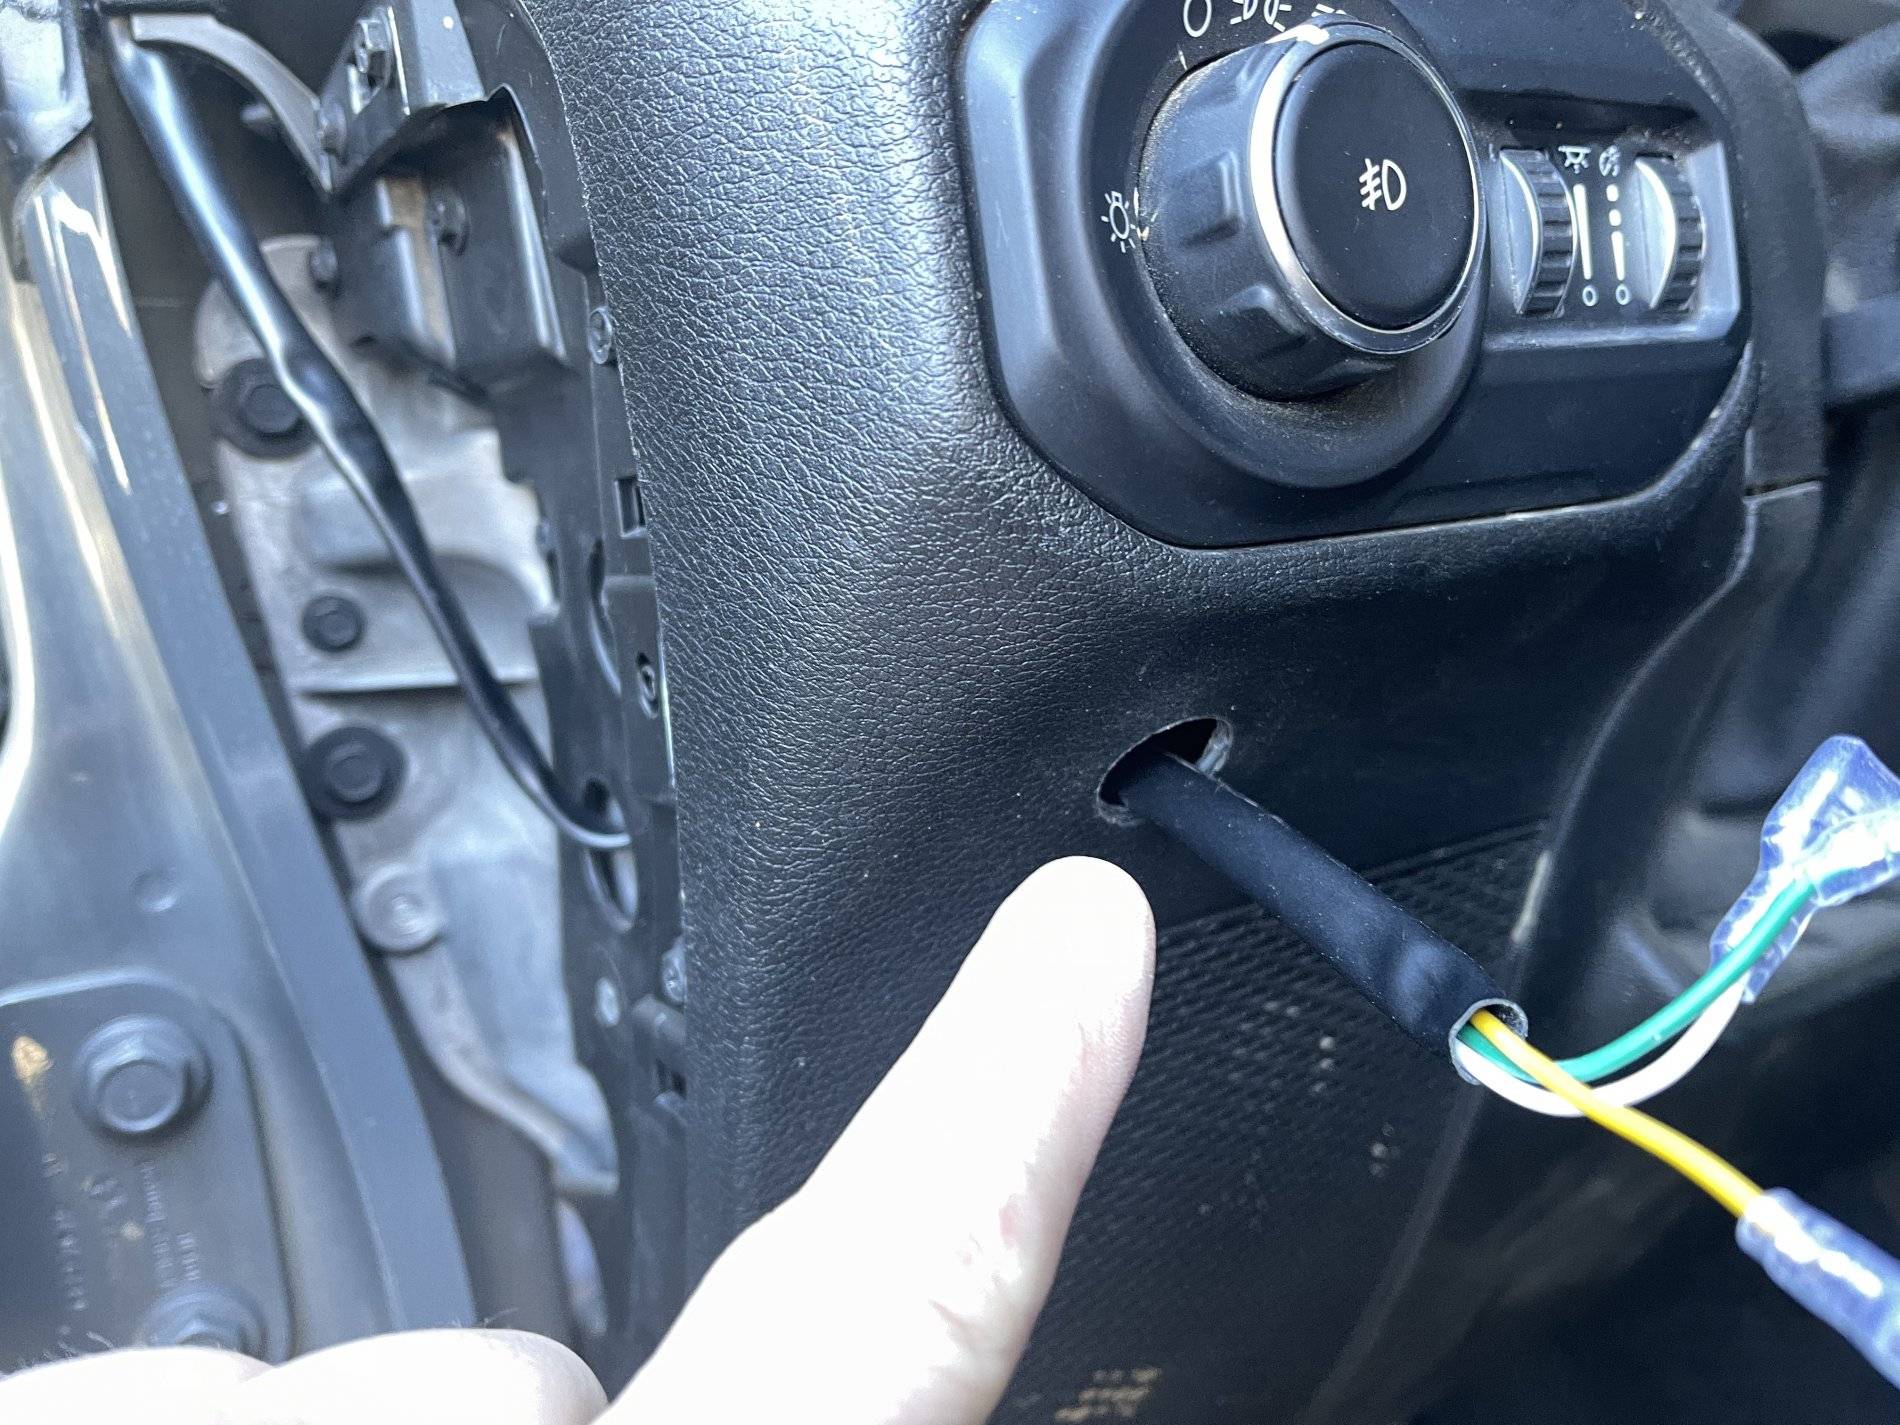
I ran the switch wires up past the lower windshield seal.
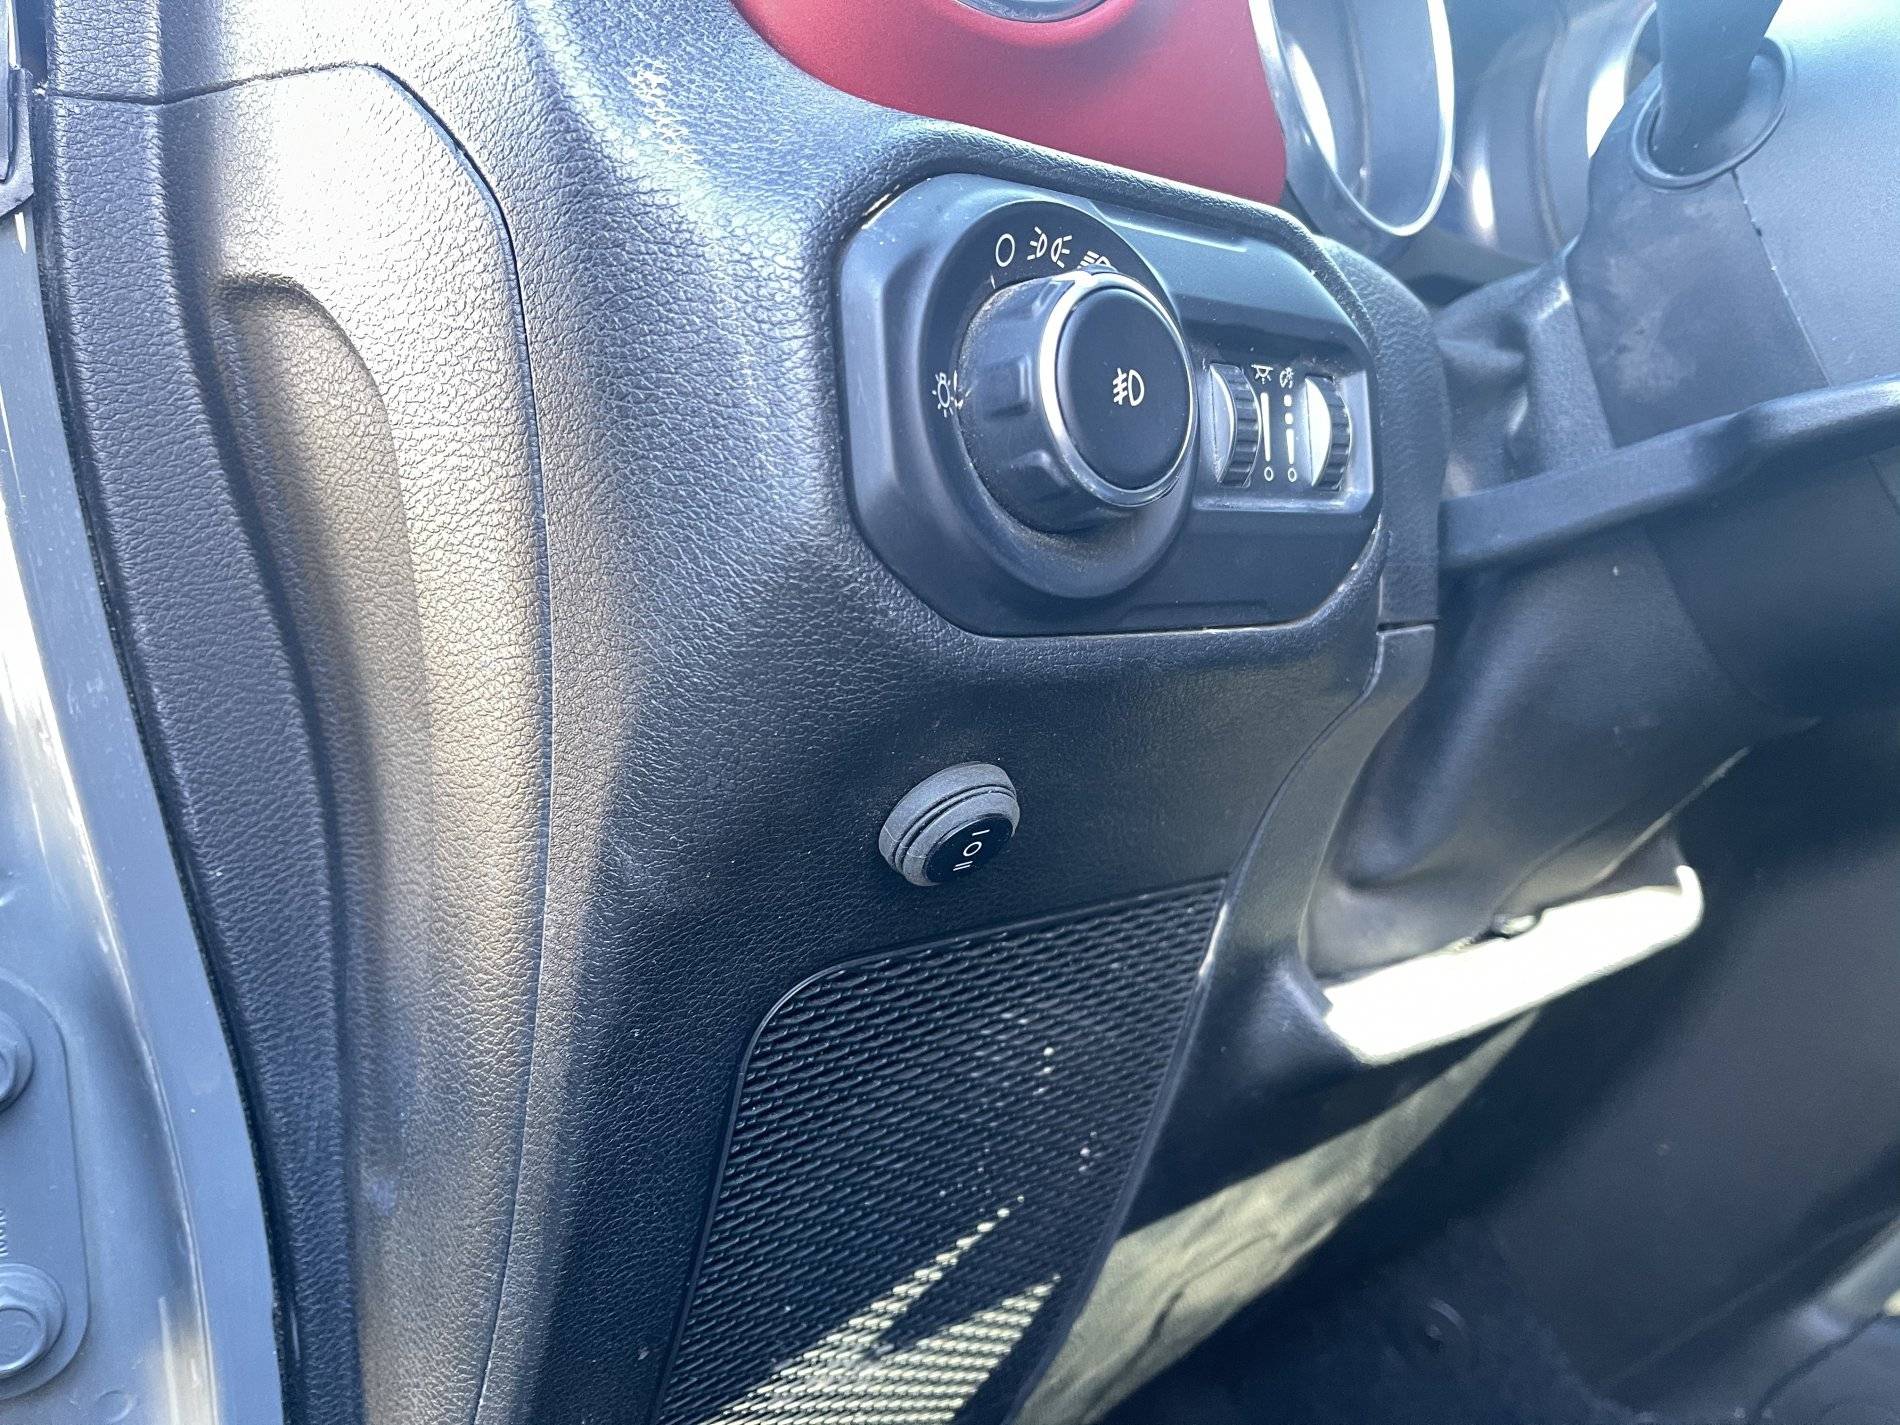
I mounted the switch below the headlight switch. It was a good spot to plug when I go to the Switch-Pro.
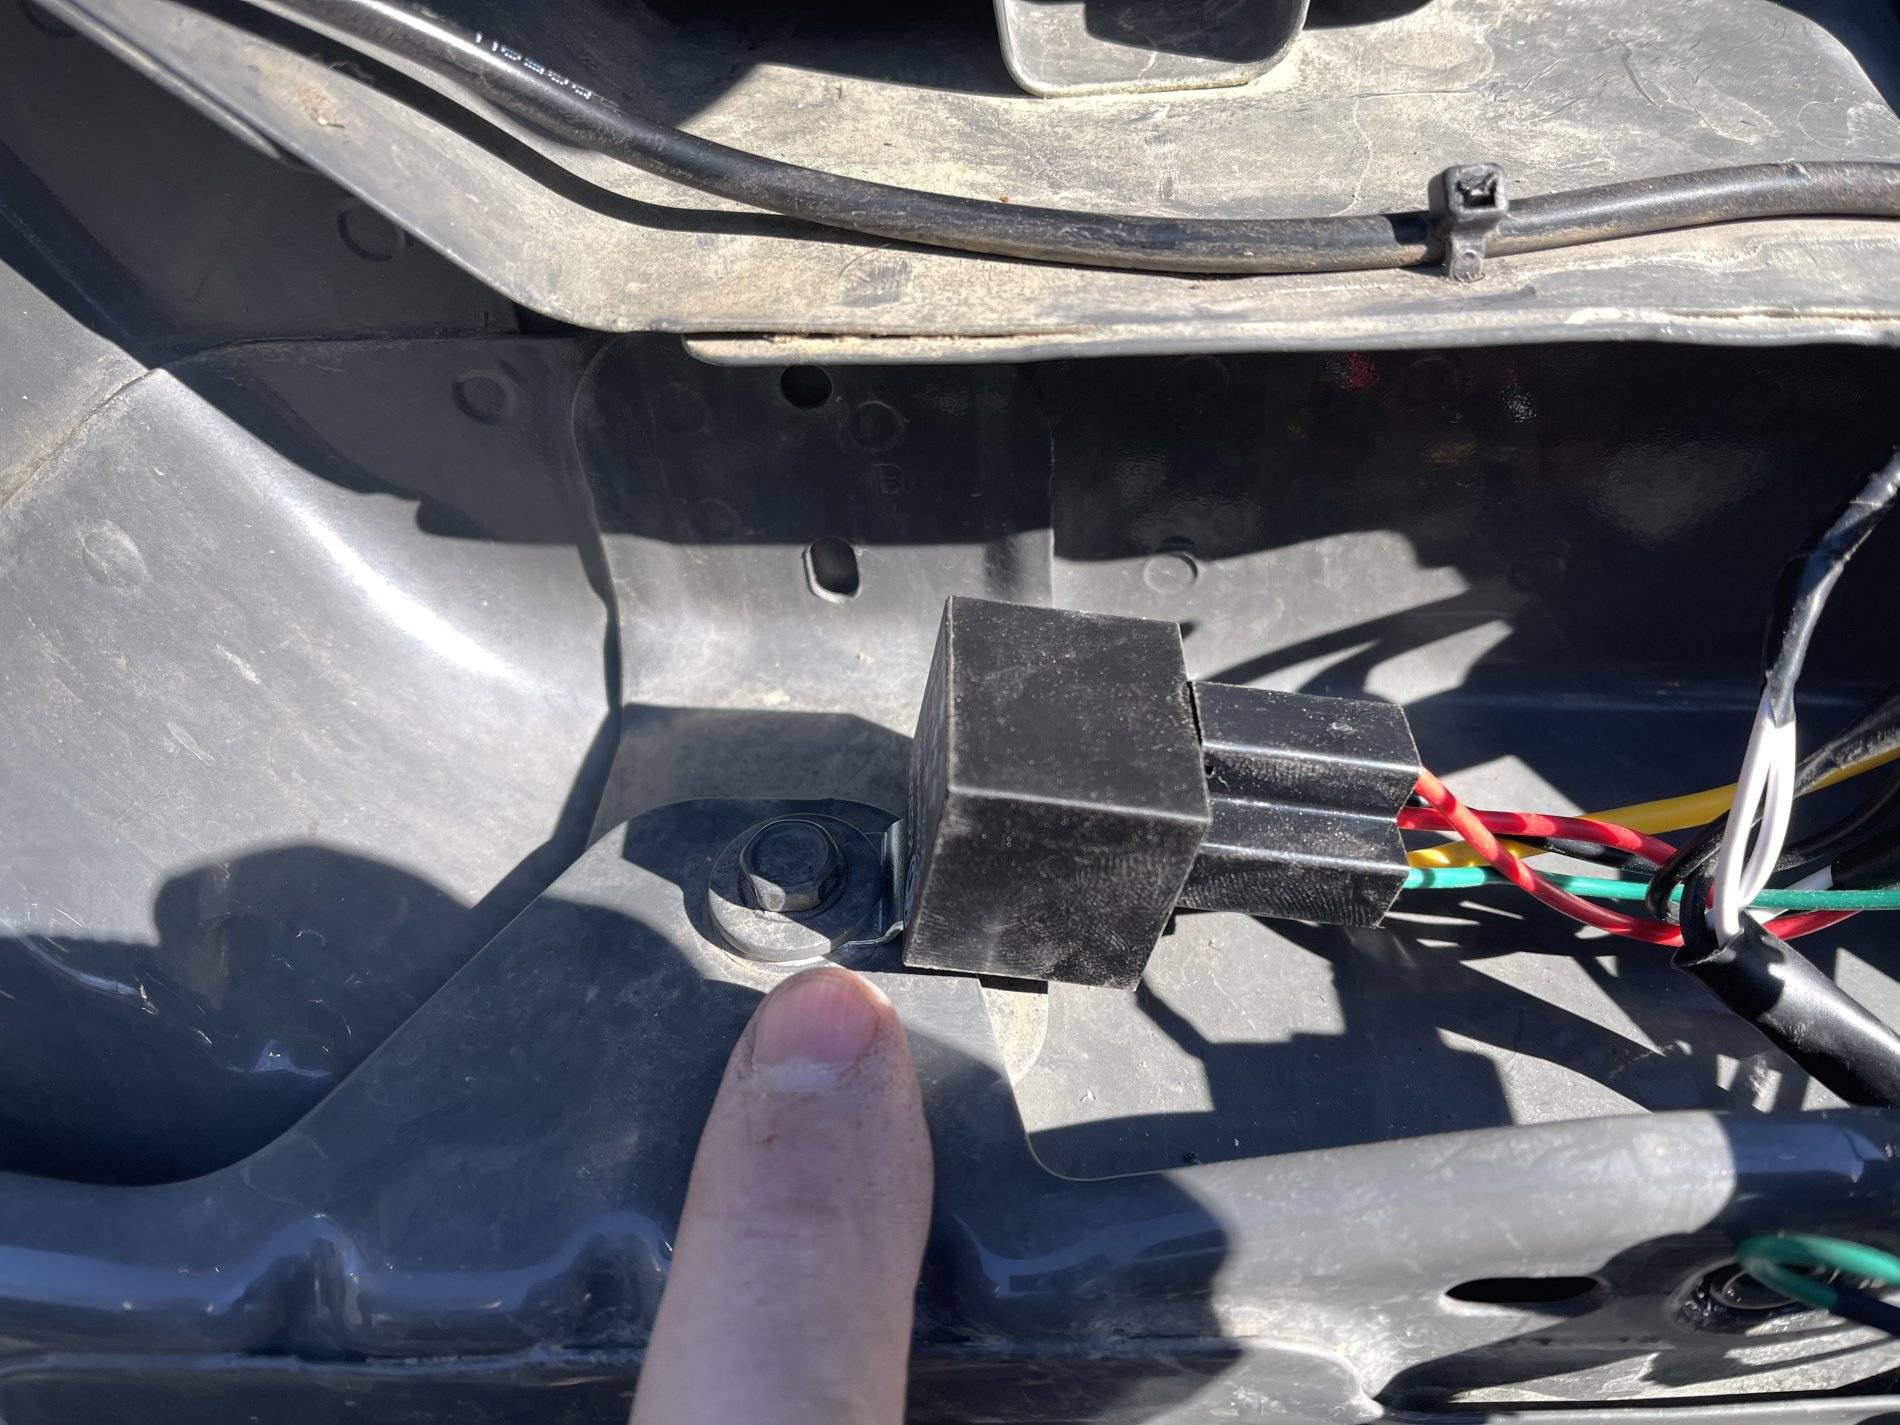
After trimming the harness, I mounted the relay in the passenger side cowl using an existing body bolt.
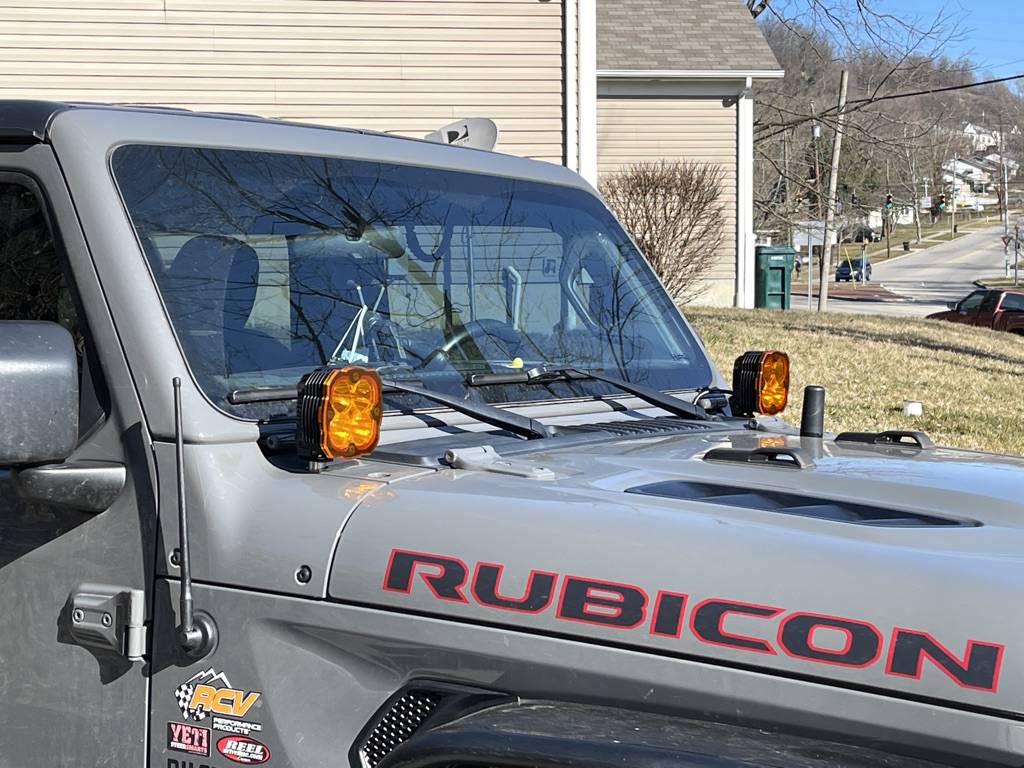
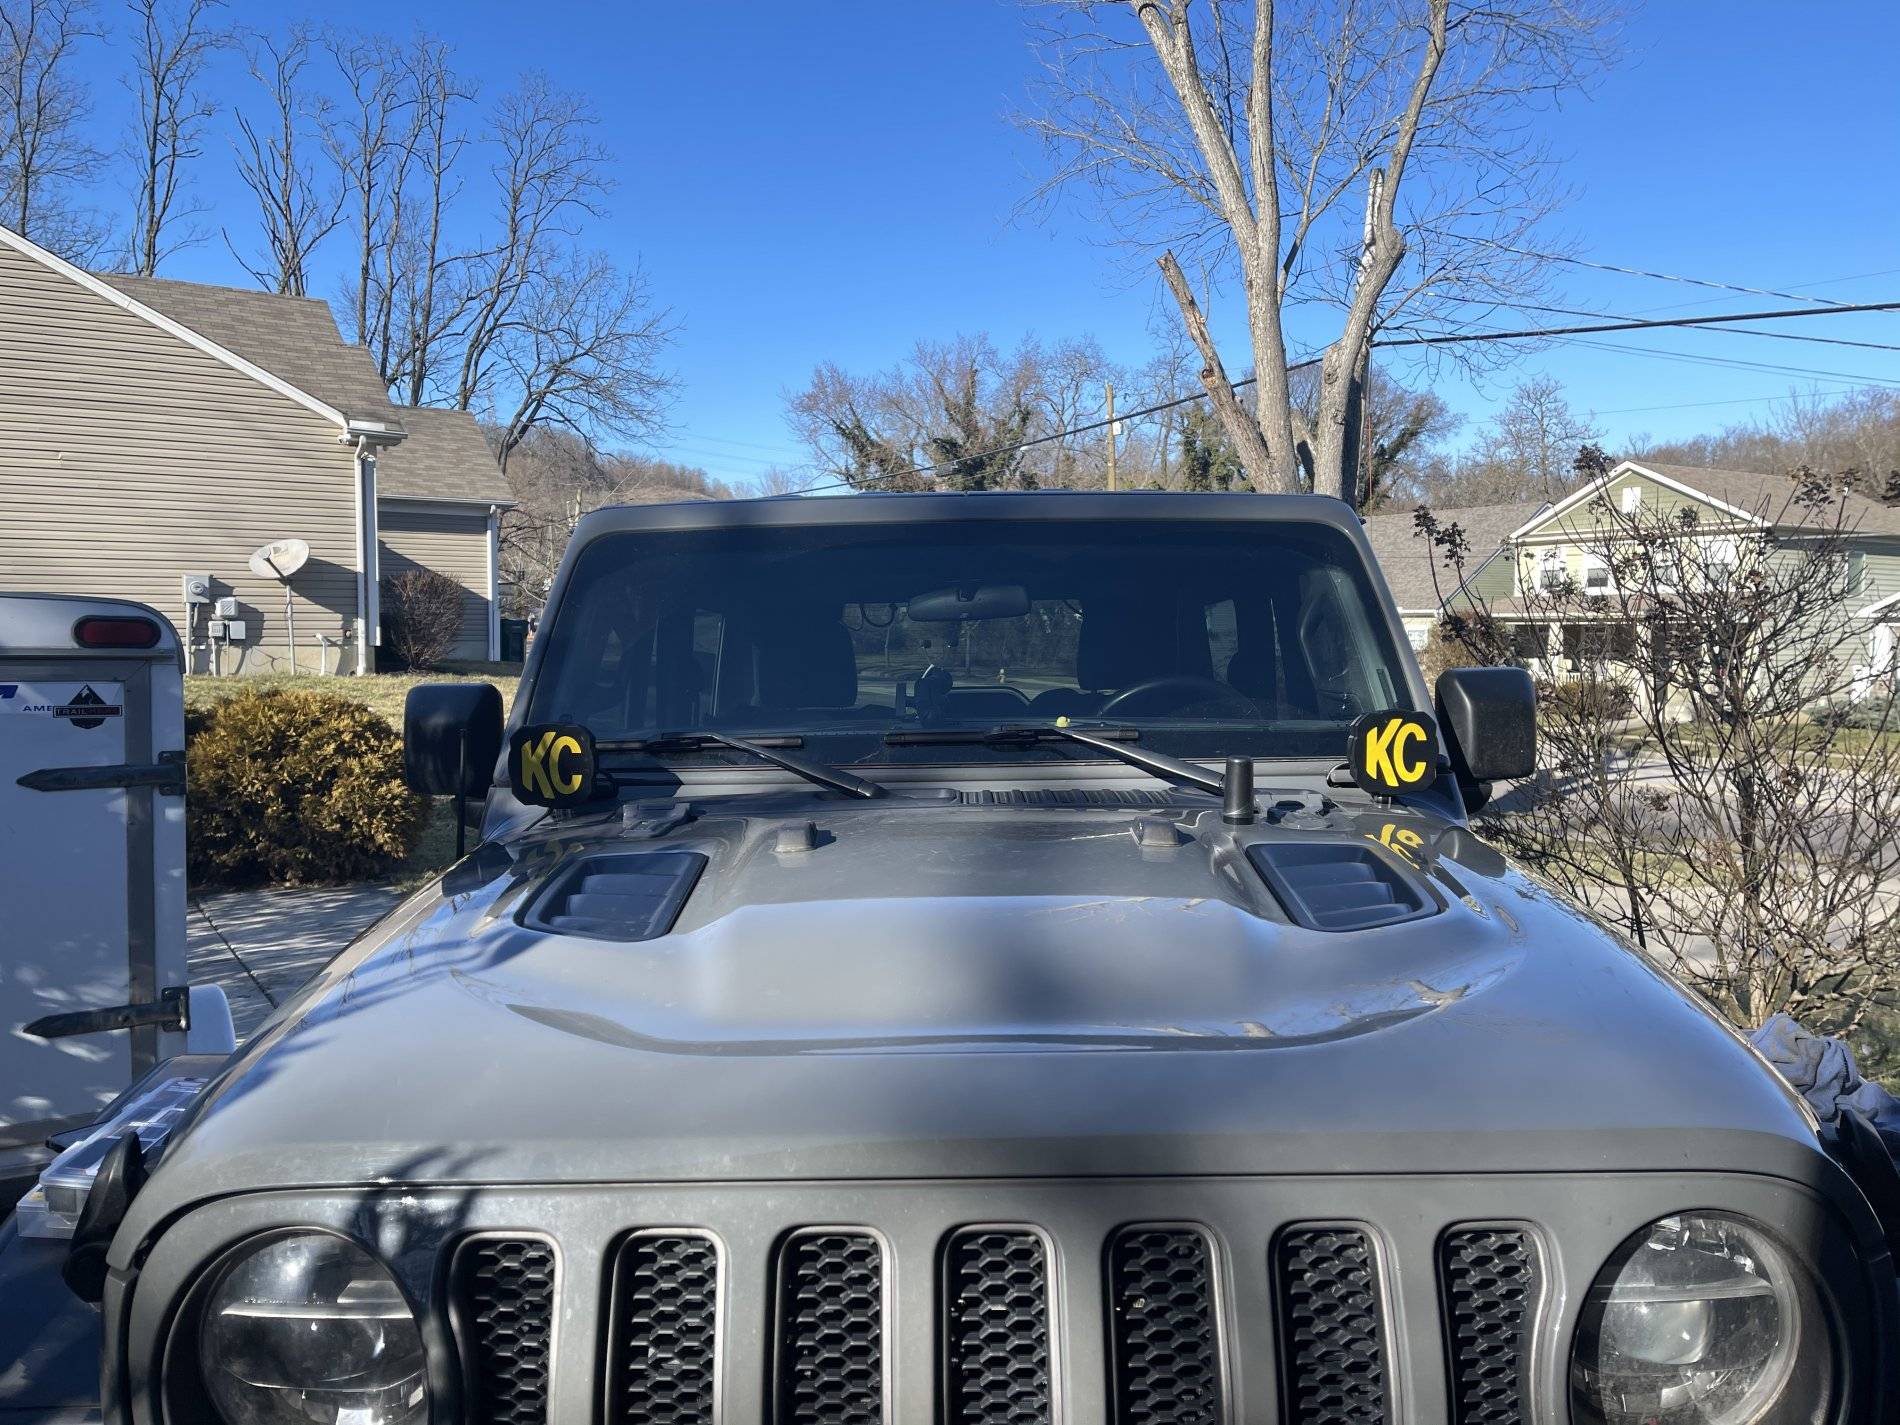
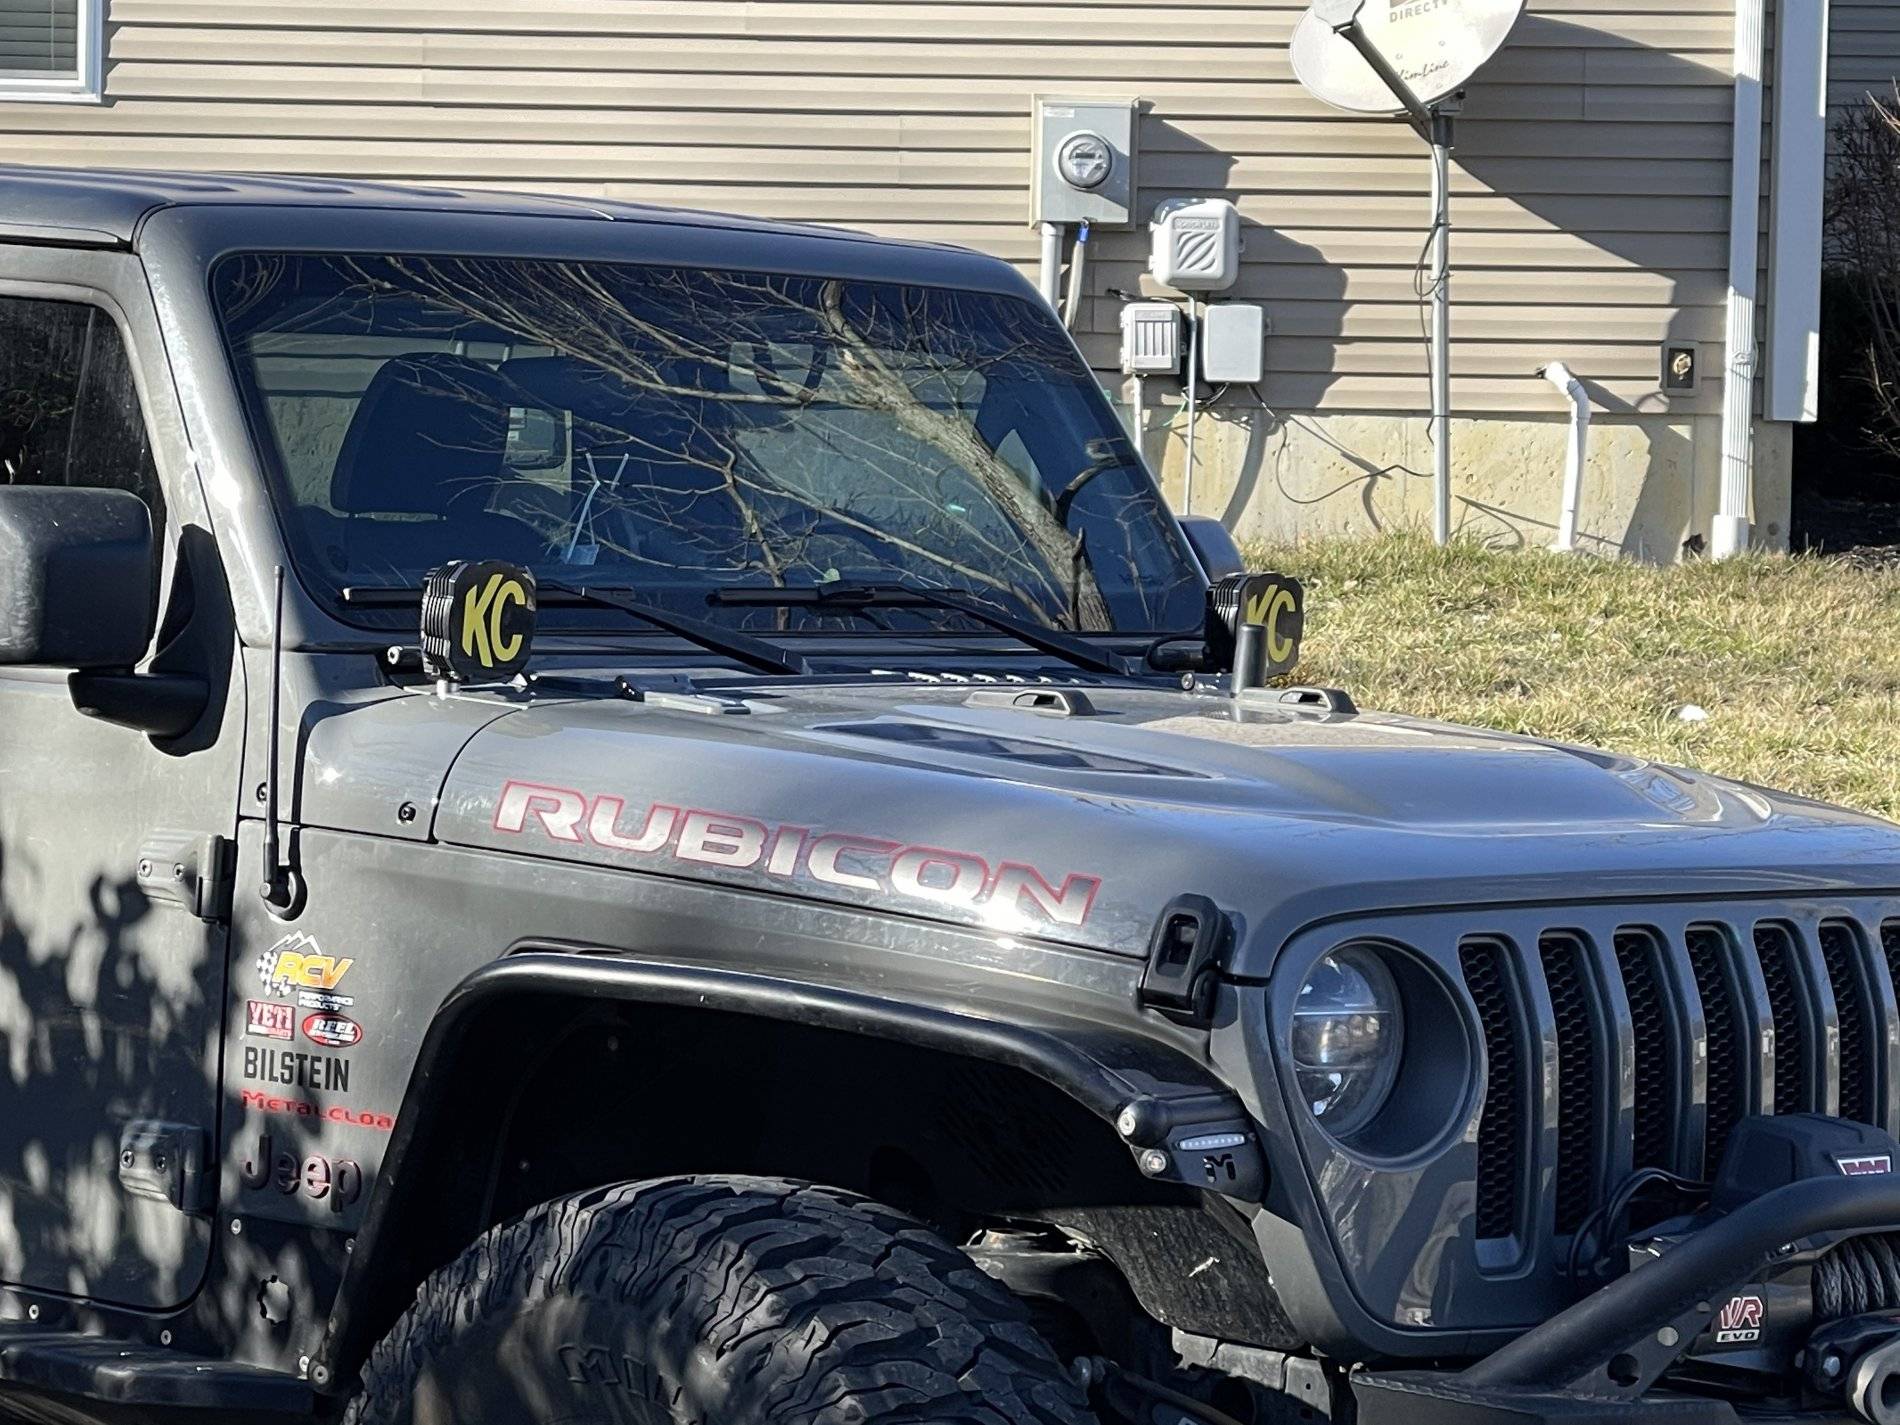
Tested the lights then buttoned it back up. Here is the result.
I went with a cowl location for my install and used the mount from Rock Hard 4x4. I liked that it wasn't some big ass bracket.
The adapter
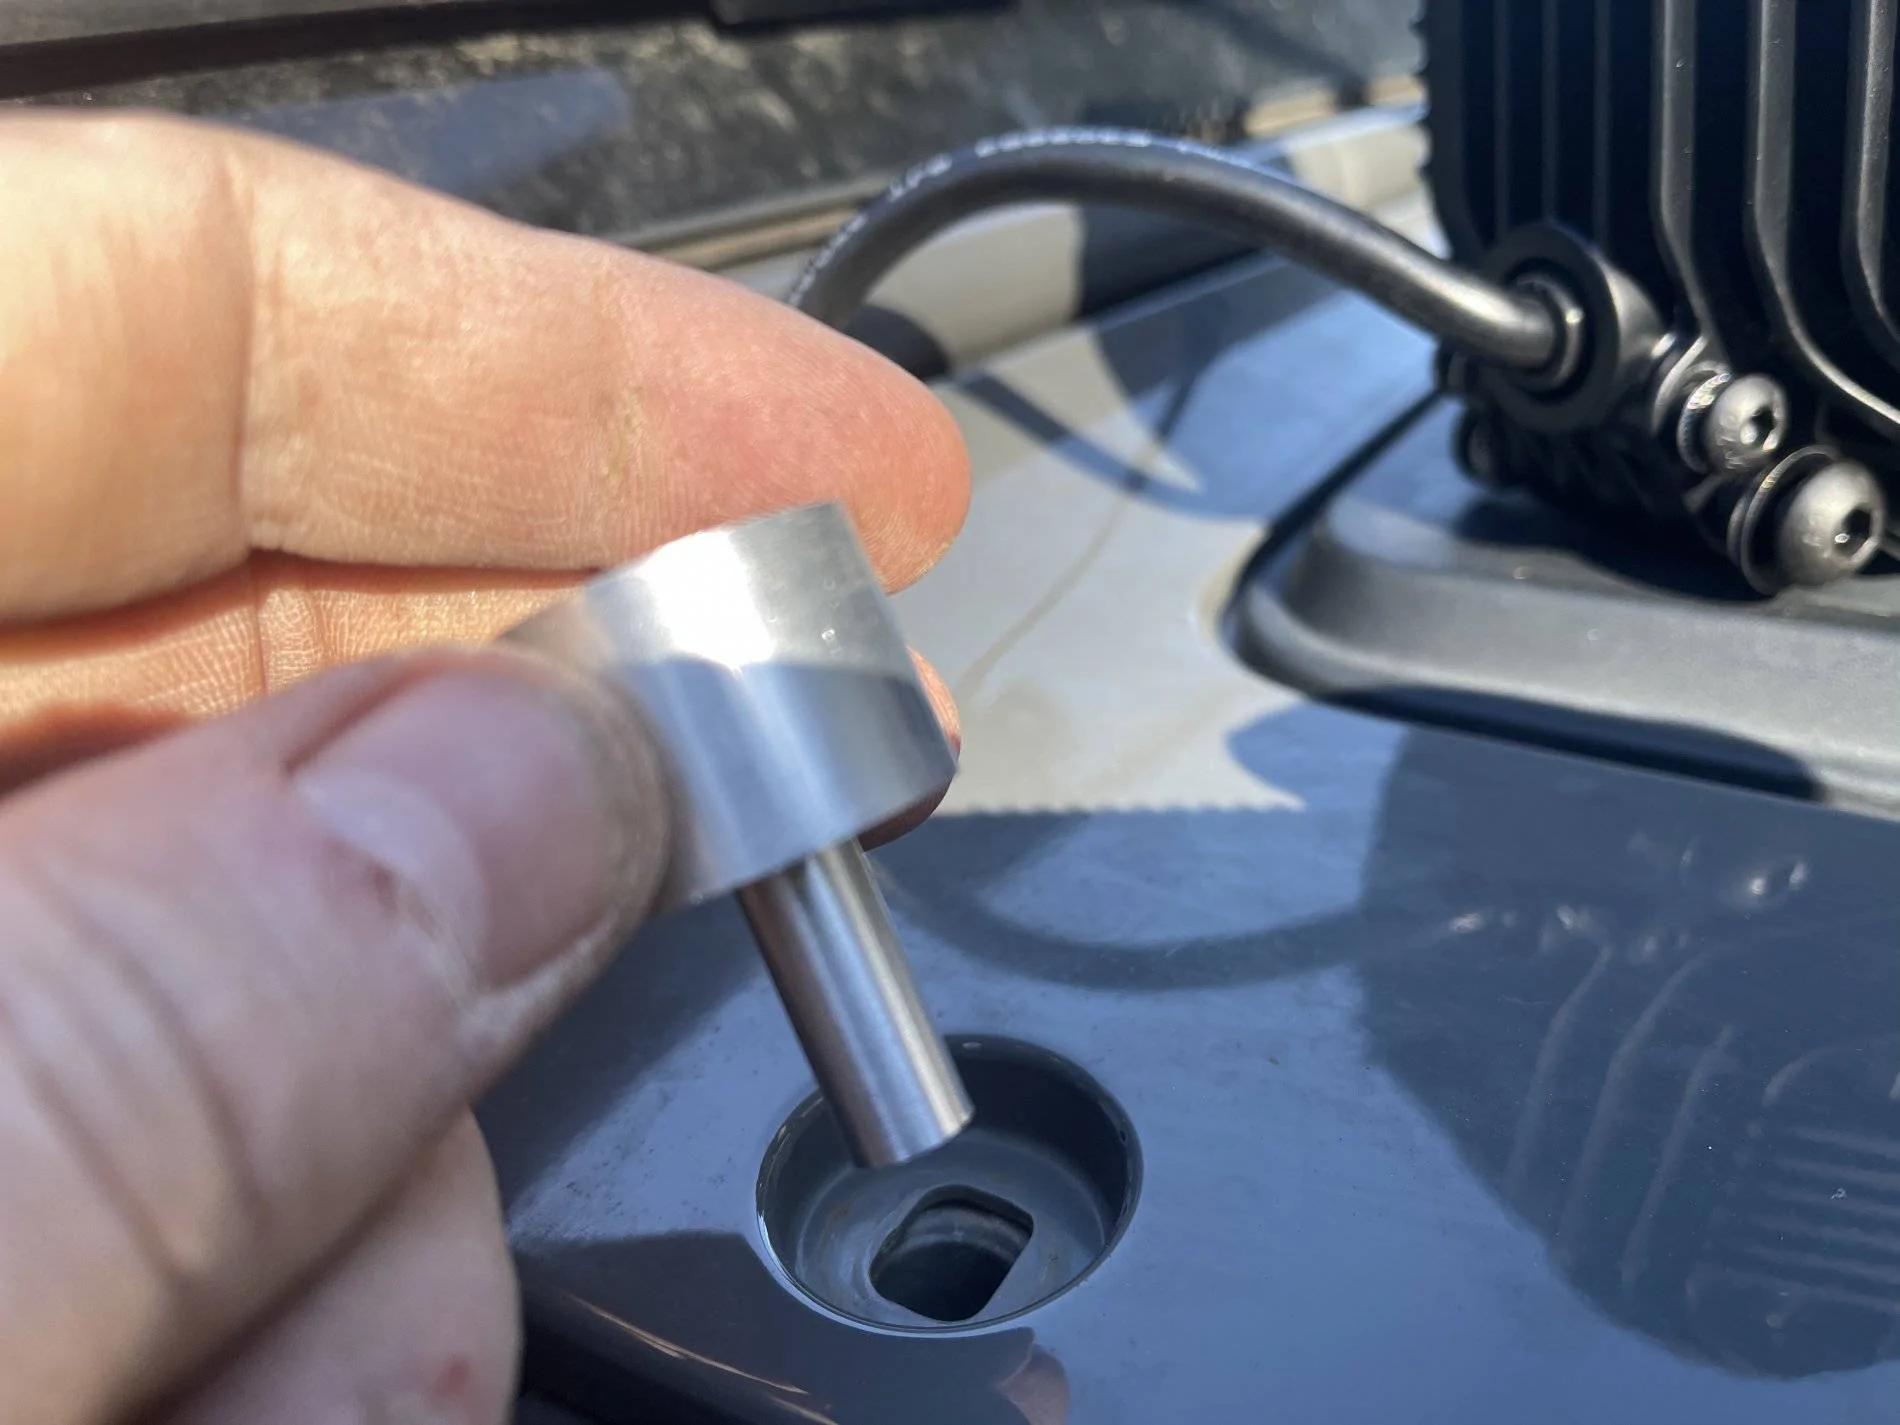
To use the adapter and have light bracket centered, I modified the carriage bolt that came with the lights by cutting a flat on the face, drilling a hole thru it and and cutting it off after the square.
On to the install...
I ran the wires for the switch and the driver's side light through the plastic wire track on the firewall.
I ran the switch wires up past the lower windshield seal.
I mounted the switch below the headlight switch. It was a good spot to plug when I go to the Switch-Pro.
After trimming the harness, I mounted the relay in the passenger side cowl using an existing body bolt.
Tested the lights then buttoned it back up. Here is the result.
Sponsored