- Joined
- Oct 12, 2016
- Threads
- 139
- Messages
- 2,542
- Reaction score
- 2,075
- Location
- Westchester, NY
- Vehicle(s)
- JLU Sahara
- Thread starter
- Banned
- #1
Yesterday I installed the Draw-Tite Front Mount Trailer Hitch
https://www.etrailer.com/Front-Hitch/Jeep/JL+Wrangler+Unlimited/2018/65079.html?vehicleid=201866679
I'd like to share some observations about doing so to help others contemplating/planning similar installations.
While other brands of front hitches may certainly exist that are compatible with the JLU, or may come to market in the future, the two I saw that were certified to work were here:
https://www.etrailer.com/fmr-2018_Jeep_JL+Wrangler+Unlimited.htm
I chose to separate this from the "What did you do to your JL today" thread because it's long winded.
=========
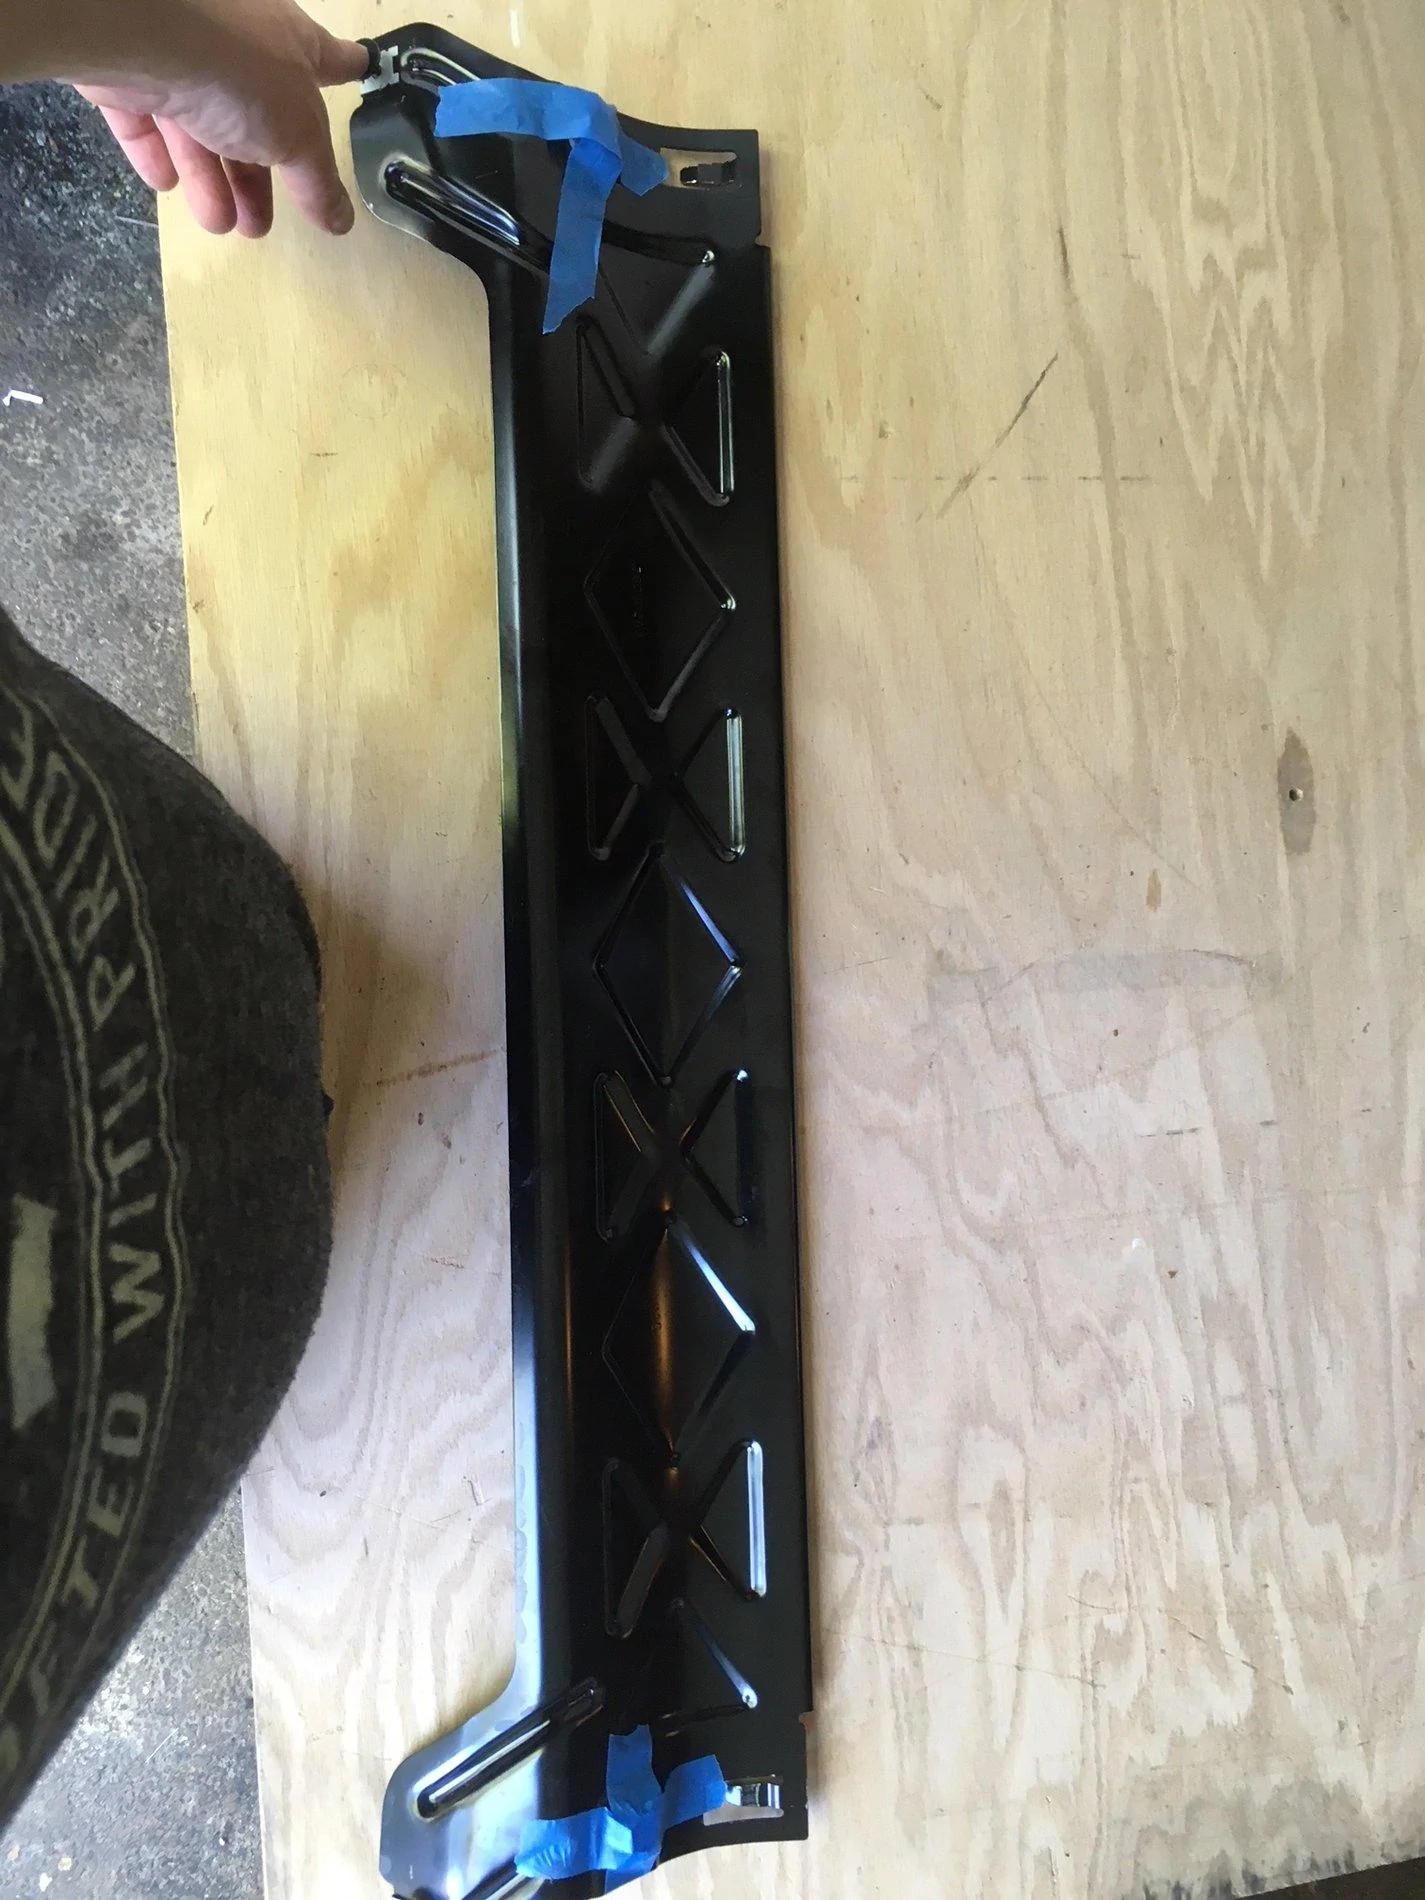
For either hitch, and I suspect any future front ones that may be designed for the JL, it is pretty much necessary to remove a metal piece behind, and that helps hold the plastic air dam in the front bottom of the vehicle in place. Both product descriptions of the two compatible front hitches at this above link note this permanent removal, referring to the same piece requiring removal as either a "steel skid shield" or "front metal air dam." I'll use both terms when referring to it; FCA may have yet another way of describing it.
While it may be possible to cut away sections of this metal piece to get it and a front hitch to fit, my impressions are that you'd have to cut away so much of it, that it may not serve its original purpose to the plastic air dam in front (as discussed below): which is to hold two metal bolts in place that secure the back of the plastic air dam (again more below).
That this metal piece may serve other purposes than securing the plastic air dam's 2 metal bolts (discussion to follow) I am not aware of.
Instructions on how to remove the plastic air dam on the JL can be found here: (even if this video was intended for the removal of other pieces off the rig.)
At exactly 2:19 into the video we can see Rob of Quadratec removing this plastic air dam
.
(Try to freeze the video at the end of 2:19)
Immediately behind the plastic air dam is a metal piece, the "steel skid shield" or "front metal air dam." easily removed by unscrewing its two bolts on either side and lifting it up and out. Again, this metal piece's purpose, at least to the plastic air dam, is to hold the portion of the air dam closest to the vehicle's back, held on by two 7 or 8mm bolts (I can't remember)--Rob says 8mm but I seem to recall it being 7mm (I may be wrong.)
We can see Rob removing 8 plastic clips (each of which have two parts: a pin and a receptacle) that hold the front of the plastic air dam on here:
with a trim tool, after which he removes the aforementioned two metal bolts that the "steel skid shield" or "front metal air dam" we need to also remove (although unlike the plastic air dam, permanently remove), serves to accept these 2 metal bolts.
Note: the 8 plastic clips seem to be a little harder to get to on the Sahara than the Sport Rob's working on in the video, but certainly accessible. This is because the area in front of these 8 plastic clips seems to be designed differently on the Sahara than the Sport shown in the video.
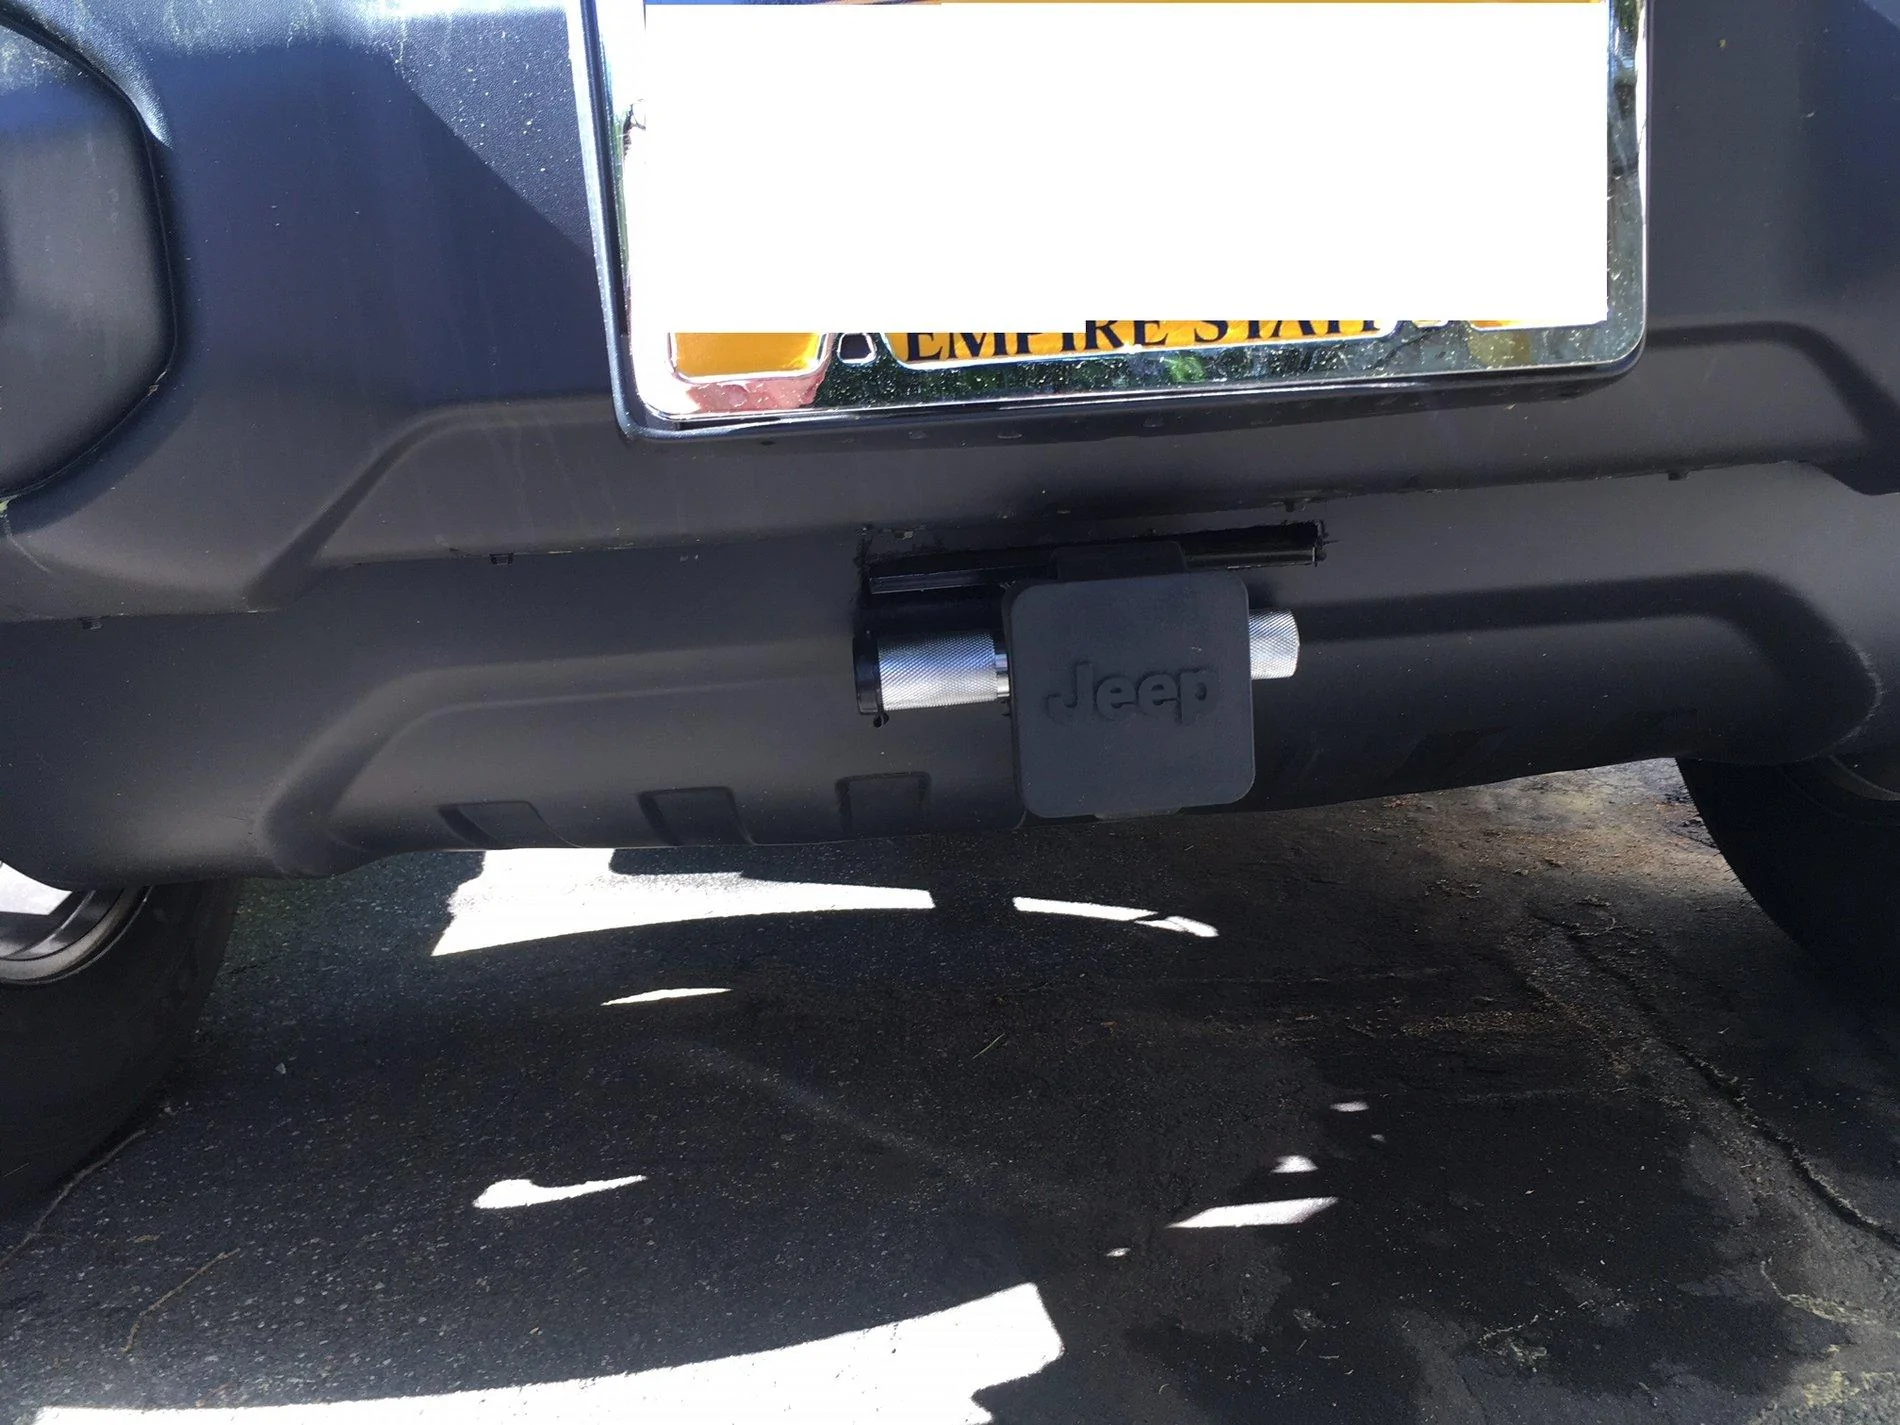
With both the plastic air dam and the "steel skid shield" or "front metal air dam" removed, (and by the way: we can/will put the plastic air dam back with some caveats), hitch installation is pretty straight forward. For the hitch I used, 3 bolts keep the hitch in place on each side. 2 of these 3 bolts involve the use of "handle nuts" as featured in this video of installing a front hitch on a JK (not a JL) at around 5:37.
.
(Please only use this JK video as a guide for 3 specific things: 1) demonstration of what a "handle nut" is (if you're unfamiliar), 2) how to cut off the excess of the handle nut after installation if desired (I just tucked mine away)
and 3) the BASIC IDEA on how to cut the plastic air dam
to allow it to be reinserted on to the rig, if you choose, now that the front hitch would prevent its assembly were this cutting not done.)
The precise areas you will need to cut your air dam are hitch and Wrangler model specific. Please use this JK example as only a conceptual guide, not as guidance for the exact locations where your plastic air dam will need to be cut in order to fit it back on once your front hitch is installed.
Some people choose to leave the plastic air dam off at this point.
Some people take it off and never even install a front hitch etc., enjoying the more rugged look.
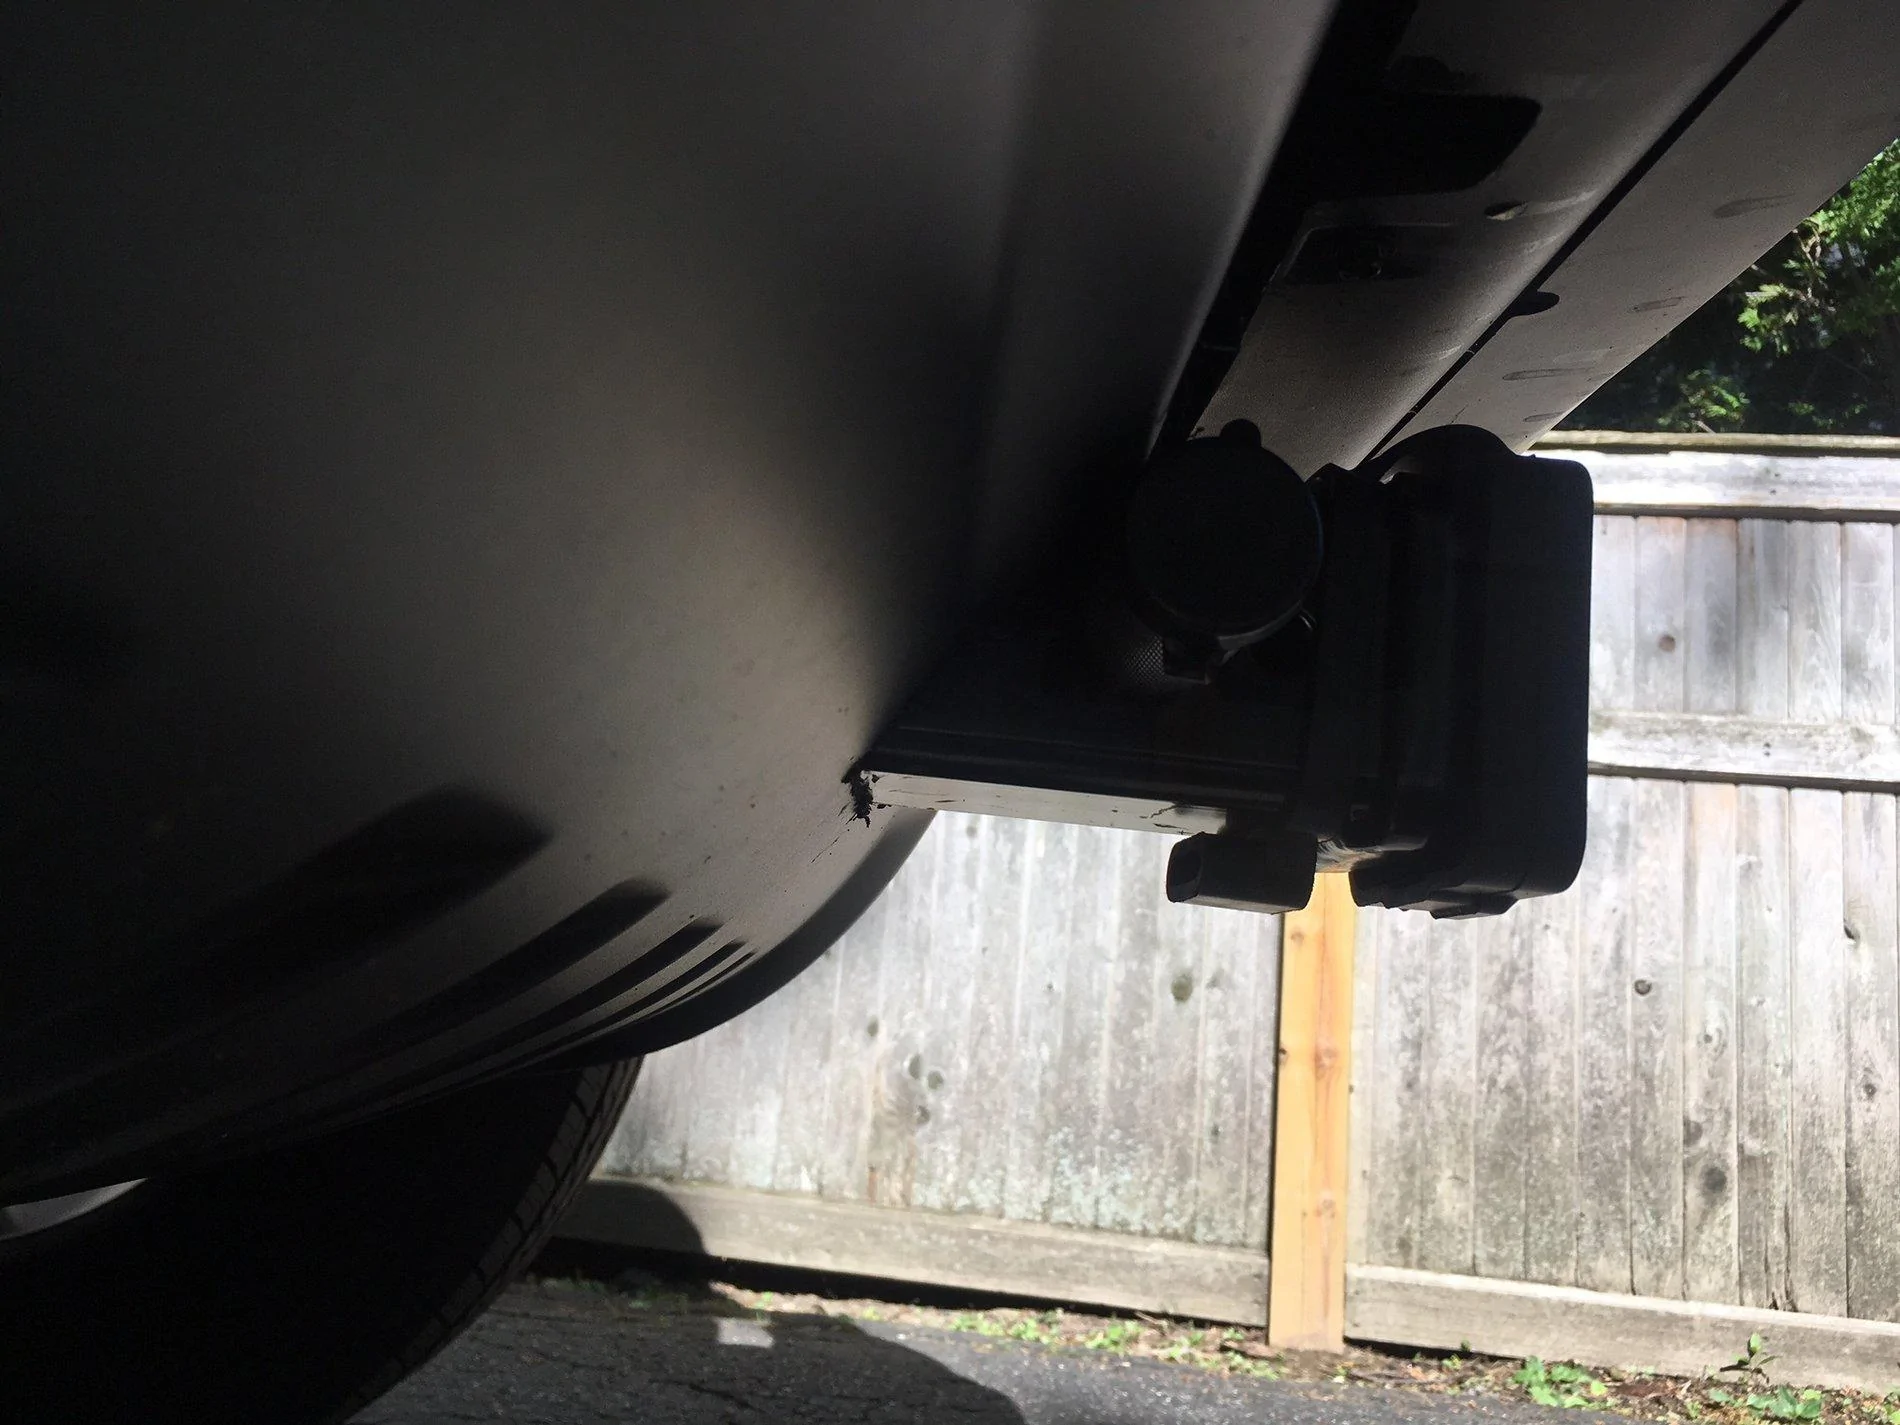
I like the look of the plastic air dam and hear it helps with gas mileage. So I cut out the section of the air dam where the hitch sits, using a ruler to take careful measurements of where the just installed front hitch sat, and an Oscillating Cutting Tool.
Placement of the plastic air dam back on the rig as a bit tricky even assuming the cut in the air dam easily allows its reinsertion on the rig around the front hitch.
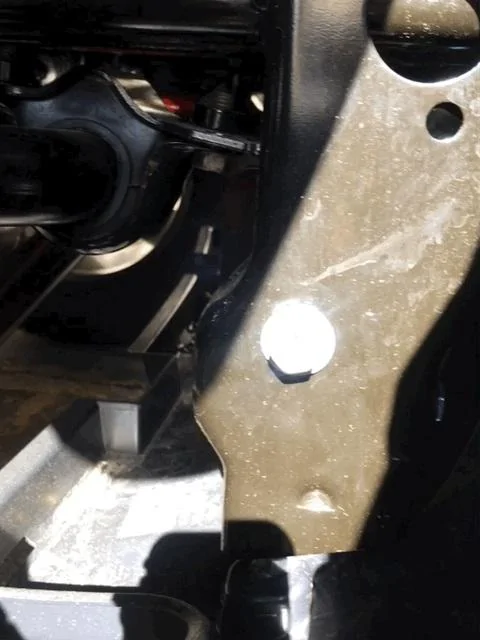
The reason why this is the case is that the back of the air dam, where the two metal bolts exists, has no place for these two bolts to attach to now that the "steel skid shield" or "front metal air dam" is permanently removed to accommodate this hitch.
This has a tendency to drop down the back of the plastic air dam towards the ground, and can make reinstallation of the 8 plastic clips a bit tricky as these clips work best when the plastic air dam is installed with these two metal bolts, which restrict the air dam's movement up or down in the back and help to position it properly.
For the time being, I made a huge knot in two pieces of strong cord on each side of the air dam (passengers and driver's side), passed it through the two holes where the metal bolts normally sat, and attached the cord to points in the vehicle's undercarriage. This resists the plastic air dam from dropping, but unlike with the "steel skid shield" or "front metal air dam" installed, not from rising as wind passes under the rig at speeds--much that there's little play that testing (physical pushing and driving at speeds) proved harmless.
Since this upward rise is minimal, in time I'll probably figure out some way to secure these two points in the back of the air dam with threaded steel rod (or something similar), to resist down- or upward movement of the back of the plastic air dam, at which time, as Murphy's law of Wranglers would have it, someone will introduce a component into front hitch installs to do this better than anything I could jury rig.
.
https://www.etrailer.com/Front-Hitch/Jeep/JL+Wrangler+Unlimited/2018/65079.html?vehicleid=201866679
I'd like to share some observations about doing so to help others contemplating/planning similar installations.
While other brands of front hitches may certainly exist that are compatible with the JLU, or may come to market in the future, the two I saw that were certified to work were here:
https://www.etrailer.com/fmr-2018_Jeep_JL+Wrangler+Unlimited.htm
I chose to separate this from the "What did you do to your JL today" thread because it's long winded.
=========
For either hitch, and I suspect any future front ones that may be designed for the JL, it is pretty much necessary to remove a metal piece behind, and that helps hold the plastic air dam in the front bottom of the vehicle in place. Both product descriptions of the two compatible front hitches at this above link note this permanent removal, referring to the same piece requiring removal as either a "steel skid shield" or "front metal air dam." I'll use both terms when referring to it; FCA may have yet another way of describing it.
While it may be possible to cut away sections of this metal piece to get it and a front hitch to fit, my impressions are that you'd have to cut away so much of it, that it may not serve its original purpose to the plastic air dam in front (as discussed below): which is to hold two metal bolts in place that secure the back of the plastic air dam (again more below).
That this metal piece may serve other purposes than securing the plastic air dam's 2 metal bolts (discussion to follow) I am not aware of.
Instructions on how to remove the plastic air dam on the JL can be found here: (even if this video was intended for the removal of other pieces off the rig.)
At exactly 2:19 into the video we can see Rob of Quadratec removing this plastic air dam
.
(Try to freeze the video at the end of 2:19)
Immediately behind the plastic air dam is a metal piece, the "steel skid shield" or "front metal air dam." easily removed by unscrewing its two bolts on either side and lifting it up and out. Again, this metal piece's purpose, at least to the plastic air dam, is to hold the portion of the air dam closest to the vehicle's back, held on by two 7 or 8mm bolts (I can't remember)--Rob says 8mm but I seem to recall it being 7mm (I may be wrong.)
We can see Rob removing 8 plastic clips (each of which have two parts: a pin and a receptacle) that hold the front of the plastic air dam on here:
with a trim tool, after which he removes the aforementioned two metal bolts that the "steel skid shield" or "front metal air dam" we need to also remove (although unlike the plastic air dam, permanently remove), serves to accept these 2 metal bolts.
Note: the 8 plastic clips seem to be a little harder to get to on the Sahara than the Sport Rob's working on in the video, but certainly accessible. This is because the area in front of these 8 plastic clips seems to be designed differently on the Sahara than the Sport shown in the video.
With both the plastic air dam and the "steel skid shield" or "front metal air dam" removed, (and by the way: we can/will put the plastic air dam back with some caveats), hitch installation is pretty straight forward. For the hitch I used, 3 bolts keep the hitch in place on each side. 2 of these 3 bolts involve the use of "handle nuts" as featured in this video of installing a front hitch on a JK (not a JL) at around 5:37.
.
(Please only use this JK video as a guide for 3 specific things: 1) demonstration of what a "handle nut" is (if you're unfamiliar), 2) how to cut off the excess of the handle nut after installation if desired (I just tucked mine away)
and 3) the BASIC IDEA on how to cut the plastic air dam
to allow it to be reinserted on to the rig, if you choose, now that the front hitch would prevent its assembly were this cutting not done.)
The precise areas you will need to cut your air dam are hitch and Wrangler model specific. Please use this JK example as only a conceptual guide, not as guidance for the exact locations where your plastic air dam will need to be cut in order to fit it back on once your front hitch is installed.
Some people choose to leave the plastic air dam off at this point.
Some people take it off and never even install a front hitch etc., enjoying the more rugged look.
I like the look of the plastic air dam and hear it helps with gas mileage. So I cut out the section of the air dam where the hitch sits, using a ruler to take careful measurements of where the just installed front hitch sat, and an Oscillating Cutting Tool.
Placement of the plastic air dam back on the rig as a bit tricky even assuming the cut in the air dam easily allows its reinsertion on the rig around the front hitch.
The reason why this is the case is that the back of the air dam, where the two metal bolts exists, has no place for these two bolts to attach to now that the "steel skid shield" or "front metal air dam" is permanently removed to accommodate this hitch.
This has a tendency to drop down the back of the plastic air dam towards the ground, and can make reinstallation of the 8 plastic clips a bit tricky as these clips work best when the plastic air dam is installed with these two metal bolts, which restrict the air dam's movement up or down in the back and help to position it properly.
For the time being, I made a huge knot in two pieces of strong cord on each side of the air dam (passengers and driver's side), passed it through the two holes where the metal bolts normally sat, and attached the cord to points in the vehicle's undercarriage. This resists the plastic air dam from dropping, but unlike with the "steel skid shield" or "front metal air dam" installed, not from rising as wind passes under the rig at speeds--much that there's little play that testing (physical pushing and driving at speeds) proved harmless.
Since this upward rise is minimal, in time I'll probably figure out some way to secure these two points in the back of the air dam with threaded steel rod (or something similar), to resist down- or upward movement of the back of the plastic air dam, at which time, as Murphy's law of Wranglers would have it, someone will introduce a component into front hitch installs to do this better than anything I could jury rig.
.
Sponsored
Last edited: