Sponsored
OP
OP
chevymitchell

chevymitchell

Well-Known Member
First Name
Shawn
Joined
Feb 18, 2018
Threads
112
Messages
5,017
Reaction score
12,147
Location
Pueblo West, CO
Vehicle(s)
2022 392XR, 2025 Wagoneer S, 2006 LJ 6-spd
Occupation
Avi Engineer
@chevymitchell I see that the B Pillar mounting plate essentially blocks the roof drains. Did you or Genright do anything to allow it to drain properly? Are you aware of any more changes they’ve made since you installed this?
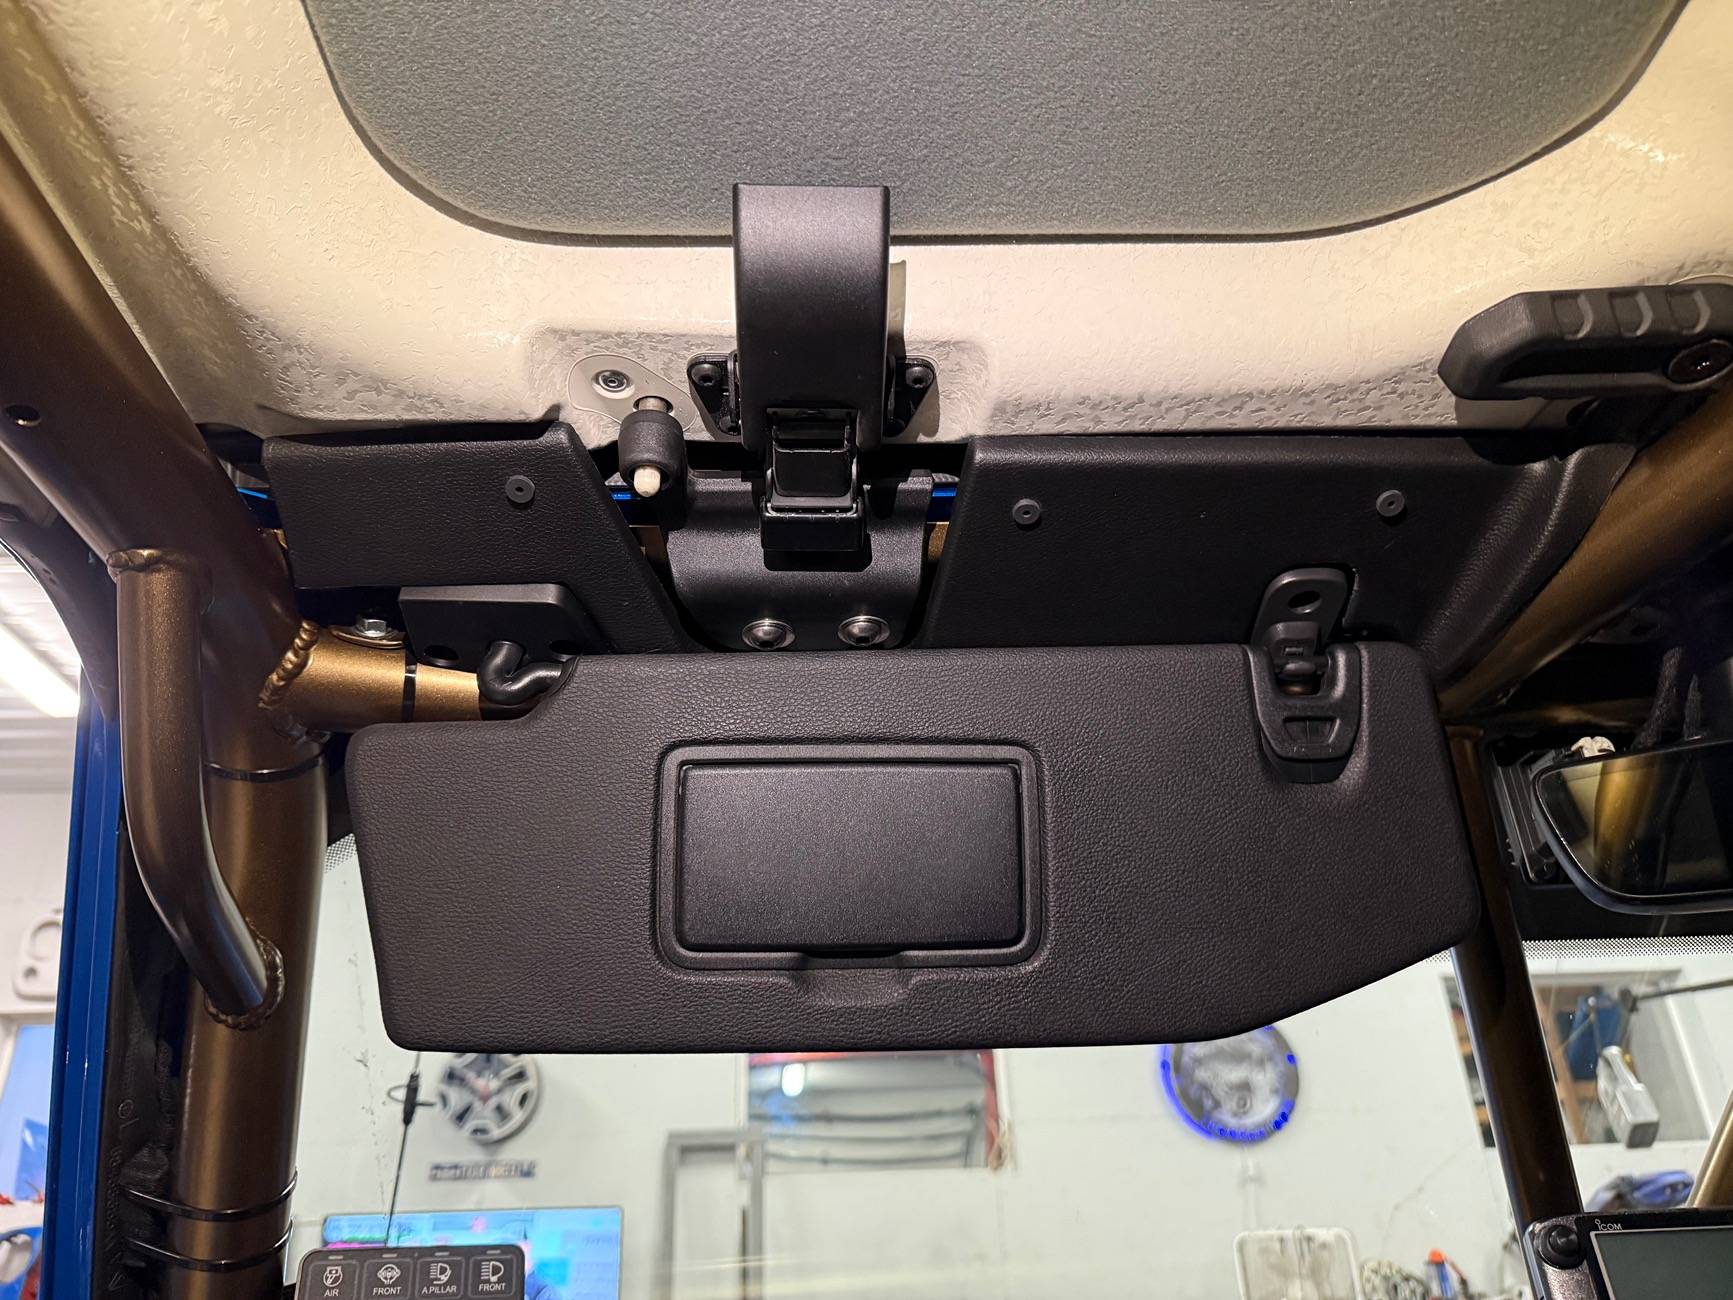
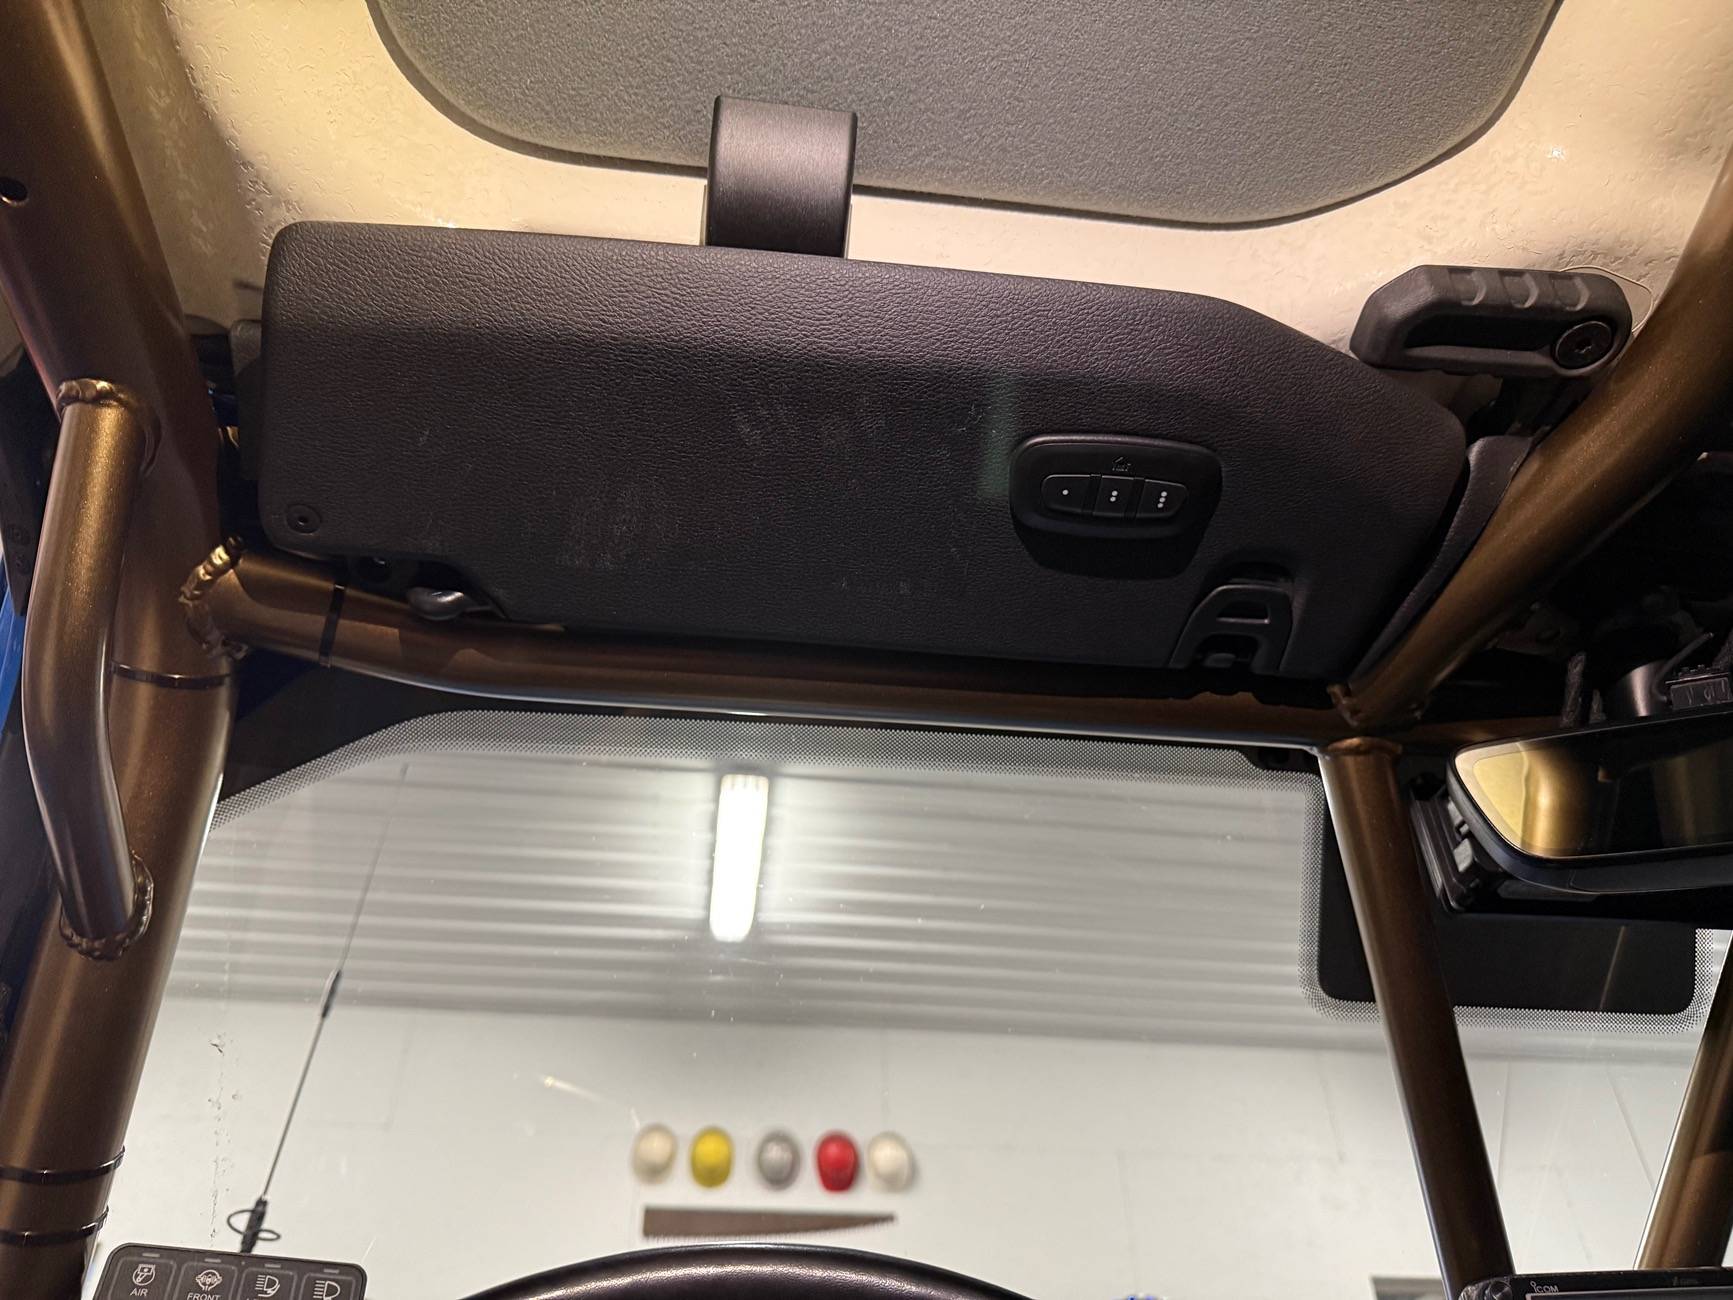
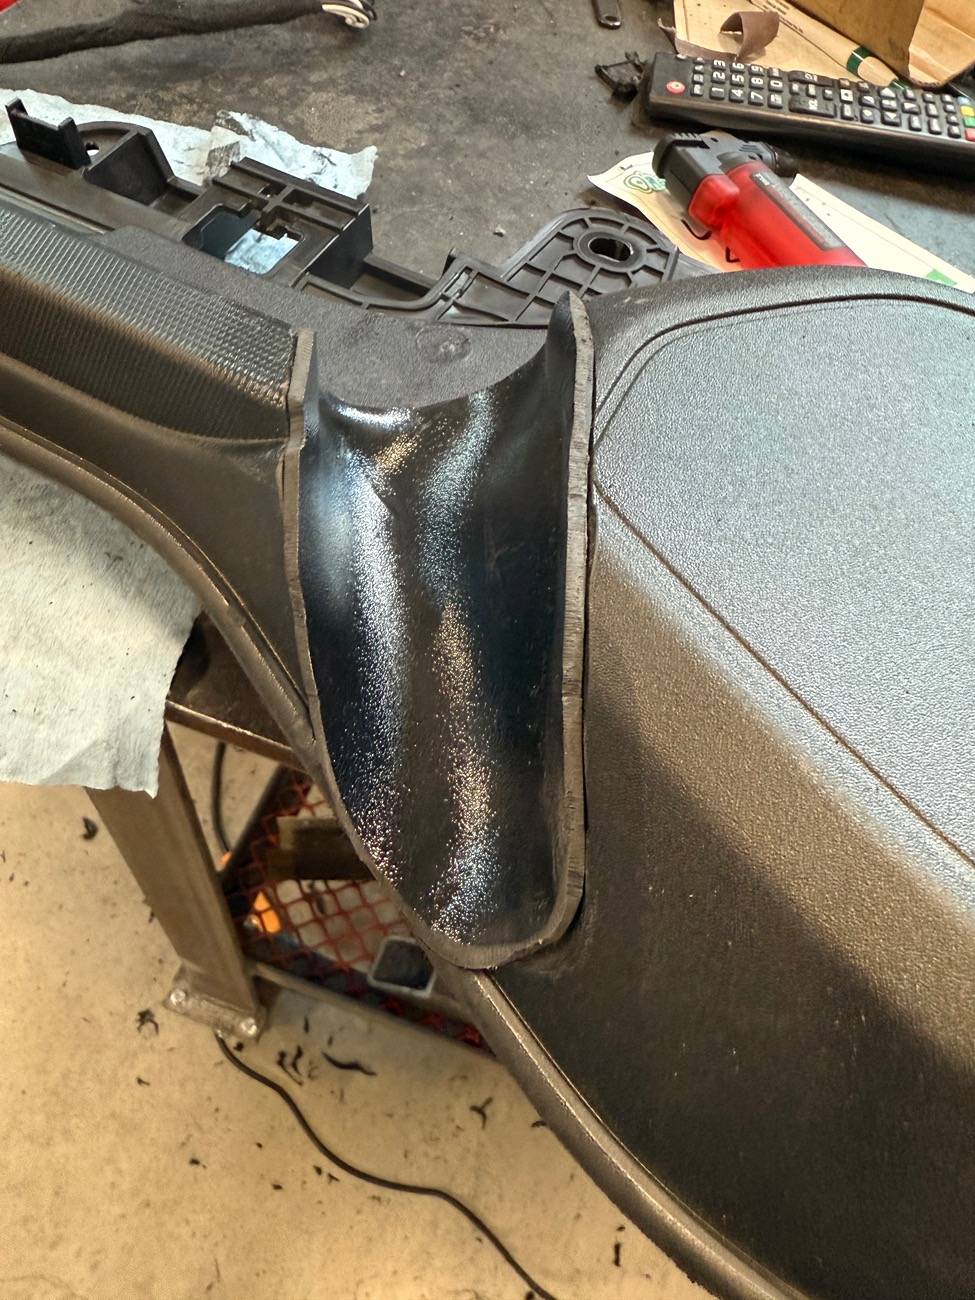
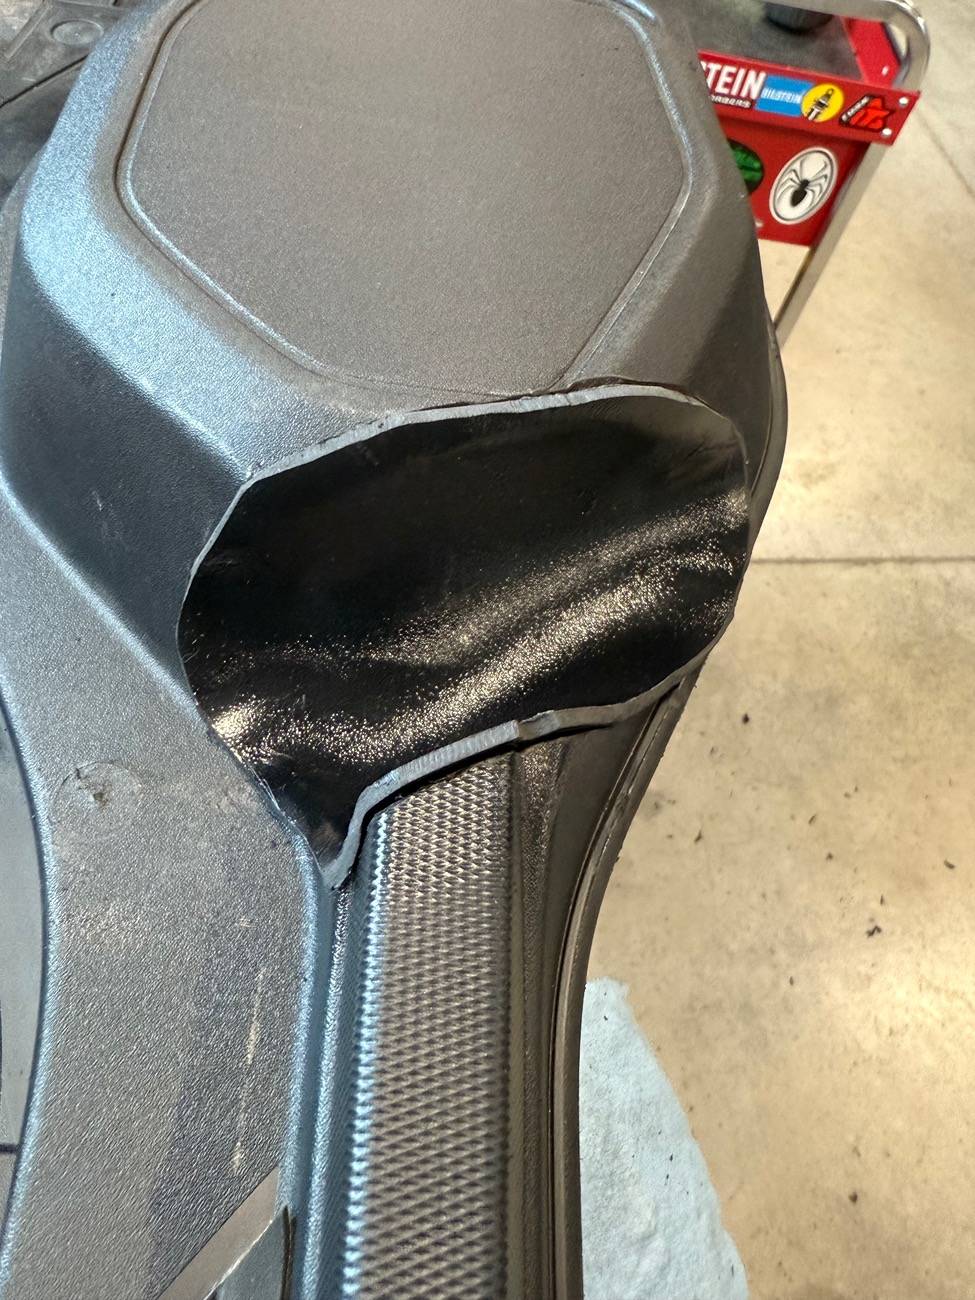
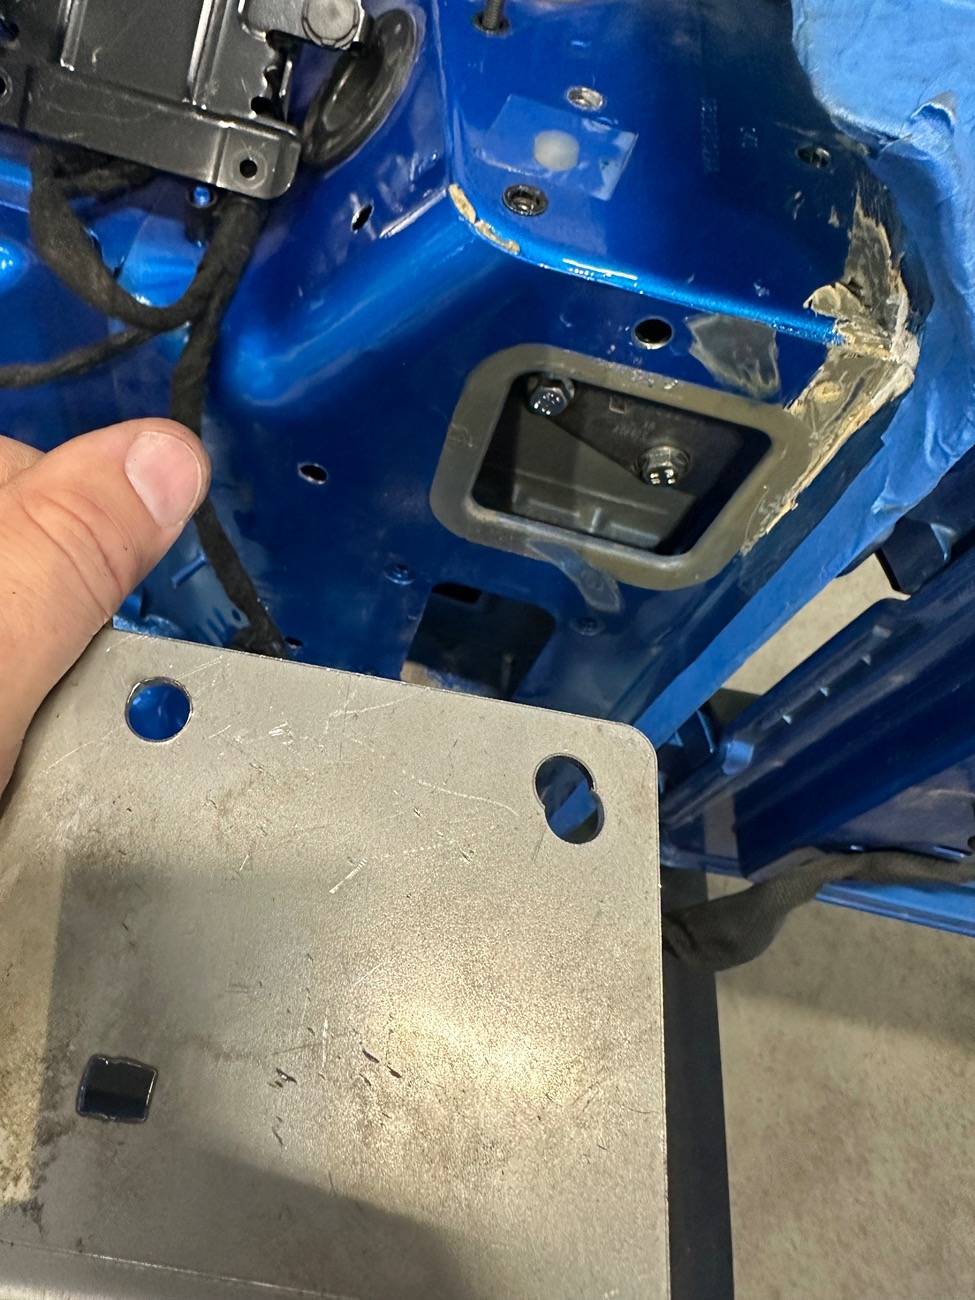
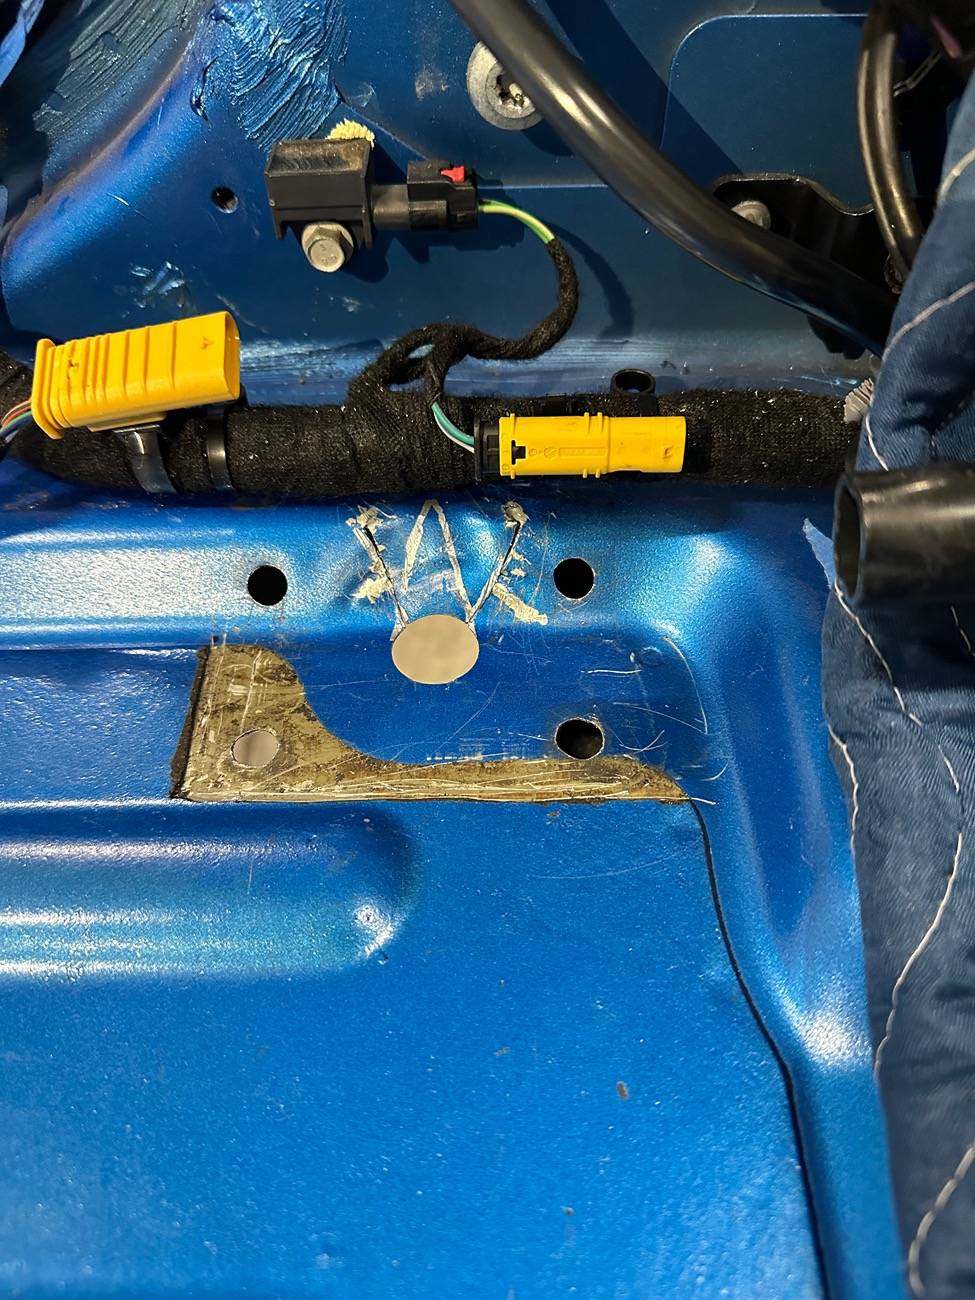
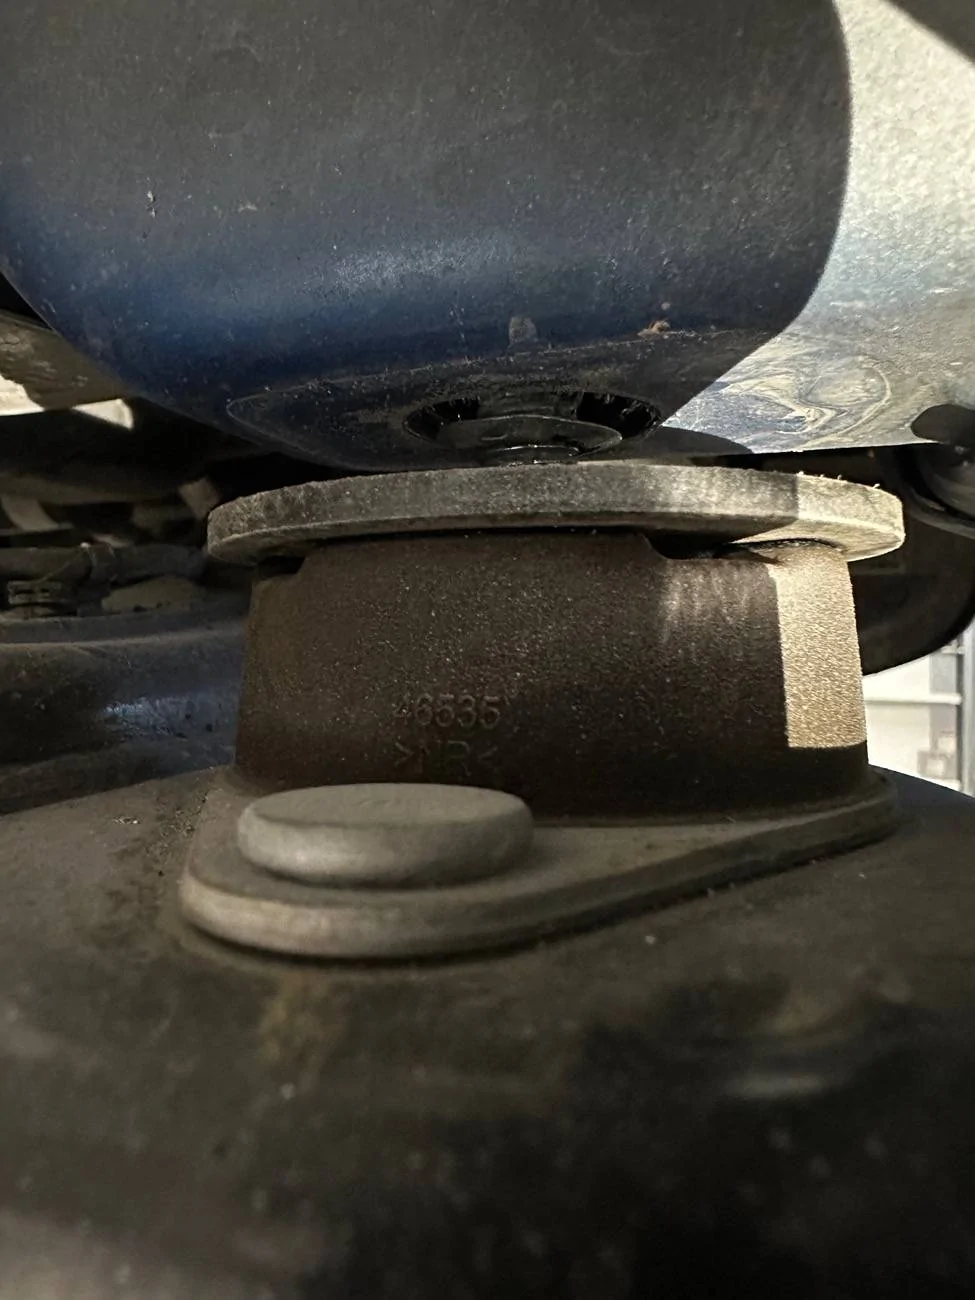
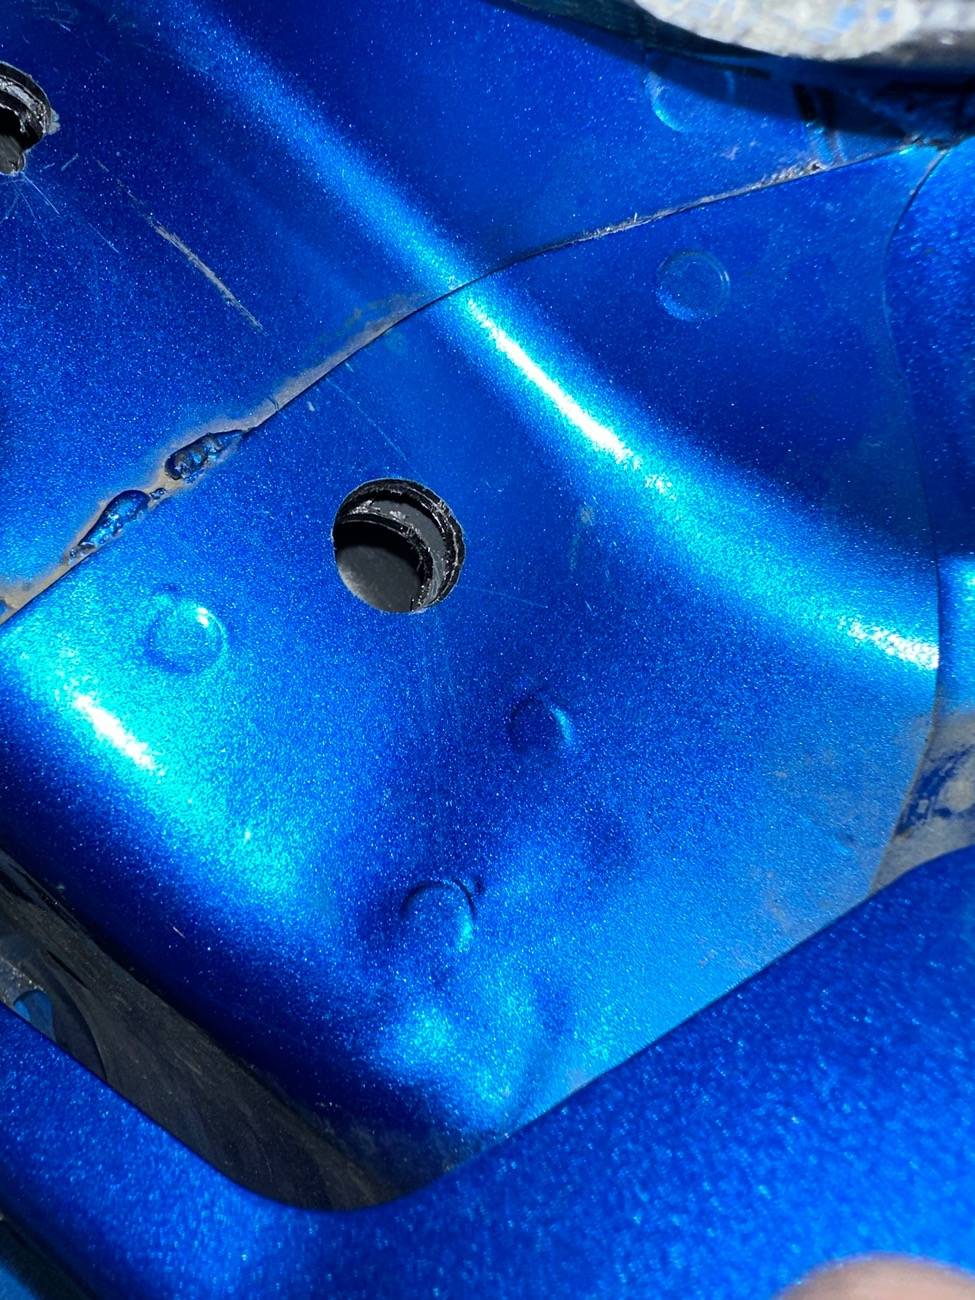
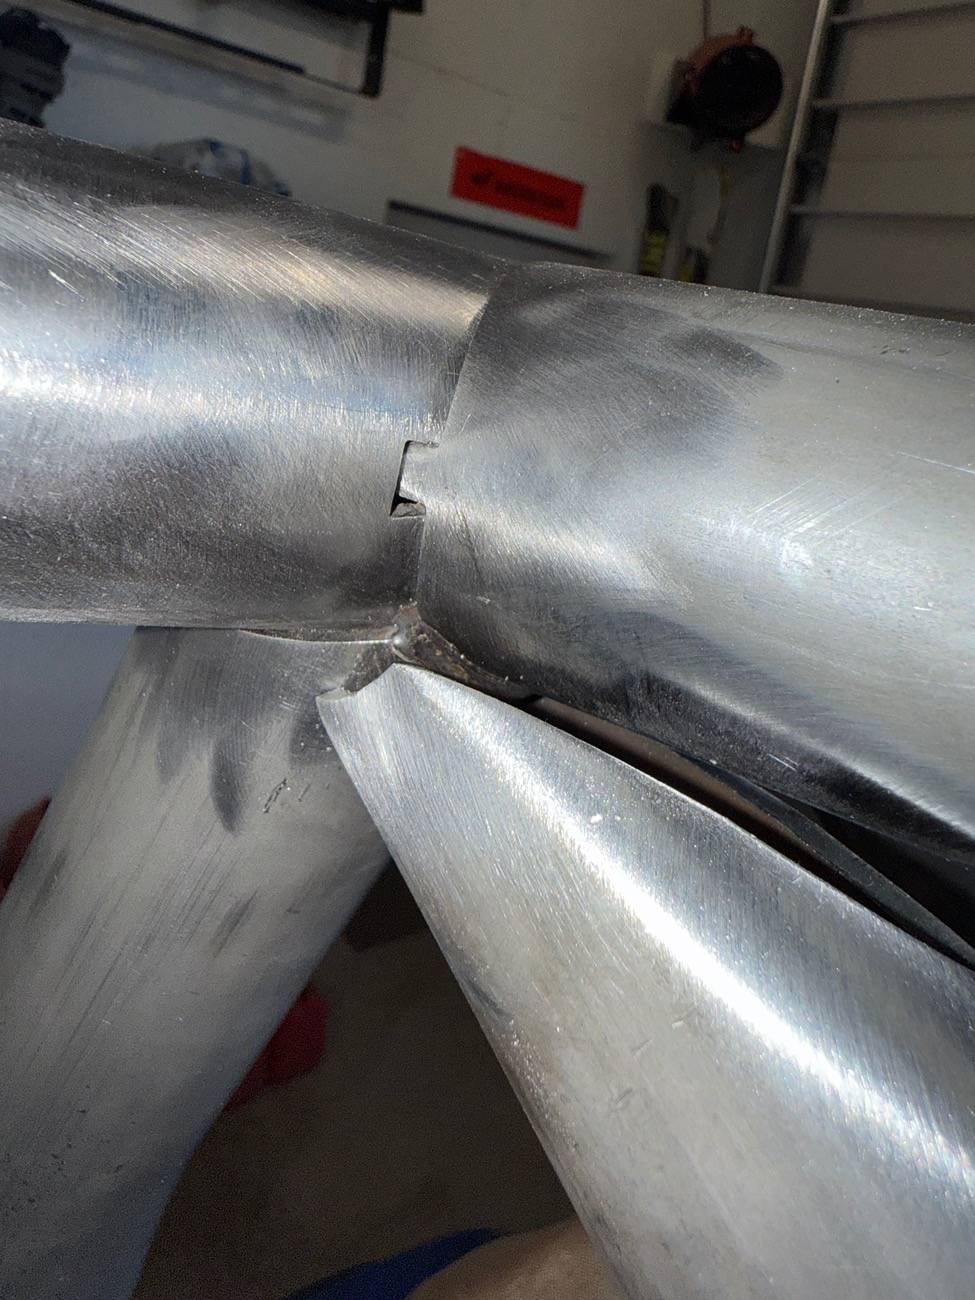
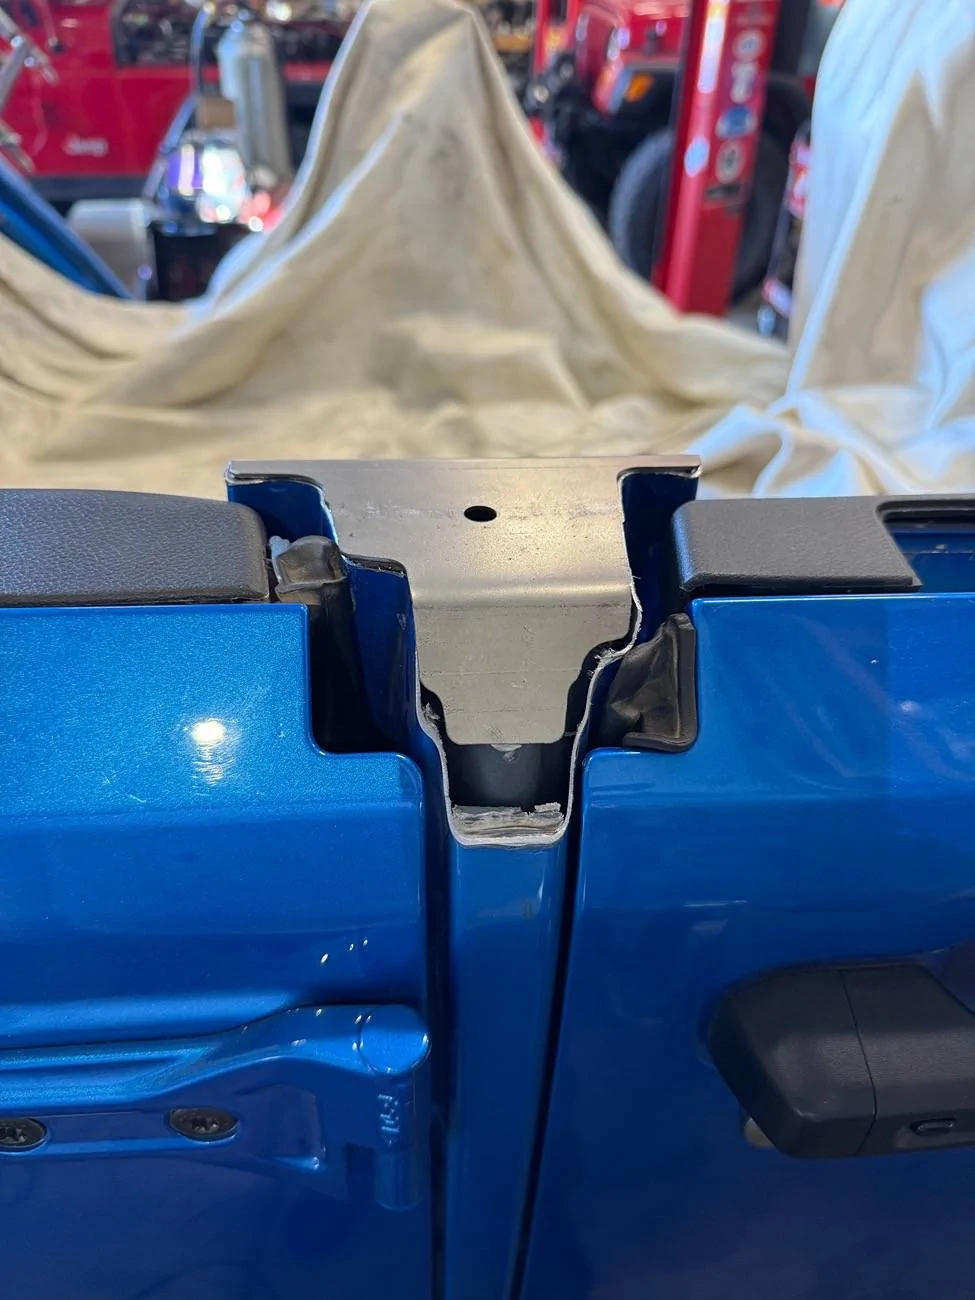
The roof drains still function normally. You just end up cutting the tube below the B-Pillar chop line and adding a rubber disconnect there for when you take the B-Pillars off.

I’m not aware, no. I haven’t looked to see if there are any improvements to it yet.
Sponsored


1996cc

Well-Known Member
Joined
Aug 19, 2019
Threads
25
Messages
899
Reaction score
1,172
Location
Oregon
Vehicle(s)
22 JLUR 392
If I haven’t said it yet, thanks for this nice write up. It’s helped give me confidence in tackling it myself. I may add a few details as I go that can hopefully add to the detail and information for the next guy.

I cut my factory one out today. I was curious how much it weighed because the FedEx packages from Genright totaled up to 346 pounds (including the cardboard). Looks like we are adding 250+ pounds overall.

Jeep Wrangler JL GenRight Roll Cage Install IMG_1761
 

1996cc

Well-Known Member
Joined
Aug 19, 2019
Threads
25
Messages
899
Reaction score
1,172
Location
Oregon
Vehicle(s)
22 JLUR 392
Didn’t have much time today, but I did get the holes drilled for the D pillar landings. Neither side lined up correctly on the top flat portion. The left side was off about 1/8”, but the passenger side was off quite a bit. The front hole ended up wallering out the lower bracket (since you drill from the top down), and the rear hole on the top plate was enlarged. I don‘t have. A pic, but I also had to notch out the upper square hole like ChevyMitchell had to do - but they do include longer bolts and nuts now for the upper hinge mount. I also had to notch about 1/4” out of the Left side bracket to clear the tailgate latch reinforcement rib (the bracket comes with a notch, but I had to extend it further)- didn’t get a pic of that either.

Jeep Wrangler JL GenRight Roll Cage Install IMG_1769


Jeep Wrangler JL GenRight Roll Cage Install IMG_1772


Jeep Wrangler JL GenRight Roll Cage Install IMG_1771
 
OP
OP
chevymitchell

chevymitchell

Well-Known Member
First Name
Shawn
Joined
Feb 18, 2018
Threads
112
Messages
5,017
Reaction score
12,147
Location
Pueblo West, CO
Vehicle(s)
2022 392XR, 2025 Wagoneer S, 2006 LJ 6-spd
Occupation
Avi Engineer
Didn’t have much time today, but I did get the holes drilled for the D pillar landings. Neither side lined up correctly on the top flat portion. The left side was off about 1/8”, but the passenger side was off quite a bit. The front hole ended up wallering out the lower bracket (since you drill from the top down), and the rear hole on the top plate was enlarged. I don‘t have. A pic, but I also had to notch out the upper square hole like ChevyMitchell had to do - but they do include longer bolts and nuts now for the upper hinge mount. I also had to notch about 1/4” out of the Left side bracket to clear the tailgate latch reinforcement rib (the bracket comes with a notch, but I had to extend it further)- didn’t get a pic of that either.

IMG_1769.jpeg


IMG_1772.jpeg


IMG_1771.jpeg
Little massaging required here and there. Lol.
 

1996cc

Well-Known Member
Joined
Aug 19, 2019
Threads
25
Messages
899
Reaction score
1,172
Location
Oregon
Vehicle(s)
22 JLUR 392
A couple more pics to compliment all of Shawn’s above. This is the floor after the needed changes are made. You can see the inner triangle gray line - this is where Genright tells you to cut. That didn’t make sense to me because they call them “relief cuts”, but that would remove the whole triangle. In Shawn’s video, he drew the lines where I cut mine. After the floor is formed to match the brackets, the sheetmetal basically touches itself in both cuts.

There are SO MANY holes to drill! Drilling is one of my least favorite automotive/fabrication tasks, so this is trying my patience. I think I only have the A pillar left to drill, unfortunately those are the hardest ones to do 😢

Jeep Wrangler JL GenRight Roll Cage Install IMG_1814


Jeep Wrangler JL GenRight Roll Cage Install IMG_1815


Jeep Wrangler JL GenRight Roll Cage Install IMG_1816
 

Sponsored

1996cc

Well-Known Member
Joined
Aug 19, 2019
Threads
25
Messages
899
Reaction score
1,172
Location
Oregon
Vehicle(s)
22 JLUR 392
A couple notes from today, I used this grinding wheel (I think they are used more for paint removal?). It removes plenty of aluminum at a time, but less than a flap wheel - so you don’t take off too much at once.
Jeep Wrangler JL GenRight Roll Cage Install IMG_1818


A few of the body bolts didn’t want to come out completely. Once I jacked up the body, I found these clips holding them in. Grabbing them with a needle nose while turning the bolt, they came right out.
Jeep Wrangler JL GenRight Roll Cage Install IMG_1821

Jeep Wrangler JL GenRight Roll Cage Install IMG_1822


The driver side B pillar support plate was way to close to the frame for my comfort, like 1/16”. Once the Jeep is put back together and loaded, I’d imagine it would easily contact it and cause squeaks and/or vibrations. It‘s been a tedious process test-fitting everything before paint and final install and I almost didn’t with these supports. I’m so glad I did. Shaving an 1/8” to 3/16” off this section gave it the clearance it needed. The passenger side was fine.
Jeep Wrangler JL GenRight Roll Cage Install IMG_1823

Jeep Wrangler JL GenRight Roll Cage Install IMG_1824

Jeep Wrangler JL GenRight Roll Cage Install IMG_1829
 
Last edited:

1996cc

Well-Known Member
Joined
Aug 19, 2019
Threads
25
Messages
899
Reaction score
1,172
Location
Oregon
Vehicle(s)
22 JLUR 392
I know Shawn mentions this, but I don’t know if anyone can fully appreciate how much of a royal pain drilling the A pillar holes is. I worked on this ONE side for 6 hours today. 6 hours for 3 holes. 2 hours per hole. Ridiculous. Shawn seemed to do a better job lining up his holes than I did. Once I had a ~1/8” hole in each, I slid the insert in and carefully watched how it aligned with the hole in the insert. Then I went to work with a die grinder to align them properly. The die grinder cuts the material really fast, but getting that initial 1/8” hole takes FOR. EV. ER. I would rotate through 5 different bits from tiny up to 1/8” and keep rotating back and forth. For some reason that seemed to cut more metal than just sticking with 1 bit at a time. The other big challenge on the lower forward bolt is that after you get through the first 2 layers, there is a gap and then the 3rd layer is at a different angle than the first 2 🤦🏼‍♂️
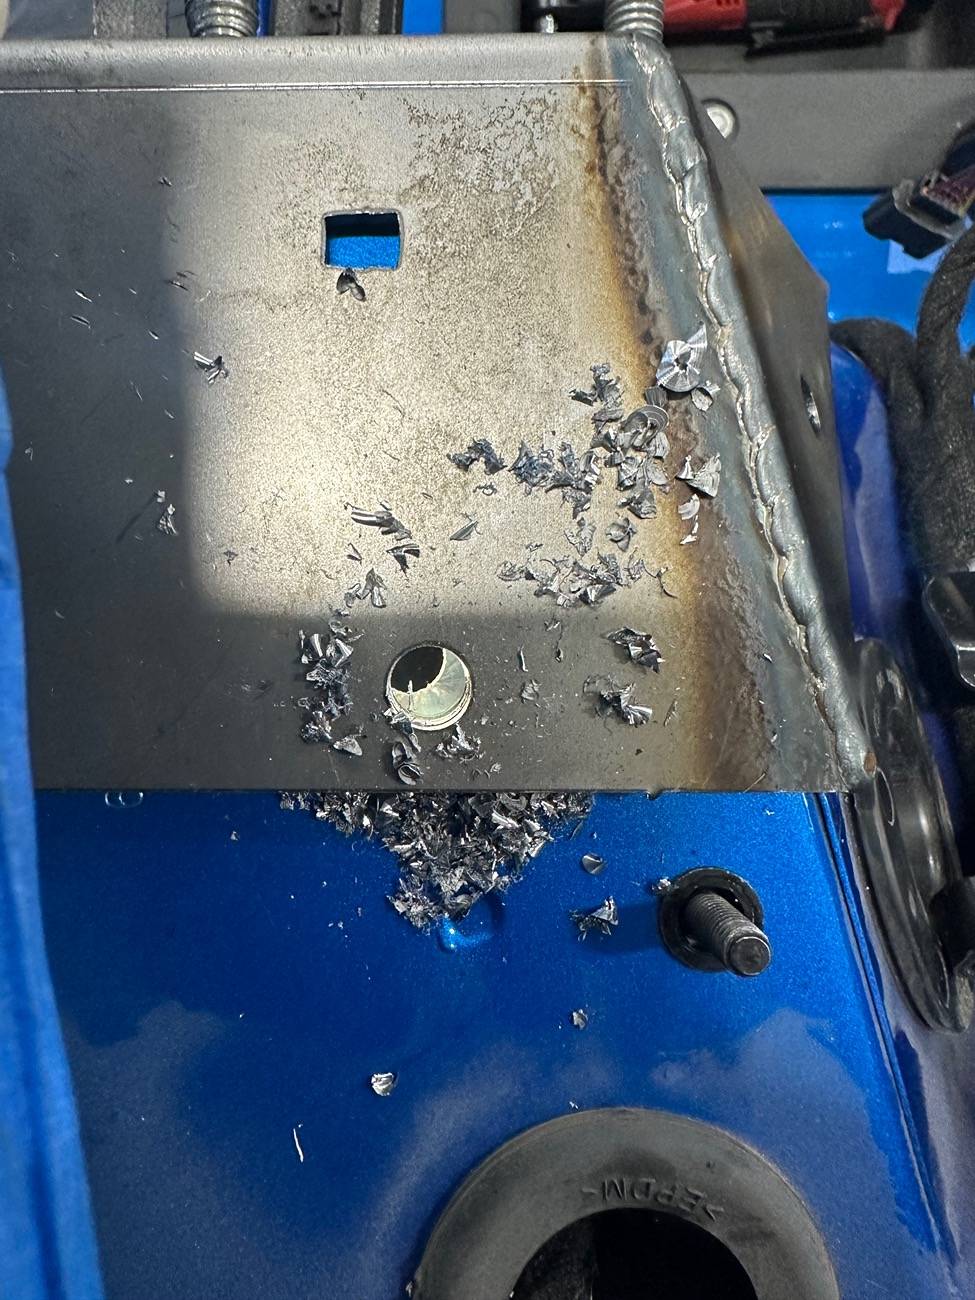
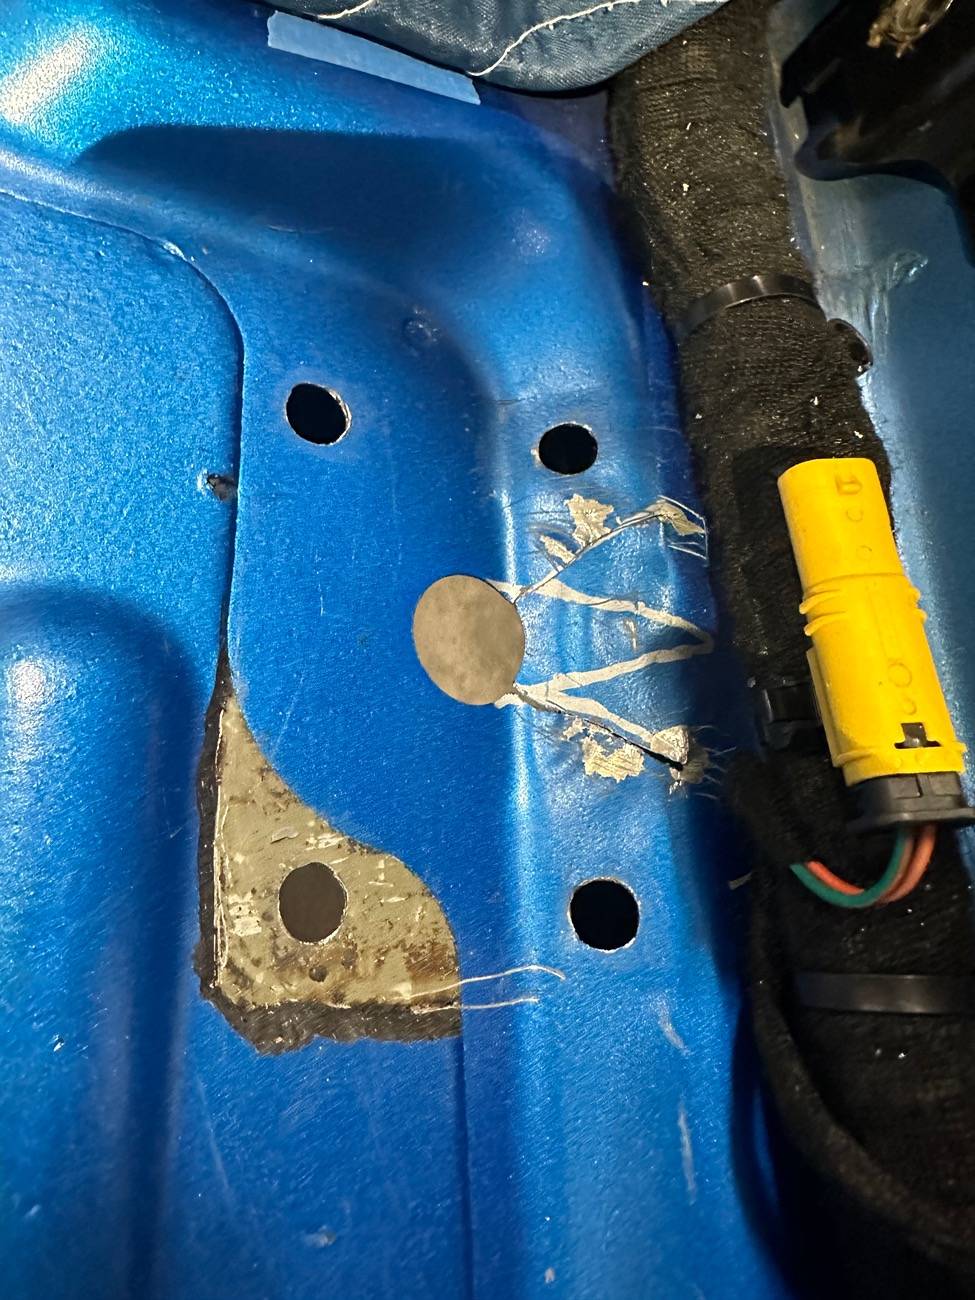
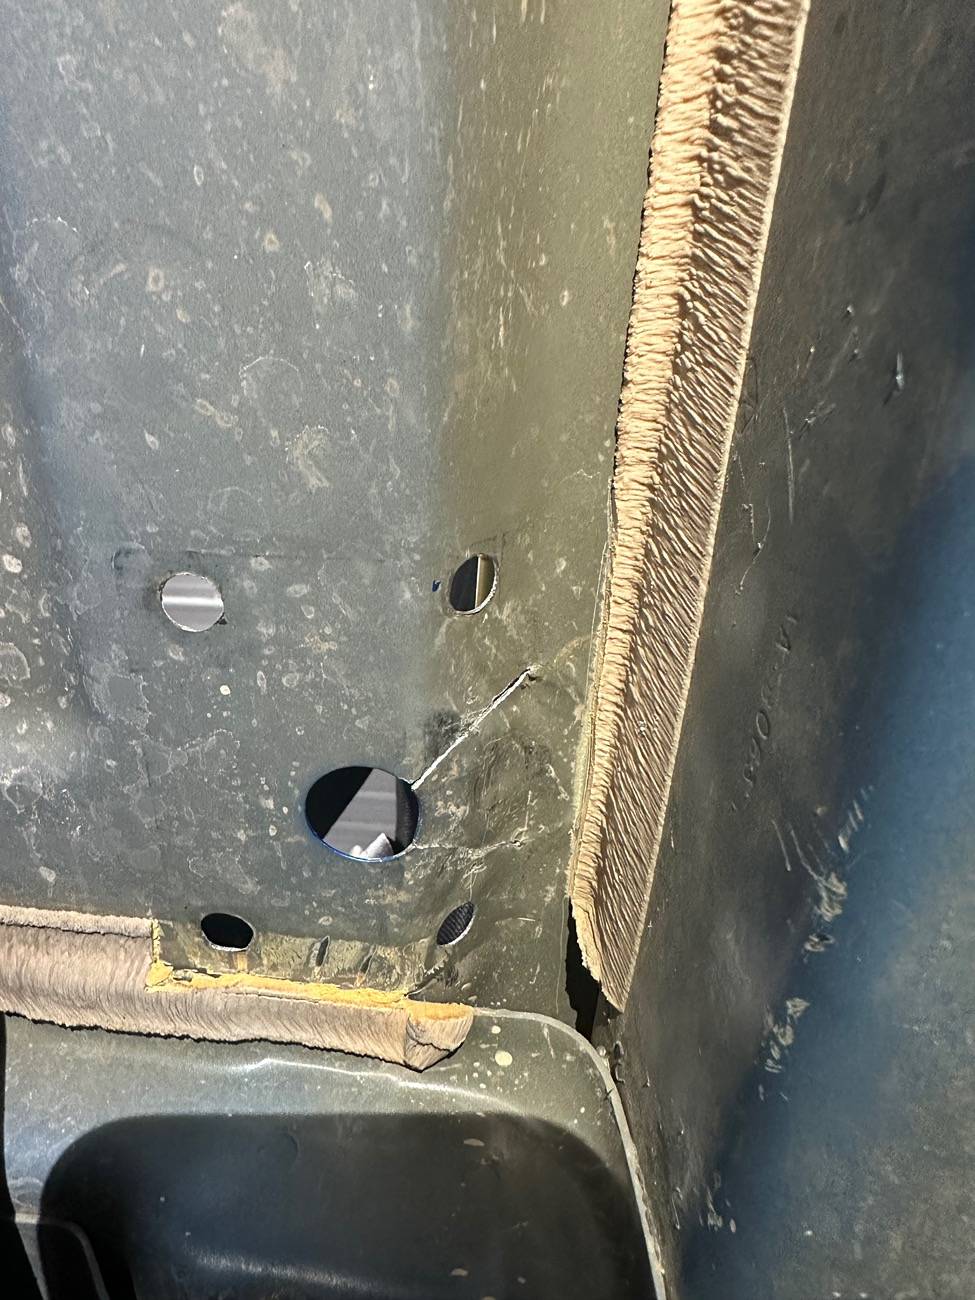
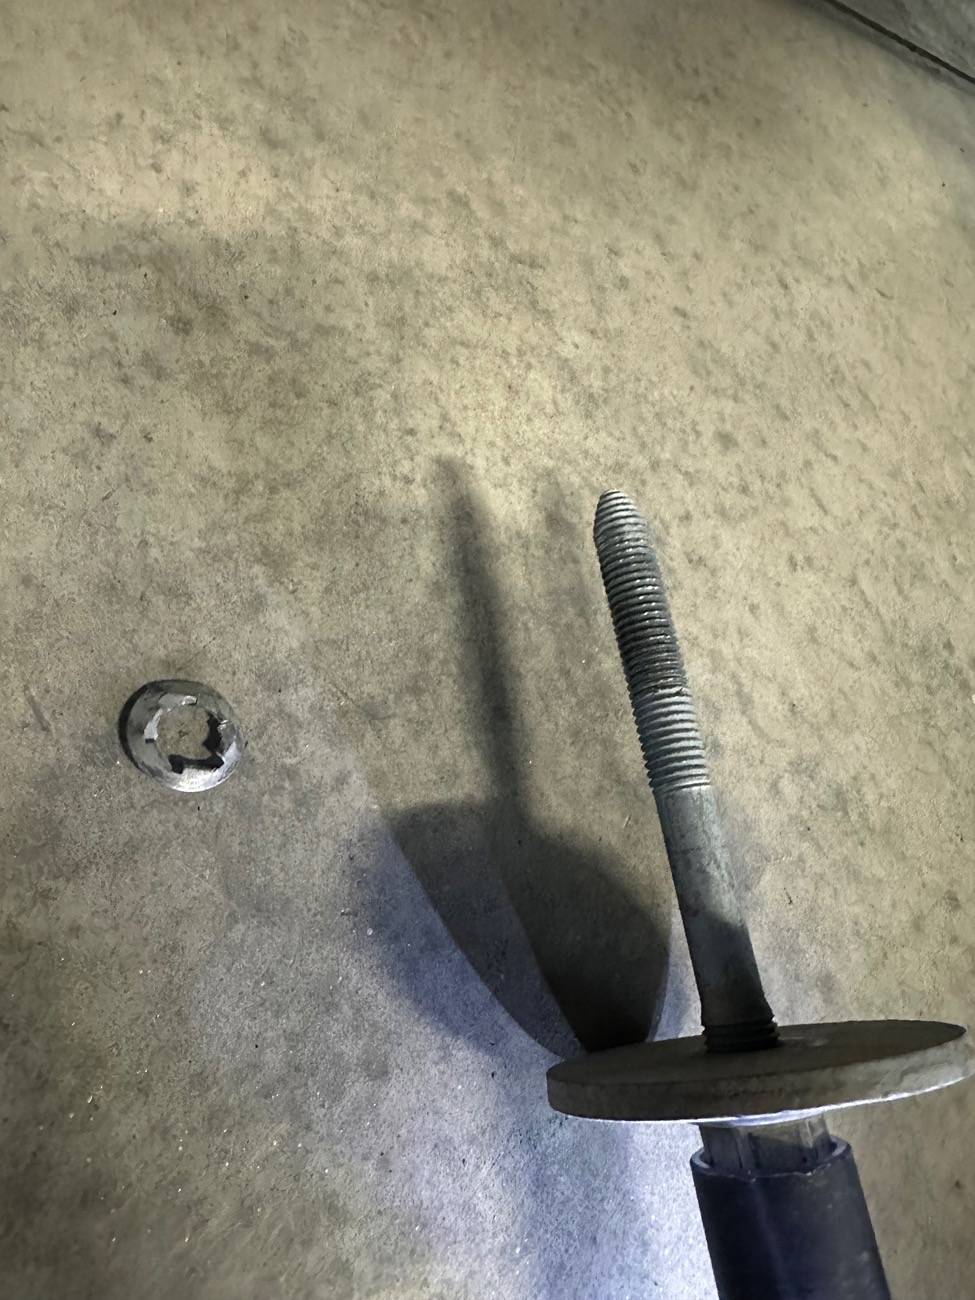
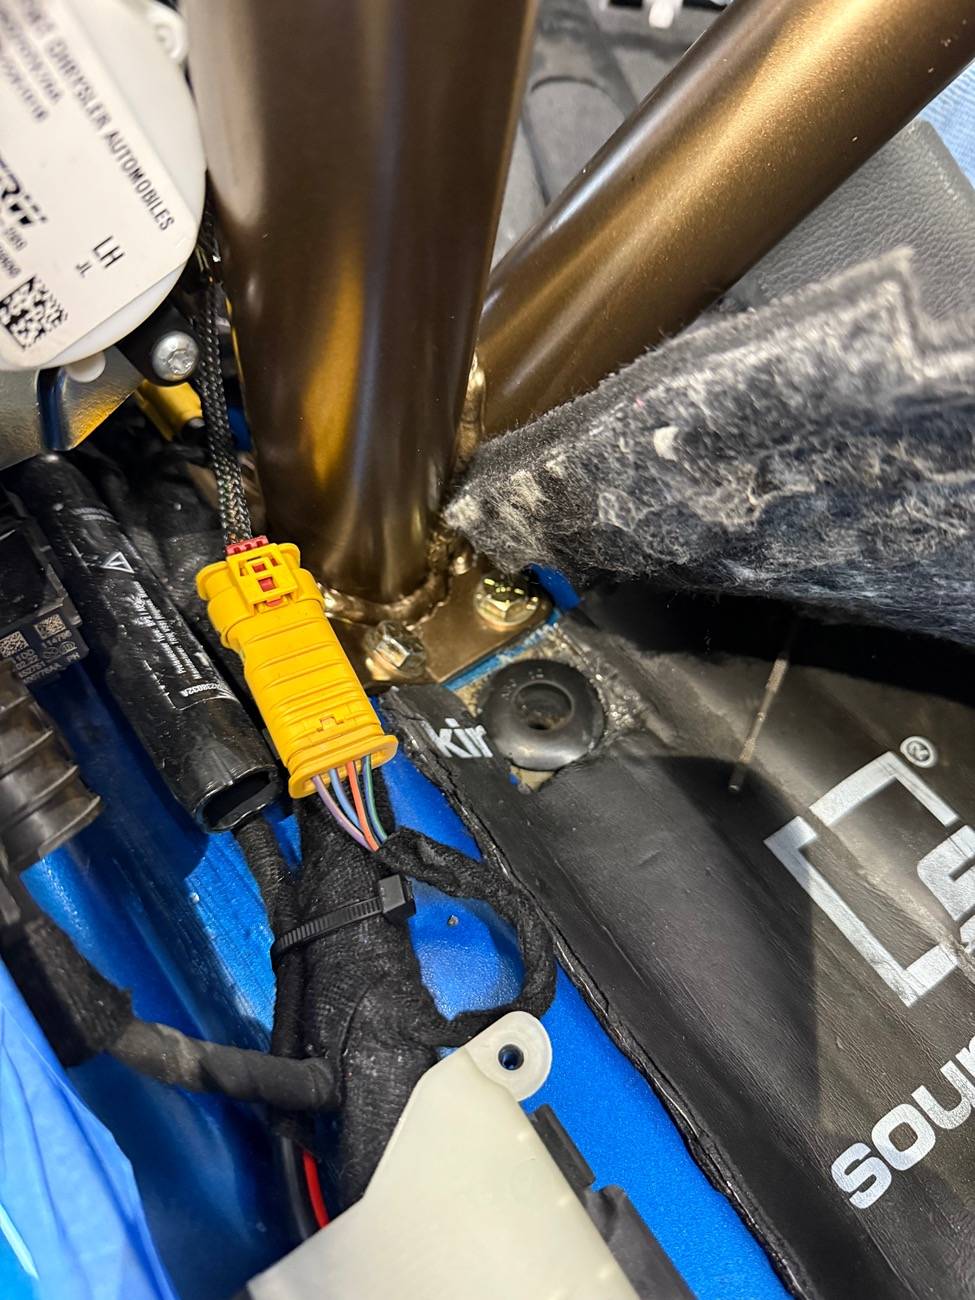
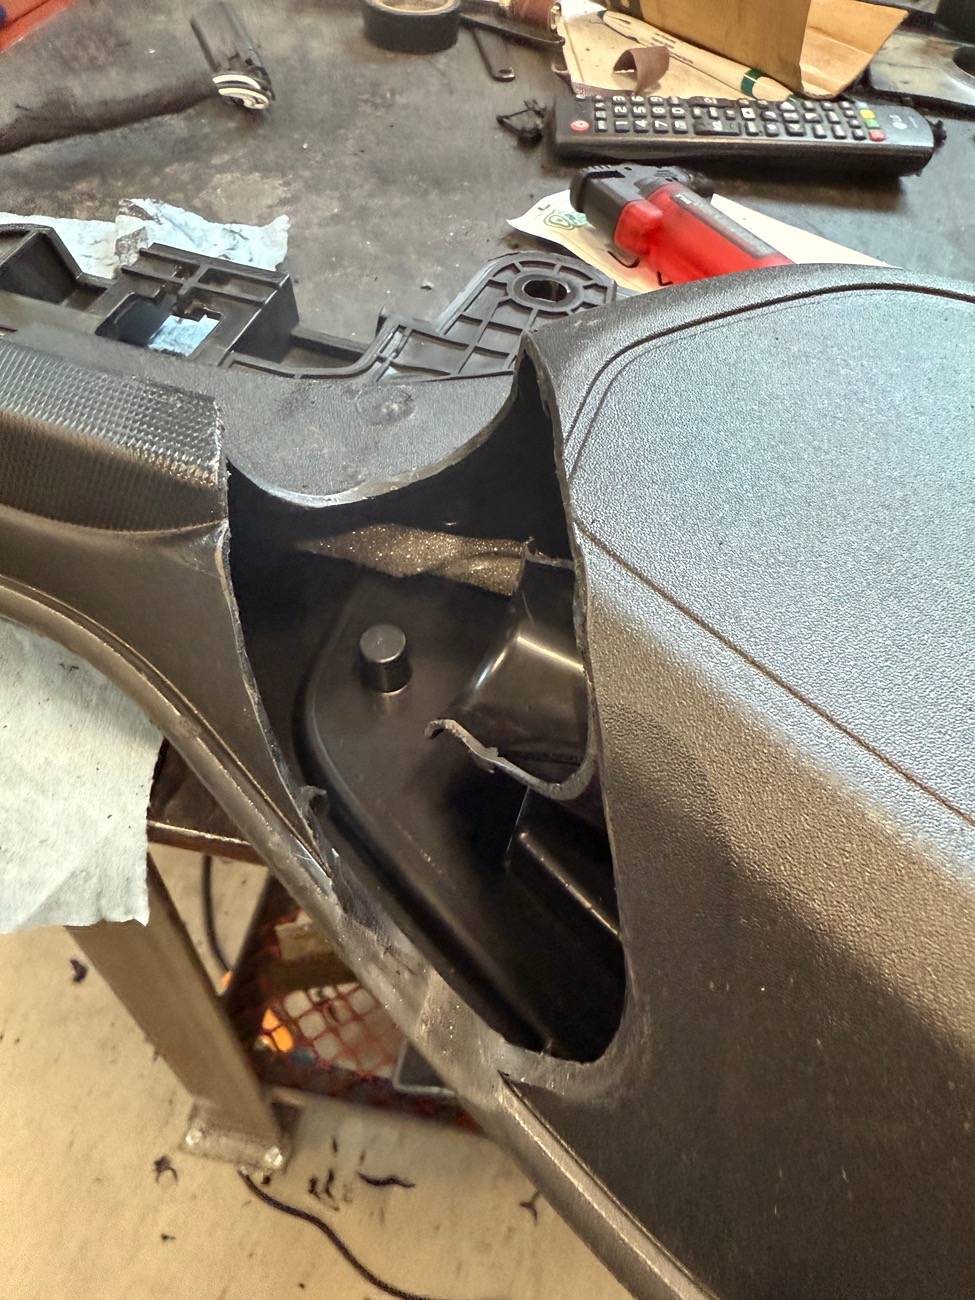
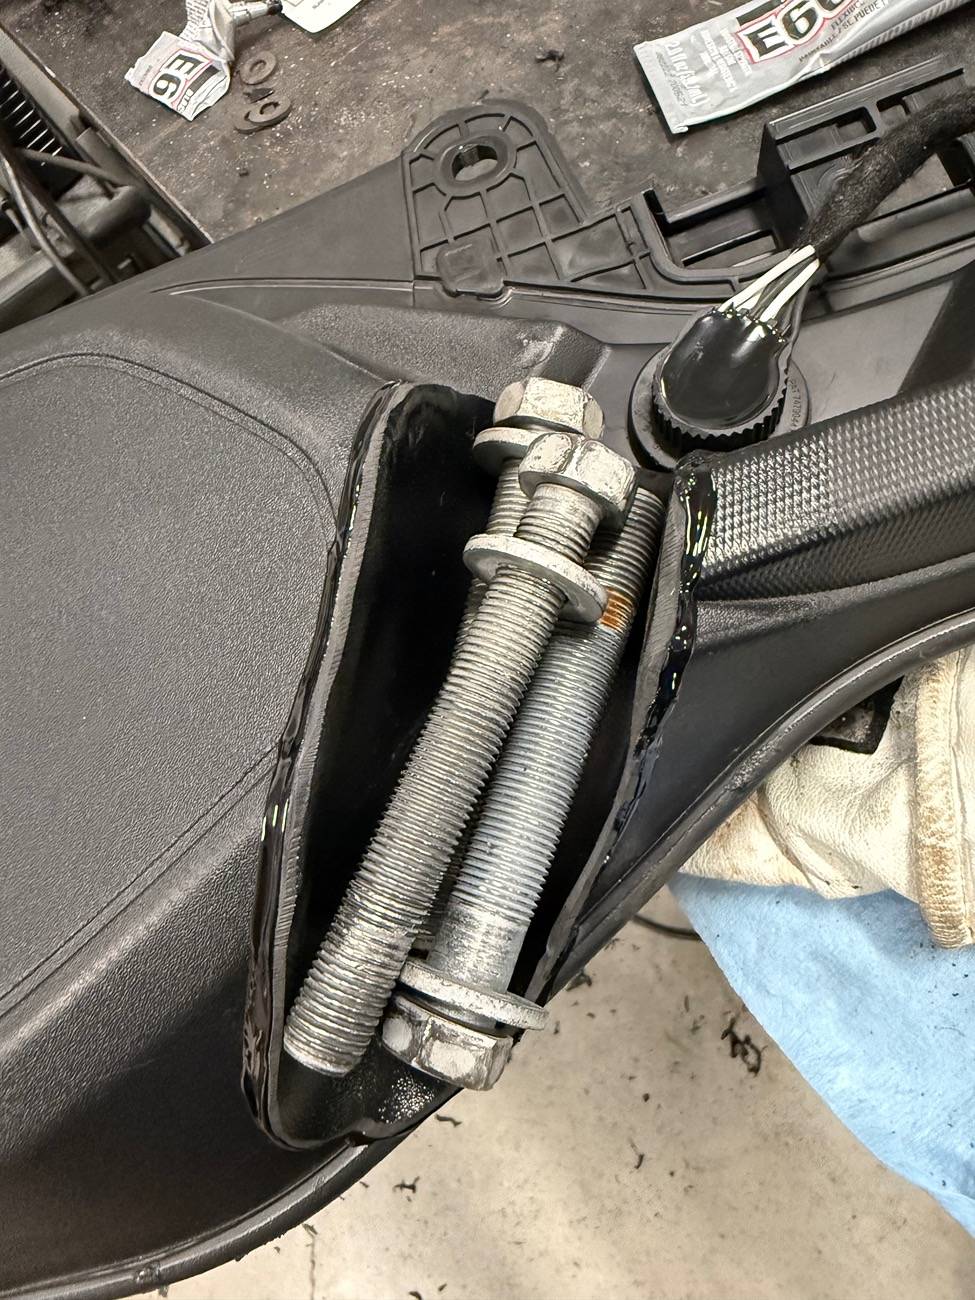
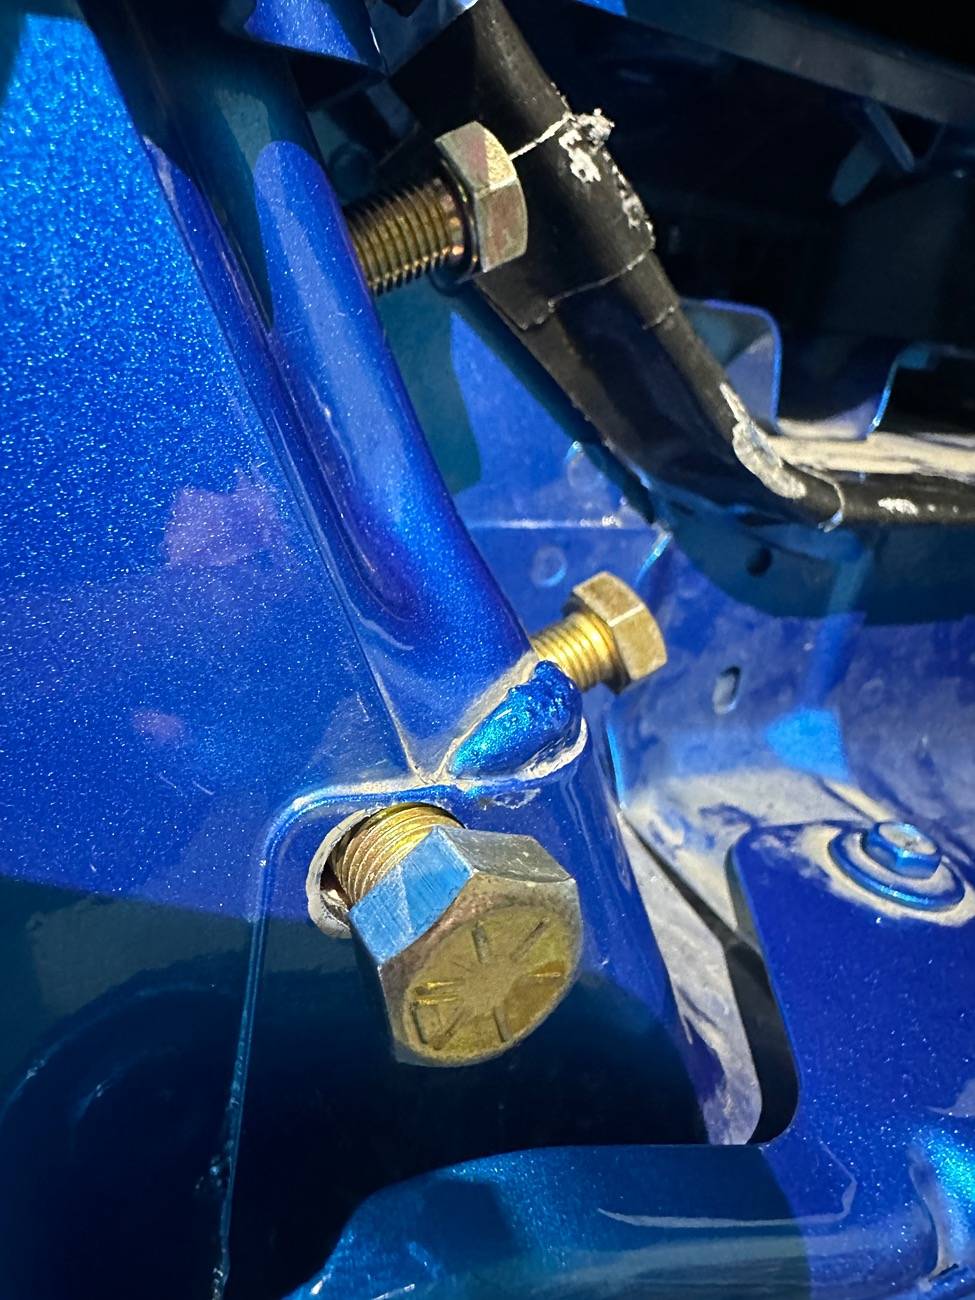
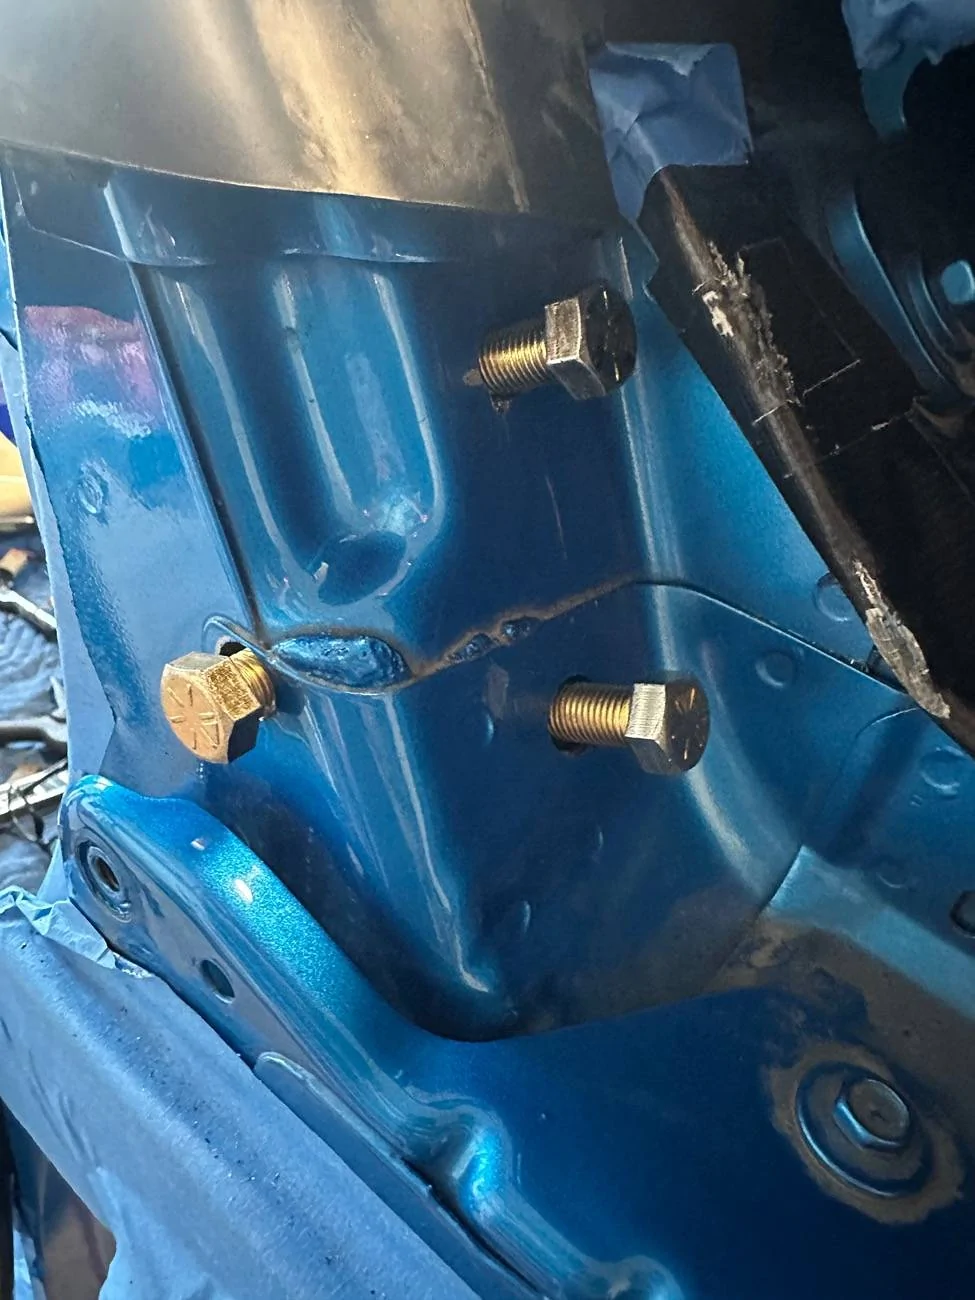
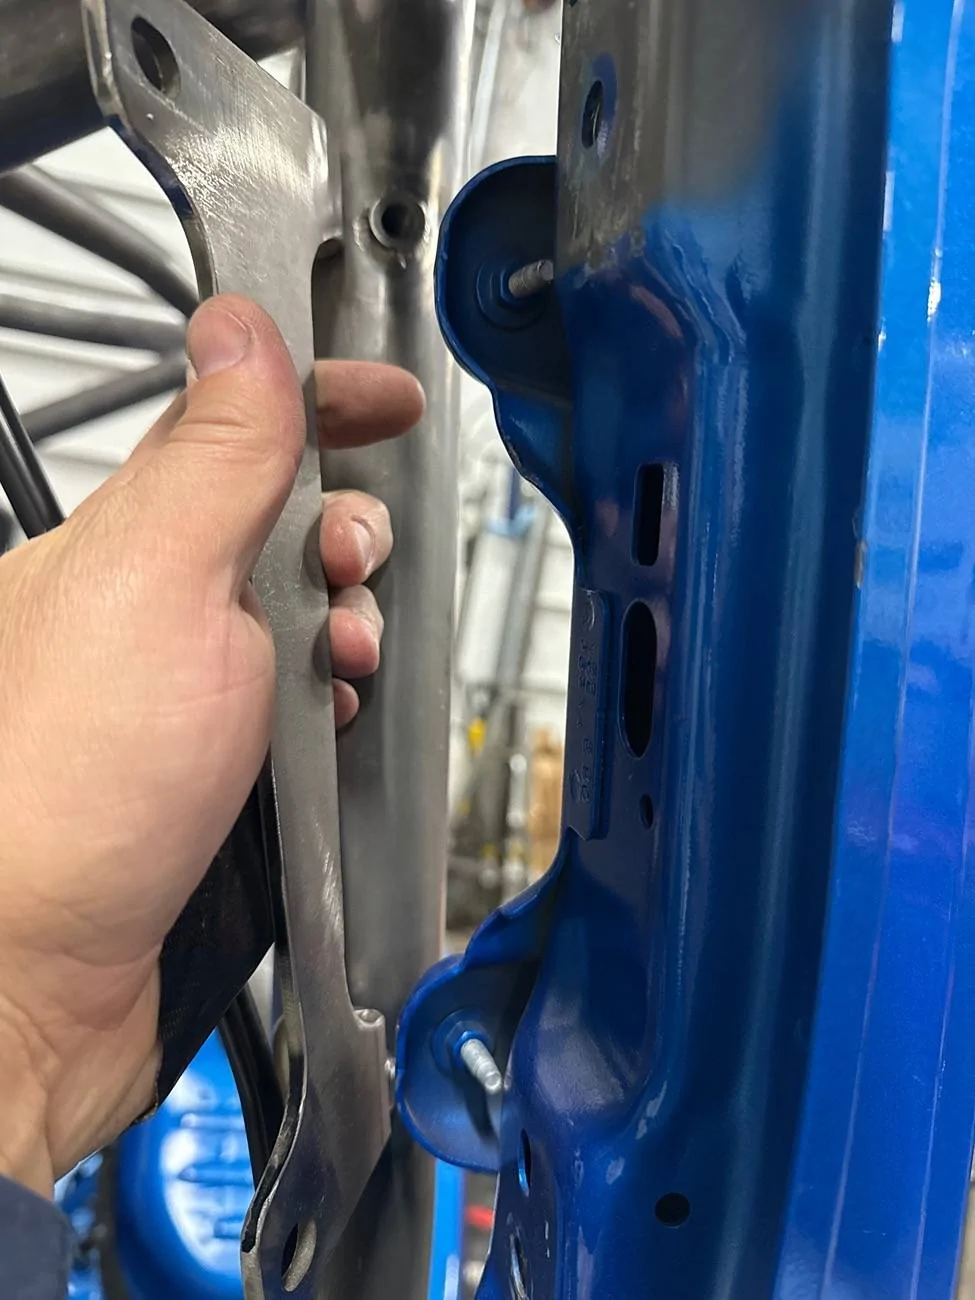
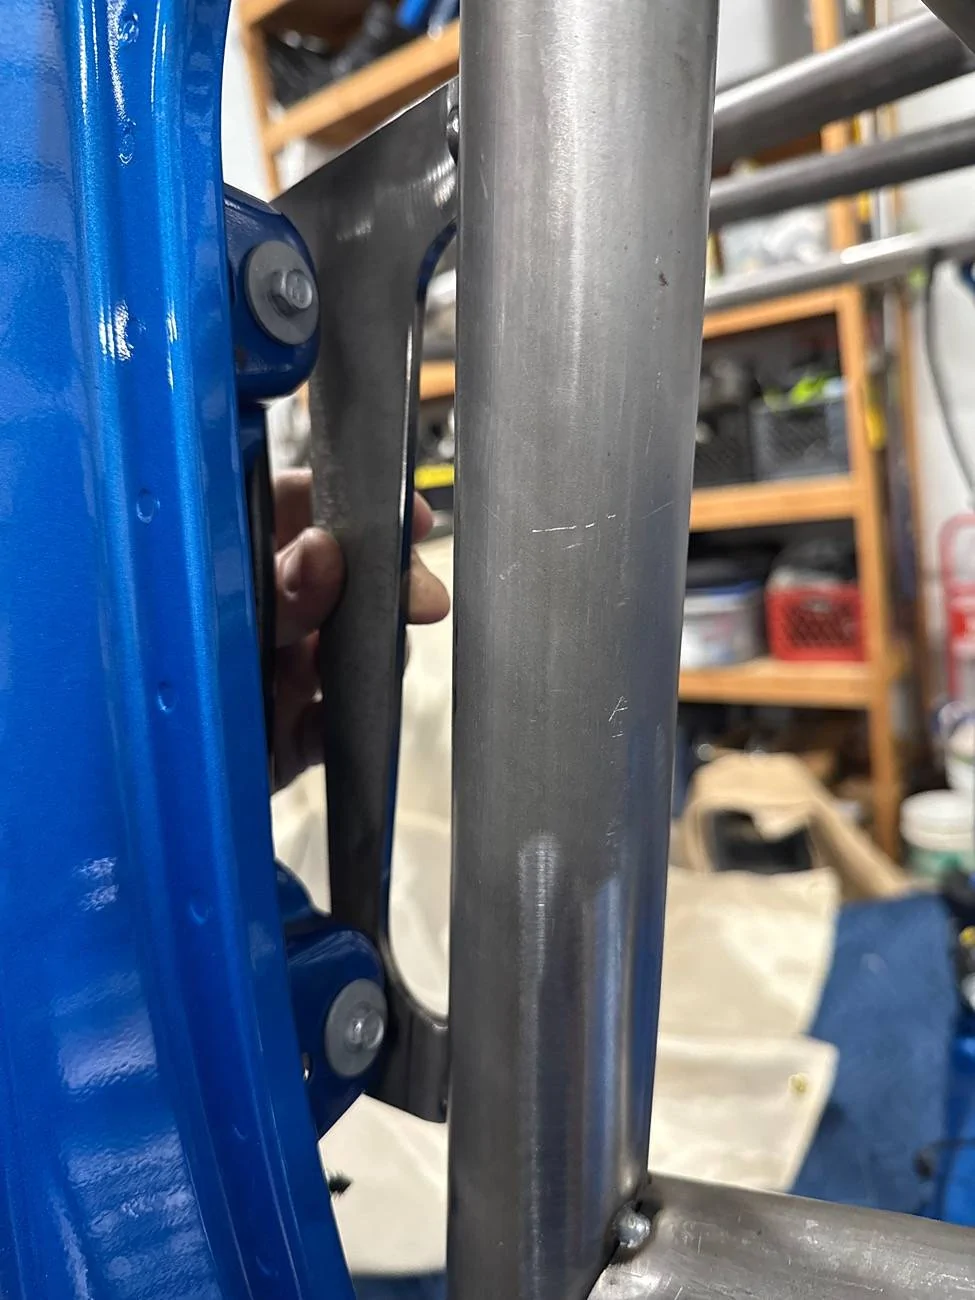
. The bottom outside bolt is similar, after the first 2 layers, then foam, then plastic, the 3rd layer is like a 1/2” deeper in. Getting the proper angle into this hole was difficult.
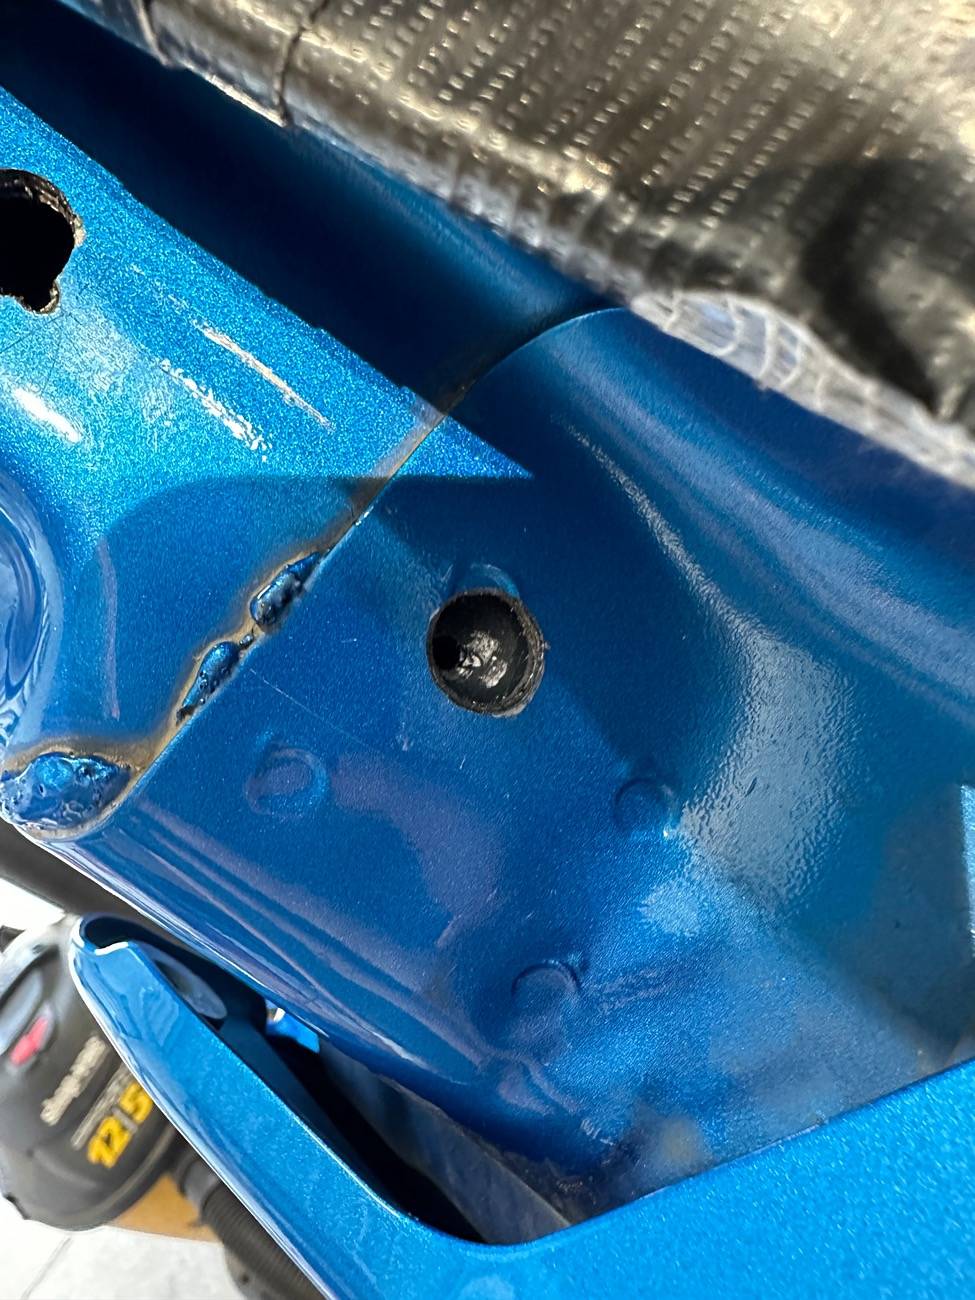
I didn’t remove the plastic molding that wraps around just below where the foam sits. It’s not in the way of any brackets or holes, but it would have likely made using a straight edge easier. Maybe that is why Shawn’s holes lined up better?? I also didn’t have to cut and bend the cowl pinch seem out of the way, I was able to drill the holes without doing that.

Jeep Wrangler JL GenRight Roll Cage Install IMG_1841

Jeep Wrangler JL GenRight Roll Cage Install IMG_1842

Jeep Wrangler JL GenRight Roll Cage Install IMG_1849

Jeep Wrangler JL GenRight Roll Cage Install IMG_1850
 
Last edited:

1996cc

Well-Known Member
Joined
Aug 19, 2019
Threads
25
Messages
899
Reaction score
1,172
Location
Oregon
Vehicle(s)
22 JLUR 392
Finally got back to the cage a bit today. I have all the main tubes in now, hope to have it fully welded by the end of the weekend.

Genright’s instructions are excellent, but they failed on a couple points I noticed today. They don’t tell you to weld the joints that get covered by the X bars. I called them to confirm, and they stated I should weld there first. You can see here where I did on the C pillar joints. I stopped short of them interfering with the fitment of the X bars.
Jeep Wrangler JL GenRight Roll Cage Install IMG_2210


I was really annoyed when I flipped to the very end of the instructions and saw that they included a template and specific instructions on where to drill the A pillar slug bolts. I initially read through the entire book before I started, but when doing the work and got up to page 32 or so, I forgot that I should have turned to page 72 to get the proper instructions 🤦🏼‍♂️ Why the heck wouldn’t they put this in order!?! 🤬

Jeep Wrangler JL GenRight Roll Cage Install IMG_2216


I also realized they don’t tell you how to deal with the upper B pillar support brackets, they completely missed it in the booklet. I’ll have to cut off the portion where the factor grab handle bolted to in order to fit everything in. This picture is in the B pillar chop kit supplement, but even it doesn’t address it.
Jeep Wrangler JL GenRight Roll Cage Install IMG_2218


Jeep Wrangler JL GenRight Roll Cage Install IMG_2219


Jeep Wrangler JL GenRight Roll Cage Install IMG_2220


I will temper my complaints though. It is worth mentioning again, the overall fitment, design, and precision of this kit is next level! It’s essentially perfect and you would have to try hard to screw it up. Out of all the different joints, I only had to fine tune/massage one of them to get the C to D bar level with the tub.
 

1996cc

Well-Known Member
Joined
Aug 19, 2019
Threads
25
Messages
899
Reaction score
1,172
Location
Oregon
Vehicle(s)
22 JLUR 392
My buddy that was with me in my last jeep when I rolled it is also a welder, I had him weld it up this weekend. In case you don’t have 6 friends handy to help you lift out the cage like Shawn does (I do have 6 friends, but I live 30 minutes from town), a mini excavator works great 😉

Jeep Wrangler JL GenRight Roll Cage Install IMG_8215


Couple notes after I started into the B pillar chop. Unfortunately, the Genright caps for the chop are only meant to match their half doors. As you can see here, they are too short for a chop that matches the factory half doors. I’m planning to fill the gaps with pieces from the A pillar cut template that came with the kit. This photo makes it look like I cut too low below the body line, but matches up.
Jeep Wrangler JL GenRight Roll Cage Install IMG_2271


I didn’t like the idea of the lower cap just being an open hole for sand, dirt, mud, water, etc to just funnel into the B pillar cavity. I ended up “capping“ the hole with random scraps of metal. If I ever change my mind later, I could just drill it out. (When you see these welds, you’ll understand why my buddy did the cage 😂)
Jeep Wrangler JL GenRight Roll Cage Install IMG_2272
 

1996cc

Well-Known Member
Joined
Aug 19, 2019
Threads
25
Messages
899
Reaction score
1,172
Location
Oregon
Vehicle(s)
22 JLUR 392
I called Genright to ask them what the included sticker template was for and learned they have supplemental instructions for the plastic trimming above the windshield. They are as detailed as the main instructions and should save me a bunch of time. Make sure you get this if you order the kit.
Jeep Wrangler JL GenRight Roll Cage Install IMG_2368
 

Sponsored

1996cc

Well-Known Member
Joined
Aug 19, 2019
Threads
25
Messages
899
Reaction score
1,172
Location
Oregon
Vehicle(s)
22 JLUR 392
Life has been full of interruptions, so I’m still not fully done with this. I have ran into a couple more tidbits I thought I’d pass on.

Here is where I relocated the drain tube holes to. Just behind the B pillar landing plates, they will still be hidden behind the plastic trim (when I can get that dialed in).
Jeep Wrangler JL GenRight Roll Cage Install IMG_3009


On the rear trunk area side panels, you lose several mounting tab points. I think the floor panels will lock them in okay, but I was worried about rattles or rubbing. I attached foam to the face of all of them to combat that.
Jeep Wrangler JL GenRight Roll Cage Install IMG_2997
 

1996cc

Well-Known Member
Joined
Aug 19, 2019
Threads
25
Messages
899
Reaction score
1,172
Location
Oregon
Vehicle(s)
22 JLUR 392
Finally got the jeep driveable a couple weeks ago, but I still have most of the interior plastic and wiring to complete. It’s taking hours upon hours. If you are detail oriented and anal like myself, it is a SLOW process. For instance, it took me 3 hours this morning just to get the front header panel wiring cleaned up (all the factory clips removed, felt tape added, etc) and installed (Had to move windshield forward, etc.) I have the sun visors on and the plastic above the driver’s visor trimmed and installed. As you can see in the pics, the visor is above the bottom of the roll bar, so it doesn’t limit visibility at all.

Jeep Wrangler JL GenRight Roll Cage Install IMG_3361

Jeep Wrangler JL GenRight Roll Cage Install IMG_3362

Jeep Wrangler JL GenRight Roll Cage Install IMG_3363
 

1996cc

Well-Known Member
Joined
Aug 19, 2019
Threads
25
Messages
899
Reaction score
1,172
Location
Oregon
Vehicle(s)
22 JLUR 392
Just now getting back to the soundbar fitment today. I planned to plastic weld these plastic/kydex “caps” in place, but the 2 types of plastic didn’t want to stick together. I will clean the edges up a bit more once the glue (E6000) cures. This detail work takes an INSANE amount of time.

Jeep Wrangler JL GenRight Roll Cage Install IMG_4527
Jeep Wrangler JL GenRight Roll Cage Install IMG_4524
Jeep Wrangler JL GenRight Roll Cage Install IMG_4525
Jeep Wrangler JL GenRight Roll Cage Install IMG_4531
Jeep Wrangler JL GenRight Roll Cage Install IMG_4529
 

lashlee

Well-Known Member
First Name
Mike
Joined
Sep 23, 2021
Threads
11
Messages
789
Reaction score
554
Location
Knoxville, TN
Vehicle(s)
'18 JLUR 2.0 Turbo 4 (Sold), Tesla M3P
If the e6000 fails (I don't expect it to, it's quite good for that type of situation) you could try some 3m 4240 plastic adhesive. Expensive it you need to but the specific gun as well as the tube itself, but will typically bond any two plastics without issue.
Sponsored


Top