4x4tographer
Well-Known Member
- First Name
- Ryan
- Joined
- Feb 2, 2019
- Threads
- 8
- Messages
- 76
- Reaction score
- 218
- Location
- Phoenix, AZ
- Vehicle(s)
- 2018 Jeep Wrangler Rubicon
- Thread starter
- #1
Hello! This thread is to document/showcase the work I've done in building my own drawer/deck system for the JL.
Driving this project my never-ending struggle with gear management - that one thing I need during a trail ride happens to be buried in a box under a mountain of other gear, forcing me to unload 1/2 the trunk just to get at it.
In full disclosure, I'm not an engineer and I'm certainly not a carpenter, so this project has its share of flaws. However, I really did enjoy putting it together and I'm looking forward to optimizing it over time.
My Project Goals:
Materials include:
Tools used:
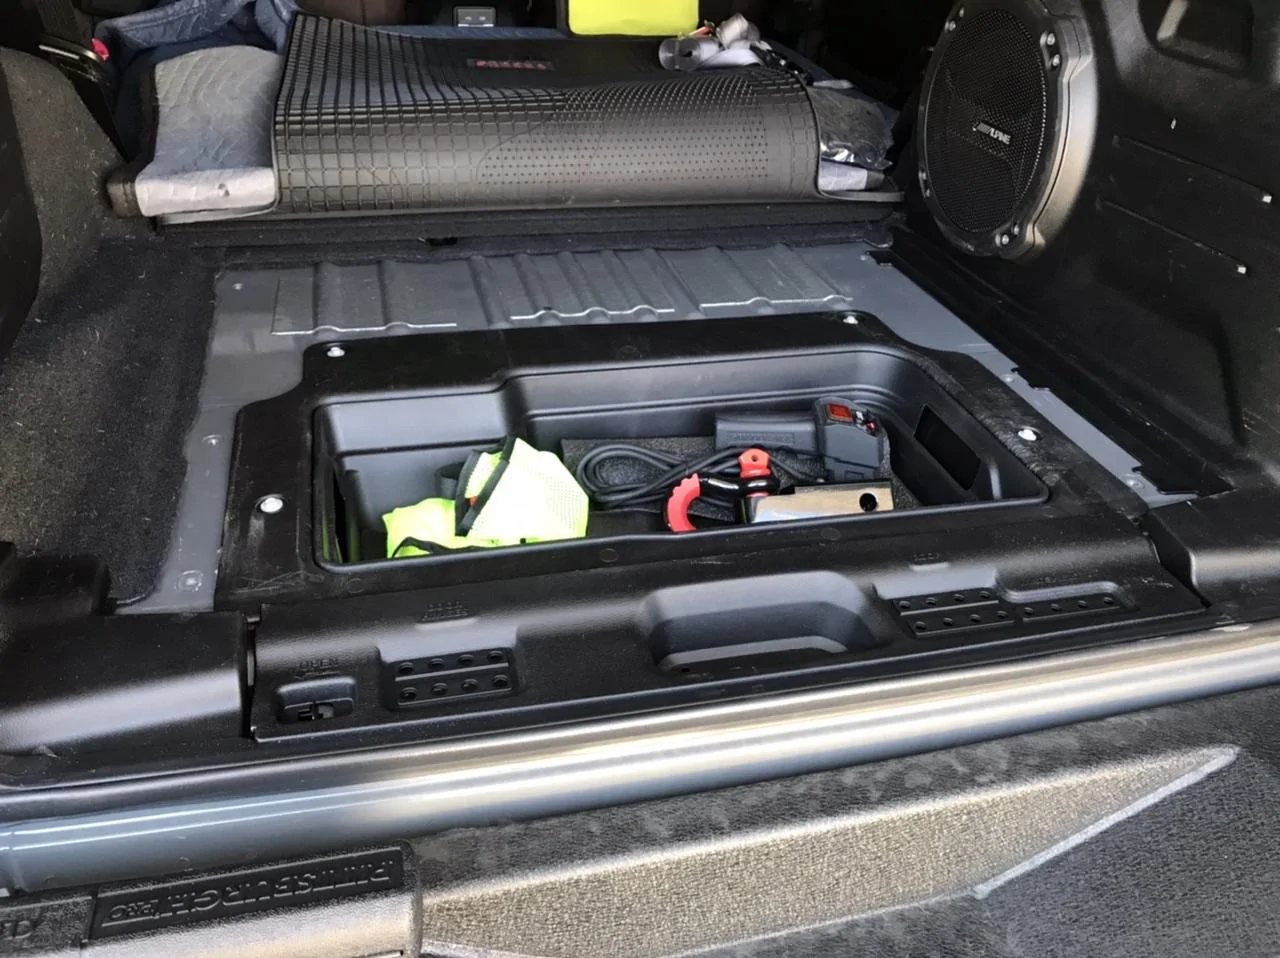
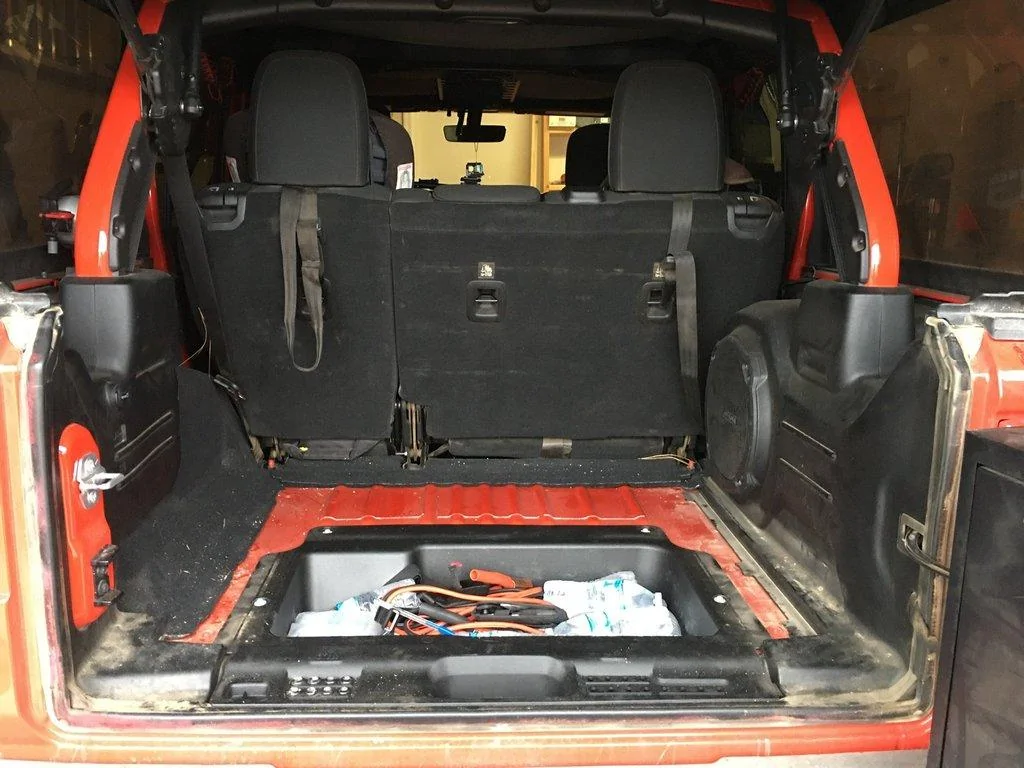
As starting point - I began by removing the rear cargo compartment lid (simply lift and pull towards the rear of the vehicle) and all of the existing cargo tie downs (flathead to pop up the plastic covers and the appropriate torx bit). I set aside the factory tie downs for use later.
An additional consideration was making sure I accommodate my existing tailgate mounted Tuffy storage lock box, which also doubles as a fold out table. This will limit my maximum box/drawer depth, but also force me to offset the drawers to the left to allow the drawers to pull all the way out to their full 24” extension without hitting the lock box.

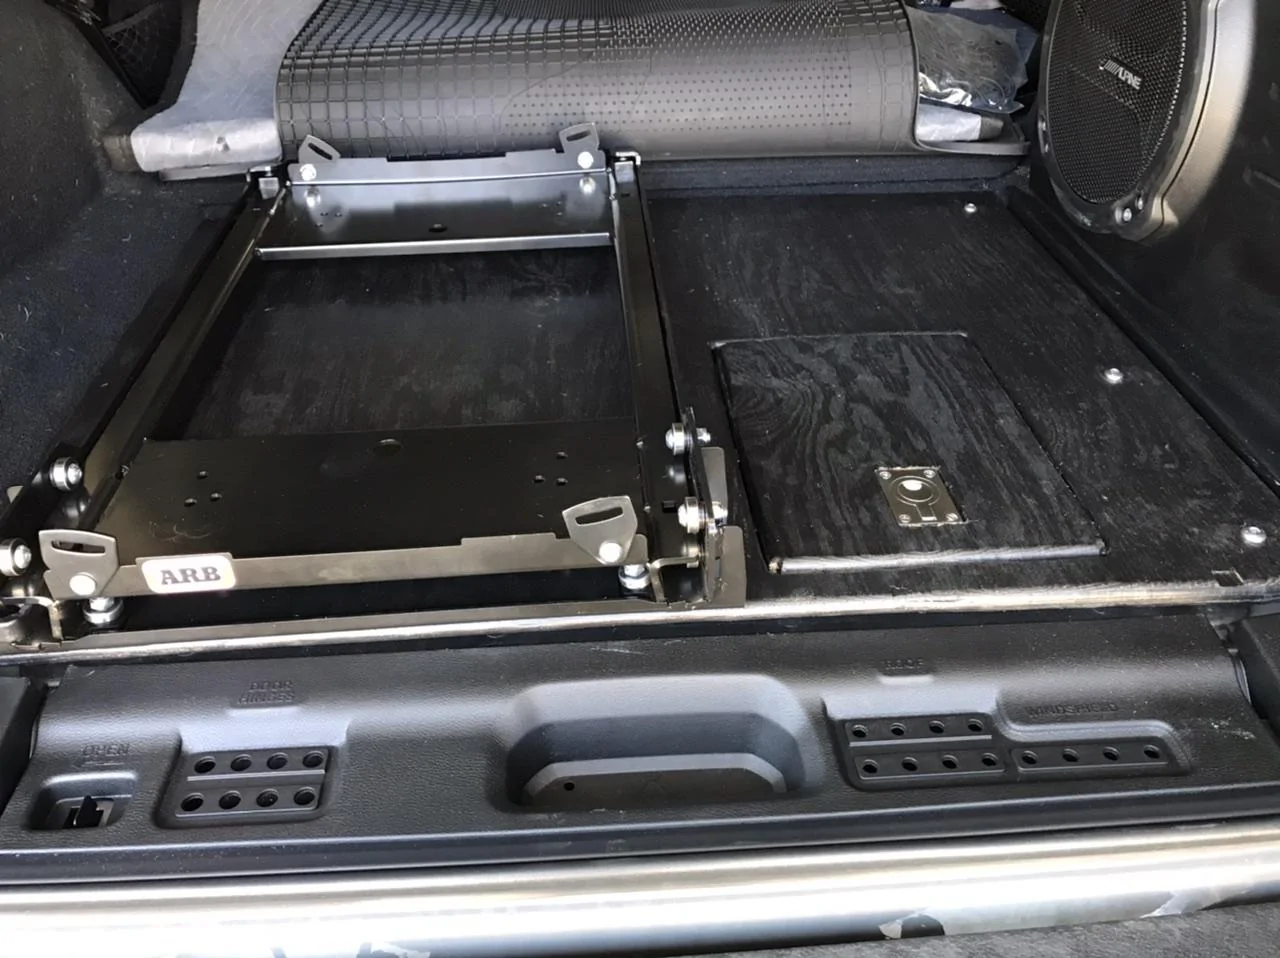
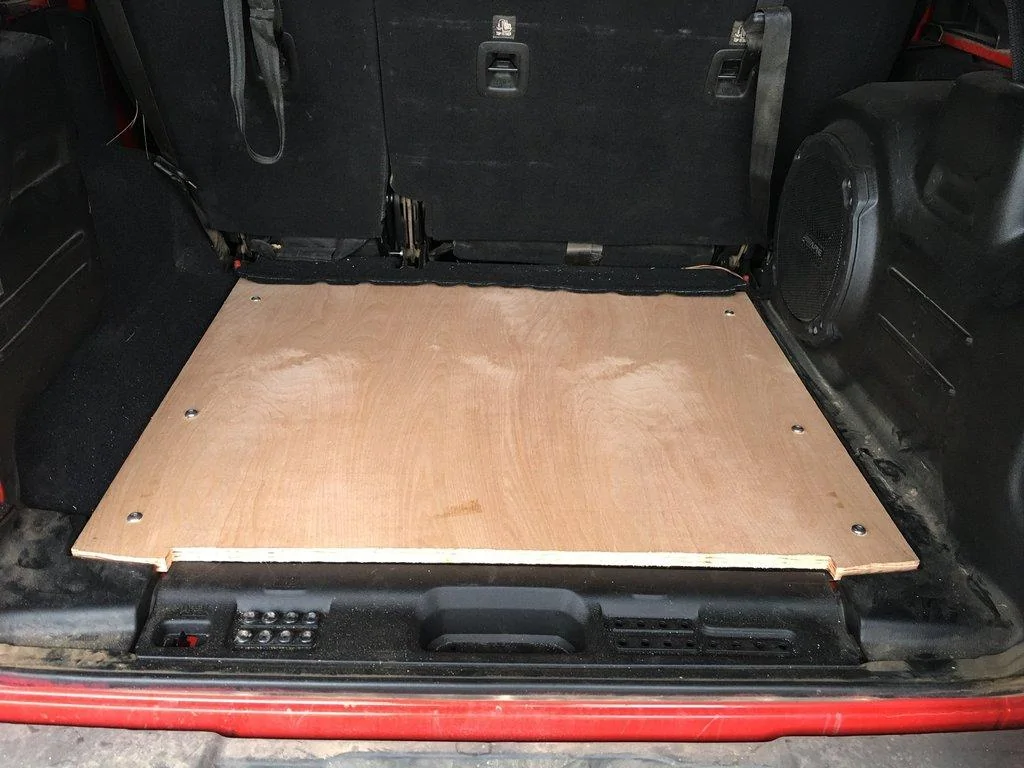
After some measurement, I ended up with the below "baseplate". Ended up making a cutout along the bottom lip to maintain access to the factory jack/tools. Bolt holes were lined up by reinstalling each of the bolts, laying the board on top, and whacking it with a big ol'hammer to mark the drill holes. Each hole was drilled and countersunk to allow for the factory bolts to sit flush with the surface of the plywood.
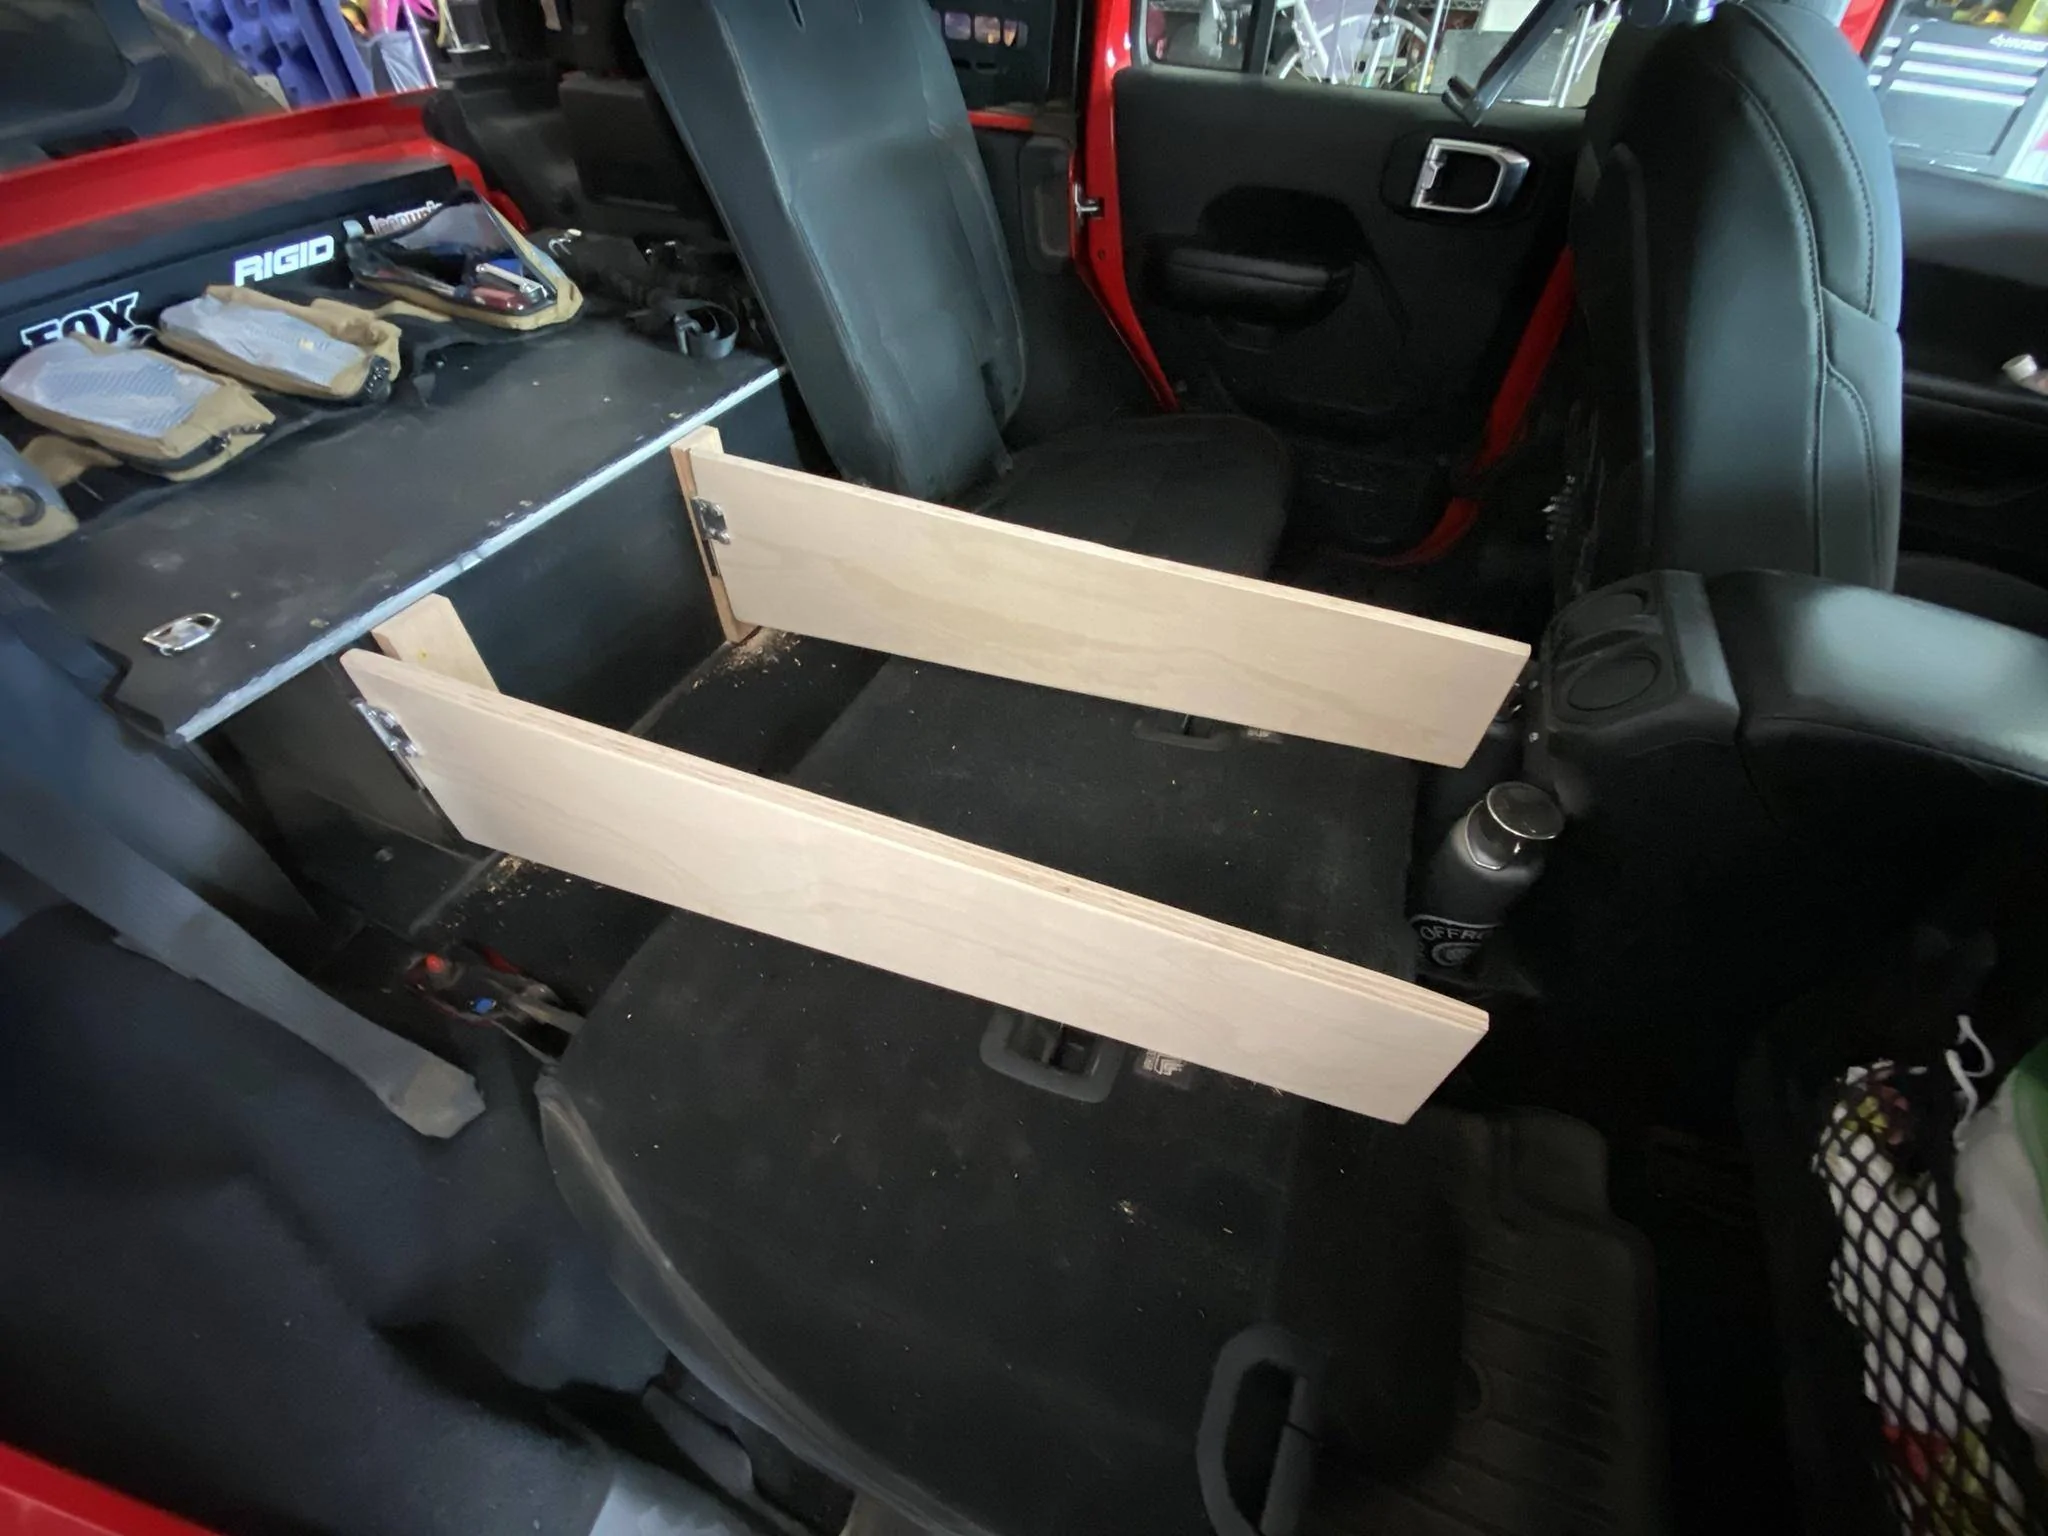
At this point, I took my remaining measurements and mapped out the box's exterior and center walls. I had to ensure that I didn't make it too wide to avoid my Tuffy tailgate lock box and the locking mechanism on the left side of the tailgate opening.
My overall plan was for 27" deep drawers, split 50/50 across the width of the box. I also wanted to have a full wide/depth deck that followed the contours of the truck for a flush fit.
Now - back to my disclaimer about not being a carpenter. I'm not, srsly, but I have built several pieces of furniture for my house. Mostly simple tables and a barn door. Through that experience, I can’t recommend a pocket hole jig enough. Easily the biggest bang-for-your-buck tool I own. Here’s the cabinet starting to come together.
I double-walled/laminated the interior wall as it will be supporting a slide and drawer on each side, and I need it to be able to take a good amount of weight from the deck when fully loaded.
Here's a test fit!
It was at this time I made a pretty big screw-up. I forgot all about that big honking Tuffy tailgate lock box. I went to close the tailgate and SMACK. I realized I made the walls too long/deep. I ended up needing to jigsaw 3 inches off of the vertical walls, bringing my total storage from 30” to 27” to accommodate the tailgate box. I used my handy oscillating cutter to clean it up and a little sanding to get rid of the stray wood glue.
Measure 300 times, cut once!
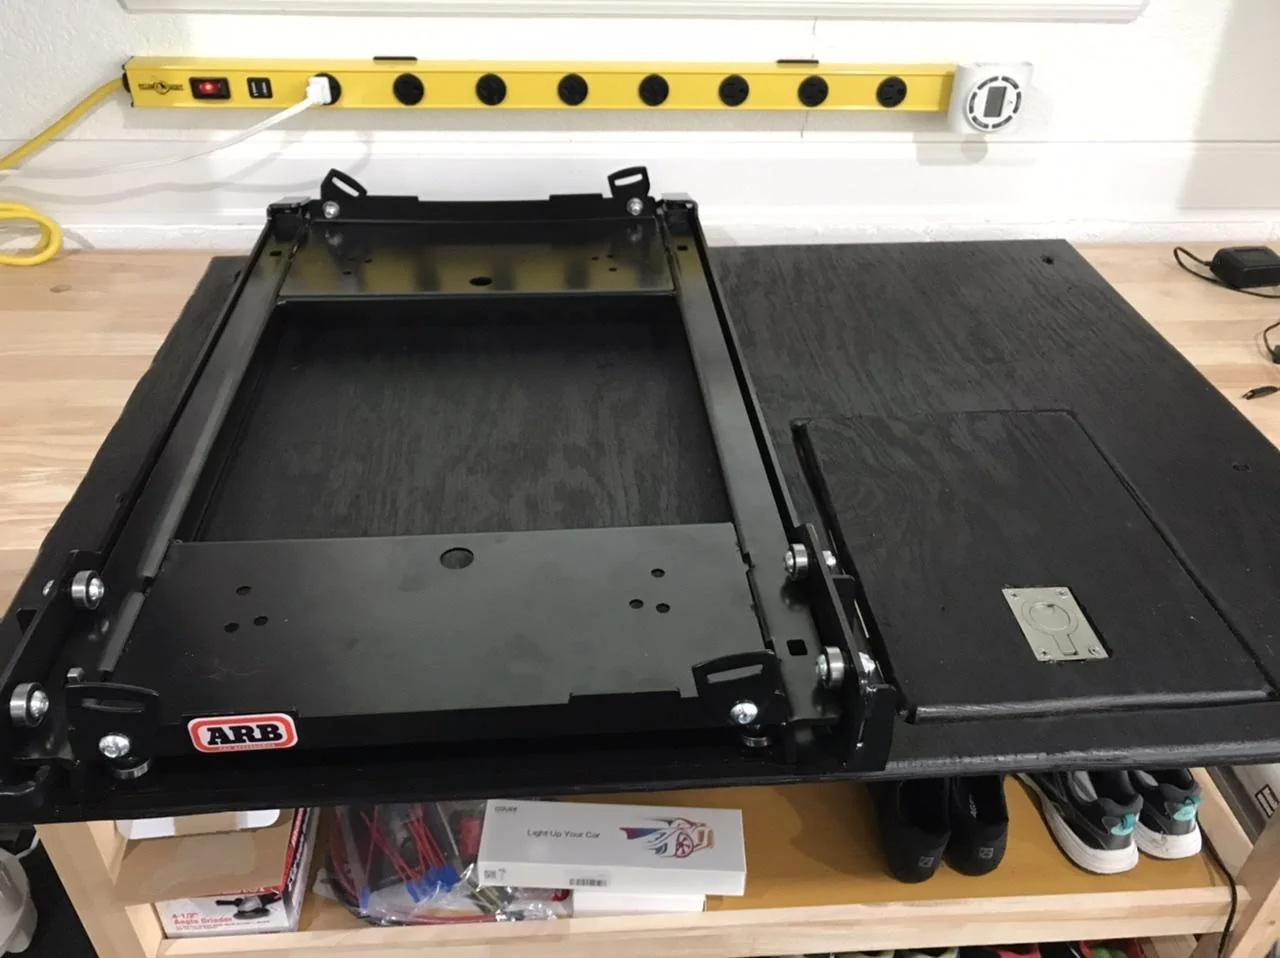
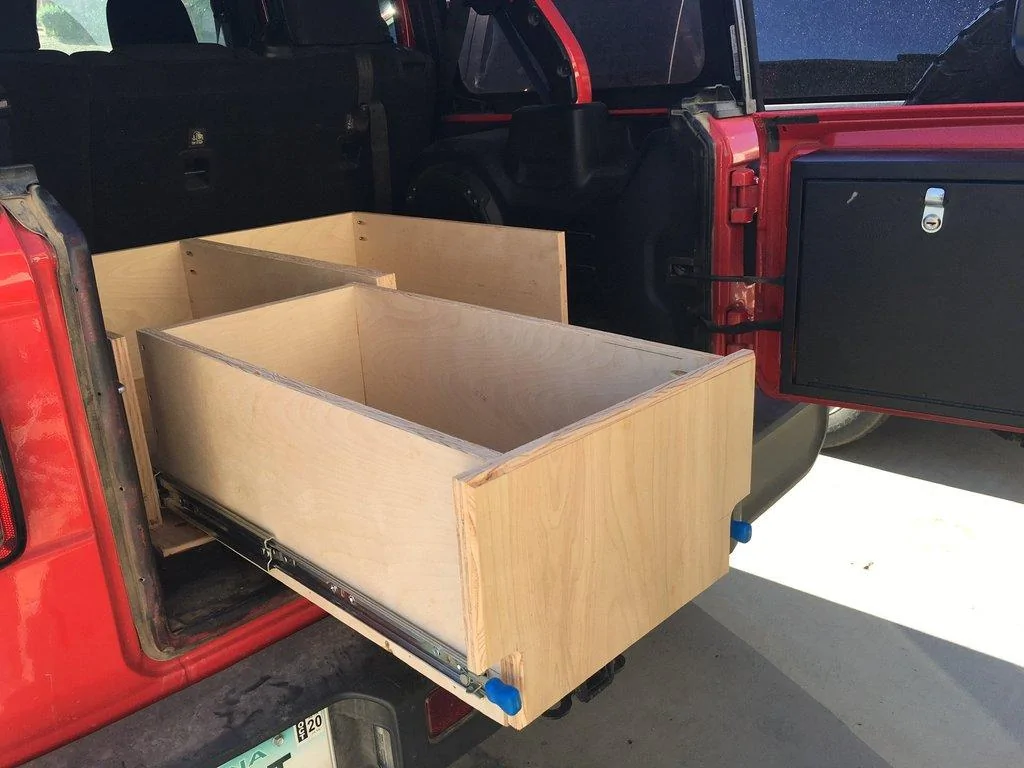
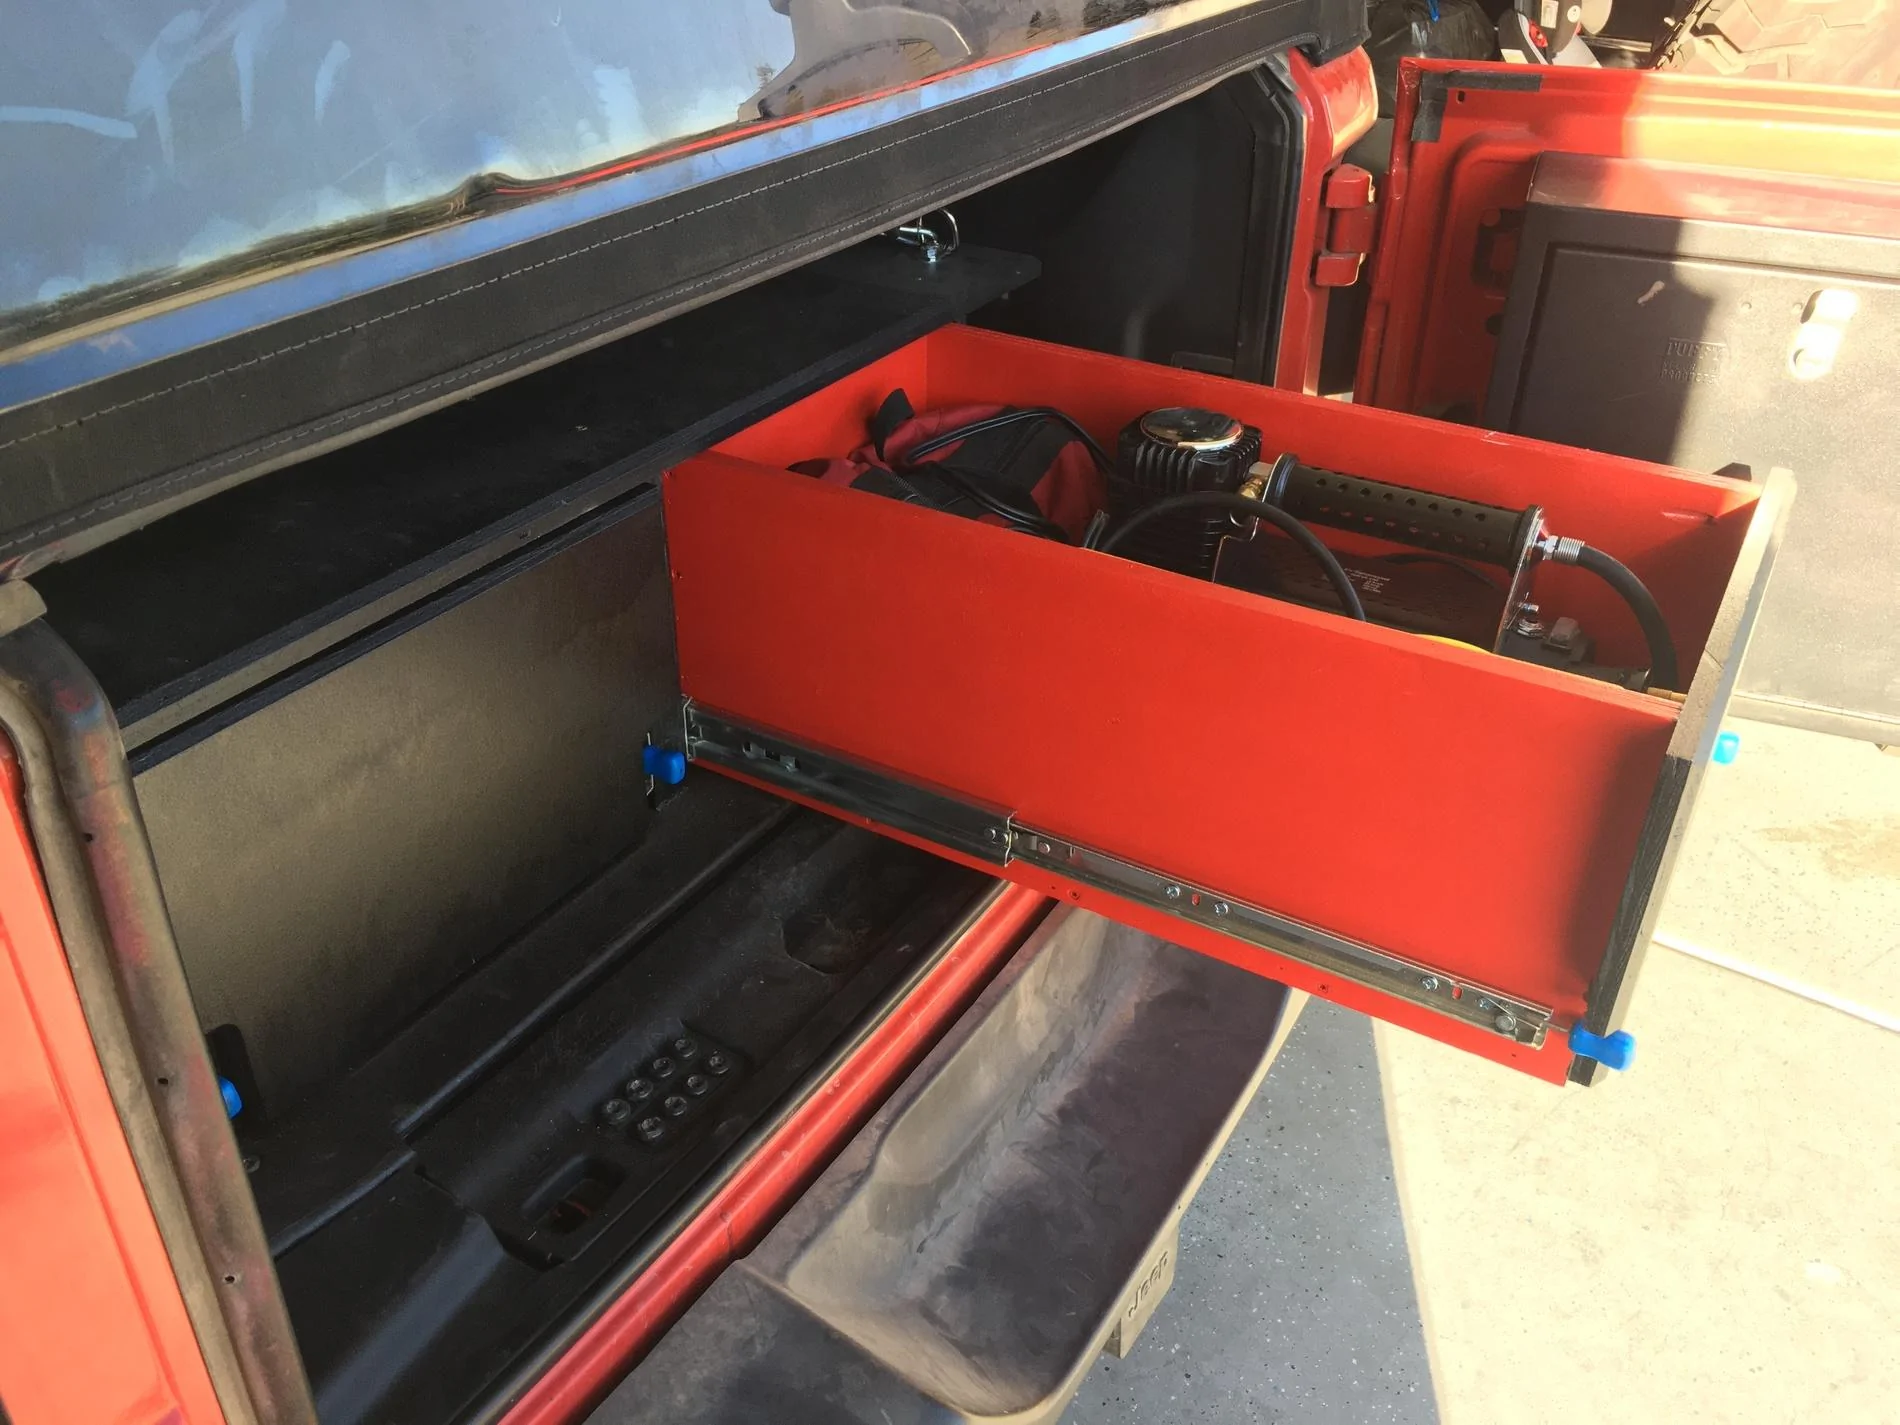
Below is an image of the rails and drawers test fitted and some hand routing around the slider latches.
Now cabinet-making is a totally different animal than anything else I've tried. The necessary precision can be maddening. I ended up making my drawers about 3-5mm too "narrow" for the mounted sliders. I solved this by shimming the sliders with some thicker metal washers to ensure everything was square. I've also read that you can use a thin steps of wood or even a strip of scrap metal (which won't compress like wood will).
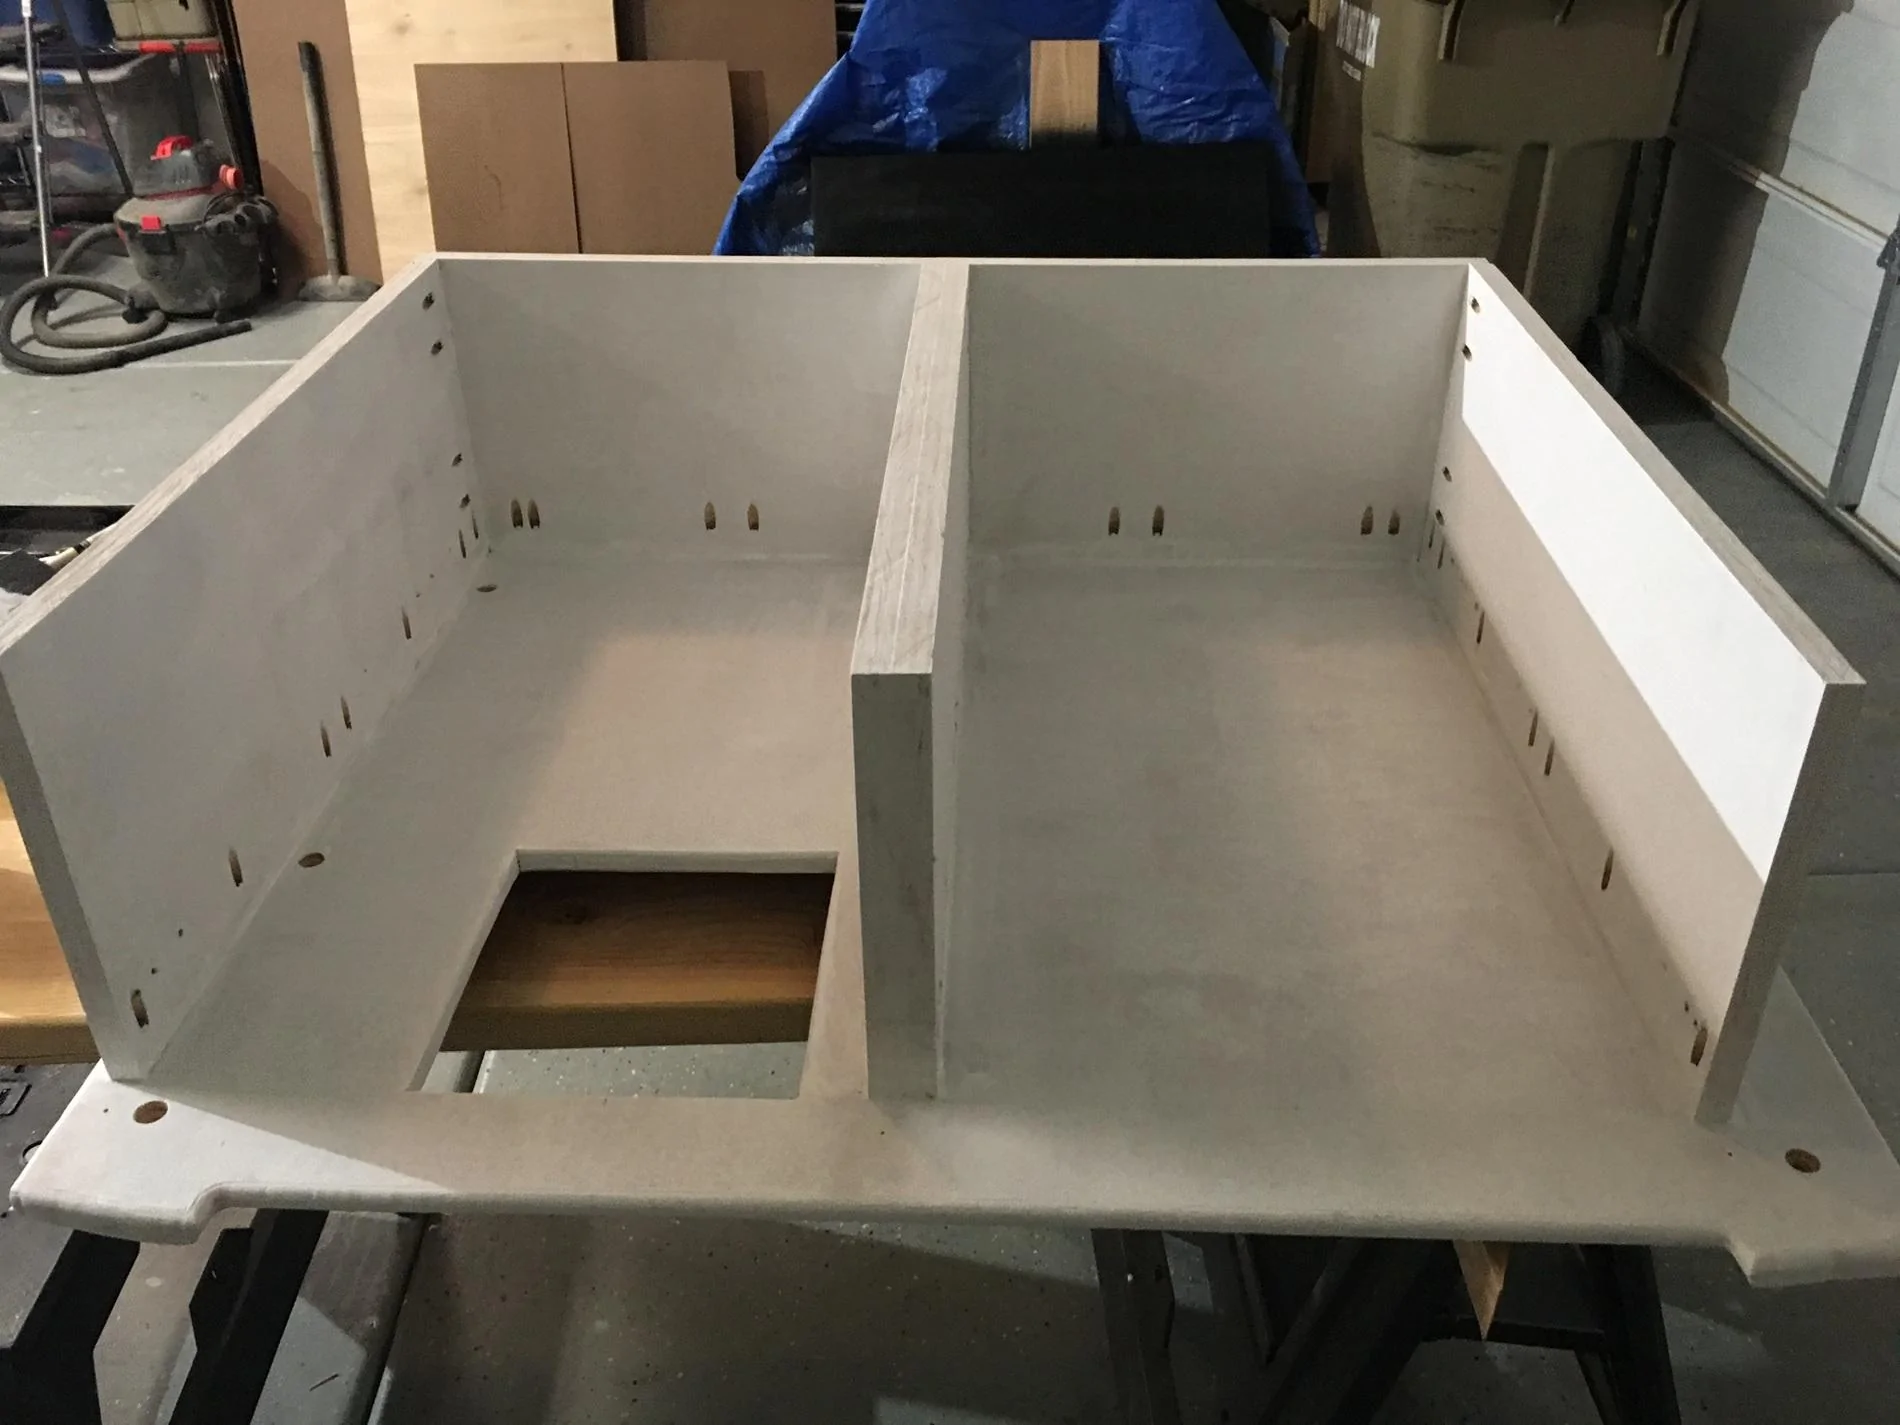
Here is an image of the box primered in Kilz and ready for paint.
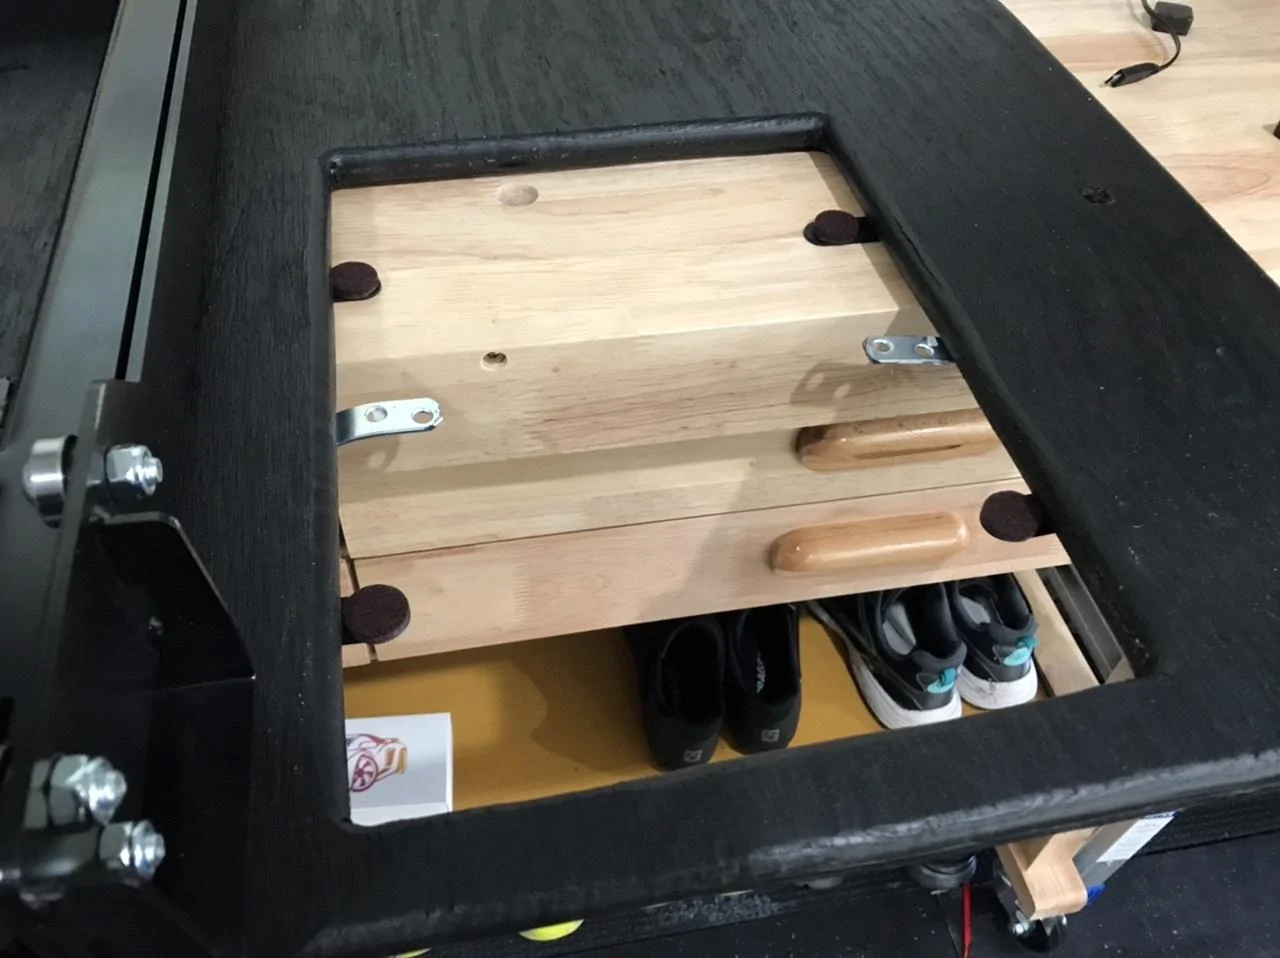
I’d also completely forgotten about maintaining access to the “super secret under-floor storage compartment”, so a grabbed the jigsaw and router and went to work. The space is accessible if I pull the drawer out, so not super convenient, but I figure I can put some emergency supplies in that compartment, or things that would be extremely rare for me to access. I’m thinking a stash of MRE’s or water bottles.

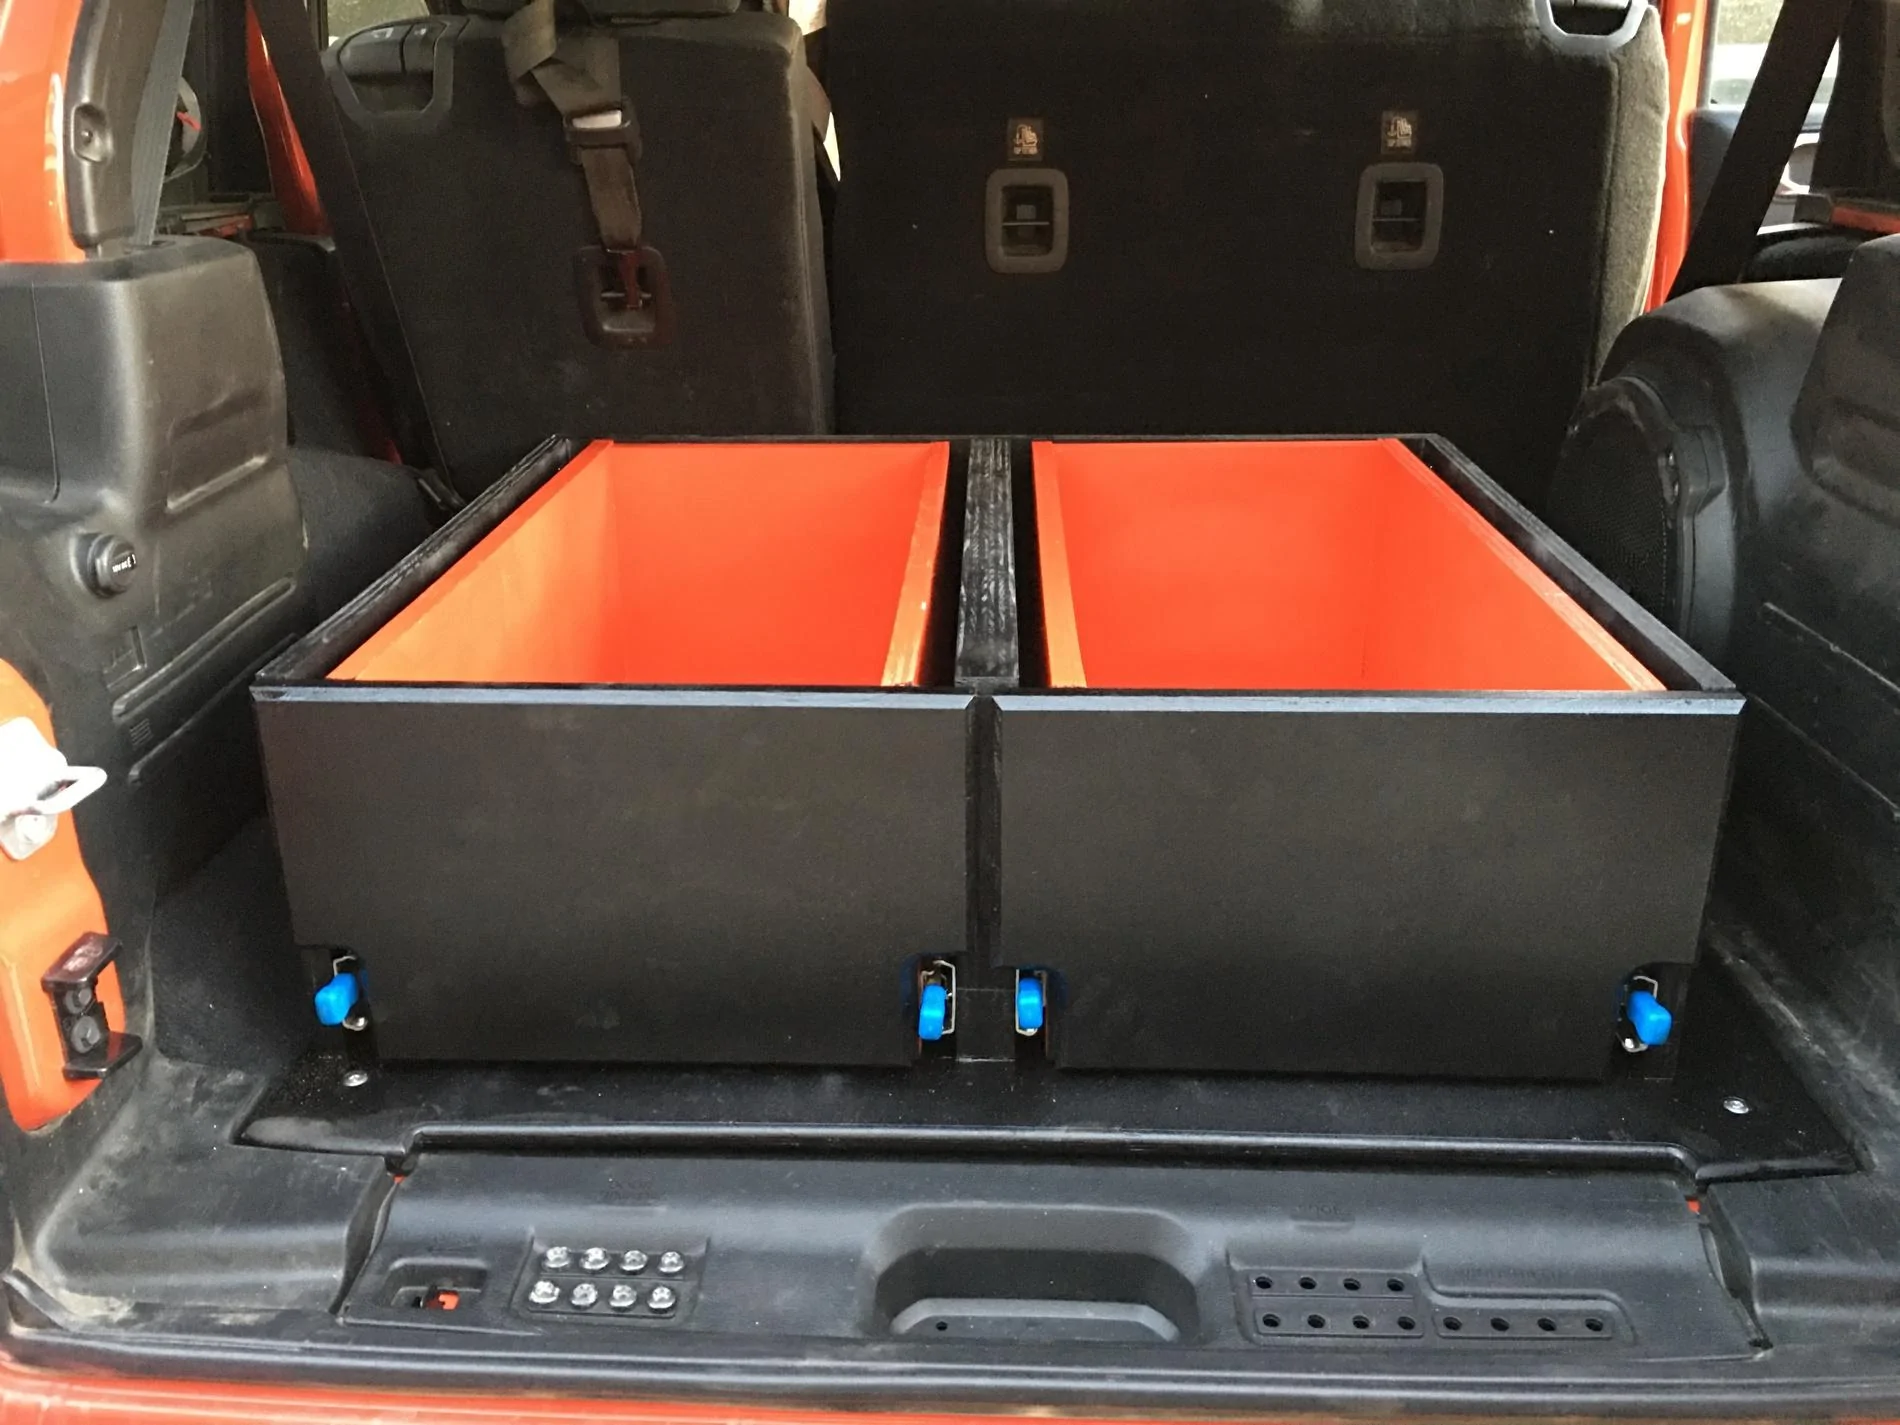
Decided to go for a pop of color on the drawers with some Apple Red paint that I think is a pretty decent match with the exterior Firecracker Red. Here’s a shot of the drawers installed before I bolted on the top deck. I wish the slide pulls were a similar color, but I’m ok with the blue. Maybe I’ll plastidip the pulls some day.
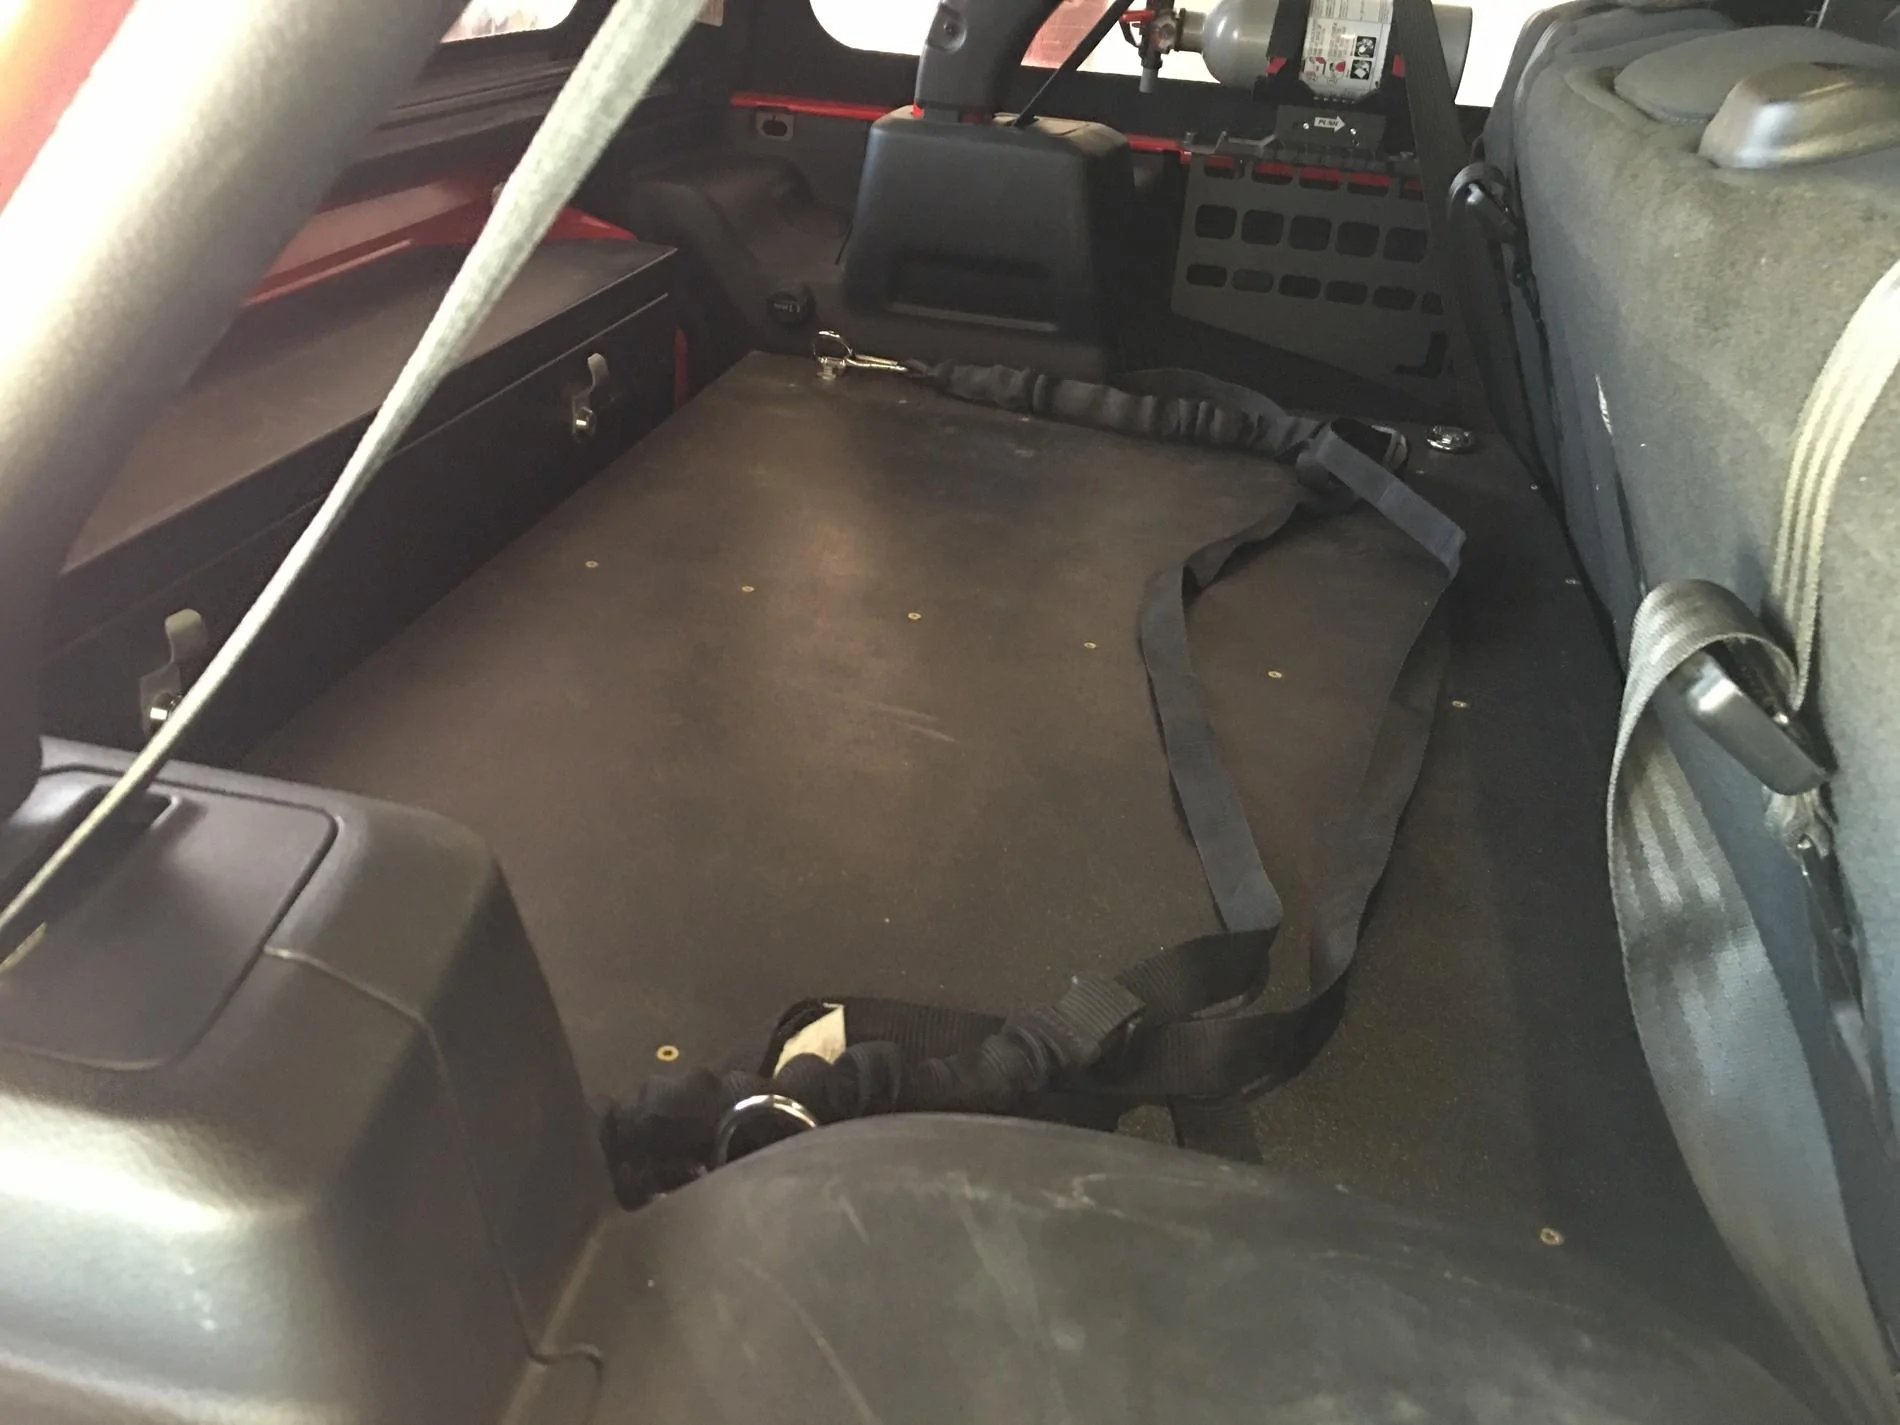
I also end up with some nice little space to the left and right of the box for some longer items, like a folding chair, cheater pipe, etc..
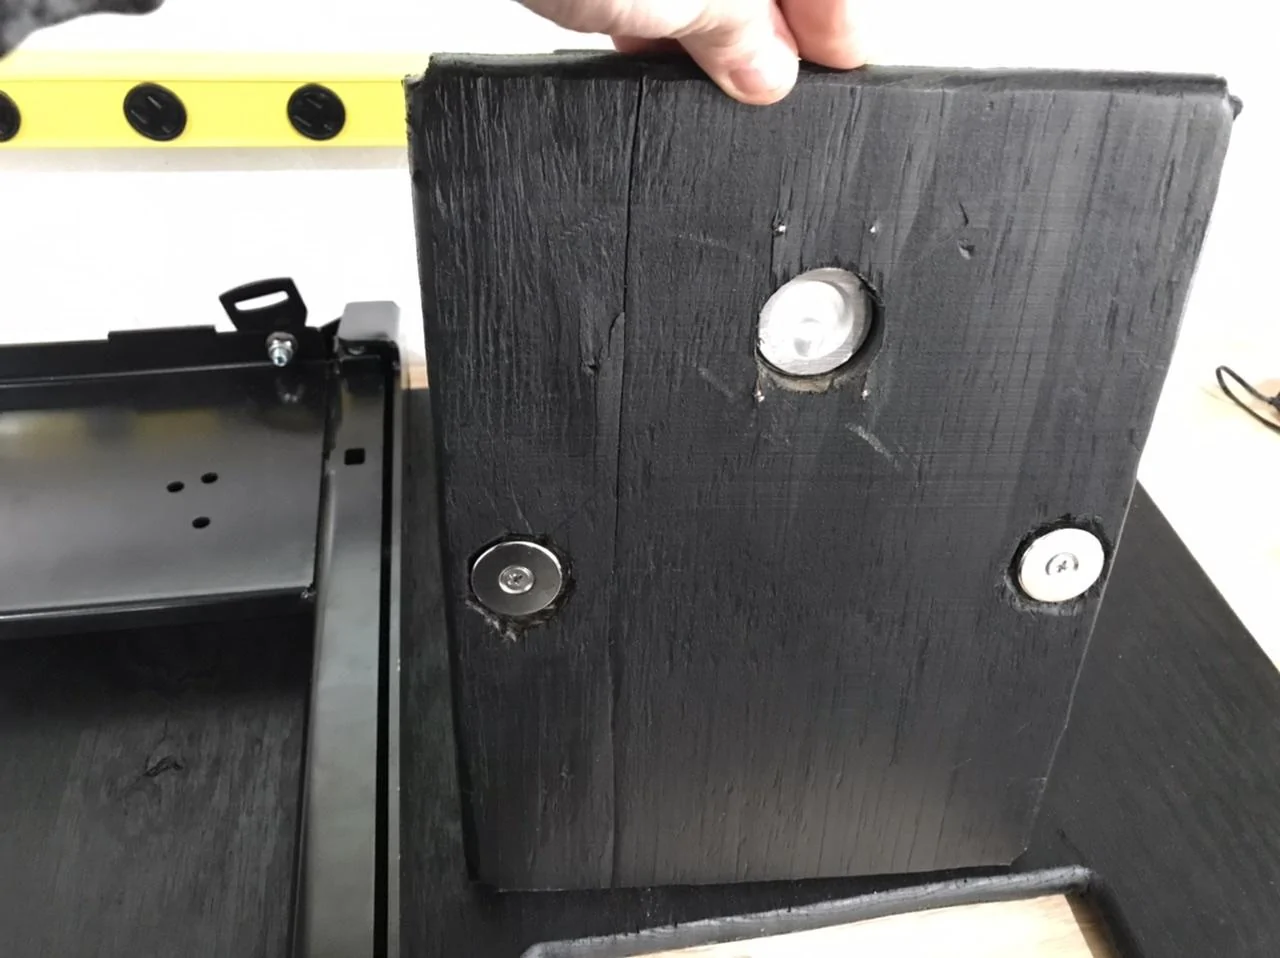
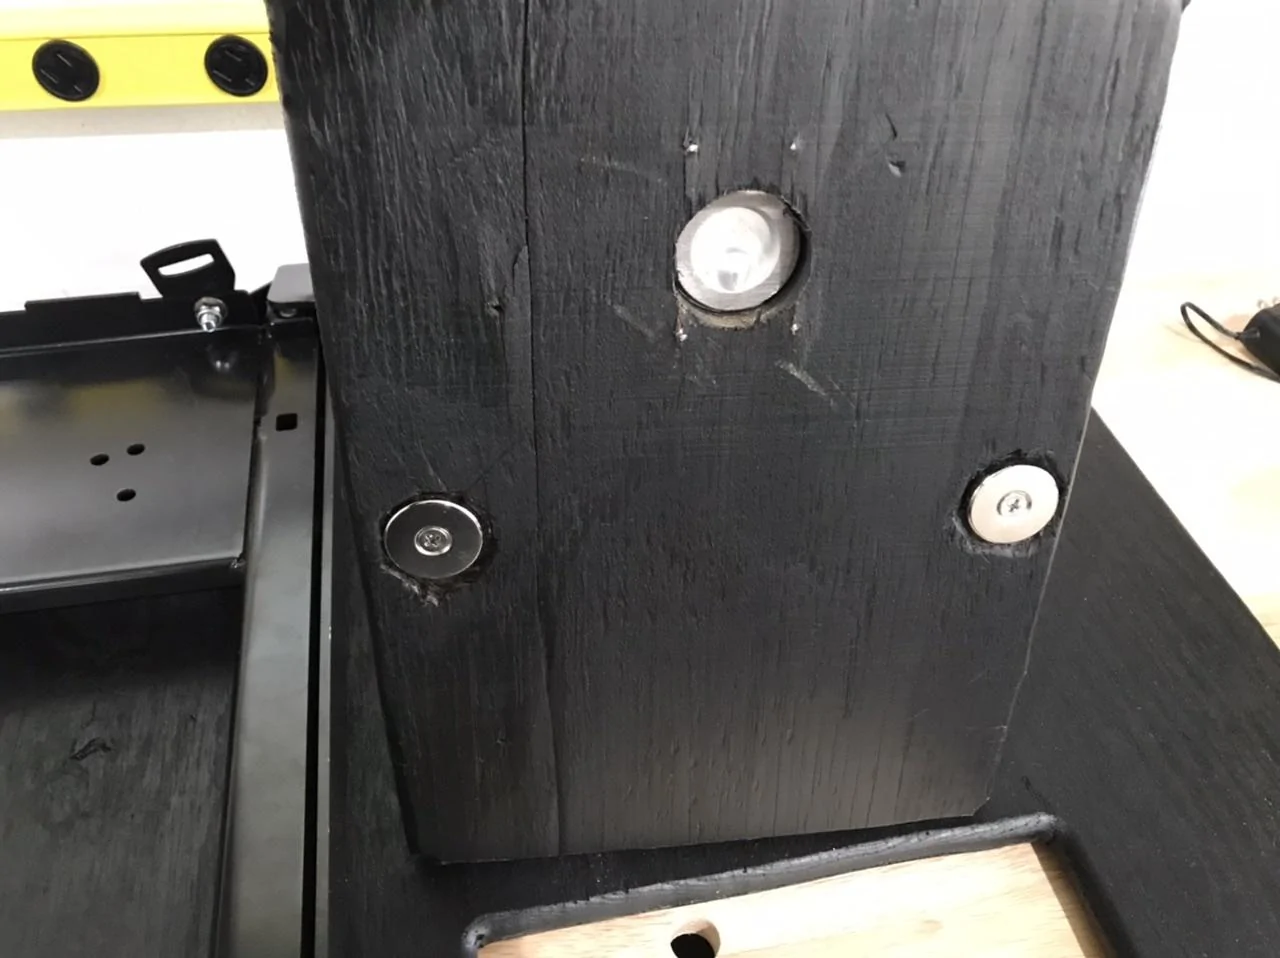
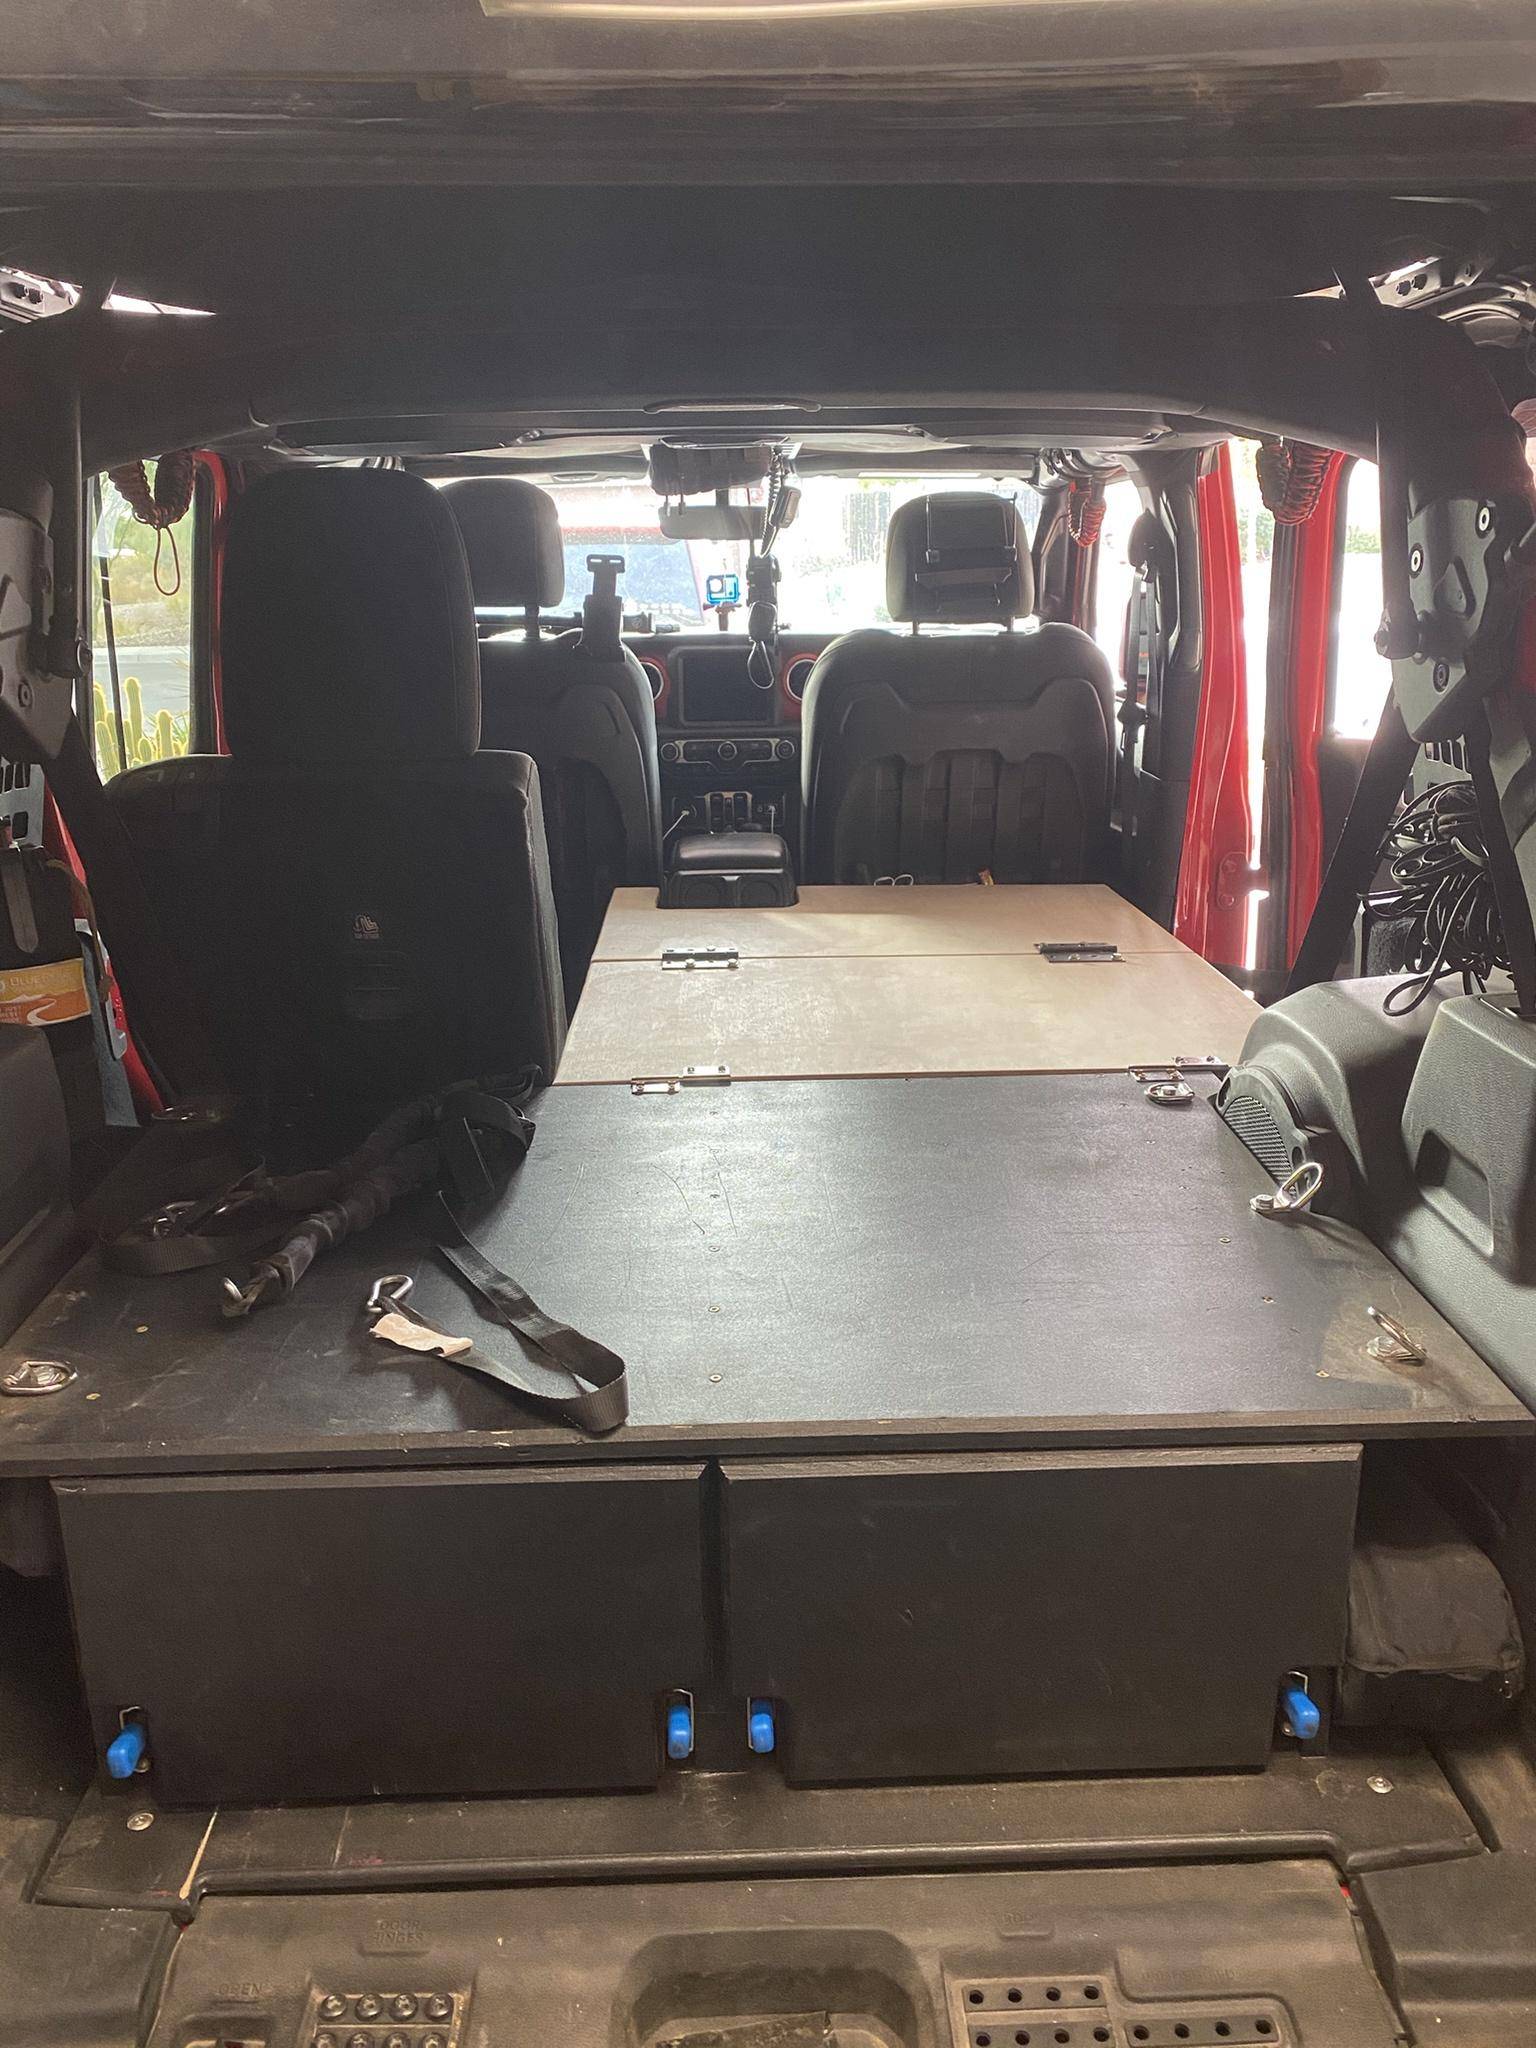
Took the factory tie down points and bolted them to the deck with some 5/8 stainless hardware and lock nuts. I might invest in a cargo net to keep back there for lighter-weight things like groceries as the trunk is a lot shallower than it used to be.
Due to the nature of the contours I had to cut around with the deck, it’s a pretty tight fit with maybe 5mm of left/right wiggle room. The contour gauge was awesome and made the process really easy to nail on the first try. As the fit was snug, I ended up screwing the deck down last as there was no way I’d be able to preassemble the entire unit and drop it in. I used bronze colored deck screws for the top, all countersunk.
I’ll be embarking on another adventure in organizing the drawers themselves as they are blank canvasses! Overall the drawers are larger than the Wolfpack’s (by FrontRunner) that I keep filled with gear. It’ll be interesting to see how much I can cram into them.
Some remaining tasks/considerations:
Driving this project my never-ending struggle with gear management - that one thing I need during a trail ride happens to be buried in a box under a mountain of other gear, forcing me to unload 1/2 the trunk just to get at it.
In full disclosure, I'm not an engineer and I'm certainly not a carpenter, so this project has its share of flaws. However, I really did enjoy putting it together and I'm looking forward to optimizing it over time.
My Project Goals:
- Full extension slides that will support the weight of my recovery gear, tools and trail snack
- Full width deck that blends into the contours of the trun
- Tie downs on the top of the deck for additional gear boxes, Gerry cans, etc...
- Bedliner/sealant incase I get caught in the rain with the top of
- Keep my existing Tuffy tailgate storage lock box
Materials include:
- Plywood
- Beadboard (used to cut as a template for mapping the Jeeps contours)
- 500lb lock in/lock out sliders from Amazon
- Pocket screws
- Nails
- Wood glue
- Kilz primer paint
- Rattle can paint (Rustoleum)
- Rattle can bedliner (also Rustoleum)
Tools used:
- Table saw
- Jig saw
- Router (straight and roundover bits)
- Circular saw
- Impact Driver
- Nail gun
- Various clamps (12-36")
- Kreg jig (pocket hole jig)
- Oscillating tool
- Mouse sander
- Speed square
- Contour gauge
As starting point - I began by removing the rear cargo compartment lid (simply lift and pull towards the rear of the vehicle) and all of the existing cargo tie downs (flathead to pop up the plastic covers and the appropriate torx bit). I set aside the factory tie downs for use later.
An additional consideration was making sure I accommodate my existing tailgate mounted Tuffy storage lock box, which also doubles as a fold out table. This will limit my maximum box/drawer depth, but also force me to offset the drawers to the left to allow the drawers to pull all the way out to their full 24” extension without hitting the lock box.
After some measurement, I ended up with the below "baseplate". Ended up making a cutout along the bottom lip to maintain access to the factory jack/tools. Bolt holes were lined up by reinstalling each of the bolts, laying the board on top, and whacking it with a big ol'hammer to mark the drill holes. Each hole was drilled and countersunk to allow for the factory bolts to sit flush with the surface of the plywood.
At this point, I took my remaining measurements and mapped out the box's exterior and center walls. I had to ensure that I didn't make it too wide to avoid my Tuffy tailgate lock box and the locking mechanism on the left side of the tailgate opening.
My overall plan was for 27" deep drawers, split 50/50 across the width of the box. I also wanted to have a full wide/depth deck that followed the contours of the truck for a flush fit.
Now - back to my disclaimer about not being a carpenter. I'm not, srsly, but I have built several pieces of furniture for my house. Mostly simple tables and a barn door. Through that experience, I can’t recommend a pocket hole jig enough. Easily the biggest bang-for-your-buck tool I own. Here’s the cabinet starting to come together.
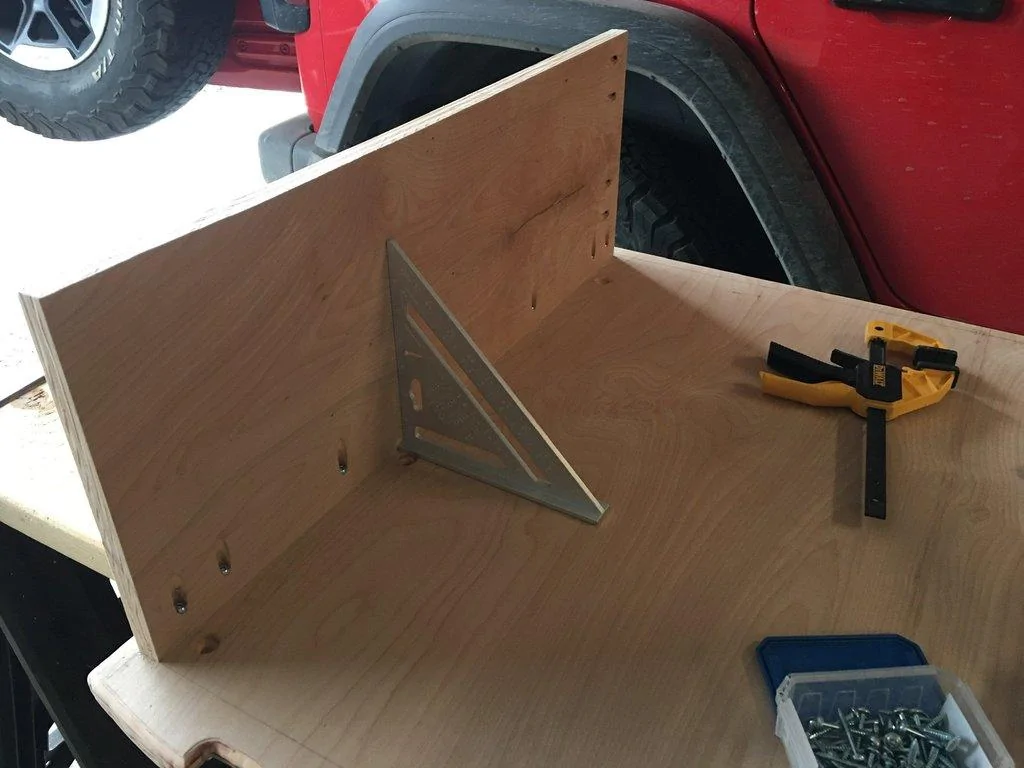
I double-walled/laminated the interior wall as it will be supporting a slide and drawer on each side, and I need it to be able to take a good amount of weight from the deck when fully loaded.
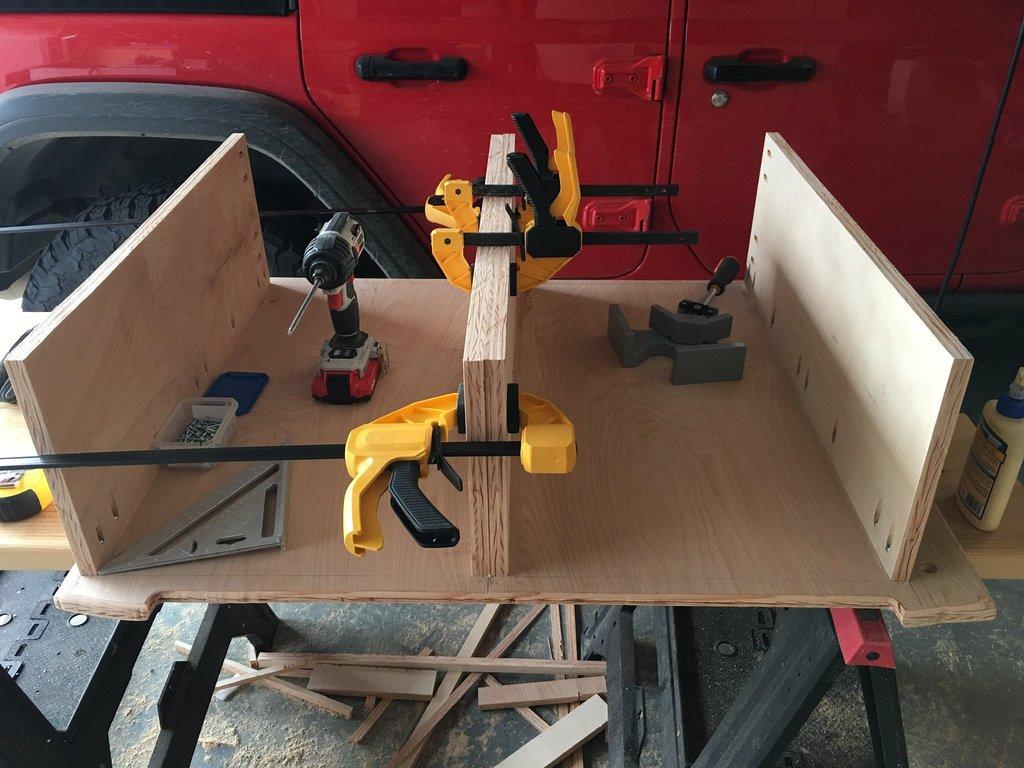
Here's a test fit!
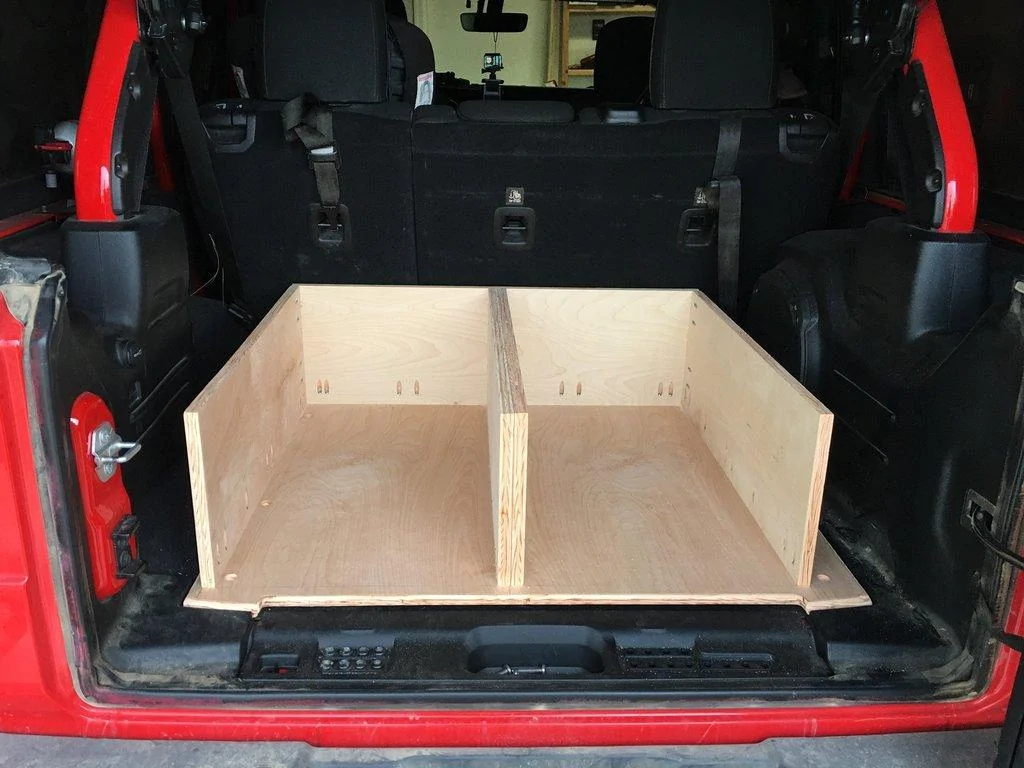
It was at this time I made a pretty big screw-up. I forgot all about that big honking Tuffy tailgate lock box. I went to close the tailgate and SMACK. I realized I made the walls too long/deep. I ended up needing to jigsaw 3 inches off of the vertical walls, bringing my total storage from 30” to 27” to accommodate the tailgate box. I used my handy oscillating cutter to clean it up and a little sanding to get rid of the stray wood glue.
Measure 300 times, cut once!
Below is an image of the rails and drawers test fitted and some hand routing around the slider latches.
Now cabinet-making is a totally different animal than anything else I've tried. The necessary precision can be maddening. I ended up making my drawers about 3-5mm too "narrow" for the mounted sliders. I solved this by shimming the sliders with some thicker metal washers to ensure everything was square. I've also read that you can use a thin steps of wood or even a strip of scrap metal (which won't compress like wood will).

Here is an image of the box primered in Kilz and ready for paint.
I’d also completely forgotten about maintaining access to the “super secret under-floor storage compartment”, so a grabbed the jigsaw and router and went to work. The space is accessible if I pull the drawer out, so not super convenient, but I figure I can put some emergency supplies in that compartment, or things that would be extremely rare for me to access. I’m thinking a stash of MRE’s or water bottles.
Decided to go for a pop of color on the drawers with some Apple Red paint that I think is a pretty decent match with the exterior Firecracker Red. Here’s a shot of the drawers installed before I bolted on the top deck. I wish the slide pulls were a similar color, but I’m ok with the blue. Maybe I’ll plastidip the pulls some day.
I also end up with some nice little space to the left and right of the box for some longer items, like a folding chair, cheater pipe, etc..
Took the factory tie down points and bolted them to the deck with some 5/8 stainless hardware and lock nuts. I might invest in a cargo net to keep back there for lighter-weight things like groceries as the trunk is a lot shallower than it used to be.

Due to the nature of the contours I had to cut around with the deck, it’s a pretty tight fit with maybe 5mm of left/right wiggle room. The contour gauge was awesome and made the process really easy to nail on the first try. As the fit was snug, I ended up screwing the deck down last as there was no way I’d be able to preassemble the entire unit and drop it in. I used bronze colored deck screws for the top, all countersunk.
I’ll be embarking on another adventure in organizing the drawers themselves as they are blank canvasses! Overall the drawers are larger than the Wolfpack’s (by FrontRunner) that I keep filled with gear. It’ll be interesting to see how much I can cram into them.
Some remaining tasks/considerations:
- Cut some rubber matting to line the drawer bottoms
- Find some organizers/dividers to cubed bags for the drawers. I might even just make some dividers/inserts out of some thin wood or acetate
- I’m kicking around the idea of some diamond plate for the deck for extra durability. I’m positive the bedliner is going to scratch off as soon as I lash down my steel Jerry cans on them.
Sponsored