nostatic
Well-Known Member
- Joined
- Jun 4, 2020
- Threads
- 9
- Messages
- 414
- Reaction score
- 935
- Location
- central coast
- Vehicle(s)
- '20 JL Sport S PDN, '18 R1200GS Rallye
- Occupation
- chief bottle washer
- Thread starter
- #1
After prototyping different installs, today was the day to settle in and do the "permanent" install. Main caveat is that I'm leasing this Jeep and while odds are good I'll buy it at the end of the lease, in case I go a different direction I want to be able to reverse most of what I did. While testing I was using the front 12V accessory port into a PowerPole splitter, but I knew that wasn't a good long-term solution, especially if I needed to plug something else in for a road trip.
For my uses, amateur radio is my go-to for comms, but given that a lot of Jeep folks run GMRS and/or CB, I figured I'd just figure out how to cram all three into the JL. Here's what's now inside:
Kenwood TM-V71A 2m/70cm
Midland MXT275 GMRS
President Bill FCC
The Kenwood has been in other vehicles - great radio. I have one in the shack at home. It just works. The Midland is nice because having the controls in the handset make mounting a bit easier. The President is just tiny, and my wife determined that where it is placed doesn't interfere with her legs/comfort at all (happy wife...).
Radios are fine, but antennas are where the rubber hits the road. In this case I went big in 2- out of the 3:
Comet SBB-7NMO
Midland MXTA26 NMO
Firefly 4'
And the mounts:
Topsy NMO (3/4") and CB (3/8") fender mounts
Cooltech CB mount
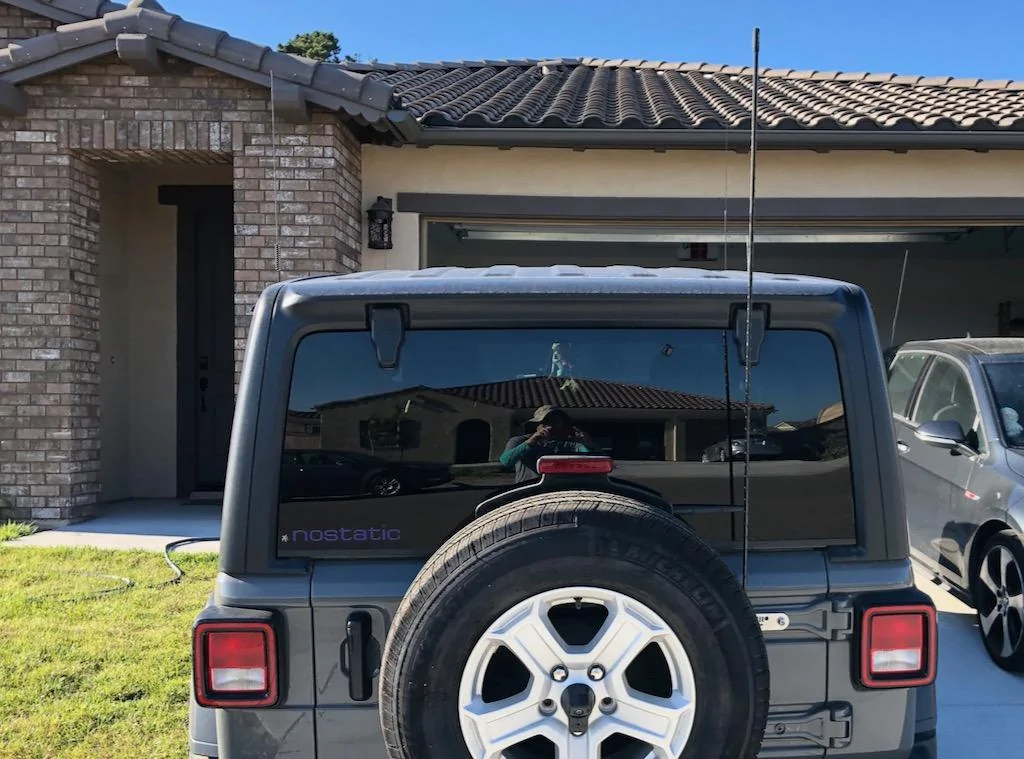
For the tl;dr crowd, here's the final product


I prototyped the antennas in different positions. There actually is some method to the madness. Over the hood probably has the most even ground plane, plus I wanted the tallest antenna up front so I could see if there were clearance issues. The Comet is nice in that it will fold down, so if I'm off-road in trees/brush I can fold it flat and lay it along the passenger sideview mirror. The Midland antenna is lower than the roof and has a spring. I may add a spring to the Firefly if need be.
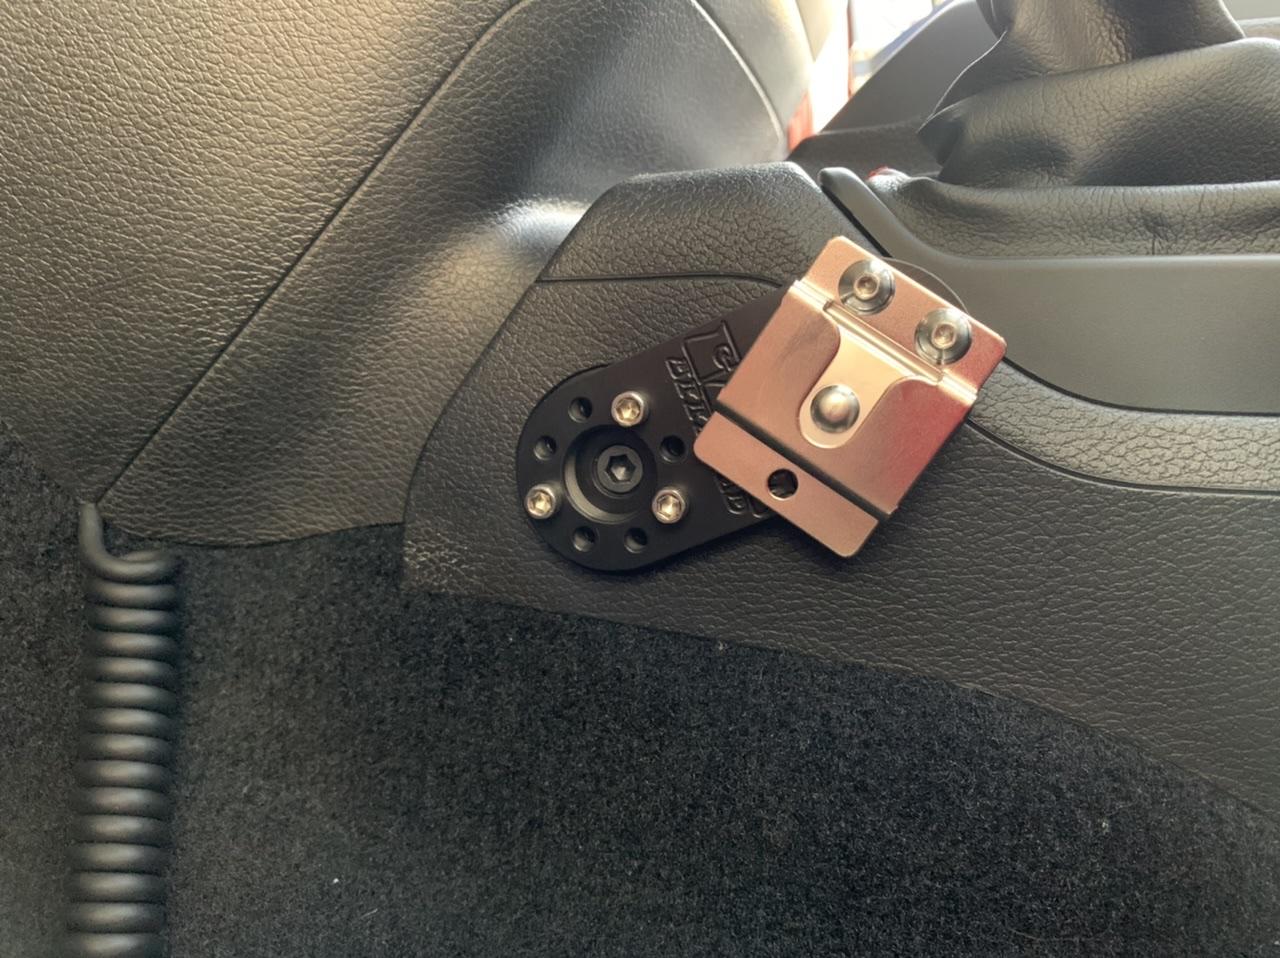
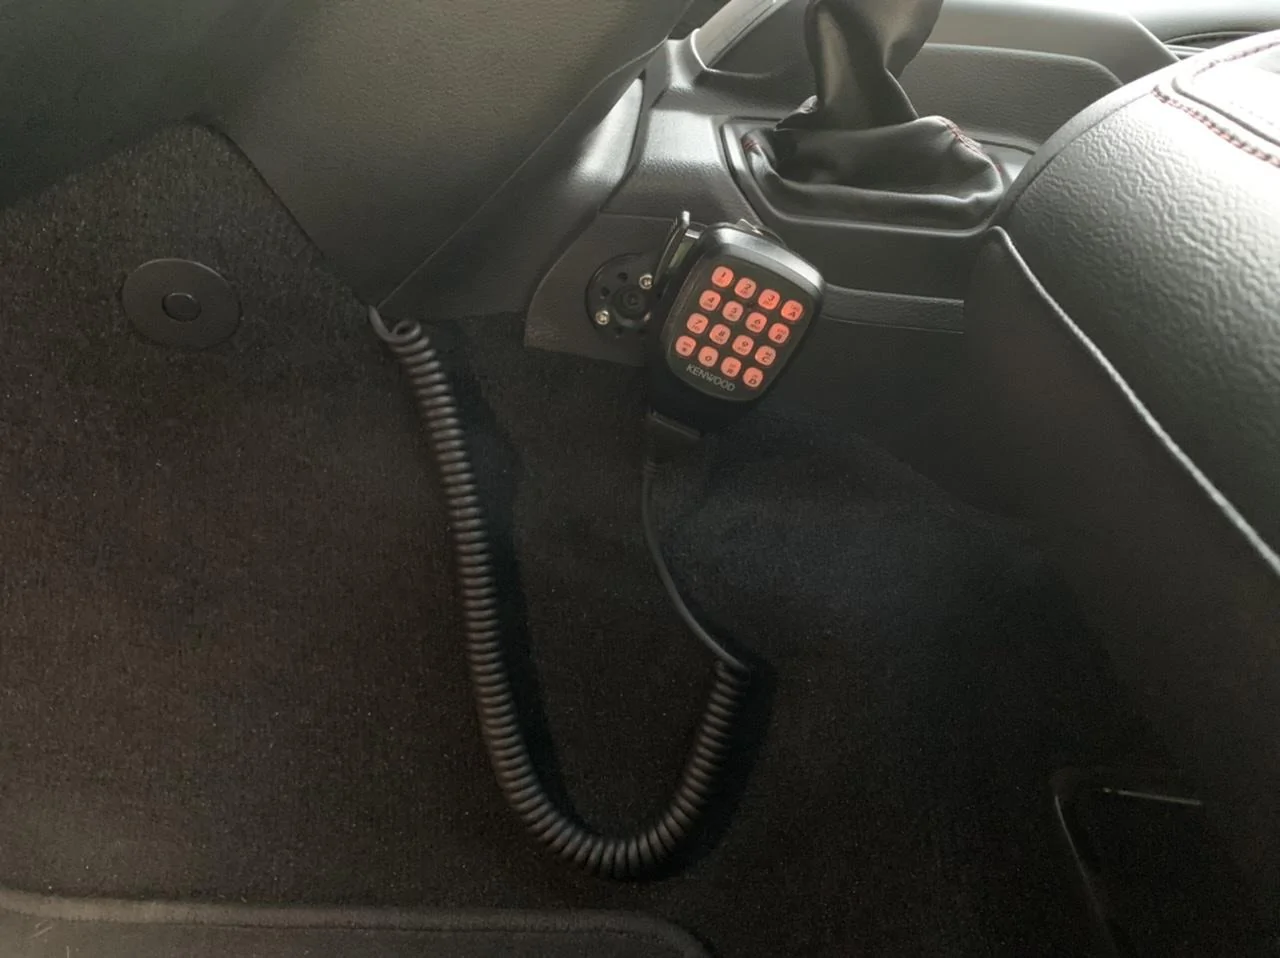
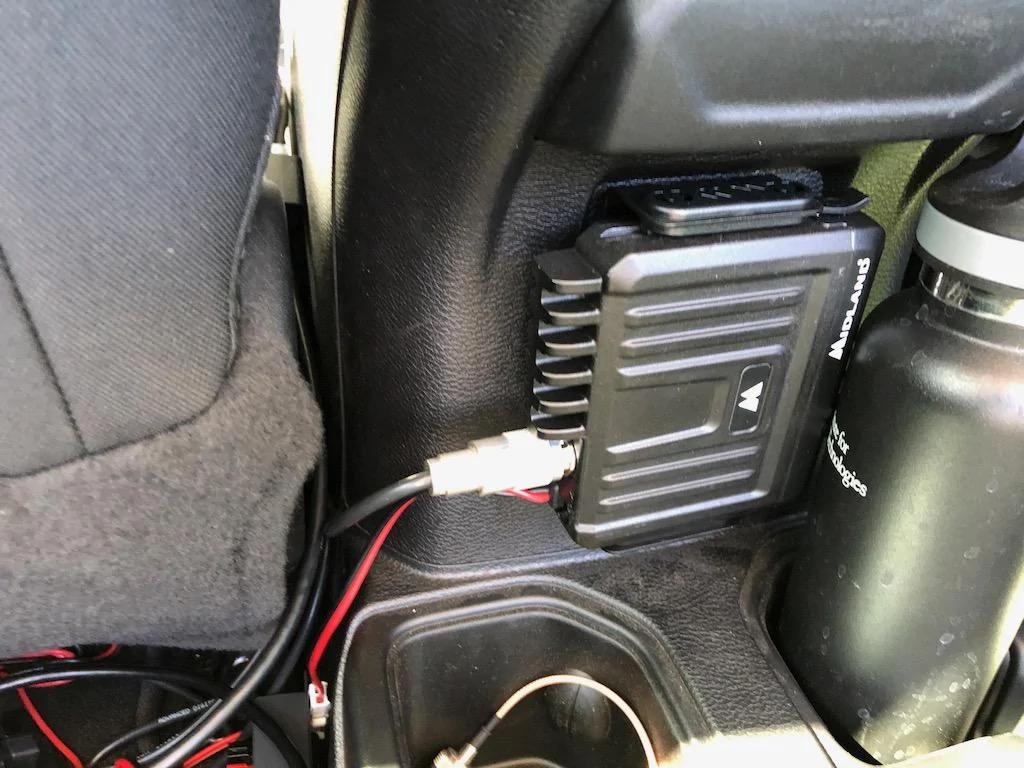
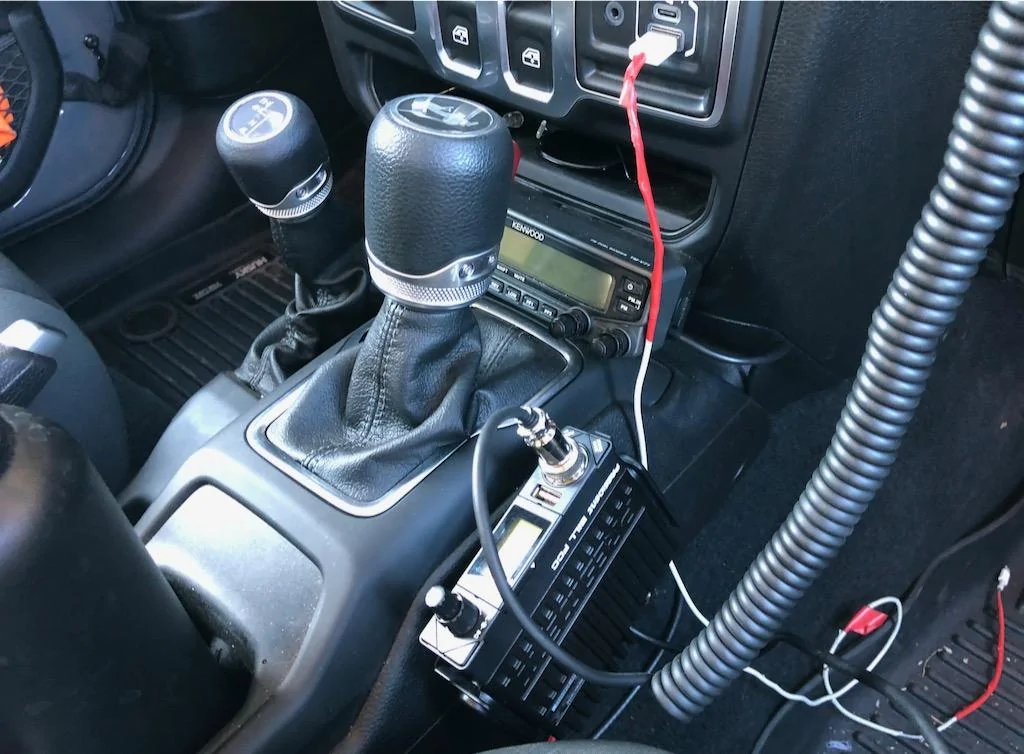
Location for the radios: the Kenwood body is under the driver's seat with the head up in front of the shifter. The Midland body is at the back of the console (two screws), and the mic/head will go on a mic mount on the grab bar. The mic is easily extended with an ethernet cable extension (I use the same for the Kenwood mic). I use Powerpole connectors on everything, and have two low-current slots open on the RigRunner so I can run/charge an HT or do something else 12V.


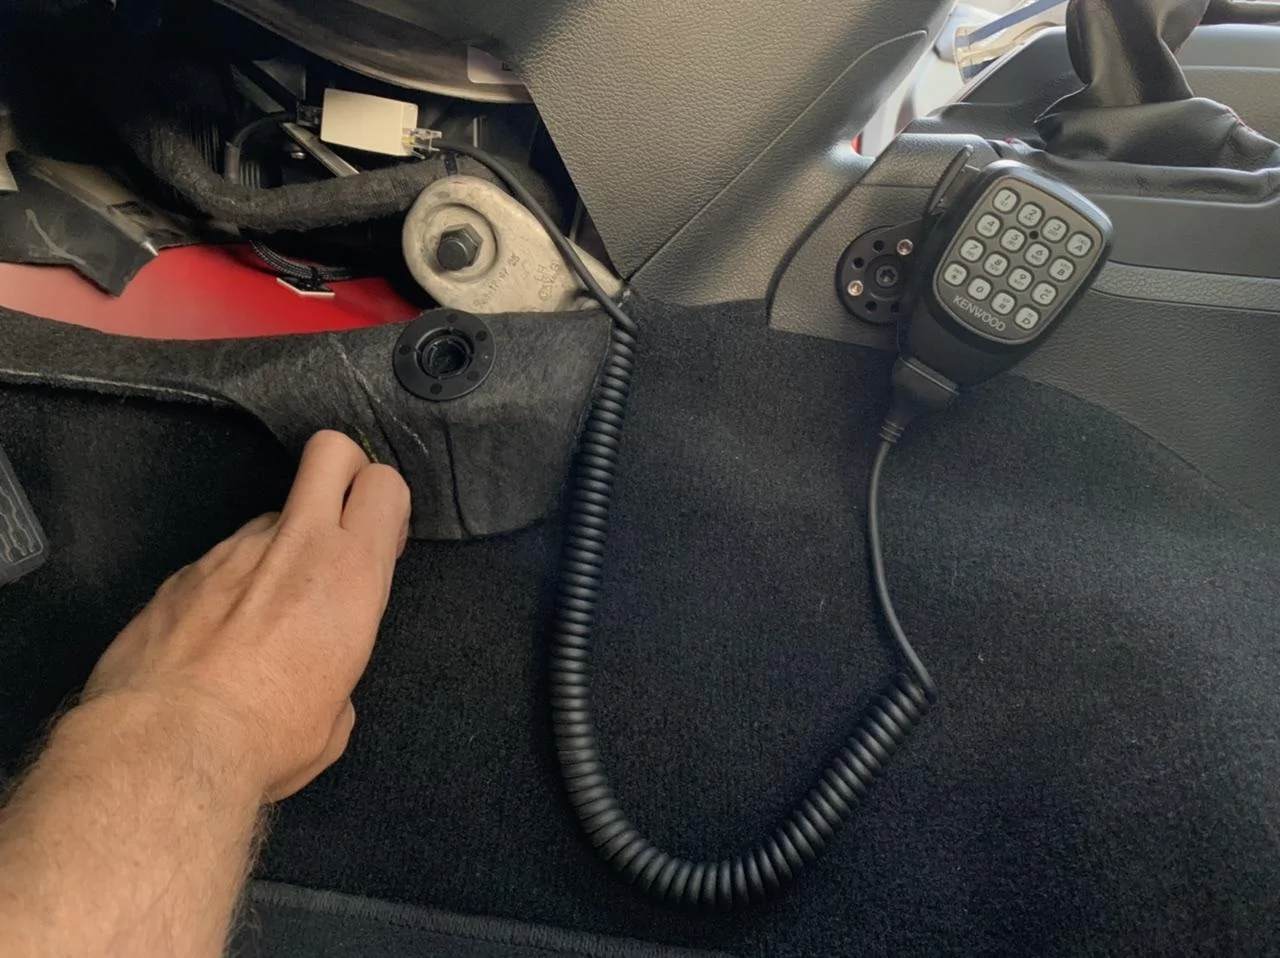
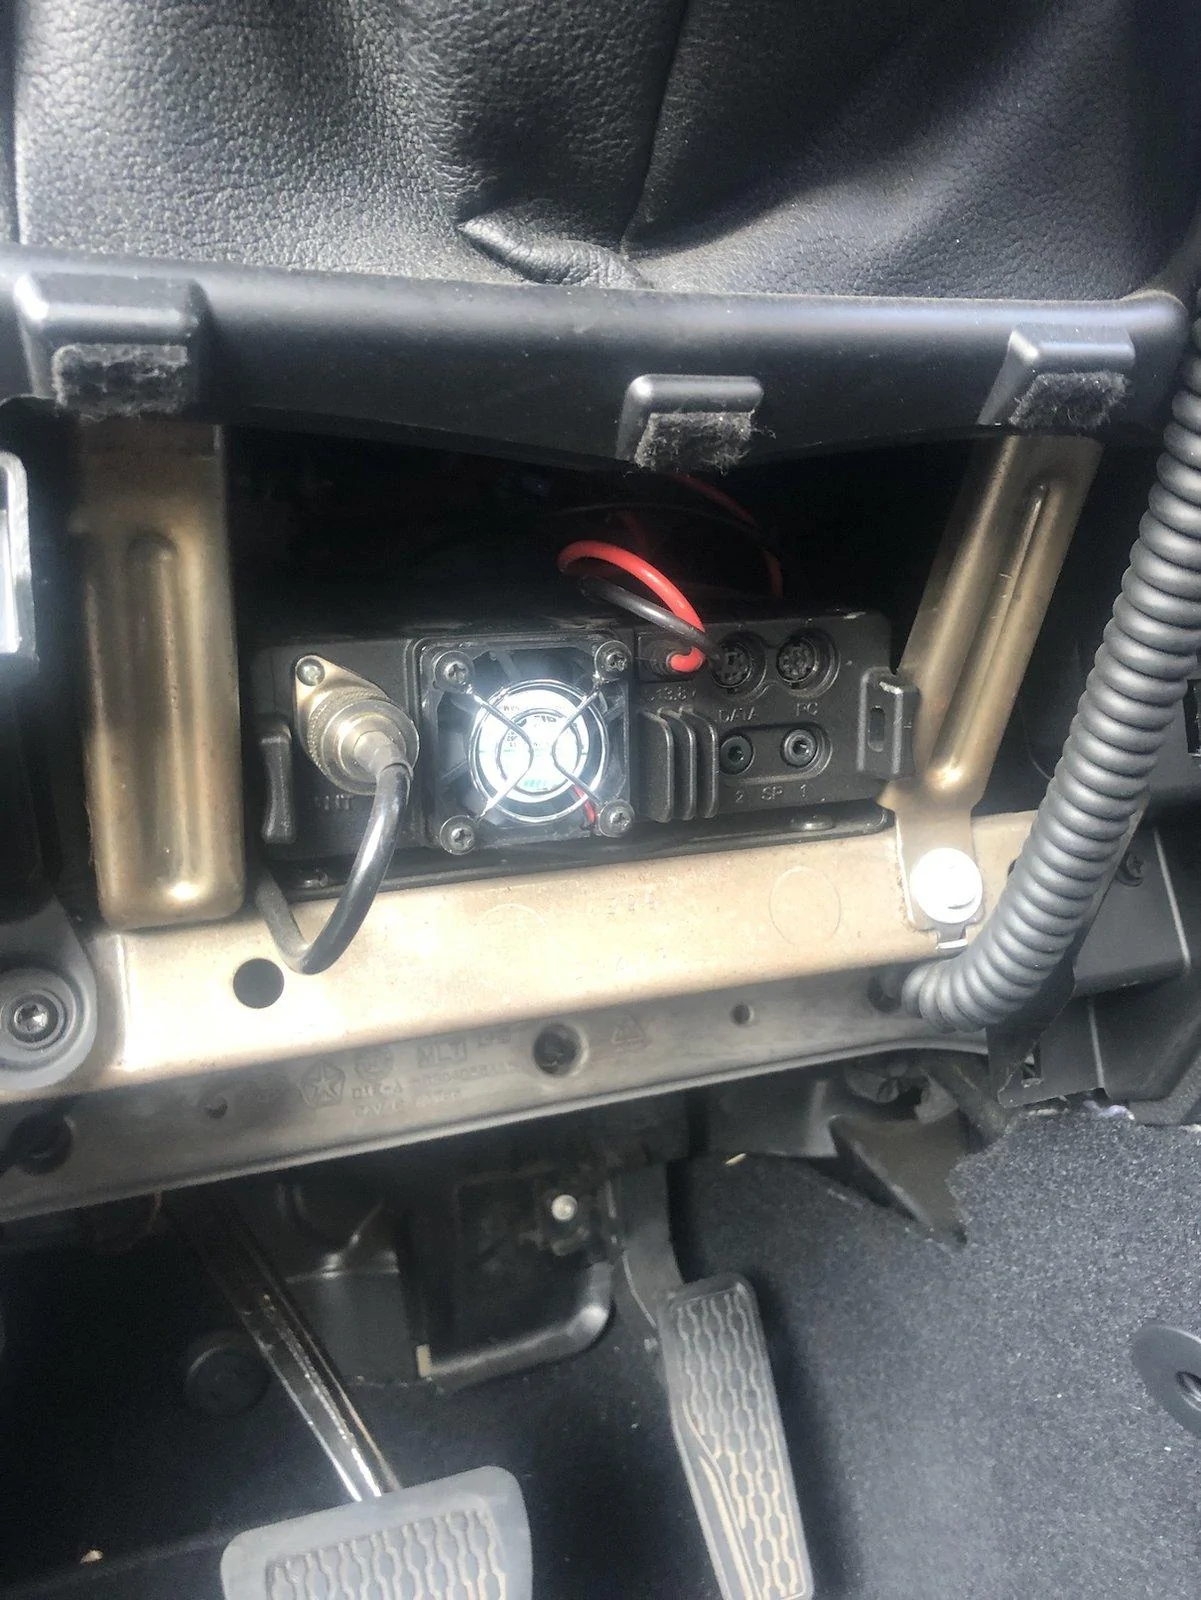
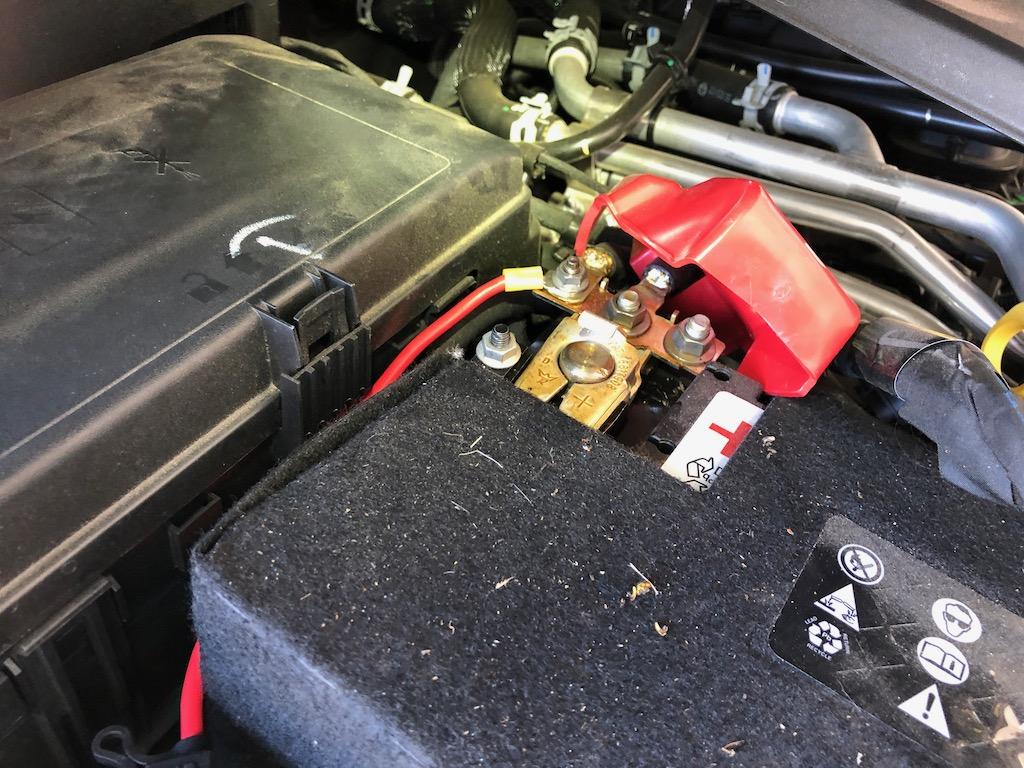
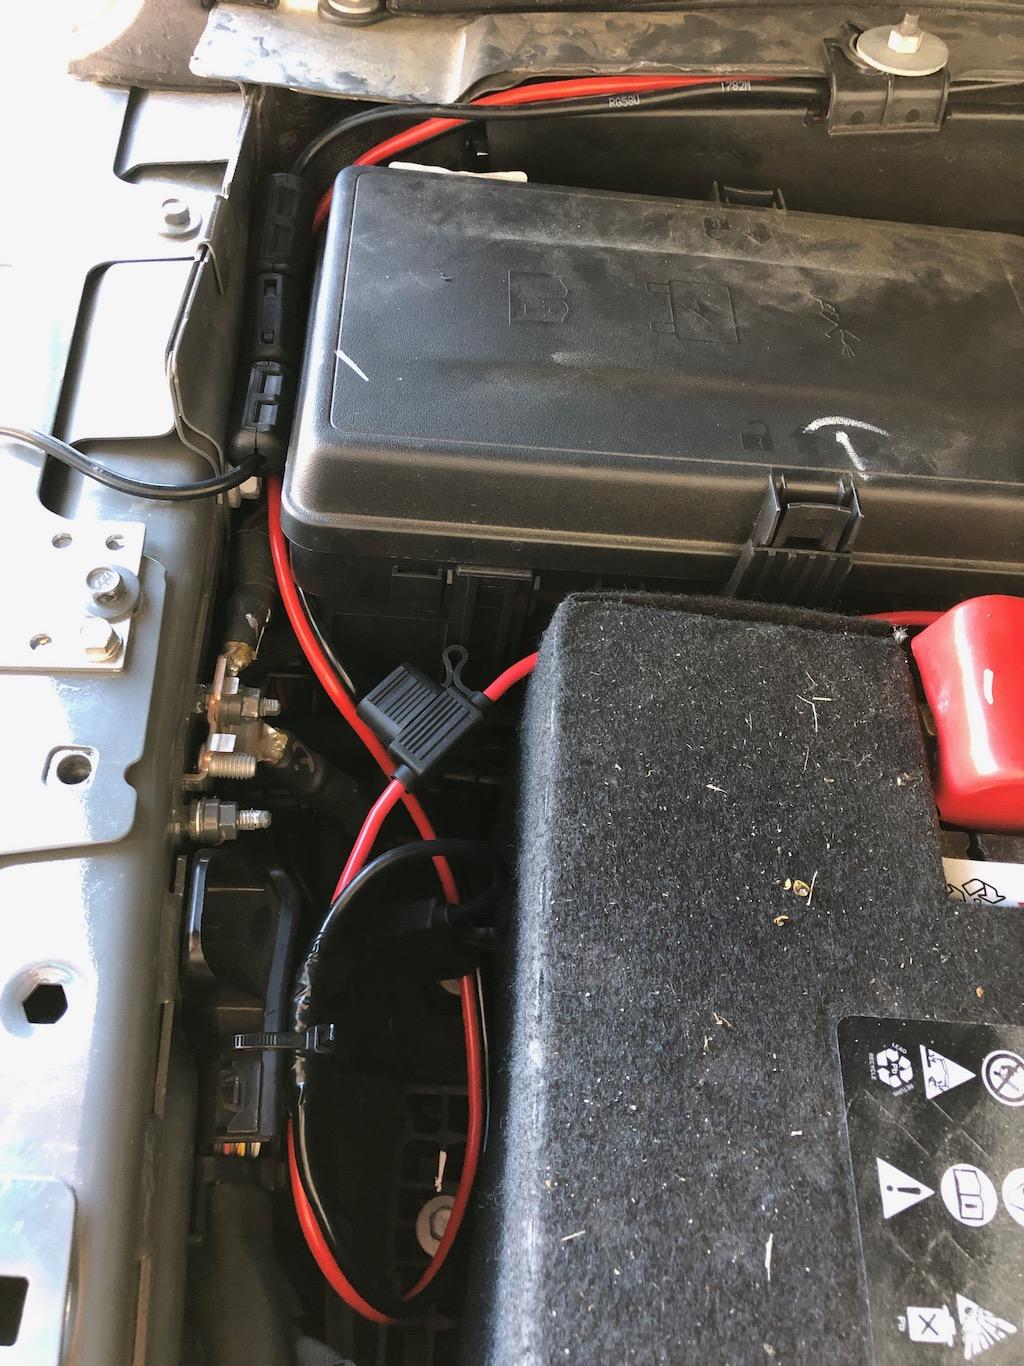
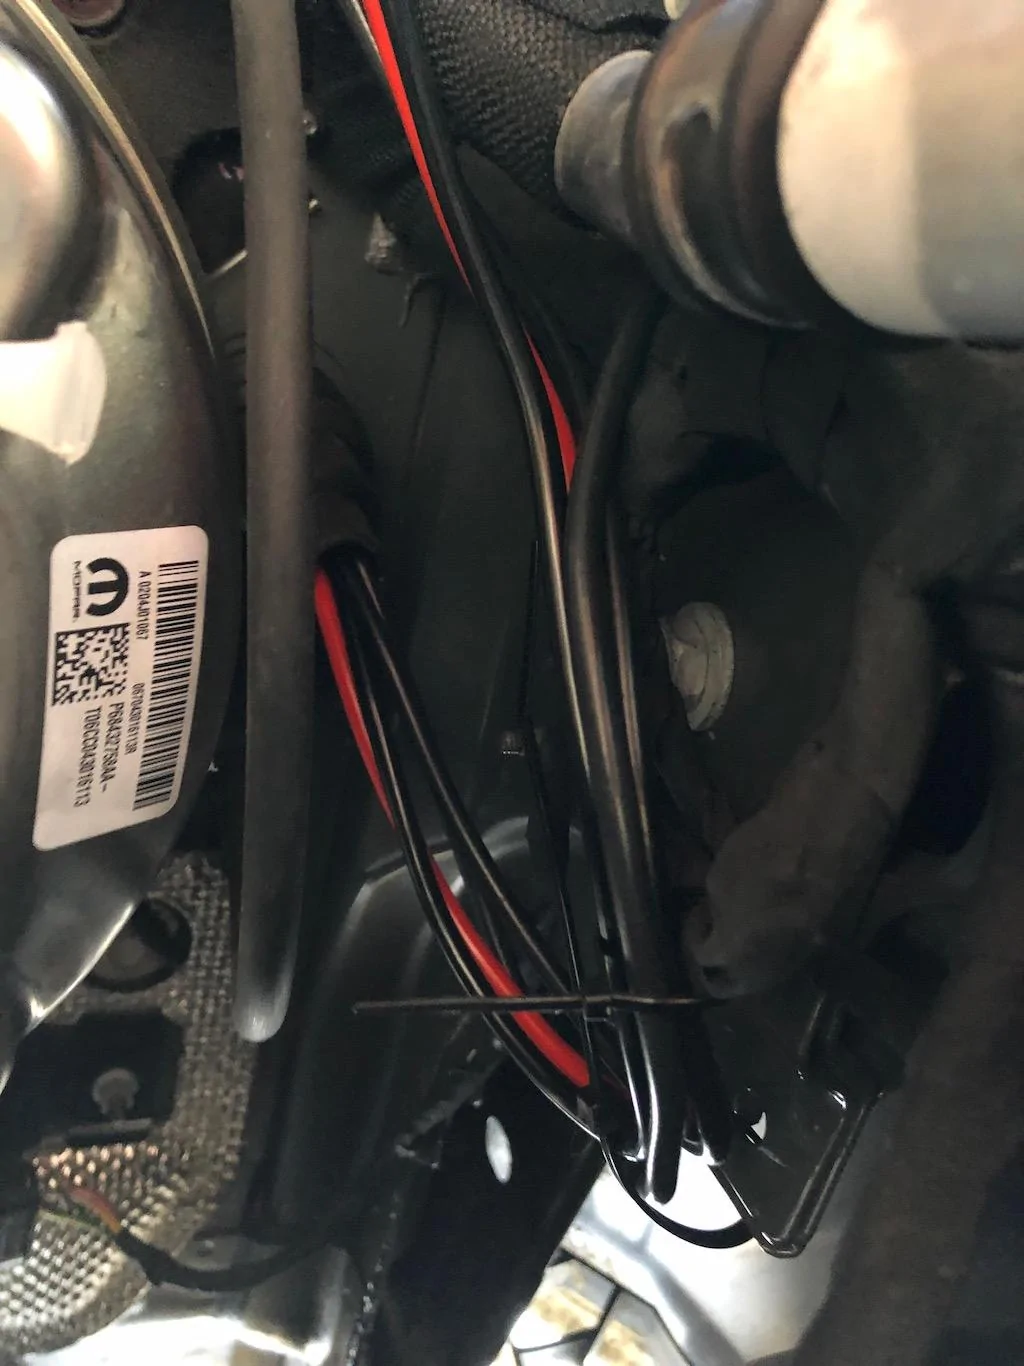
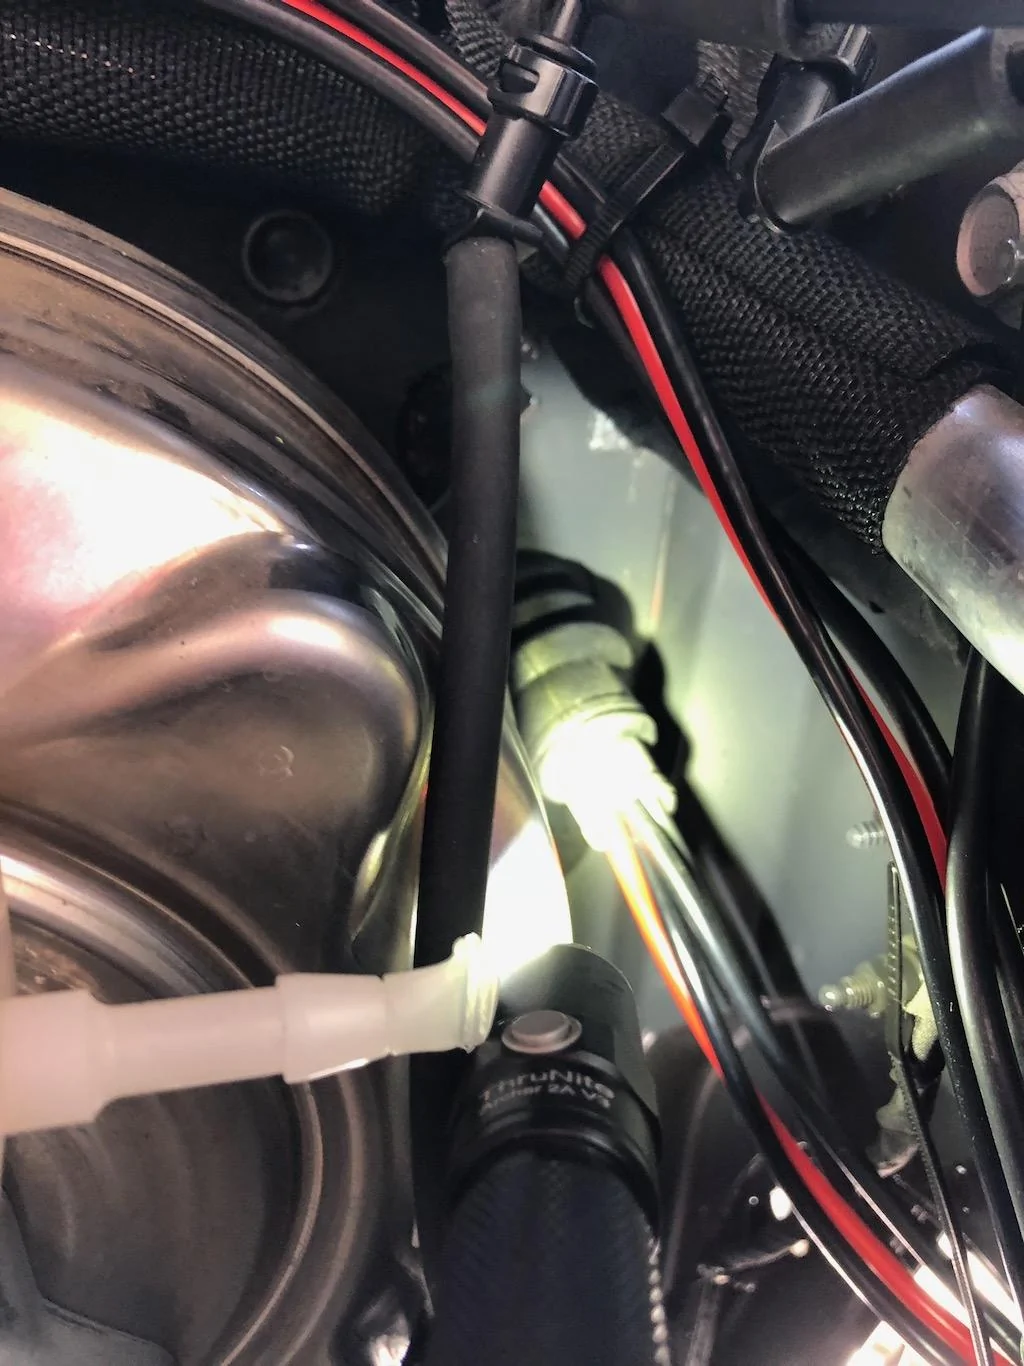
Power is a 10 gauge home-run to the battery. I put 30 amp fuses on both hot and ground at the battery, and use a Powerpole fuse block at the radios (essentially I'm triple fused). Power and coax from the front come through the hole that is for the clutch (mine is an automatic). I pulled the blanking plug and ran both coax and power through a universal grommet. I also tied off all cables with a drip loop before going into the firewall grommet.

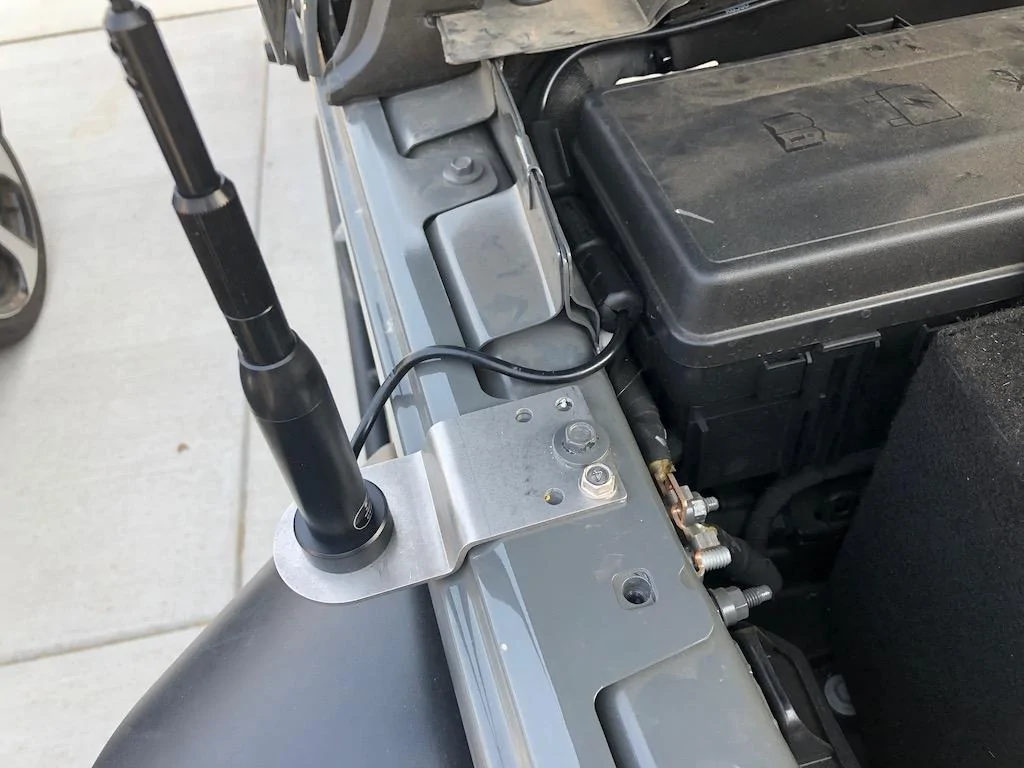
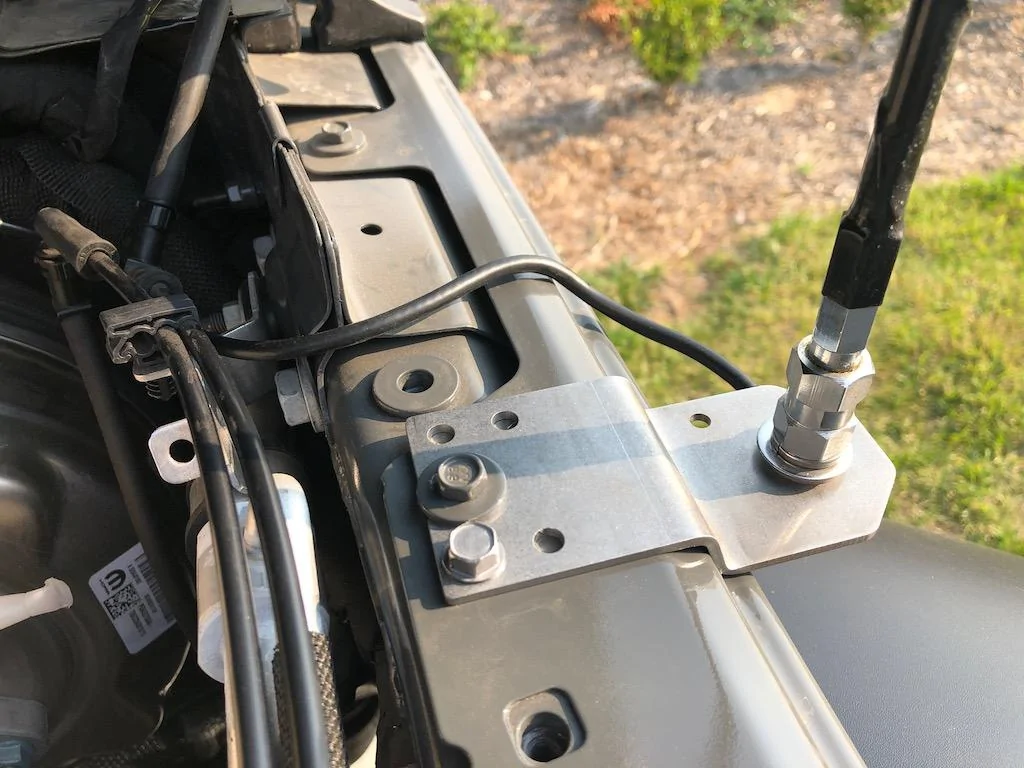
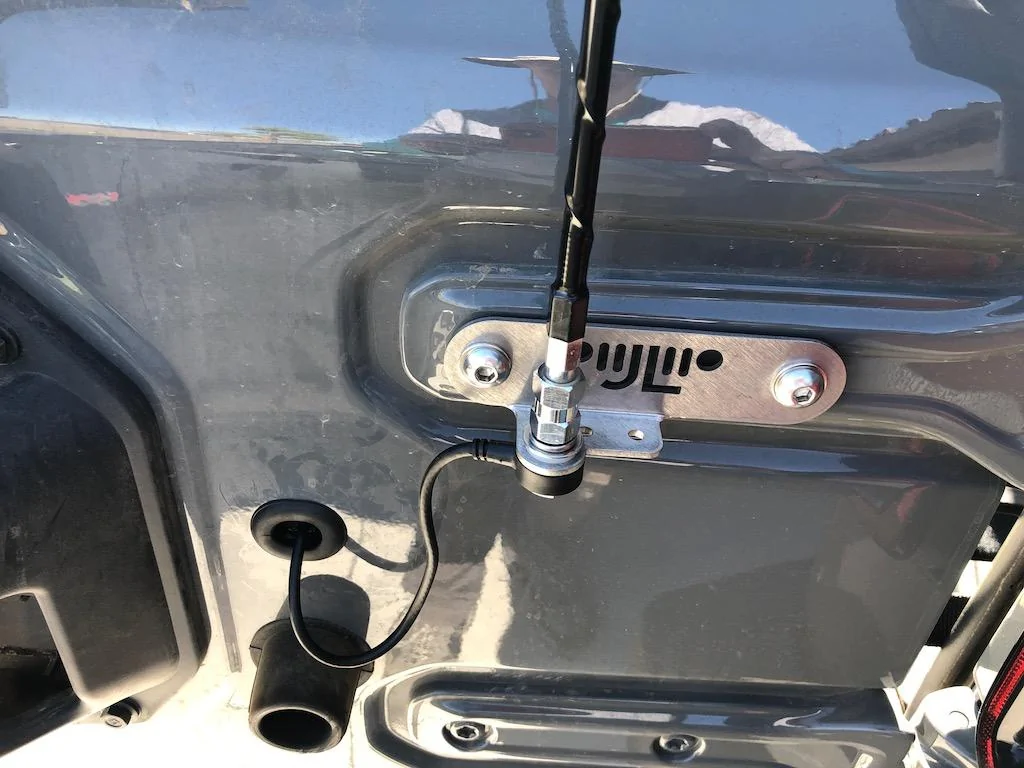
Topsy antenna mounts. I drilled and added the self-tapping screw as I'm running taller antennas. Note - the second photo is older, when I was testing the CB up front. I pulled the CB mount and replaced it with a Hustler NMO mount that will work with a 3/8" hole. The Firestick mount went in back.
The mount in back went smoothly. One tip I read here - I used the cardboard in the jamb and also removed one hinge bolt completely then installed the CoolTech bolt (not fully tight), then pulled the second hinge bolt. Yes, use a mallet to tap the 55 torx head into the bolt head - that way you don't strip the bolt. Most of the work was cutting a slot into the grommet and feeding the coax through. But eventually I got it, torqued the 6mm bolts to 35 ft/lbs, and routed the coax - with a drip loop. If you can't tell, I believe in drip loops.
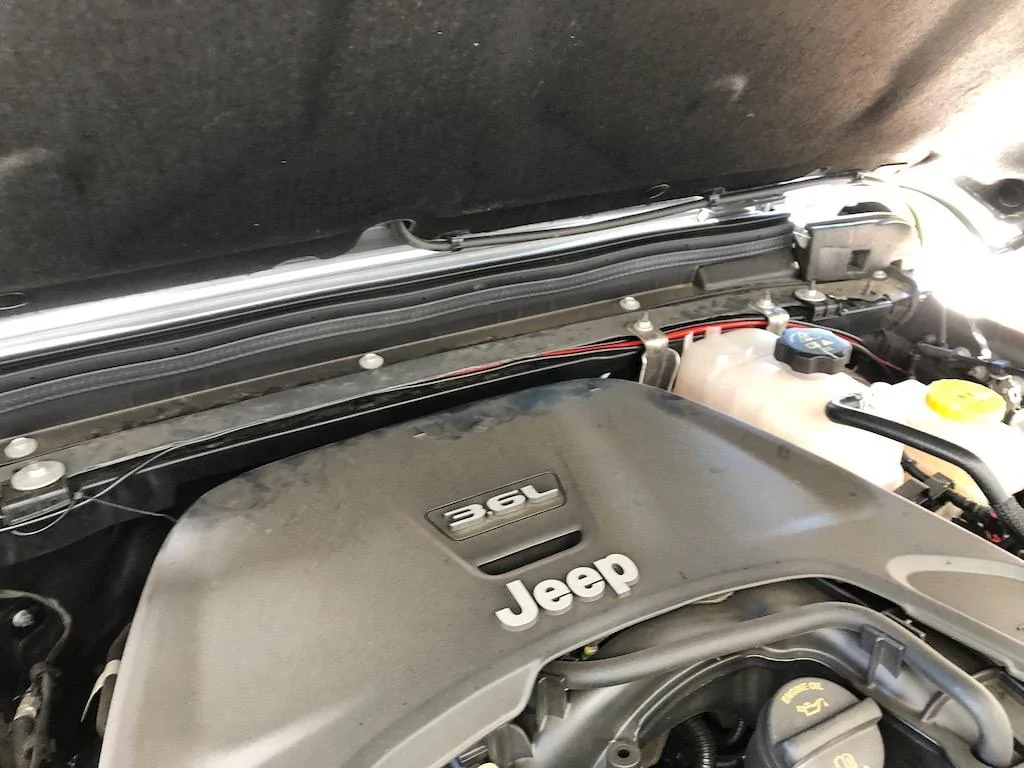
Up front I carefully tucked the coax and power under the trim pieces, using some leverage and a trim tool when necessary. I didn't pull any trim piece, just worked slowly with them in place. Very clean up front. In the back I didn't replace the hinge interior as I have a table coming that will go there (it replaces the stock trim). I'll need to figure out a mount for the filter material that is used against the vent slots underneath the spare.
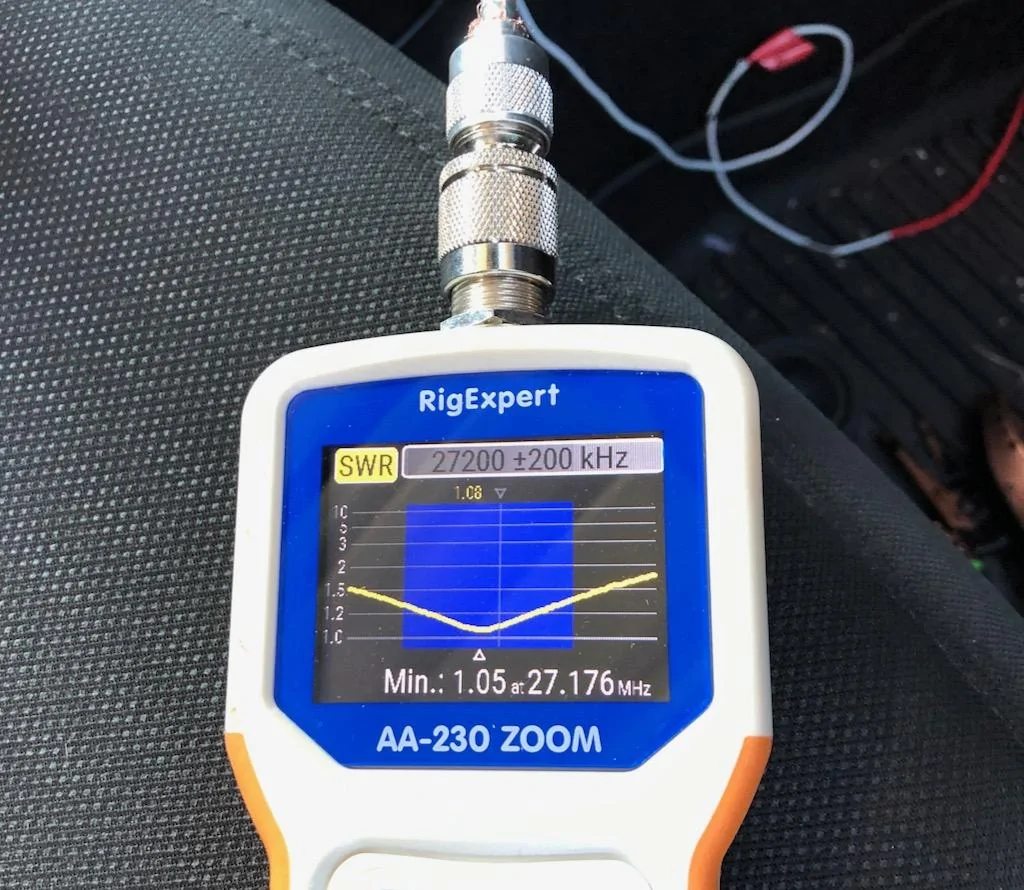
I had previously tuned the Firefly when prototyping it up front. I was happy to find it barely shifted in the rear mount

Did a quick spin around the block and everything seems sorted. I measured 3x and cut once, and had to redo one coax fitting (not sure what I screwed up). And I reran one of the coax as I wanted to get it clean as possible in the engine compartment. Will do some more benchmarking tonight and still have some wiring to tidy up but I have no excuses for not being able to communicate either on the trail or around town.
For my uses, amateur radio is my go-to for comms, but given that a lot of Jeep folks run GMRS and/or CB, I figured I'd just figure out how to cram all three into the JL. Here's what's now inside:
Kenwood TM-V71A 2m/70cm
Midland MXT275 GMRS
President Bill FCC
The Kenwood has been in other vehicles - great radio. I have one in the shack at home. It just works. The Midland is nice because having the controls in the handset make mounting a bit easier. The President is just tiny, and my wife determined that where it is placed doesn't interfere with her legs/comfort at all (happy wife...).
Radios are fine, but antennas are where the rubber hits the road. In this case I went big in 2- out of the 3:
Comet SBB-7NMO
Midland MXTA26 NMO
Firefly 4'
And the mounts:
Topsy NMO (3/4") and CB (3/8") fender mounts
Cooltech CB mount
For the tl;dr crowd, here's the final product
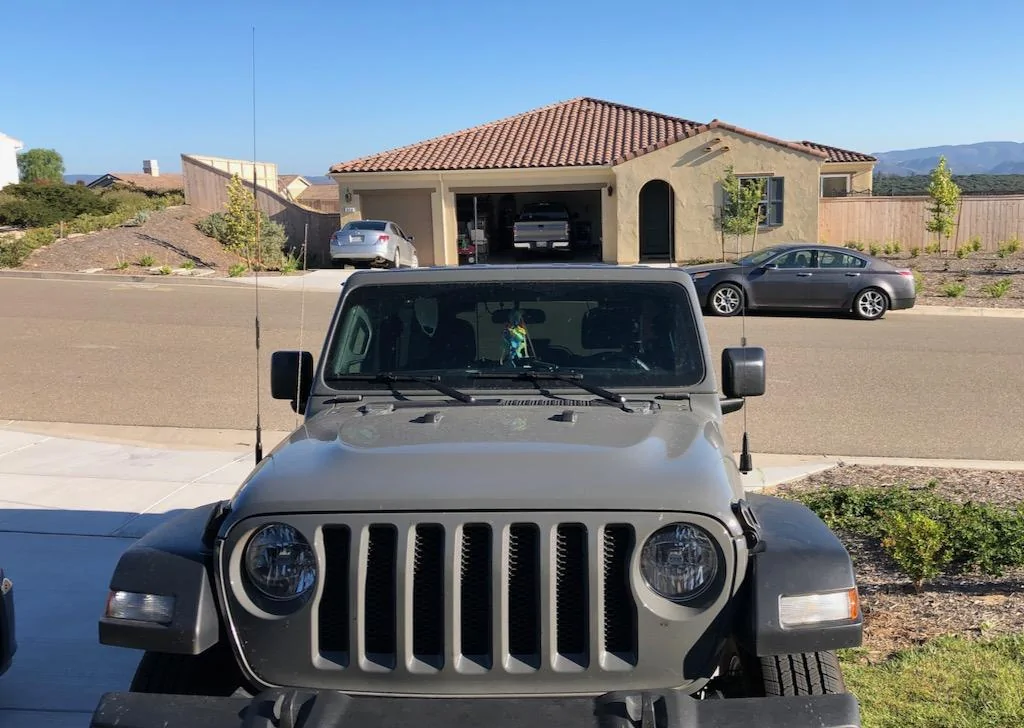
I prototyped the antennas in different positions. There actually is some method to the madness. Over the hood probably has the most even ground plane, plus I wanted the tallest antenna up front so I could see if there were clearance issues. The Comet is nice in that it will fold down, so if I'm off-road in trees/brush I can fold it flat and lay it along the passenger sideview mirror. The Midland antenna is lower than the roof and has a spring. I may add a spring to the Firefly if need be.
Location for the radios: the Kenwood body is under the driver's seat with the head up in front of the shifter. The Midland body is at the back of the console (two screws), and the mic/head will go on a mic mount on the grab bar. The mic is easily extended with an ethernet cable extension (I use the same for the Kenwood mic). I use Powerpole connectors on everything, and have two low-current slots open on the RigRunner so I can run/charge an HT or do something else 12V.
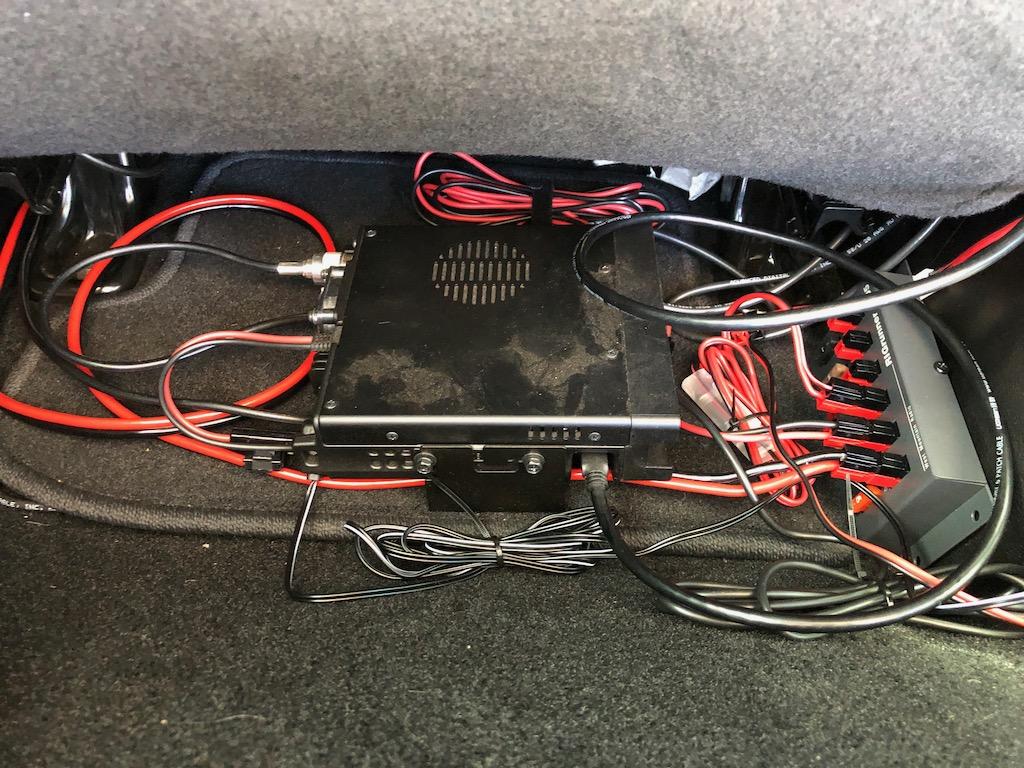
Power is a 10 gauge home-run to the battery. I put 30 amp fuses on both hot and ground at the battery, and use a Powerpole fuse block at the radios (essentially I'm triple fused). Power and coax from the front come through the hole that is for the clutch (mine is an automatic). I pulled the blanking plug and ran both coax and power through a universal grommet. I also tied off all cables with a drip loop before going into the firewall grommet.
Topsy antenna mounts. I drilled and added the self-tapping screw as I'm running taller antennas. Note - the second photo is older, when I was testing the CB up front. I pulled the CB mount and replaced it with a Hustler NMO mount that will work with a 3/8" hole. The Firestick mount went in back.
The mount in back went smoothly. One tip I read here - I used the cardboard in the jamb and also removed one hinge bolt completely then installed the CoolTech bolt (not fully tight), then pulled the second hinge bolt. Yes, use a mallet to tap the 55 torx head into the bolt head - that way you don't strip the bolt. Most of the work was cutting a slot into the grommet and feeding the coax through. But eventually I got it, torqued the 6mm bolts to 35 ft/lbs, and routed the coax - with a drip loop. If you can't tell, I believe in drip loops.
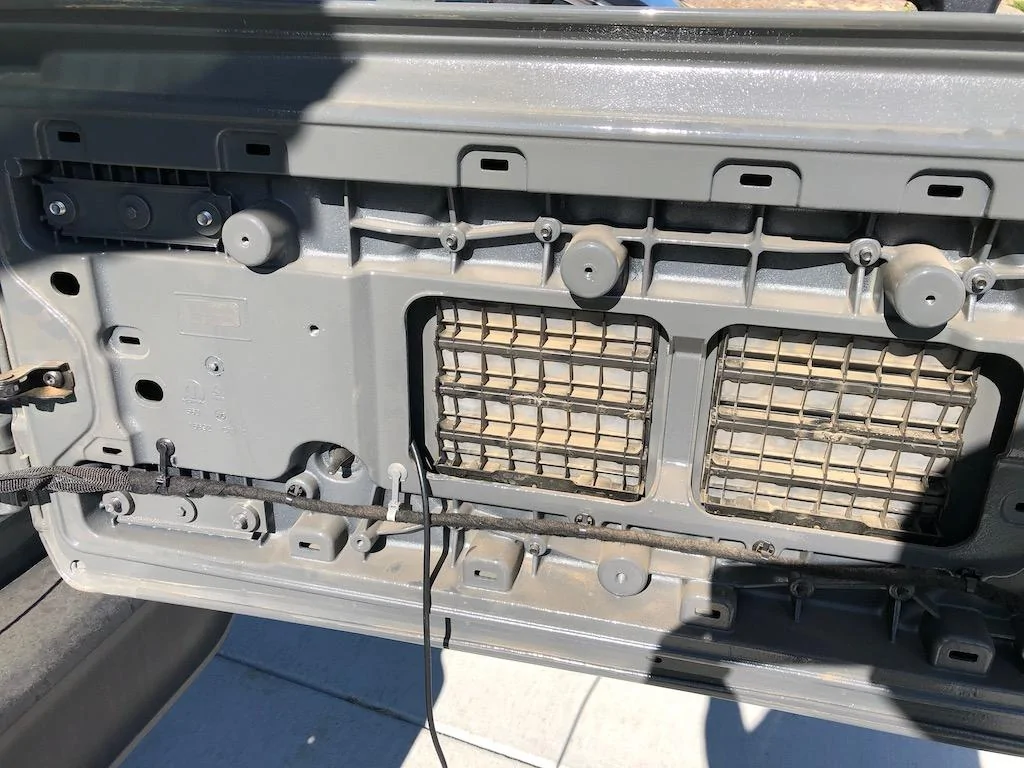
Up front I carefully tucked the coax and power under the trim pieces, using some leverage and a trim tool when necessary. I didn't pull any trim piece, just worked slowly with them in place. Very clean up front. In the back I didn't replace the hinge interior as I have a table coming that will go there (it replaces the stock trim). I'll need to figure out a mount for the filter material that is used against the vent slots underneath the spare.
I had previously tuned the Firefly when prototyping it up front. I was happy to find it barely shifted in the rear mount
Did a quick spin around the block and everything seems sorted. I measured 3x and cut once, and had to redo one coax fitting (not sure what I screwed up). And I reran one of the coax as I wanted to get it clean as possible in the engine compartment. Will do some more benchmarking tonight and still have some wiring to tidy up but I have no excuses for not being able to communicate either on the trail or around town.
Sponsored
Last edited: