TrailSnail
Well-Known Member
- First Name
- Josh
- Joined
- Aug 12, 2021
- Threads
- 7
- Messages
- 341
- Reaction score
- 720
- Location
- Gilbert, AZ
- Vehicle(s)
- '21 JL Unlimited Sport S
- Vehicle Showcase
- 1
- Thread starter
- #1
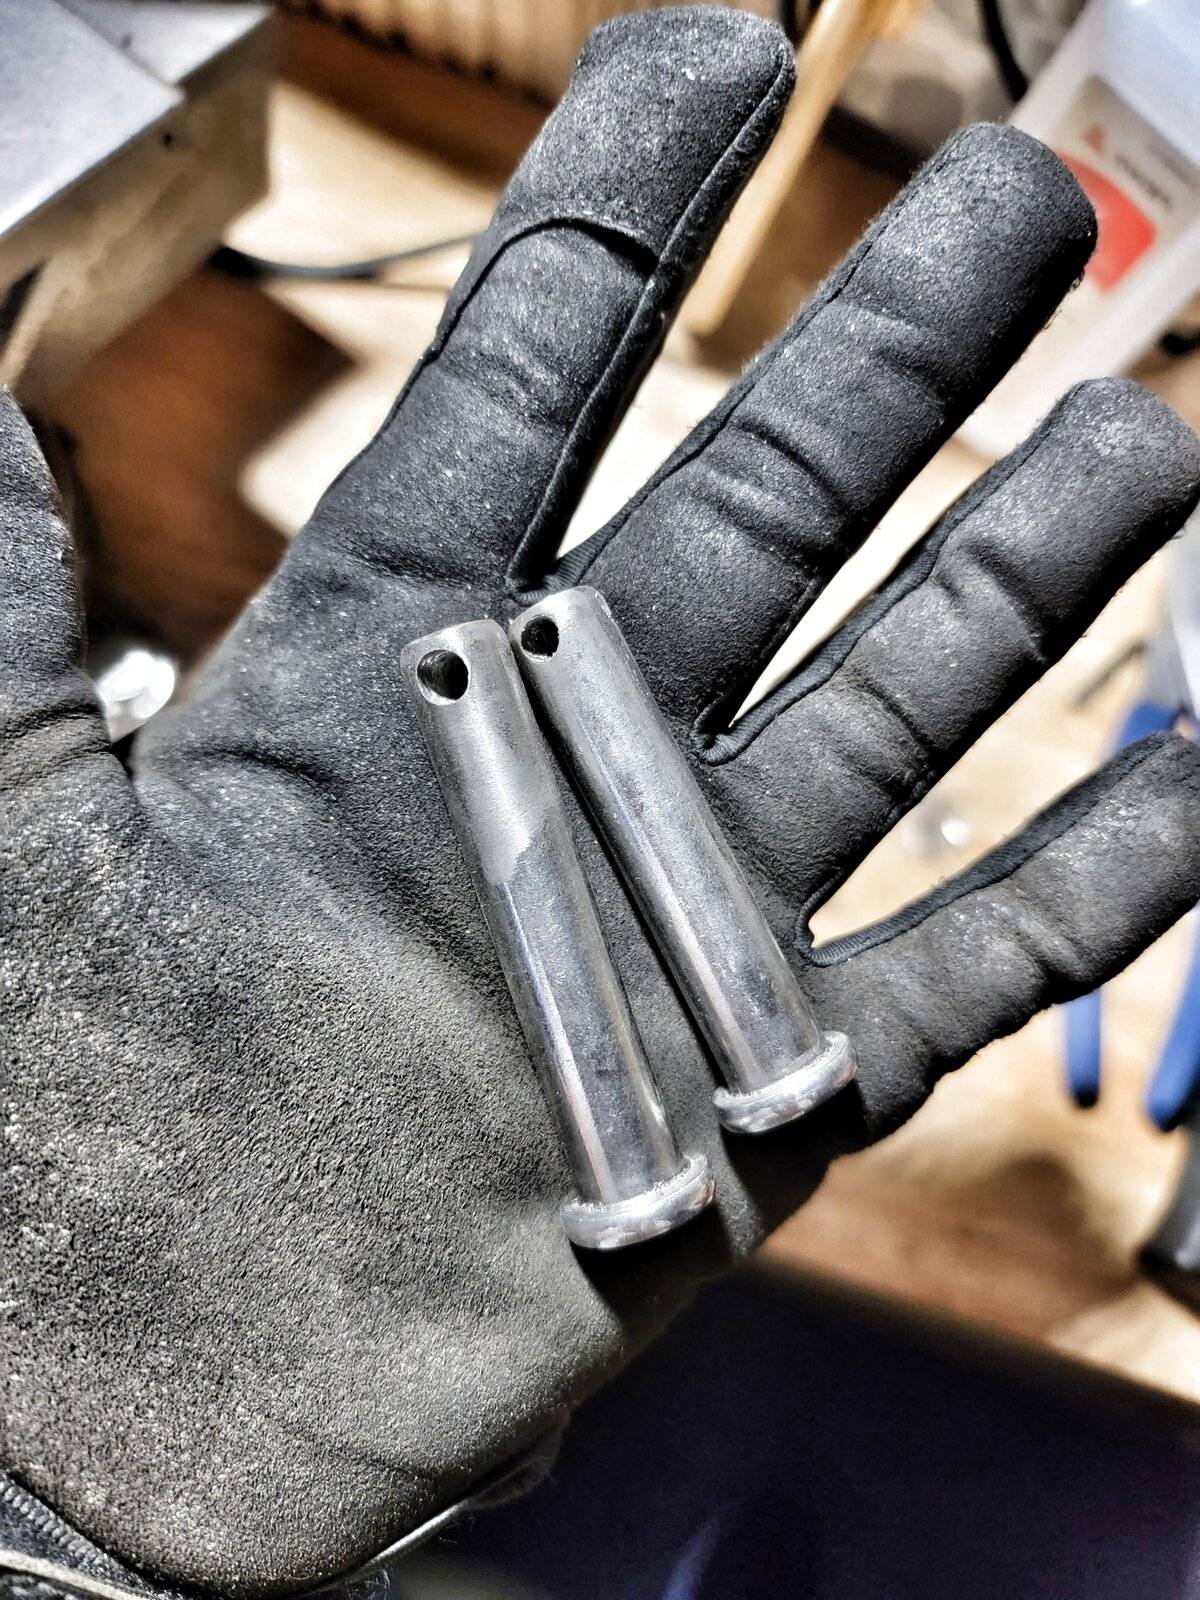
Here are the super duper totally custom quick disconnects I made for my un-lifted Sport. Total cost was around 20 bucks.
Parts list:
- M12 x 55mm clevis pin x 1
- M12 x 60mm clevis pin x 1
- M4 cotter pins x 2
- M12 washers x 2-4
- Retaining straps x 2
Rundown:
The only stainless M12 clevis pins I could find were 100mm in length, so I had to cut them down. I cut the driver's side pin shank down to approximately 2.15" (~55mm) and the passenger side 2.35" (~60mm), re-drilled the cotter pin holes and beveled the nose and pin holes. Ideally, you may be able to locate clevis pins already made to these lengths, or close enough to make up the difference with washers and skip all the hassle.

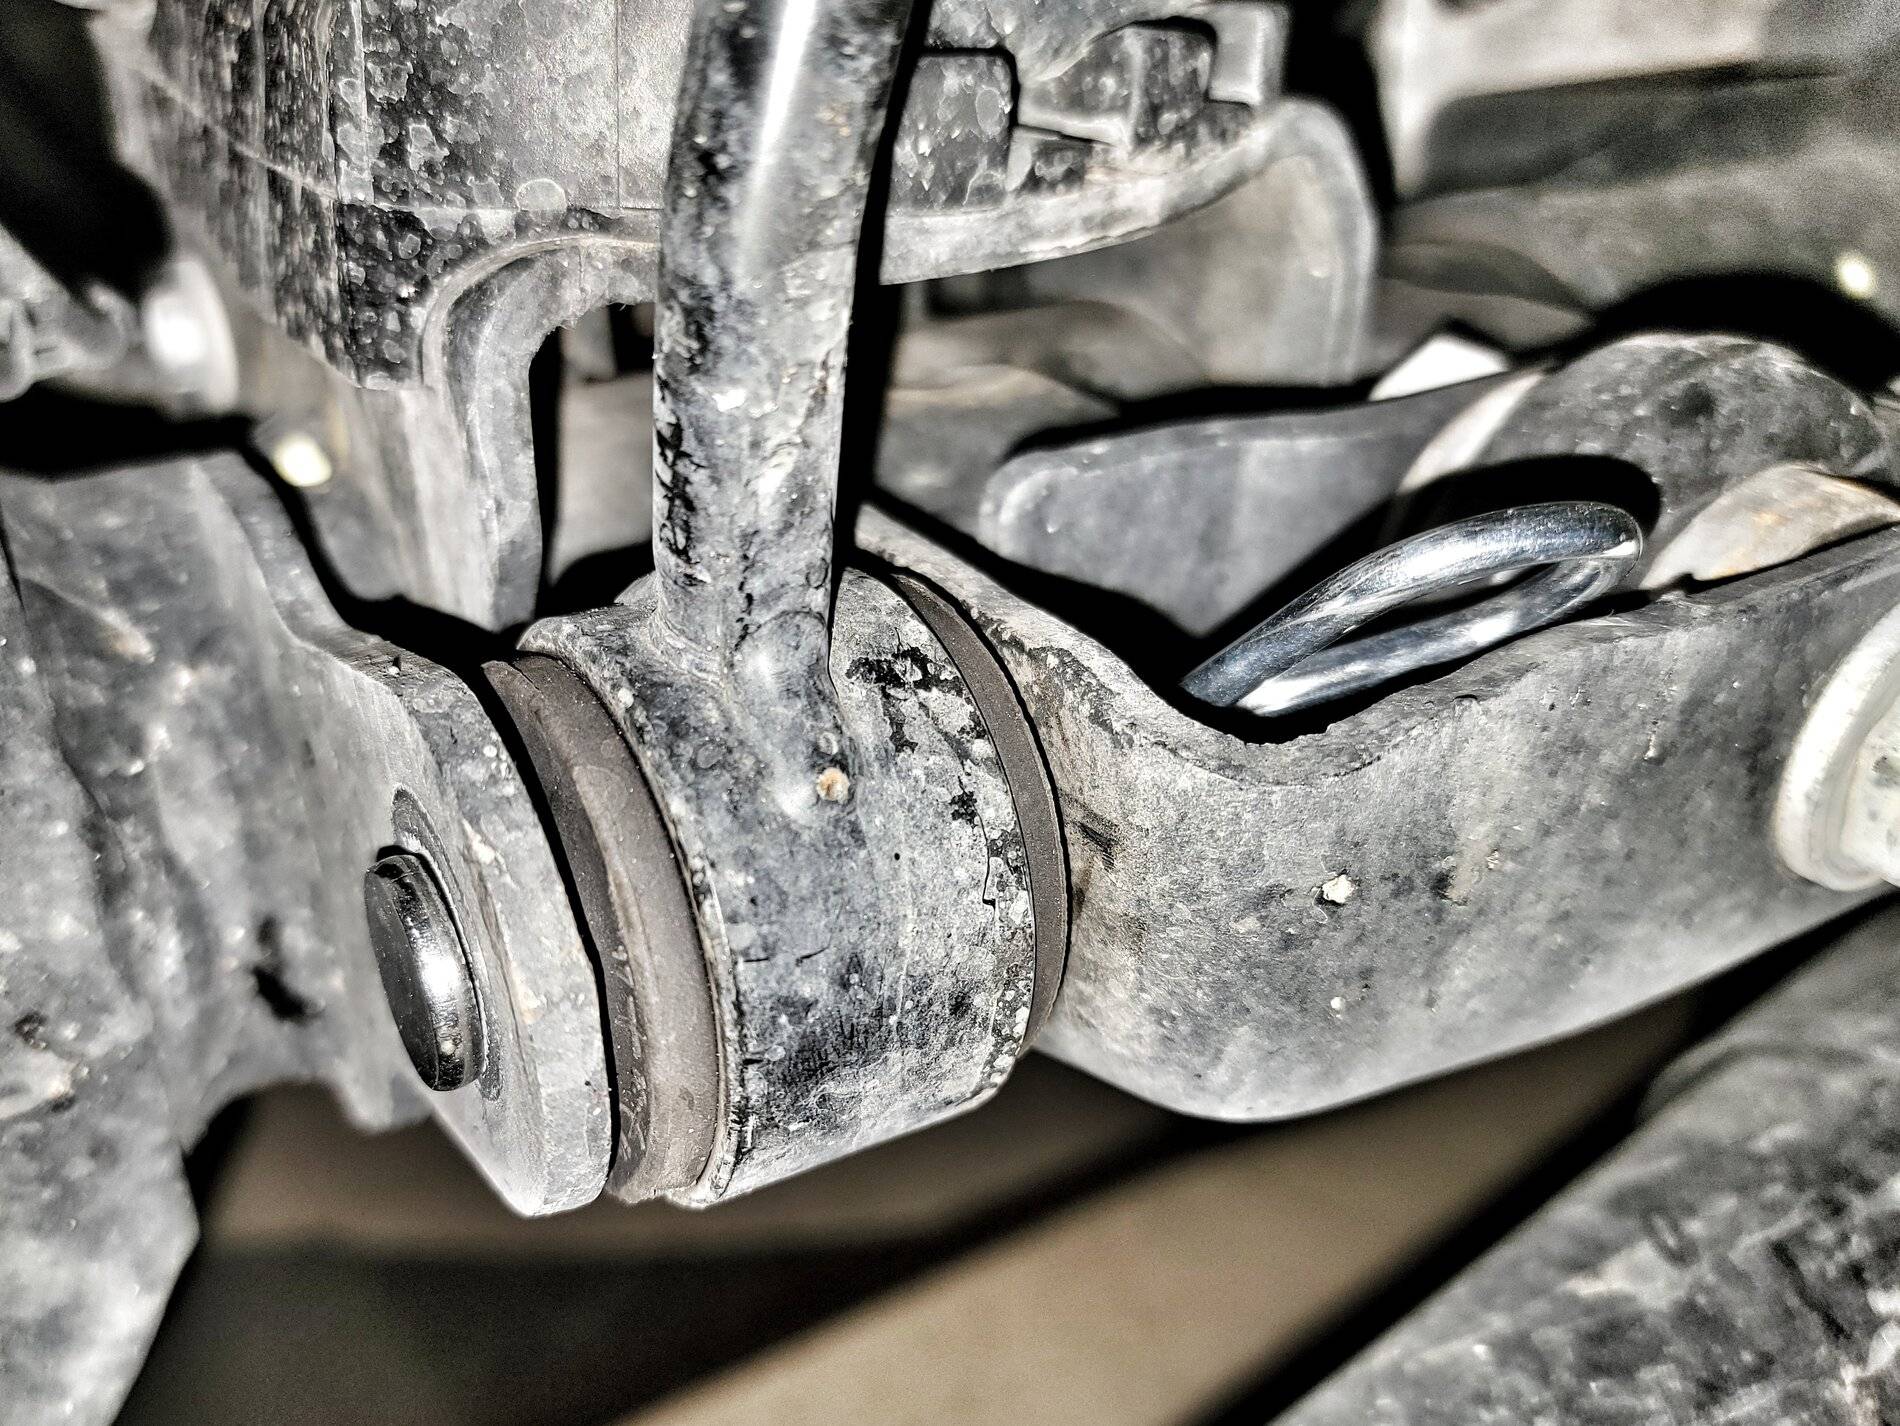
Remove OEM lower link bolts/nuts. IIRC they were 18mm. Test fit your pins and use washers as necessary for a snug fit with minimal slop (especially on the driver's side where it only mounts to the axle with a single tab for whatever reason). I didn't have washers in place for the photos but fitment was loose without them.
The cotter pins I got also fit the clevis shanks loosely, so I used the bench vise to squish the two halves together for snug retention. YMMV.

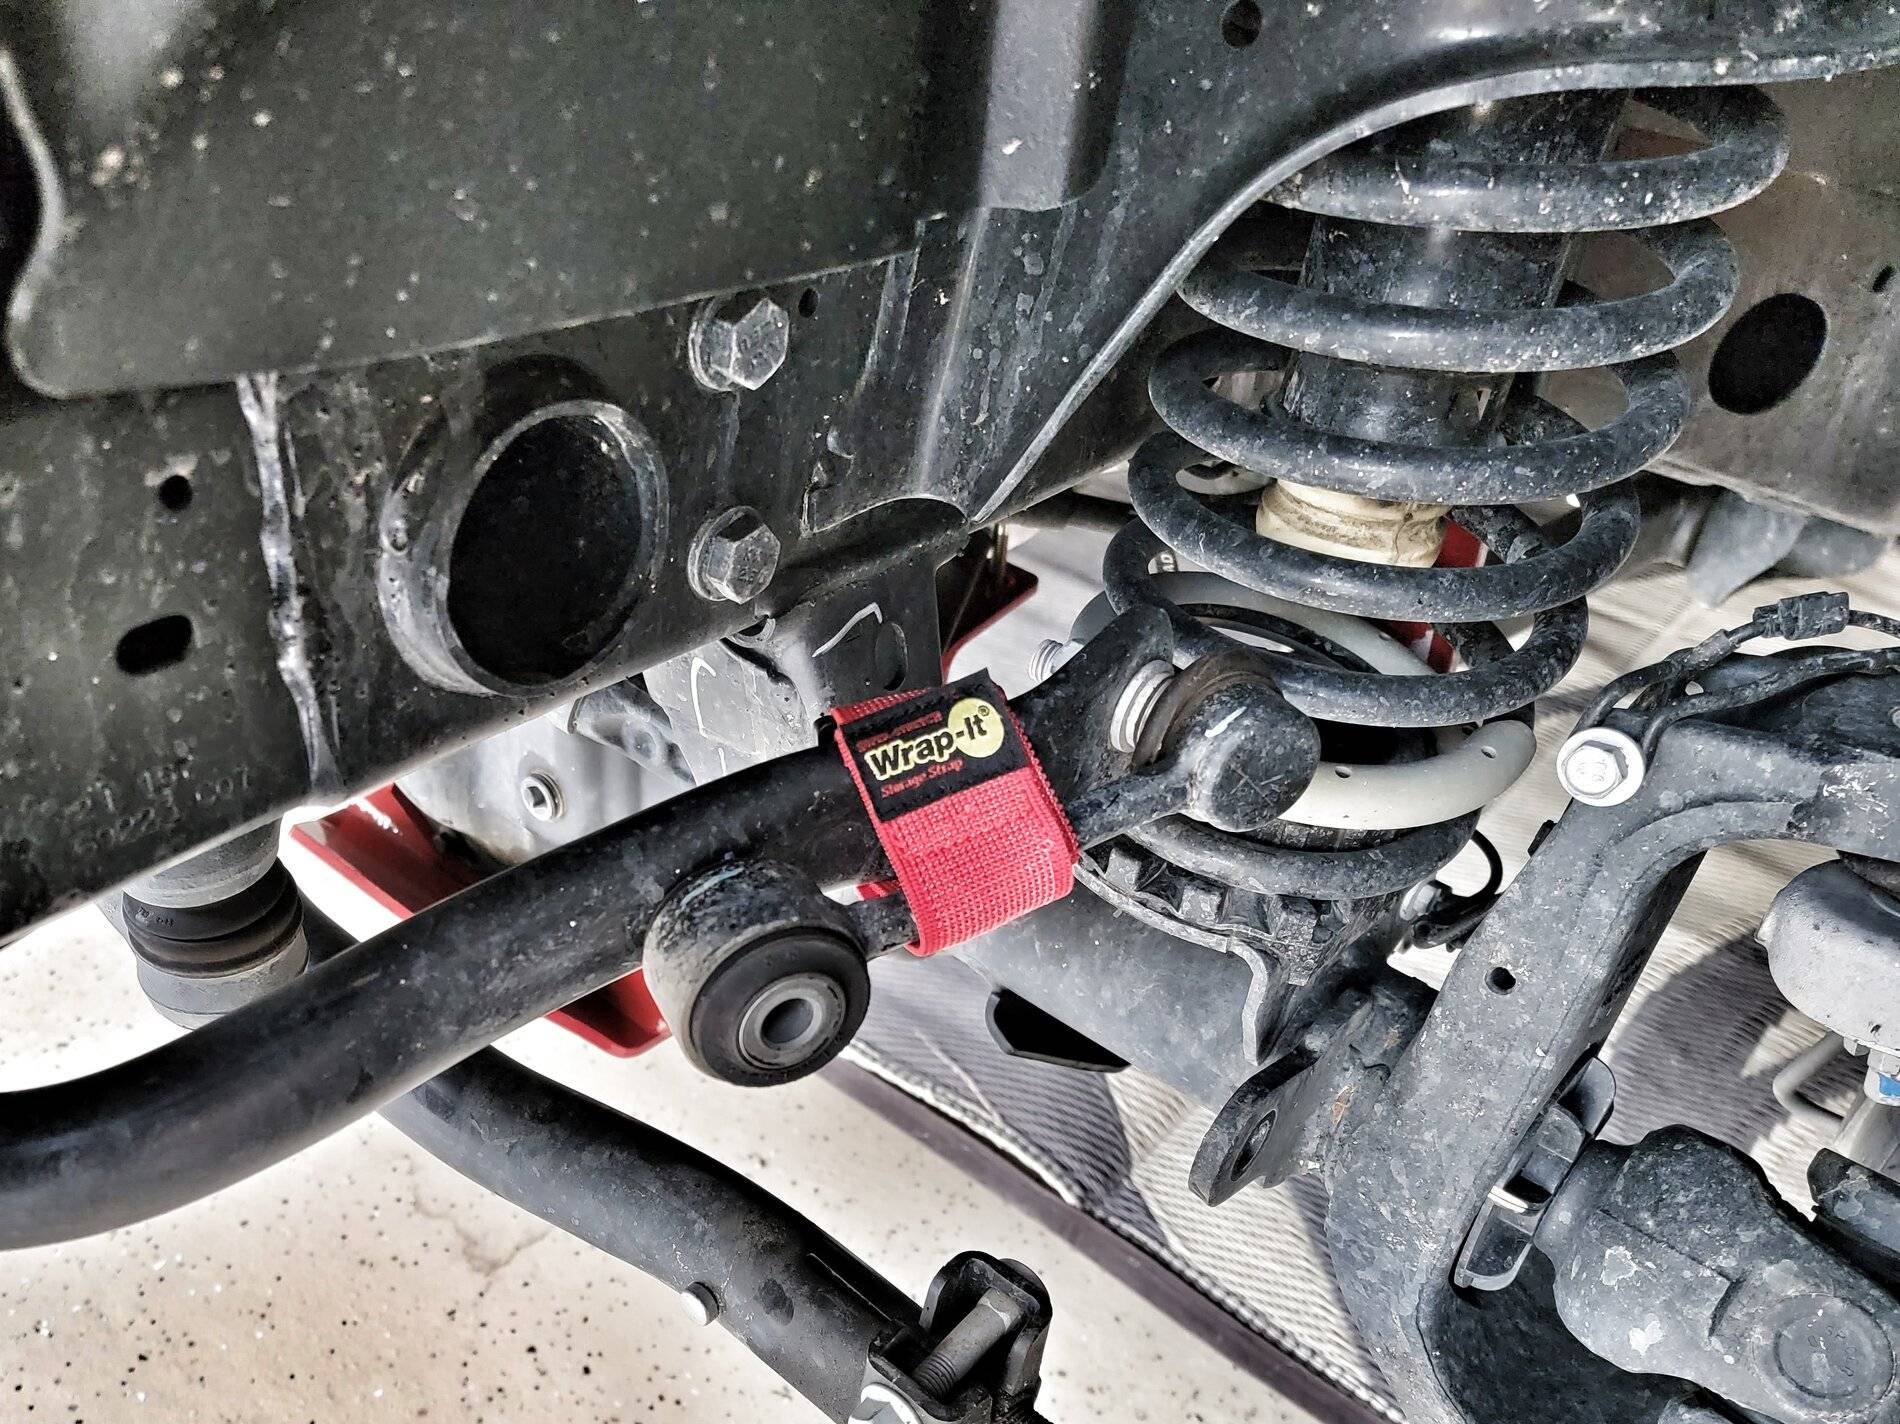
When disconnecting, use the straps to secure the links to the bar. Rocket science.

Enjoy the enhanced flexibility.
Parts list:
- M12 x 55mm clevis pin x 1
- M12 x 60mm clevis pin x 1
- M4 cotter pins x 2
- M12 washers x 2-4
- Retaining straps x 2
Rundown:
The only stainless M12 clevis pins I could find were 100mm in length, so I had to cut them down. I cut the driver's side pin shank down to approximately 2.15" (~55mm) and the passenger side 2.35" (~60mm), re-drilled the cotter pin holes and beveled the nose and pin holes. Ideally, you may be able to locate clevis pins already made to these lengths, or close enough to make up the difference with washers and skip all the hassle.
Remove OEM lower link bolts/nuts. IIRC they were 18mm. Test fit your pins and use washers as necessary for a snug fit with minimal slop (especially on the driver's side where it only mounts to the axle with a single tab for whatever reason). I didn't have washers in place for the photos but fitment was loose without them.
The cotter pins I got also fit the clevis shanks loosely, so I used the bench vise to squish the two halves together for snug retention. YMMV.

When disconnecting, use the straps to secure the links to the bar. Rocket science.
Enjoy the enhanced flexibility.
Sponsored