BradyW
Well-Known Member
- First Name
- Brady
- Joined
- Nov 13, 2021
- Threads
- 13
- Messages
- 360
- Reaction score
- 1,175
- Location
- Weatherford TX
- Vehicle(s)
- 2021 392XR
- Vehicle Showcase
- 1
- Thread starter
- #1
I thought I'd post my install experience with this kit on the 392 since it is explicitly left out of the official instructions. The great news is that the 392 process is notably less involved than the standard instructions! With the 392, you don't have to remove any components not affiliated with the power steering pump or make any modifications to brackets to make room for the pressure adjuster. I was a bit intimidated coming into this project, but the pressure adjuster portion of the installation was very straightforward. It took me around 3hrs to install the adjuster, but I could do it again much faster as long as the Jeep is a 392.
Steps:

Steps:
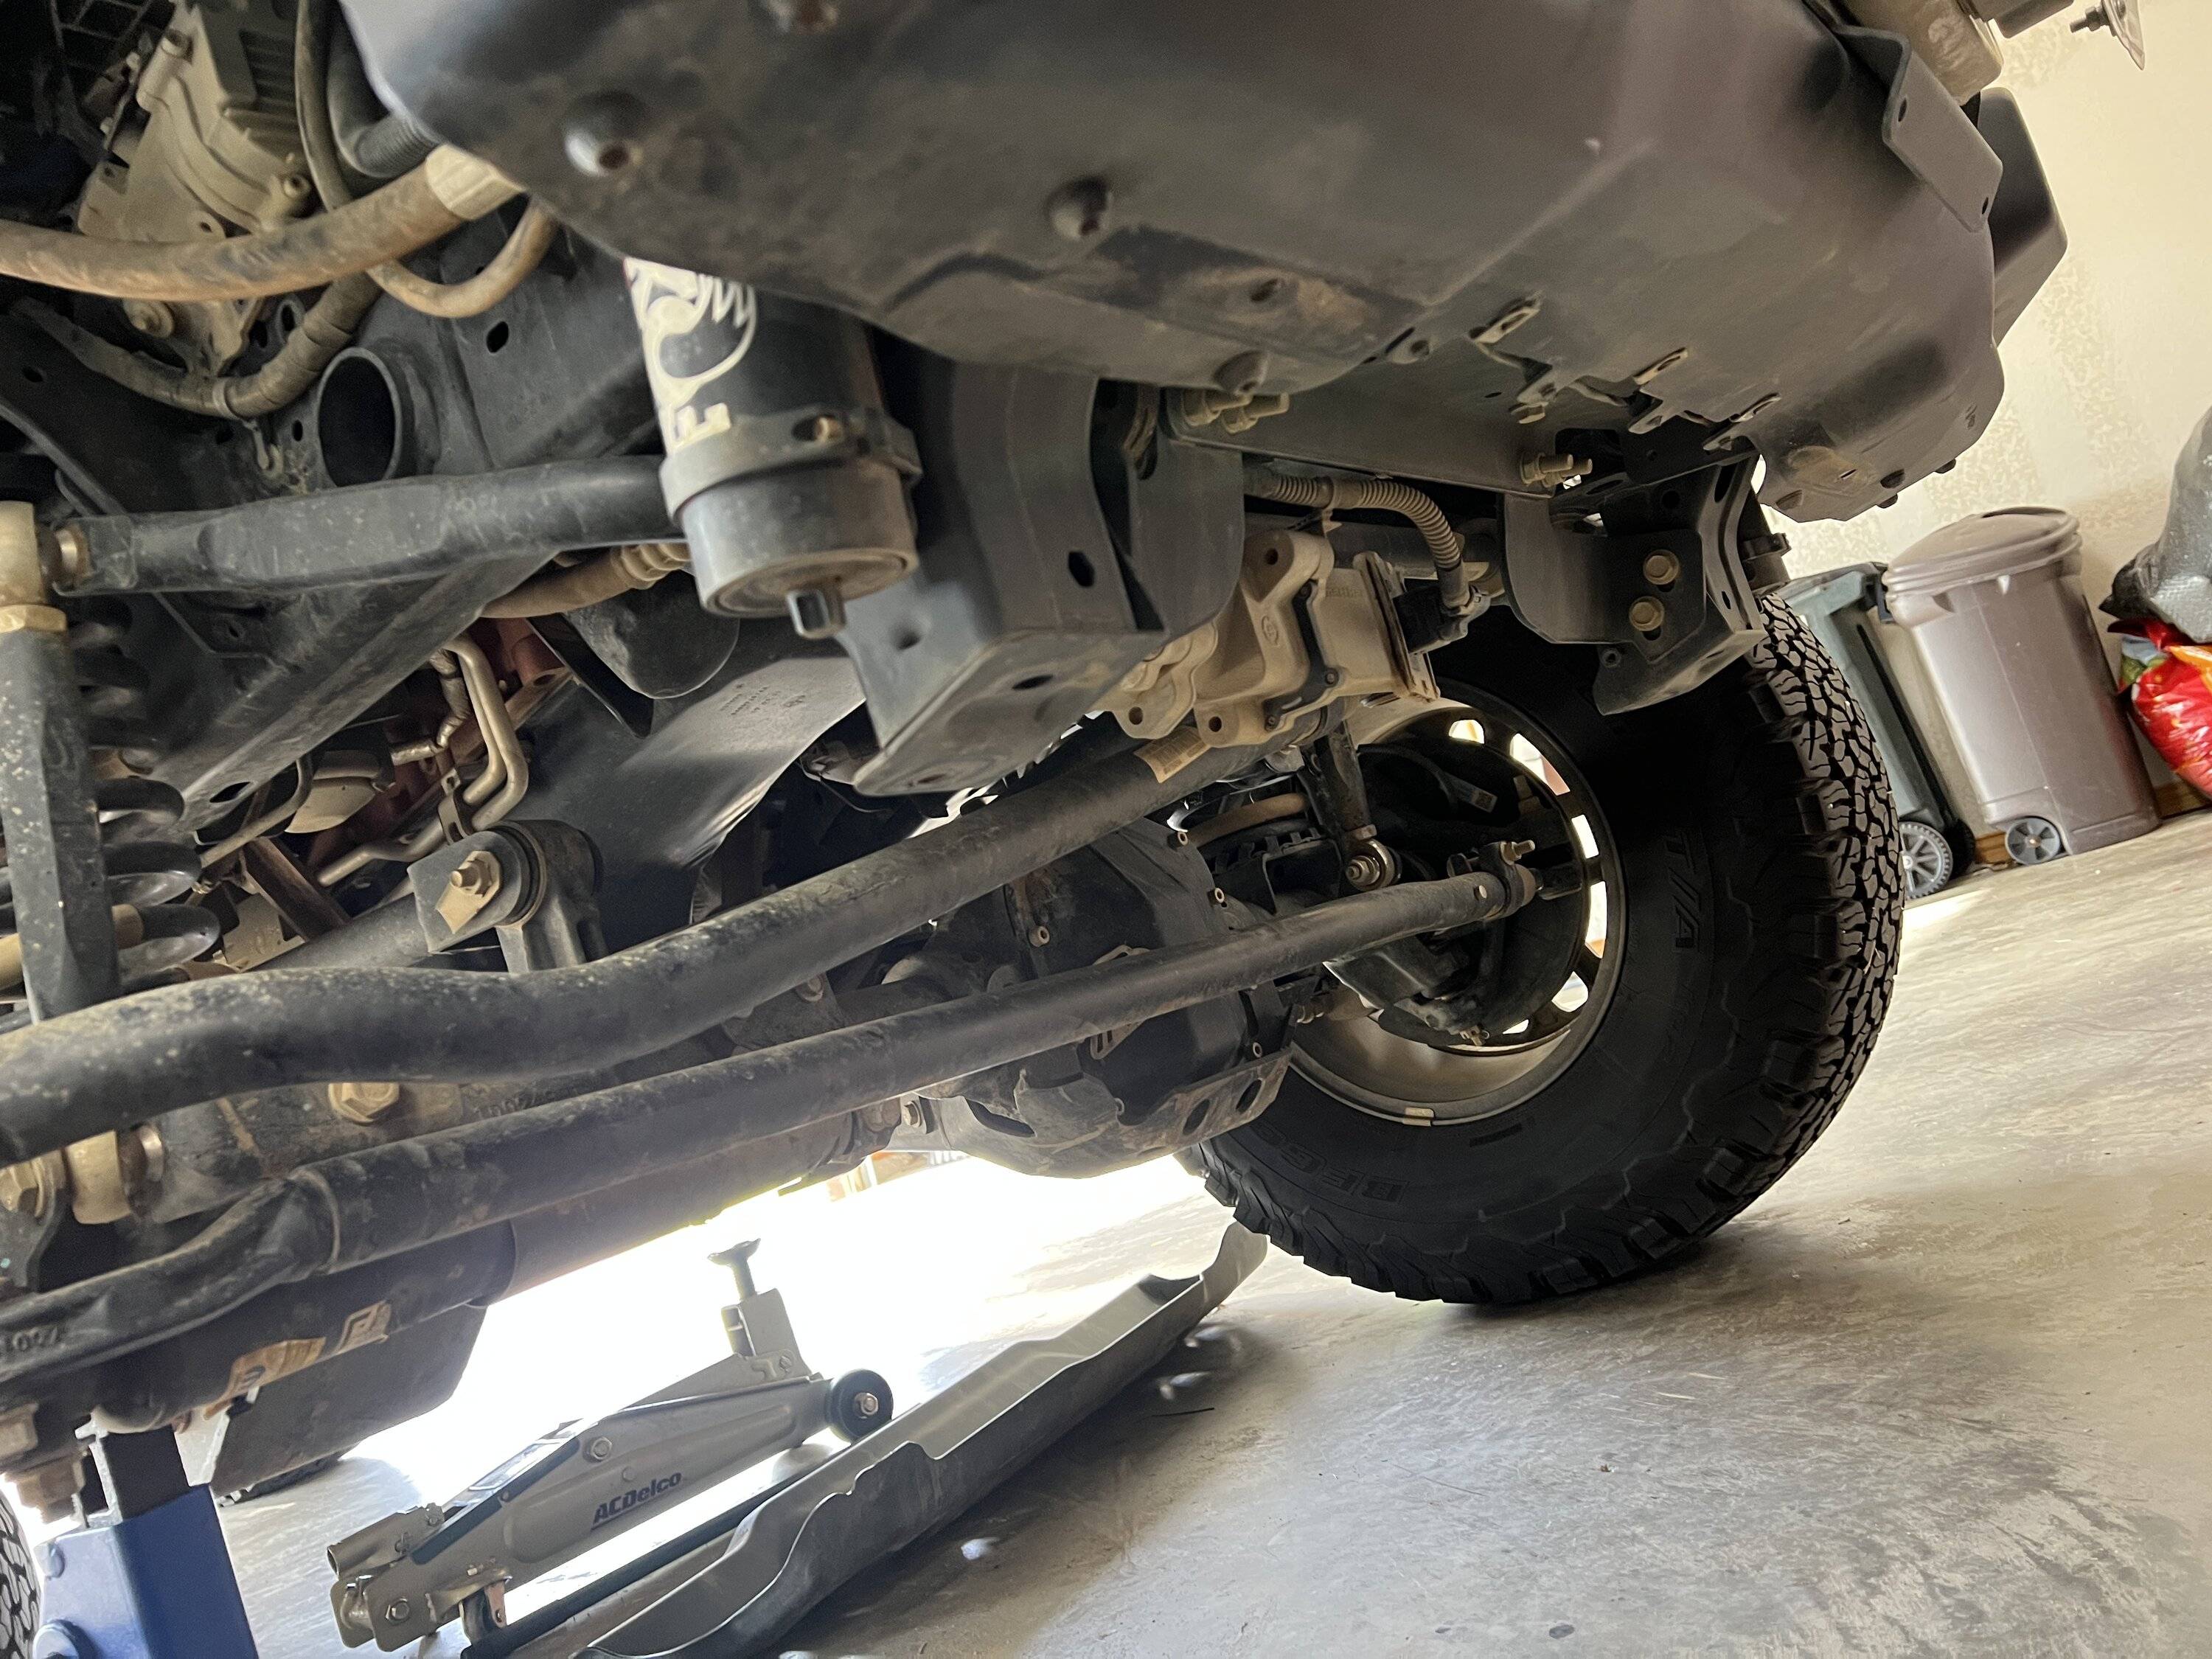
- Support the passenger front axle and remove the front passenger tire
- Remove the lower skid plate from the front bumper if you have one. This step can be done pretty much anytime, but you'll want it off eventually for the oil cooler install.
-
- Pull back the inner fender liner; you don't have to remove it completely
- I'm installing aftermarket inner fender liners immediately after this, so I removed the entire stock liner
- You can see the power steering pump mounted to the frame rail just in front of the coil spring bucket
-

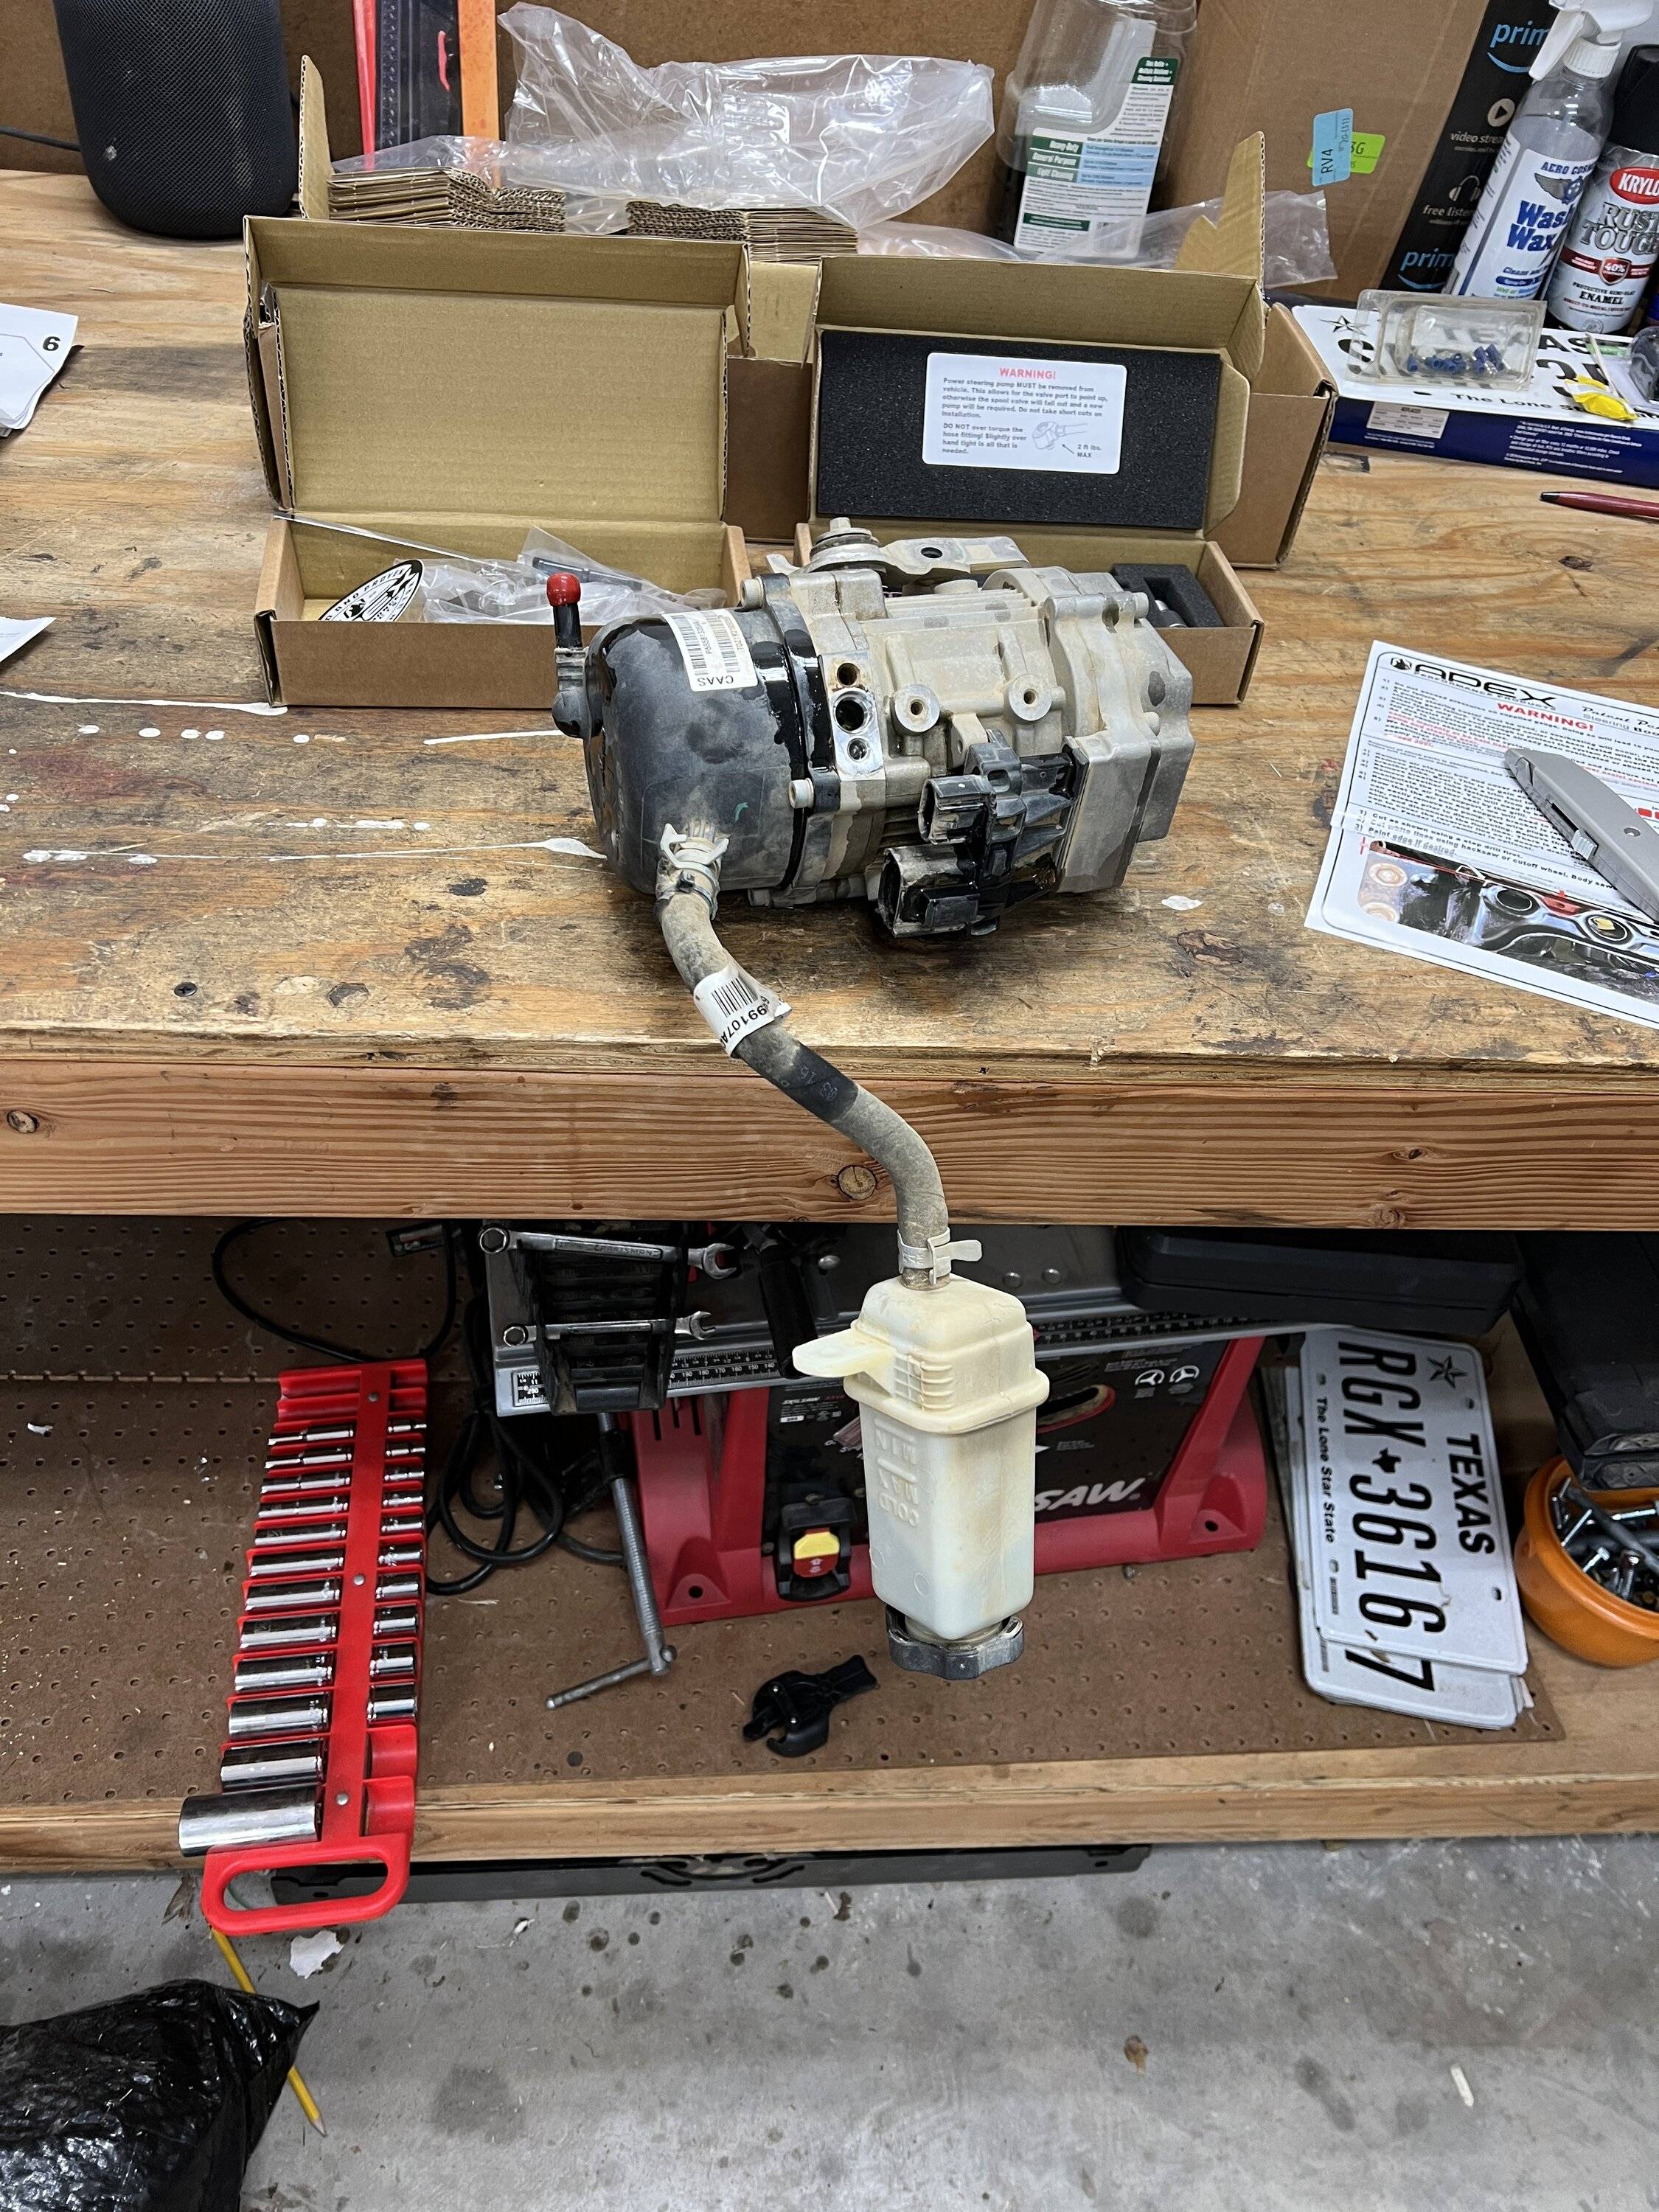
- Unhook the power steering fluid reservoir.
-
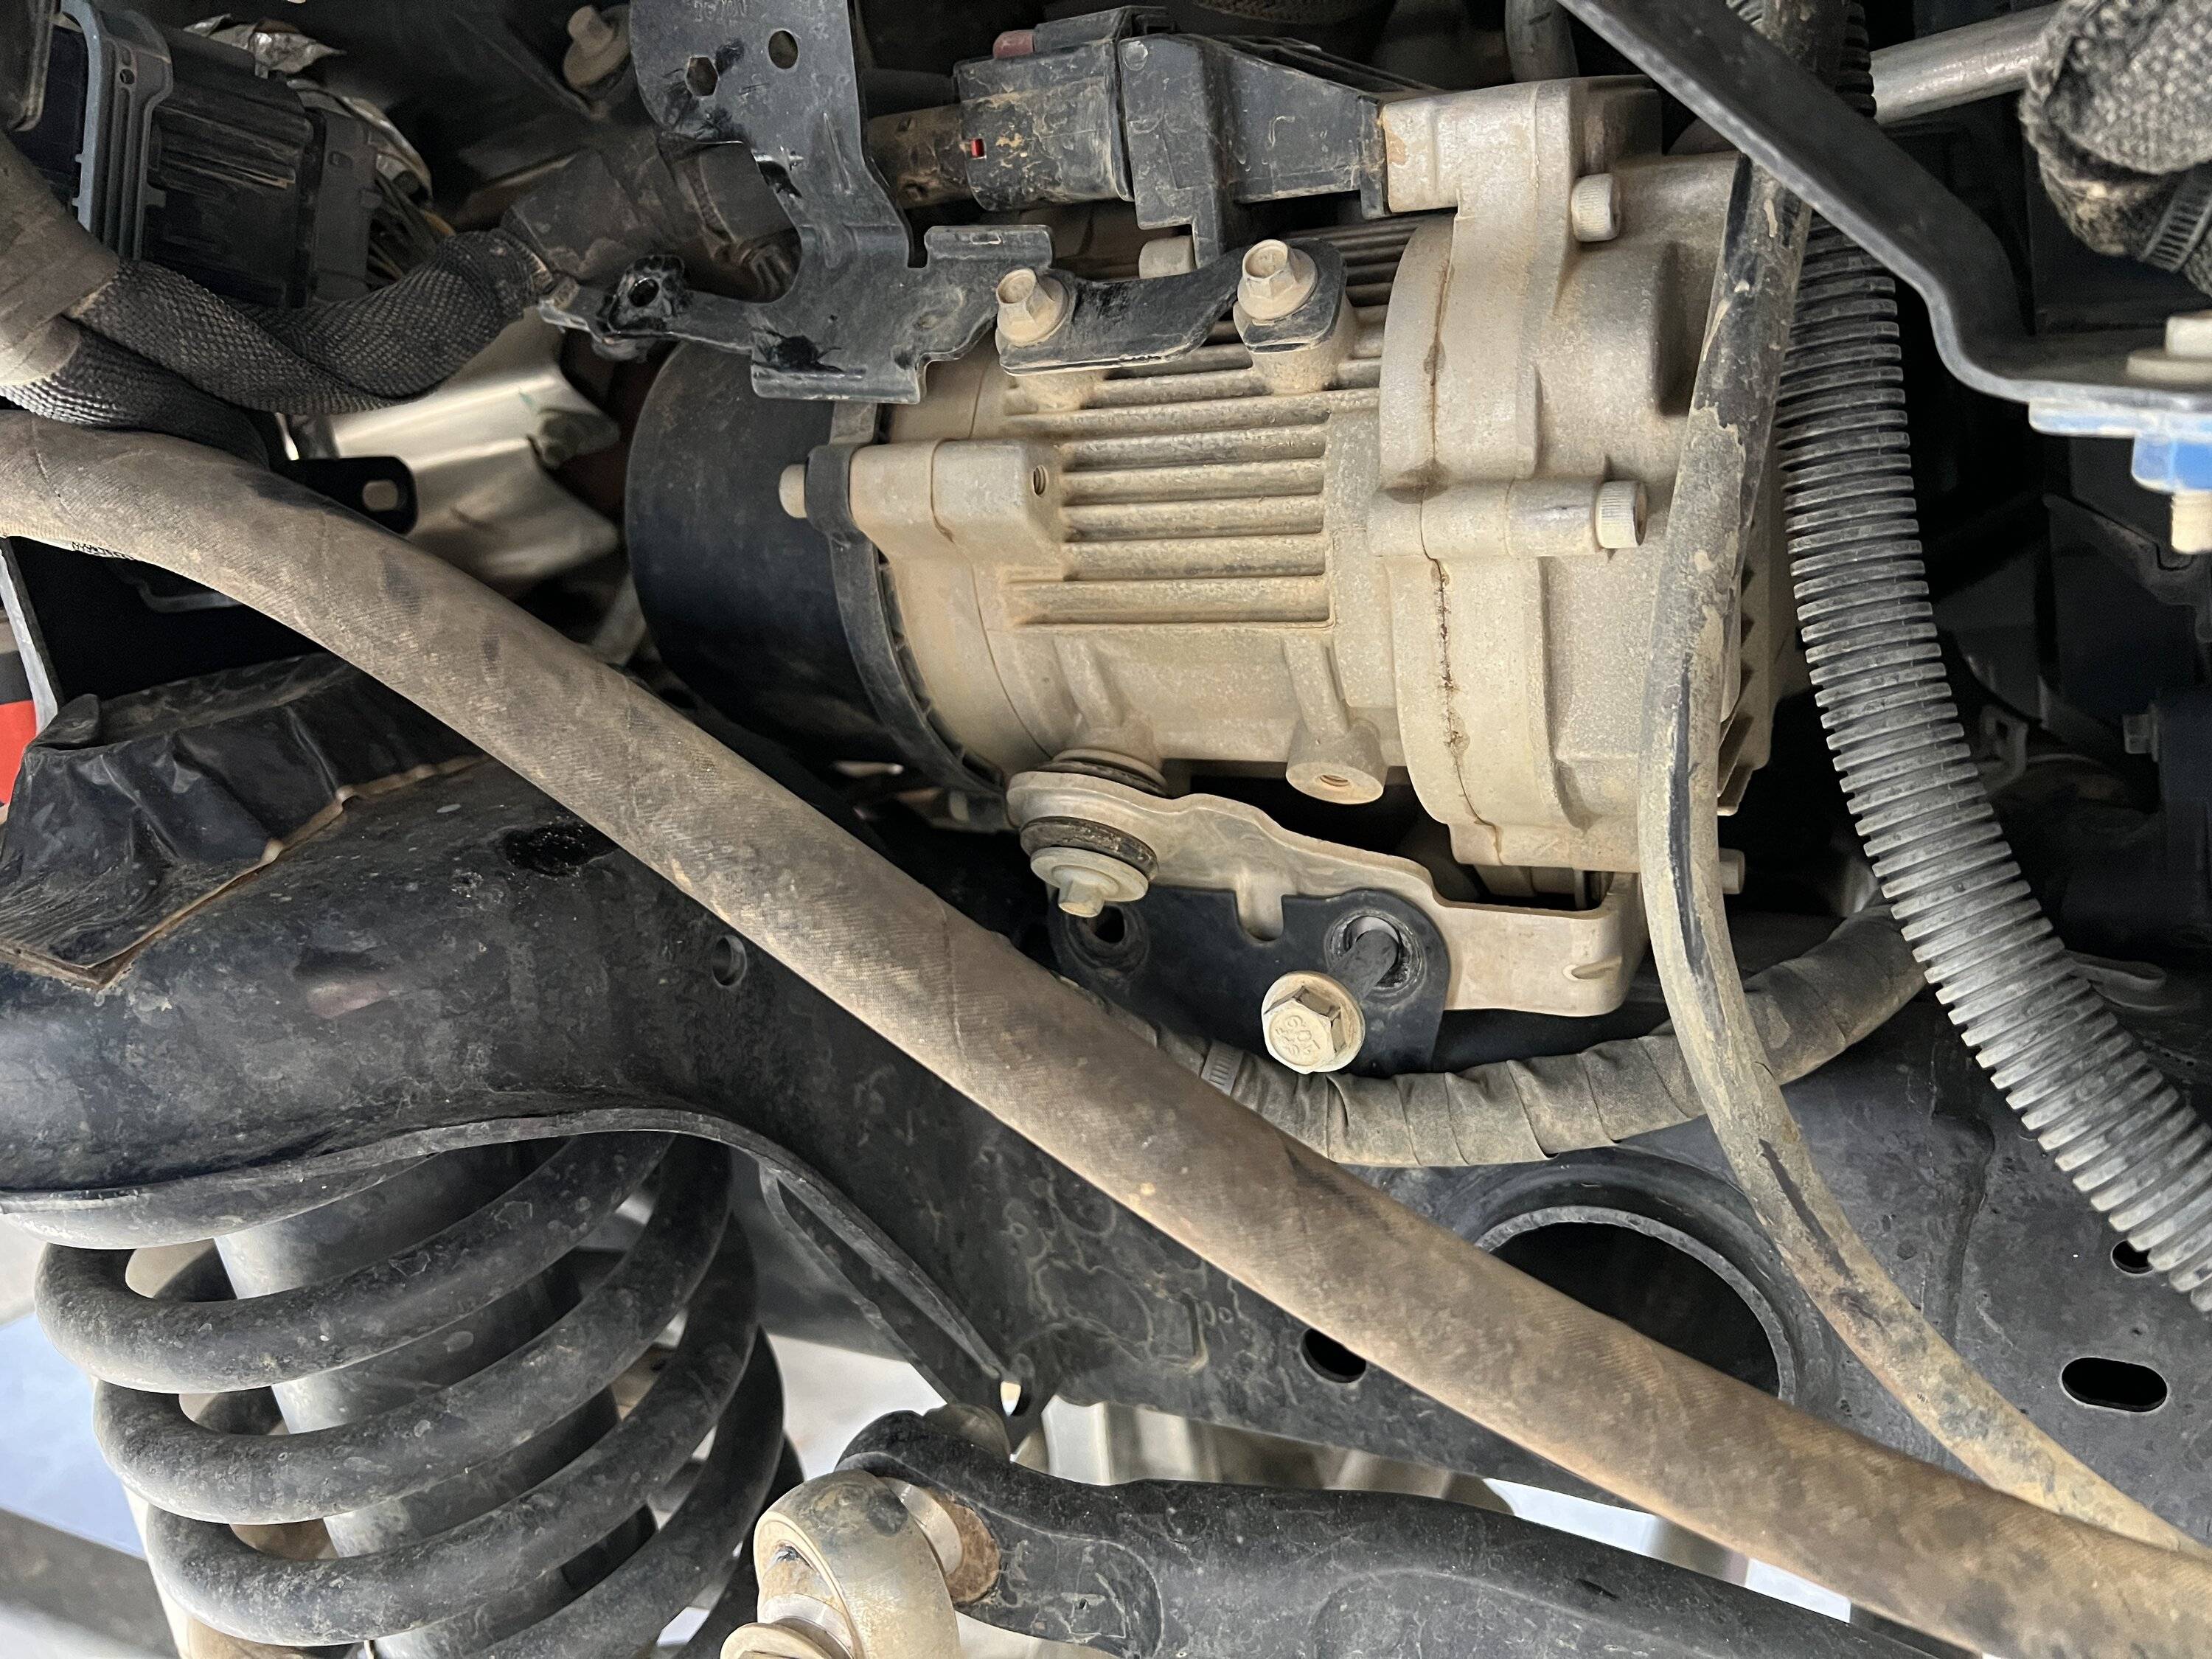
- Remove the bracket that has the wiring harness clip attached to the end; this bracket is mounted with two 8mm bolts and is located just below the wiring plugs. I did not do this in the photo below. I removed the wiring harness from the bracket and then ended up removing the bracket from the pump at a later time. It would be easier to just remove the bracket with the harness still attached and fold it out of the way.
- Remove the two bolts holding the pump to the frame. One bolt is already out, and the second is halfway out below. The harness bracket mentioned in the bullet above is also visible here.
-
- Remove the bolt from the high-pressure fitting. This bolt is just behind the wiring harness; the black fitting just under the bolt has green paint on it in the photo below. Rotate the pump, so the bolt faces upwards, and use a long socket extension bar. When reassembling, you will need to repeat this process with the socket cap screw. It's the only angle where you can get a torque wrench on the bolt.
-
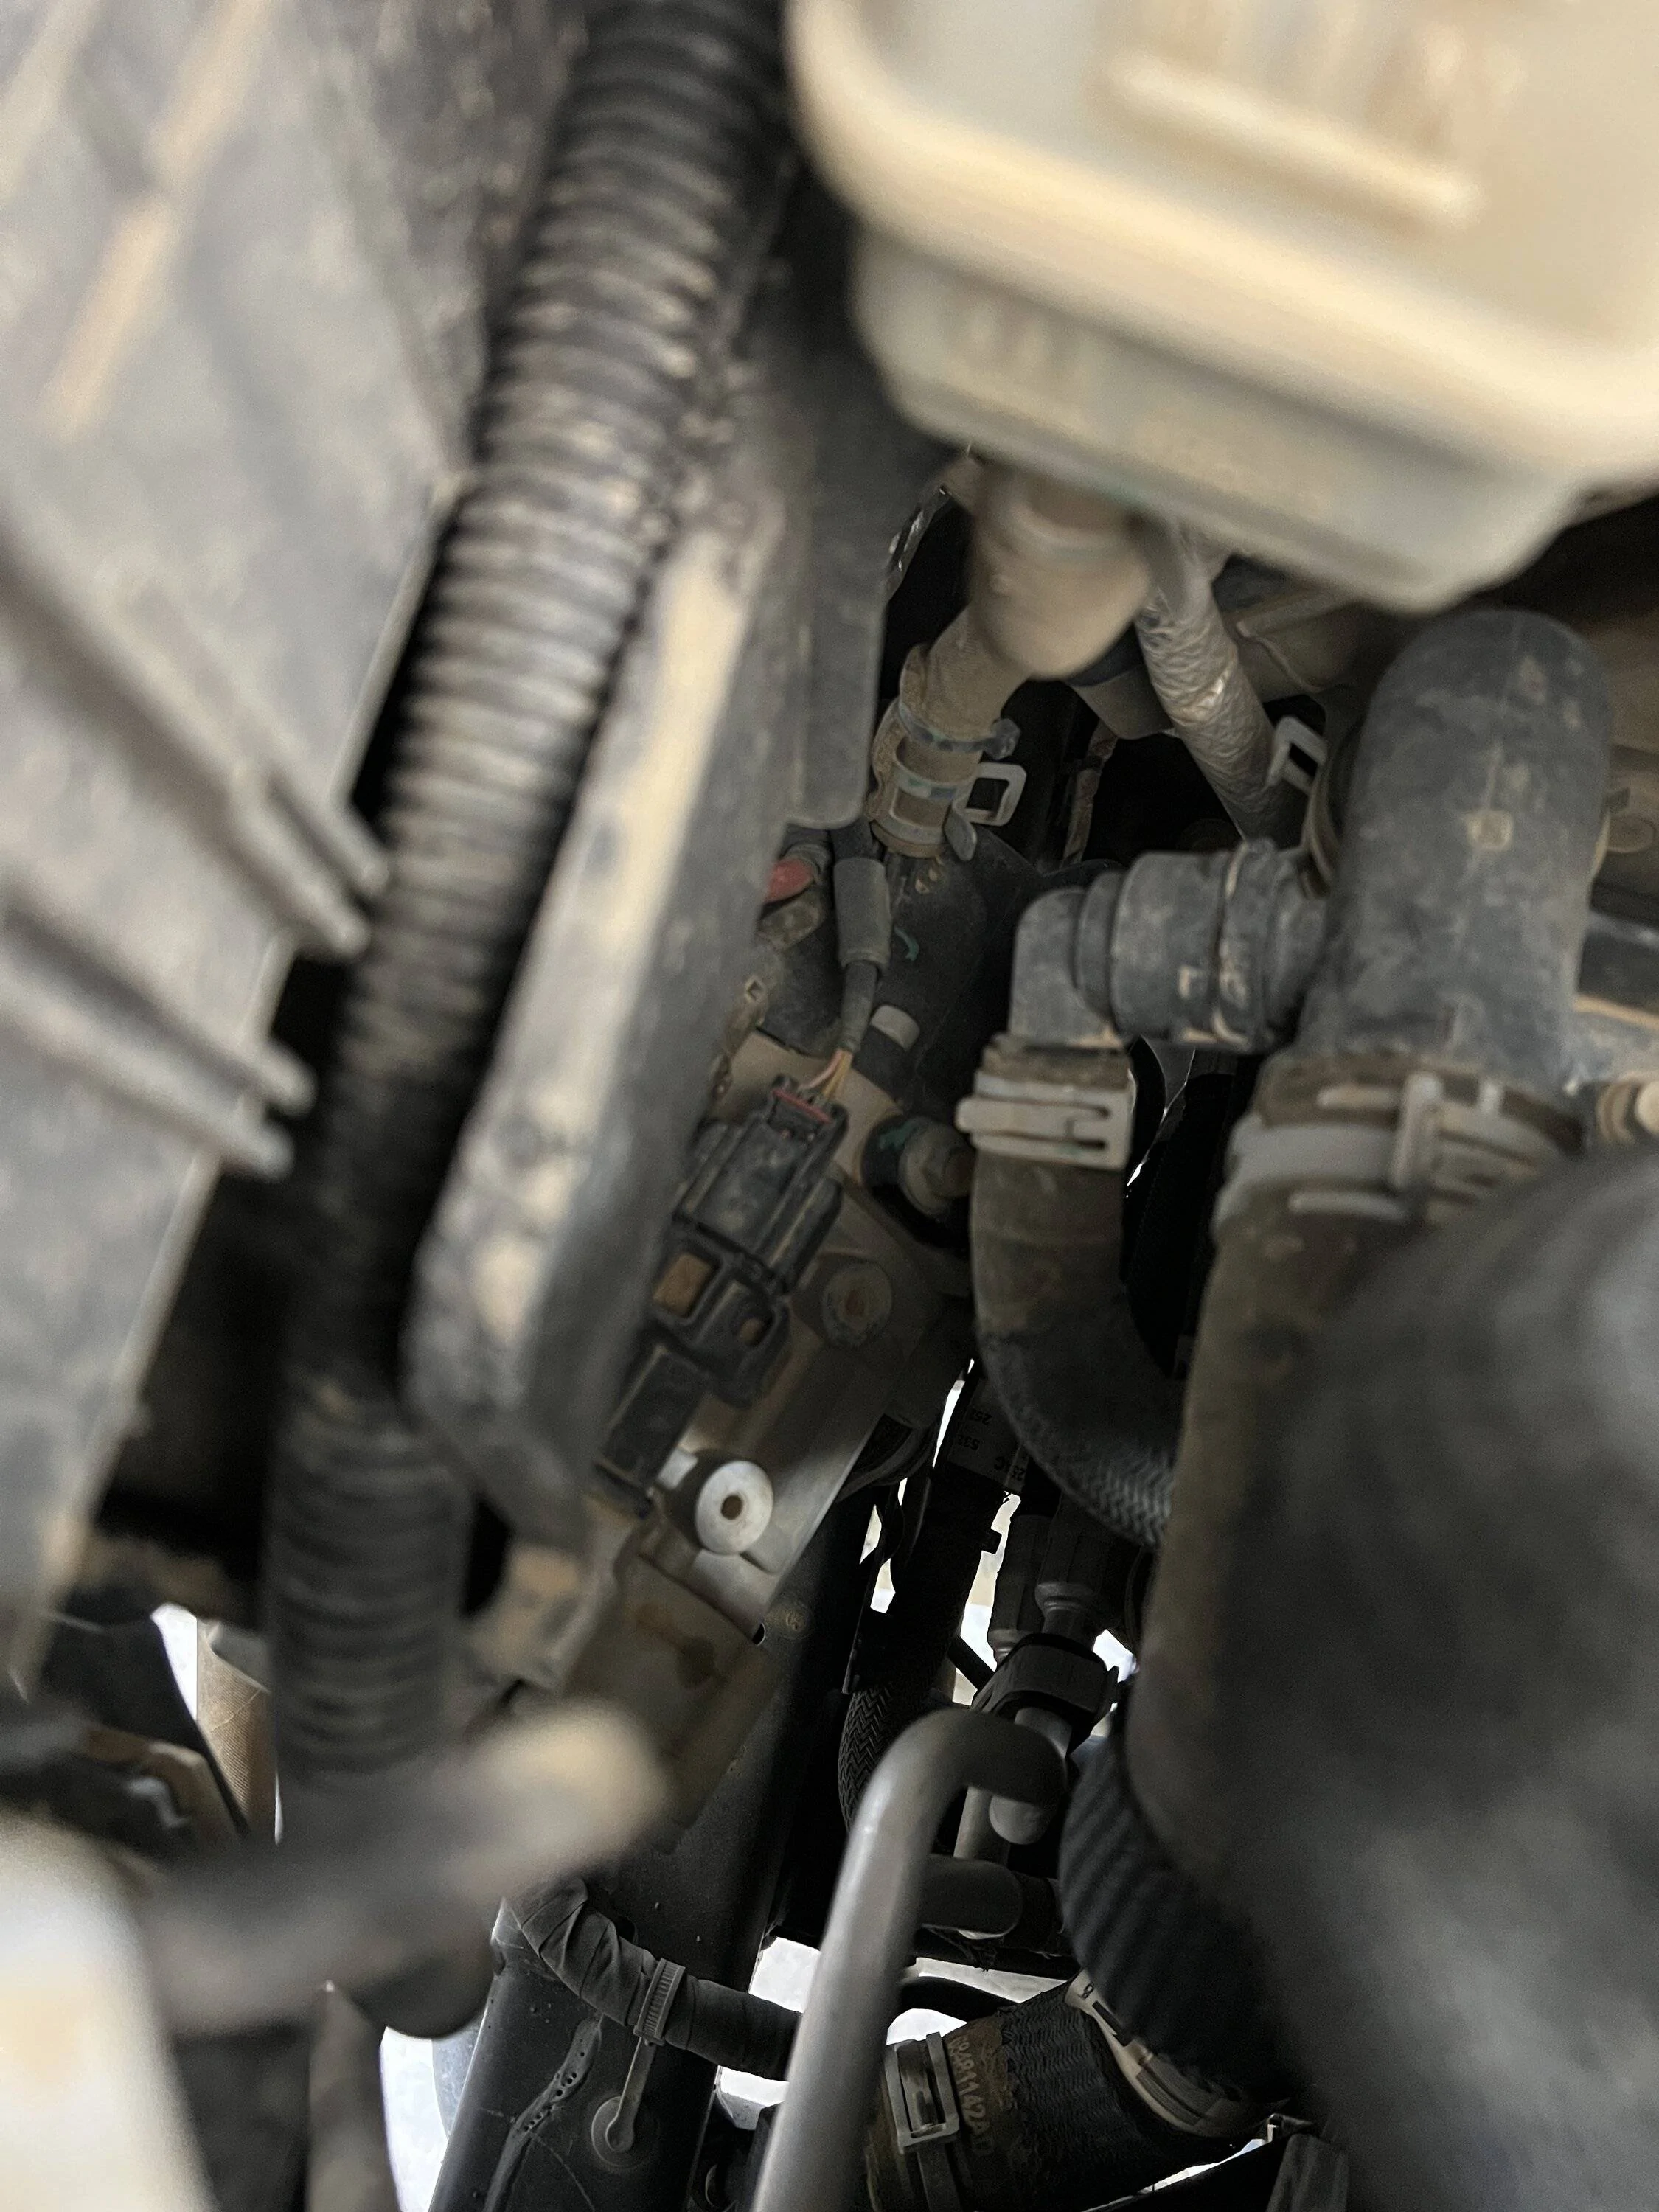
- Push the power steering fluid reservoir down near the pump and rotate the pump out of its bracket and onto the frame rail. This position will give you access to the wiring connectors. Use a flat-bladed screwdriver to release the red locks and pry the connectors apart. Apex has a short video on this step that is worth the watch. Apex tips on wiring connectors
-
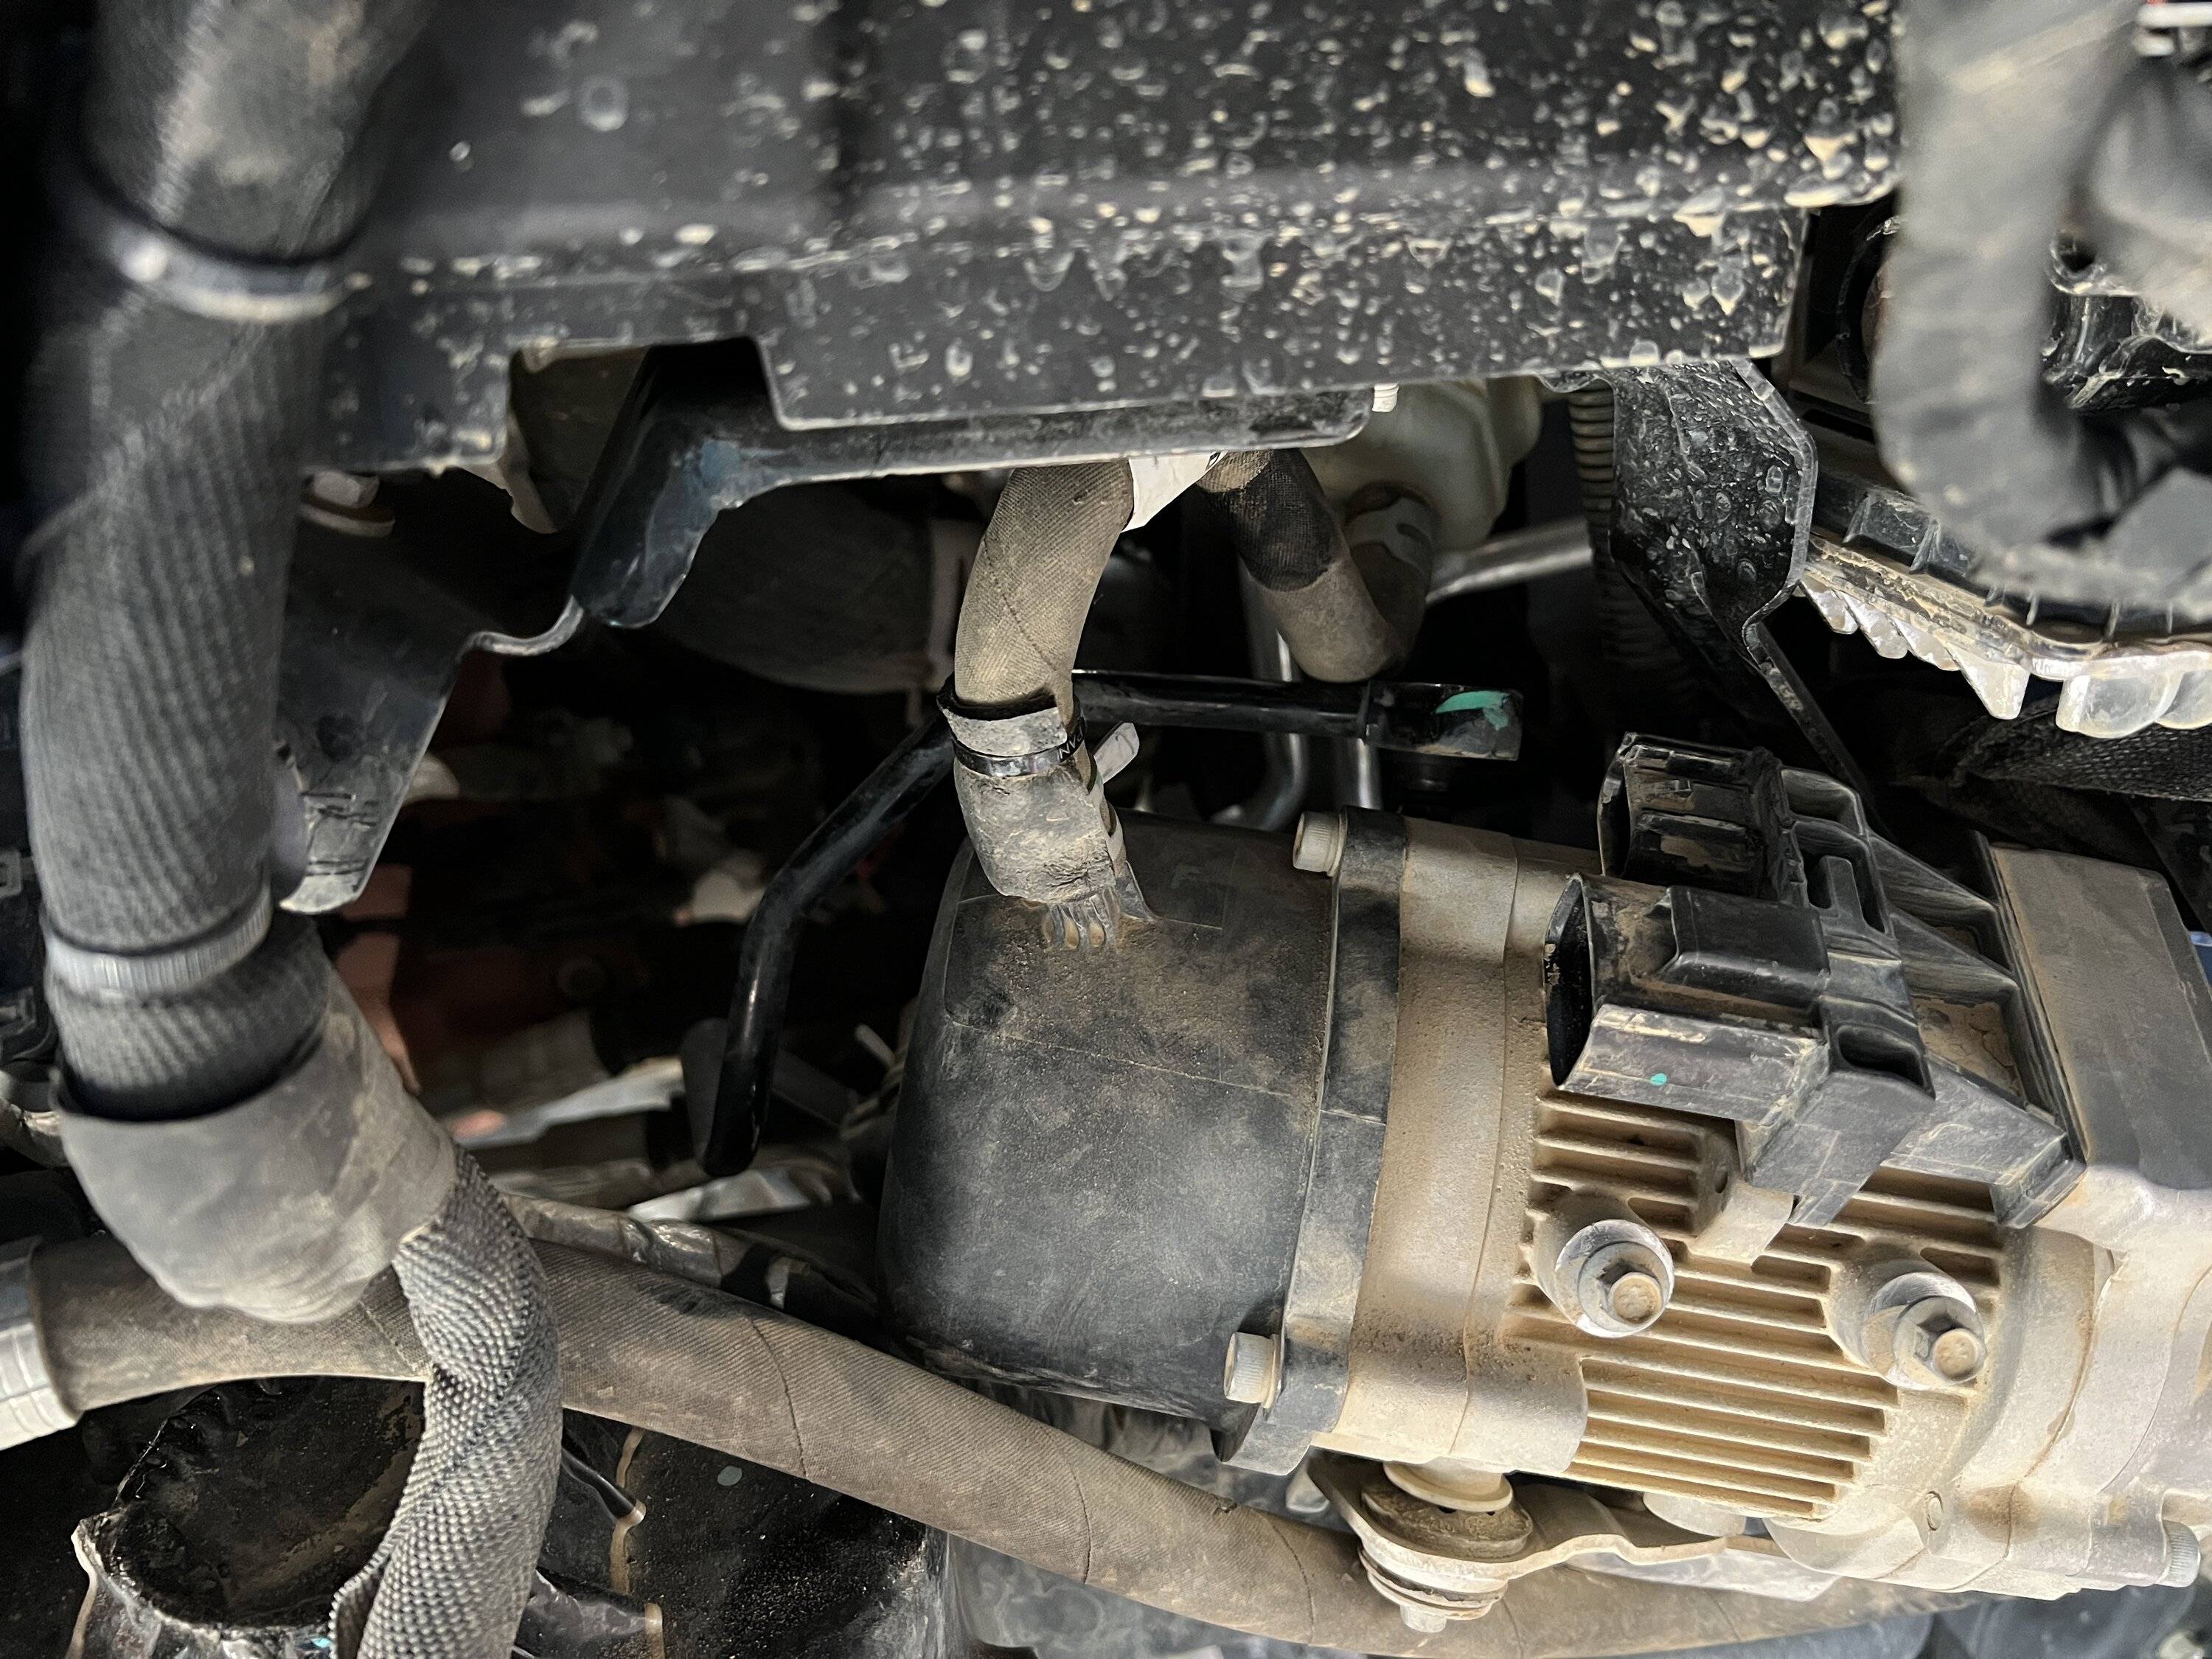
- Separate the high-pressure fitting from the pump; a small flat-bladed screwdriver will help. There are no threads; it pops straight up. The fitting is the black hard tubing shown below with green paint on the end.
-
- Remove the low-pressure hose from the back of the pump. Move the hose clamp away from the barb, and a flat-bladed screwdriver can help get the hose started up the barb. I used the supplied red cap to cover the low-pressure barb after the hose had been removed.
-
- Remove the pump and clean it up a bit. Orient the pump so that the pressure spring is vertical and up. At this point is normal to have mixed feelings about ripping a perfectly fine power steering pump out of your $80,000 commuter vehicle. But don't worry; you're fully committed now anyway; just keep going.
-
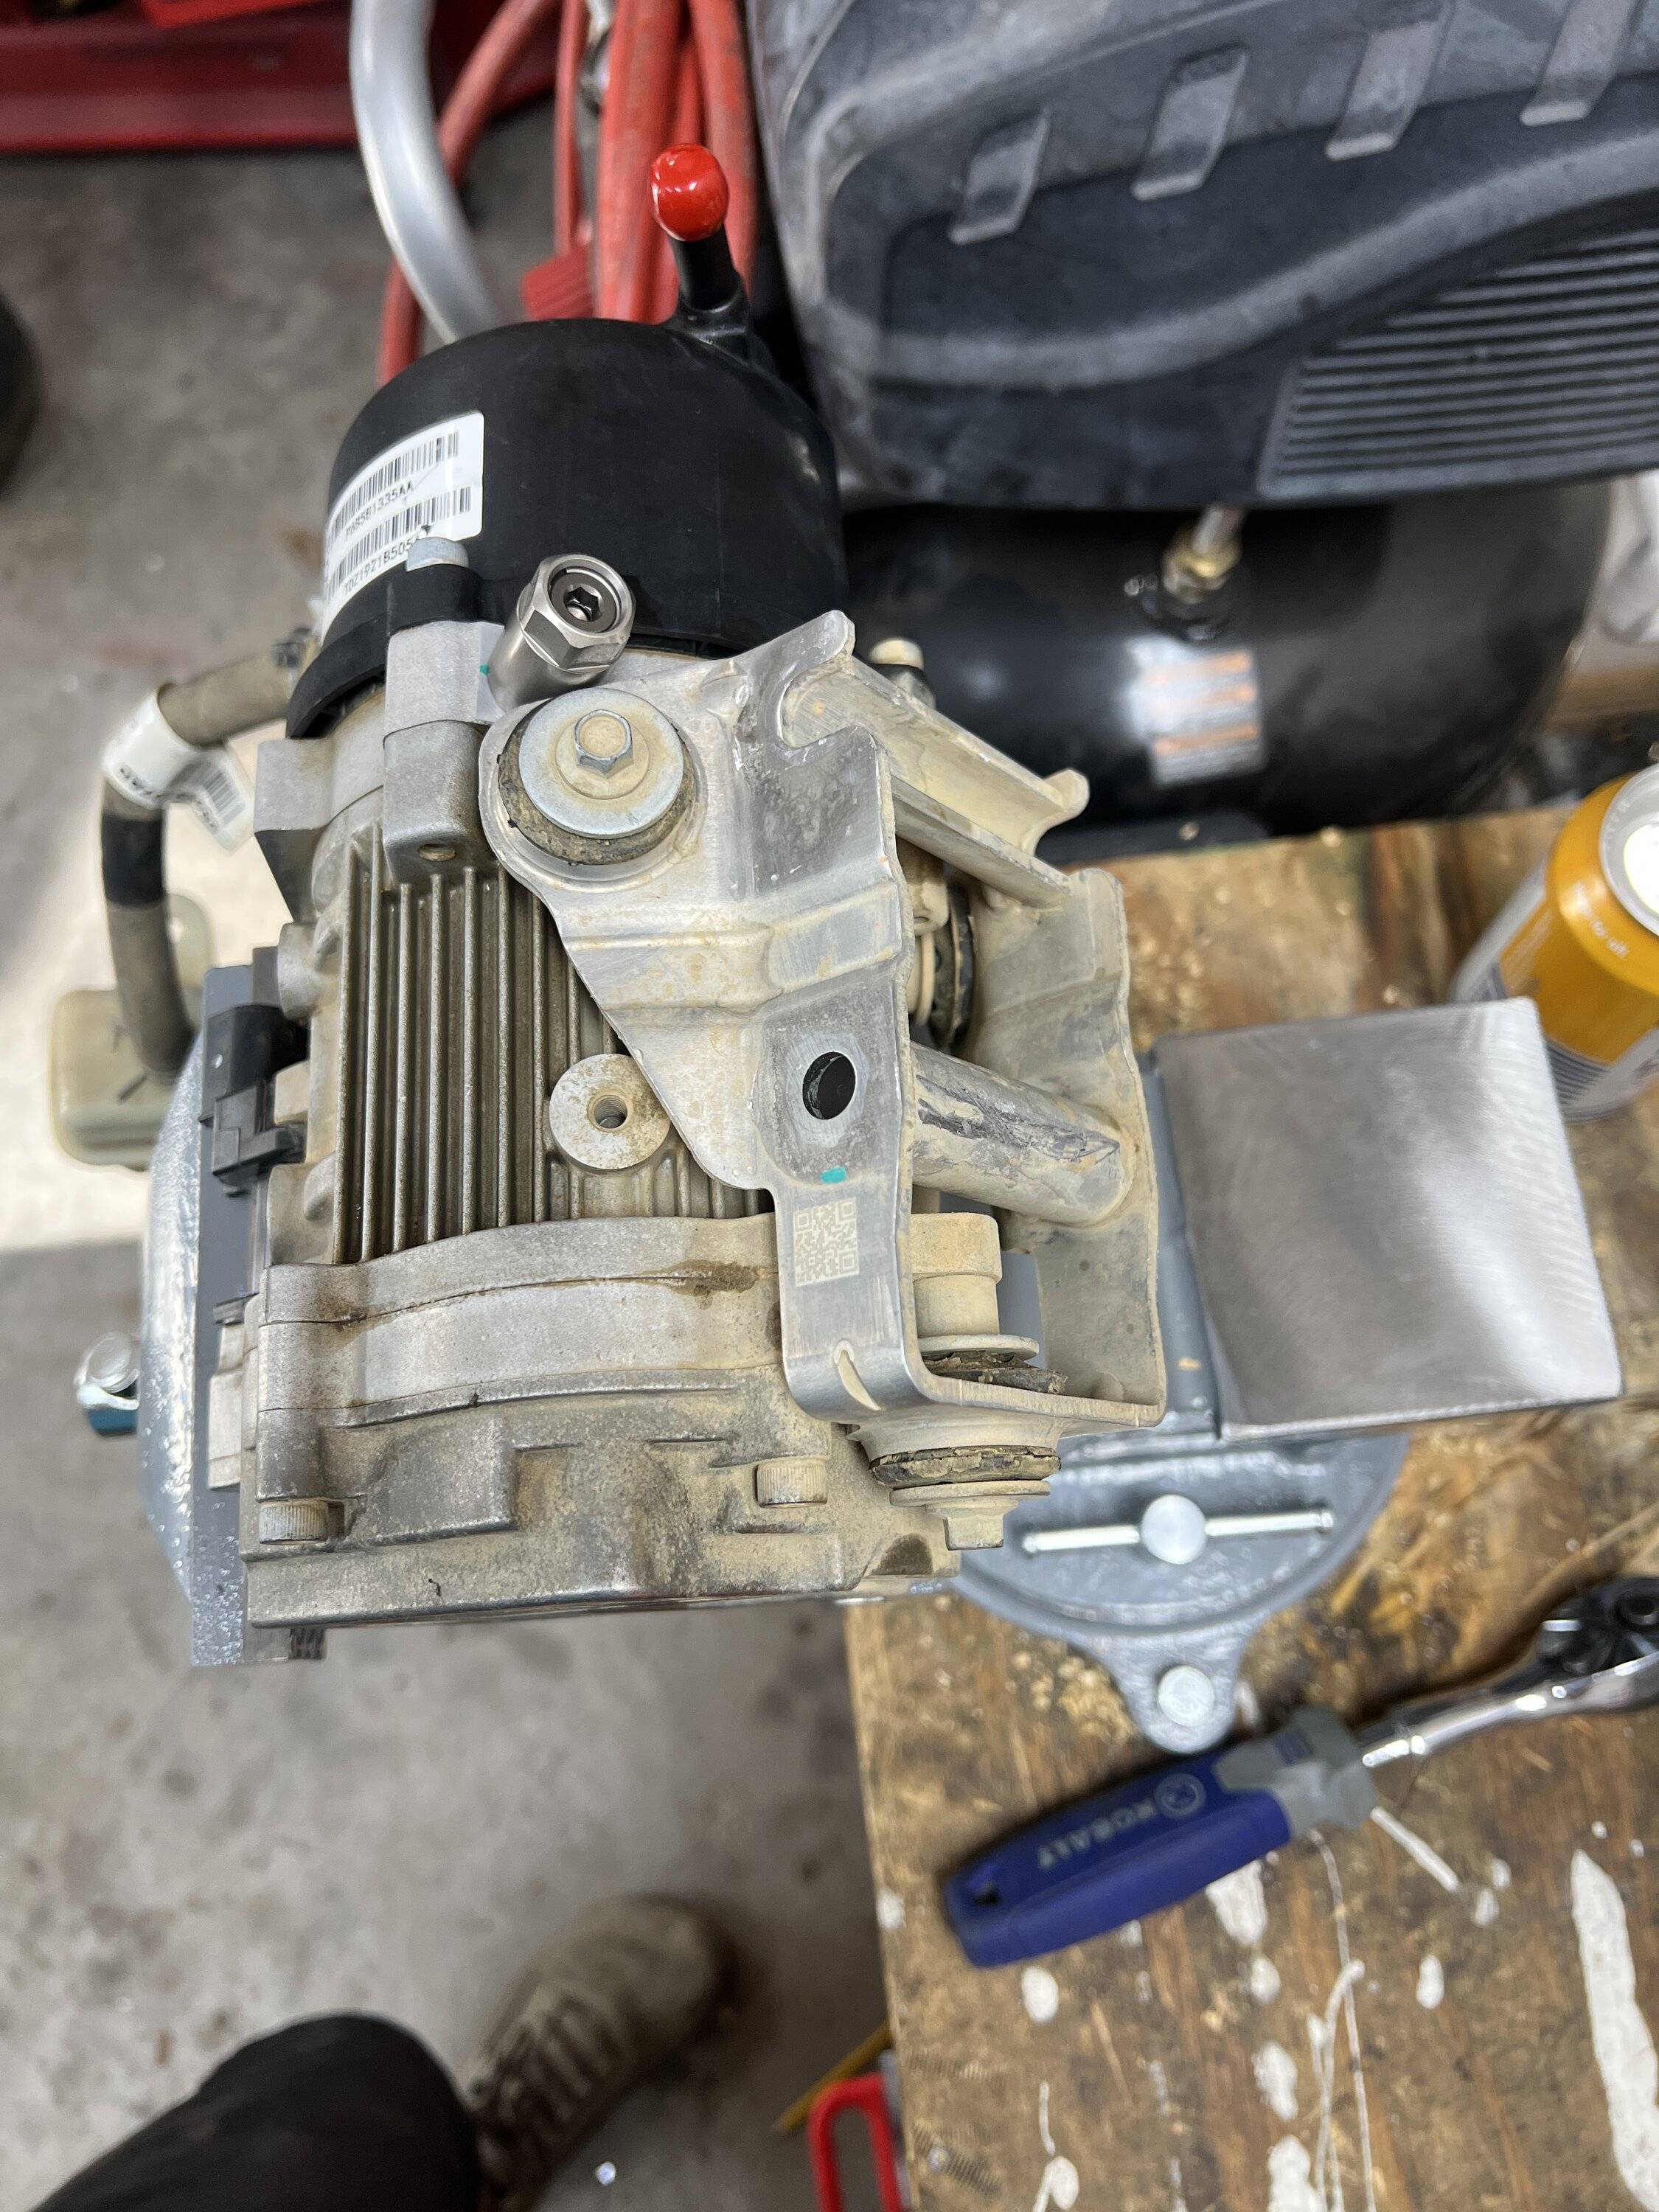
- Install the Apex adjustable valve per their instructions. No need for me to rehash what they have put together. The valve has been installed below
-
- Start re-installing the pump by attaching things in reverse order. Make sure to line up the gauge fitting that sits against the pump to have the same orientation as the high-pressure fitting on the Jeep. In this photo, you can see the bolt hole closest to the camera, and then the pump will rotate up into the frame and mate to the high-pressure fitting. I found a second pair of hands very useful to orient the pump so that the socket head bolt is angled straight up through the engine bay.
-
- There is a nice location to zip-tie the gauge with some wiring harnesses in the engine bay. I'll probably leave my gauge attached since I'm lazy, and it's not getting in the way of anything else. Extra gauges give you street cred anyway. Embrace your inner Paul Walker.
-
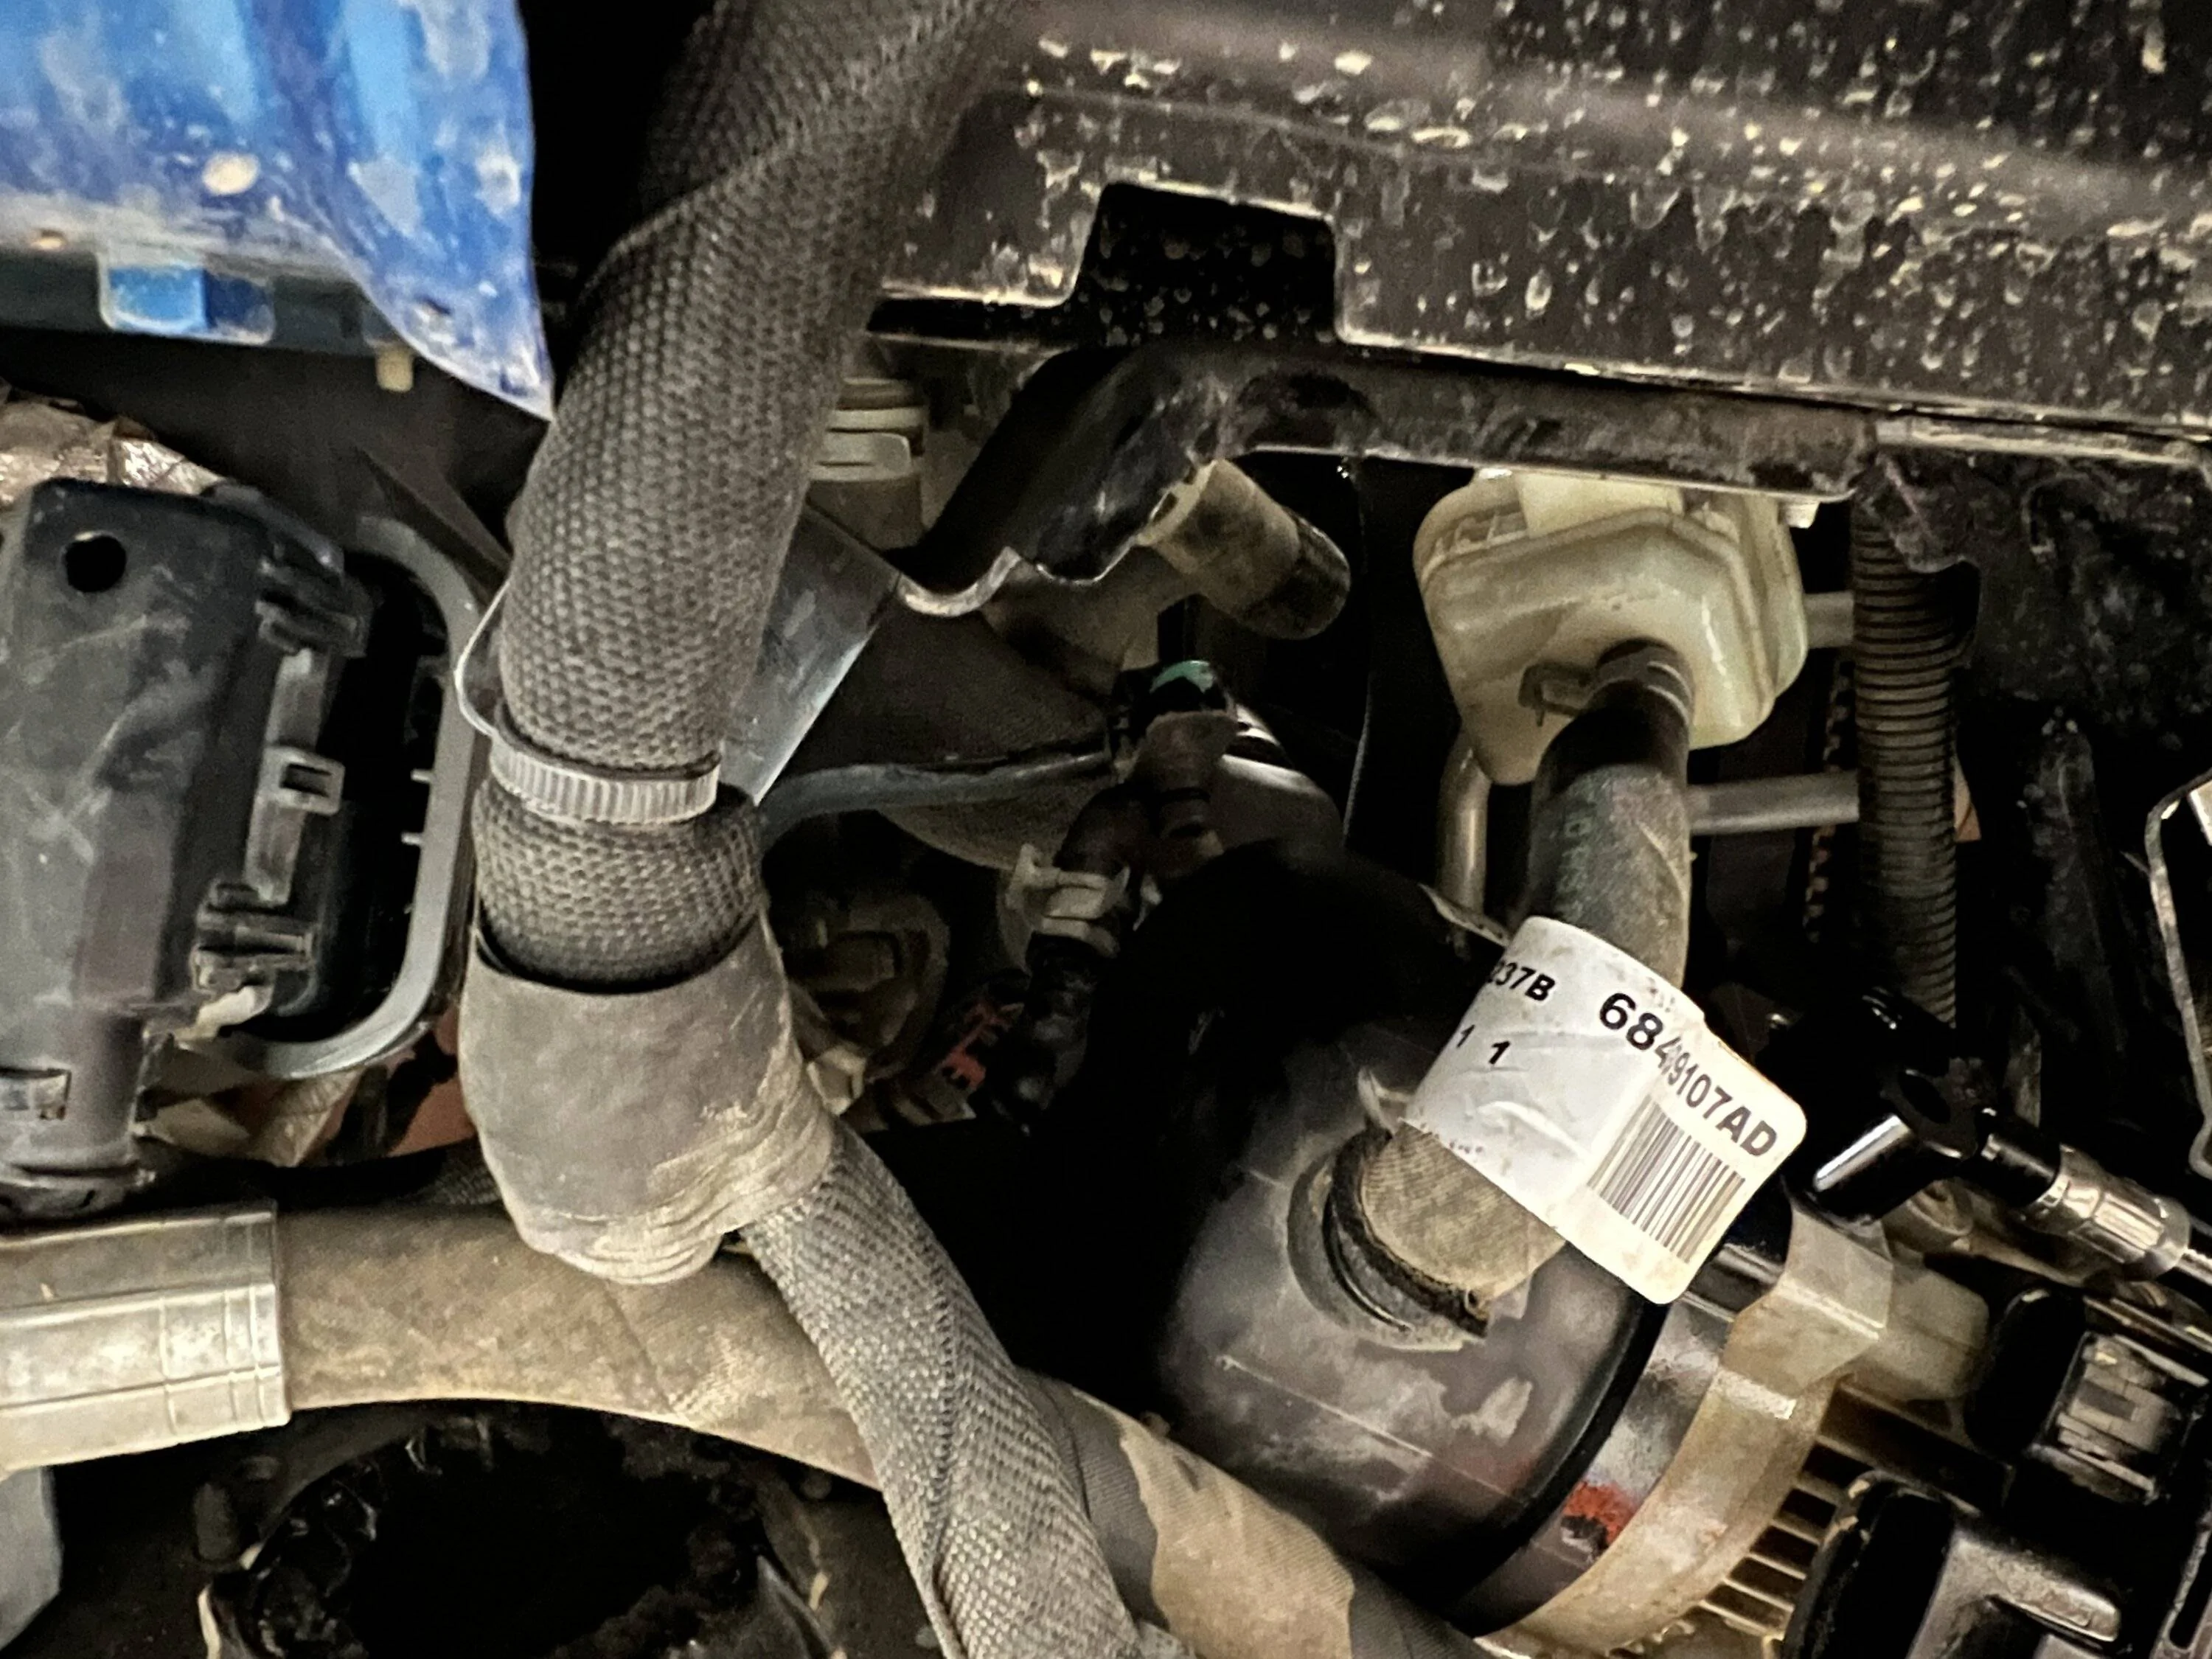
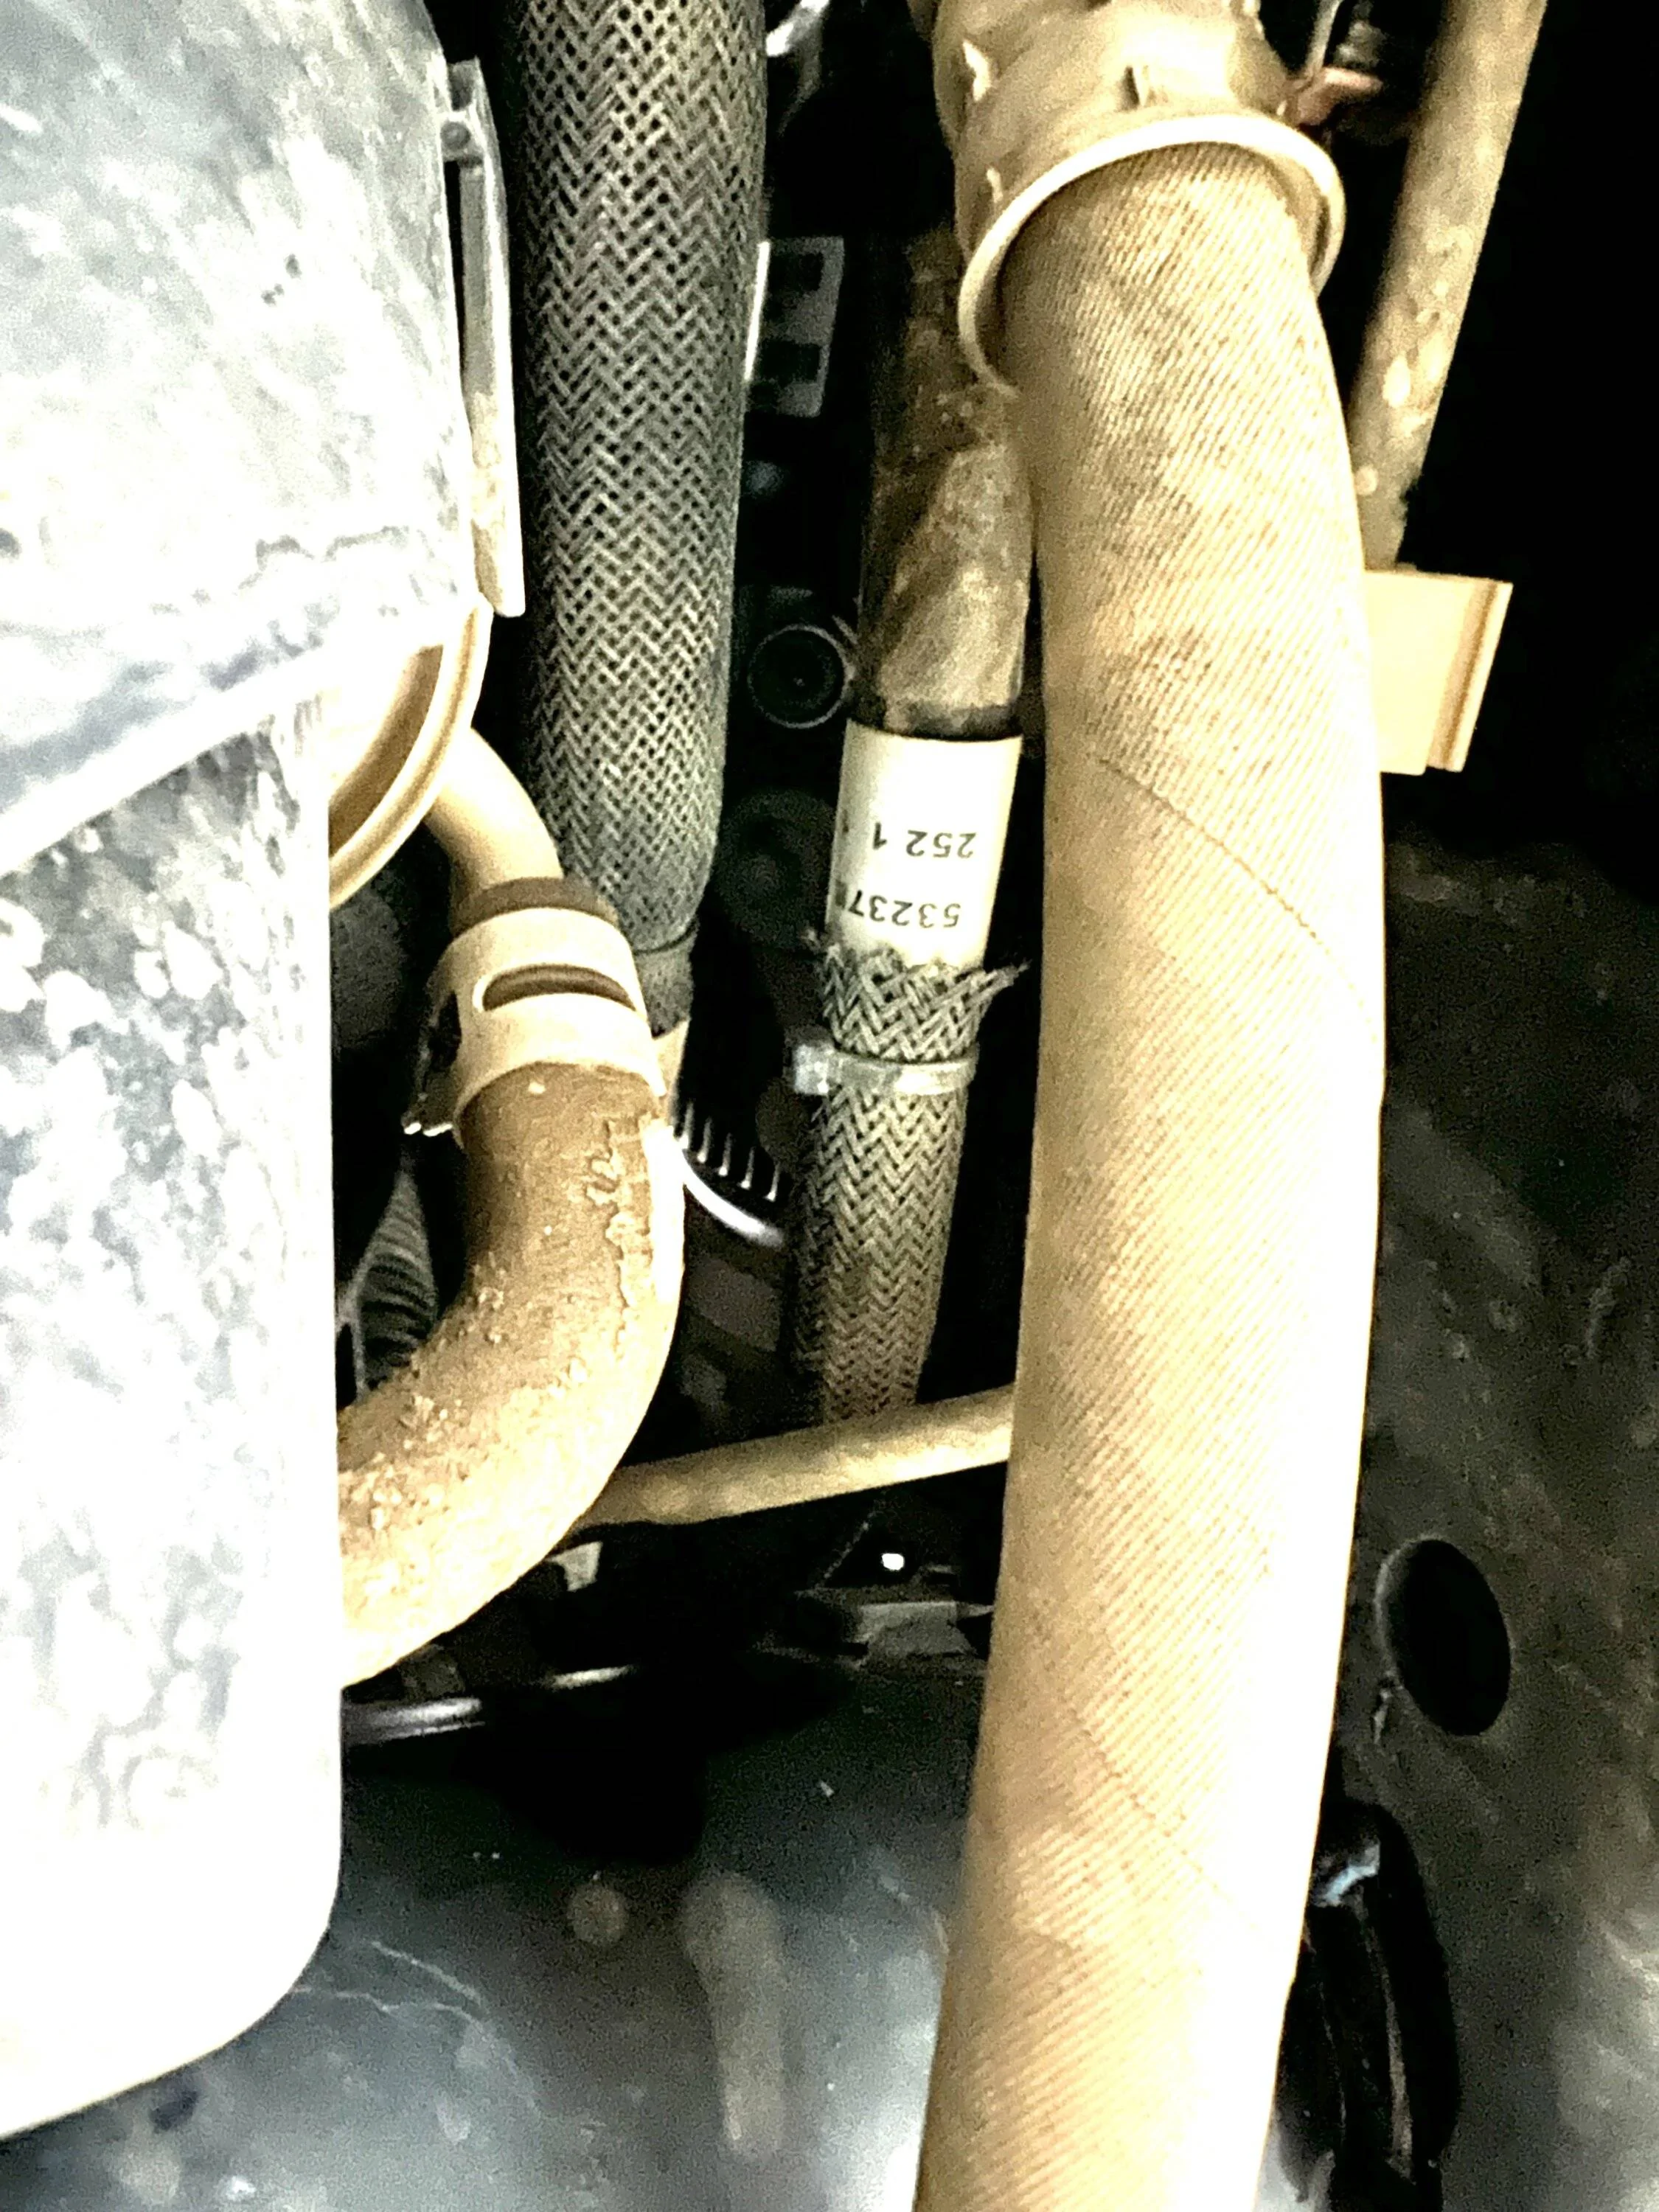
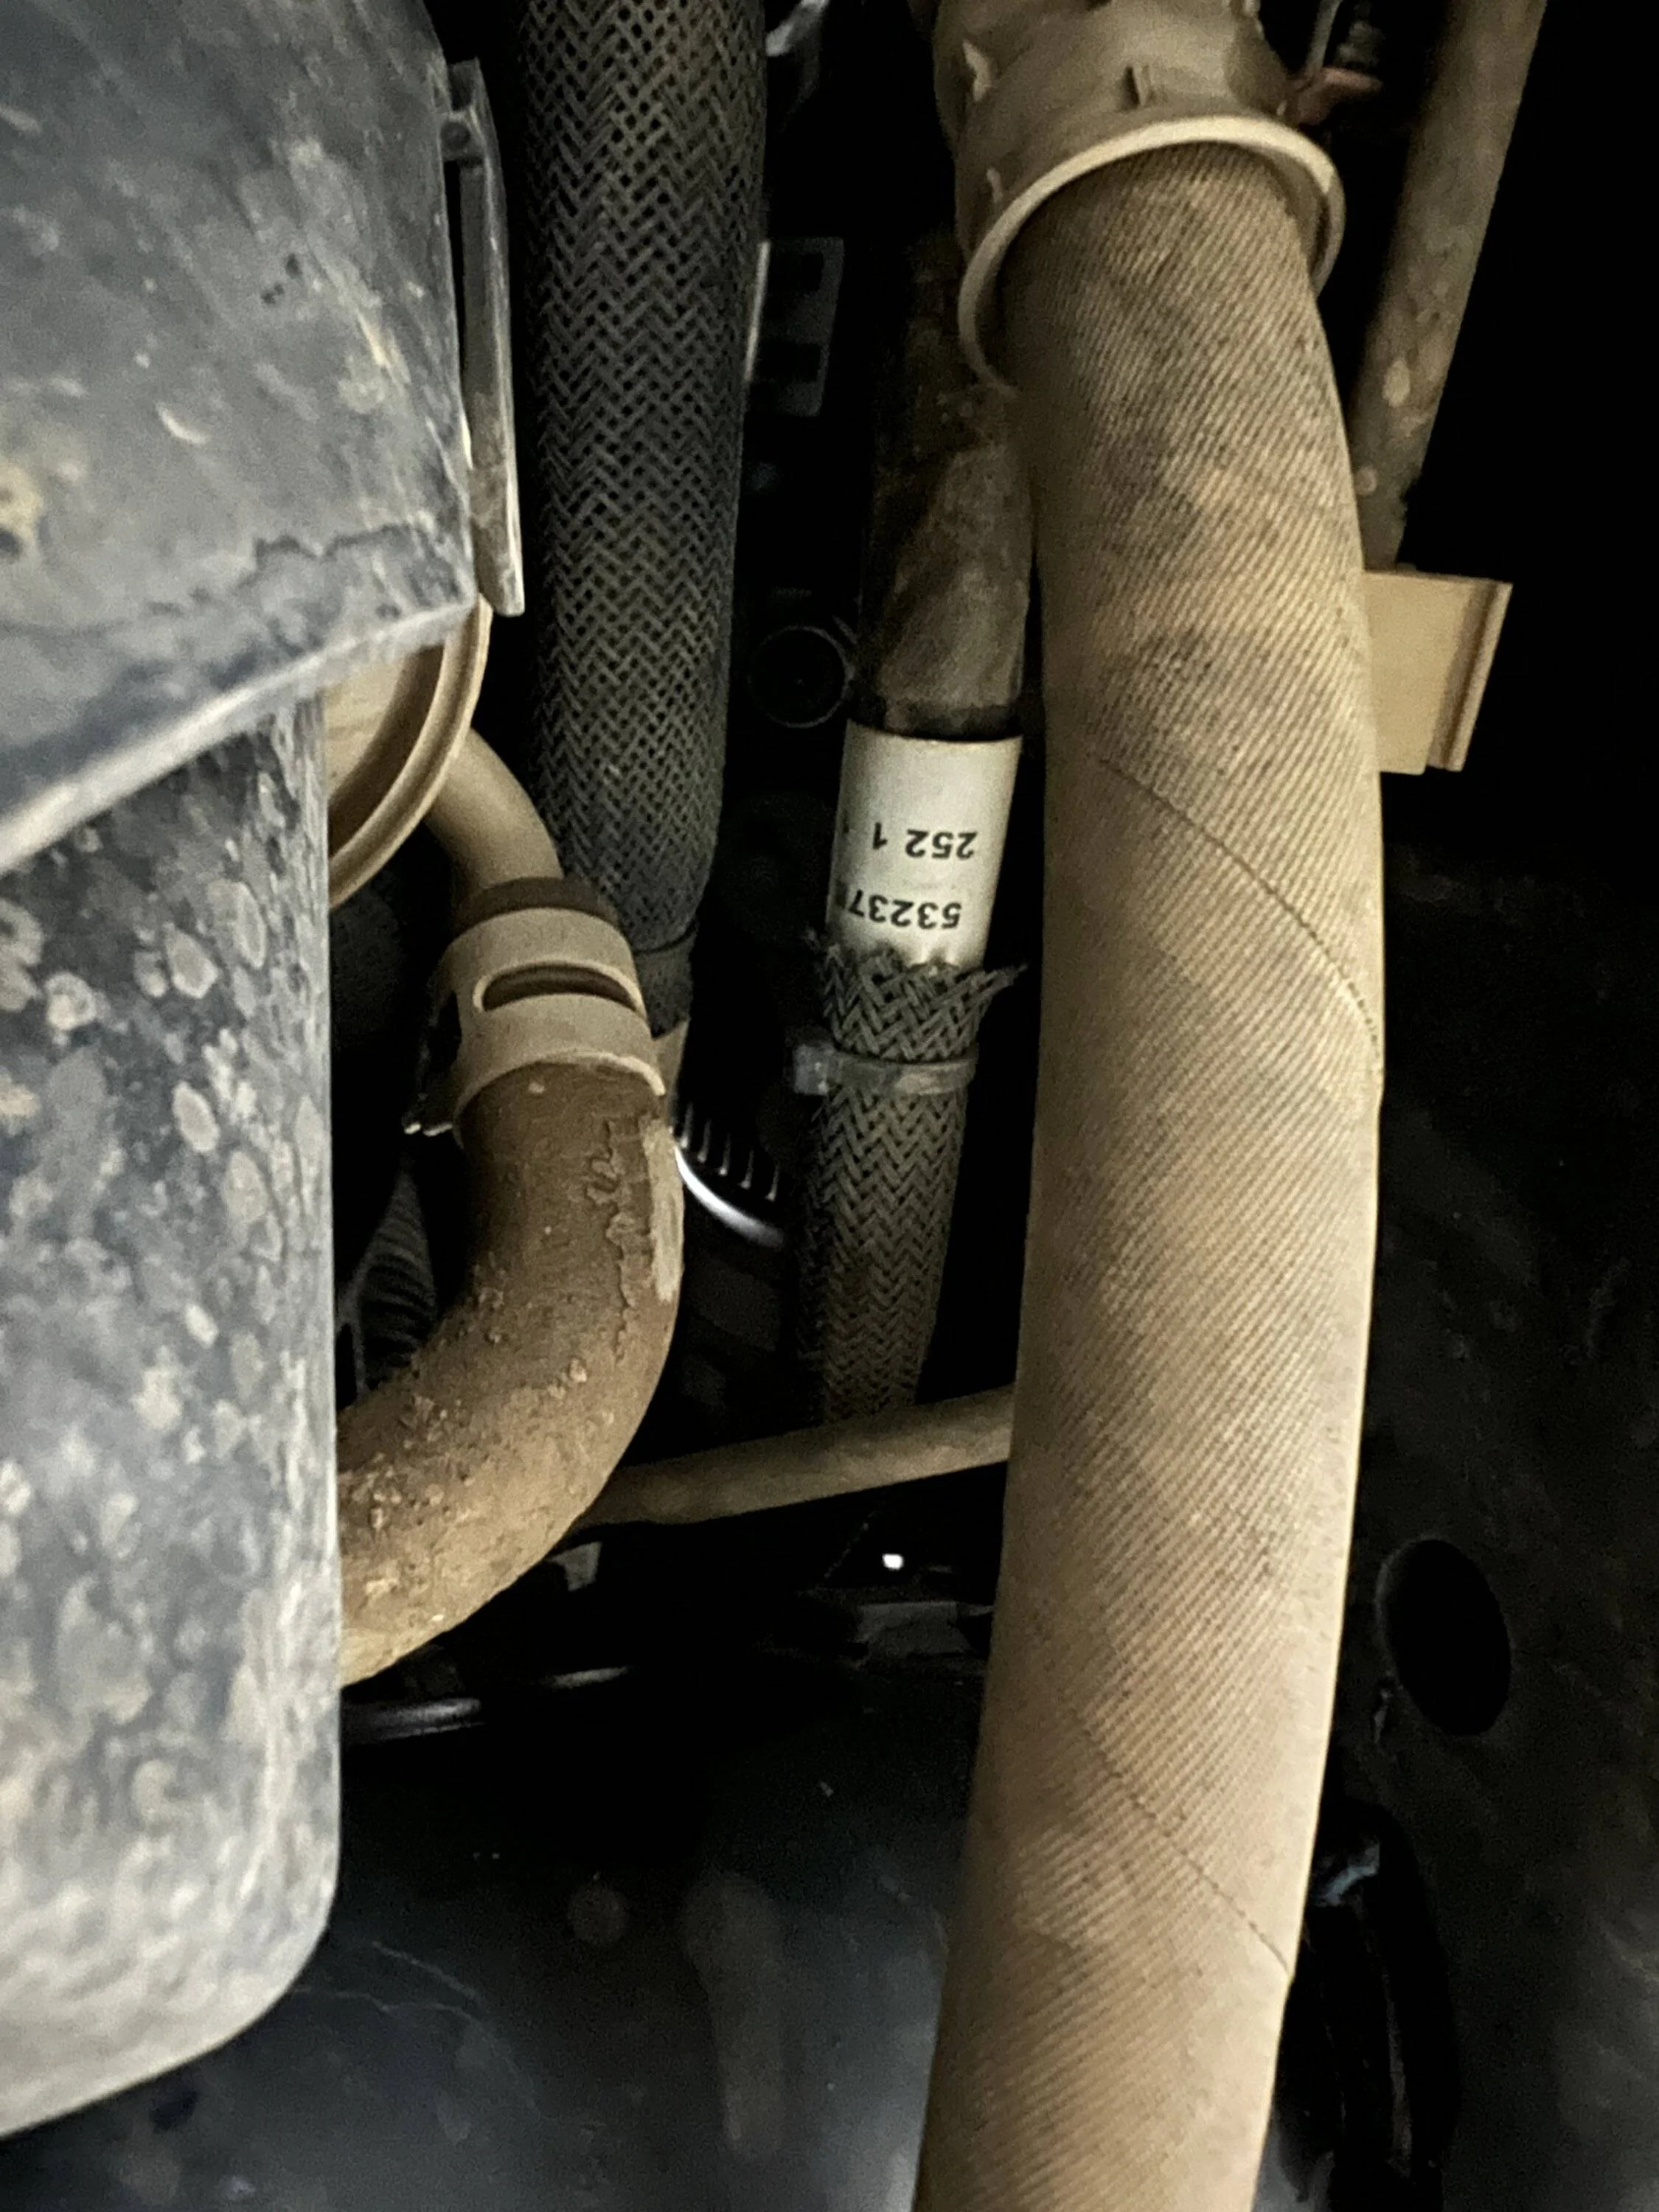
- There are NO modifications that need to be made to the frame or other brackets to reach the pressure adjuster on the 392. The new pressure adjuster sits just inside the frame rail. You can find it to the right of the oil filter and up by the frame. Luckily, 392 owners do not need to grind or cut to finish the installation. You can just see the silver hex of the adjuster up and to the left of the label with the numbers in this photo.
-


Sponsored
Last edited:
