4a4c55
Well-Known Member
- First Name
- Mike
- Joined
- Mar 14, 2023
- Threads
- 17
- Messages
- 261
- Reaction score
- 243
- Location
- near Seattle
- Vehicle(s)
- 2010 BMW M3, 2020 Sahara JLU
- Thread starter
- #1
I've been poking around in a few other threads about installing a dual-band radio in my Wrangler. My install isn't too special, but I'd make a couple of decisions that I don't think others have made so I thought I'd share the results for people exploring different options.
Here's the gear I used:
Some existing equipment:
I already had the VoSwitch kit, and it's nice to be able to kill all the accessories I've added whenever I want to -- maybe for diagnosis, maybe to save battery, whatever. My LED lights are on the switch, plus a solenoid for my winch, the CB radio, and an aux power unit for an extra cigarette lighter jack that I can use for charging batteries.
There are some posts here on the forum about the VoSwitch having problems when mounted in the regular spot on the driver's fender near a VHF antenna on the same fender. I flipped my relay box over and mounted it above my battery. With some spacers, that works fine. (But it also means most wires go through the passenger foot well, which some people don't like stabbing.)
The CB Radio is under the passenger seat with the mic hanging from the passenger grab handle. The FTM-500 control head has a touch screen and a speaker, so I didn't need to mount a speaker anywhere else. Plenty of room under the driver's seat and it was central to the driver's fender, the driver's A-pillar, and a path to the duck pond -- plus power coming through the firewall.
The boot-shaped rubber grommet works great, and I pulled both the RG58 and power through its smallest opening. The antenna and power go behind the plastic on the left hand of the driver's foot well, under the plastic at the door, and then under the carpet to the radio.
For the CAT6 cable, I first removed the HVAC controls and the radio bezel. I removed the radio, too, so I could safely drill downward from the duck pond into the dash. I cut an X into the rubber pad in the duck pond and pulled the cable through. There's lots of steel framing around the radio, but I found a way to go down the left side of the center console to the transmission tunnel and backward under the carpet toward the radio under the seat.
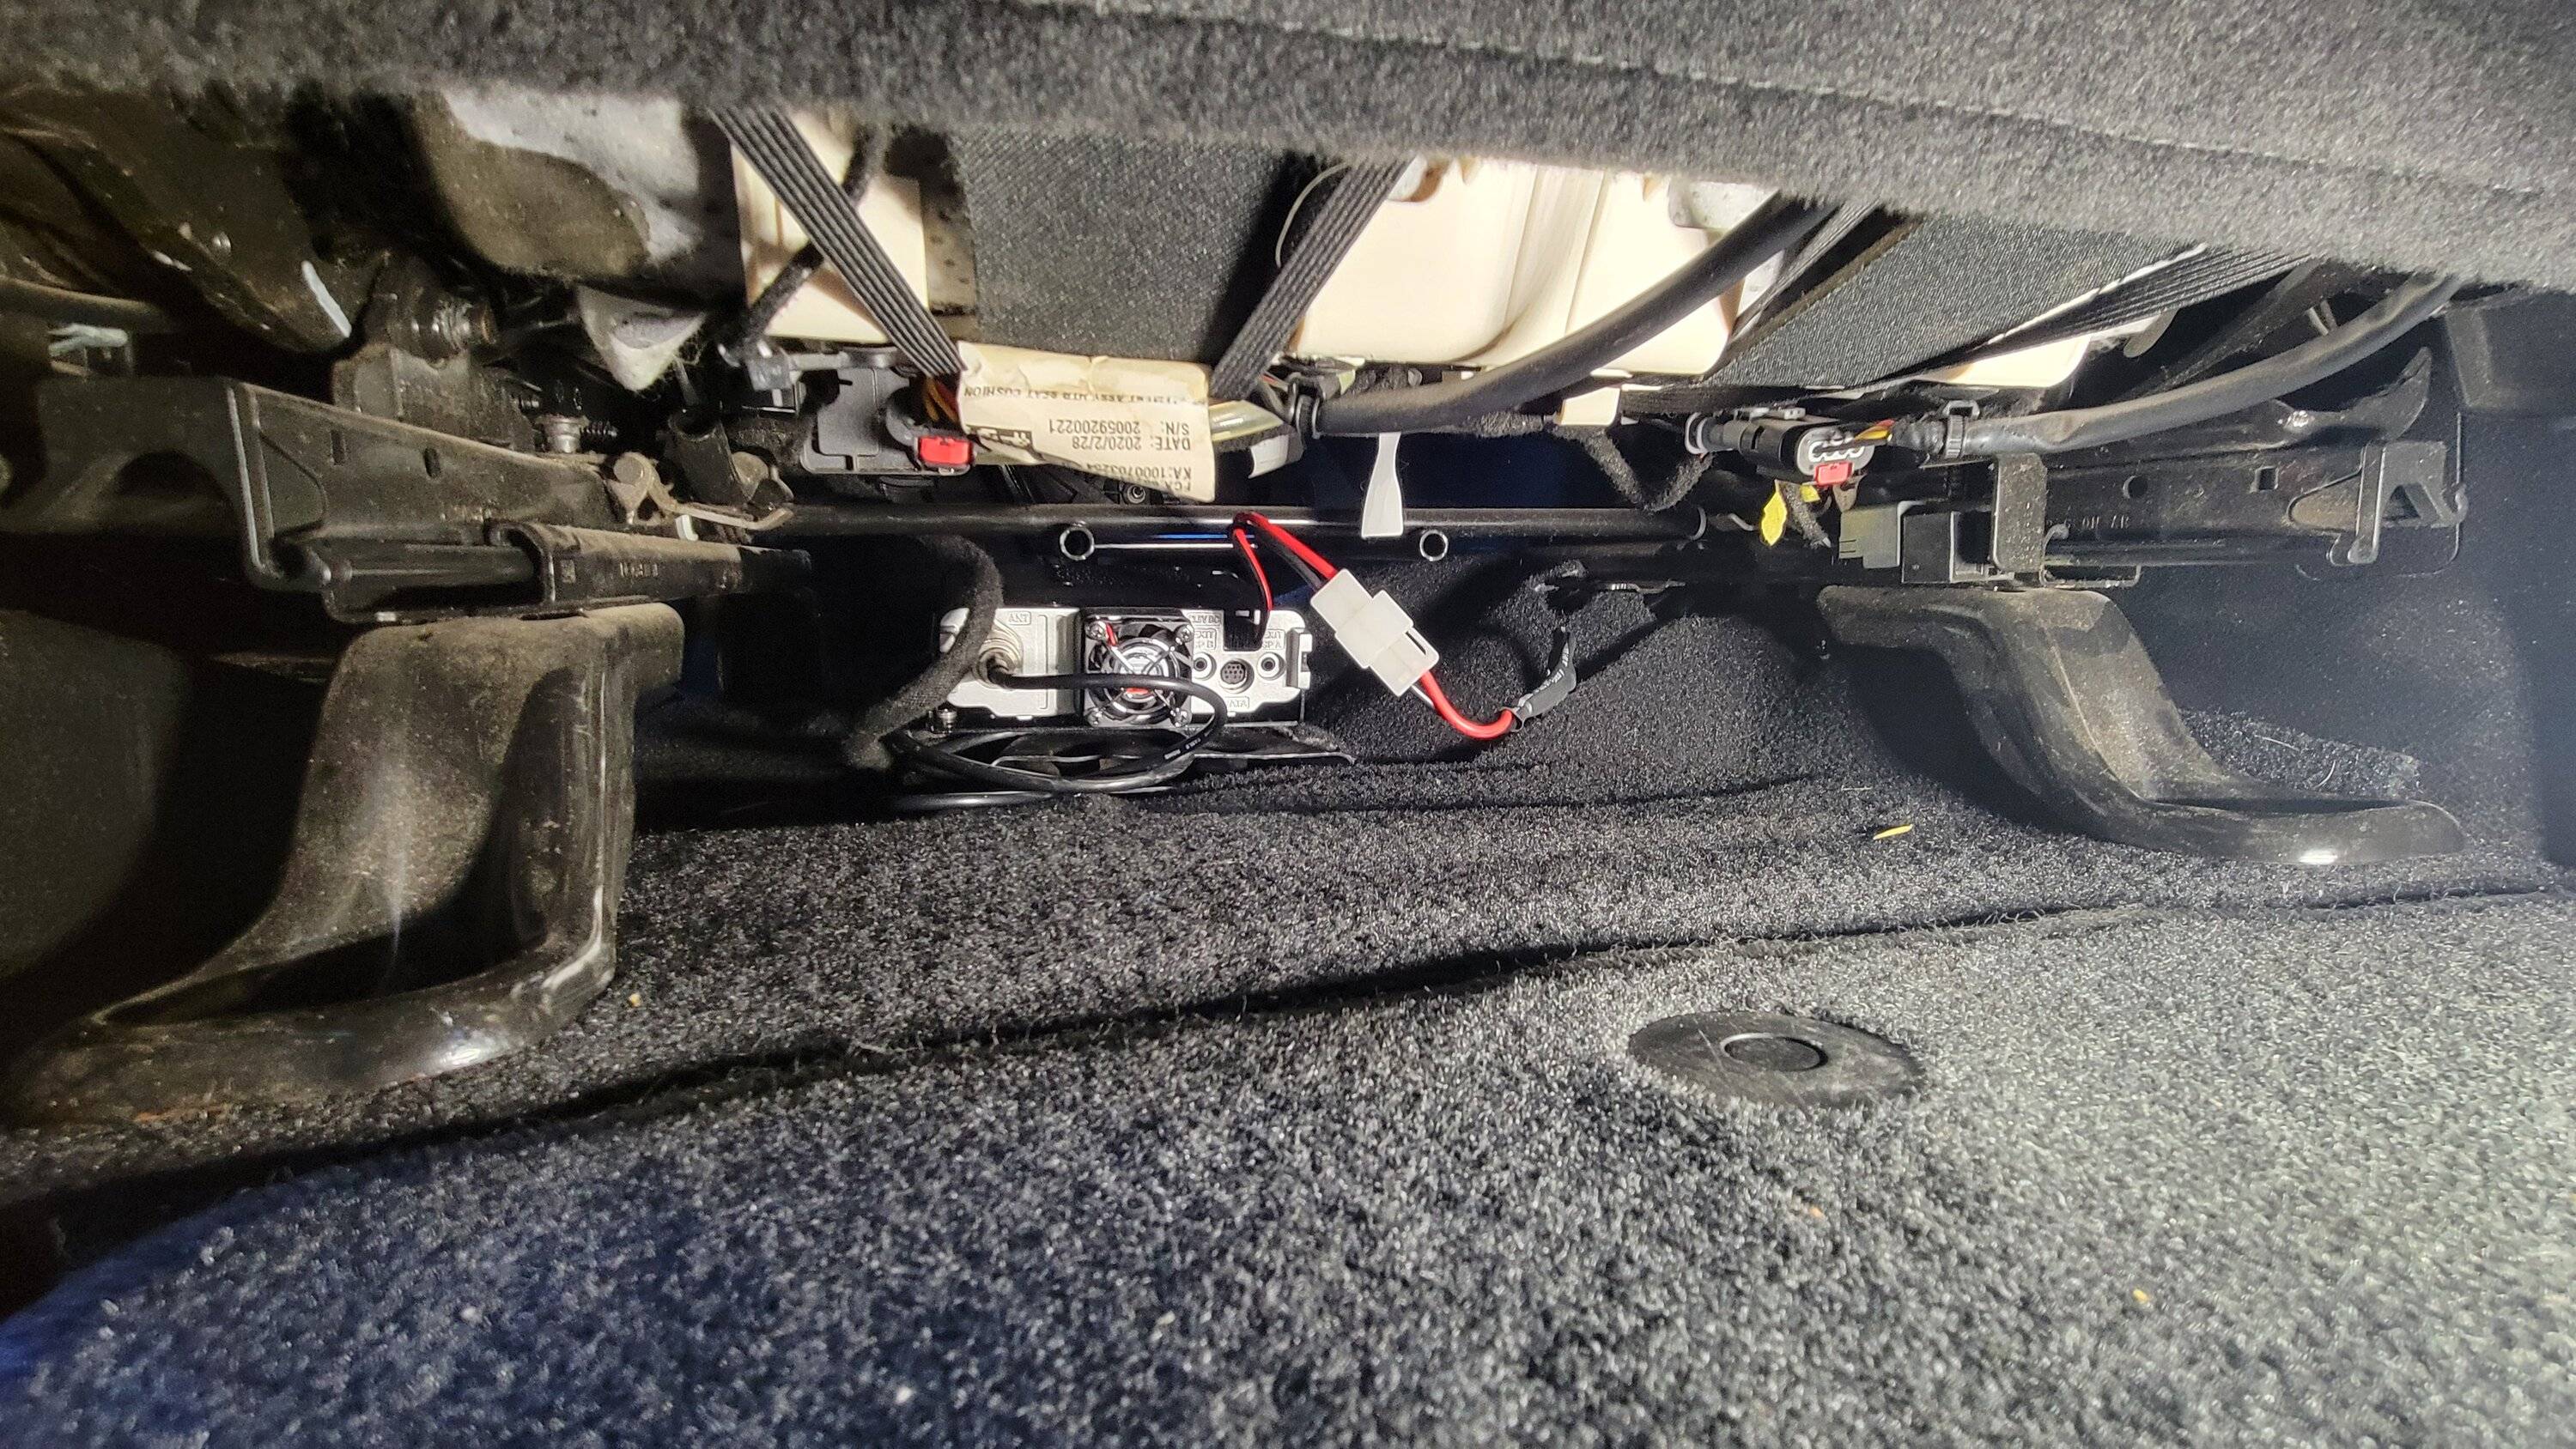
The radio is mounted to its U-shaped bracket. I cut two small slits in the carpet and pushed bolts through, backed by washers, to fasten the radio to the carpet. There's a seam in the carpet that runs laterally, and a heating duct pokes up through it to the foot well of the back seat. The radio sits on the top of the heating duct, so it isn't blocking any airflow or getting heated (or cooled!) by the HVAC system. It sounds floppy, but it's really fine; the carpet is thick, kind of stiff, and under tension from all its contouring and mounting points.
The mic is at the left hand side on the A-pillar mount and works great there. It's a bit tight to the steering wheel, but I think there's plenty of room.
The radio works great, is plenty loud enough, and I'm not having any RFI issues with any of the other electronics. I think I should get a shorter stick for the radio head because it is a bit too far out. Maybe I need to secure the female end of the microphone line. And I think I could've drilled the hole for the head unit line a bit further back, but it's good enough and I can't even see it.
Those are my notes! Happy to answer any questions.
From the driver's B pillar looking in

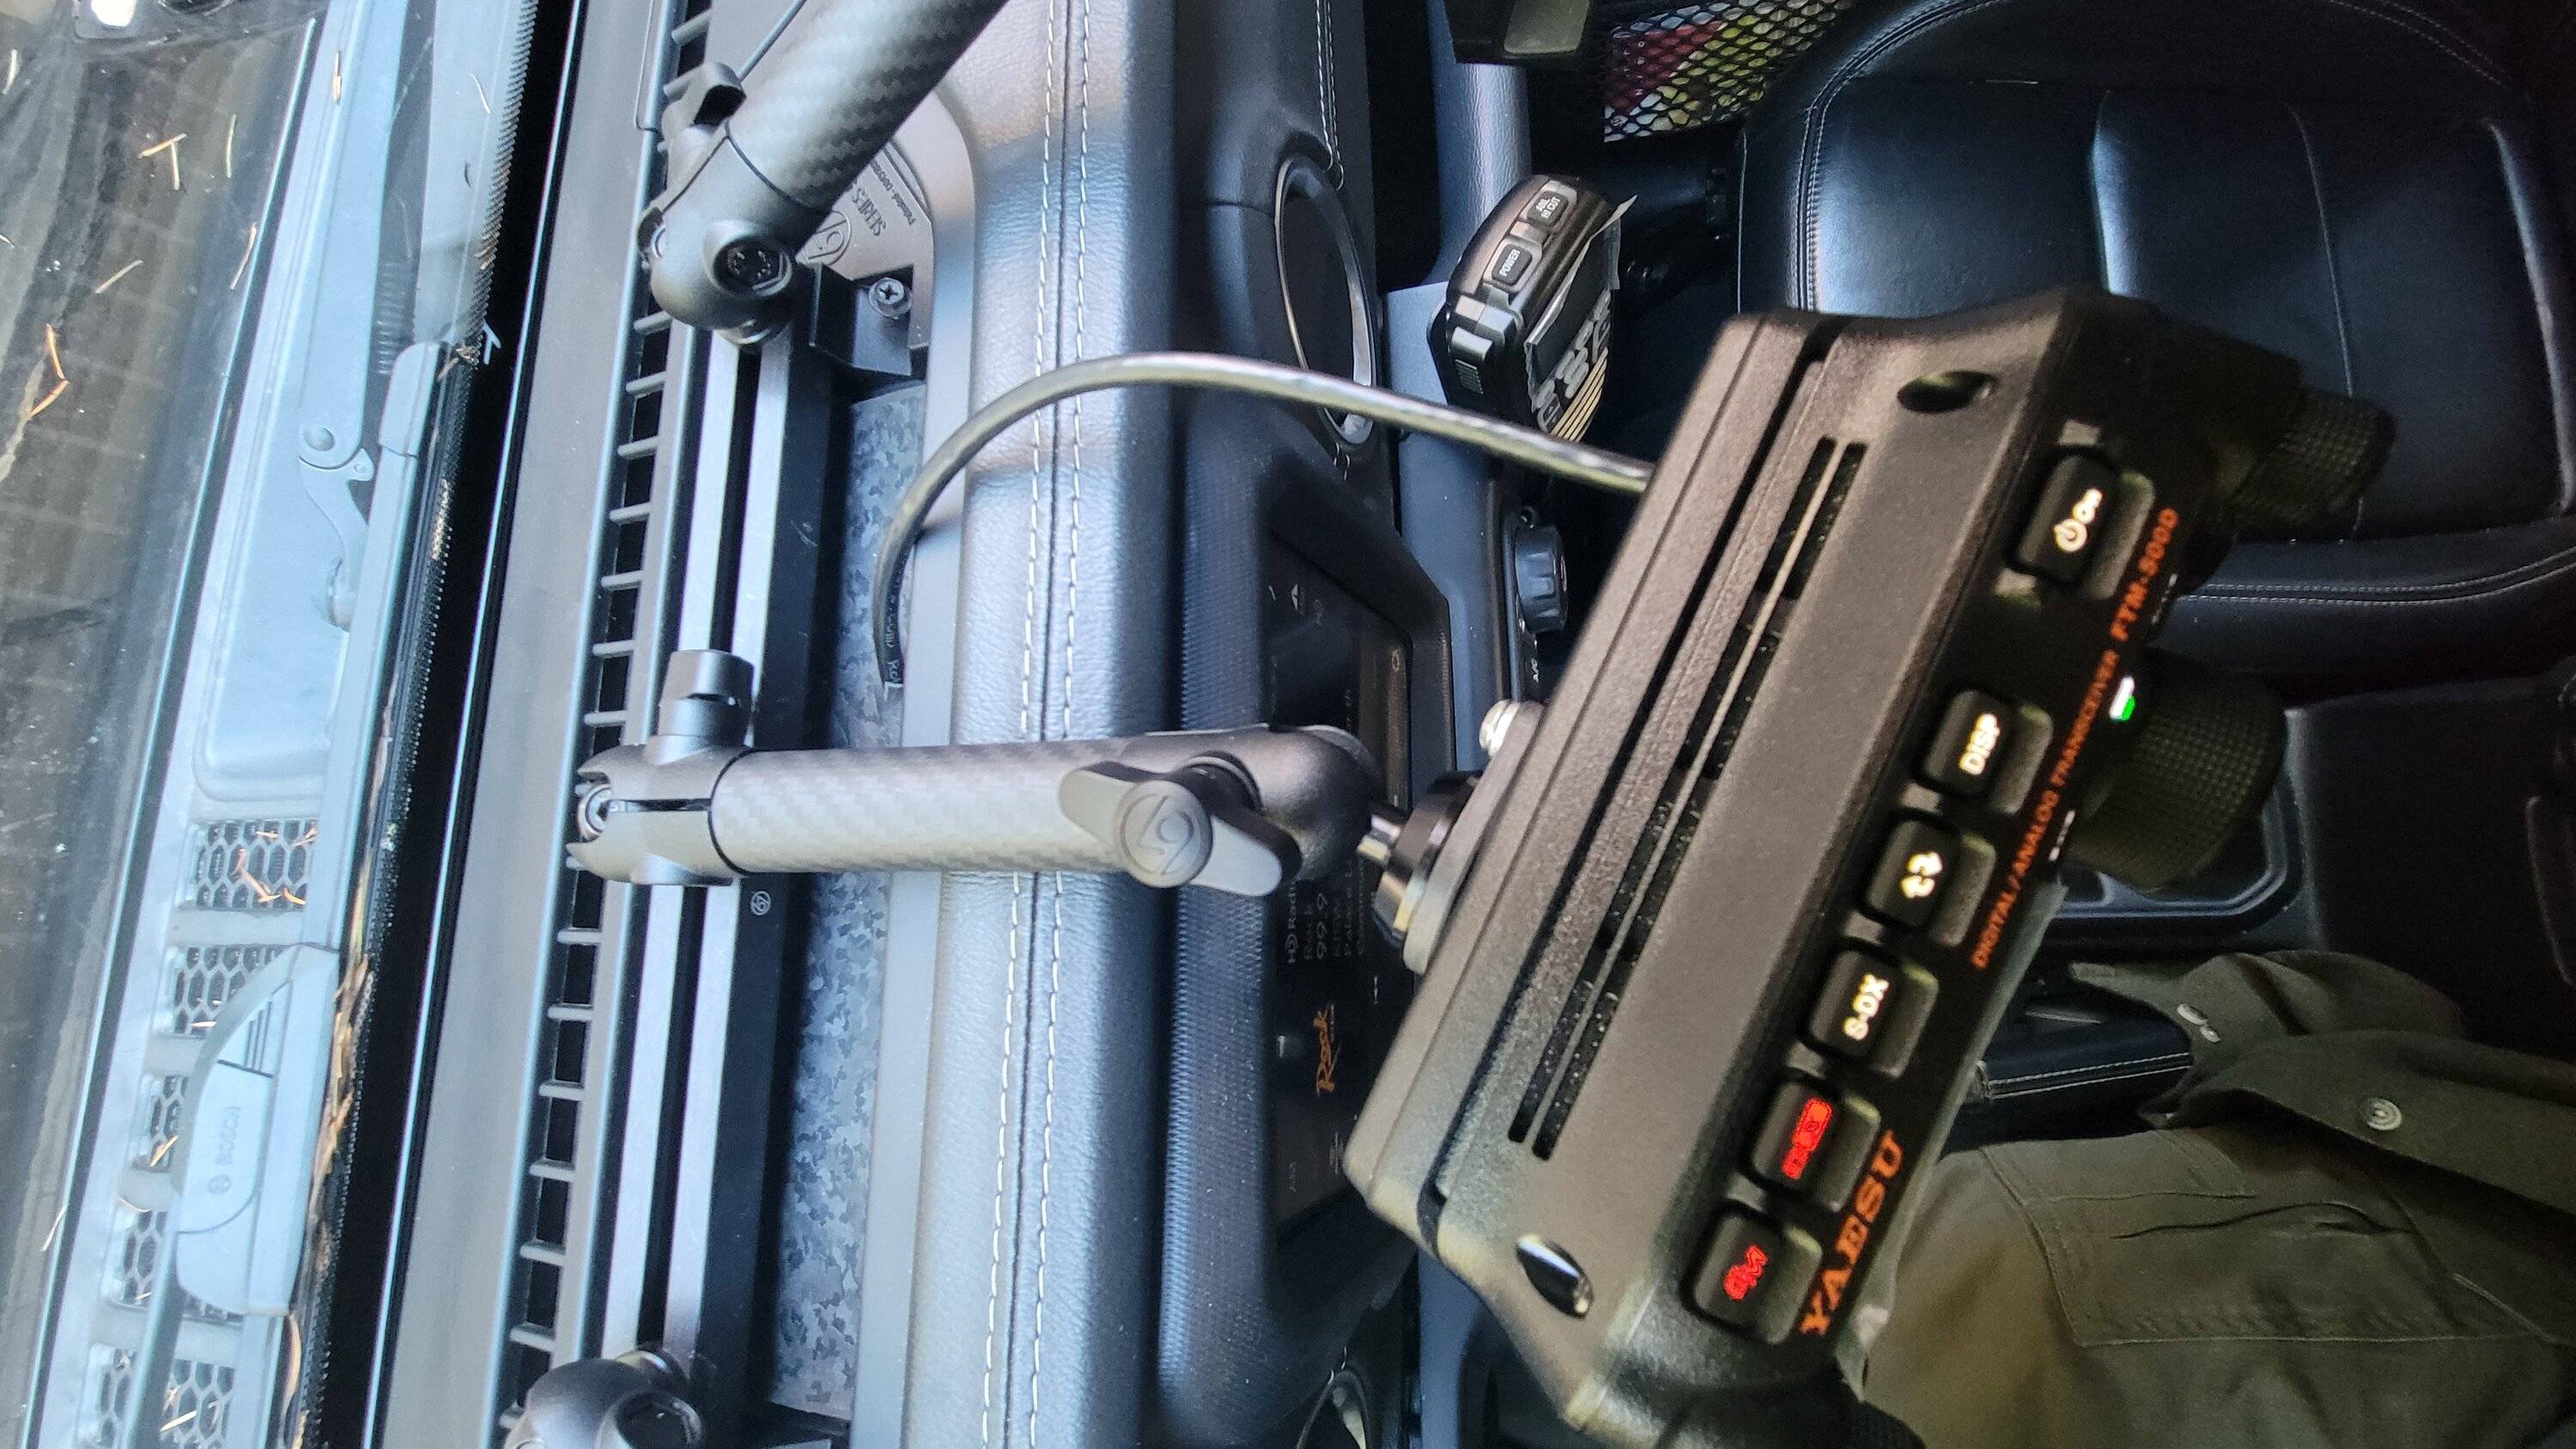
Along the dash from the driver's mirror to show clearance and projection.
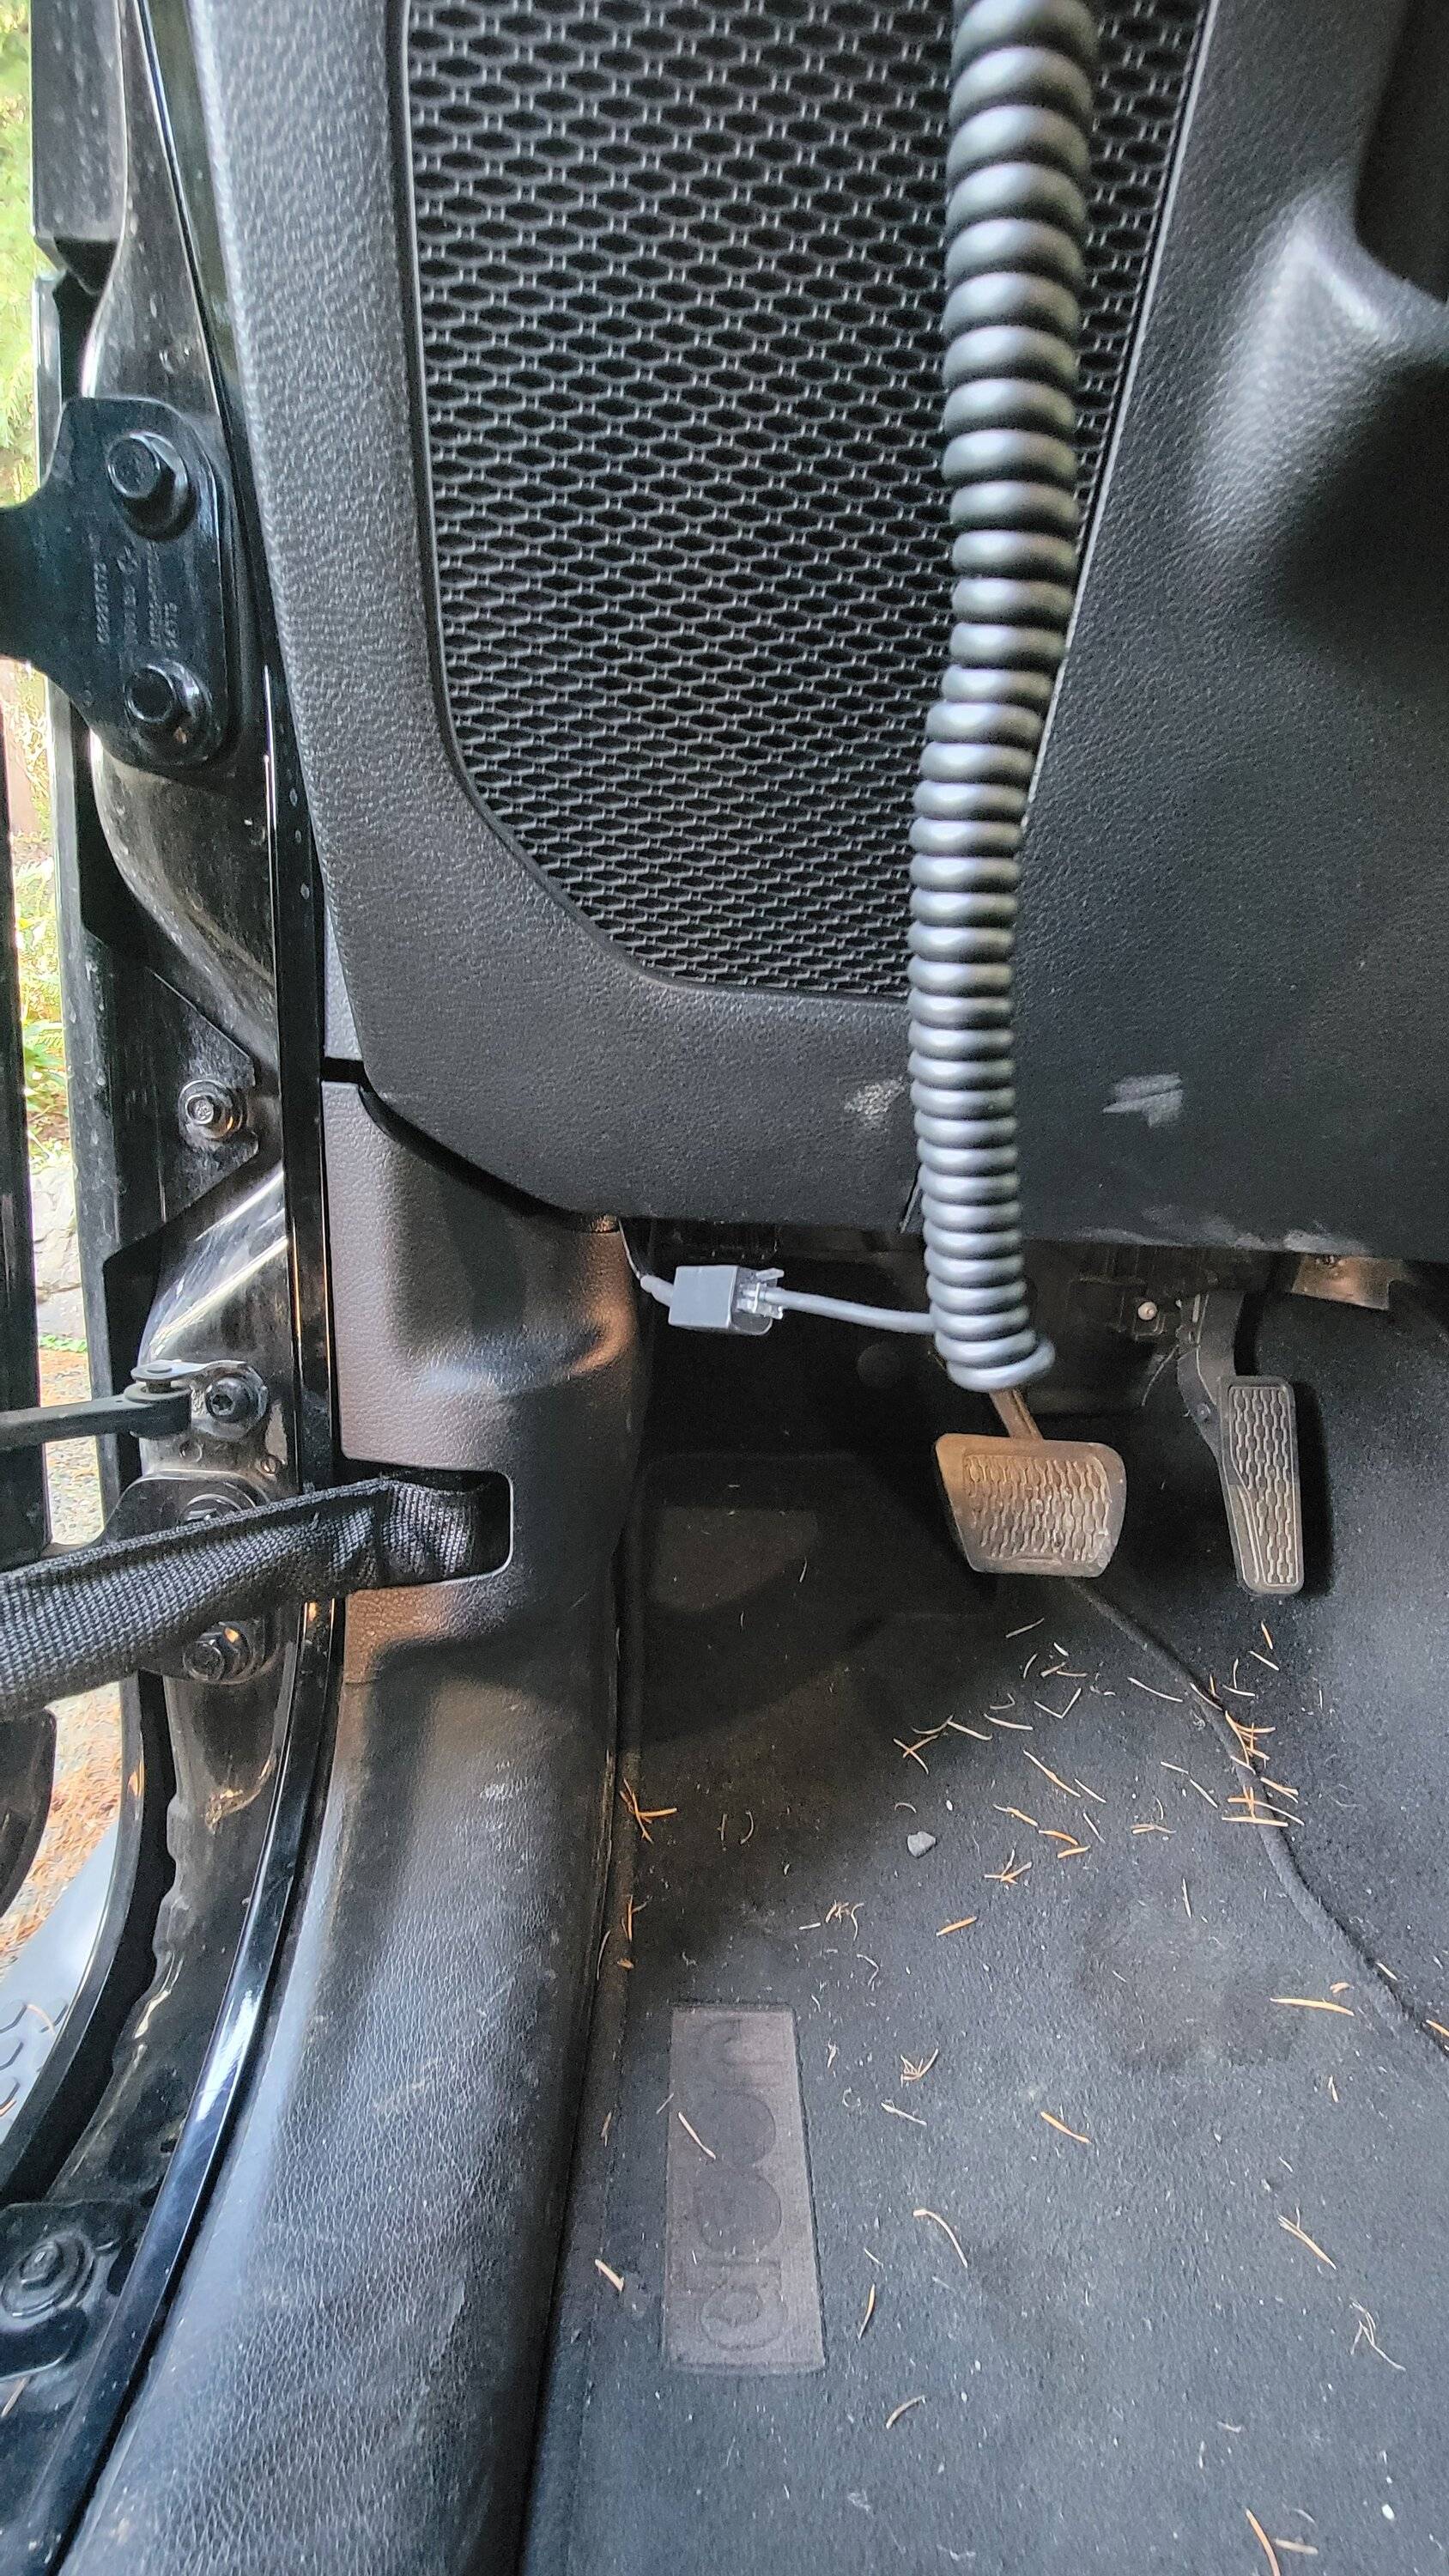
Microphone connection at the bottom of the steering covers, near the ODB2 port

Looking at the duck pond down onto the radio.
From the rear foot well looking forward under the driver's seat to see the radio
Here's the antenna mount. The white wire is the power cable.
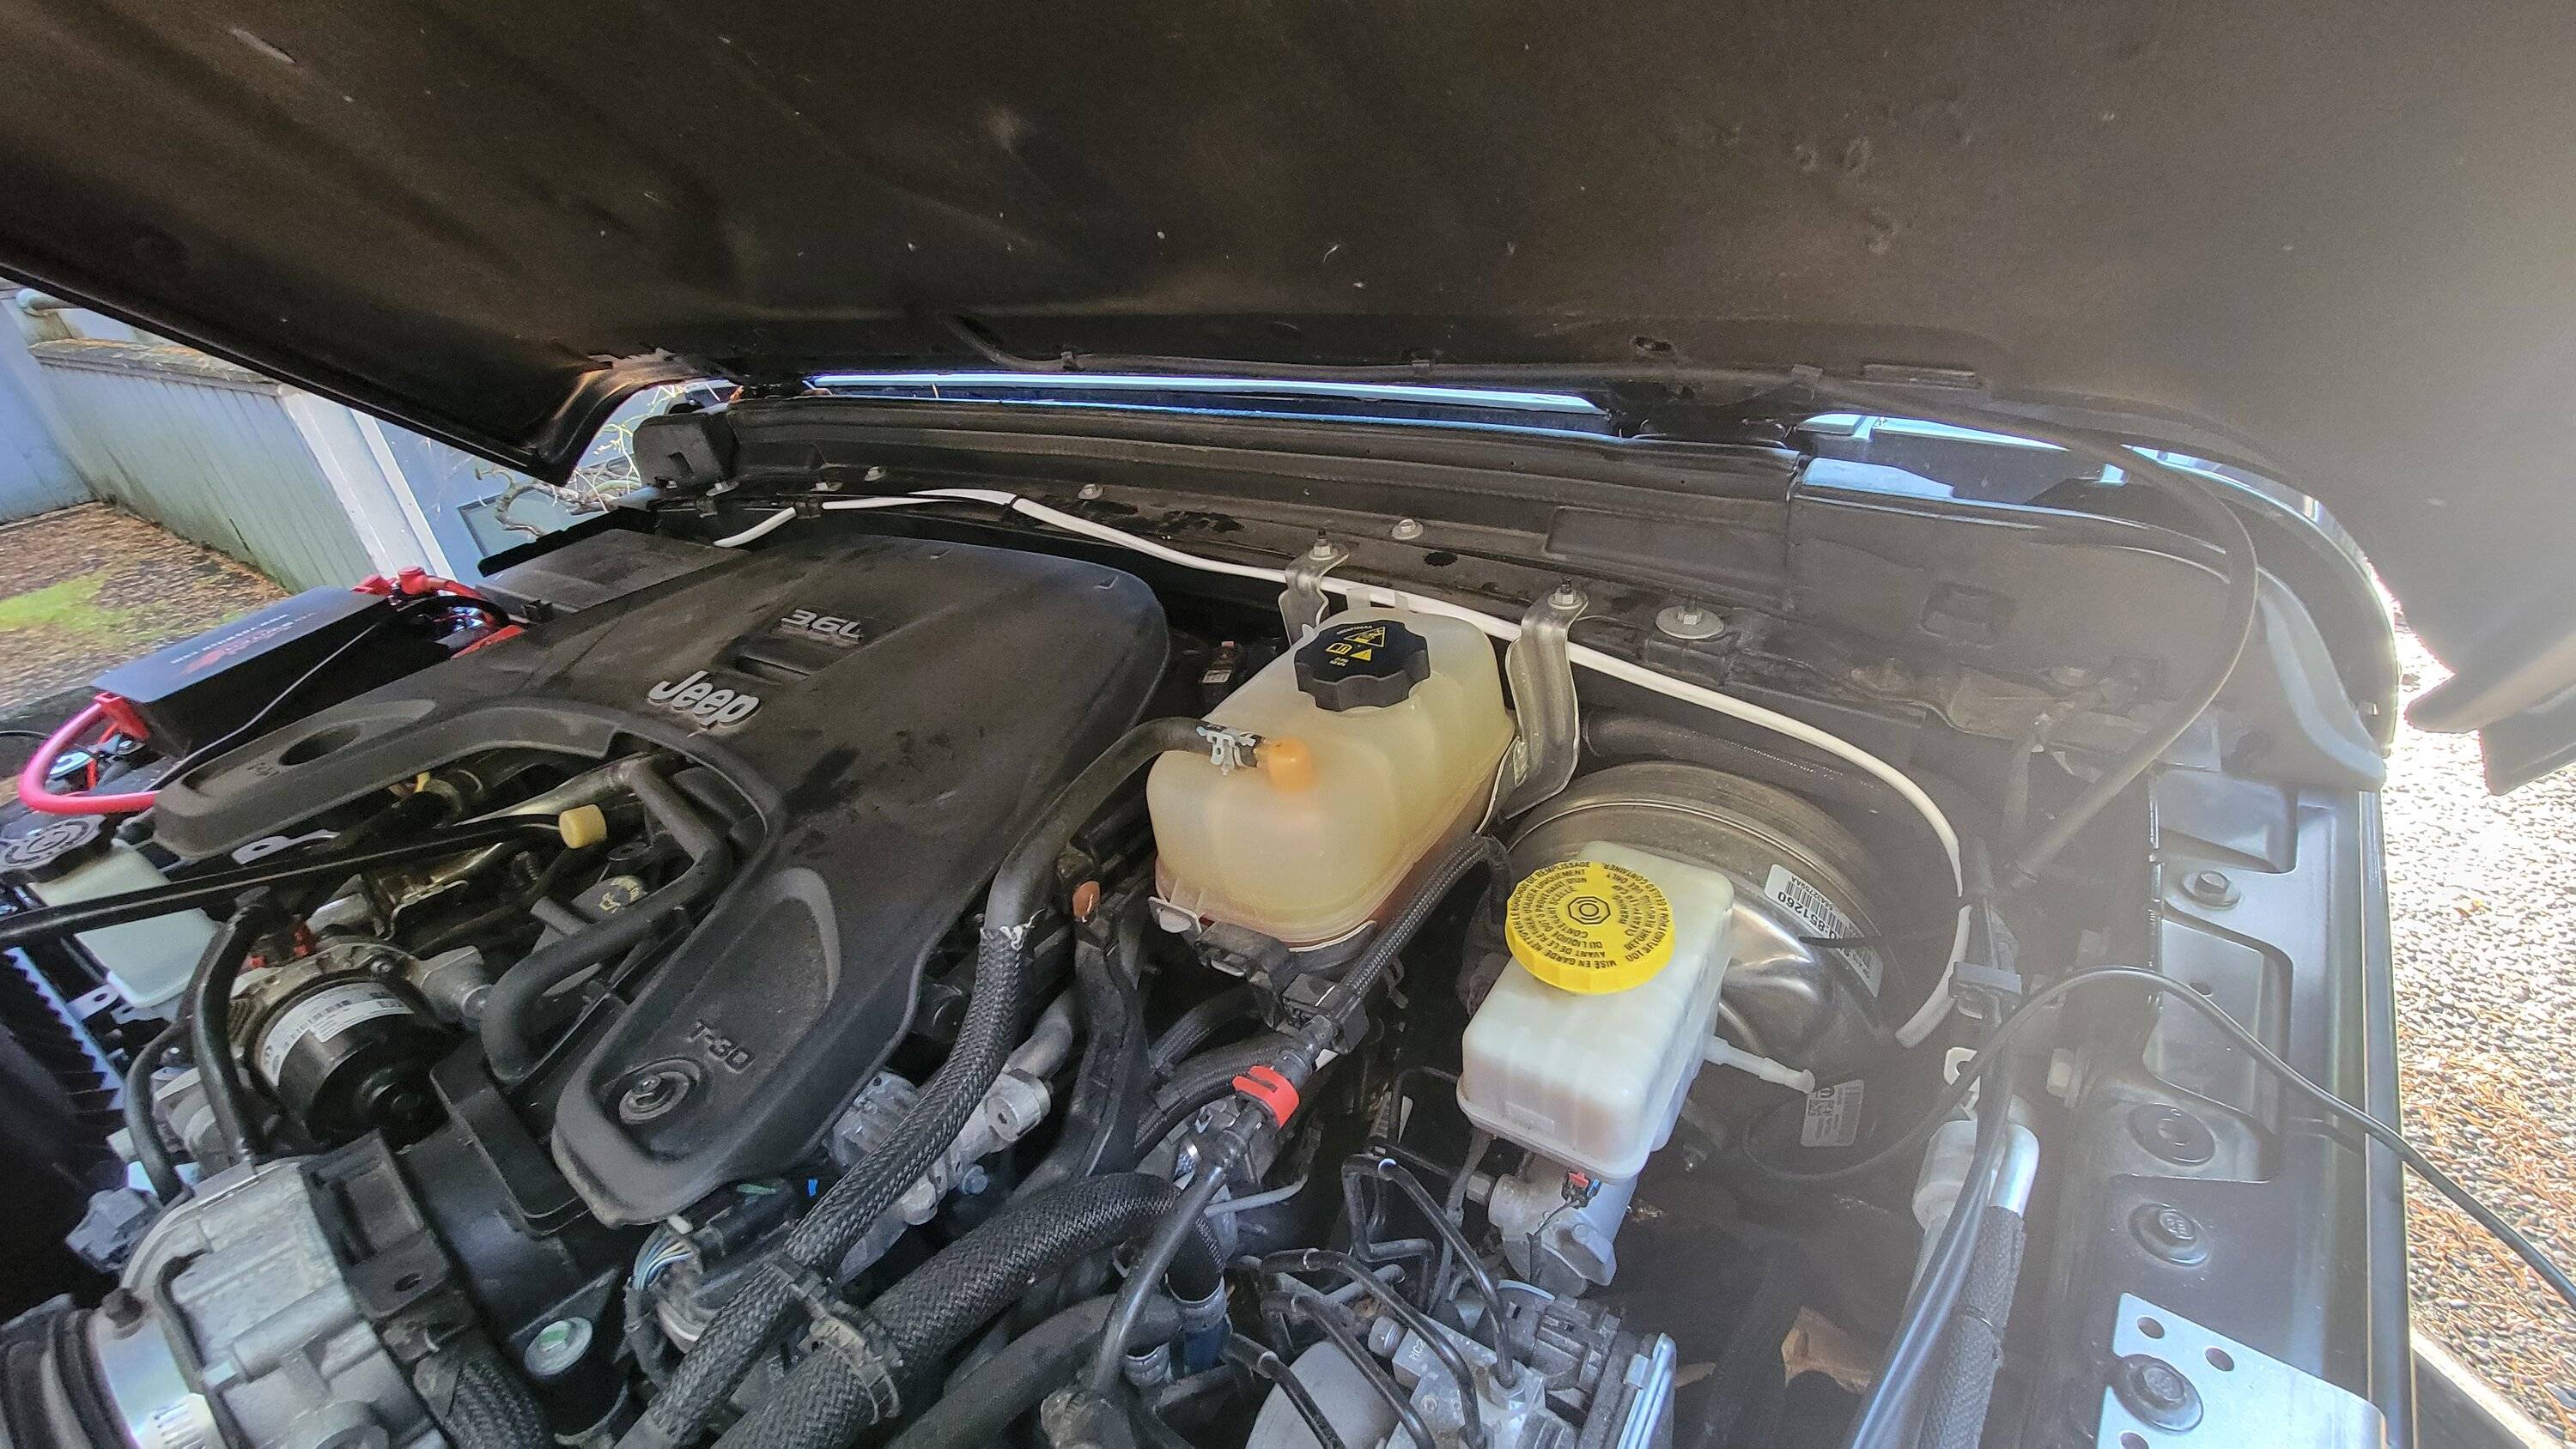
Here's my "inverted" VoSwitch mount, over the battery. The 2 AWG wire connects the positive battery terminal to the solenoid at the bottom left, and the other side of the solenoid goes to my winch.
Marine-grade power cable along the top of the firewall.
Here's the gear I used:
- Yaesu FTM-500 dual-band radio, from Ham Radio Outlet
- Comet CA-2x4SRNMO dual-band 150-watt NMO mount antenna, also from HRO
- CMM A-pillar 20mm ball mount
- generic CAT6 cable to reach the control panel mount.
- microphone extension kit from eBay
- TackForm CB microphone mount
- TackForm 3.5-inch socket arm
- 67 Deisgns "small" arm
- 67 Designs 5mm offset mount
- Topsy Products NMO antenna fender mount
- Larsen NMO base with raw RG58 cable
- 1.25-inch rubber grommet for firewall
- Amphenol RG58 crimp-on connectors from DX Engineering
Some existing equipment:
- VoSwitch JL-300 swithces and relay kit
- 67 Designs phone mount kit (with the duck pond bar and the phone mount)
- Wiring doodads: shrink tube, butt connectors, zip ties
- 12 AWG two-conductor cabie I had left over for a boat project
- Edge-mount zip tie clips
I already had the VoSwitch kit, and it's nice to be able to kill all the accessories I've added whenever I want to -- maybe for diagnosis, maybe to save battery, whatever. My LED lights are on the switch, plus a solenoid for my winch, the CB radio, and an aux power unit for an extra cigarette lighter jack that I can use for charging batteries.
There are some posts here on the forum about the VoSwitch having problems when mounted in the regular spot on the driver's fender near a VHF antenna on the same fender. I flipped my relay box over and mounted it above my battery. With some spacers, that works fine. (But it also means most wires go through the passenger foot well, which some people don't like stabbing.)
The CB Radio is under the passenger seat with the mic hanging from the passenger grab handle. The FTM-500 control head has a touch screen and a speaker, so I didn't need to mount a speaker anywhere else. Plenty of room under the driver's seat and it was central to the driver's fender, the driver's A-pillar, and a path to the duck pond -- plus power coming through the firewall.
The boot-shaped rubber grommet works great, and I pulled both the RG58 and power through its smallest opening. The antenna and power go behind the plastic on the left hand of the driver's foot well, under the plastic at the door, and then under the carpet to the radio.
For the CAT6 cable, I first removed the HVAC controls and the radio bezel. I removed the radio, too, so I could safely drill downward from the duck pond into the dash. I cut an X into the rubber pad in the duck pond and pulled the cable through. There's lots of steel framing around the radio, but I found a way to go down the left side of the center console to the transmission tunnel and backward under the carpet toward the radio under the seat.
The radio is mounted to its U-shaped bracket. I cut two small slits in the carpet and pushed bolts through, backed by washers, to fasten the radio to the carpet. There's a seam in the carpet that runs laterally, and a heating duct pokes up through it to the foot well of the back seat. The radio sits on the top of the heating duct, so it isn't blocking any airflow or getting heated (or cooled!) by the HVAC system. It sounds floppy, but it's really fine; the carpet is thick, kind of stiff, and under tension from all its contouring and mounting points.
The mic is at the left hand side on the A-pillar mount and works great there. It's a bit tight to the steering wheel, but I think there's plenty of room.
The radio works great, is plenty loud enough, and I'm not having any RFI issues with any of the other electronics. I think I should get a shorter stick for the radio head because it is a bit too far out. Maybe I need to secure the female end of the microphone line. And I think I could've drilled the hole for the head unit line a bit further back, but it's good enough and I can't even see it.
Those are my notes! Happy to answer any questions.
From the driver's B pillar looking in

Along the dash from the driver's mirror to show clearance and projection.

Microphone connection at the bottom of the steering covers, near the ODB2 port
Looking at the duck pond down onto the radio.
From the rear foot well looking forward under the driver's seat to see the radio
Here's the antenna mount. The white wire is the power cable.

Here's my "inverted" VoSwitch mount, over the battery. The 2 AWG wire connects the positive battery terminal to the solenoid at the bottom left, and the other side of the solenoid goes to my winch.

Marine-grade power cable along the top of the firewall.
Sponsored
Last edited: