TheHops
Member
- Thread starter
- #1
I sort of cross posted this from my build thread over on the Gladiator forum, which goes much more in depth with my own "command center" setup and personal touches, but I figured someone over here may find this helpful in a more general sense. I removed as much information as possible that didn't pertain directly to the USB hub installation, but please forgive any oversights. Also, full disclosure, I derped and ordered an AC hub, but I have an identical form factor DC one on the way that will be taking its place. I went ahead with the process though in order to get pictures.
What you'll need (for my method):
-Phillips head screwdriver
-Small flathead screwdriver (jewelry/eyeglasses sized)
-Small drill bit
-Drill or dremel
-Wiring pliers and/or a sharp knife
-Plastic trim tool
-Jeep tool kit (for dropping the windshield)
-USB hub (appropriately sized...no more than about 4 inches long, 2.5 inches wide, and 1.5 inches tall if you want it fully hidden in the cubby)
-12v power adapter/piggyback harness for JL/JT (Amazon/Quadratec carries them)
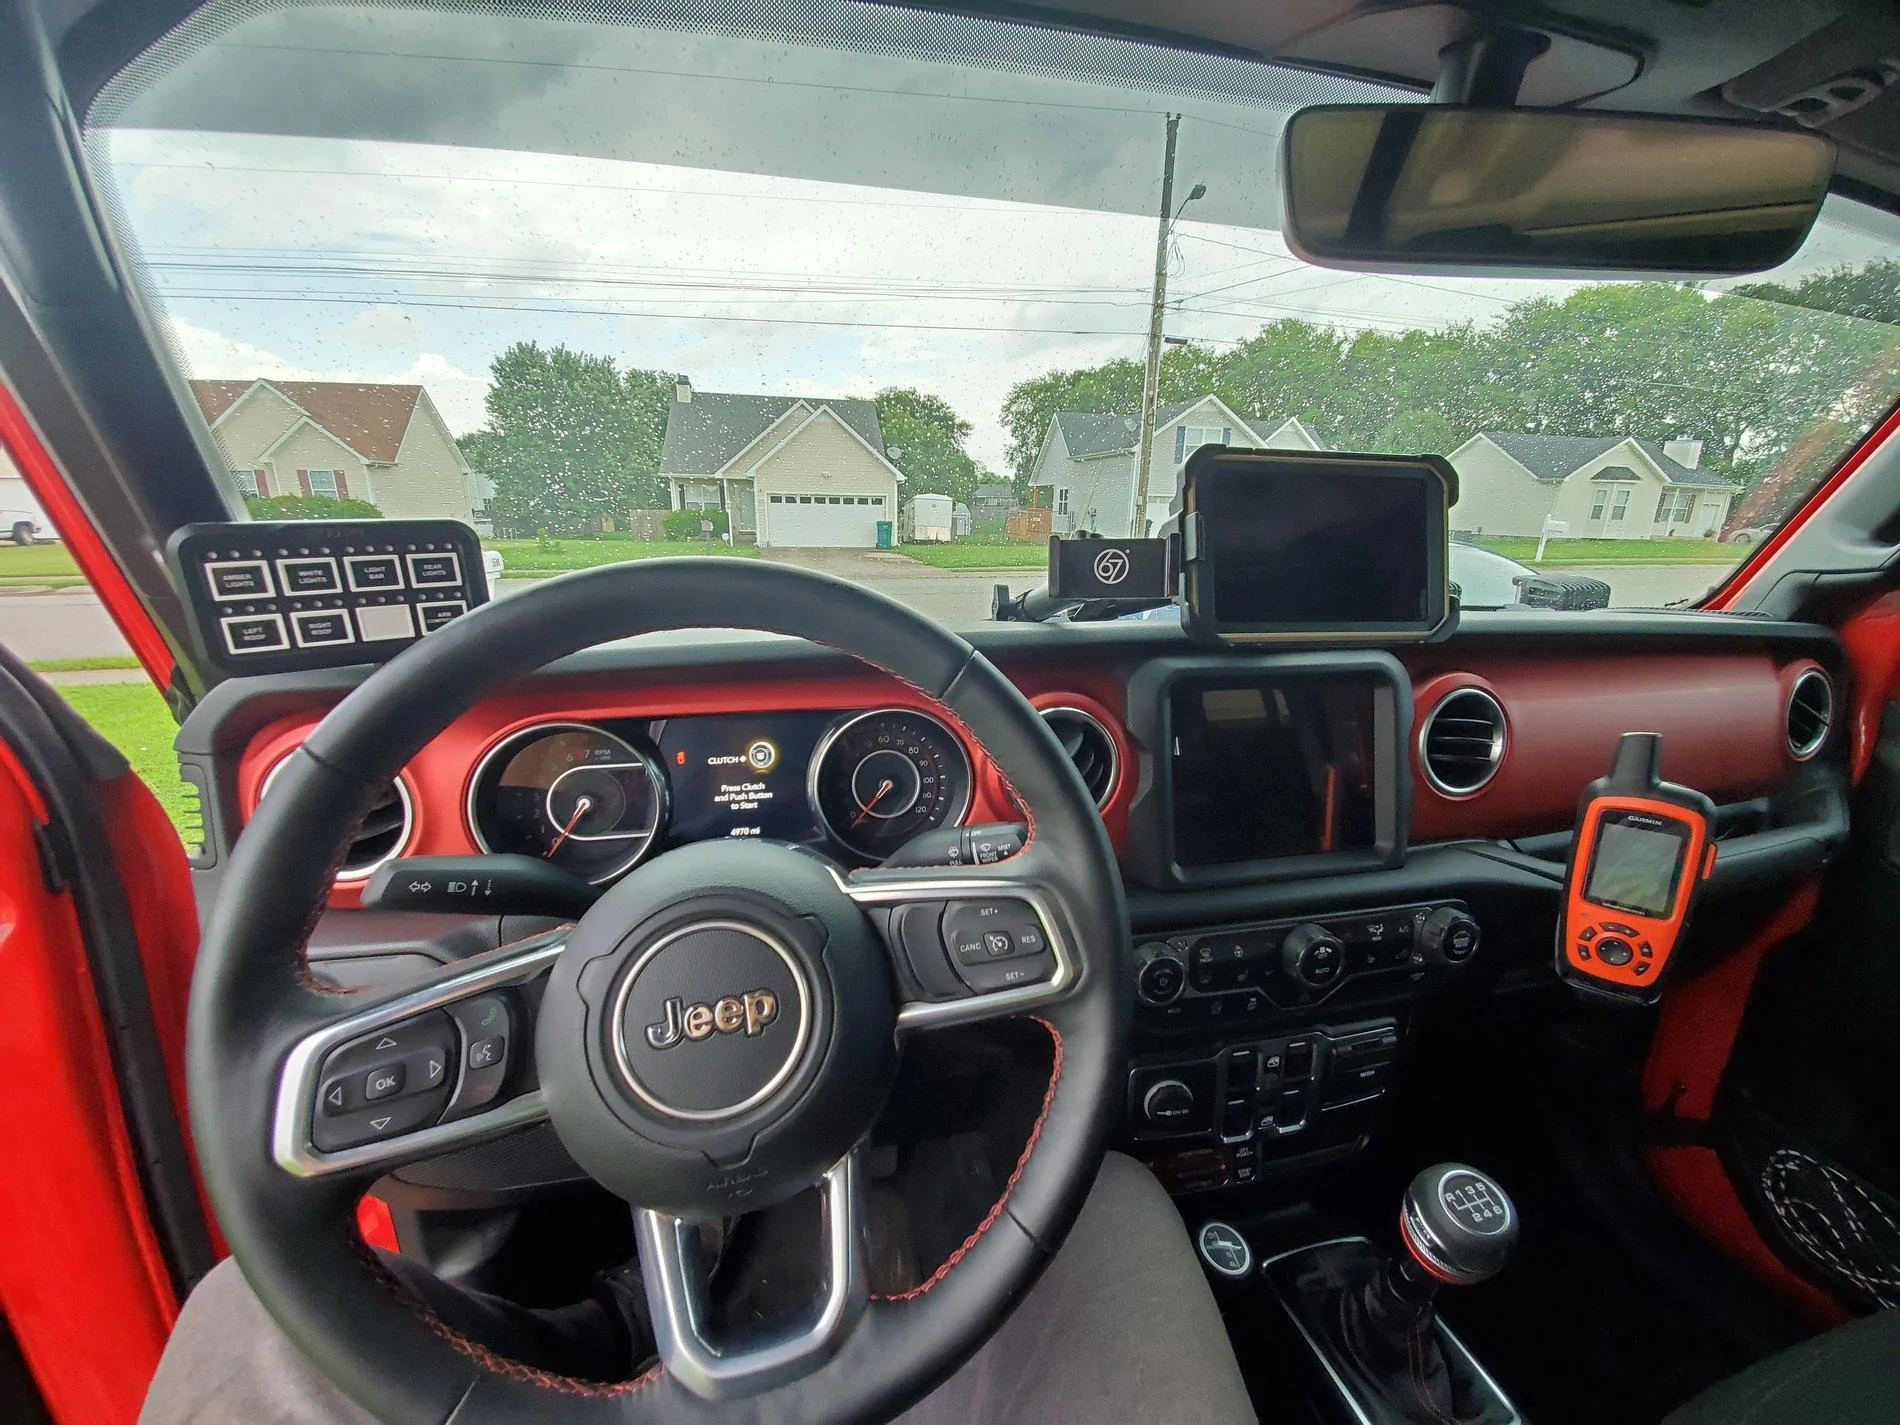
The low down: My vision was to have a customizable, centralized yet low profile "command center" that would incorporate my phone, an *actual" GPS (with off road maps), and my personal SOS beacon (which also has trail and topo maps). I also wanted a mounting solution for my GoPro to film trail runs. With all of these devices, I didn't want a spaghetti monster of cords, so having a hidden USB hub in the vicinity of the devices was also a must. That is the main reason why I opted to go with the mounts that I did, being that they retain a portion of the recessed top cubby.
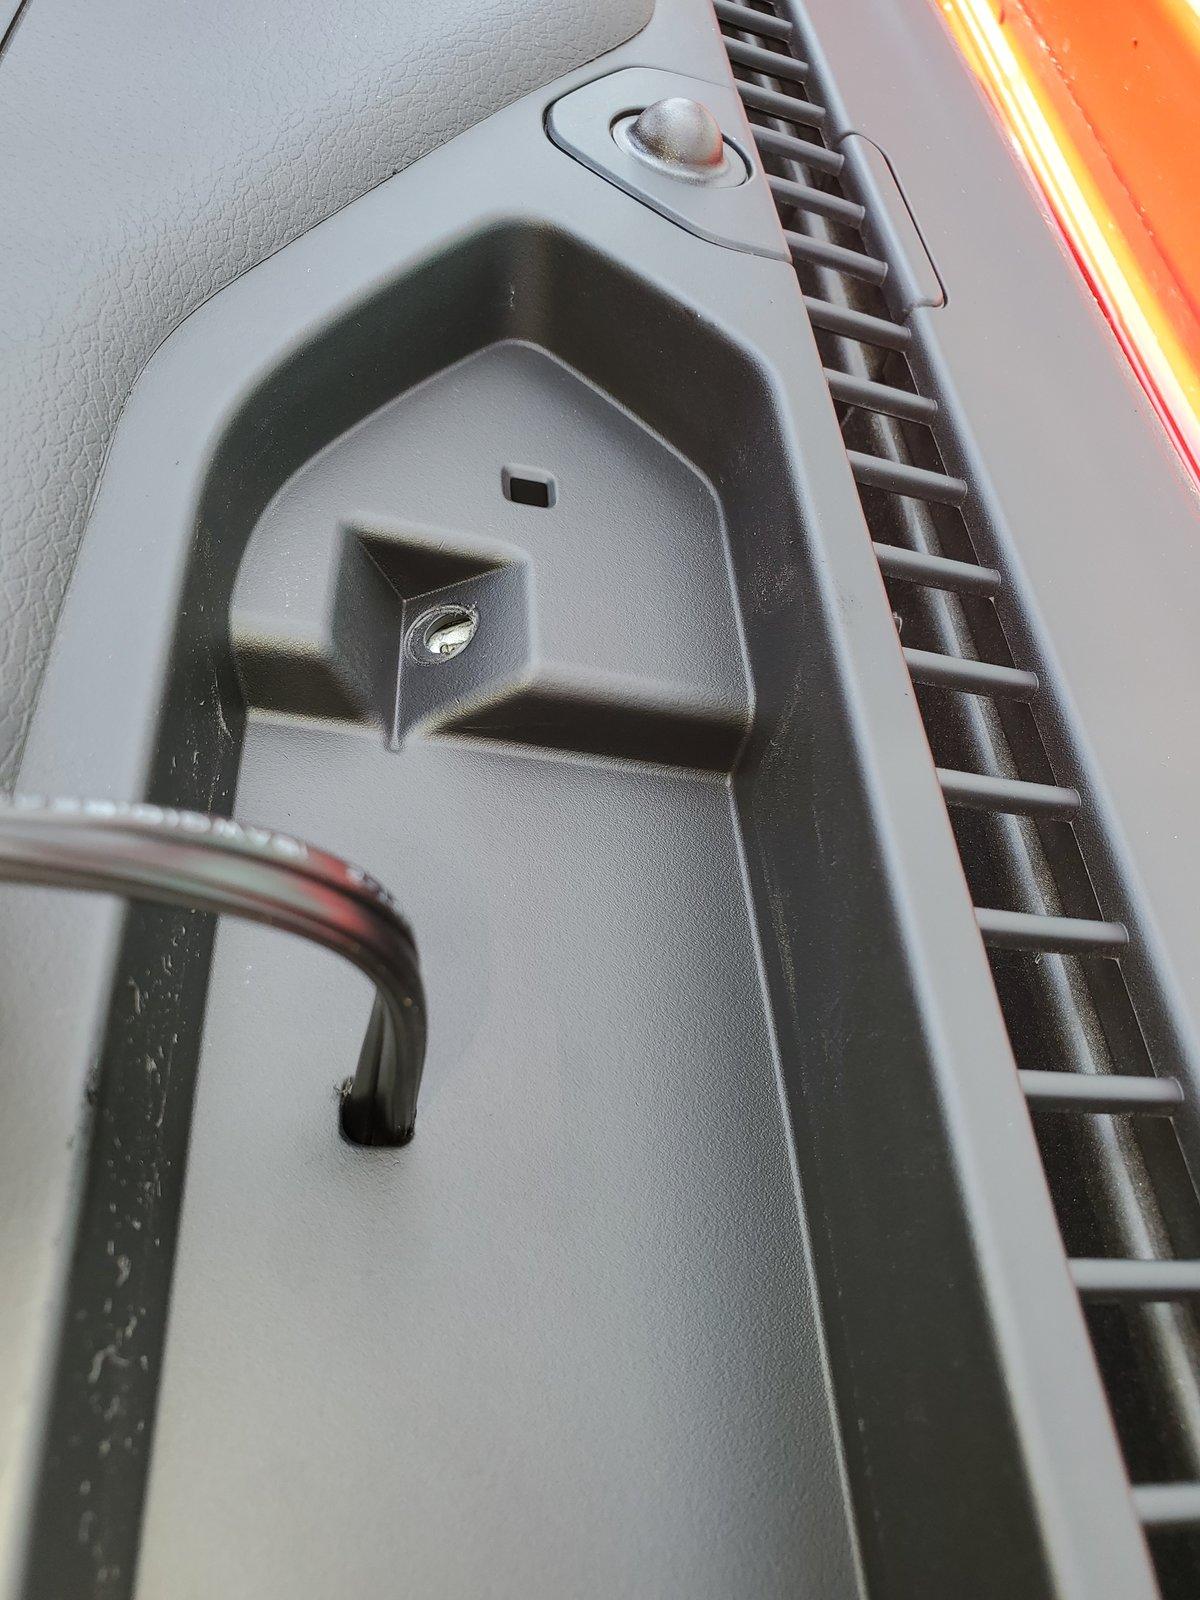
I determined that I wanted a very small ingress point for the USB hub, in case I ever wanted to put the insert back in and go back to stock. This small indentation on the left side of the cubby (insert removed) is the point that I personally decided on, but just about anywhere will work for my method. I mean that to say that, as long as you're not using one of the large (deep), round, recessed USB sockets you should be just fine. If you do use one of those, you will need to choose your location more carefully as the radio will likely be competing for the same space.

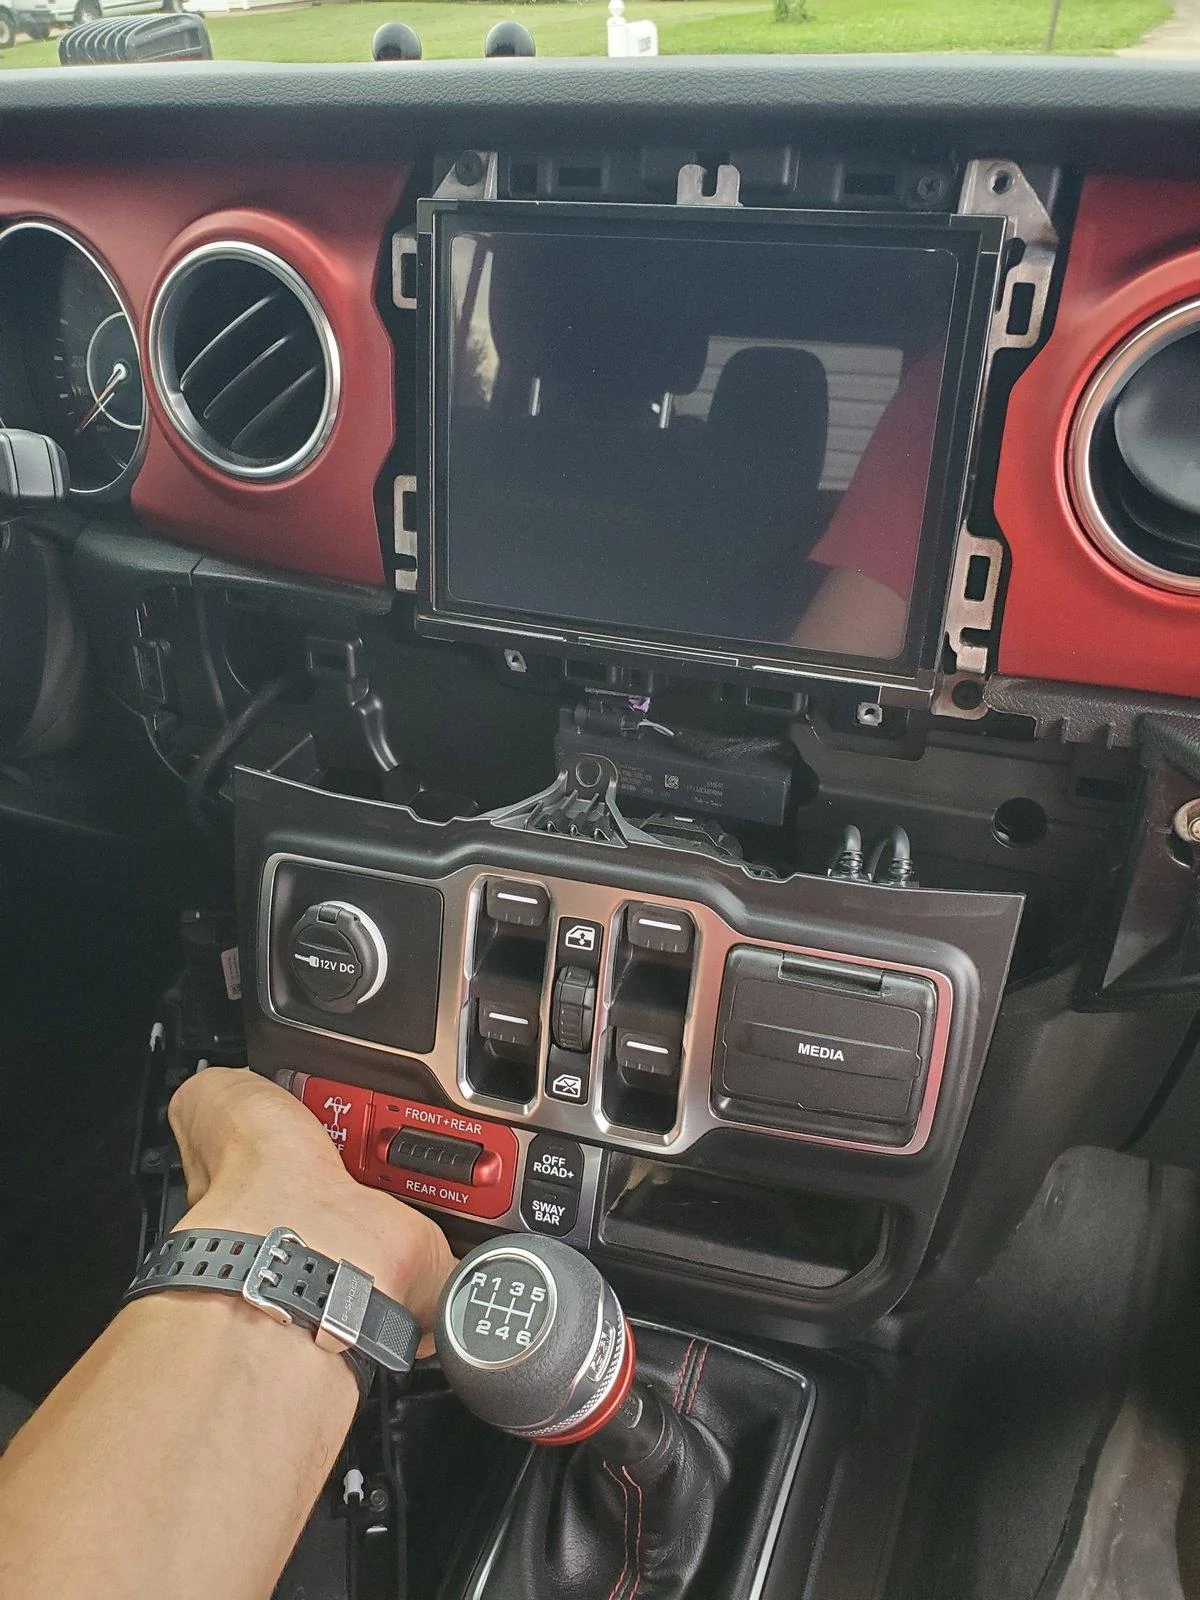
Before drilling, I wanted to make sure things were clear behind the dash, so I started popping panels. This was much easier than I expected. If you are unsure, Google the how-to for the JL for a step-by-step in real time. Honestly though, the guy talked way too much for such a simple operation, so I'll keep it easy for you. The down and dirty is to start with the panel with the AC controls. It is completely held in place by clips. I started with a plastic trim tool nearest to the passenger grab bar, and worked my way across the top to the push start button. Once you have that out of place, you can work on the radio. I have the upgraded radio, but I imagine it is similar for the 7" system. There are two screws at the base of the radio to remove, that will allow you to peel off the radio surround trim, which is also held on by clips.

Once those are undone and the trim is removed, you will see four screws at the corners of the radio. Undo these, and the radio will pop loose.
Once behind the radio, I was able to see my ingress point. It appeared to be safely away from all obstructions, and was not blocked by the radio when in place. Again, just about anywhere on this cubby should work for simply routing wires, but be sure to do your due diligence if you are using a deep, flush mounted hub.
At this point, I decided to remove the freedom panels and drop the windshield in order to give myself more room to work, and so that I could drill straight downward. I used a dremel and a small bit to drill out and gradually widen the hole until the clipped USB hub wires fit snugly through. I used a small cardboard box to catch all of the plastic shavings, then I hit the top side with a shop vac. The result is fairly clean, and would be easily covered by the Mopar insert if taken back to stock.
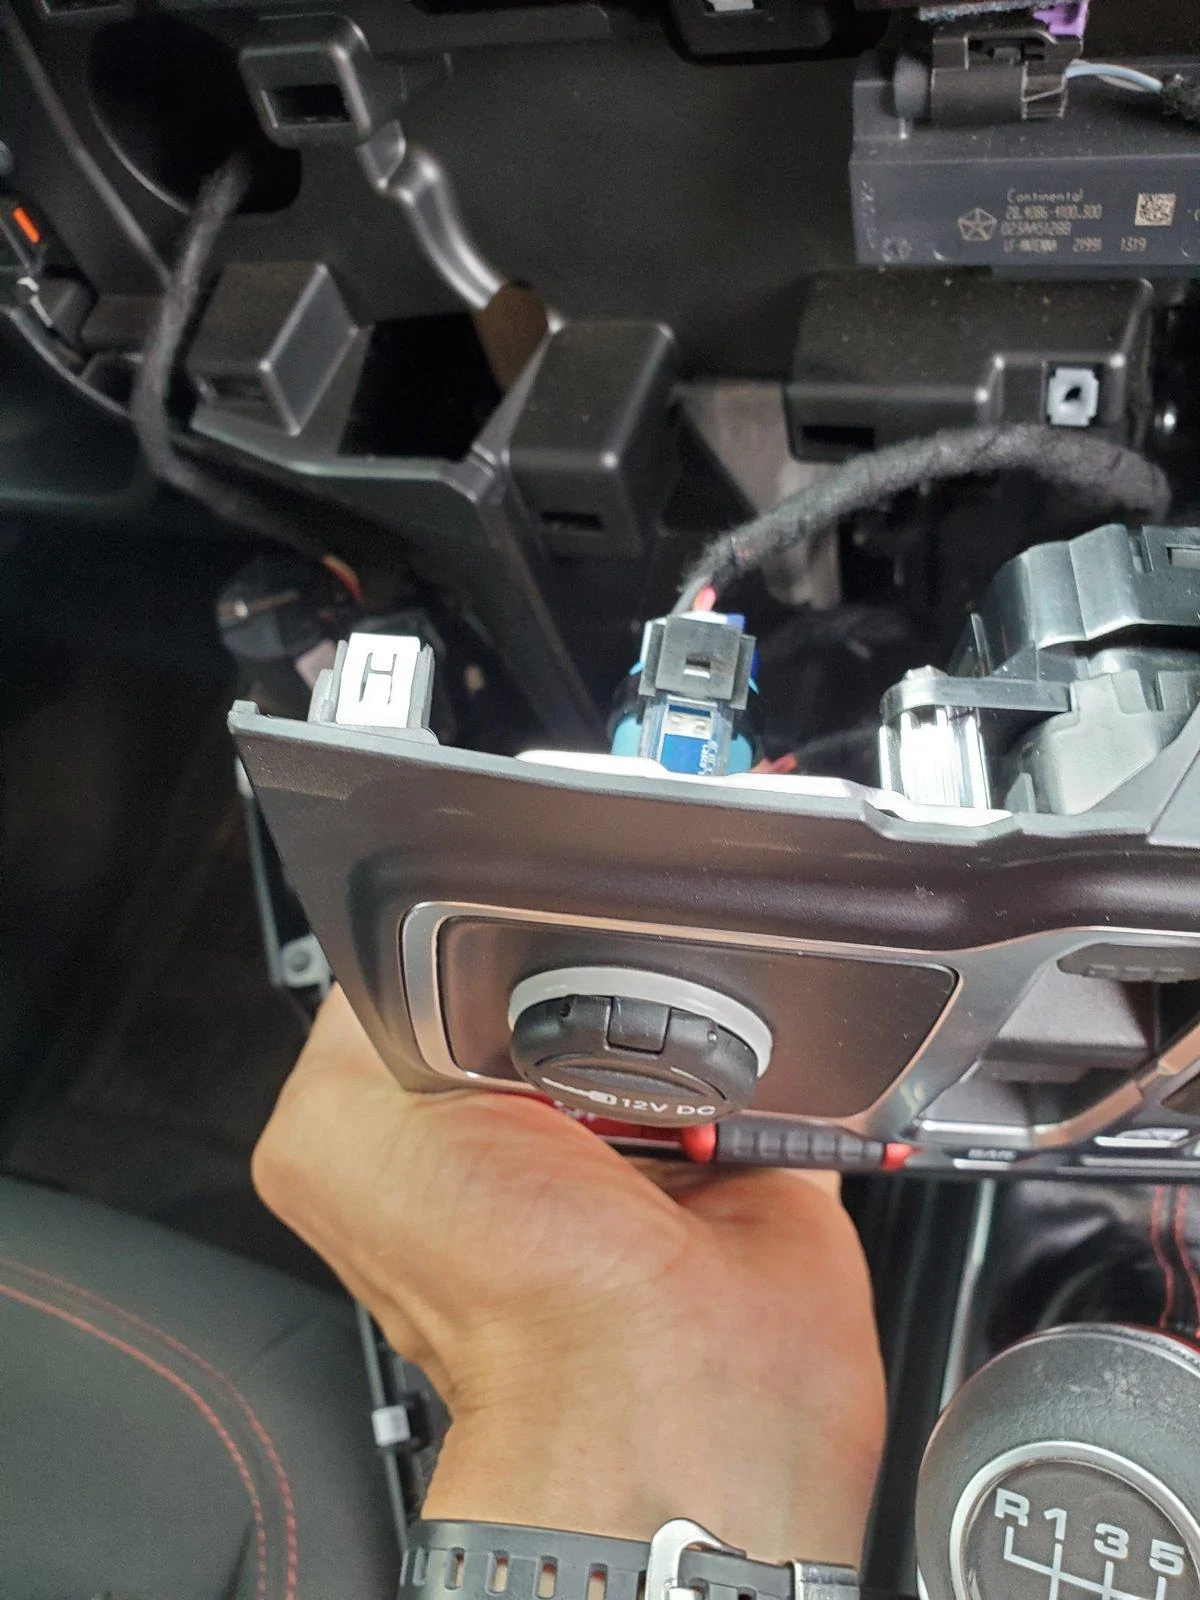
Having completed that, it was time to work on the lower part of the dash and get my piggyback harness up behind the radio. The lower dash (with the window controls) is held in place by a single screw, and numerous clips. Once this screw is undone, gently pry on the upper corners with your fingers and it will pop out of place.
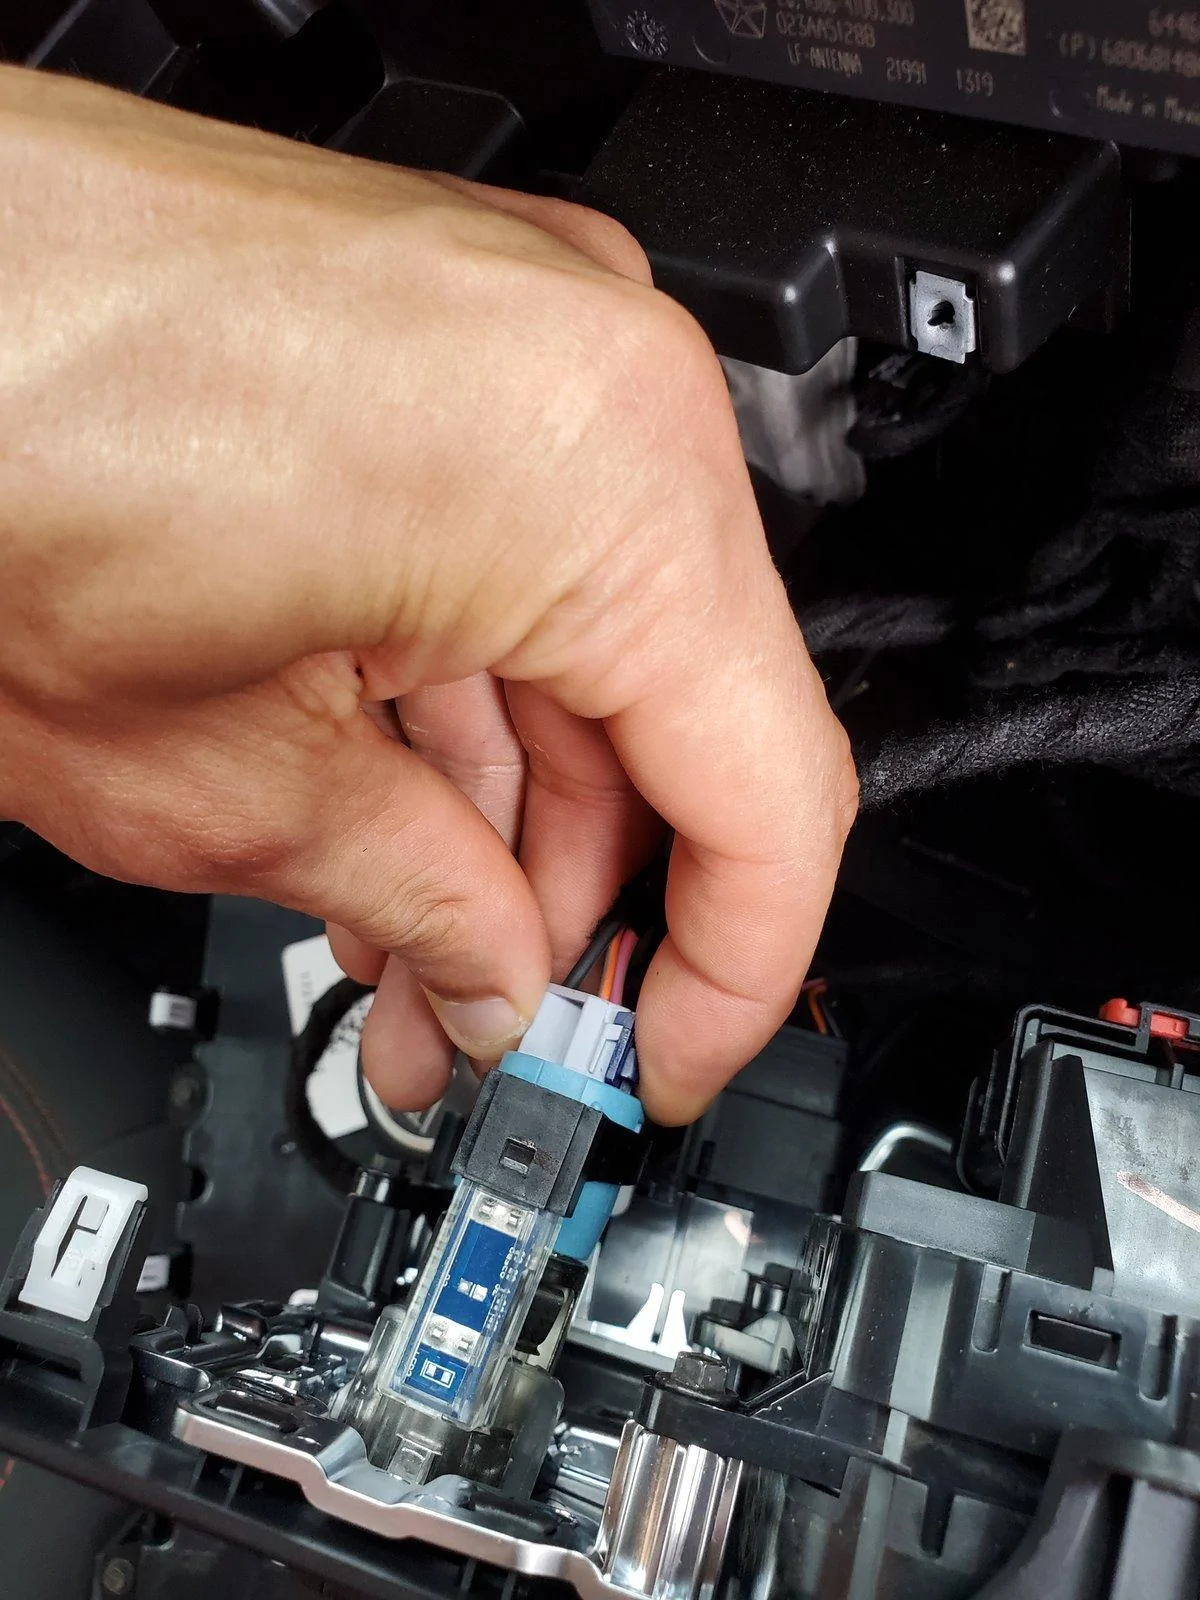
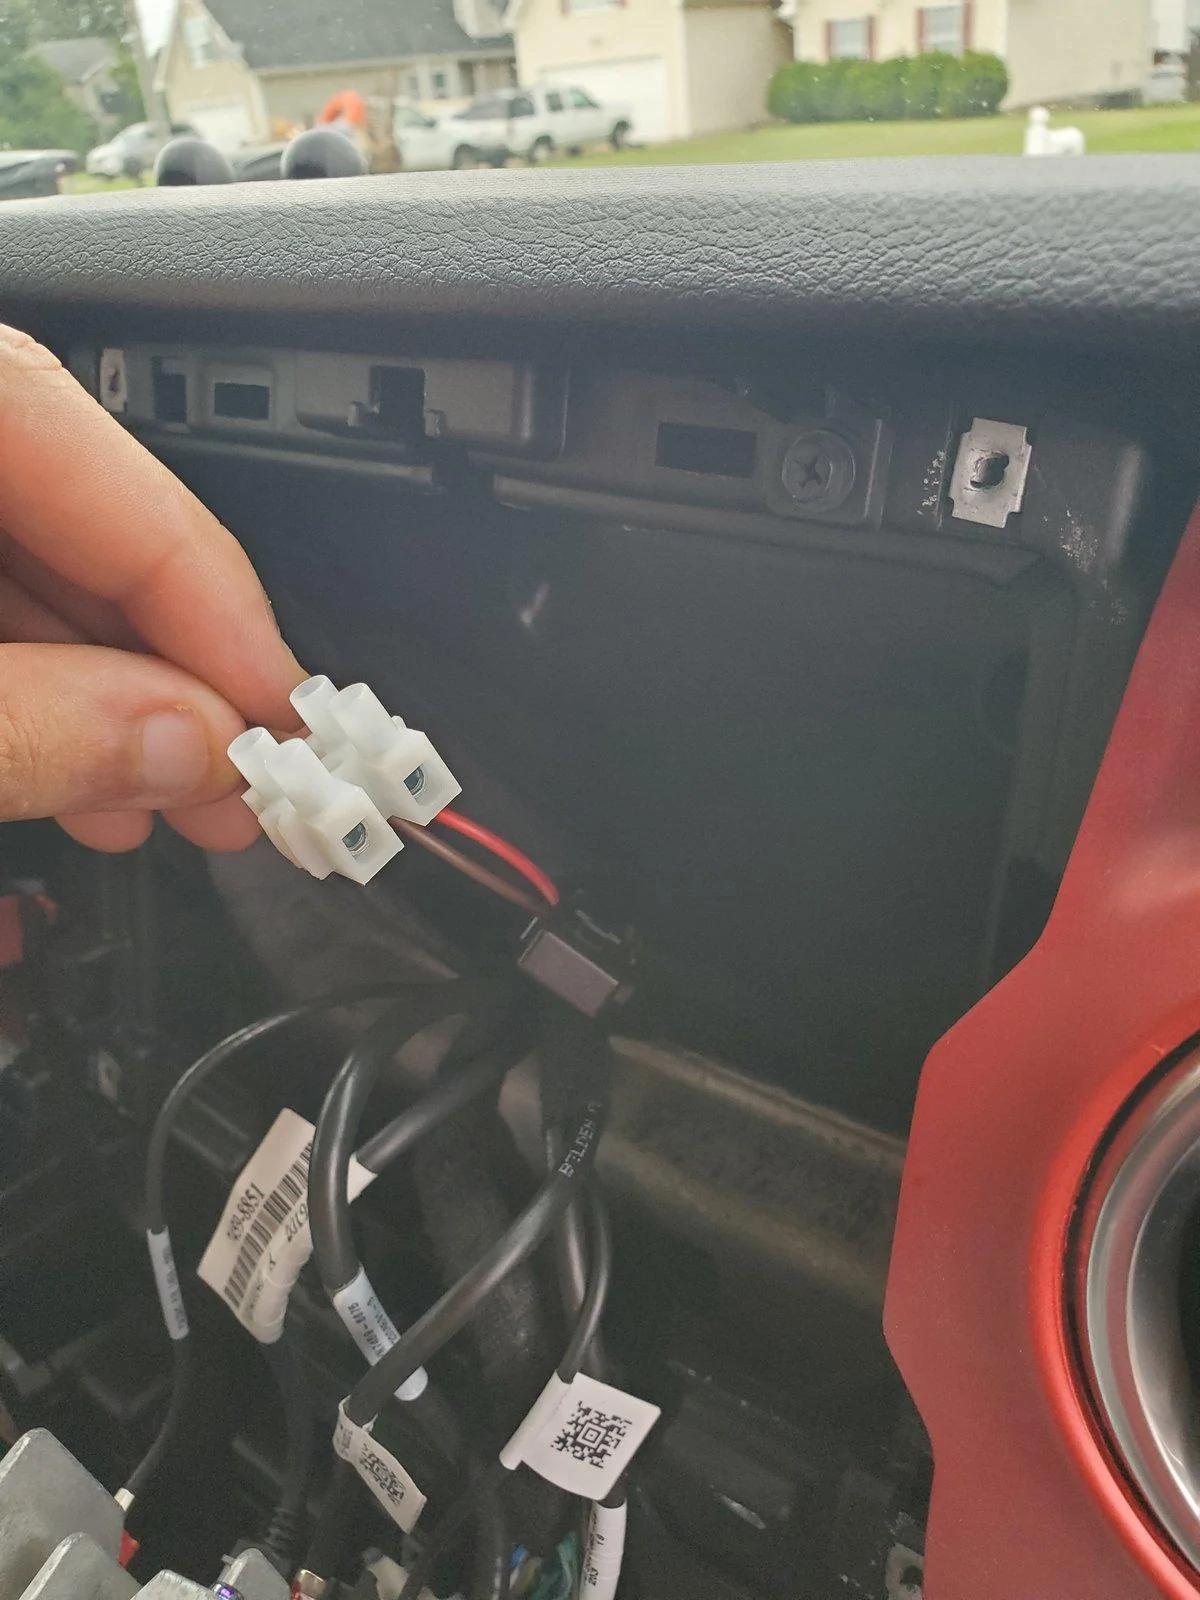
Once that is out of the way, look directly behind the 12v port and identify the plug. Pinch against the blue clip, and remove the OEM harness.
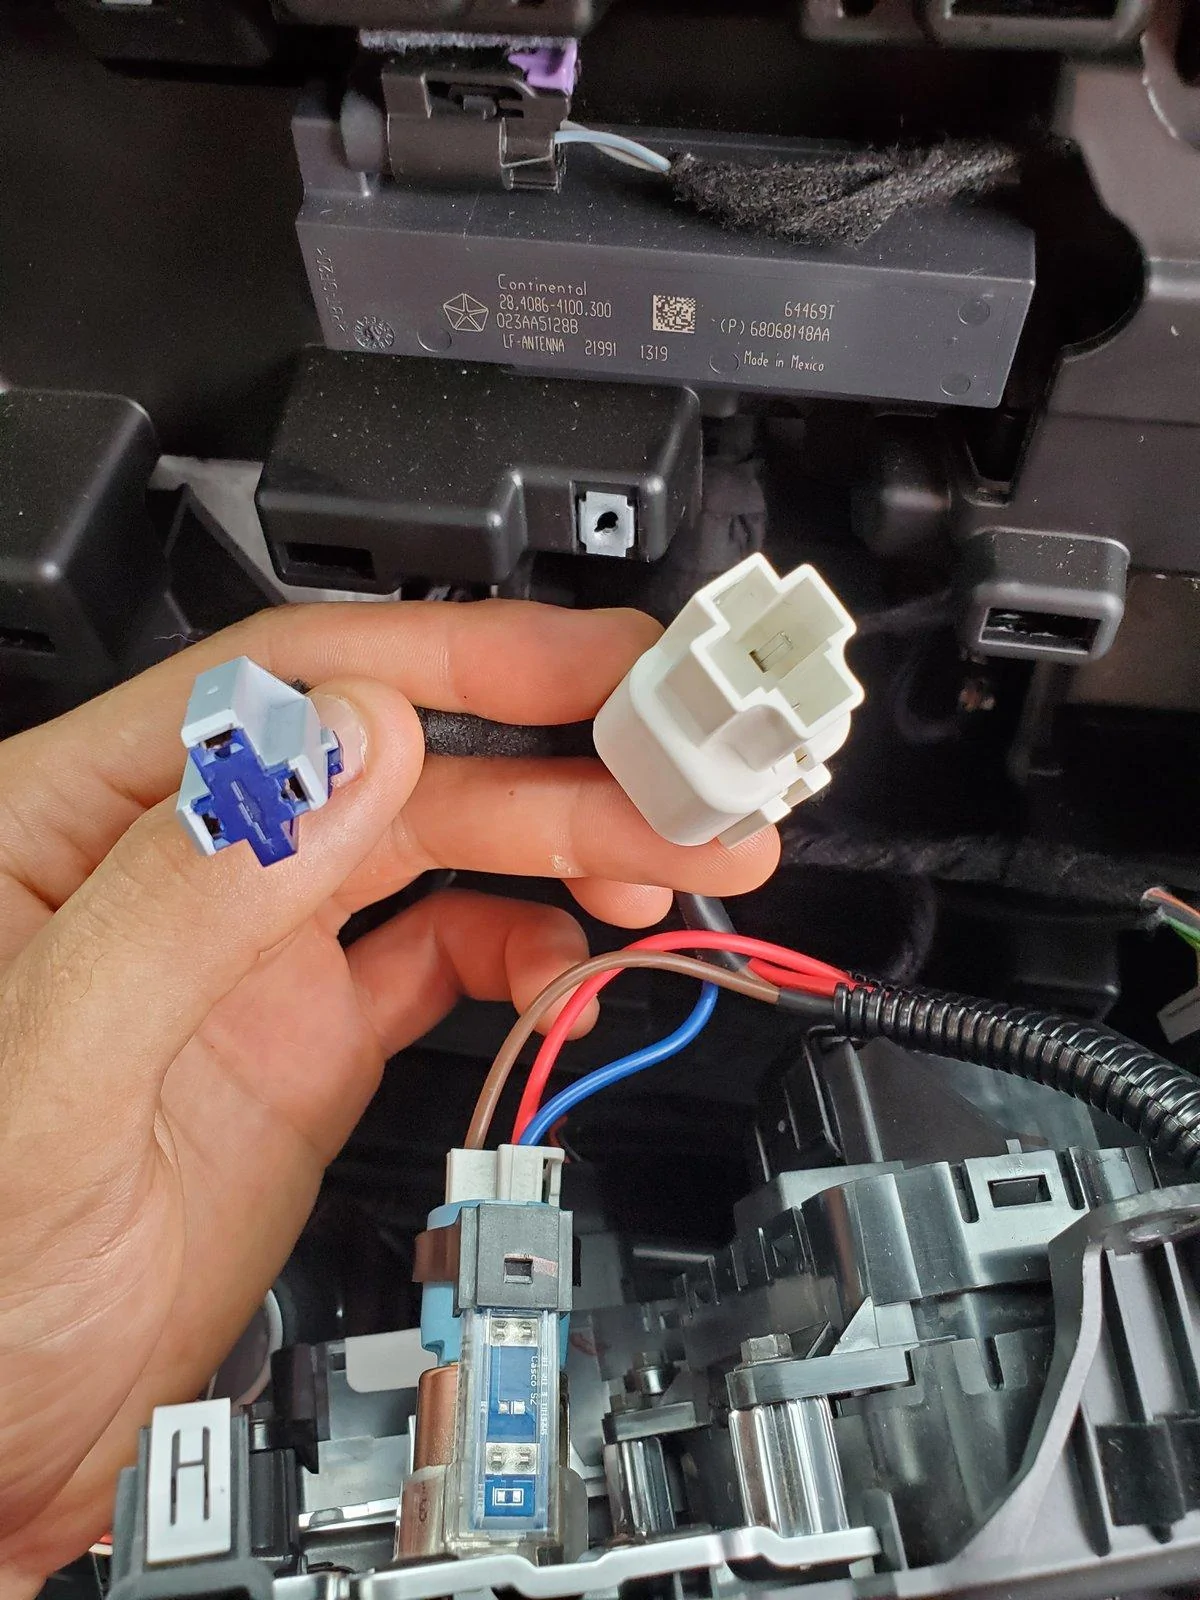
With the purchased harness, plug in the appropriate piece to the OEM 12v from where you just removed the stock plug, and plug the stock piece in to the splitter on the purchased harness. In the picture below, the left piece (OEM harness) plugs in to the right piece (splitter on the purchased harness).
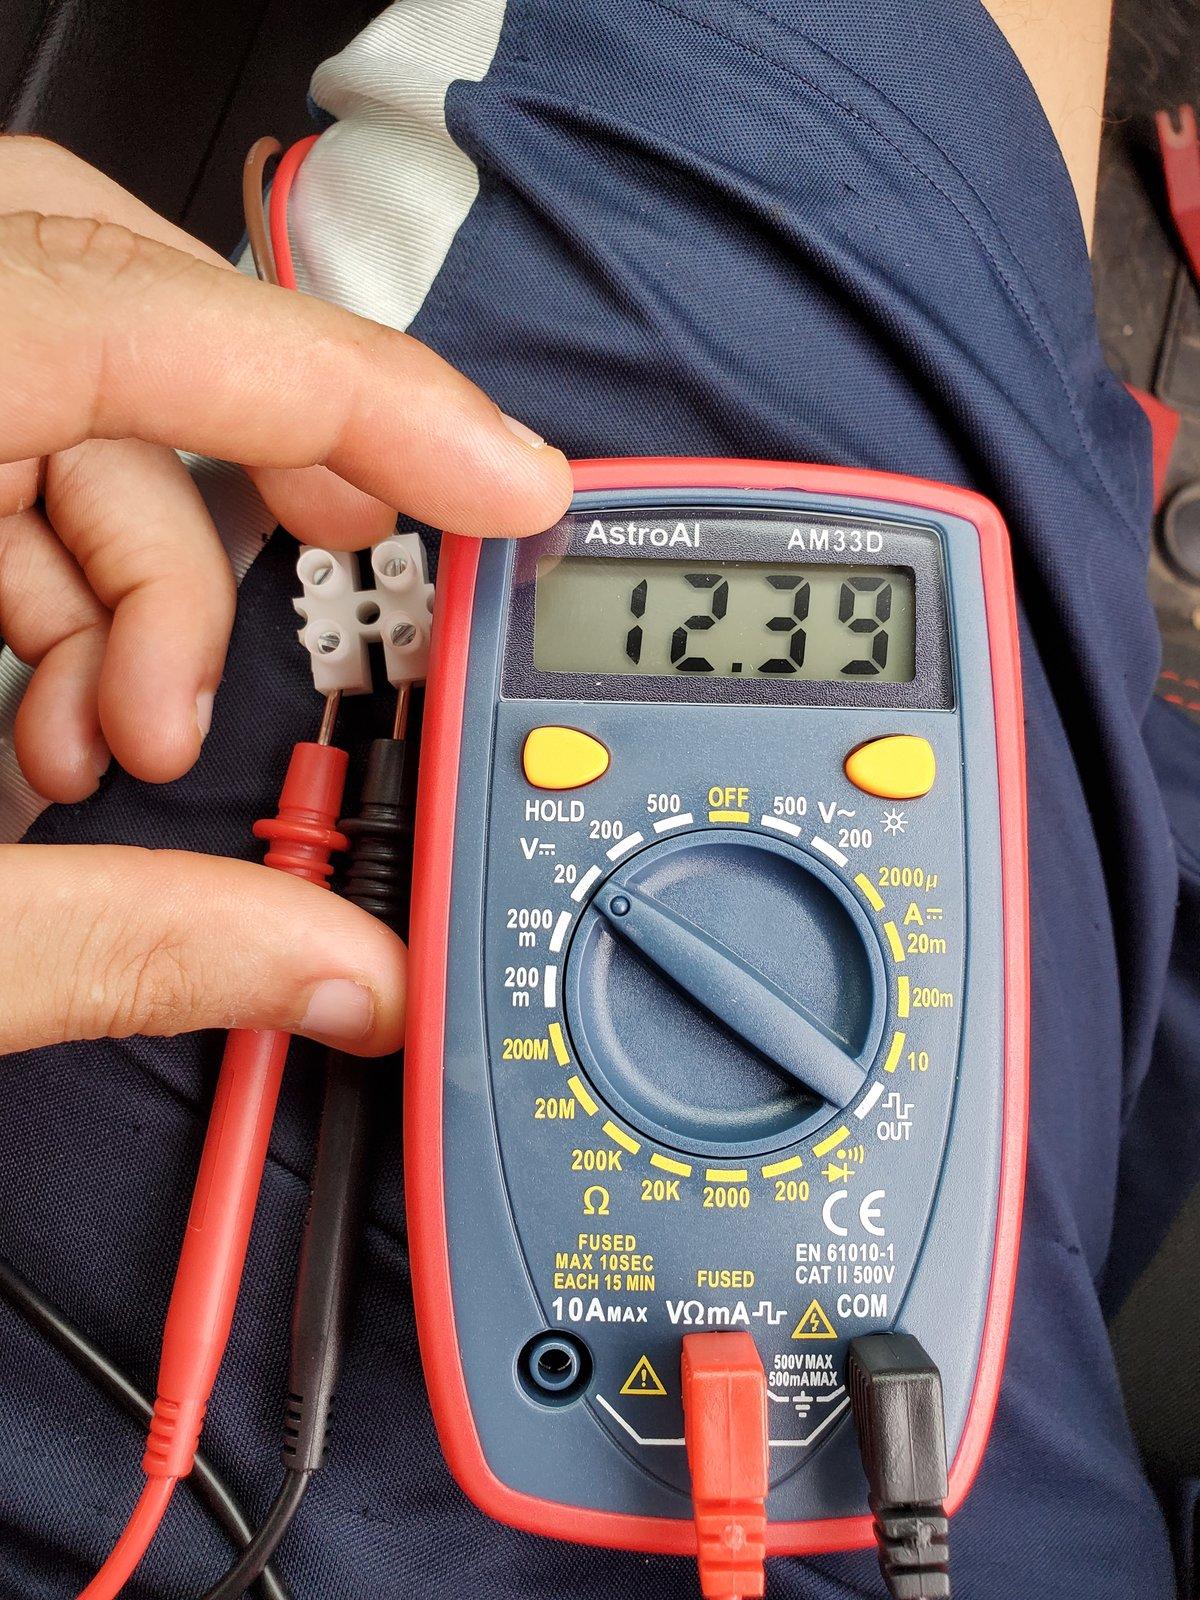
After that take the free end, and route it up behind the radio, and pull through. It was a bit tight for my ham hands, but not too bad once you find the route. After that, I turned on the ignition and I hit it with my multimeter to make sure everything was good.
From there, strip the positive and negative wires on the USB hub, insert it in to the corresponding positive/negative opening on the purchased harness, and tighten down the clamps with your mini flathead for a solid connection. Once that is complete, make sure all wires are tucked safely away from pinch points, and you are good to reinstall all of the trim. Don't forget to reinstall all of the screws (again: one for the lower dash piece, four for the radio, two for the radio trim)! All of the screws are identical (assuming that the 7" radio is the same), so don't worry about mixing them up.
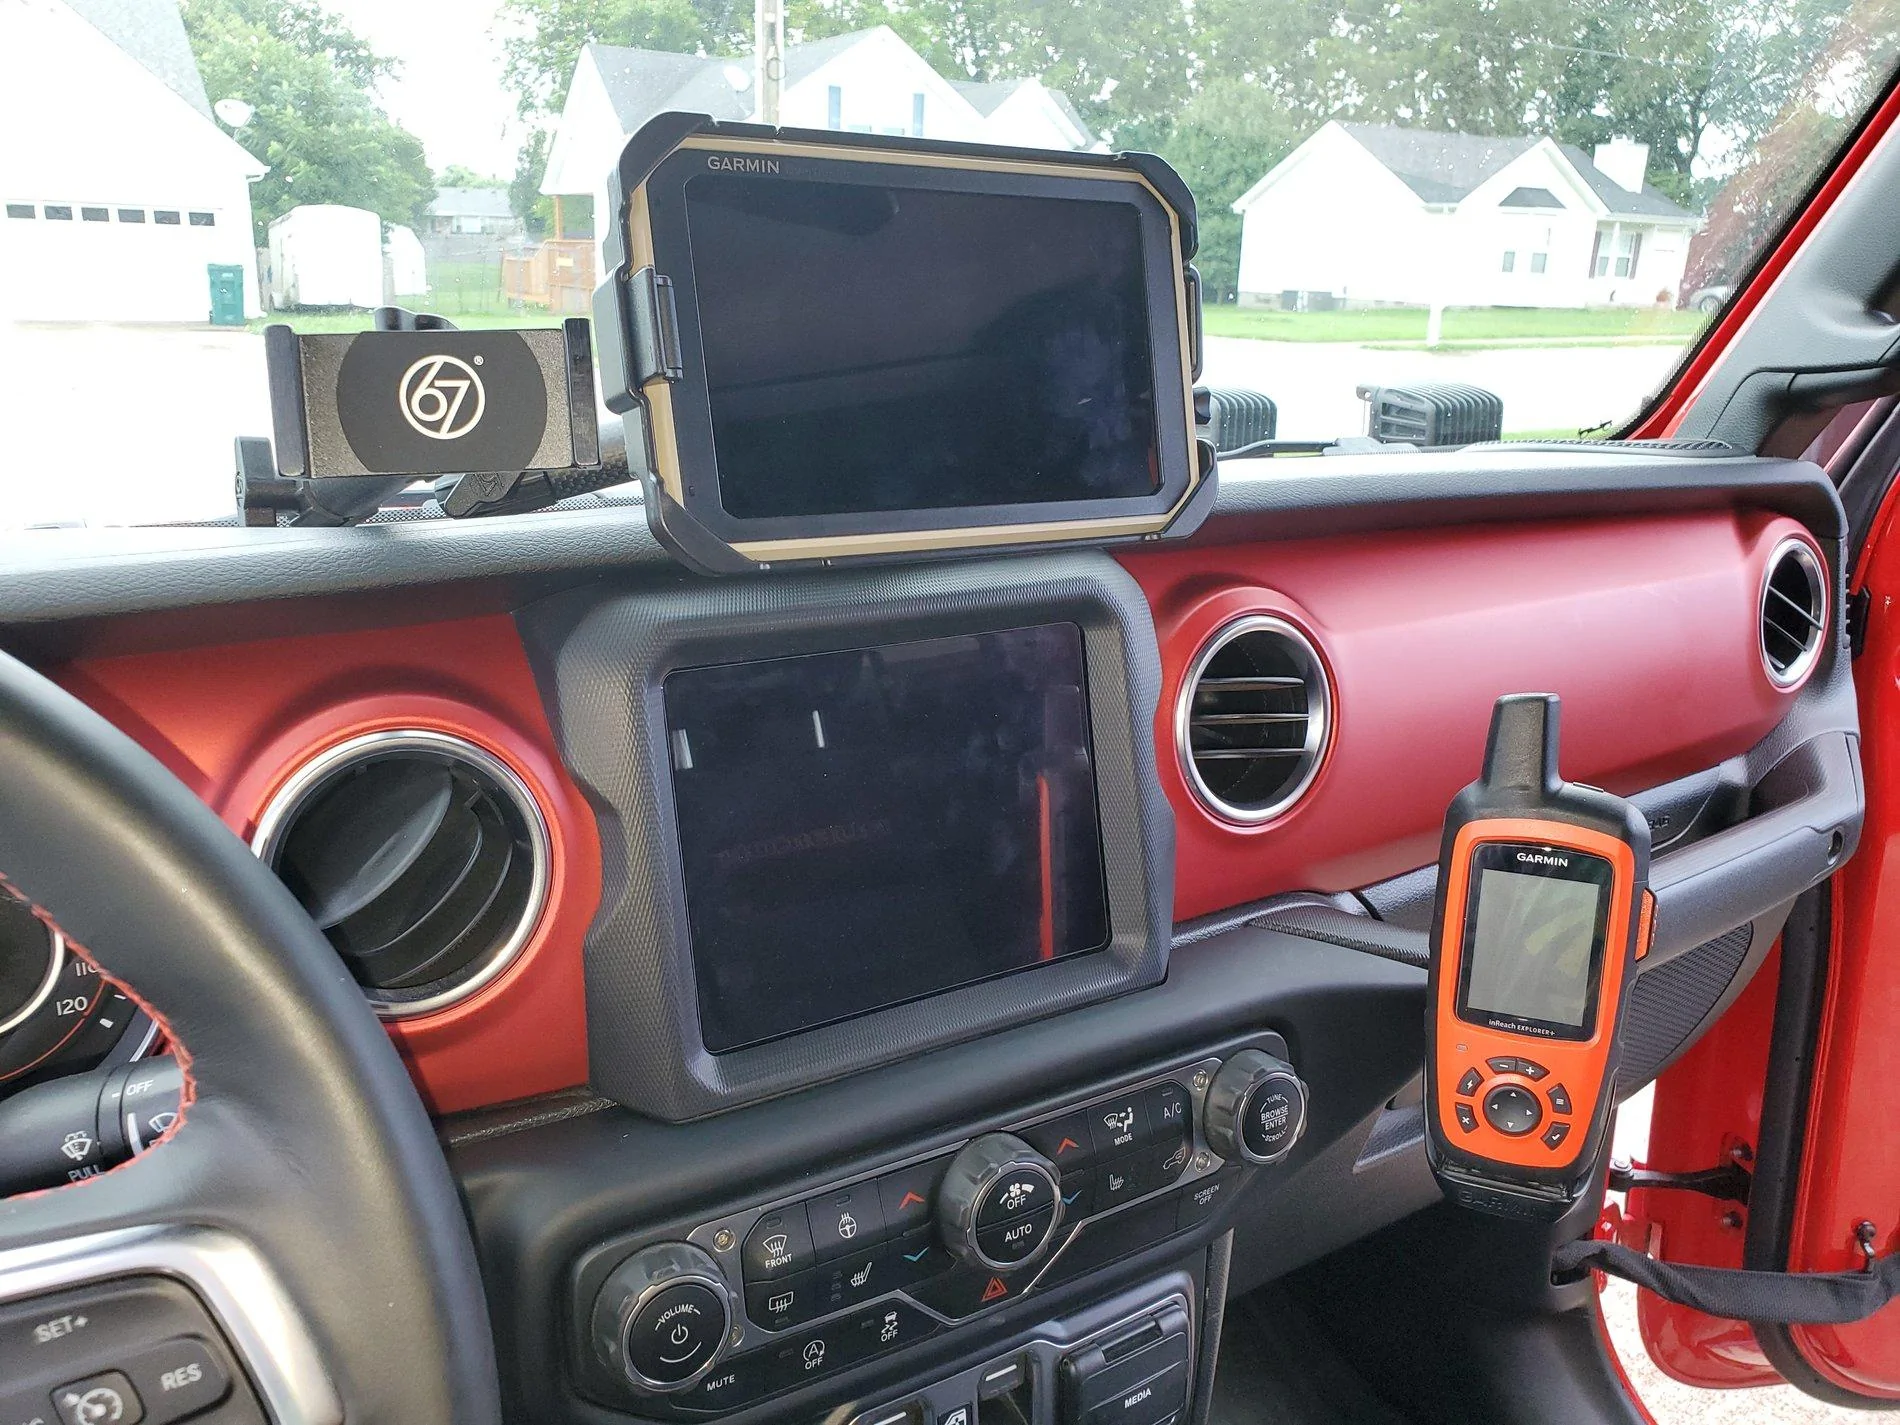
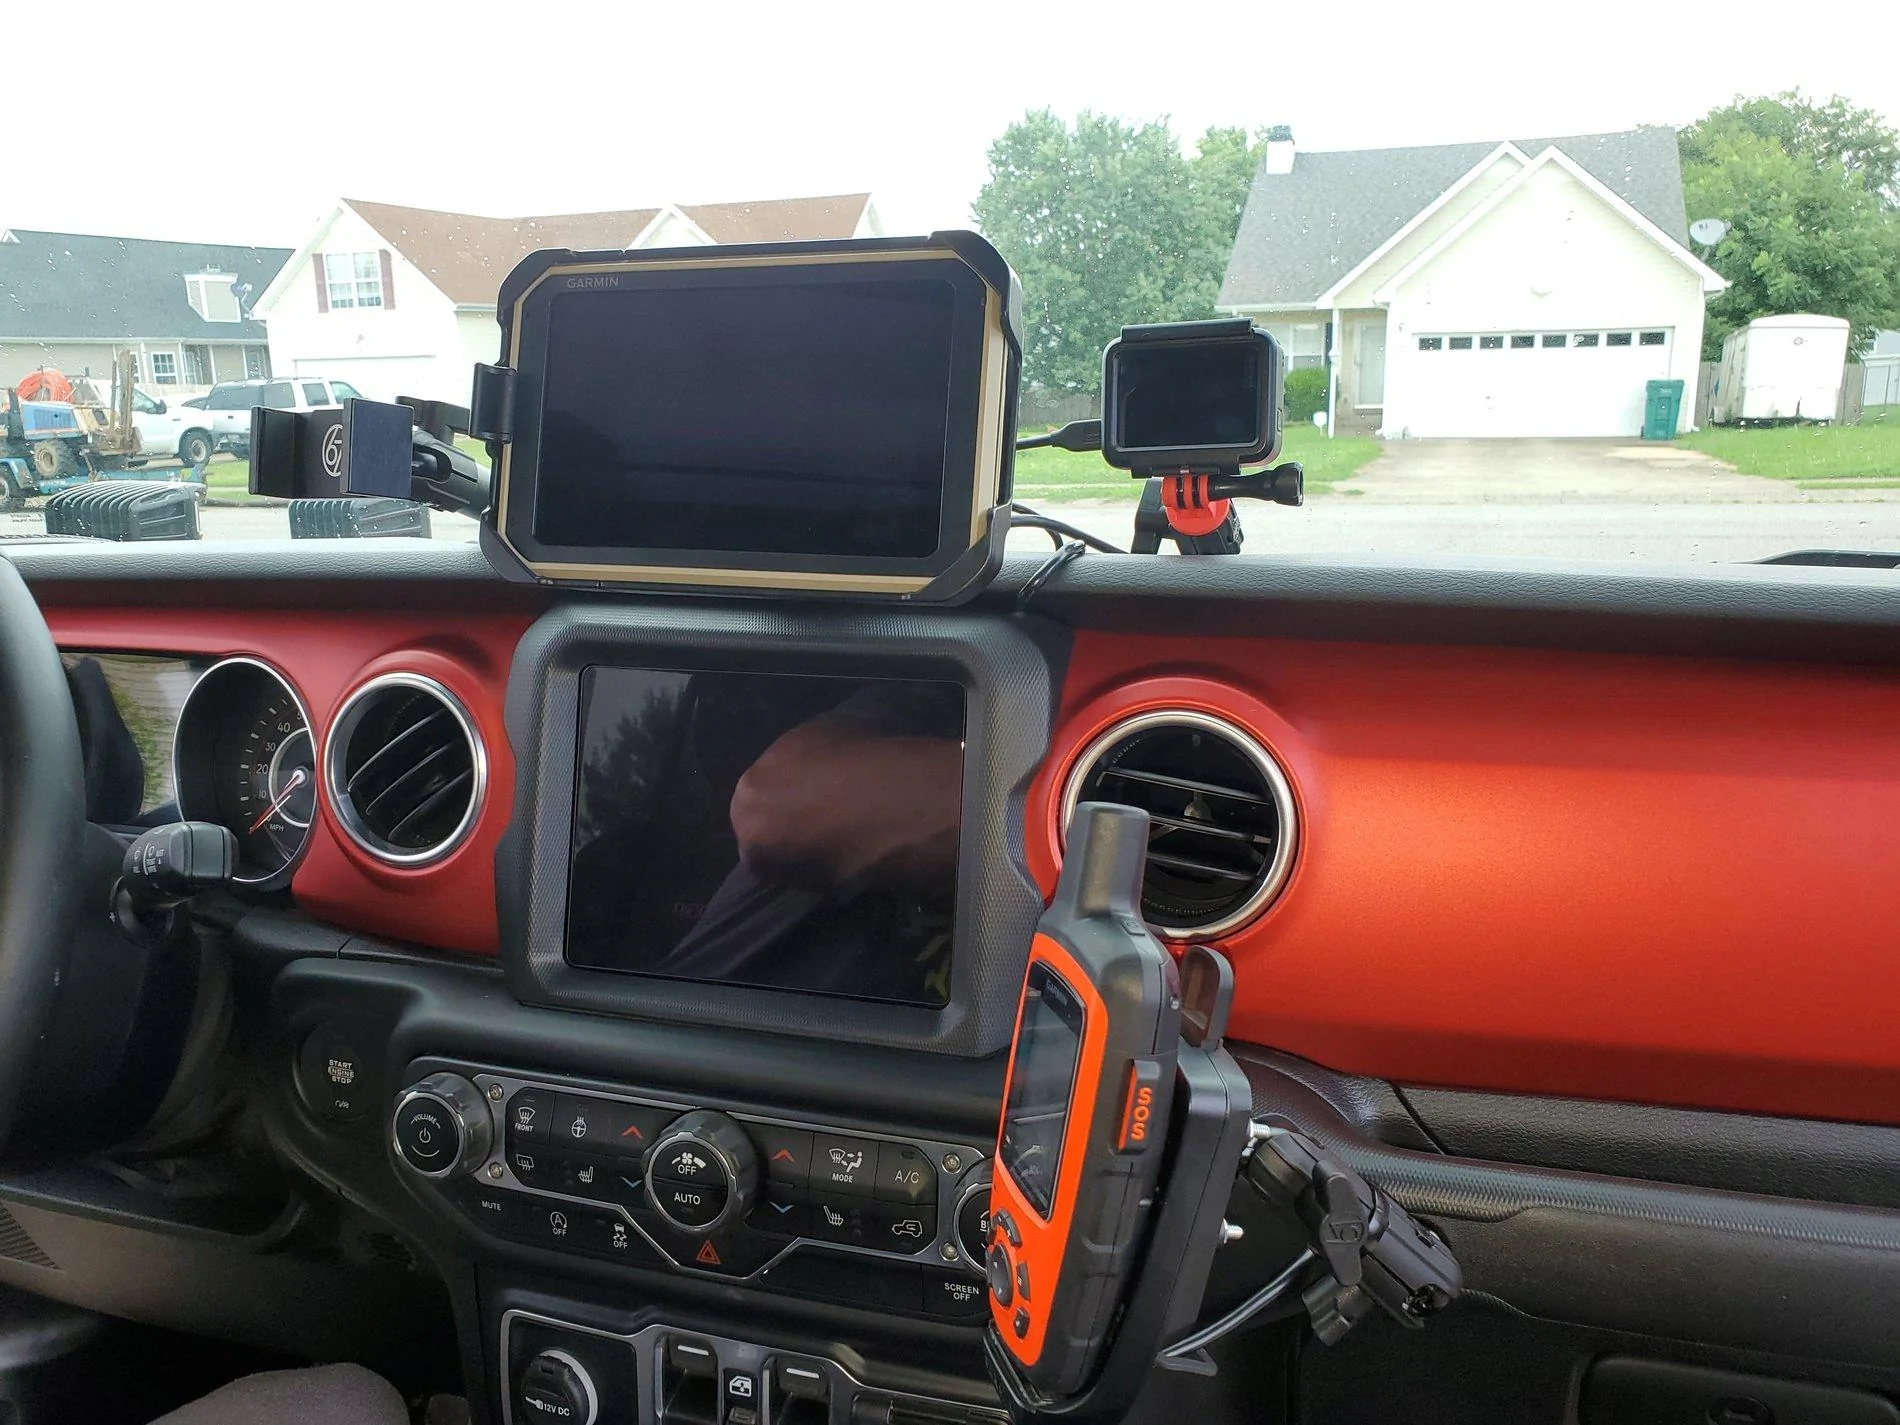
That's it! Below are a couple of bonus pictures with all of my mounts and devices installed, wired to the USB hub.
As you can see, all of the wires are very well hidden, and with the purchased harness they are switched off of the ignition. They wake up and charge when the ignition is turned on, and go back to sleep after 30 seconds when it is turned off.
I hope this helps someone! If you're interested in a more in depth look with all of the mounts and devices, feel free to check out the long version in my build thread here - https://www.jeepgladiatorforum.com/forum/threads/ares-build-thread.26187/post-539414
Happy modding!
What you'll need (for my method):
-Phillips head screwdriver
-Small flathead screwdriver (jewelry/eyeglasses sized)
-Small drill bit
-Drill or dremel
-Wiring pliers and/or a sharp knife
-Plastic trim tool
-Jeep tool kit (for dropping the windshield)
-USB hub (appropriately sized...no more than about 4 inches long, 2.5 inches wide, and 1.5 inches tall if you want it fully hidden in the cubby)
-12v power adapter/piggyback harness for JL/JT (Amazon/Quadratec carries them)
The low down: My vision was to have a customizable, centralized yet low profile "command center" that would incorporate my phone, an *actual" GPS (with off road maps), and my personal SOS beacon (which also has trail and topo maps). I also wanted a mounting solution for my GoPro to film trail runs. With all of these devices, I didn't want a spaghetti monster of cords, so having a hidden USB hub in the vicinity of the devices was also a must. That is the main reason why I opted to go with the mounts that I did, being that they retain a portion of the recessed top cubby.
I determined that I wanted a very small ingress point for the USB hub, in case I ever wanted to put the insert back in and go back to stock. This small indentation on the left side of the cubby (insert removed) is the point that I personally decided on, but just about anywhere will work for my method. I mean that to say that, as long as you're not using one of the large (deep), round, recessed USB sockets you should be just fine. If you do use one of those, you will need to choose your location more carefully as the radio will likely be competing for the same space.

Before drilling, I wanted to make sure things were clear behind the dash, so I started popping panels. This was much easier than I expected. If you are unsure, Google the how-to for the JL for a step-by-step in real time. Honestly though, the guy talked way too much for such a simple operation, so I'll keep it easy for you. The down and dirty is to start with the panel with the AC controls. It is completely held in place by clips. I started with a plastic trim tool nearest to the passenger grab bar, and worked my way across the top to the push start button. Once you have that out of place, you can work on the radio. I have the upgraded radio, but I imagine it is similar for the 7" system. There are two screws at the base of the radio to remove, that will allow you to peel off the radio surround trim, which is also held on by clips.
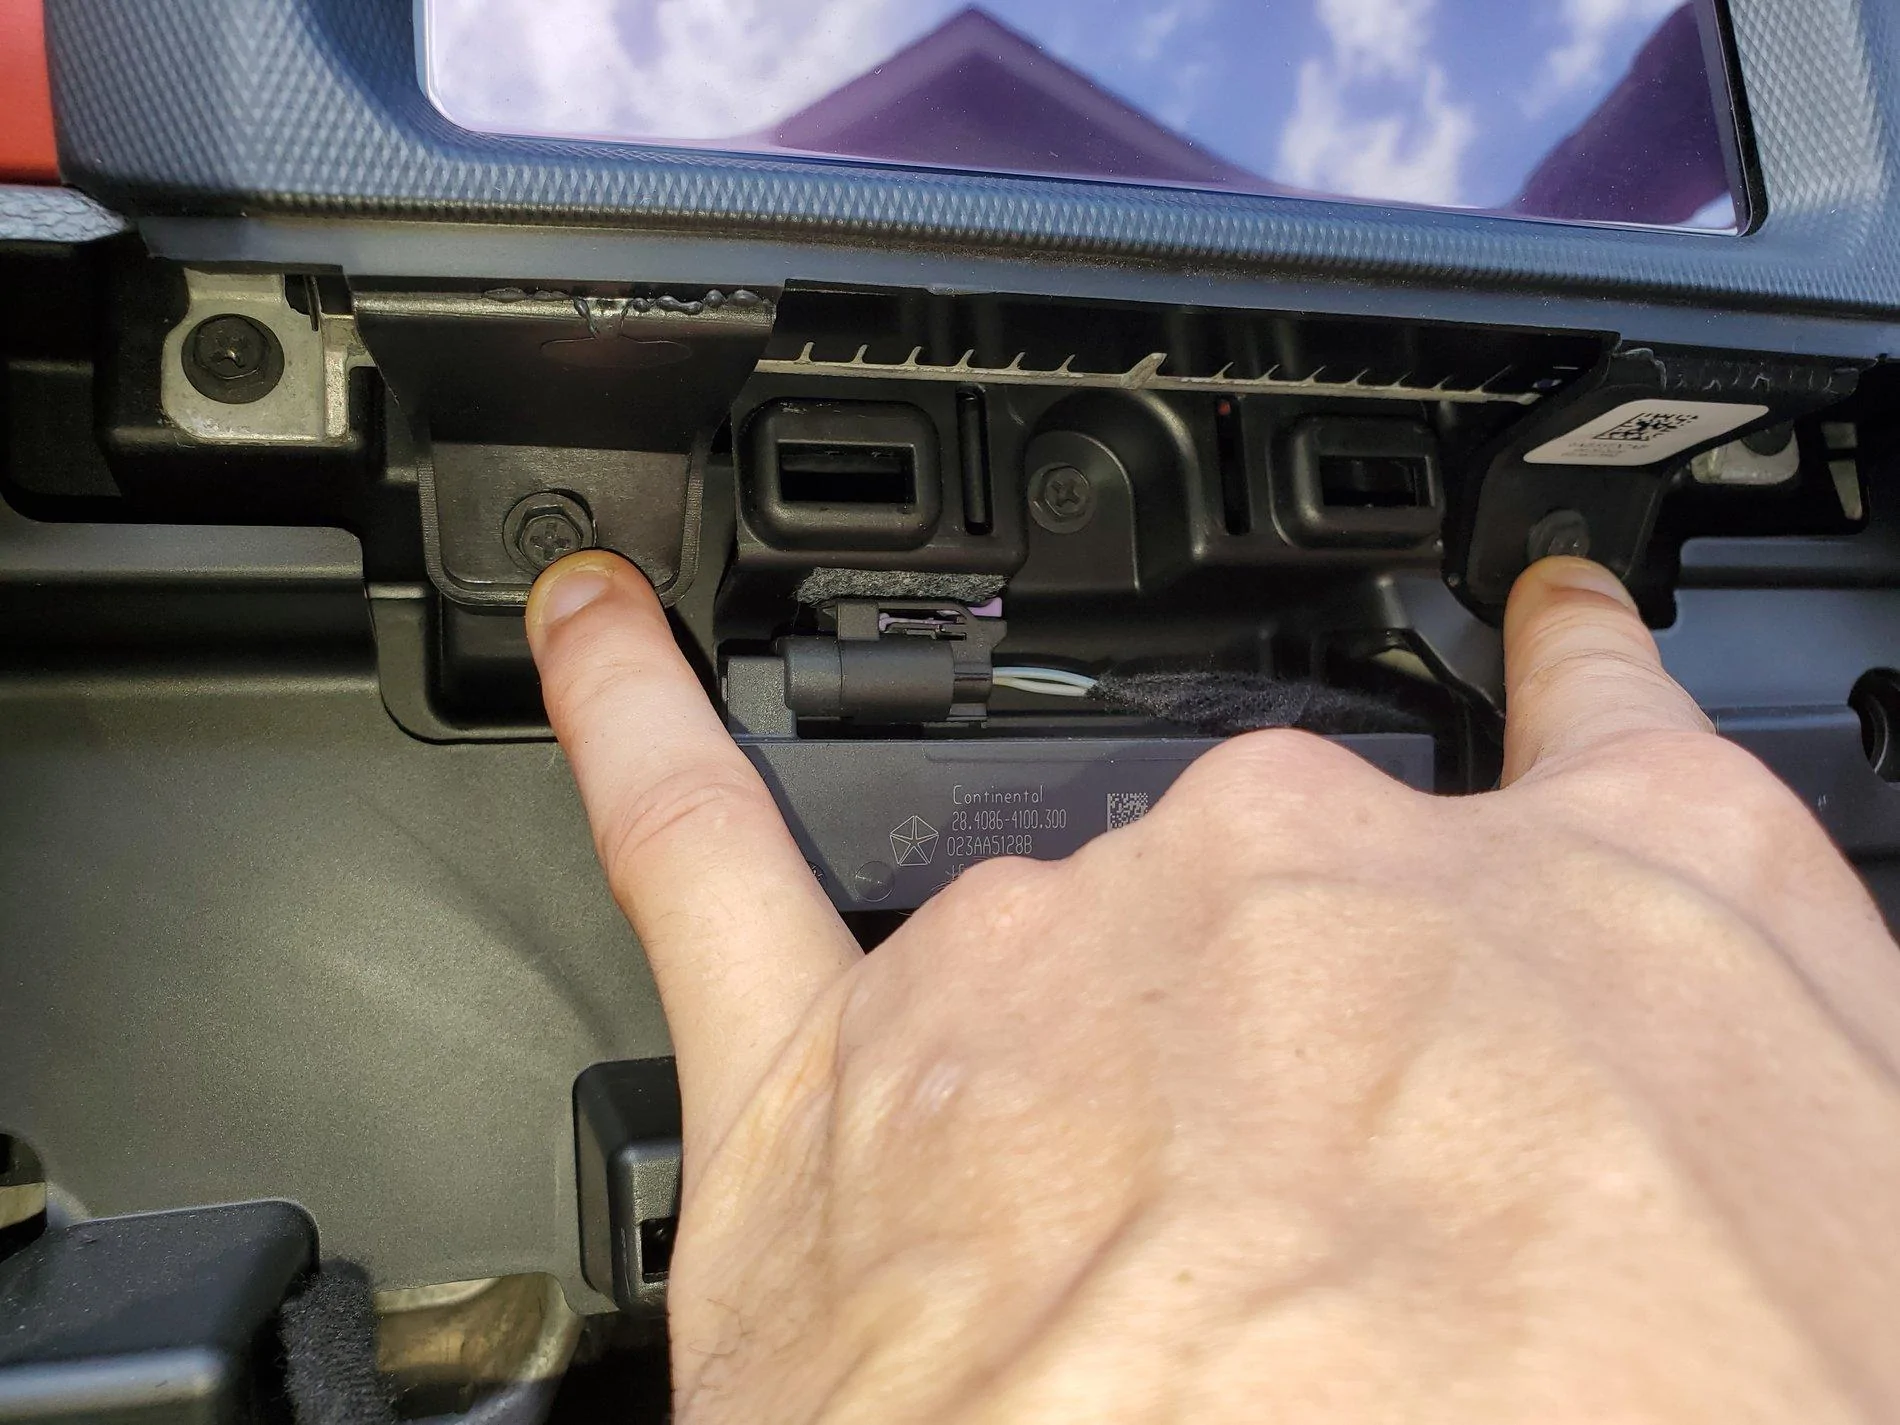
Once those are undone and the trim is removed, you will see four screws at the corners of the radio. Undo these, and the radio will pop loose.
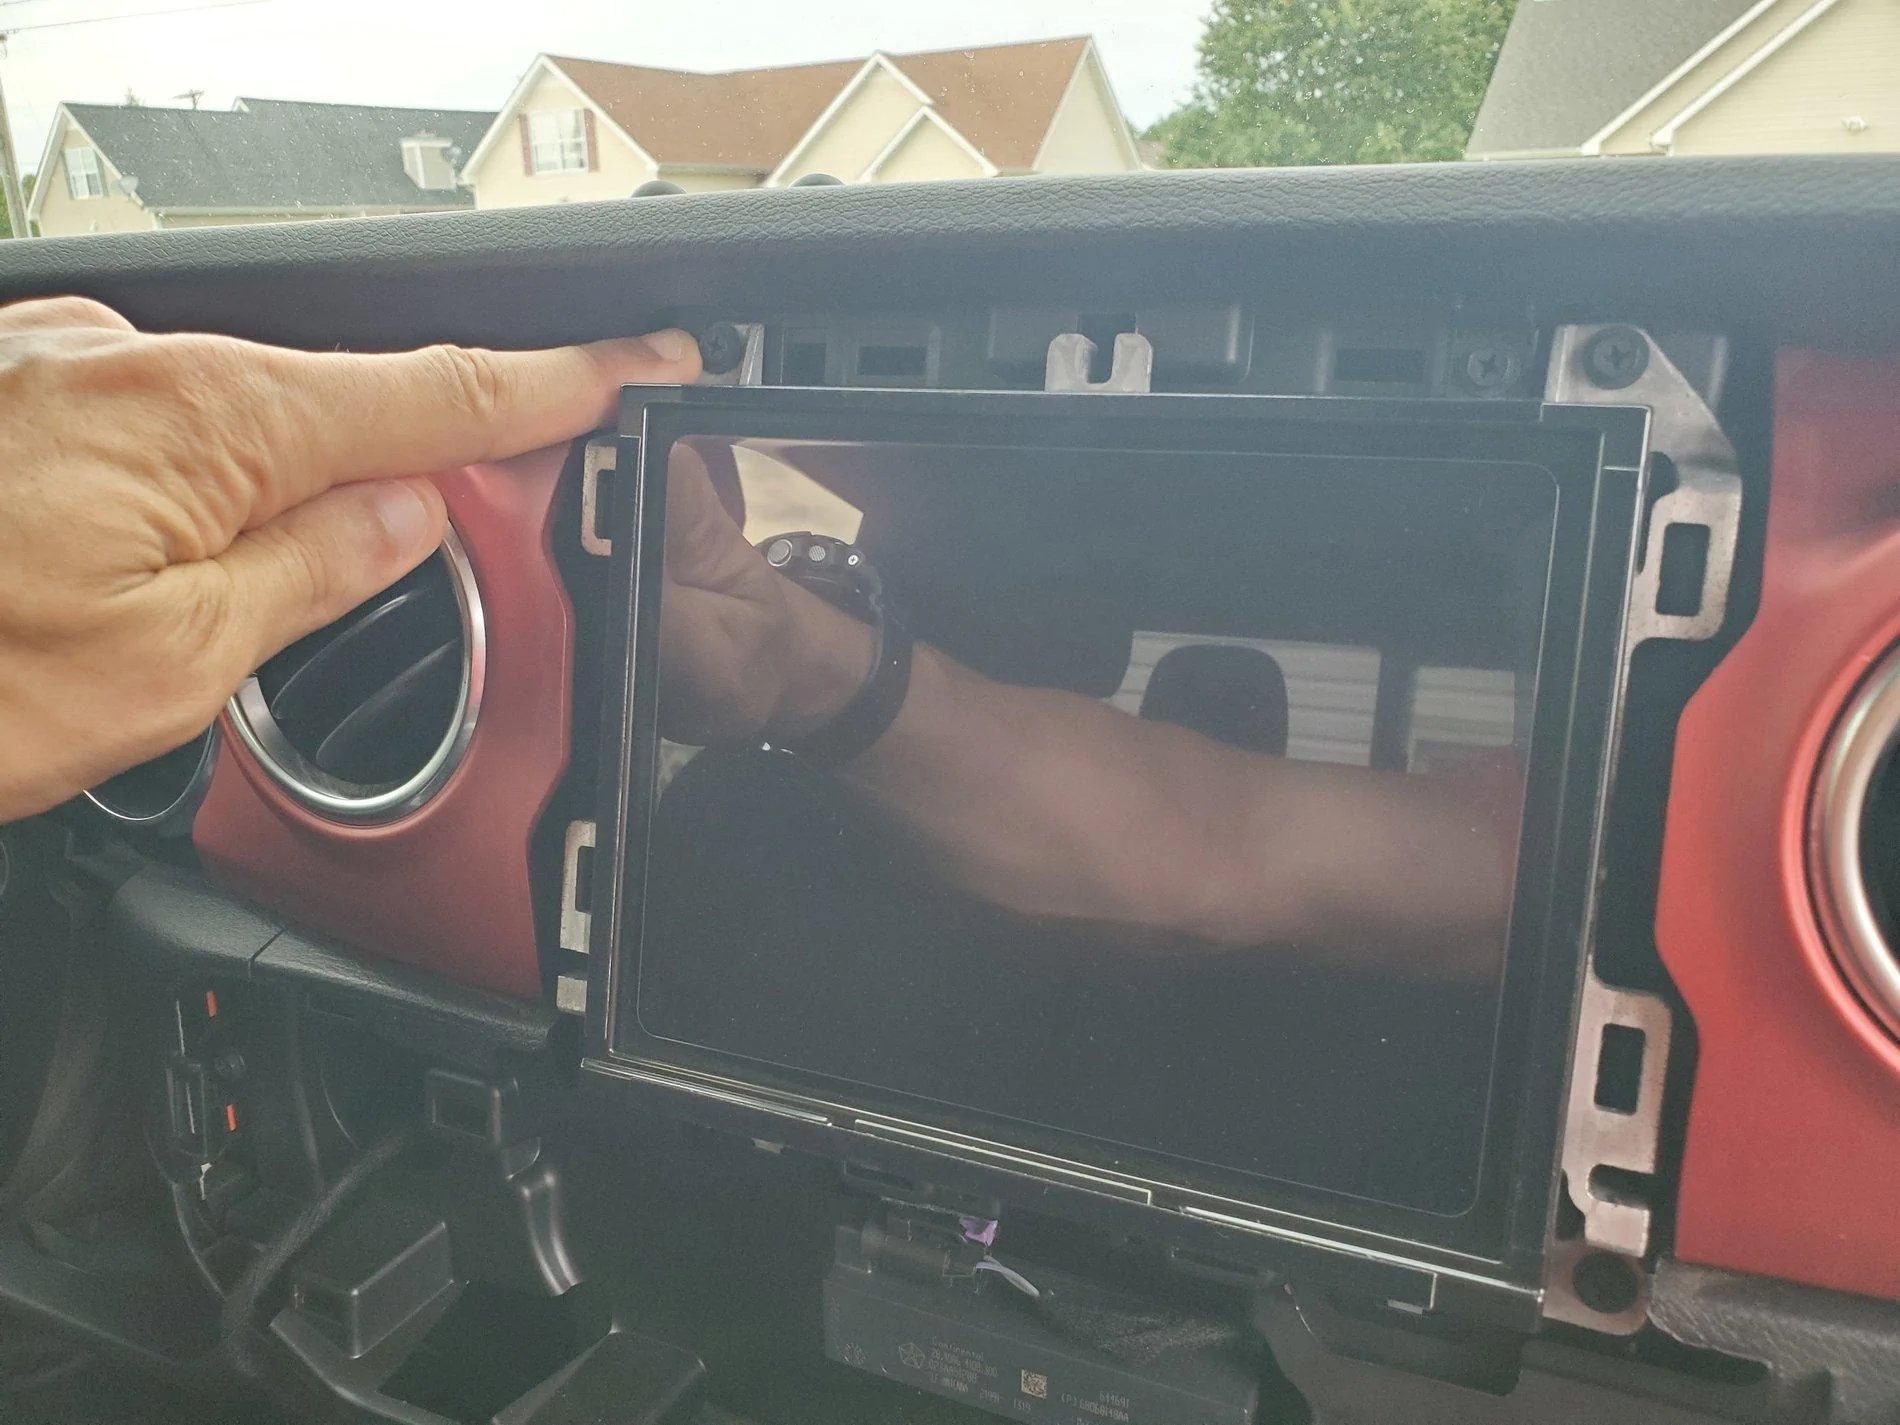
Once behind the radio, I was able to see my ingress point. It appeared to be safely away from all obstructions, and was not blocked by the radio when in place. Again, just about anywhere on this cubby should work for simply routing wires, but be sure to do your due diligence if you are using a deep, flush mounted hub.
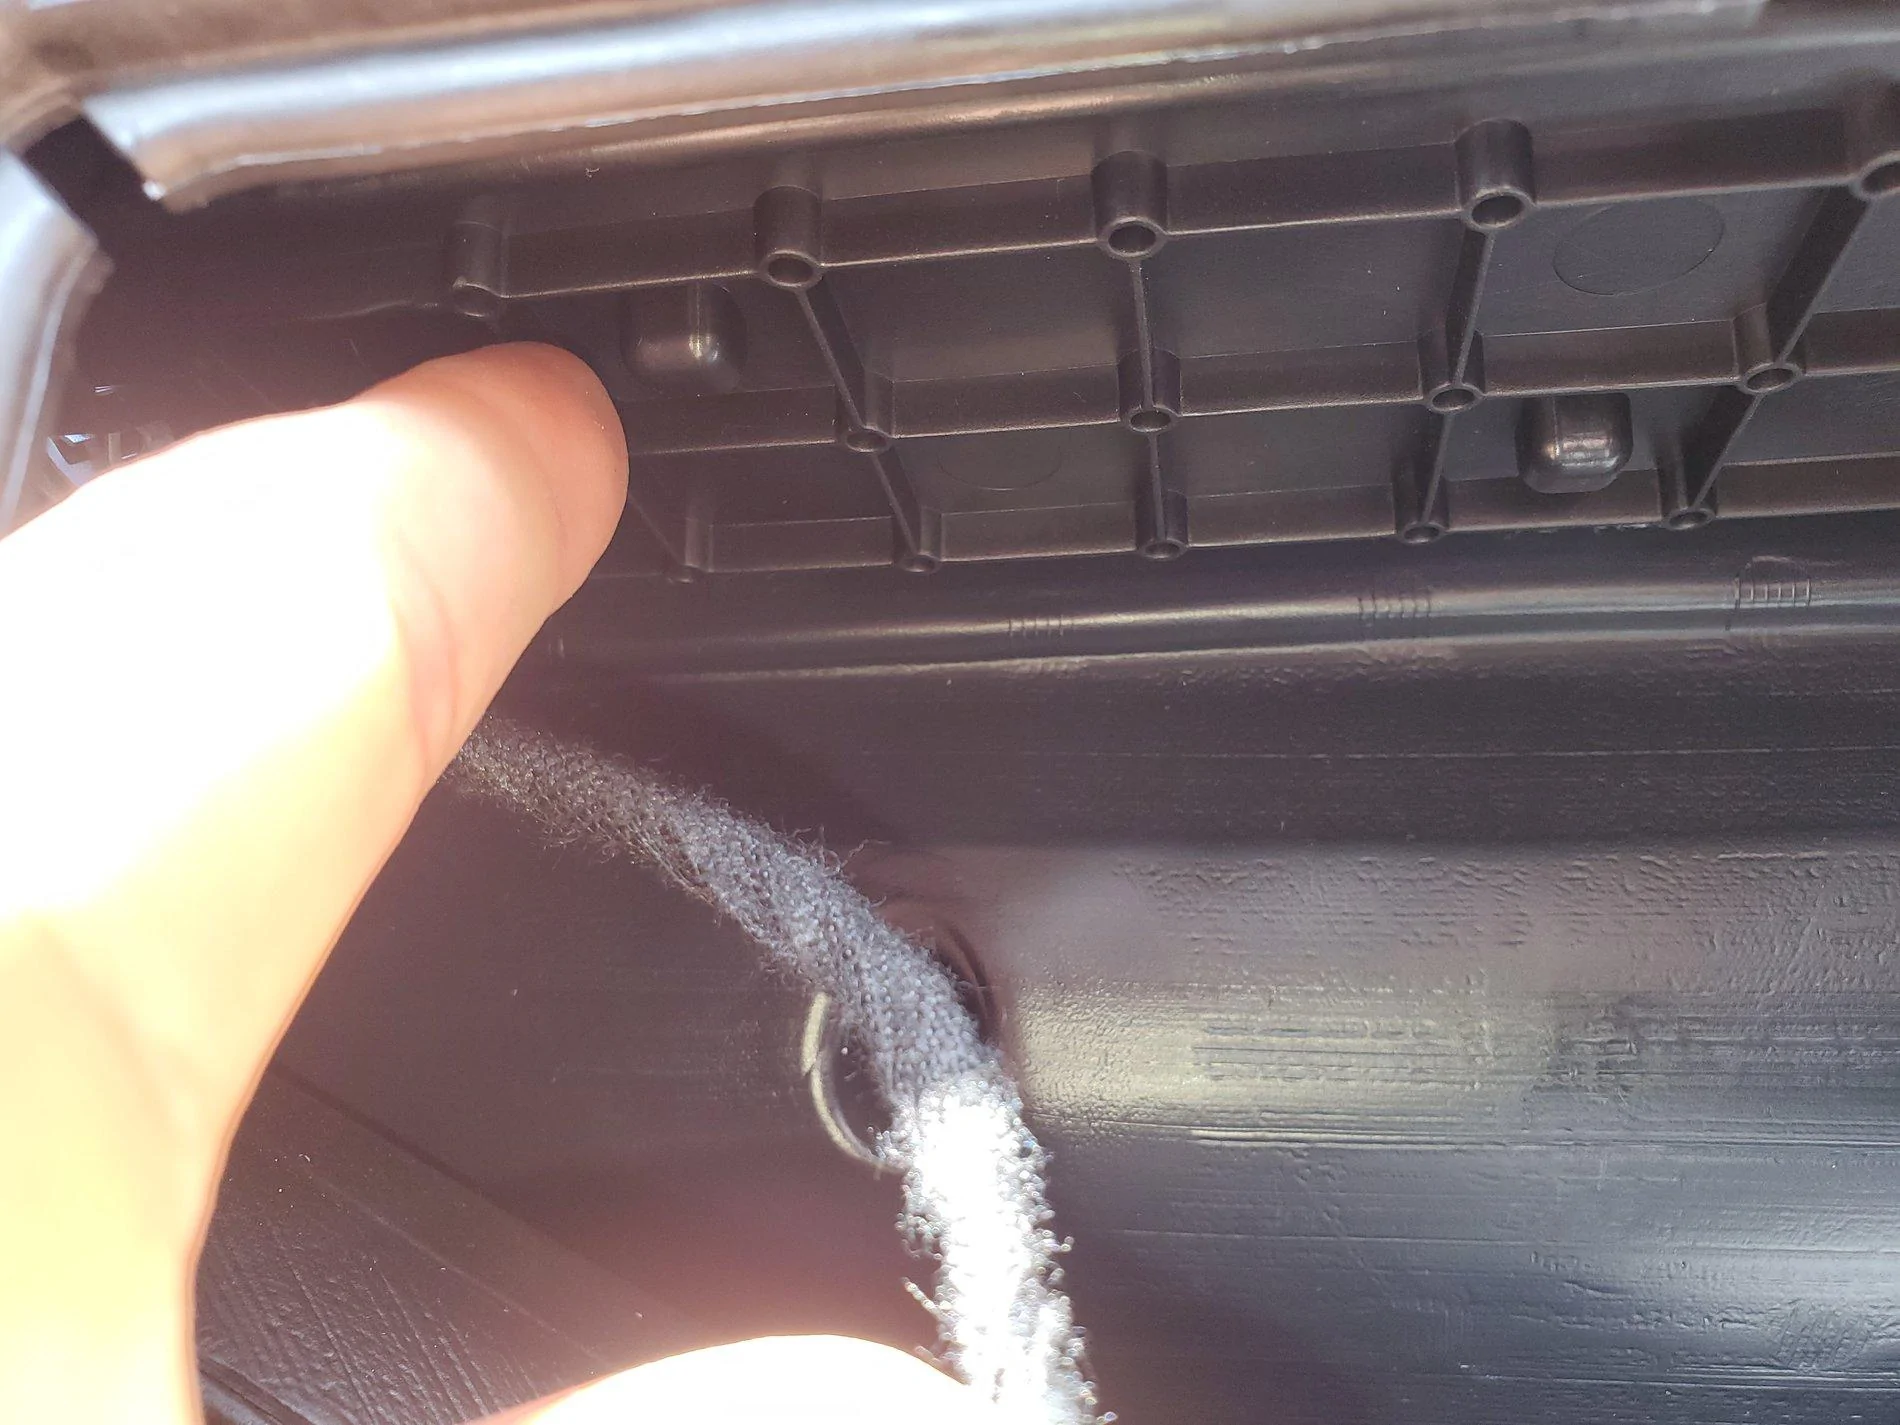
At this point, I decided to remove the freedom panels and drop the windshield in order to give myself more room to work, and so that I could drill straight downward. I used a dremel and a small bit to drill out and gradually widen the hole until the clipped USB hub wires fit snugly through. I used a small cardboard box to catch all of the plastic shavings, then I hit the top side with a shop vac. The result is fairly clean, and would be easily covered by the Mopar insert if taken back to stock.


Having completed that, it was time to work on the lower part of the dash and get my piggyback harness up behind the radio. The lower dash (with the window controls) is held in place by a single screw, and numerous clips. Once this screw is undone, gently pry on the upper corners with your fingers and it will pop out of place.

Once that is out of the way, look directly behind the 12v port and identify the plug. Pinch against the blue clip, and remove the OEM harness.
With the purchased harness, plug in the appropriate piece to the OEM 12v from where you just removed the stock plug, and plug the stock piece in to the splitter on the purchased harness. In the picture below, the left piece (OEM harness) plugs in to the right piece (splitter on the purchased harness).
After that take the free end, and route it up behind the radio, and pull through. It was a bit tight for my ham hands, but not too bad once you find the route. After that, I turned on the ignition and I hit it with my multimeter to make sure everything was good.
From there, strip the positive and negative wires on the USB hub, insert it in to the corresponding positive/negative opening on the purchased harness, and tighten down the clamps with your mini flathead for a solid connection. Once that is complete, make sure all wires are tucked safely away from pinch points, and you are good to reinstall all of the trim. Don't forget to reinstall all of the screws (again: one for the lower dash piece, four for the radio, two for the radio trim)! All of the screws are identical (assuming that the 7" radio is the same), so don't worry about mixing them up.
That's it! Below are a couple of bonus pictures with all of my mounts and devices installed, wired to the USB hub.

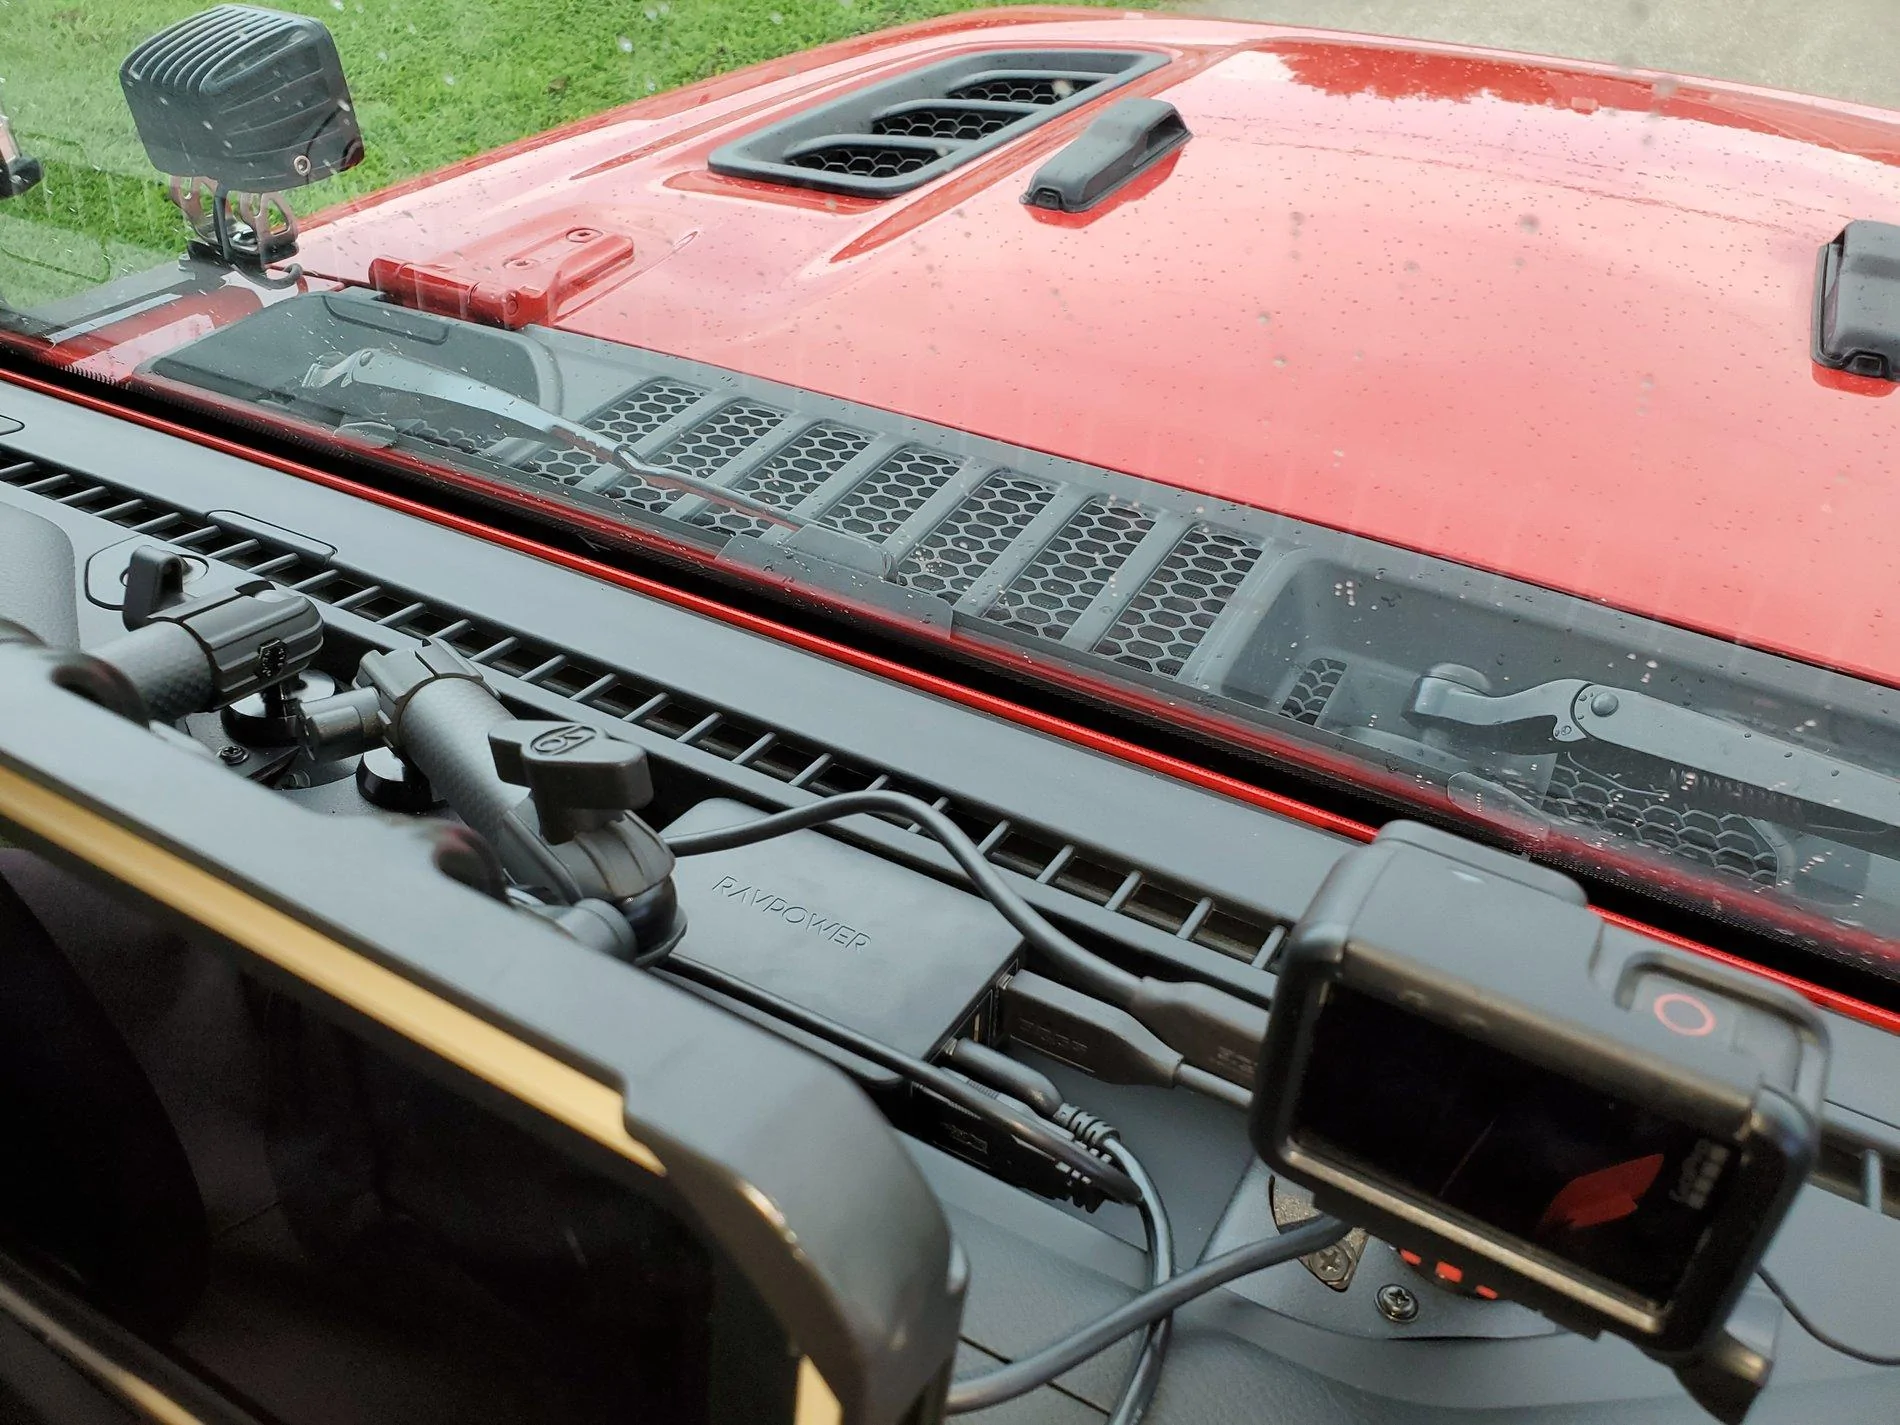
As you can see, all of the wires are very well hidden, and with the purchased harness they are switched off of the ignition. They wake up and charge when the ignition is turned on, and go back to sleep after 30 seconds when it is turned off.
I hope this helps someone! If you're interested in a more in depth look with all of the mounts and devices, feel free to check out the long version in my build thread here - https://www.jeepgladiatorforum.com/forum/threads/ares-build-thread.26187/post-539414
Happy modding!
Sponsored