Sponsored
Team Alien Sunshade Has Landed!
- Thread starter AlienSunshade
- Start date
- Watchers 28
BlairF
Well-Known Member
- First Name
- Blair
- Joined
- Jun 27, 2018
- Threads
- 6
- Messages
- 206
- Reaction score
- 306
- Location
- Humble, TX
- Vehicle(s)
- 2018 JLUS-S Mojito! - 2014 Challenger RT Classic (SuperCharged) - 2016 Dodge Durango RT
- Occupation
- Technology Incident Management
- Vehicle Showcase
- 2
@AlienSunshade ?????
Skubaa
Well-Known Member
Just got my shade and went straight out to install. I took out the bolts for the windshield. No way could I do it without doing that. I also had 3 of the 4 clips “fail” trying to put them on the corners. I put “” around fail because i was able to put the worst two in the center spots and really struggle with the outer corners. The curve softens that goes on the windshield and won’t hold with tension.
I have no clue if I did the back clips correct. I only used 4 bungess on the sides because the back needed two. But now the back end doesn’t lay nicely like in the photos.
My recommendations:
*Make the clips thicker or provide 3 times the number of clips. Cause they will soften at the part that hooks onto windshield.
*for the corner clips, I held the clip from underneath with one hand and the bungee in place on top as my son put in the bolt. It was not easy because you could only apply a little pressure to hold it in place without it popping. But finger on the clip seems to help.
*include two more bungees as I have two grommets with no bungees. I installed 4 om each side (4-door full shade) and used 2 on each back corner.
*most importantly, include a full drawing showing layout such as which side goes in back (assume alien logo) and placement of each bungee cord with arrows pointing. The instruction for the windshield were pretty decent then the rest fell off a cliff.
I don’t think my back is correct but have no clue how else to install those bungees.
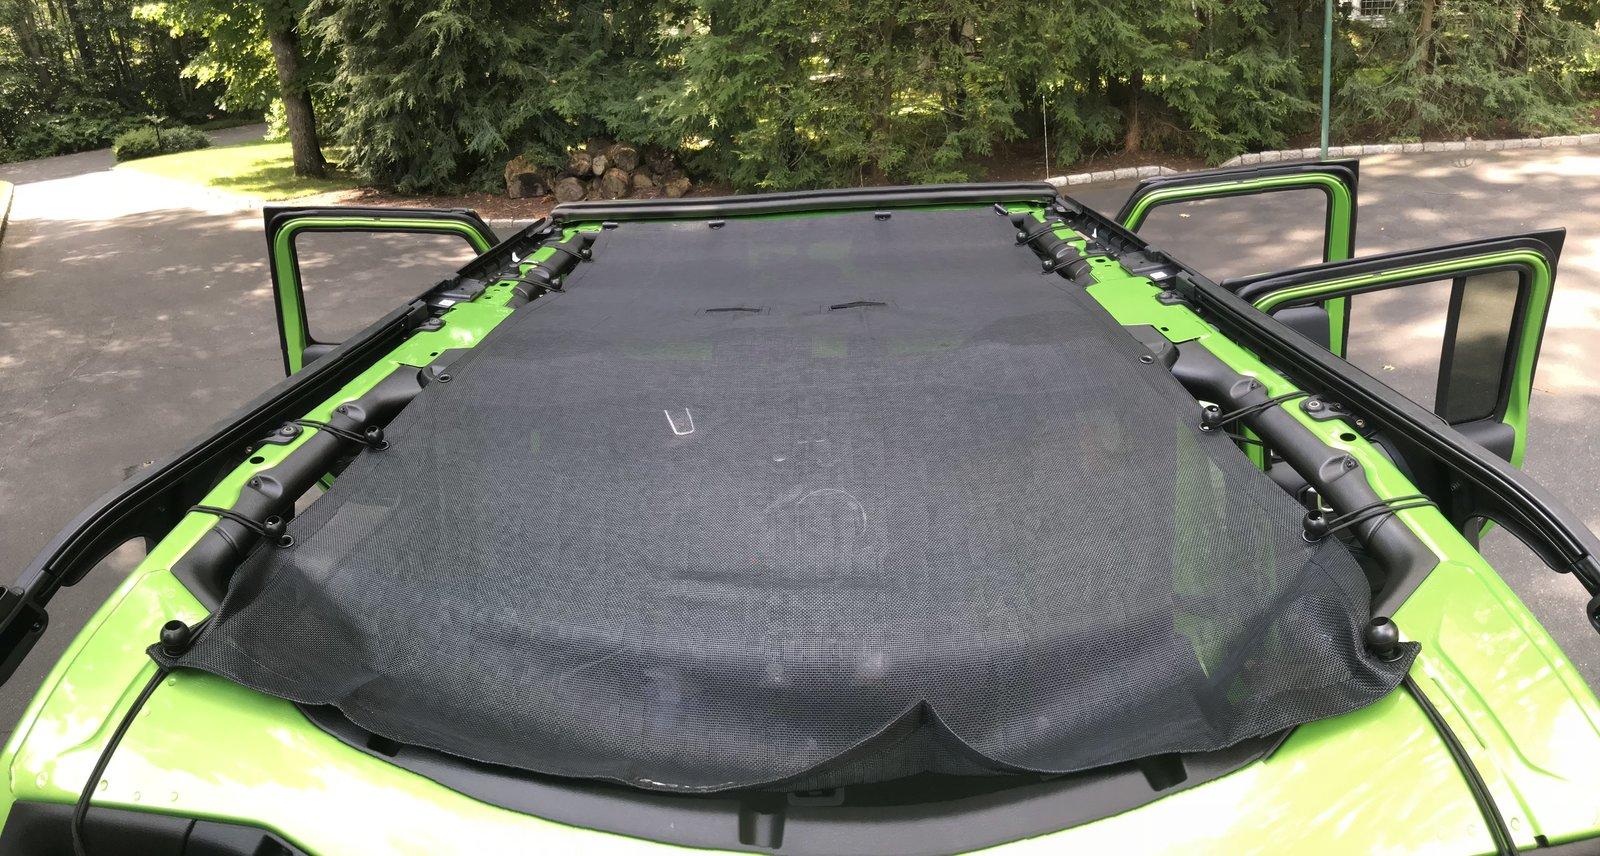
We did a ride around the block and it is beautiful under the shade. And I did a hose test to make sure the windshield was back on weather tight.
The photo is taken from the back facing forward.

I have no clue if I did the back clips correct. I only used 4 bungess on the sides because the back needed two. But now the back end doesn’t lay nicely like in the photos.
My recommendations:
*Make the clips thicker or provide 3 times the number of clips. Cause they will soften at the part that hooks onto windshield.
*for the corner clips, I held the clip from underneath with one hand and the bungee in place on top as my son put in the bolt. It was not easy because you could only apply a little pressure to hold it in place without it popping. But finger on the clip seems to help.
*include two more bungees as I have two grommets with no bungees. I installed 4 om each side (4-door full shade) and used 2 on each back corner.
*most importantly, include a full drawing showing layout such as which side goes in back (assume alien logo) and placement of each bungee cord with arrows pointing. The instruction for the windshield were pretty decent then the rest fell off a cliff.
I don’t think my back is correct but have no clue how else to install those bungees.
We did a ride around the block and it is beautiful under the shade. And I did a hose test to make sure the windshield was back on weather tight.
The photo is taken from the back facing forward.
Tar Heel Wrangler
Well-Known Member
- Joined
- Feb 2, 2018
- Threads
- 2
- Messages
- 278
- Reaction score
- 370
- Location
- Raleigh, NC
- Vehicle(s)
- JL Willys Sport, JT Mojave, Sold JLU Sport S
- Occupation
- Cigar & IPA Snob
It doesn't lay right because you used 4 bungees in the back. You should only use 2. The first time I installed mine, I couldn't get the rear tied using 2 bungees as they wouldn't reach. I then started over, did the front first, then the rear, then the sides. It fit perfectly then.Just got my shade and went straight out to install. I took out the bolts for the windshield. No way could I do it without doing that. I also had 3 of the 4 clips “fail” trying to put them on the corners. I put “” around fail because i was able to put the worst two in the center spots and really struggle with the outer corners. The curve softens that goes on the windshield and won’t hold with tension.
I have no clue if I did the back clips correct. I only used 4 bungess on the sides because the back needed two. But now the back end doesn’t lay nicely like in the photos.
My recommendations:
*Make the clips thicker or provide 3 times the number of clips. Cause they will soften at the part that hooks onto windshield.
*for the corner clips, I held the clip from underneath with one hand and the bungee in place on top as my son put in the bolt. It was not easy because you could only apply a little pressure to hold it in place without it popping. But finger on the clip seems to help.
*include two more bungees as I have two grommets with no bungees. I installed 4 om each side (4-door full shade) and used 2 on each back corner.
*most importantly, include a full drawing showing layout such as which side goes in back (assume alien logo) and placement of each bungee cord with arrows pointing. The instruction for the windshield were pretty decent then the rest fell off a cliff.
I don’t think my back is correct but have no clue how else to install those bungees.
We did a ride around the block and it is beautiful under the shade. And I did a hose test to make sure the windshield was back on weather tight.
The photo is taken from the back facing forward.
Tar Heel Wrangler
Well-Known Member
- Joined
- Feb 2, 2018
- Threads
- 2
- Messages
- 278
- Reaction score
- 370
- Location
- Raleigh, NC
- Vehicle(s)
- JL Willys Sport, JT Mojave, Sold JLU Sport S
- Occupation
- Cigar & IPA Snob
bump - this will save you some timeI've posted this before. I highly recommend lowering the windshield slightly, put clips and bungees in front. Next do the rear bungees, the others will fall in place nicely. If you do the rear last, you'll probably have issues.
Sponsored
Skubaa
Well-Known Member
But the one bungee doesn’t reach around the back. There was no way of not using 2. Is it suppose to go on the side?It doesn't lay right because you used 4 bungees in the back. You should only use 2. The first time I installed mine, I couldn't get the rear tied using 2 bungees as they wouldn't reach. I then started over, did the front first, then the rear, then the sides. It fit perfectly then.
We did the front first then did the back but obviously the back isn’t right. Anyone have pic of their back?
Skubaa
Well-Known Member
We didn’t technically lower but did take all the bolts out so we could lift it up. That was the only way I was gonna get it done. The clips would stress on the corners trying to get them to the outside of the bolt. They wouldn't break but they weakened enough they would snap off the car. We finally got the corners placed properly while bolting the windshield back on.bump - this will save you some time
BlairF
Well-Known Member
- First Name
- Blair
- Joined
- Jun 27, 2018
- Threads
- 6
- Messages
- 206
- Reaction score
- 306
- Location
- Humble, TX
- Vehicle(s)
- 2018 JLUS-S Mojito! - 2014 Challenger RT Classic (SuperCharged) - 2016 Dodge Durango RT
- Occupation
- Technology Incident Management
- Vehicle Showcase
- 2
1 Bungee... pass it through, pull the ball down around the SIDE of the cage, and the loop around the BACK of the cage and meet in the middle, You gotta REALLY wrestle with it, and i had to stare at photos for an hour to sort this out...But the one bungee doesn’t reach around the back. There was no way of not using 2. Is it suppose to go on the side?
We did the front first then did the back but obviously the back isn’t right. Anyone have pic of their back?
Skubaa
Well-Known Member
Thank you. Will try that in the morning. How exciting. But I never would have figured that out for myself.1 Bungee... pass it through, pull the ball down around the SIDE of the cage, and the loop around the BACK of the cage and meet in the middle, You gotta REALLY wrestle with it, and i had to stare at photos for an hour to sort this out...

On another note, I put the top up in sunrider mode so to keep the shade from flapping and oh it was awesome. Then put the top all up due to some possibility of rain on the way home. Alien sunshade is amazing at cutting down the sun scorching.
Last edited:
Sponsored
Skubaa
Well-Known Member
Thank you BlairF. With a little help pulling taught the sunshade, I am now officially and more importantly correctly installed. And I may even have a sunny day to take a ride and test it out. How exciting!
Could not have done it without your photo for an example.

Could not have done it without your photo for an example.
BlairF
Well-Known Member
- First Name
- Blair
- Joined
- Jun 27, 2018
- Threads
- 6
- Messages
- 206
- Reaction score
- 306
- Location
- Humble, TX
- Vehicle(s)
- 2018 JLUS-S Mojito! - 2014 Challenger RT Classic (SuperCharged) - 2016 Dodge Durango RT
- Occupation
- Technology Incident Management
- Vehicle Showcase
- 2
Awesome!Thank you BlairF. With a little help pulling taught the sunshade, I am now officially and more importantly correctly installed. And I may even have a sunny day to take a ride and test it out. How exciting!
Could not have done it without your photo for an example.
Now if @AlienSunshade Would just come back to this post....
OP
OP
AlienSunshade
Well-Known Member
- Joined
- Jun 3, 2018
- Threads
- 9
- Messages
- 374
- Reaction score
- 292
- Location
- Toldeo, Ohio
- Website
- www.aliensunshade.com
- Thread starter
- #88
Quick Review and feedback of front only sunshade :
Pro’s
Con’s
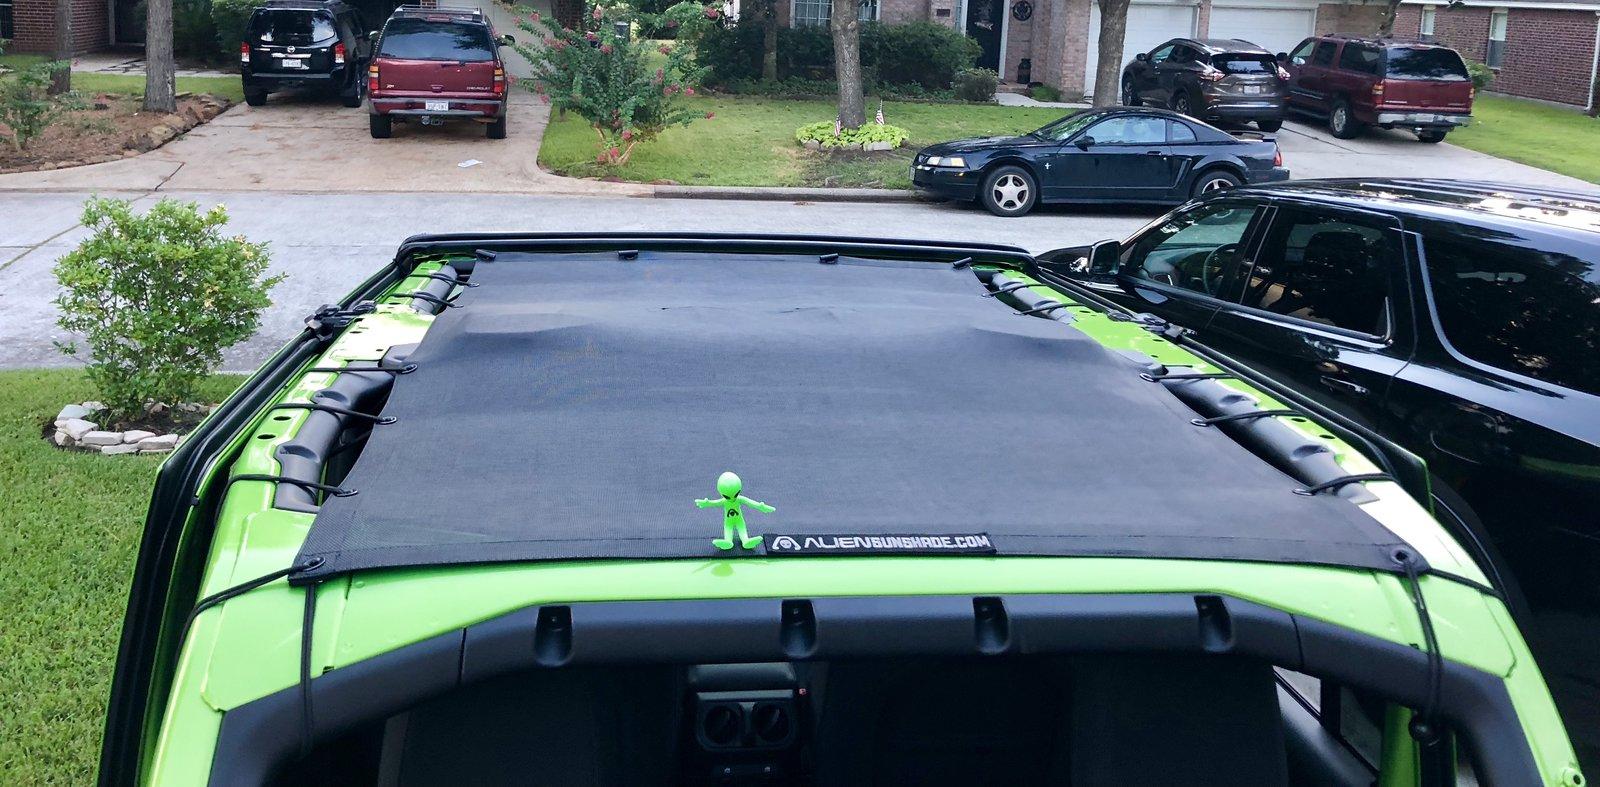
- Tank green color is great on the granite crystal and with the freedom panels on acts like a headliner which is much nicer than the white hardtop panels.
- Sun shade & blocking is excellent while retaining fairly good visibility out
- No buffeting or flapping at high freeway speeds
- You do get less airflow (pro & con) more like a large panoramic sunroof but with the doors off it is perfect
- Removing the panels with it on is harder but I’m glad that it is doable
- Good value at $75
- I wasted a bunch of time trying to get the front clips on without lowering the windshield and failed. I understand it is possible but it is way to difficult for this to be advertised as not requiring taking the windshield down. Taking the windshield down is very easy with only 4 bolts and a cheap wiper puller tool pulls them easily. This should be the recommended install method.
- I only got two of the front clips @AlienSunshade can you send me he other two as I had jerry rig it
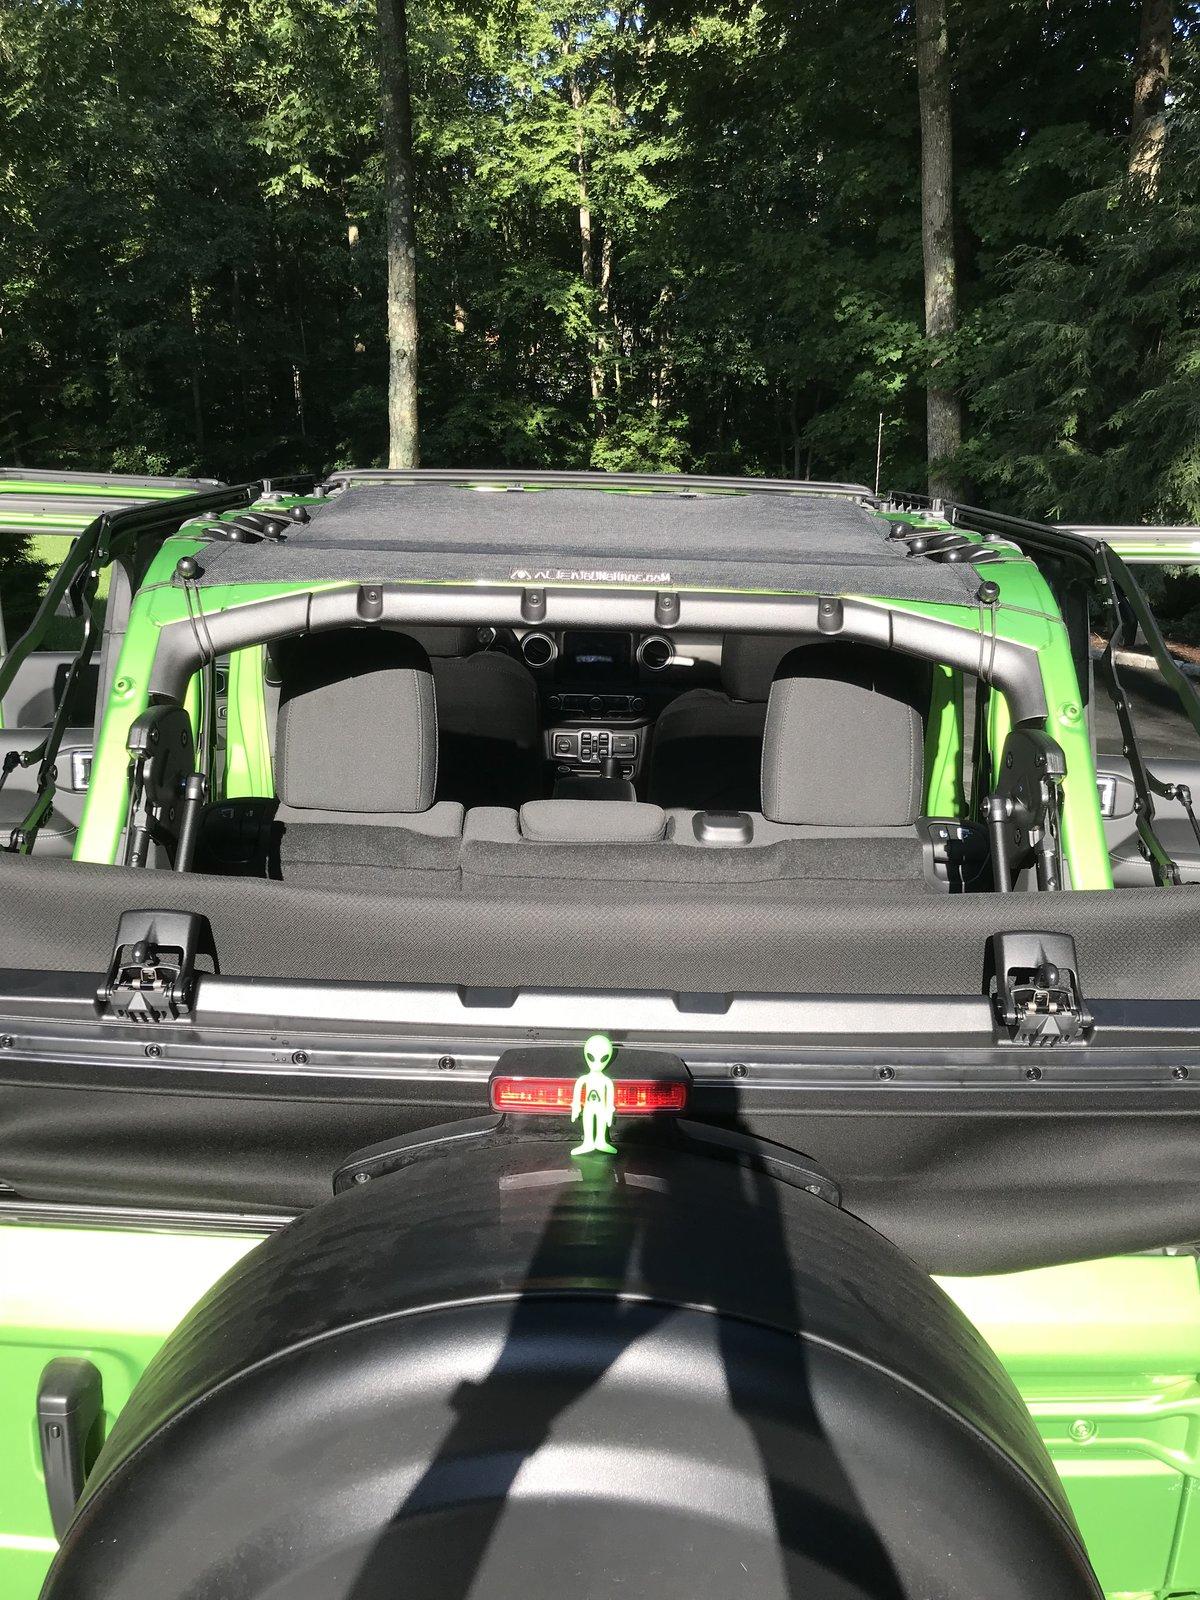
- There is a 4 + inch gap between the windshield and the shade in the front letting glare in. There is almost no gap in the rear. @AlienSunshade is this normal or is this due to the missing front clips?
Thanks for the review and feedback!!
Lowering the windshield definitely helps makes things easier since you can see the clips attach instead of feeling around. I've done the install a few times if you can imagine and with a little patience (and assuming your fingers can fit), you can get the clips to sit properly.
And you 100% need to have 4 front windshield clips. That's why your shade is sitting further back. I will message you right now so we can get you taken care of.
OP
OP
AlienSunshade
Well-Known Member
- Joined
- Jun 3, 2018
- Threads
- 9
- Messages
- 374
- Reaction score
- 292
- Location
- Toldeo, Ohio
- Website
- www.aliensunshade.com
- Thread starter
- #89
First of all...awesome screen name.@AlienSunshade Do you guys know when you’ll be getting the red and black colors back in stock? I was looking to order both colors within the next two weeks. Thanks
These colors are back in stock!
Alien Sunshade Jeep Wrangler JL Front Shade
Alien Sunshade Jeep Wrangler JL/JLU Full Length Shade
OP
OP
AlienSunshade
Well-Known Member
- Joined
- Jun 3, 2018
- Threads
- 9
- Messages
- 374
- Reaction score
- 292
- Location
- Toldeo, Ohio
- Website
- www.aliensunshade.com
- Thread starter
- #90
You weren't the only one to say that so we made an installation video! I know it's a bit late for you but I'm finishing up the final edits and then it'll be up on YouTube early next week. PROMISE!!I Might be an idiot... but these instructions f*ing suck. I cannot figure out the last 2 bungees to save my damn life... could be because it is 100 degrees outside and i flustered because i did have to take my windshield down, which was no big deal, btw. but these instructions suck.. and there are zero videos on the web for this anywhere... which is also very hard to believe.

Sponsored
Similar threads
- Replies
- 375
- Views
- 98,772

- Replies
- 0
- Views
- 4,221
- Replies
- 12
- Views
- 4,705