Robby Robot
Well-Known Member
- First Name
- Nate
- Joined
- Jun 1, 2022
- Threads
- 8
- Messages
- 84
- Reaction score
- 112
- Location
- NC
- Website
- www.nathantothrow.com
- Vehicle(s)
- Rubicon JLU, Roush 2 Mustang, Triumph T-Bird
- Occupation
- KZ4KNR | Business Intelligence Consultant
- Thread starter
- #1
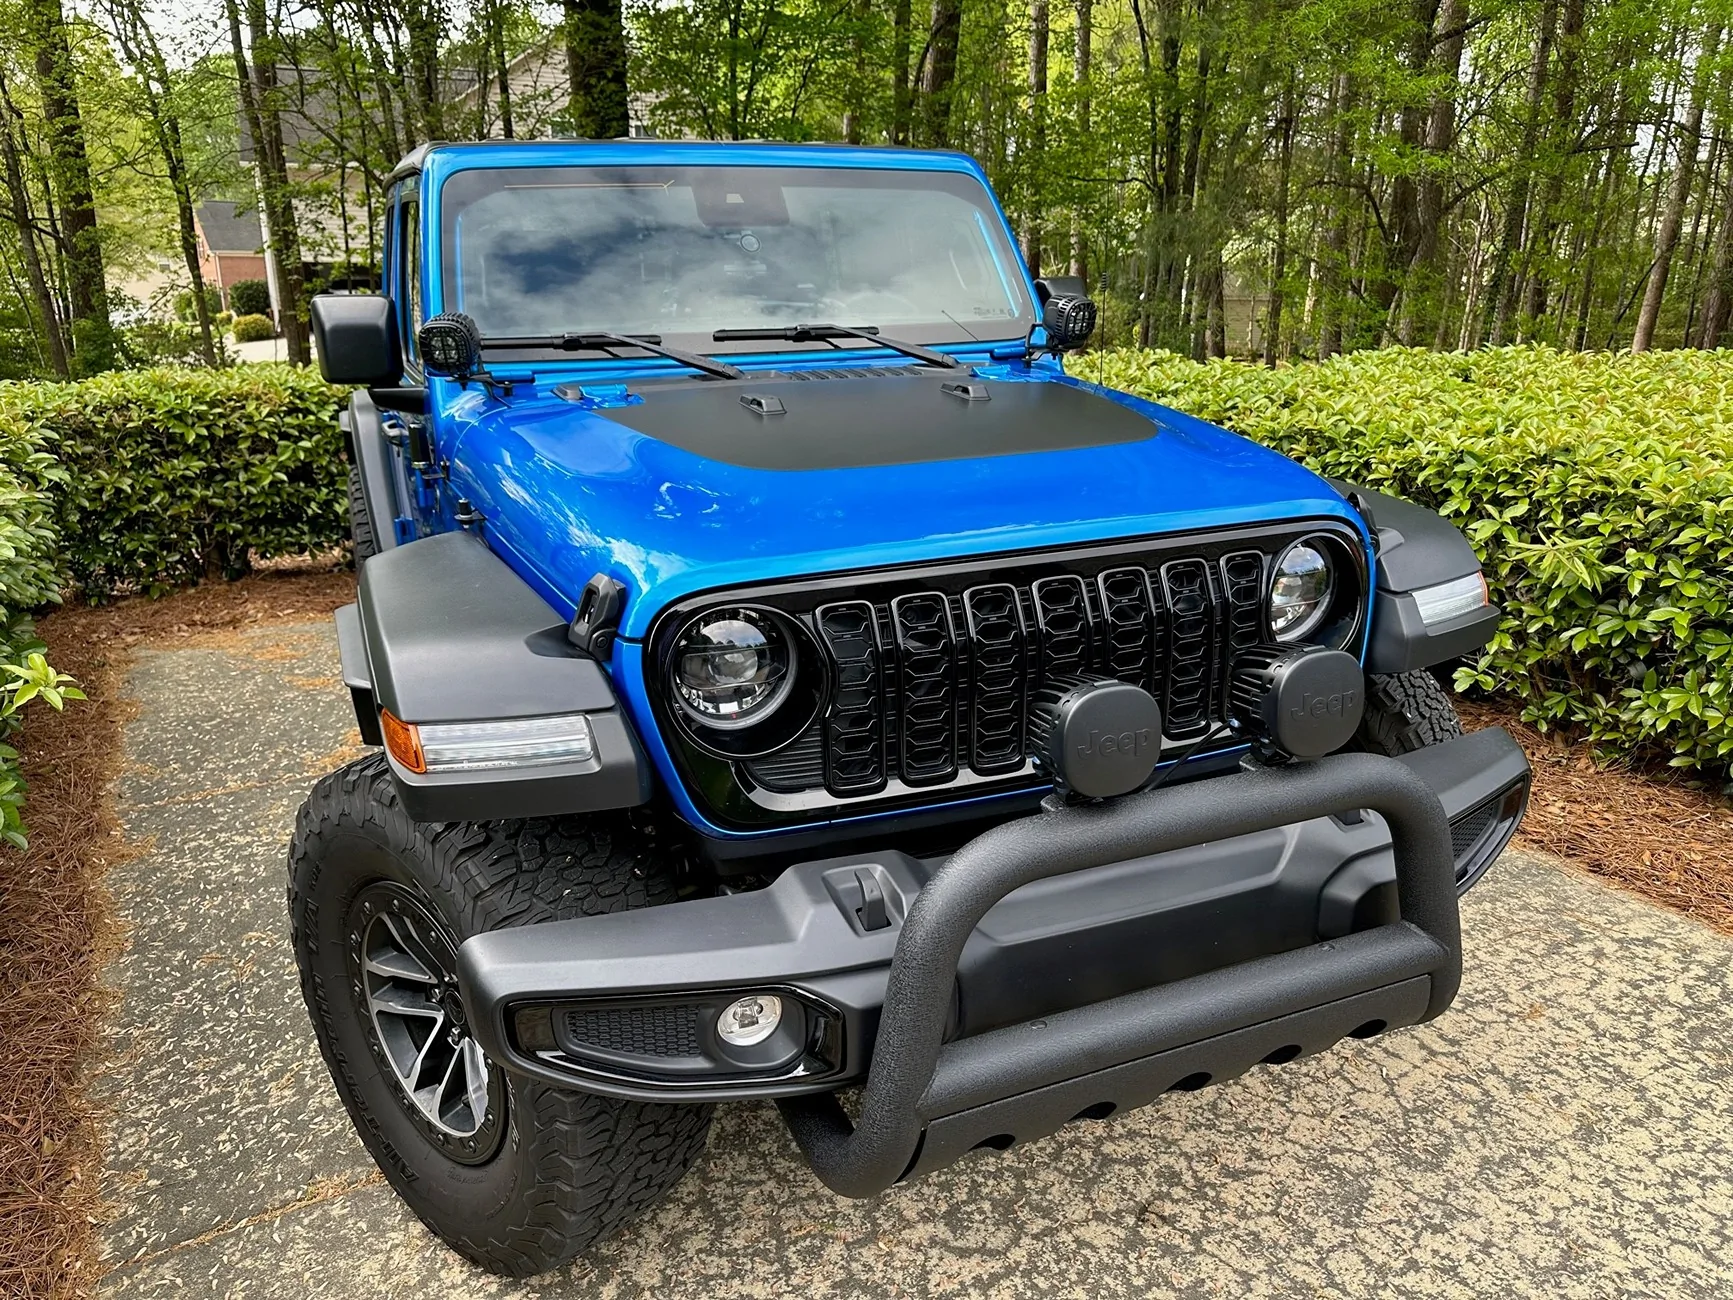
I just installed the JL vinyl blackout hood decal from PixelDecals.com. I installed it by myself following the instructions on the website and thought I'd share my personal notes in case anyone might be thinking of doing the same.
- Overview: I found the instructions on the PD website to be pretty spot on. The video didn't show a lot of detail on technique, but it was helpful. There are others on YouTube that get more into the weeds of specifics. I watched several, and was probably over-prepared. Hardest part IMO was removing the hood liner, rubber stops, and washer nozzles.
- Prep: If you have a hood liner, best to remove all of the plastic push pins (13 or 14 total?) and lay the liner over the top of the engine. I used a trim removal tool. Putting a piece of blue painter's tape over the pin after sliding the trim removal tool under it will help keep it from flying around the garage when you pop it off (ask me how I know). The two washer hose nozzles can be removed by wiggling them while pulling down. Each rubber window bumper is held in place by two 10mm nuts AND a push clip at the forward end. At the aft end (nearest window) the washer nozzle can be removed by squeezing one or both of the plastic springs and rocking it fore and aft to remove from the top. KEEP A GOOD HOLD ON THOSE NOZZLES as they are small enough to lose inside the hood cavity. Once these are removed you can clean the area around all those holes. I then used a spray bottle with 70% isopropyl to remove any wax or oils, wiped clean, and allowed it to air dry.
- Prepping the Decal: As per the instructions, I had unrolled the decal and allowed it to lay flat for 24 hours. This seemed to help a great deal. The website also noted that creases and marks in the vinyl could be removed with a little heat once installed. I noticed two "creases" in mine.
- Positioning the Decal: I filled a 12 oz spray bottle with water and three healthy drops of Dawn dish soap. Knowing I would not have enough hands to spray the backside of the decal, I sprayed a liberal amount on the hood -- probably 2x what was necessary. Peeling the decal from the backing was tricky with one person, and would probably enlist help if I did it again. But if you take your time, it can be done. Don't pull too hard and try to remove at a sharp angle if possible. Once on the hood, the decal moved pretty easily. I centered it between the hinges and left about 2mm between the rear edge of the decal and the aft edge of the hood.
- Removing the Soapy Water: After checking for any dust/dirt (will look like a small, sharp speck pushing on the surface of the decal as opposed to a bubble), I used a felt-edged squeegee to push water from the middle to the outboard sides working forward from the aft edge. Be careful not to move the decal as you push the squeegee. You'll notice the decal start to grip the hood as more and more water is removed. I used a microfiber towel to dry the decal surface as I worked forward. Continually check for alignment, and make sure you have good contact at the edges.
- Drying: The instructions note to install out of direct sunlight with a temperature between 50 and 85 degrees-F. I was in a garage at about 70. After I had pushed out all of the water and lightly dried the decal's surface, I allowed it to cure for an hour before reinstalling the bumpers and nozzles. I then let it sit overnight before driving, but this was likely far more conservative than necessary. The creases I had noticed earlier were completely gone after drying. Not heat was necessary.
- Reinstalling the Bumpers: I used my finger to press an indent into each of the holes for the bumper, then used a plastic awl (spudger) to make a hole in the center of each indent. I installed the washer nozzles first, then the bumpers over them. They each snapped right in and held in place pretty well until I secured the screws and reconnected the nozzles (in that order).
Overall I am very please with the results. Definitely cuts down on glare into the windshield. I guess the only thing I would do differently next time is to get some help removing the decal from the backing, but it is definitely doable by one reasonably patient person.
Probably more info than most would care to read, but hoping it might be helpful to someone considering doing a large graphic install.
Sponsored