MartyP
Member
- Thread starter
- #1
Hello All. This is my first Jeep and first time posting on a forum, so please be kind. As a member, I have learned a great deal about my Jeep from the awesome folks who contribute here. I would like to give back and have added my own (small) contribution here.
Background: I have a 2019 JL Sport. Sting Grey, 2 Door, Manual, V6, Hard Top/Soft Top, manual windows, manual door locks, no A/C. (This puts me in the unicorn, unicorn category). Like most others here, I have begun to make changes/improvements, many of which I learned from here!
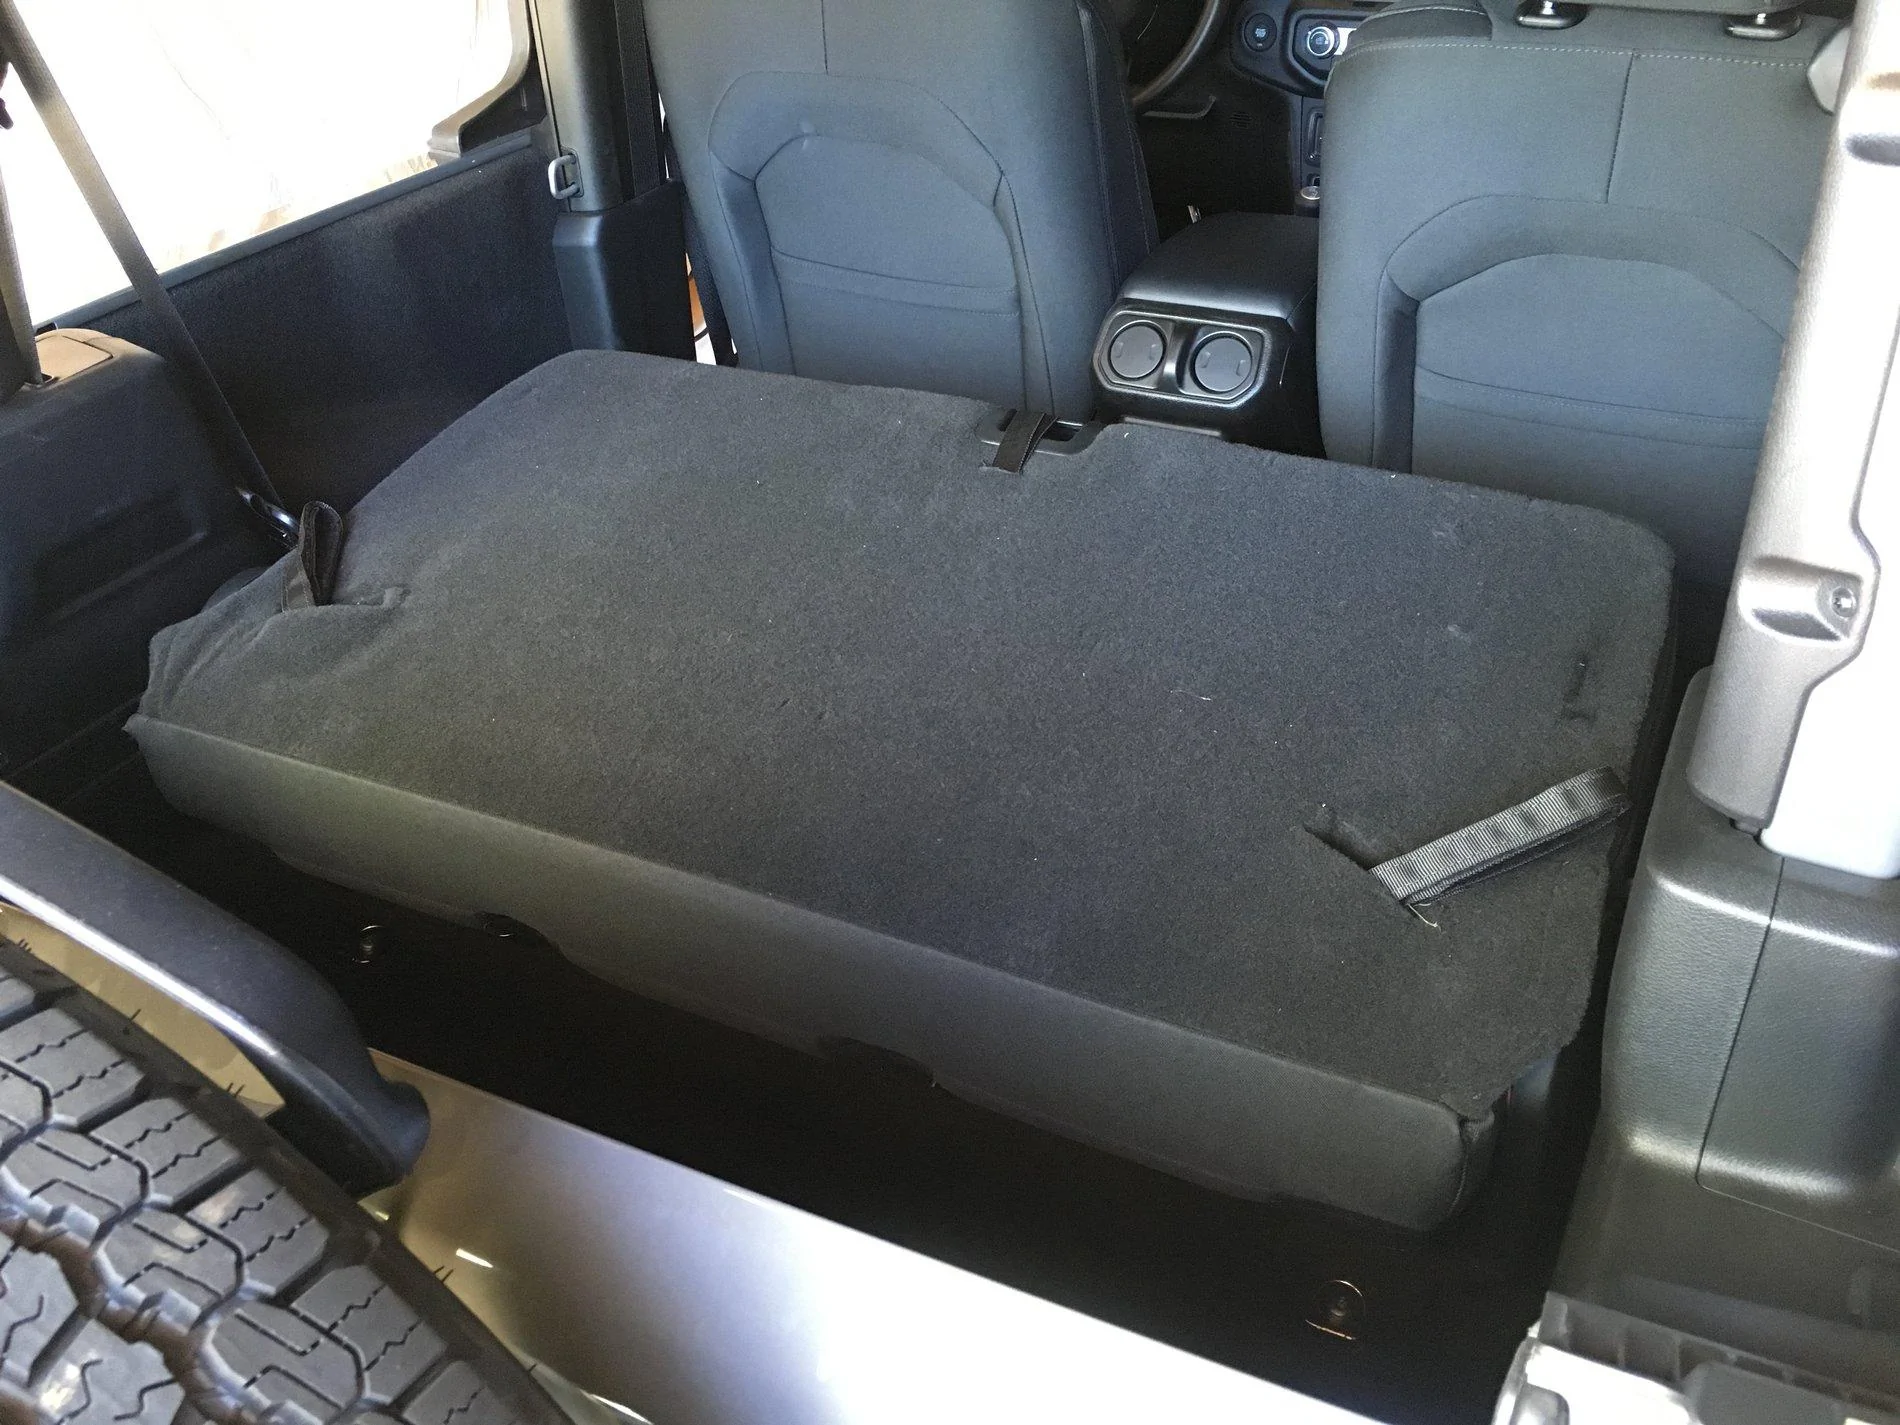
I use the rear seat in the 2dr to haul my teens and their friends so it stays in unless I am hauling something large. Mostly I run with the seat folded when not in use, like this:

The stock rear seat ‘Tumble’ feature does not allow for this configuration unless you strap the seat down. After some investigating, I discovered two small steel cables that connect the seat back to the rear floor latches. They are located by the hinges, one on each side. When this seat back is folded, these cables pull the rear seat latches allowing the seat to tumble forward:

When I dis-connected the cables, I found I could fold the back of the seat forward without the rear latches releasing; exactly what I wanted. All I had to do next was to modify the cables to provide a way to “manually” release the rear latches. With this mod, the back of the seat folds down, as shown and stays latched to the floor. Perfect!
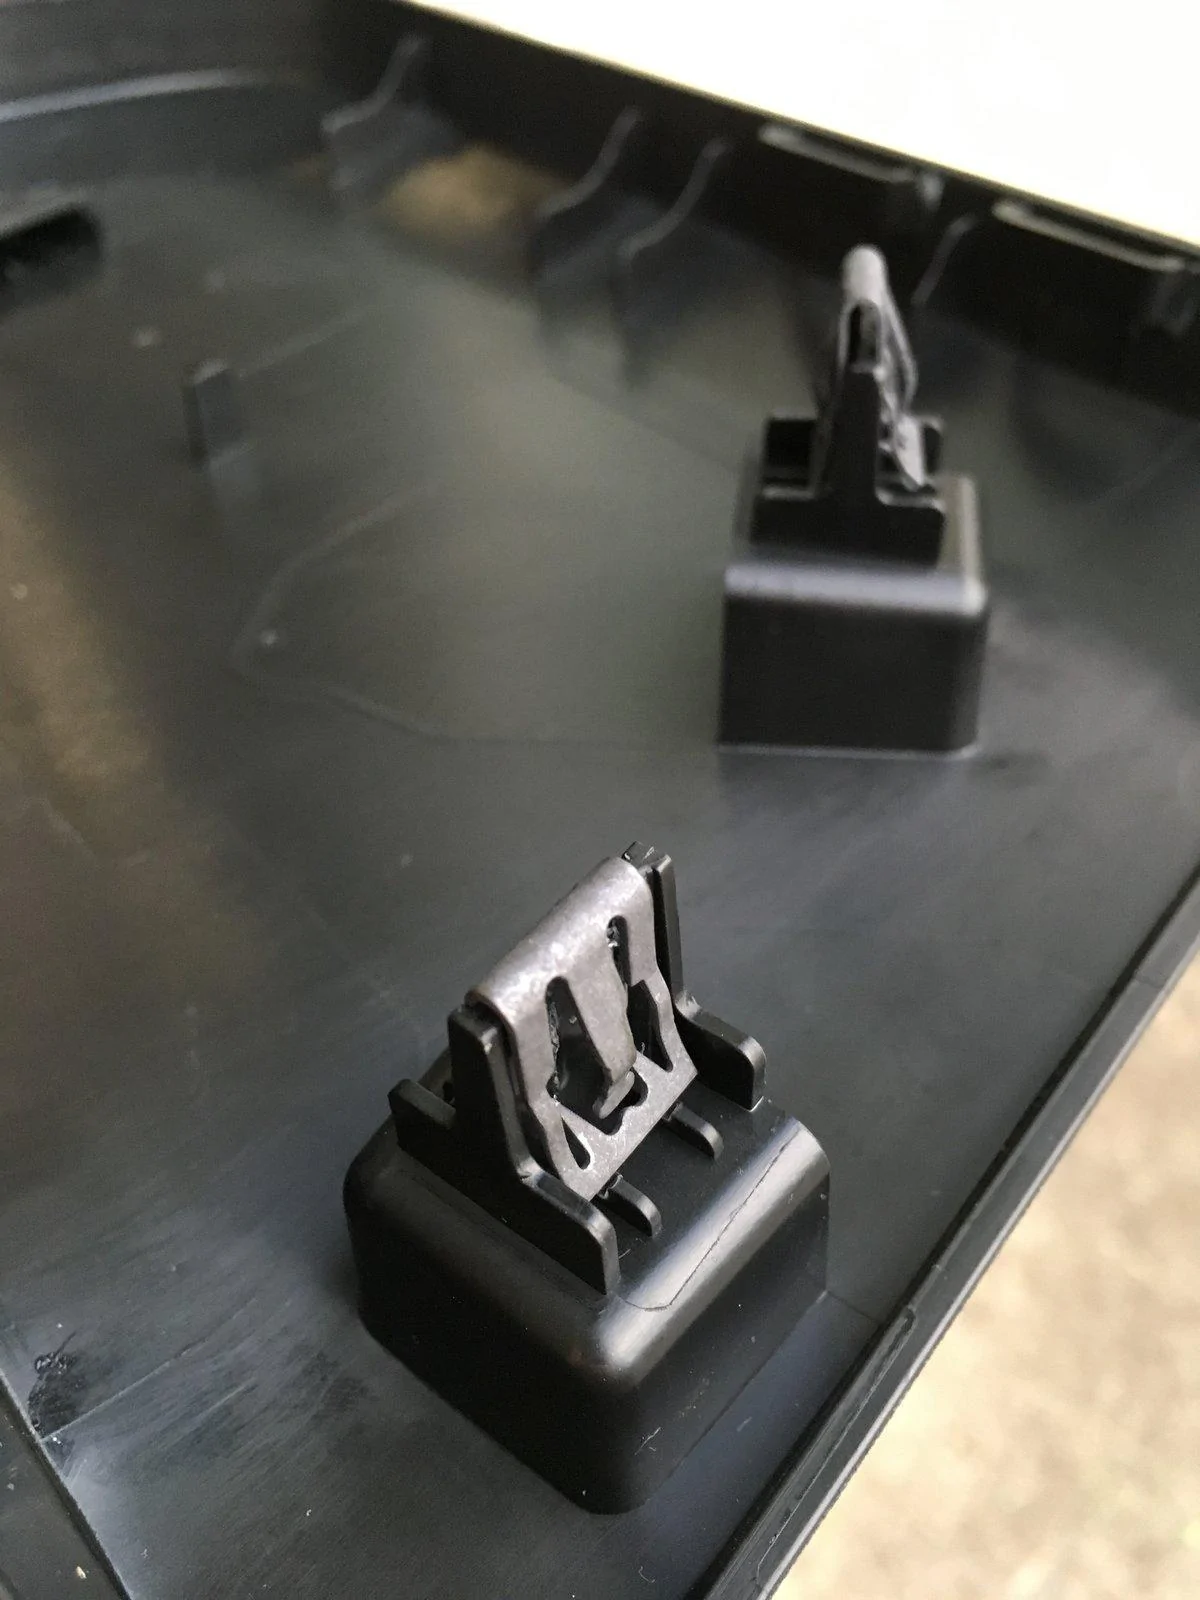
I started by removing the side covers at the hinges:
They are held in place by the same clips found everywhere in the interior of the JL.
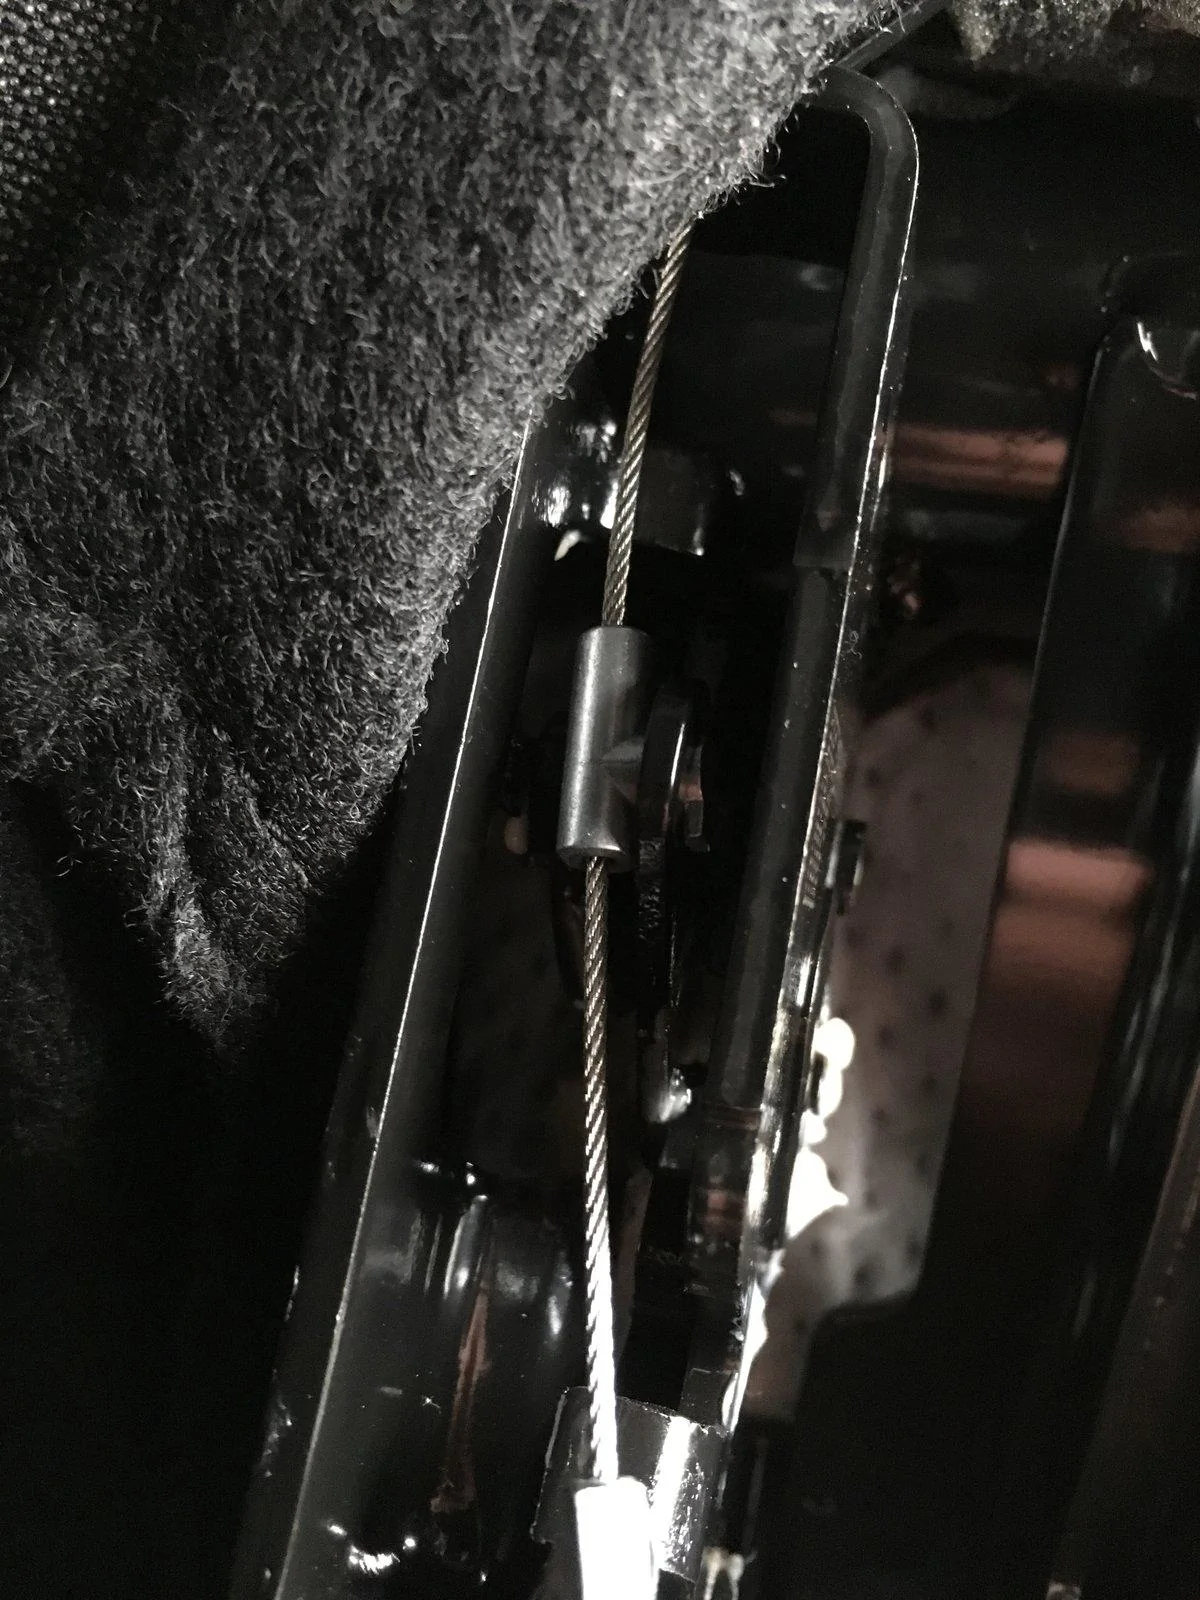
First, carefully peel back the Velcro that holds the bottom fabric to the sides of the seat pan. This exposes the workings of the rear latch and the seat hinge.
To remove the covers, start at the bottom and carefully pull out until they pop off. There are 2 clips that insert into the steel seat frame, 4 clips that hold the inner ‘clamshell’ and a tab that inserts into a pocket near the top of the cover. I was able to use a screw driver to depress the clips which makes them easier to remove. Be careful with the 4 tabs that hold the inner shell in place. They also can be depressed with a screw driver to aid in removal. Then carefully slide the cover up and off of the tab. Do Not pull the cover straight off!
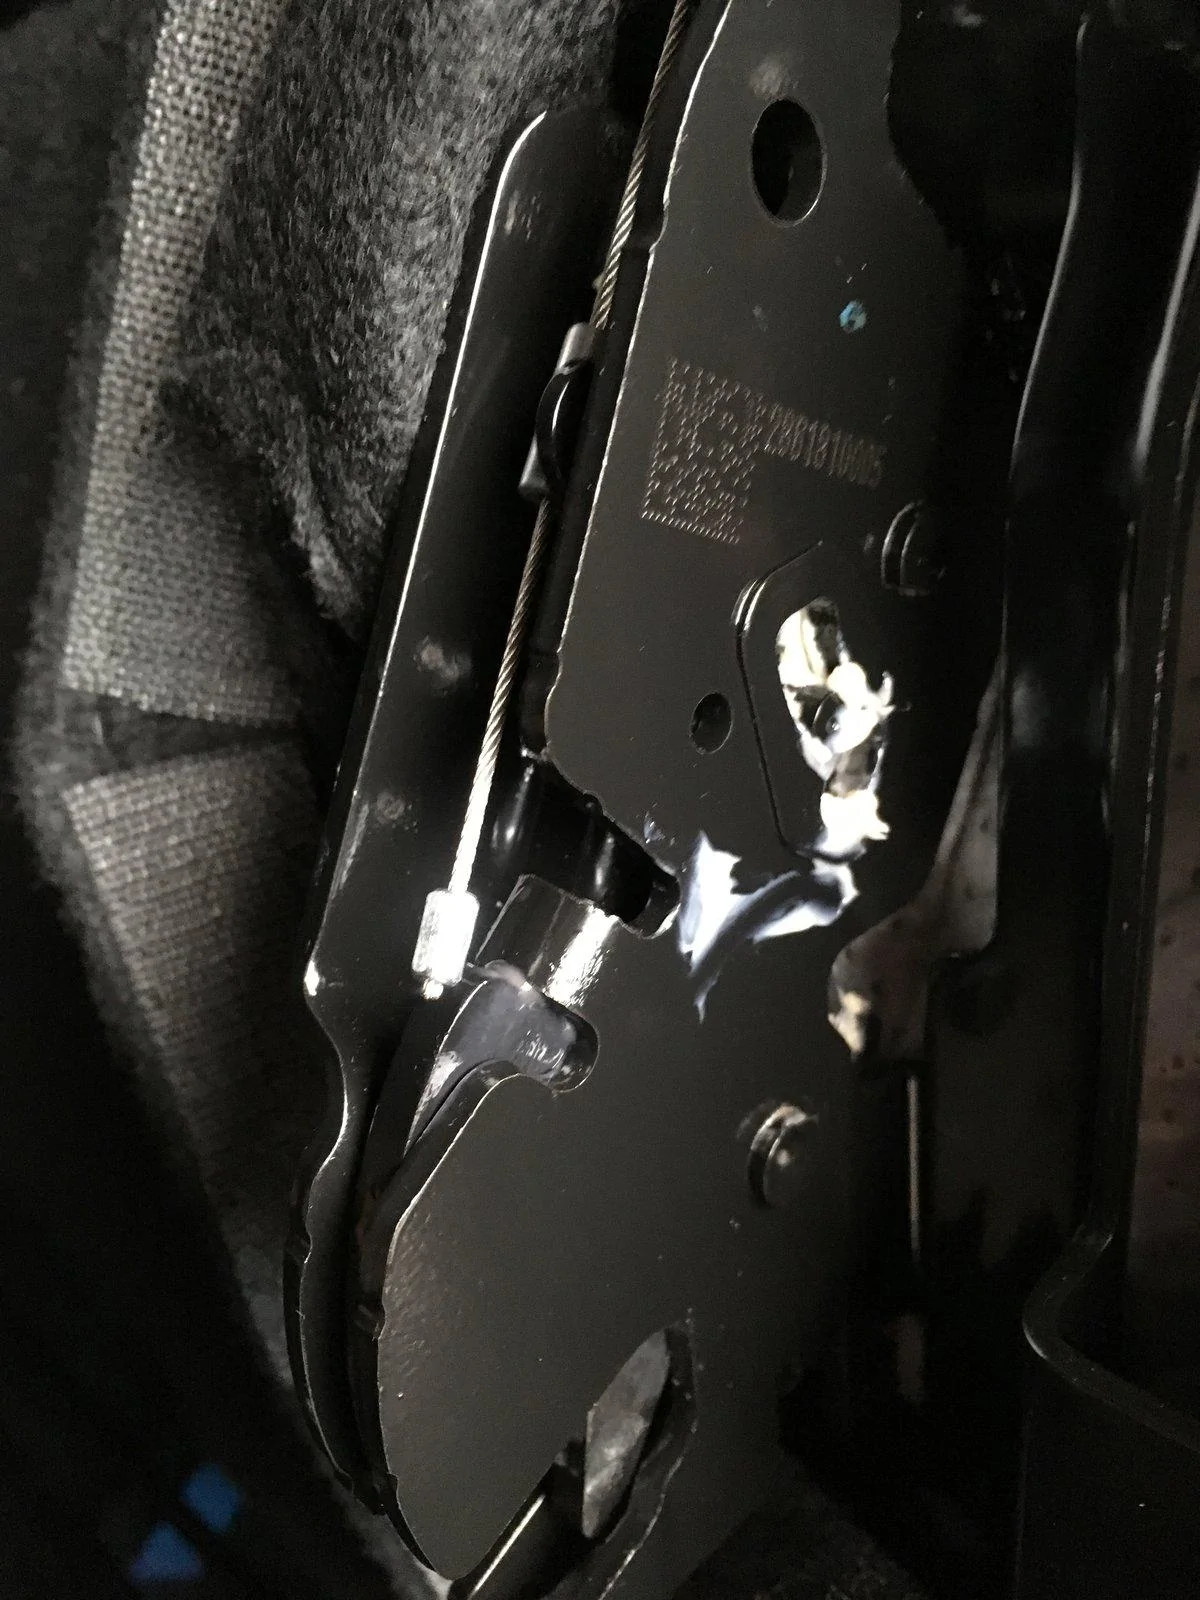
Once the cover is removed, look for the cable and how it is attached:
The sheath had two features: a 90 degree bend and a slot type end with a post that inserts into the steel side plate. To get the cable out, I removed the bottom end sliding fitting by rotating, then the 90 degree bend from the seat bottom, then the end of the sheath from the side plate, and finally the top fitting by rotating. The ends have a special fitting that twist and lock:
Once the cable is removed it looks like this:
Keep track of each cable after removal, as they are different lengths left to right. It helps that they have different color 90 degree bends to tell them apart. (One is black and one is white).
The next step was to make a loop in place of the top fitting (where it was attached to the seat back). Unfortunately, I did not find an easy way to make the OEM cable innards work with what I wanted. So, I went to my local hardware store for some 1/16” dia. wire rope and swage fittings. You will need:
· Two pcs of 1/16” wire rope approx. 18” long.
· Two 1/16” swage splice fittings (to make the loop).
· Two 1/16” swage stoppers (for the ends).
· Some heat shrink tubing for the loop. (Any color you choose)
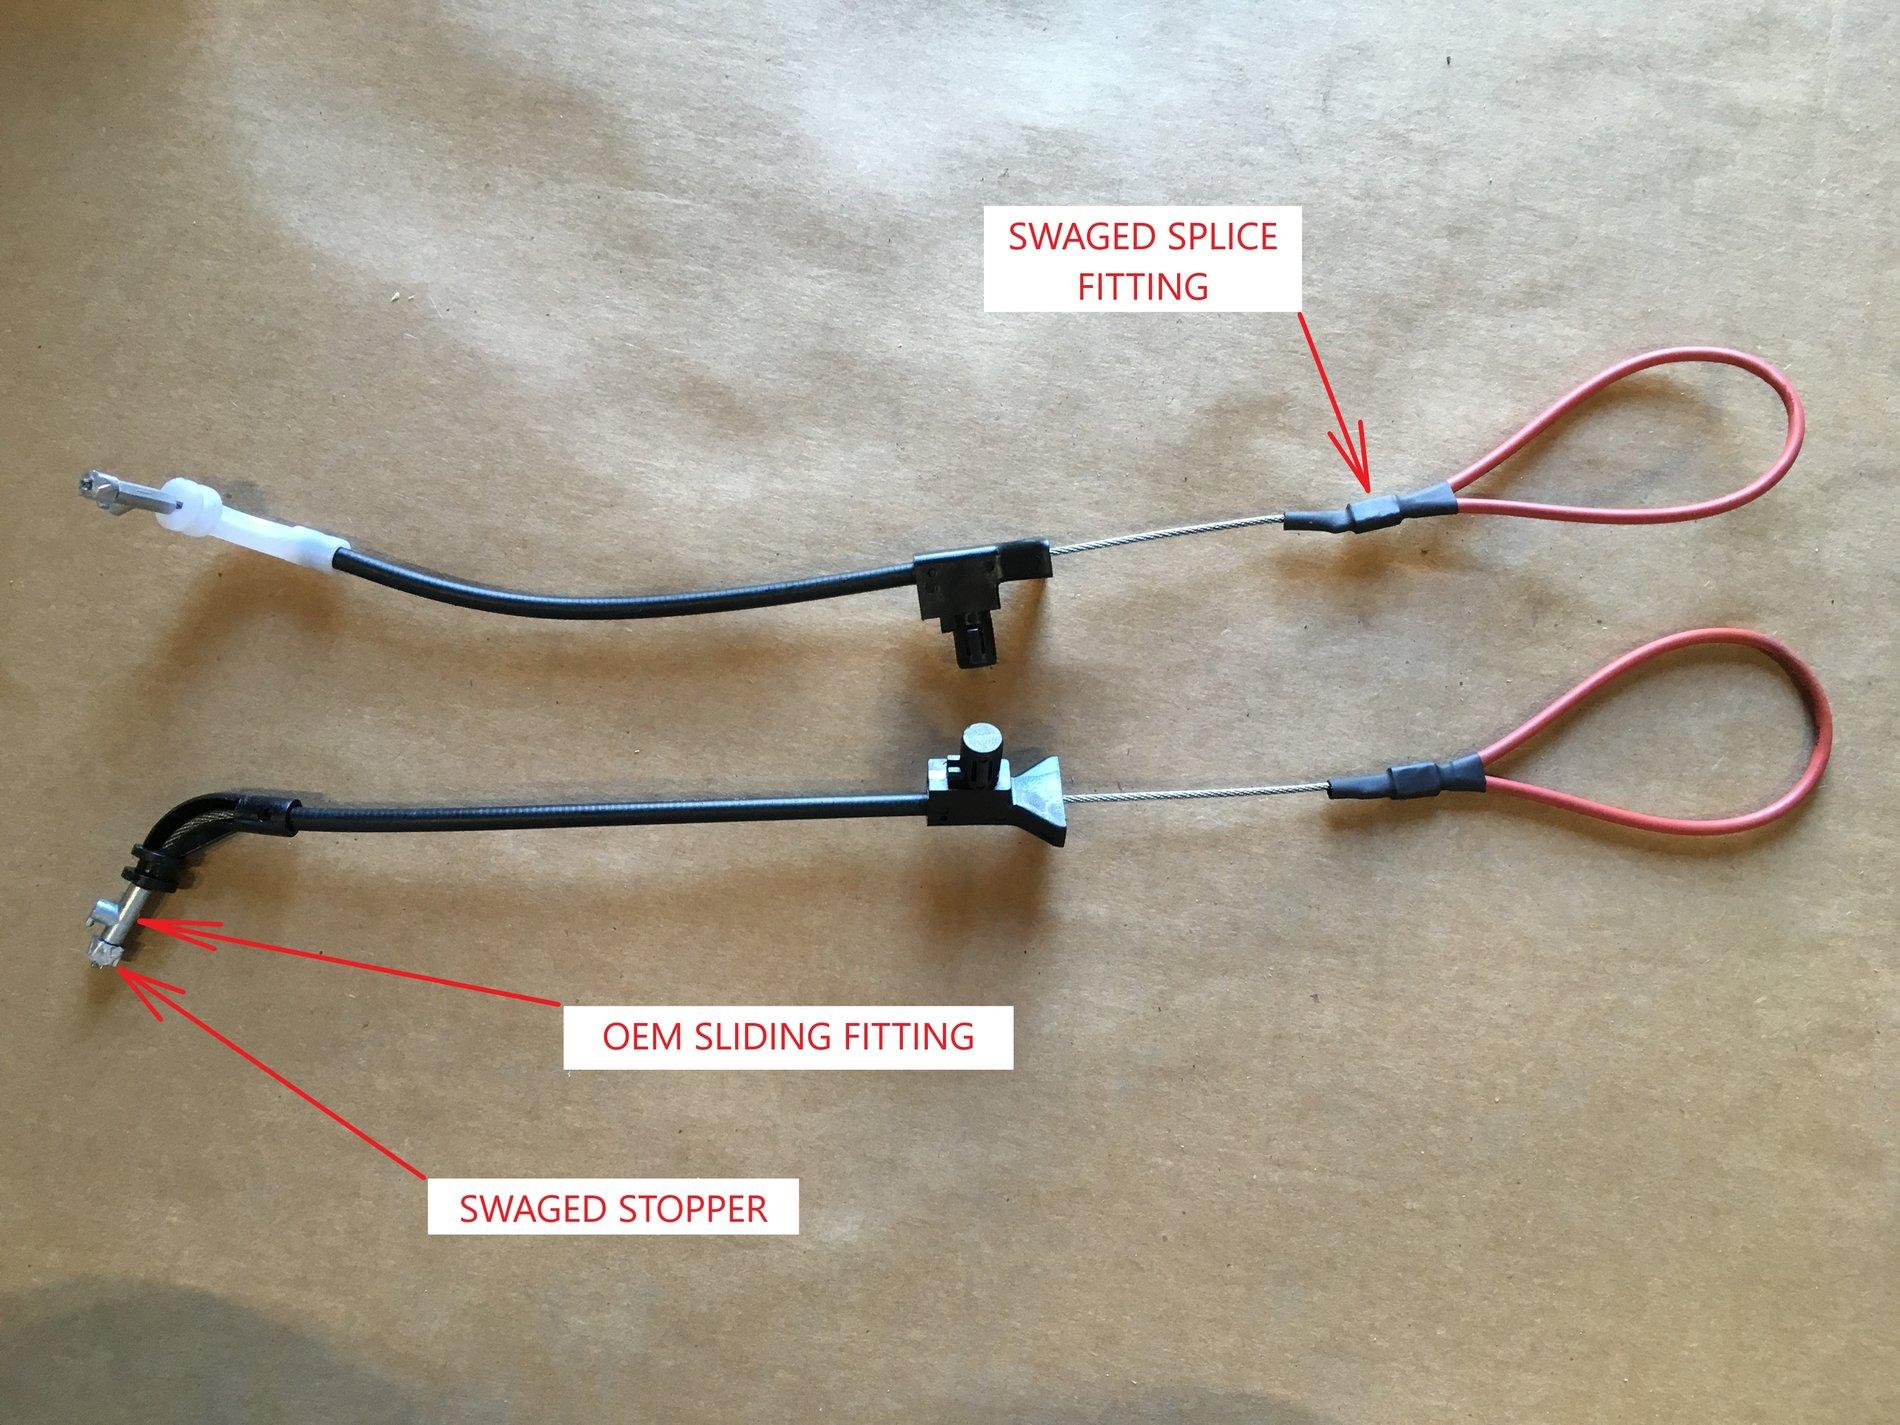
First, I cut one of the fittings off of the OEM cable and removed the inside from the sheath. Keep the OEM end fitting that slides on the wire rope for reuse. I then created a new cable with the OEM sliding fitting and the new parts for each side. This has to be done in the proper sequence. First, make the loop using the splice fitting (remember to put the heat shrink before swaging the fitting). I used my vice to do the swaging. The loop size is up to you, but should be big enough for two fingers. Second, pass the free end of the cable into the slotted end of the sheath. Third, slide the OEM Sliding Fitting on the cable. Fourth, swage the stopper onto the cable. I approximated the overall length by eyeballing against the seat. Cut off any excess length after swaging.
In the end they looked like this:
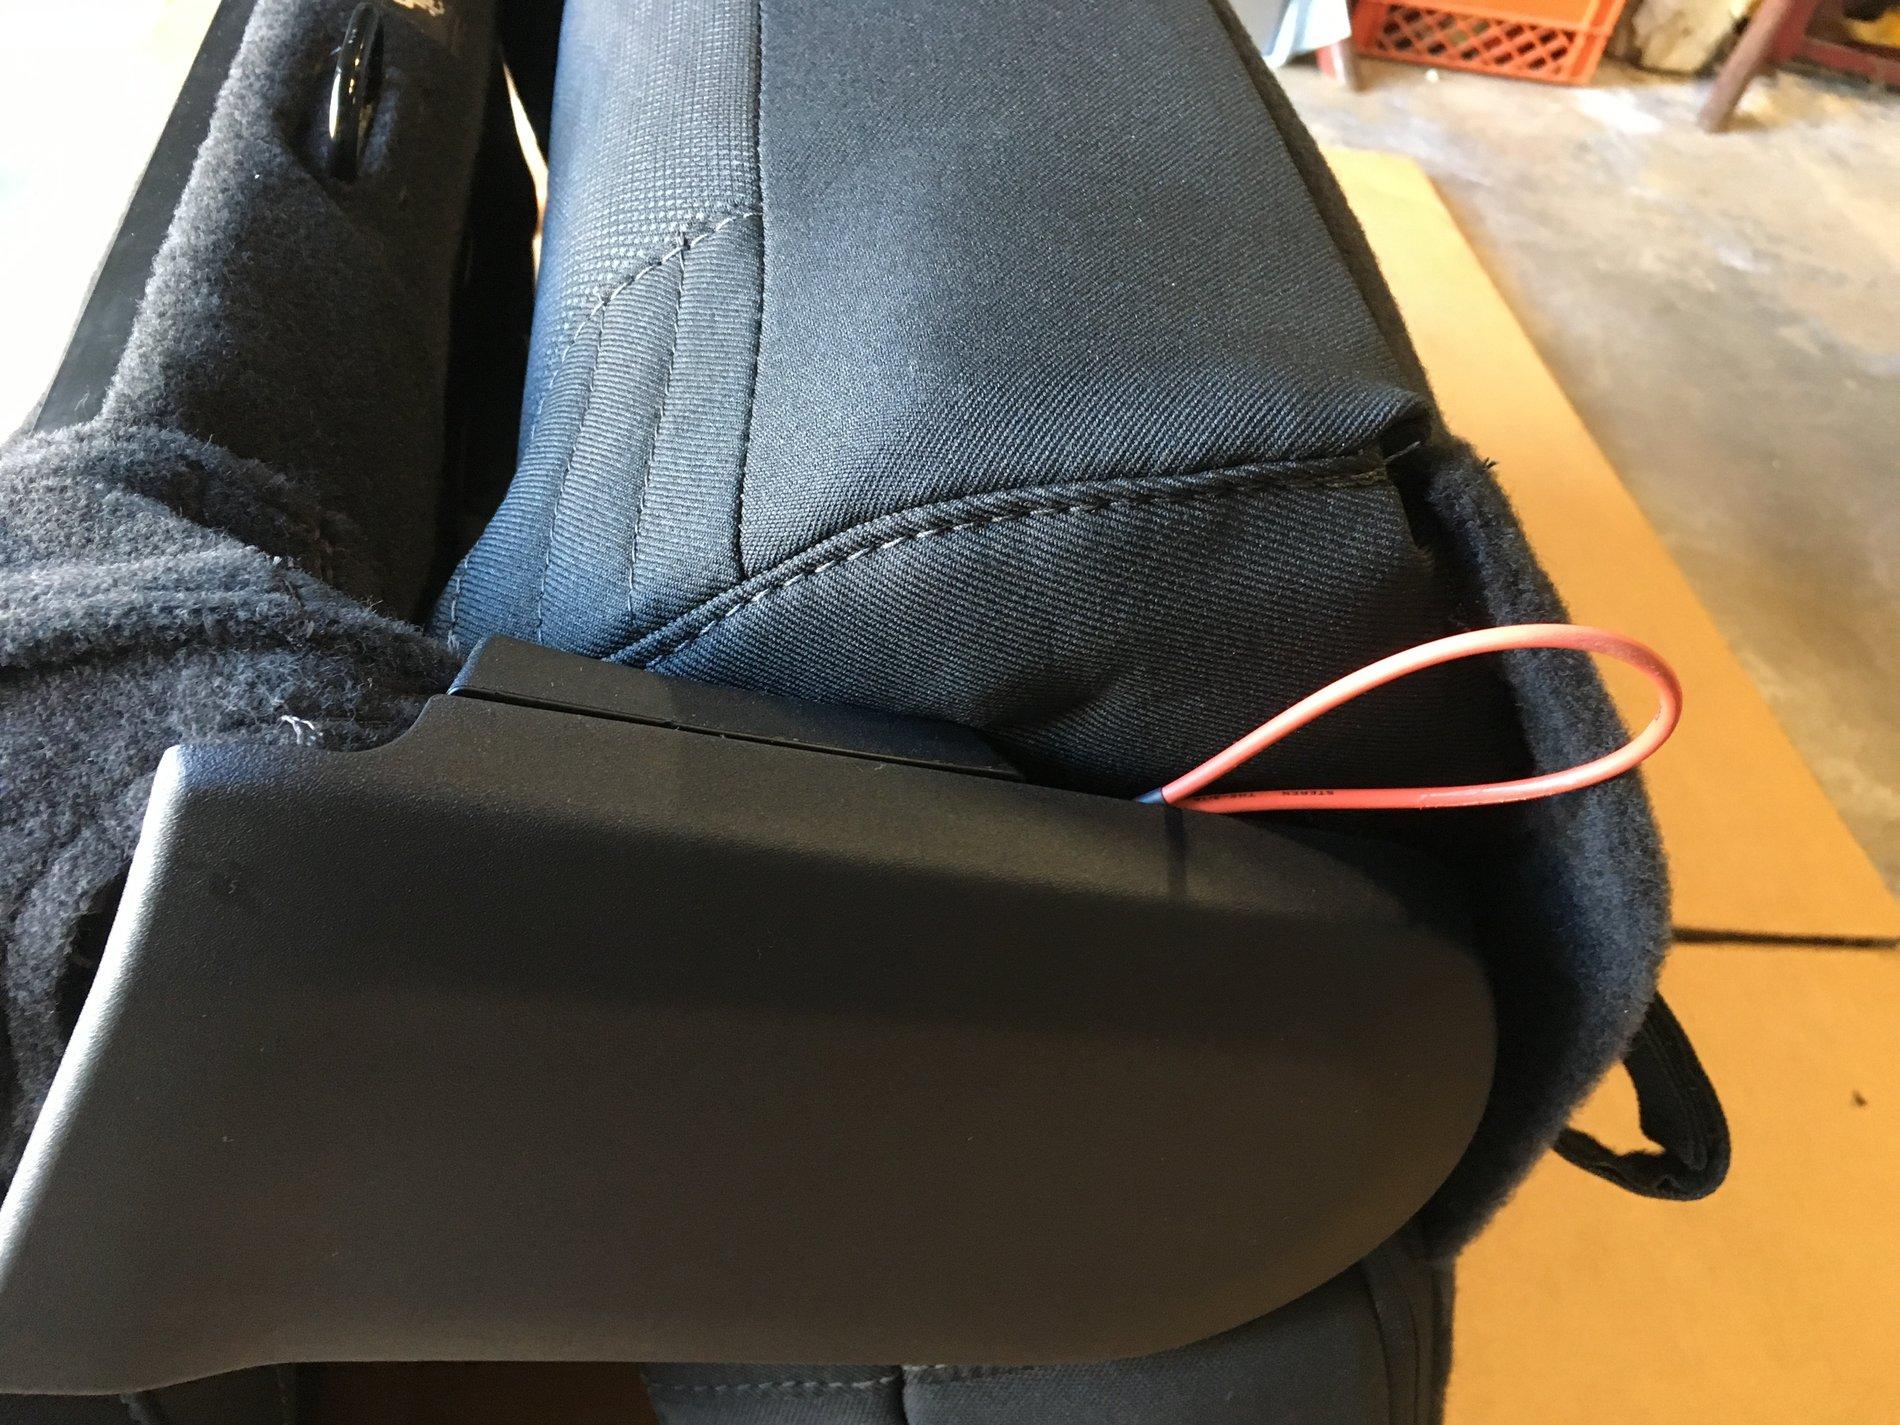
I then installed the new cables with sheaths back into the seat with the loop taking the place of the top OEM fitting. After testing, I replaced the side covers, and re-positioned the velcro bottom seat cover. The new loops can be tucked in along side the covers and pulled out when the seat is to be tumbled forward. They look like this:
Now the seat functions as follows:
1. To fold the back of the seat down, lift the OEM latch at the top and fold as before. This allows the seat to remain latched to the floor while running folded.
2. Next, to tumble the seat forward, pull on the new loops to unlatch the rear hooks.
3. To remove the seat, fold the back of the seat down, pull the new loops to tumble forward, then compress the front latch and remove the seat.
Background: I have a 2019 JL Sport. Sting Grey, 2 Door, Manual, V6, Hard Top/Soft Top, manual windows, manual door locks, no A/C. (This puts me in the unicorn, unicorn category). Like most others here, I have begun to make changes/improvements, many of which I learned from here!
I use the rear seat in the 2dr to haul my teens and their friends so it stays in unless I am hauling something large. Mostly I run with the seat folded when not in use, like this:
The stock rear seat ‘Tumble’ feature does not allow for this configuration unless you strap the seat down. After some investigating, I discovered two small steel cables that connect the seat back to the rear floor latches. They are located by the hinges, one on each side. When this seat back is folded, these cables pull the rear seat latches allowing the seat to tumble forward:
When I dis-connected the cables, I found I could fold the back of the seat forward without the rear latches releasing; exactly what I wanted. All I had to do next was to modify the cables to provide a way to “manually” release the rear latches. With this mod, the back of the seat folds down, as shown and stays latched to the floor. Perfect!
I started by removing the side covers at the hinges:

They are held in place by the same clips found everywhere in the interior of the JL.
First, carefully peel back the Velcro that holds the bottom fabric to the sides of the seat pan. This exposes the workings of the rear latch and the seat hinge.
To remove the covers, start at the bottom and carefully pull out until they pop off. There are 2 clips that insert into the steel seat frame, 4 clips that hold the inner ‘clamshell’ and a tab that inserts into a pocket near the top of the cover. I was able to use a screw driver to depress the clips which makes them easier to remove. Be careful with the 4 tabs that hold the inner shell in place. They also can be depressed with a screw driver to aid in removal. Then carefully slide the cover up and off of the tab. Do Not pull the cover straight off!
Once the cover is removed, look for the cable and how it is attached:

The sheath had two features: a 90 degree bend and a slot type end with a post that inserts into the steel side plate. To get the cable out, I removed the bottom end sliding fitting by rotating, then the 90 degree bend from the seat bottom, then the end of the sheath from the side plate, and finally the top fitting by rotating. The ends have a special fitting that twist and lock:

Once the cable is removed it looks like this:

Keep track of each cable after removal, as they are different lengths left to right. It helps that they have different color 90 degree bends to tell them apart. (One is black and one is white).
The next step was to make a loop in place of the top fitting (where it was attached to the seat back). Unfortunately, I did not find an easy way to make the OEM cable innards work with what I wanted. So, I went to my local hardware store for some 1/16” dia. wire rope and swage fittings. You will need:
· Two pcs of 1/16” wire rope approx. 18” long.
· Two 1/16” swage splice fittings (to make the loop).
· Two 1/16” swage stoppers (for the ends).
· Some heat shrink tubing for the loop. (Any color you choose)
First, I cut one of the fittings off of the OEM cable and removed the inside from the sheath. Keep the OEM end fitting that slides on the wire rope for reuse. I then created a new cable with the OEM sliding fitting and the new parts for each side. This has to be done in the proper sequence. First, make the loop using the splice fitting (remember to put the heat shrink before swaging the fitting). I used my vice to do the swaging. The loop size is up to you, but should be big enough for two fingers. Second, pass the free end of the cable into the slotted end of the sheath. Third, slide the OEM Sliding Fitting on the cable. Fourth, swage the stopper onto the cable. I approximated the overall length by eyeballing against the seat. Cut off any excess length after swaging.
In the end they looked like this:
I then installed the new cables with sheaths back into the seat with the loop taking the place of the top OEM fitting. After testing, I replaced the side covers, and re-positioned the velcro bottom seat cover. The new loops can be tucked in along side the covers and pulled out when the seat is to be tumbled forward. They look like this:

Now the seat functions as follows:
1. To fold the back of the seat down, lift the OEM latch at the top and fold as before. This allows the seat to remain latched to the floor while running folded.
2. Next, to tumble the seat forward, pull on the new loops to unlatch the rear hooks.
3. To remove the seat, fold the back of the seat down, pull the new loops to tumble forward, then compress the front latch and remove the seat.
Sponsored

