fuelxc
Active Member
- First Name
- Eric Harrison
- Joined
- Jun 18, 2018
- Threads
- 5
- Messages
- 29
- Reaction score
- 18
- Location
- Scottsdale
- Vehicle(s)
- 18 JL Rubi
- Thread starter
- #1
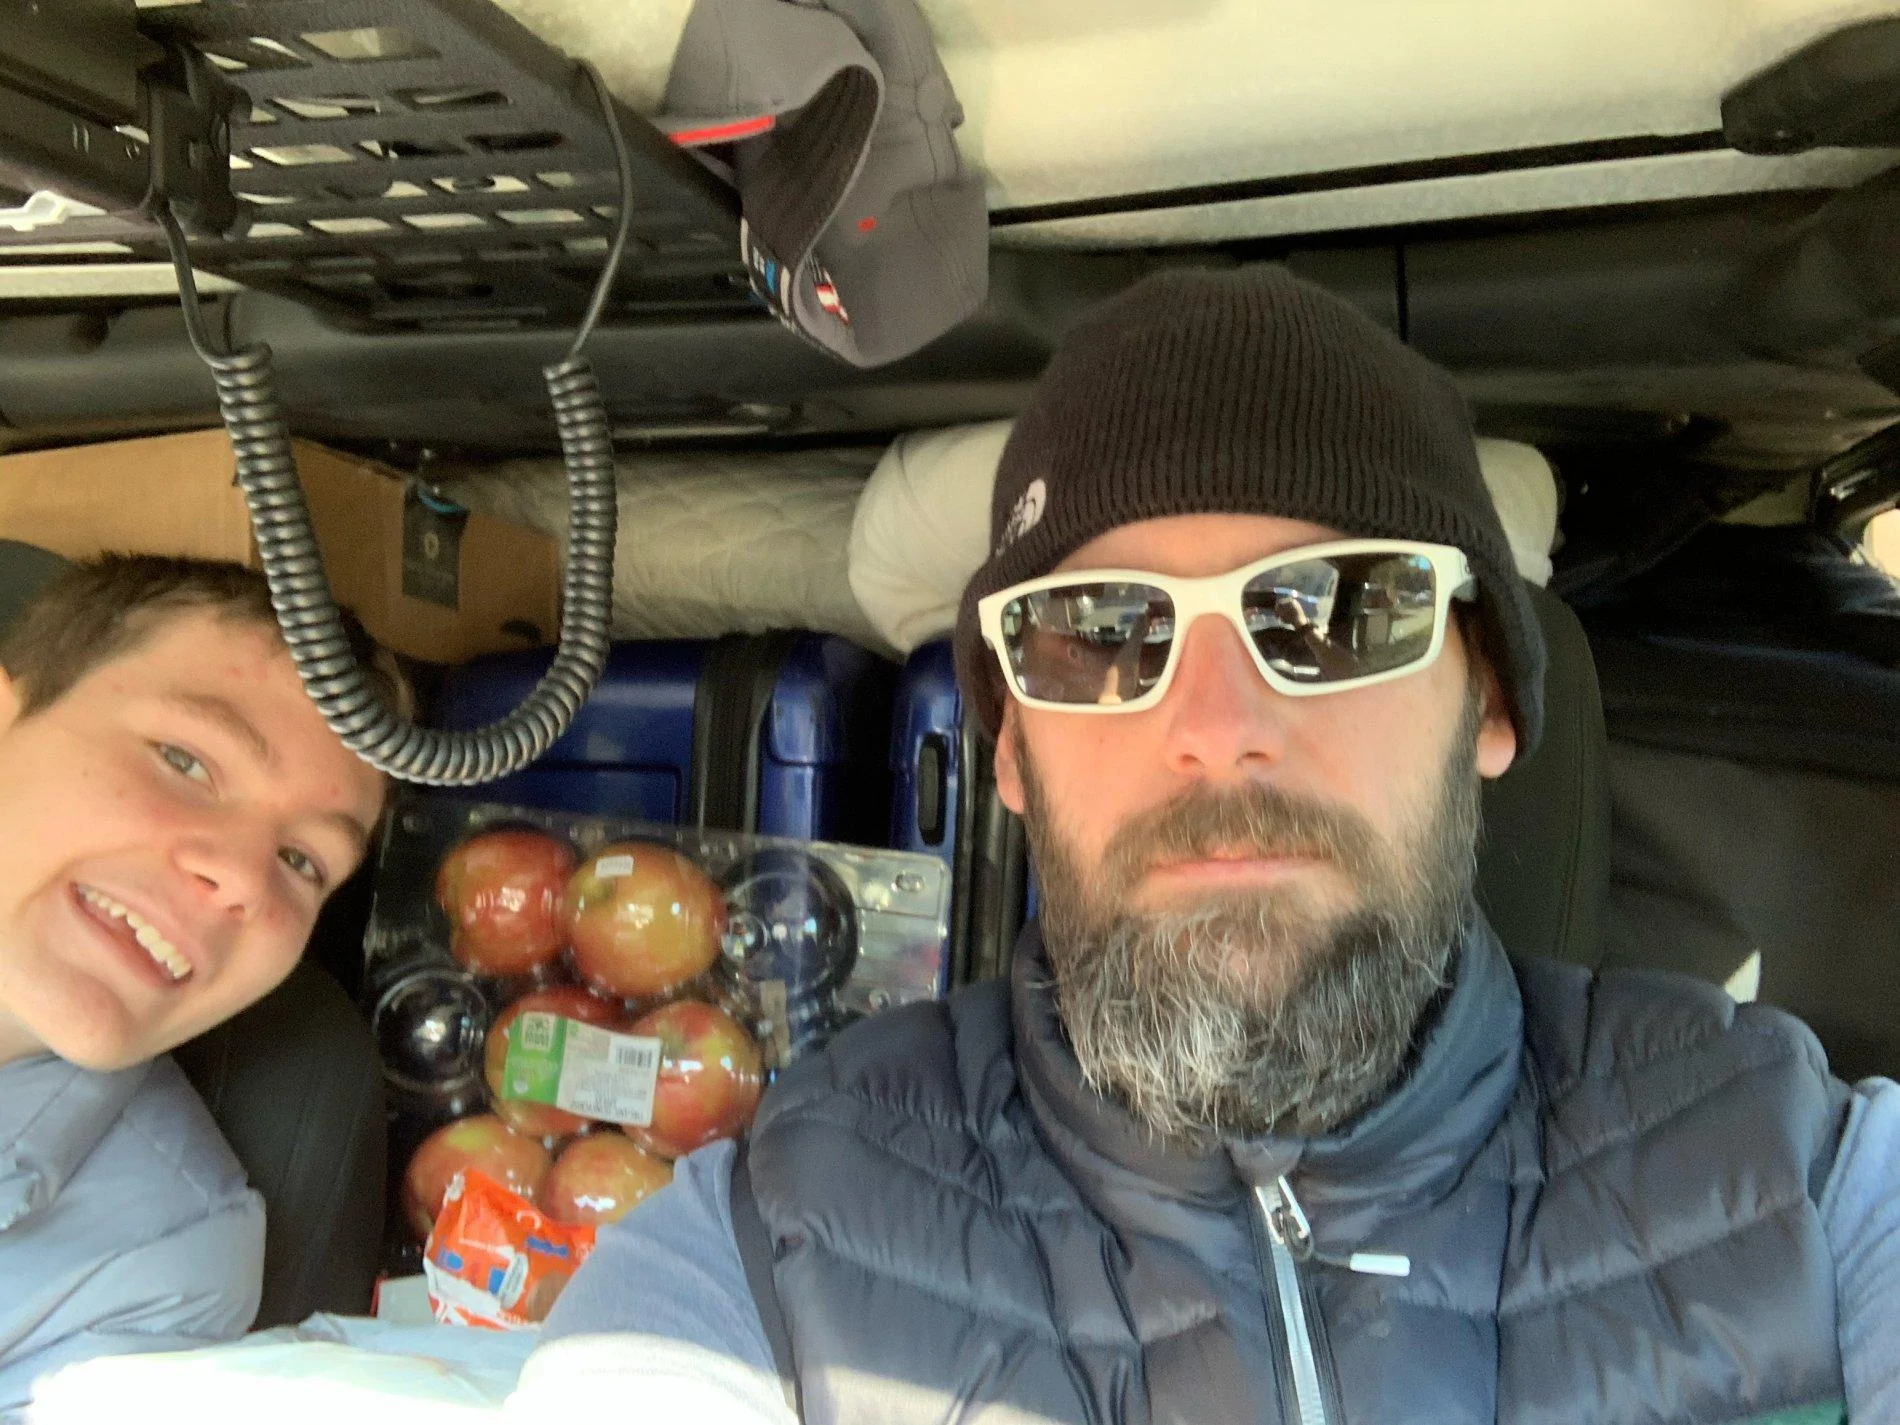
I recently went ahead and took my ham license exam again so that I could have some good comm and aprs. I took some photos as I went but frustrated with not having all my tools (we are in an AirBNB until our house is ready) I didn't take pics the whole way.
JeepUniq I ordered at the same time and got an email saying things are delayed. Fair enough, though everywhere else disclaims that BEFORE you order. They did not. I got an email 3 days later. I have since responded, asked questions, etc with no response in over a week. So, unfortunately I am not able to review that product but their customer care/support is terrible at this point.
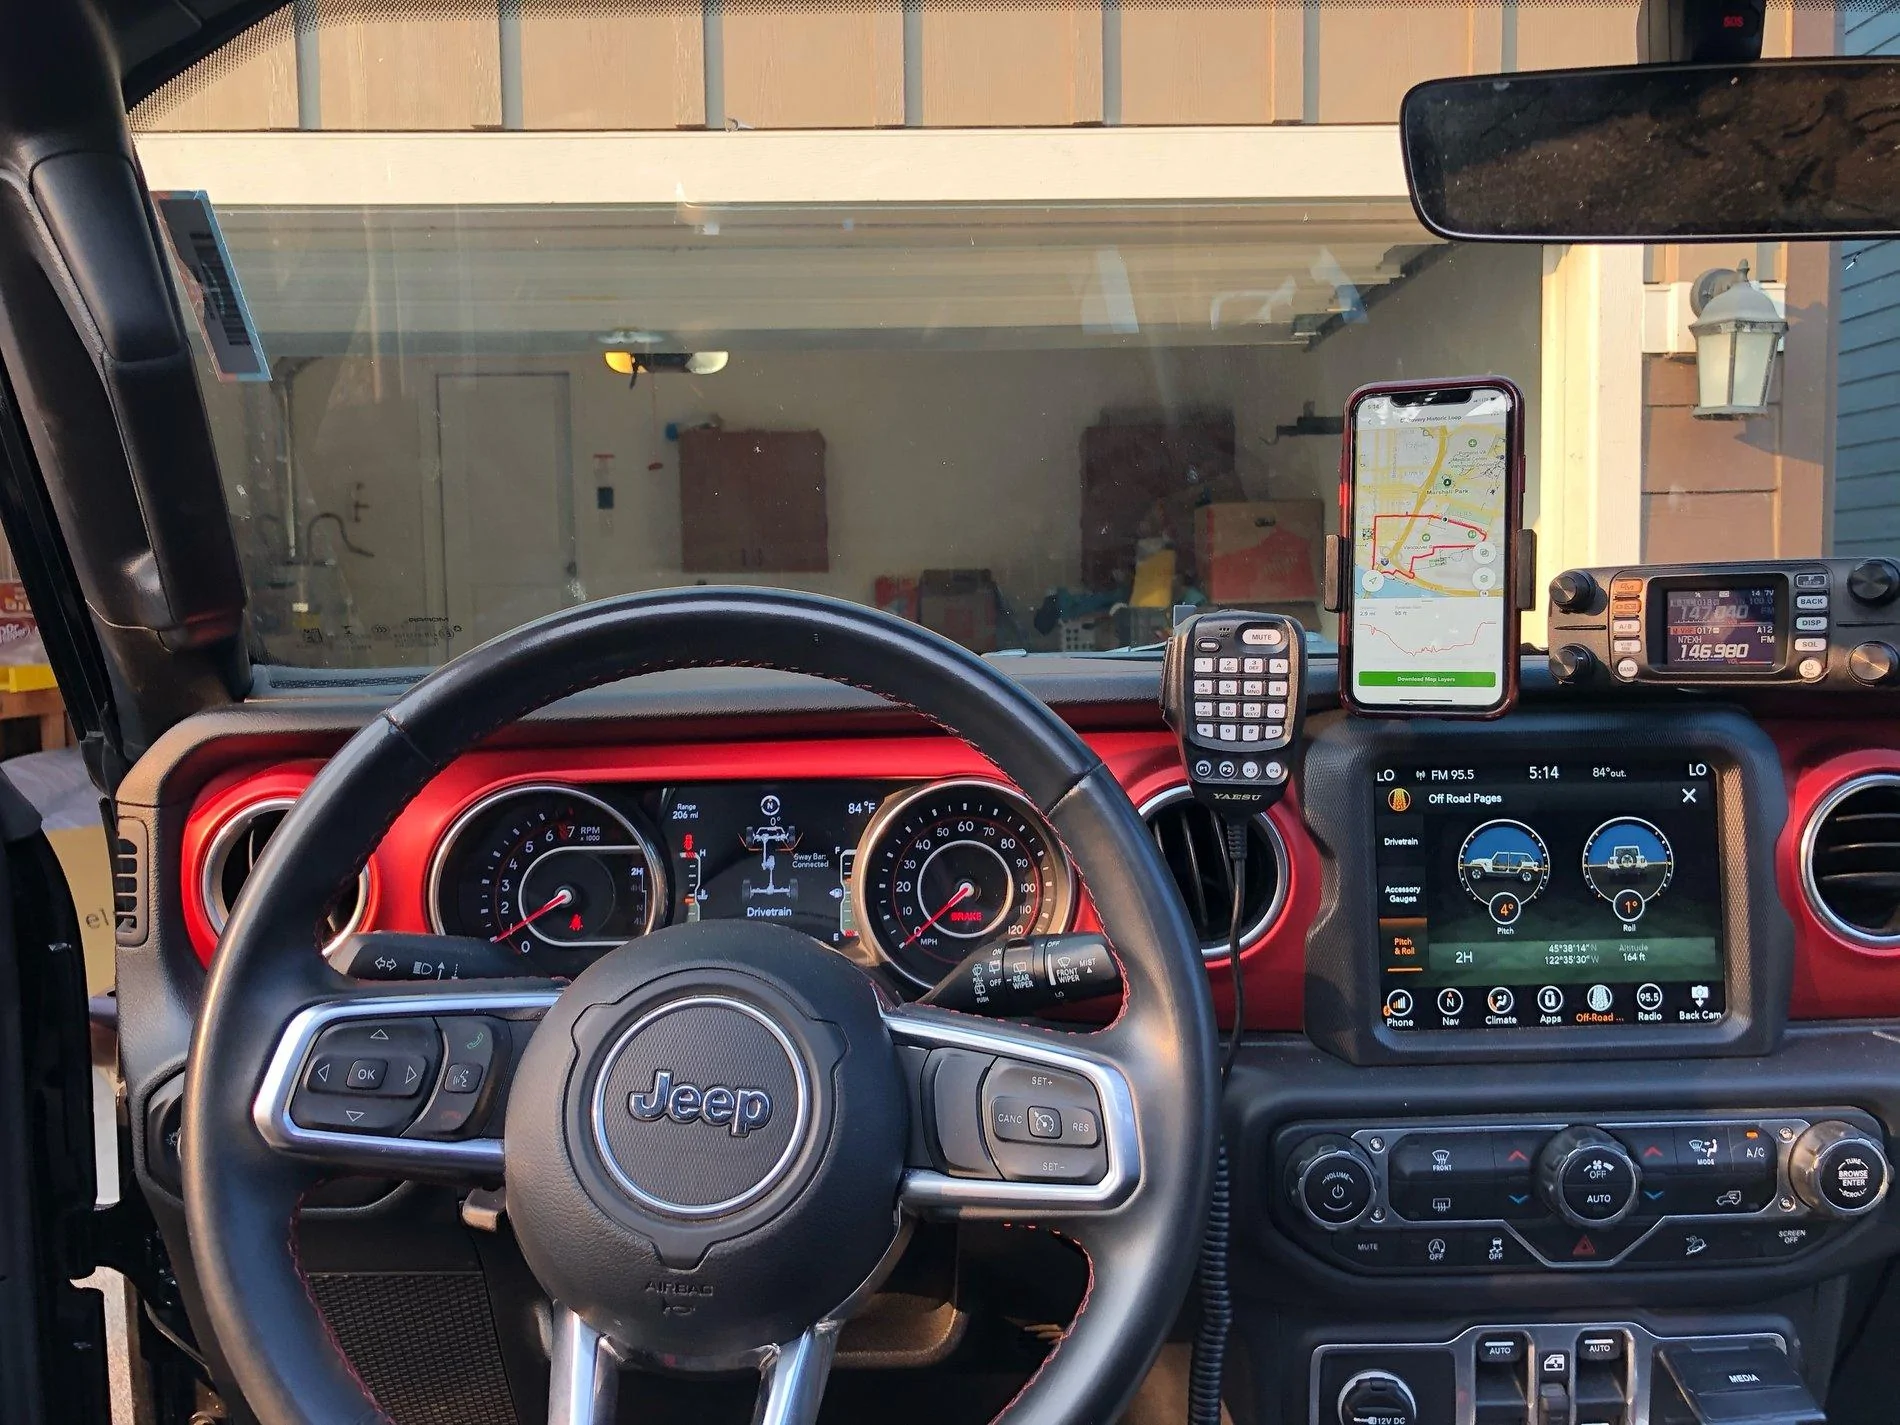
Gear:
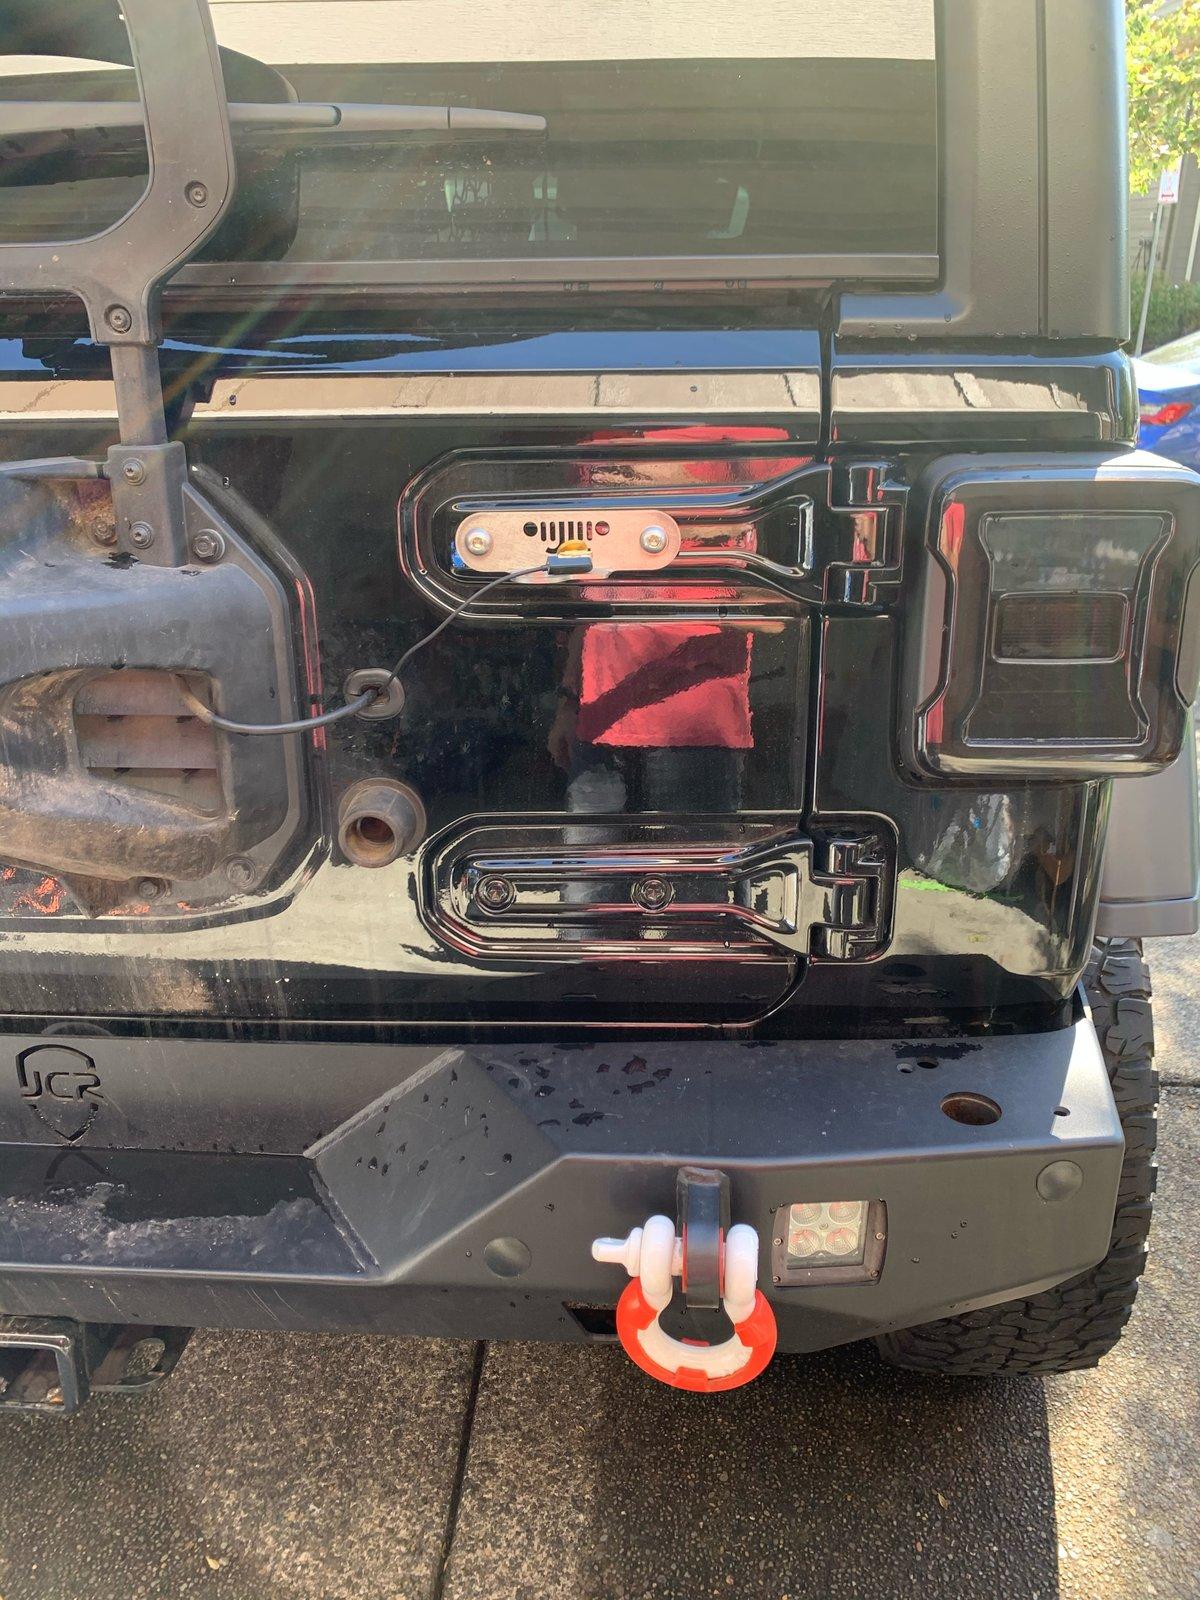
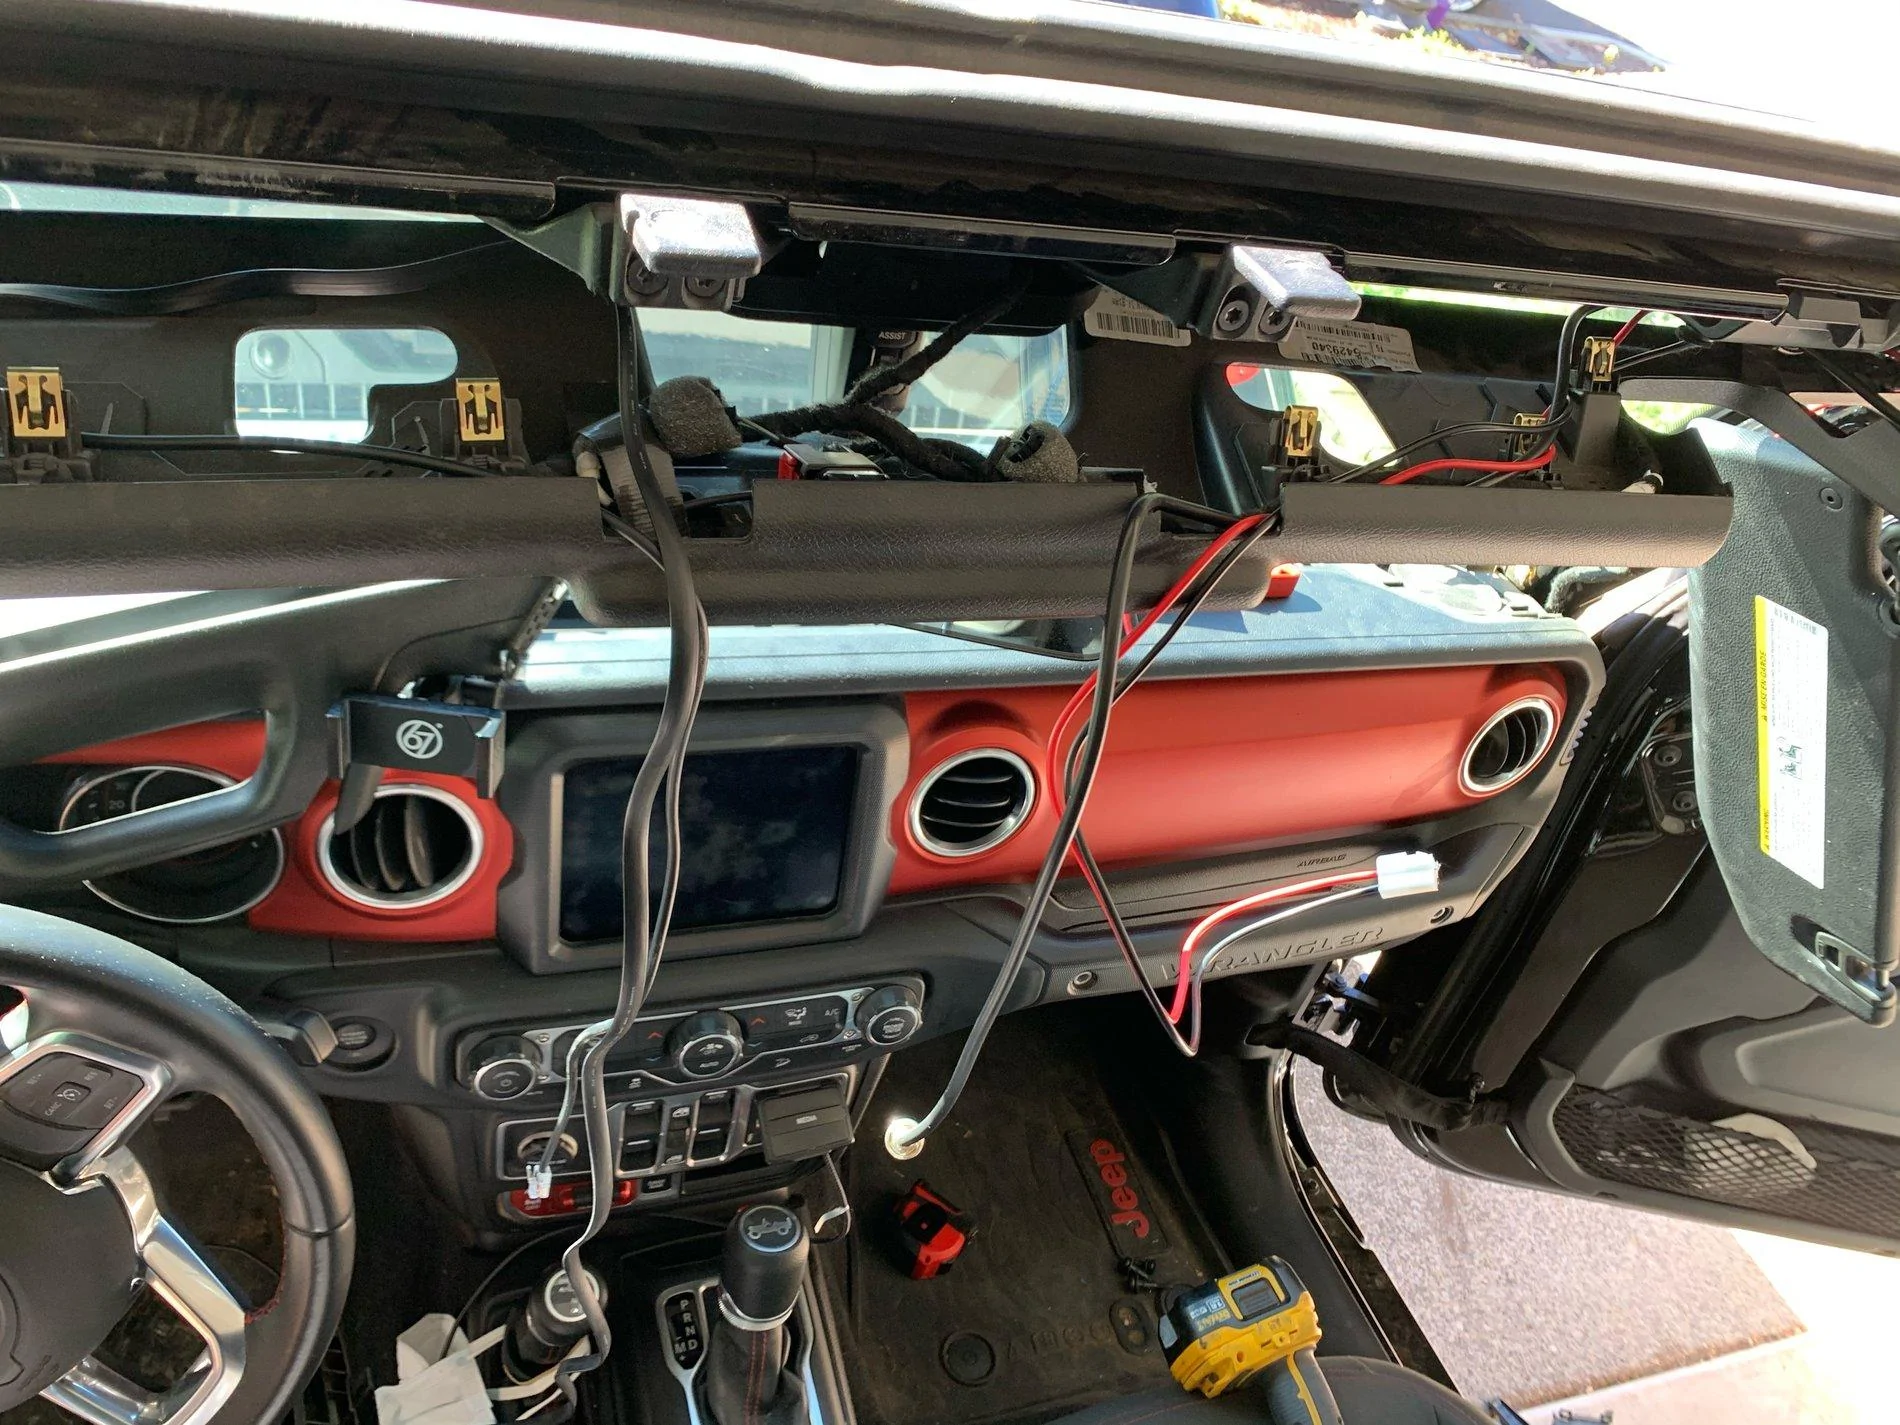
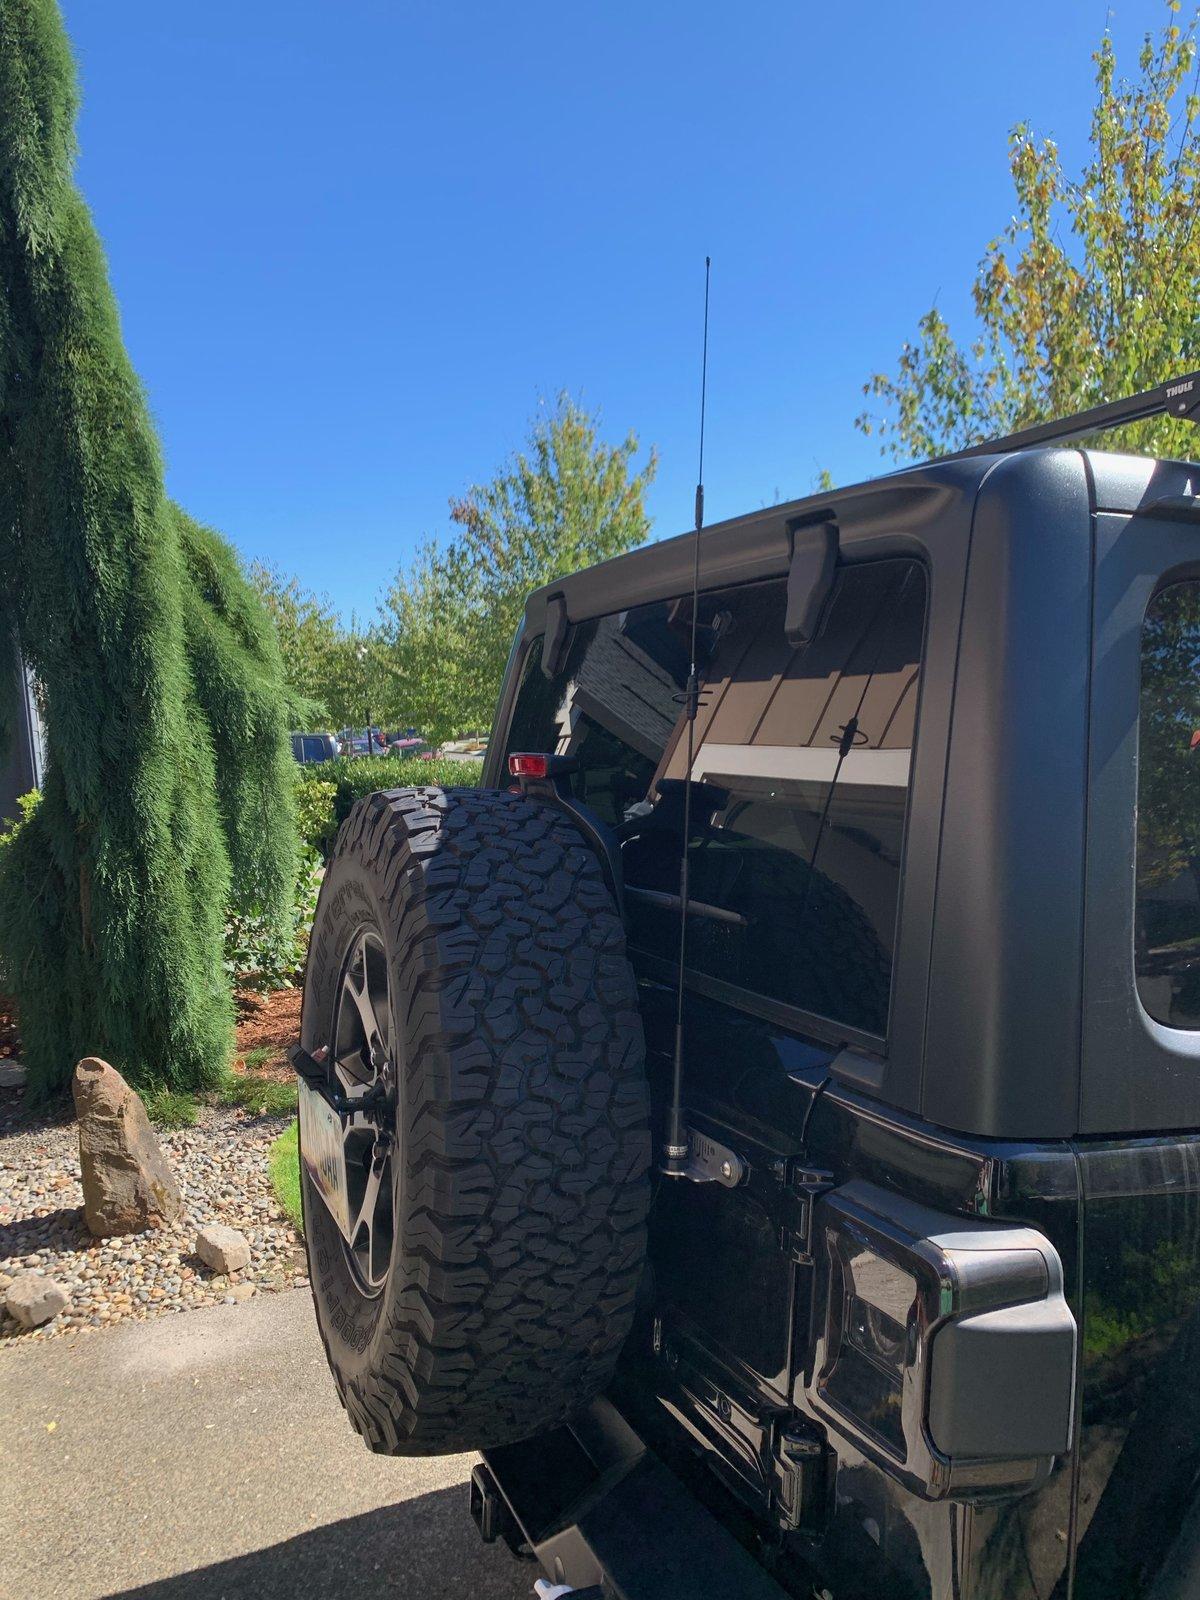
I started off by installing the antennae mount and running the coax to the front. I snaked the coax under trims panels on the roll cage all the way to the front. The only problem I had with this path so far is when I have the rear view camera on it interferes with the reception.

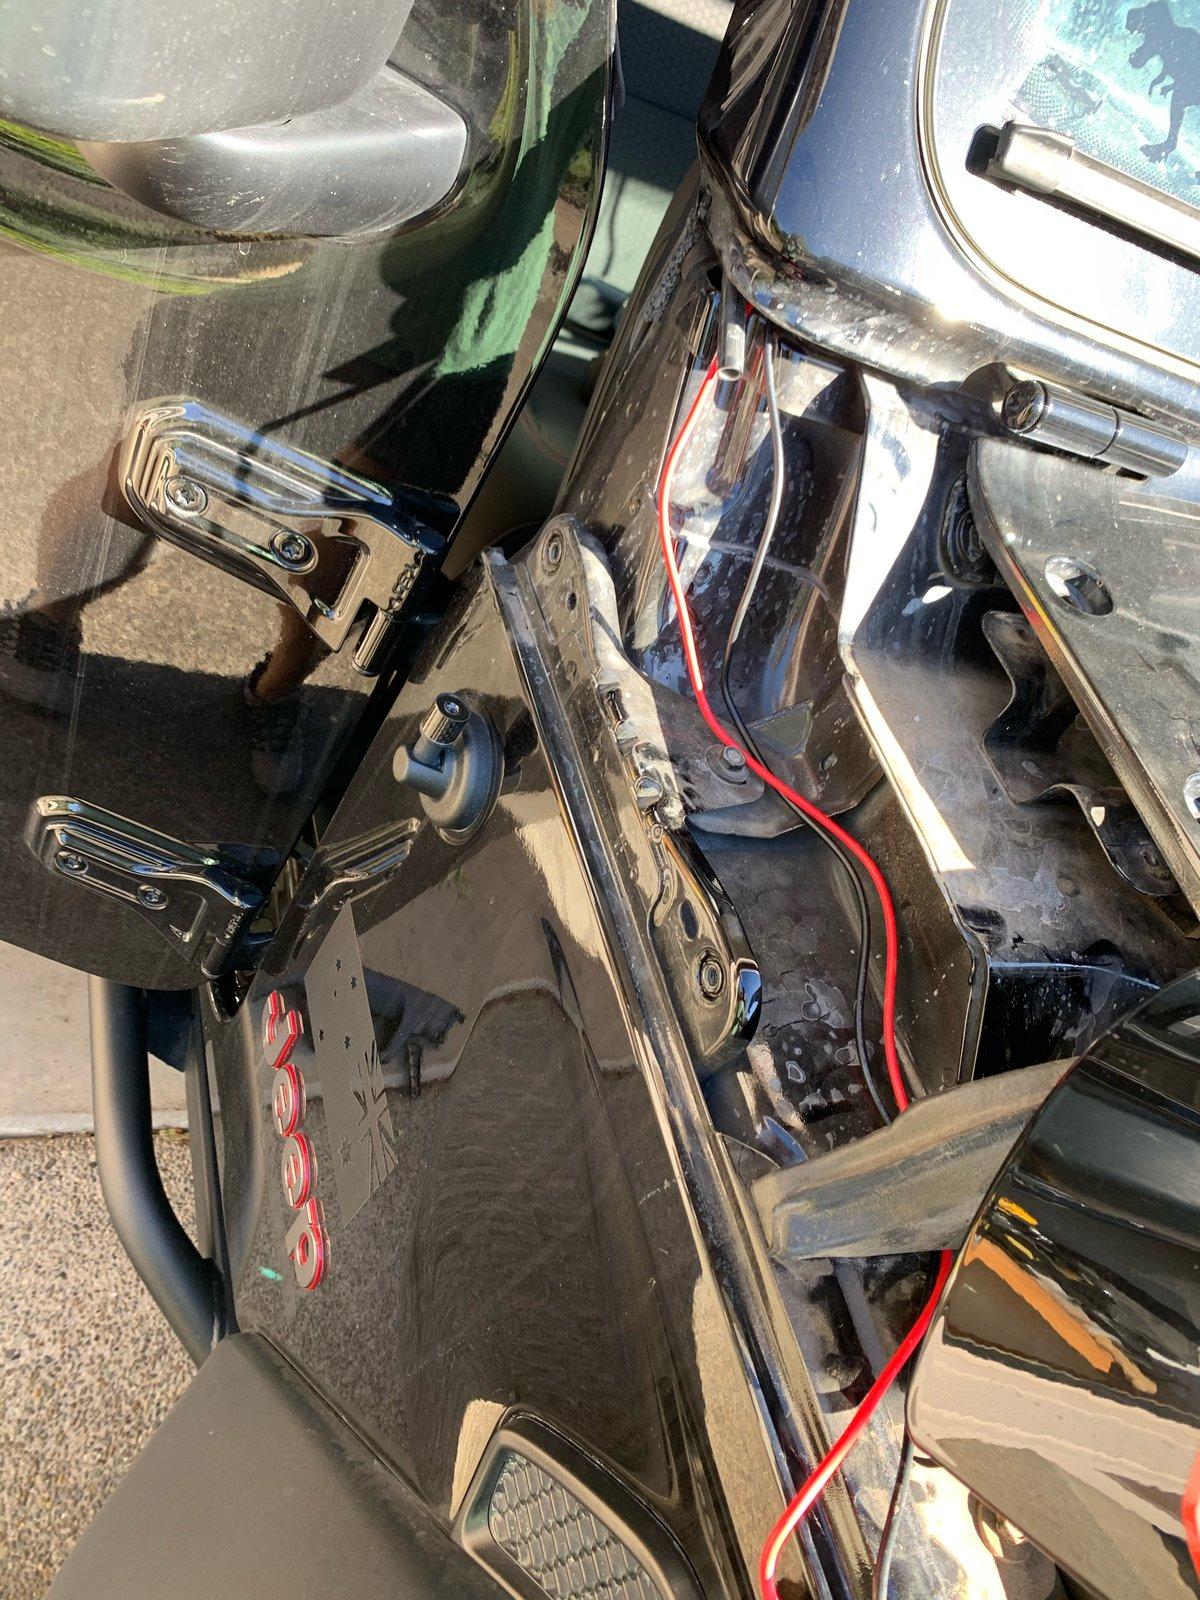
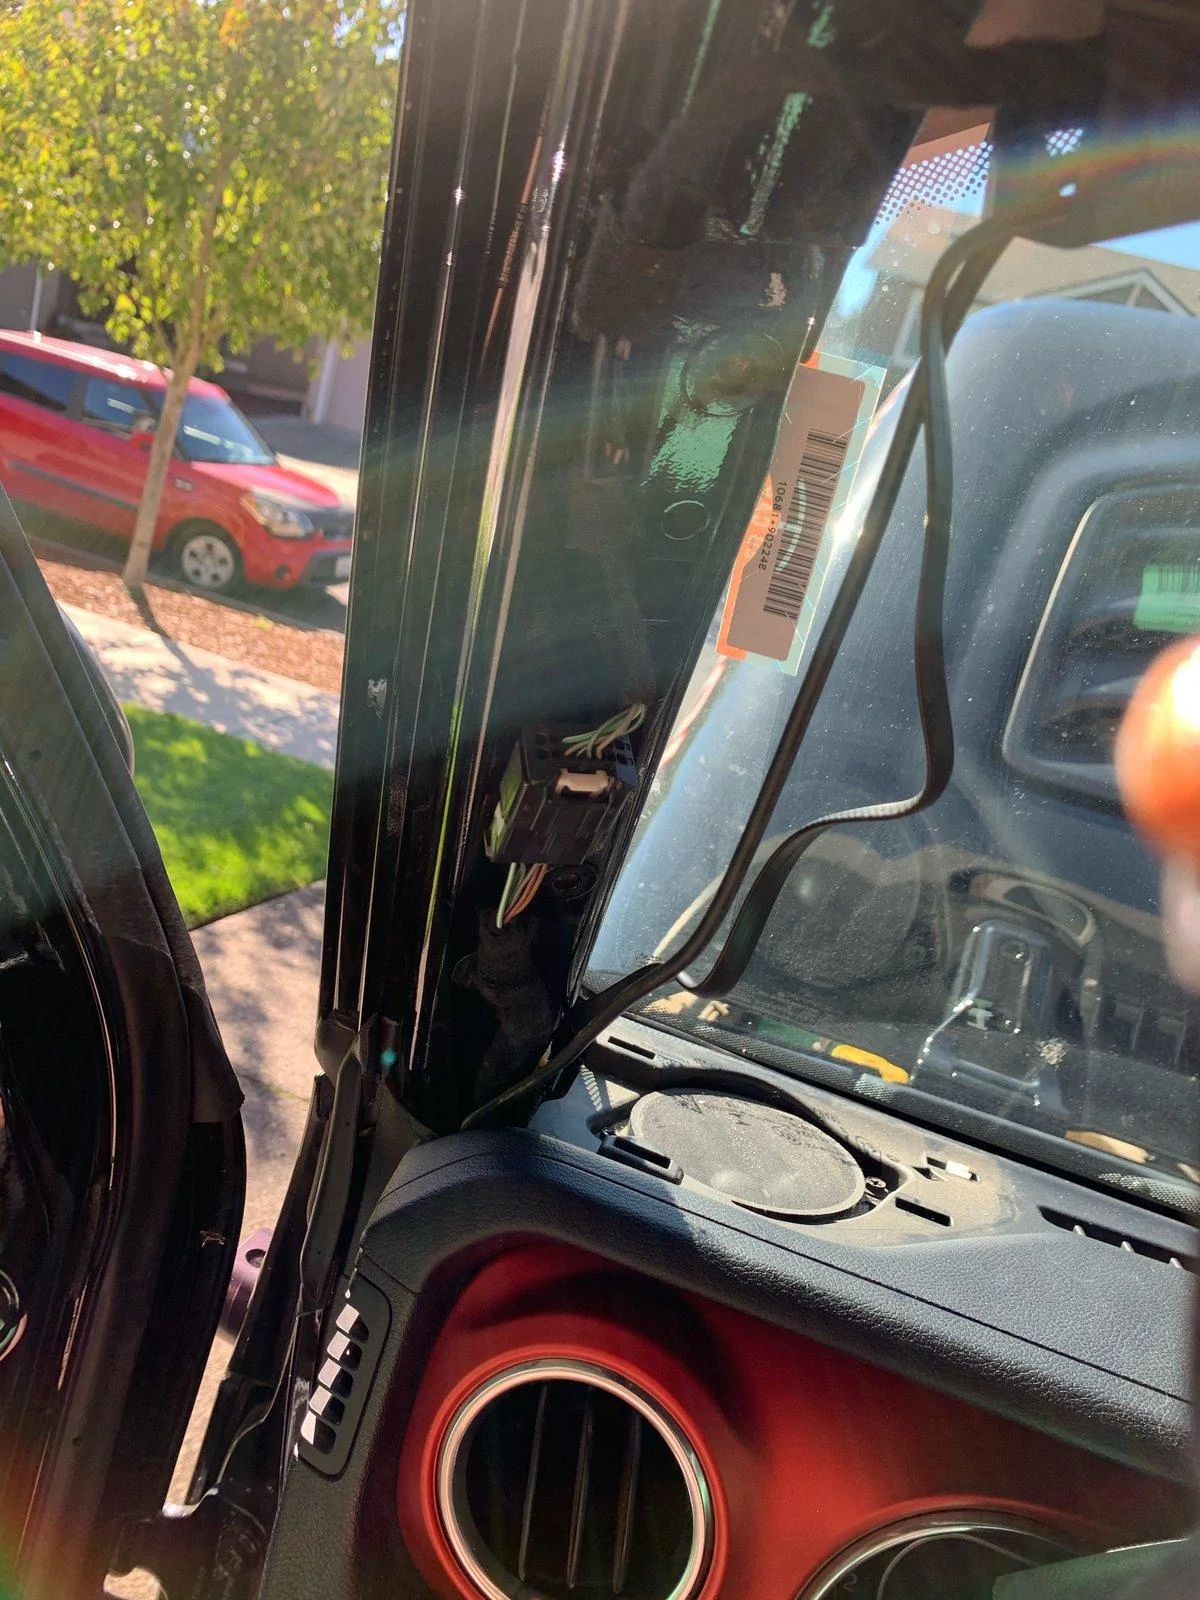
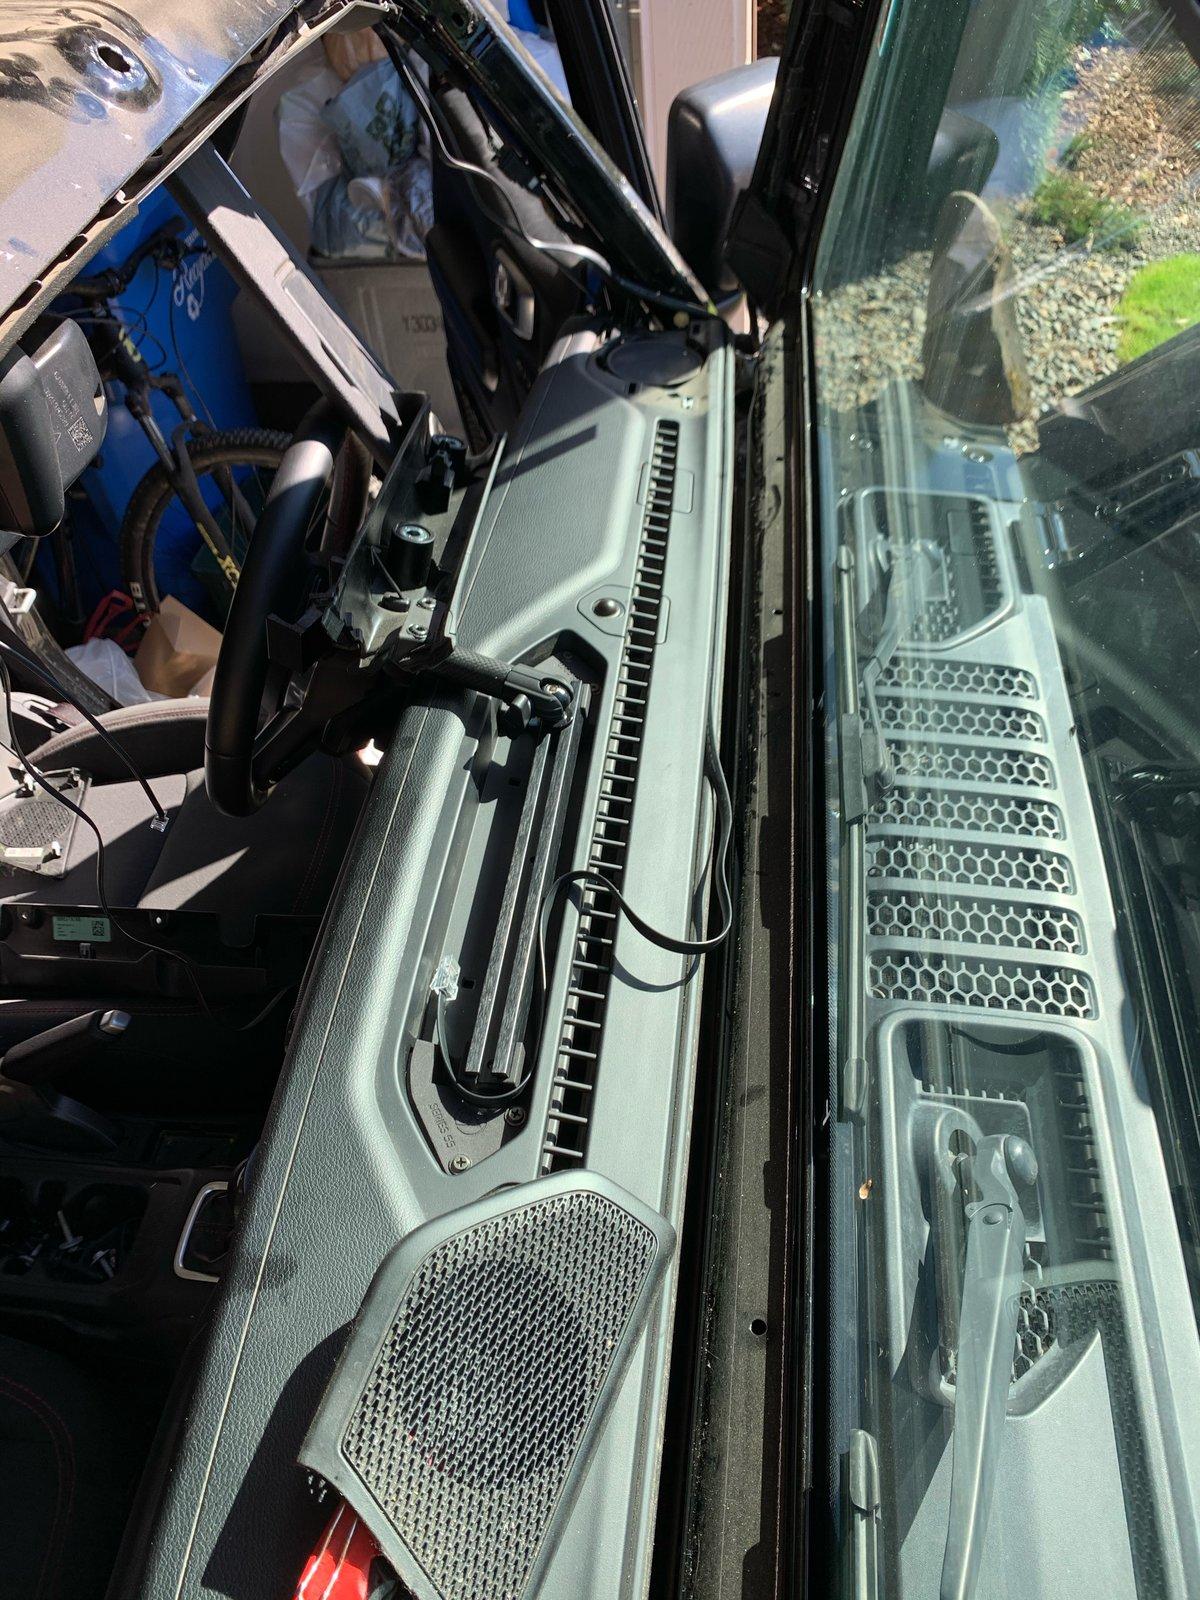
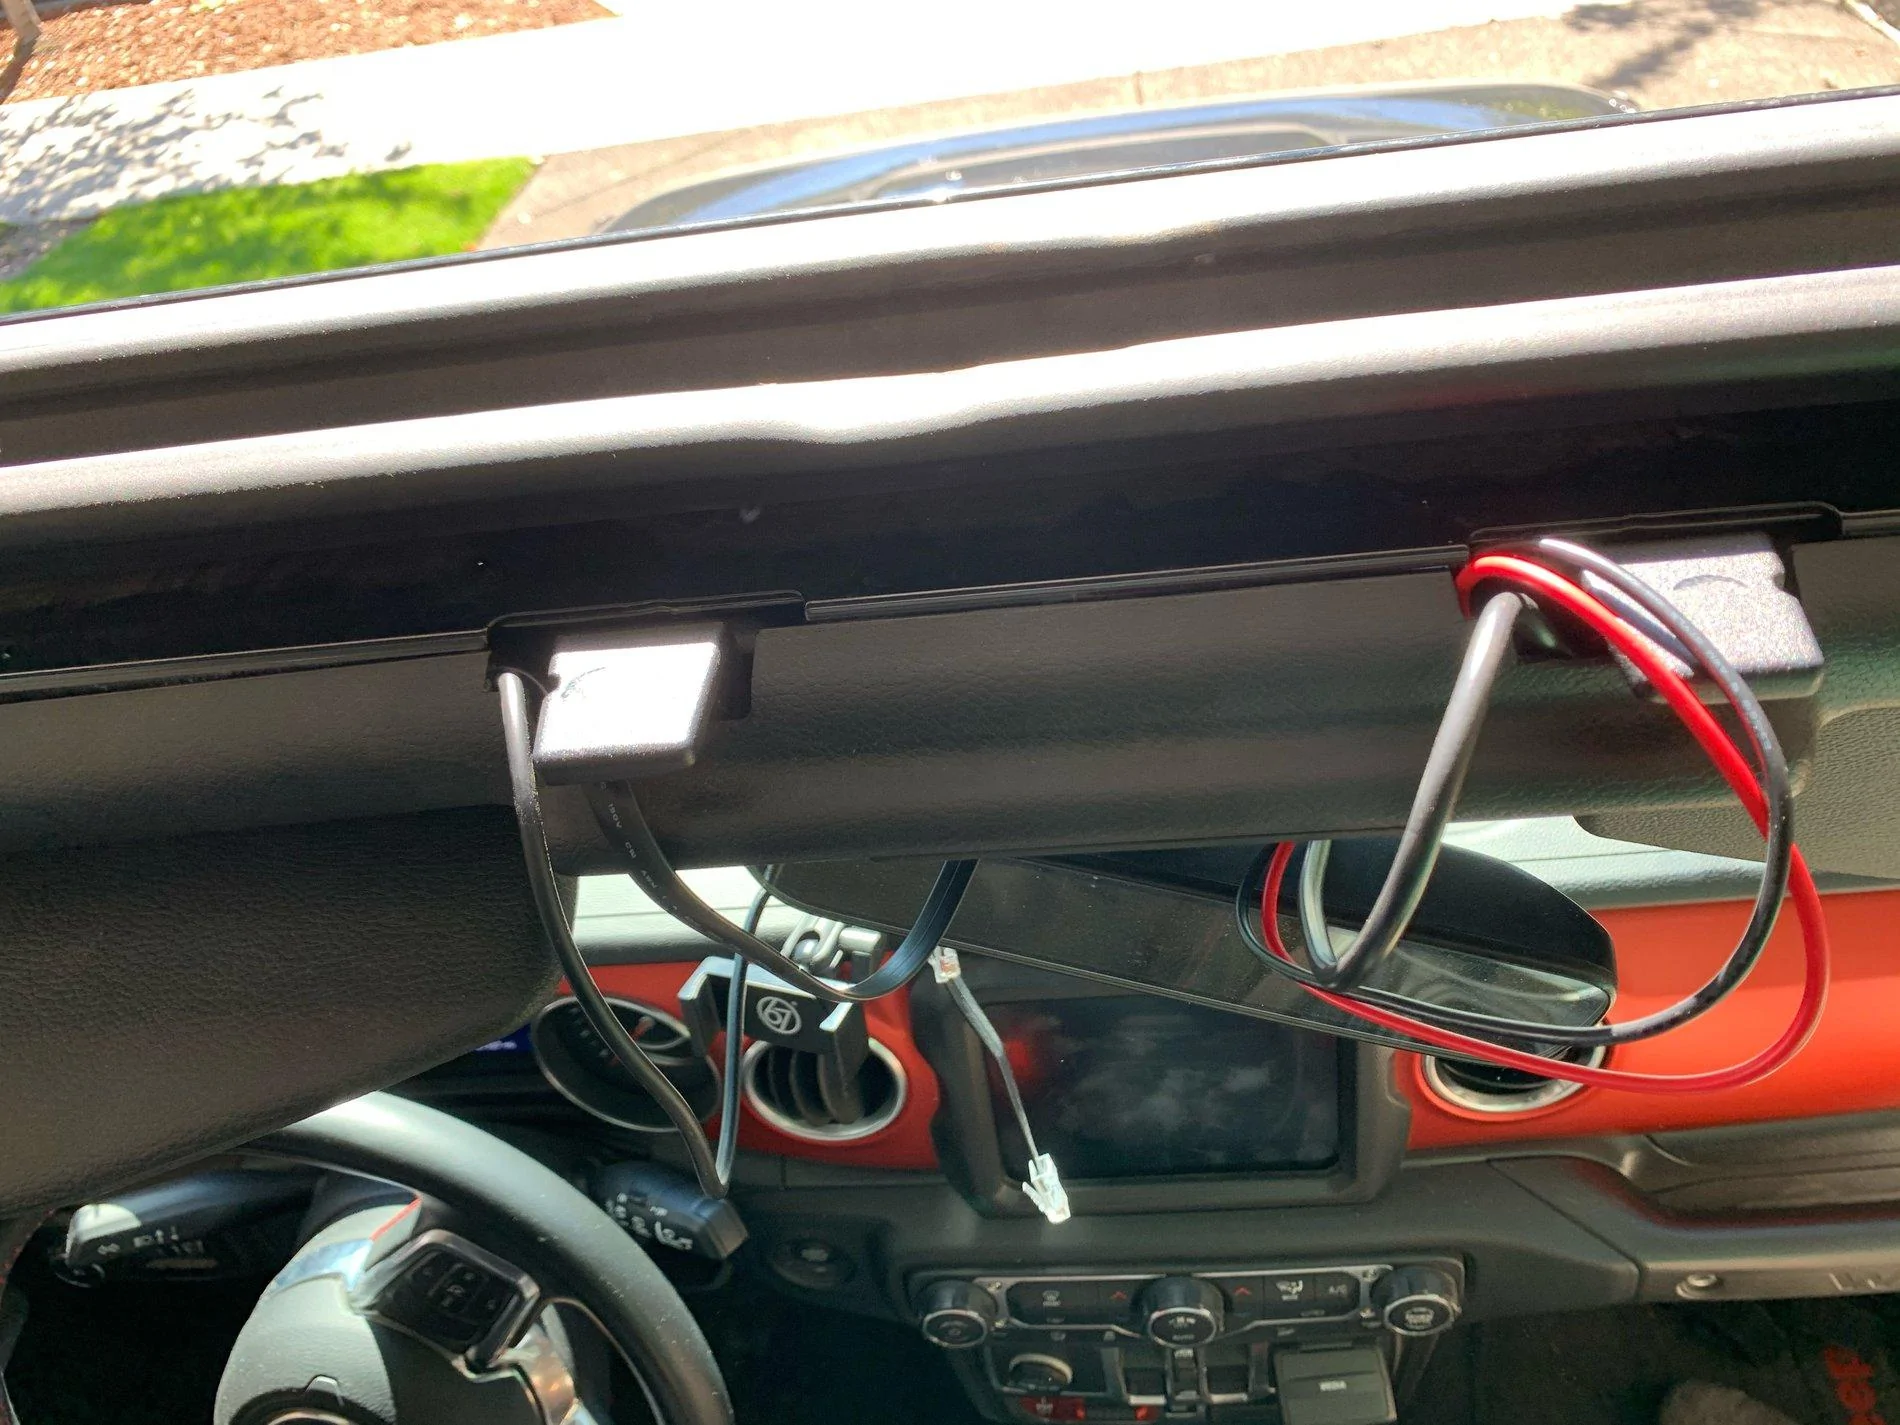
Next I ran the power from the battery using the supplied leads that came the the Yaesu. Removing the grab handle requires unbolting two bolts under the the covers on each end of the handle then it just pops off. I also removed the speaker cover to ease installation. I also removed the catches for the sun visors and unscrewed both of the visors and let them dangle. This allowed for the trim panel that runs across the front windscreen rollbar to pop off easily. The supplied leads were perfect length to fish then through the corner panel, up the rollbar behind the trim and out above the rear view mirror.
I wanted to make sure I had options to mount the display for the radio. I worried if I had the roof off and it was mounted by the rearview mirror it could be hard to see. The extension kit came with a long display and mic cable though any cat6 cable should work. Not having any of my tools I would of had to pay more for the tools to make the cables than it cost to buy their kit so I ponied up for the yaesu kit. I ran the mic and display down the driver side away from the power and antennae (though I would suggest getting a longer coax and run it across the roll bar and up the the middle of the molle panel which I will probably do in the future). The flat cable for the display worked perfectly to slip it in the weather stripping of the windscreen until I got it to the center of the dash.

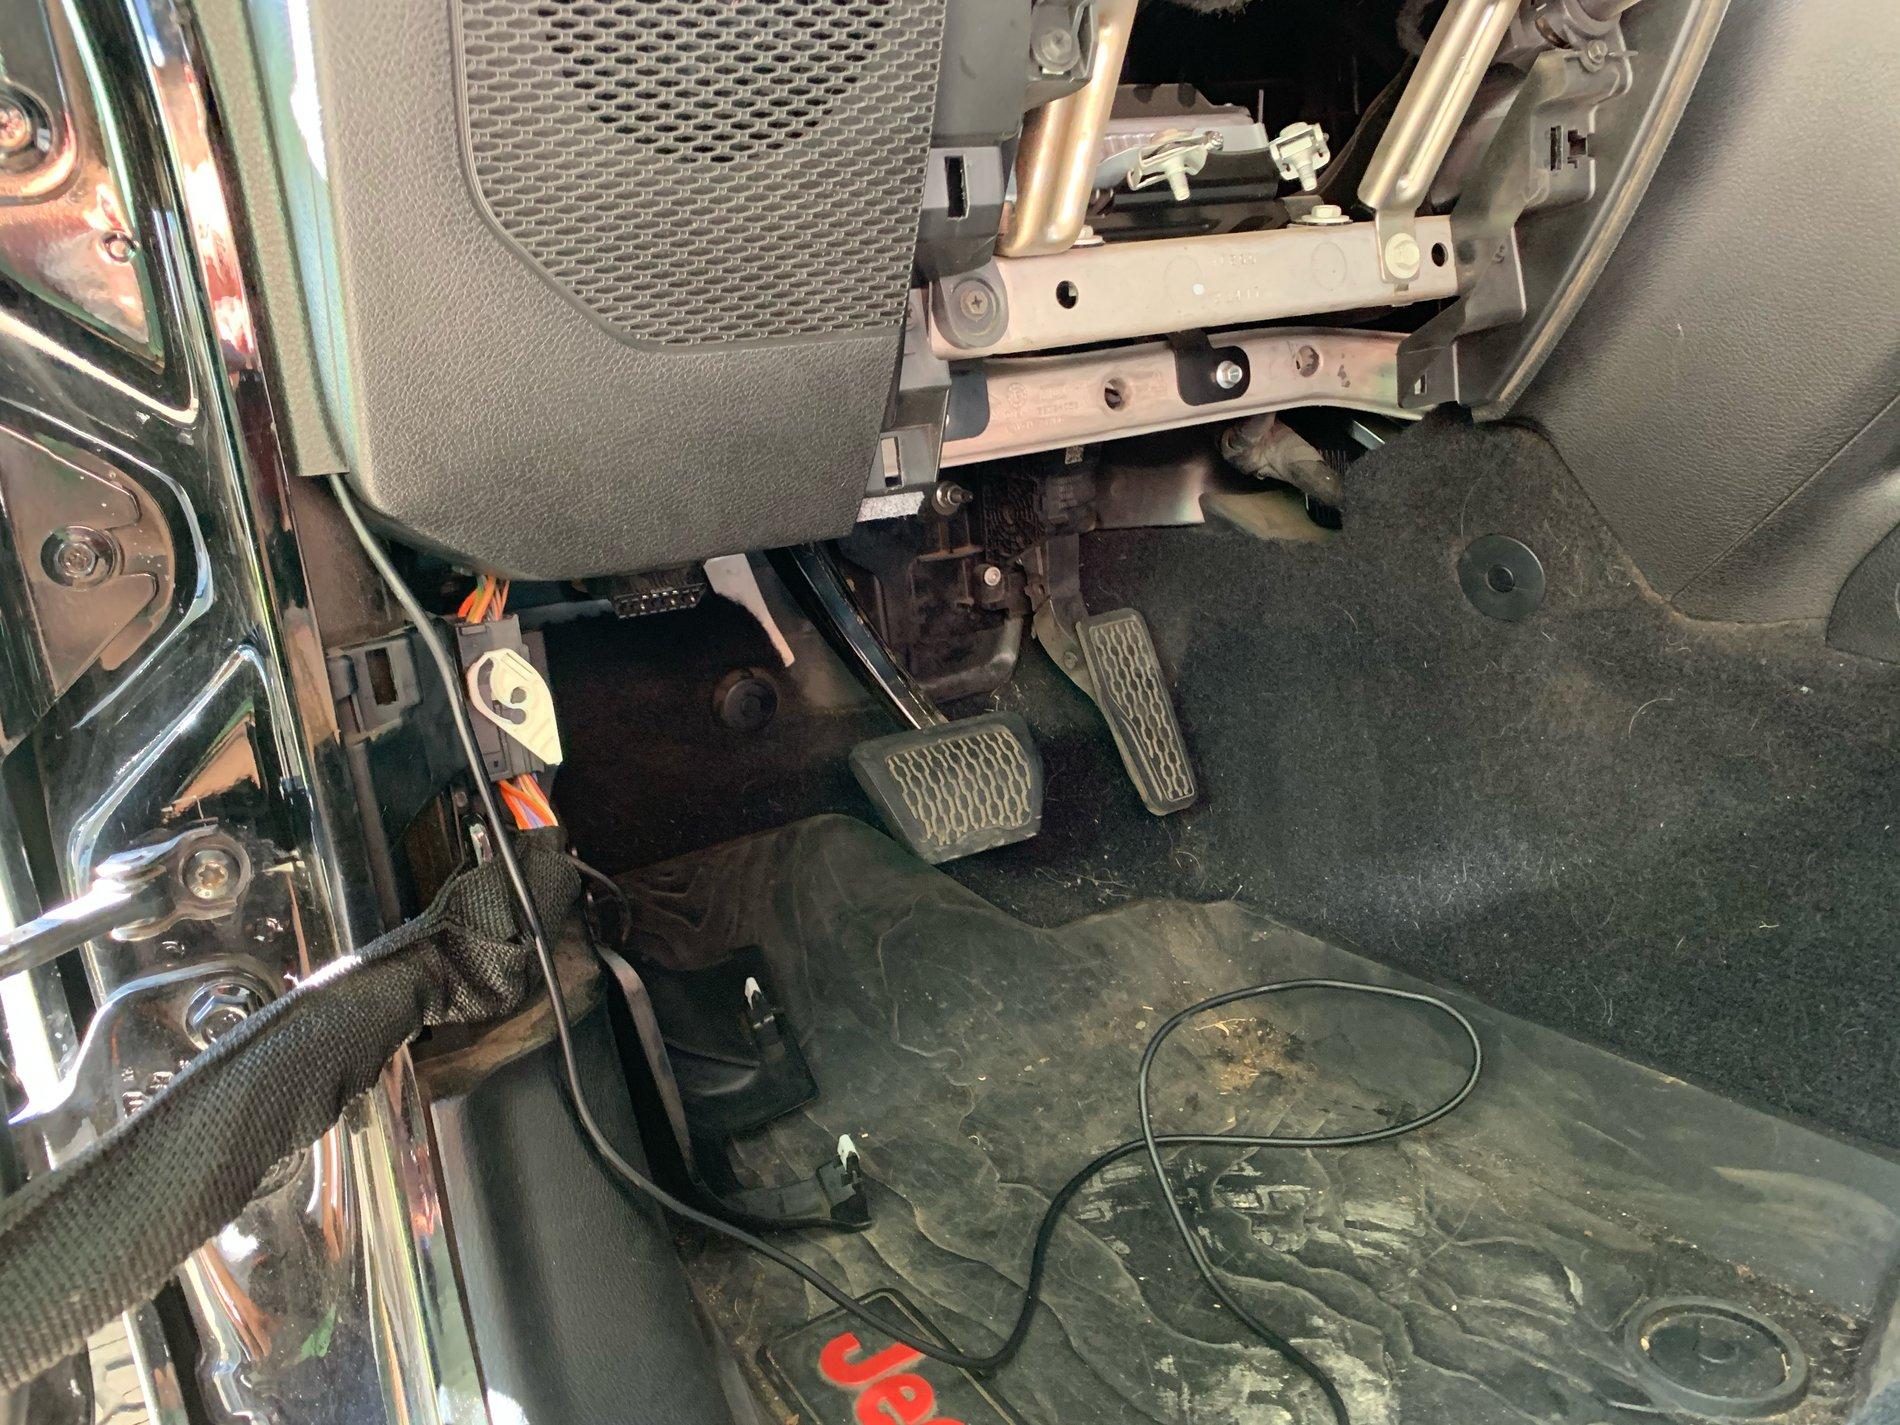
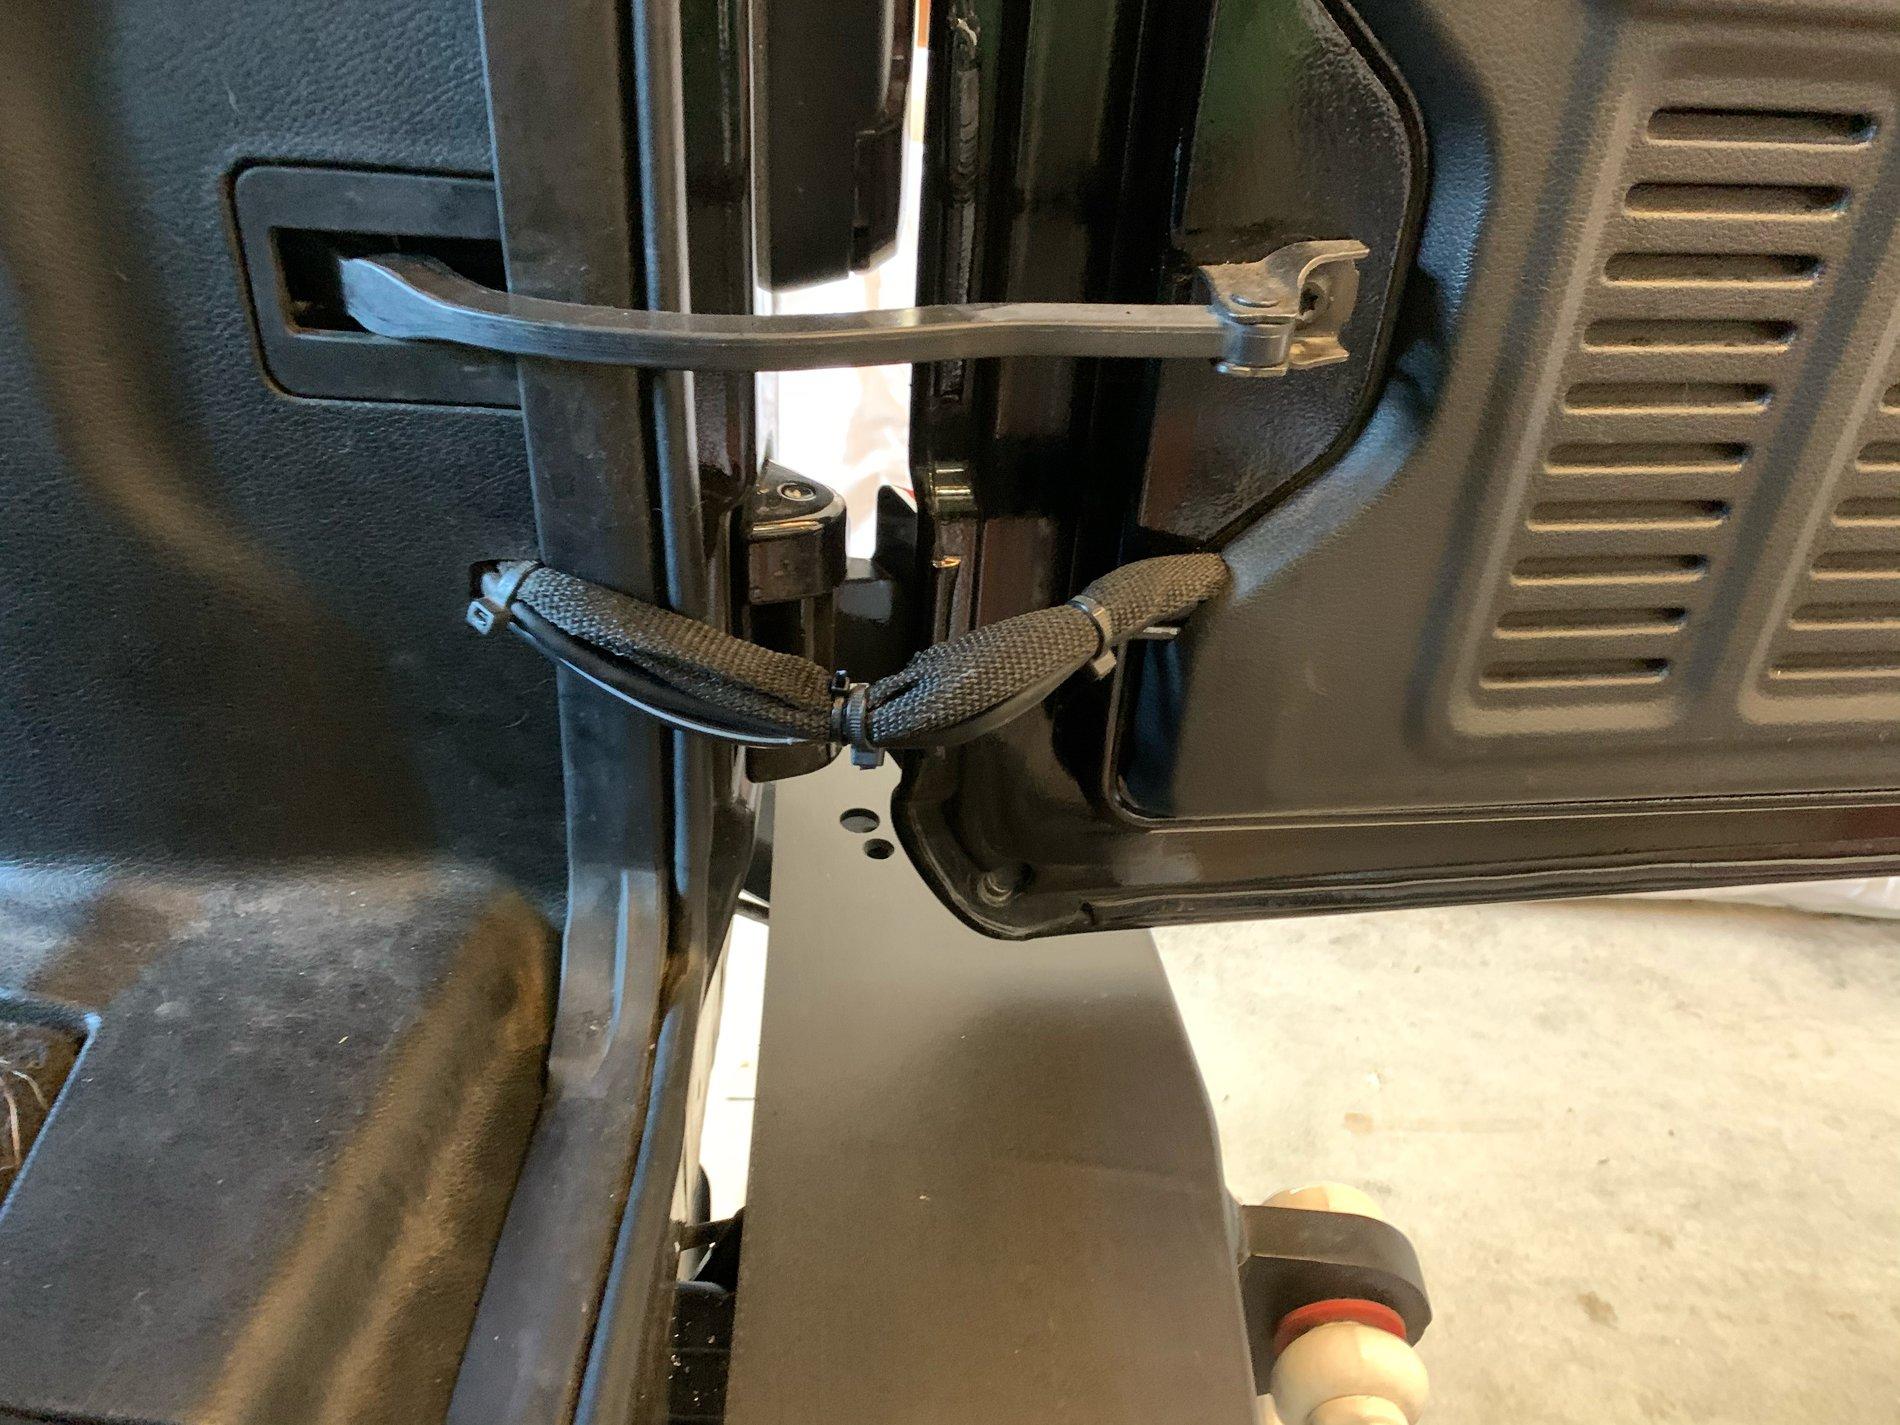
The microphone cable went through the dash and out under the steering wheel. I used a coat hanger to fish it down the trim panel to where the door connection is. Then just zip tied across to the center console.
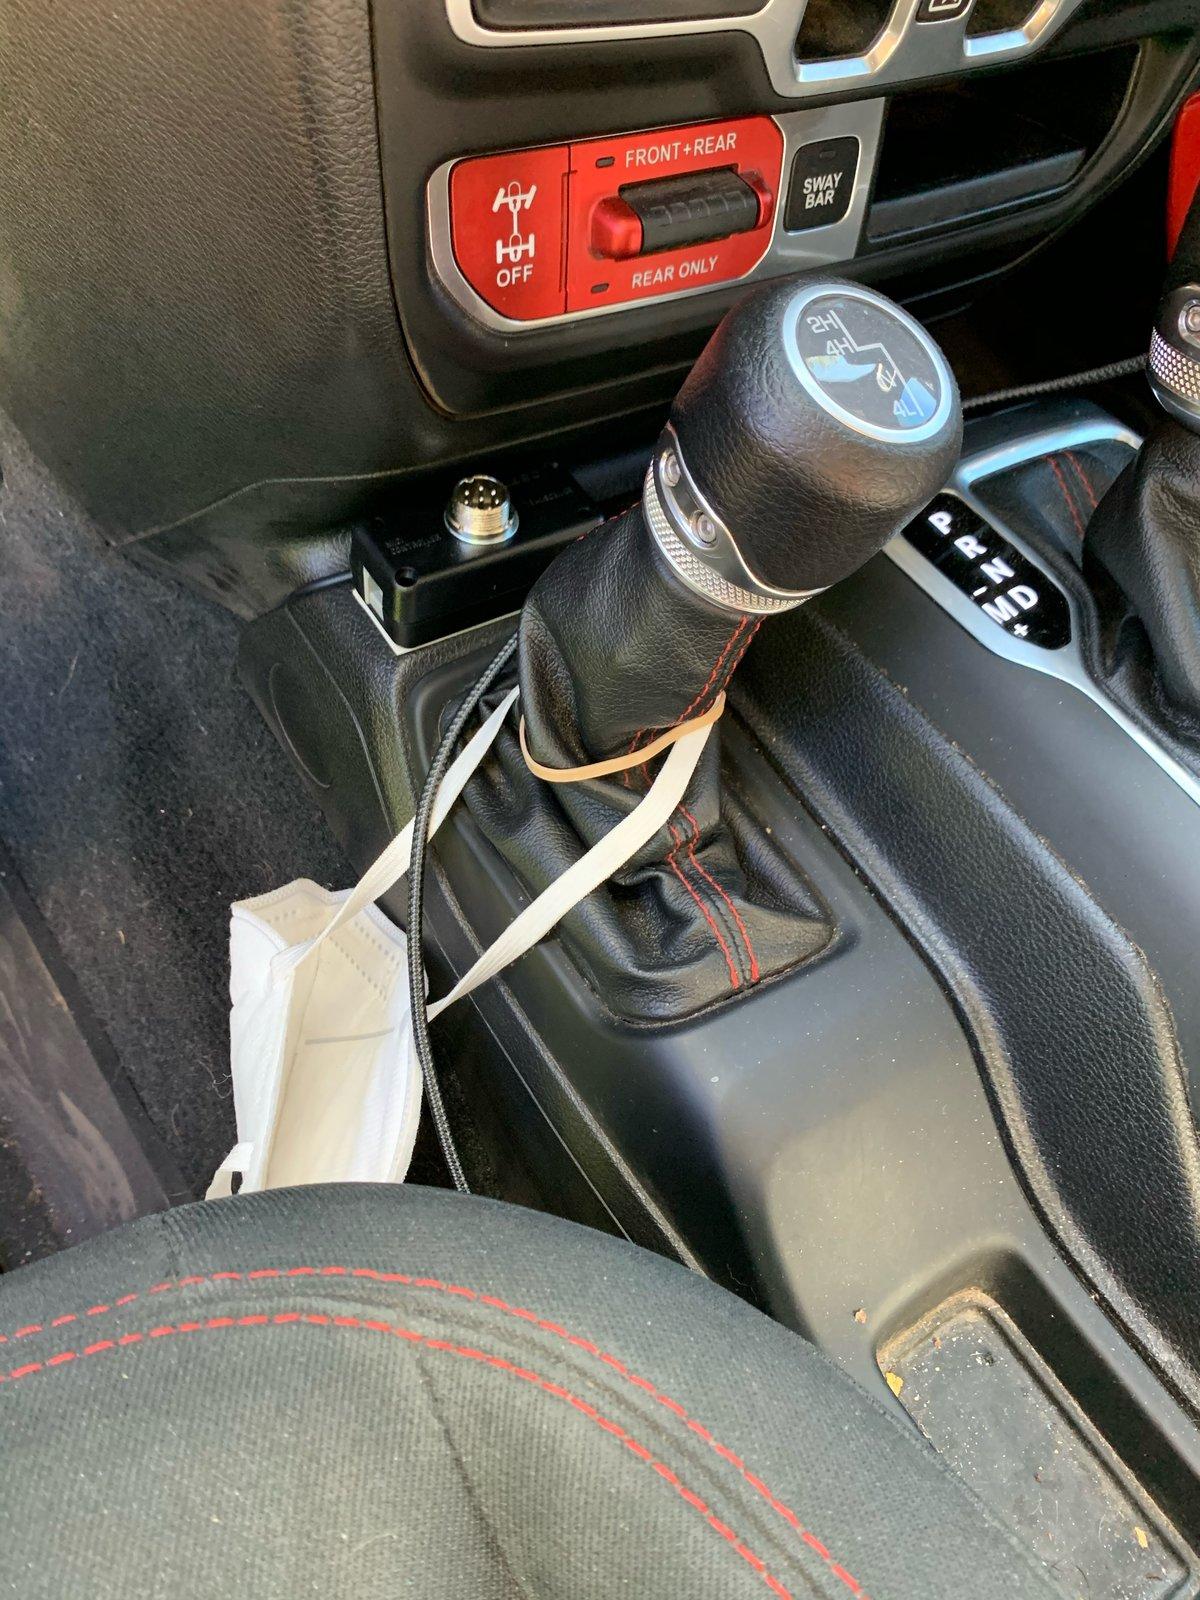
I then buttoned everything up, zip tied the cables and placed the supplied connector and double sided sticky tape to mount it just in front of the 4wd selector. I had to cut little notches in the trim above the mirror to allow for the cables to exit.
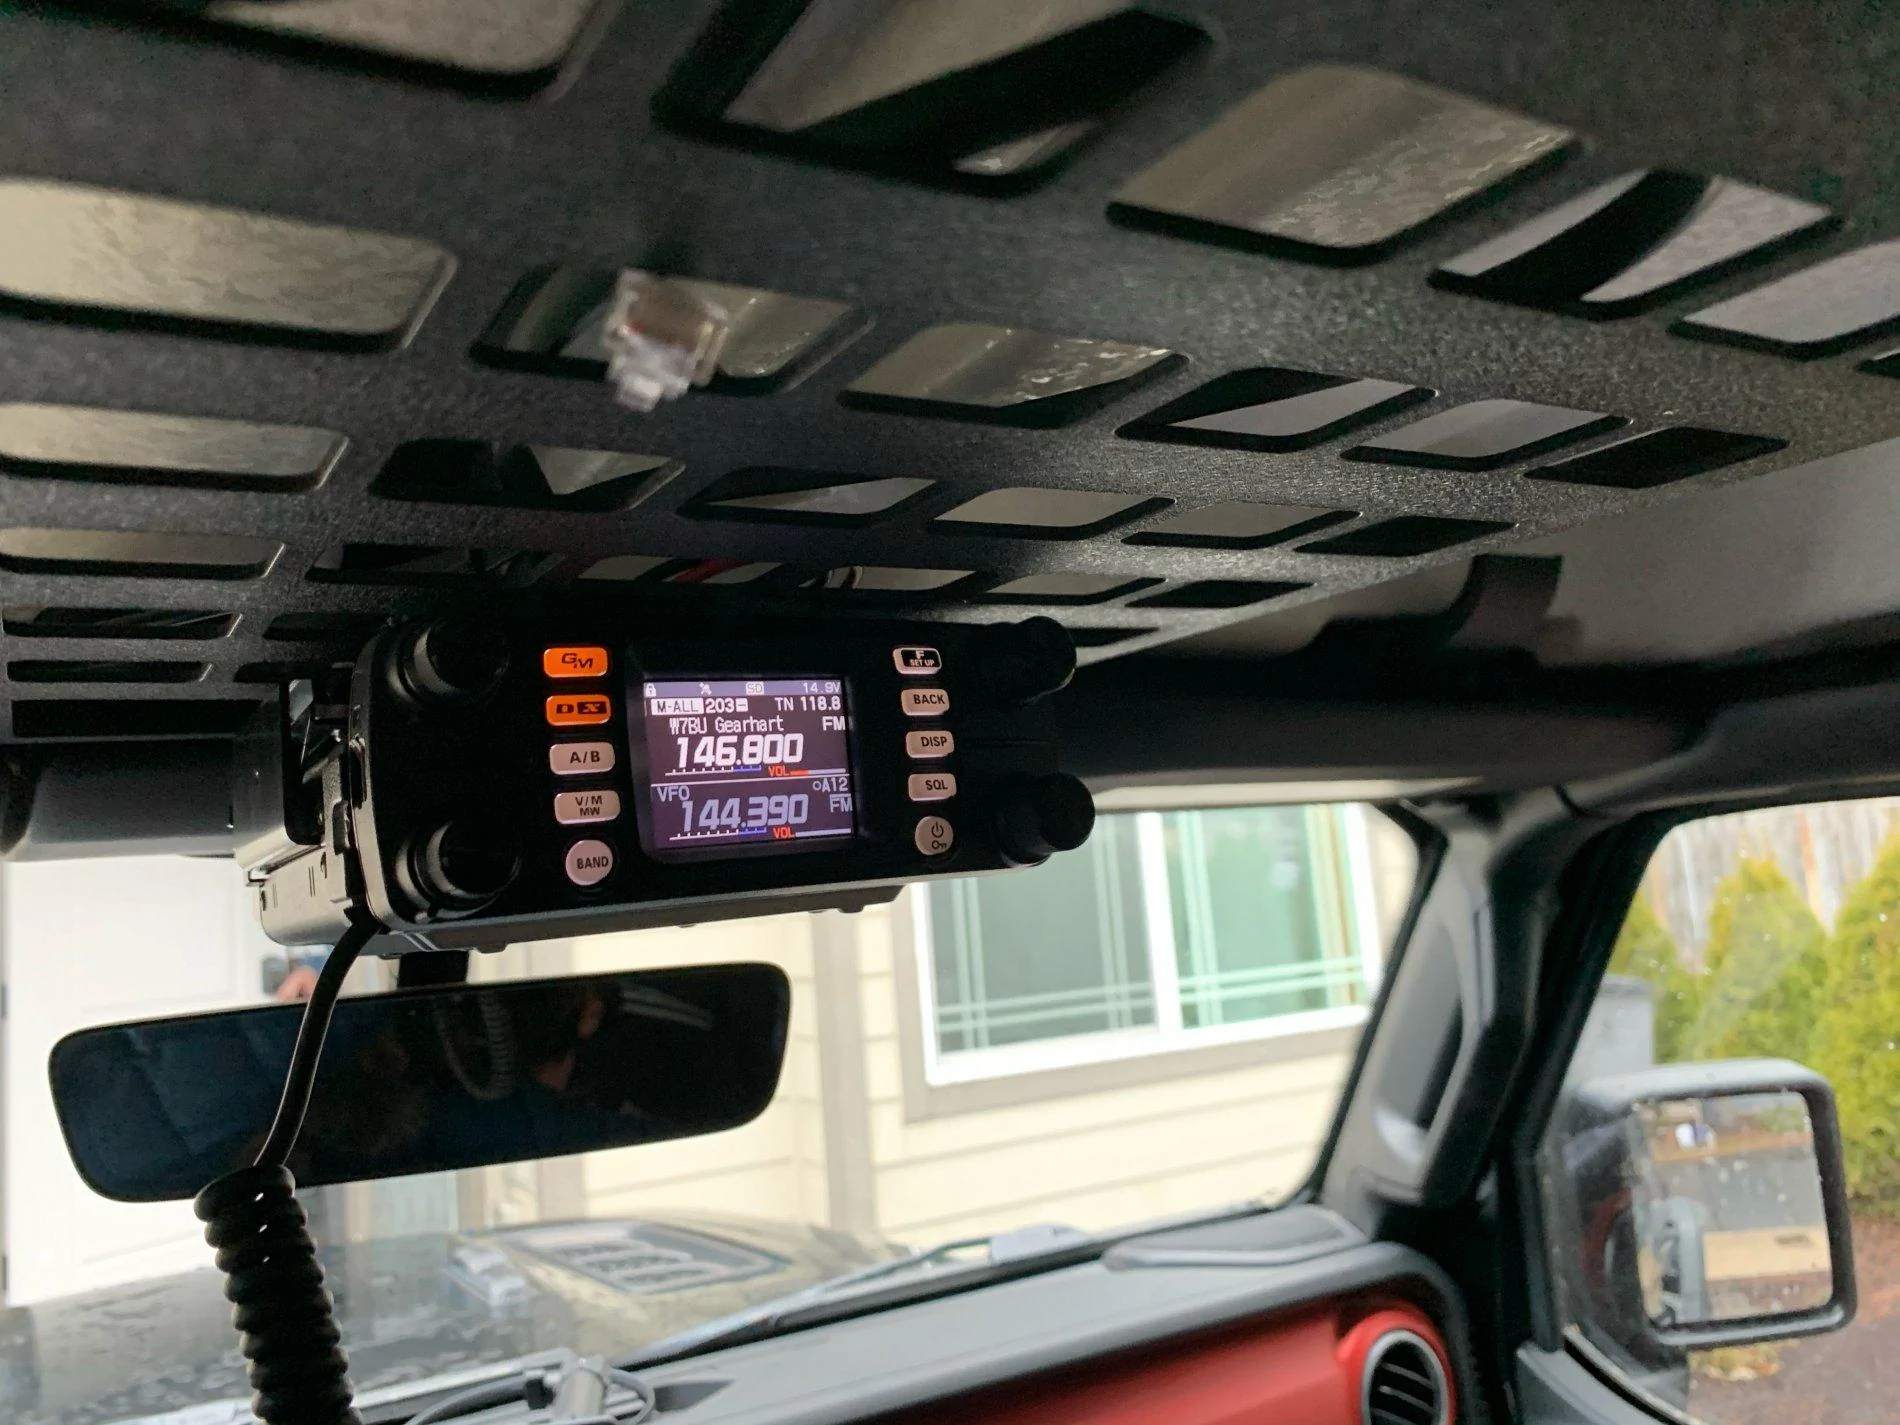
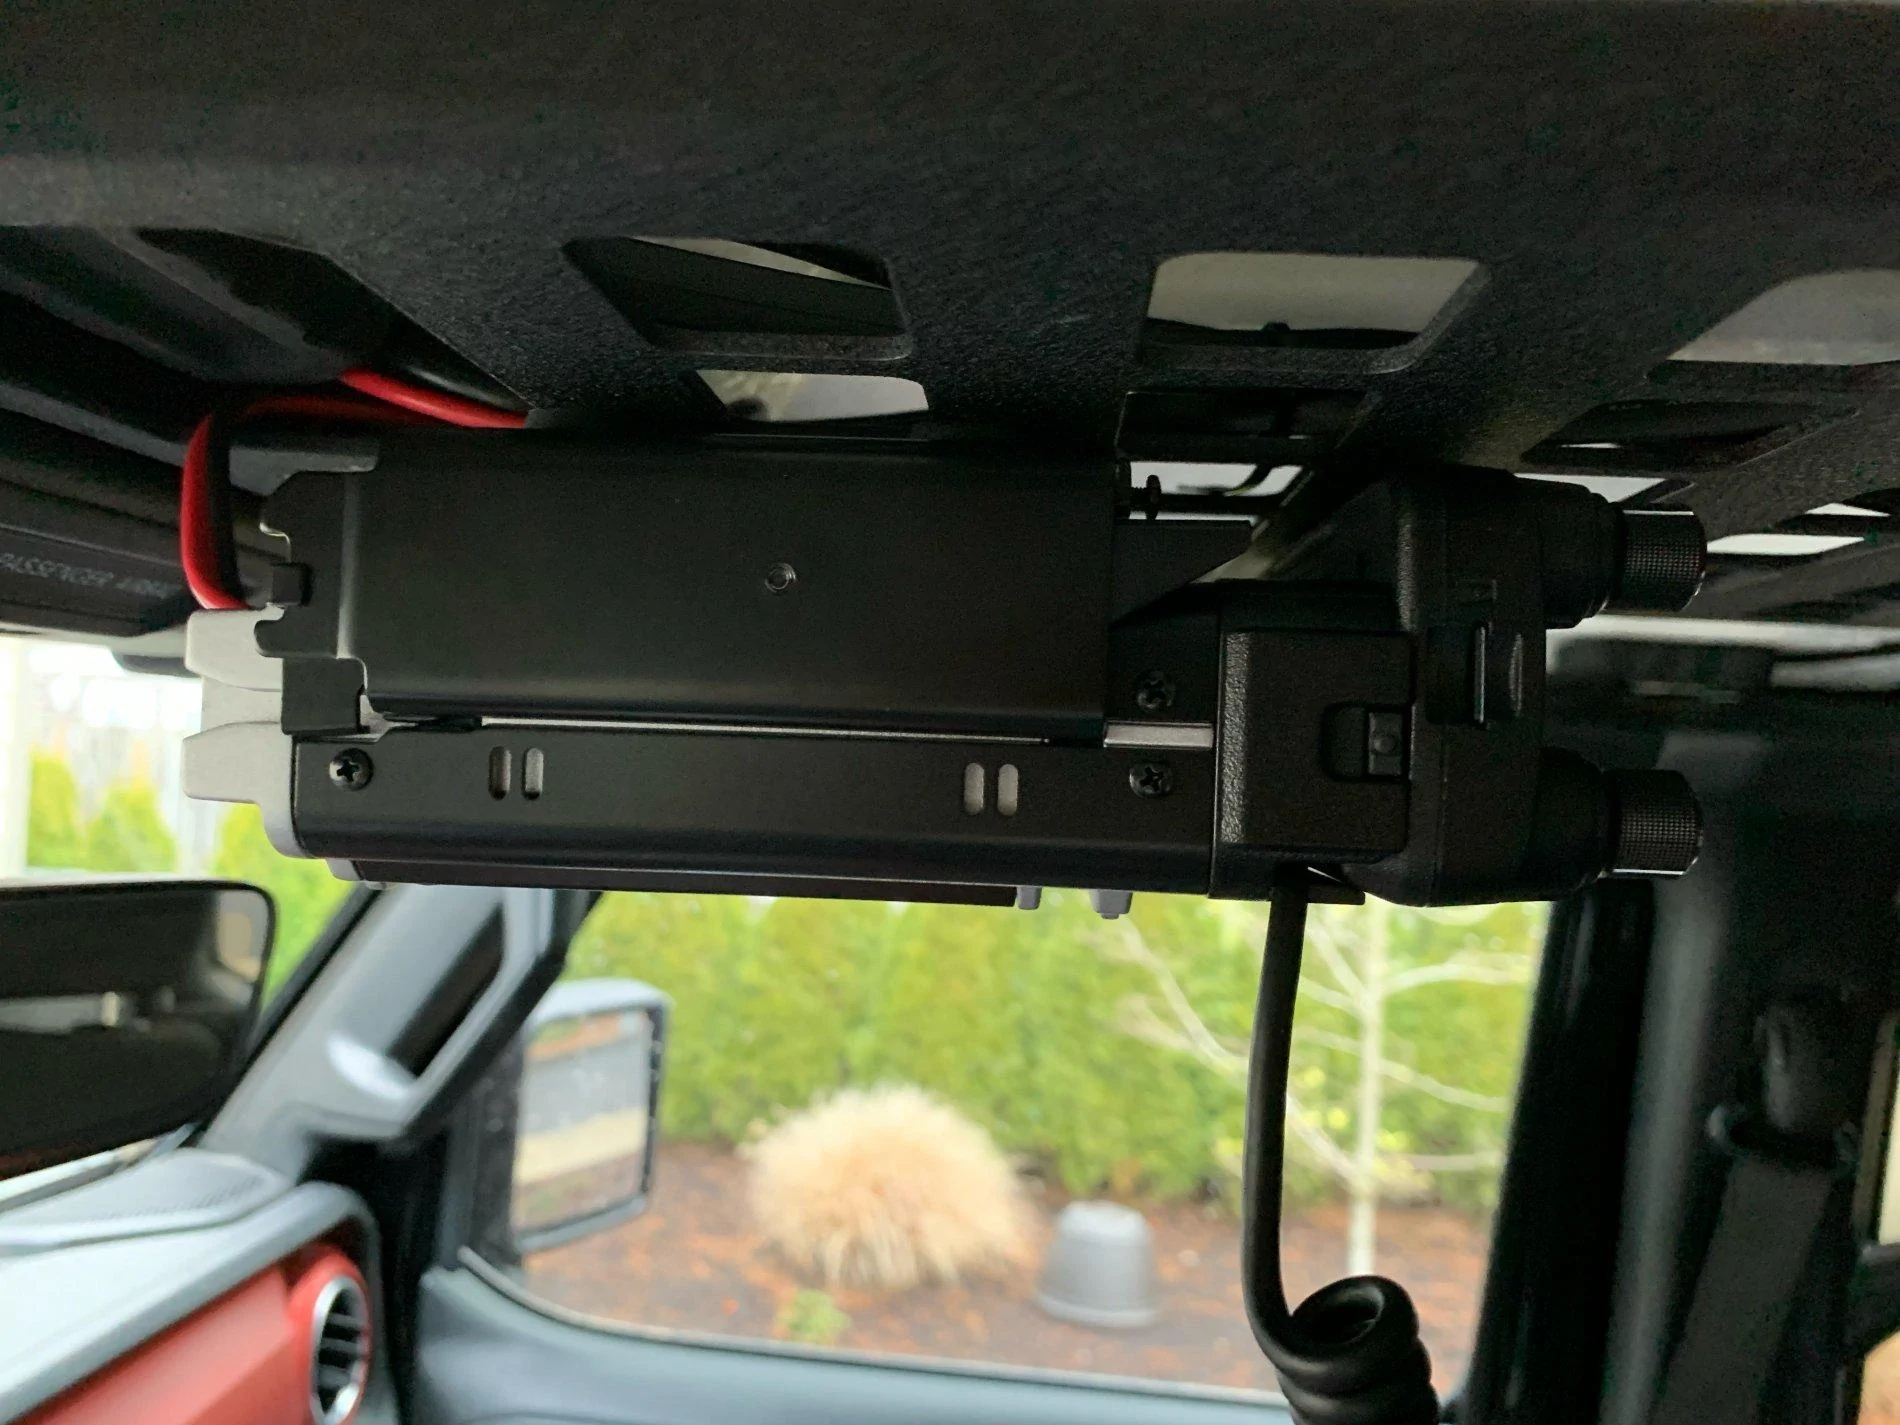
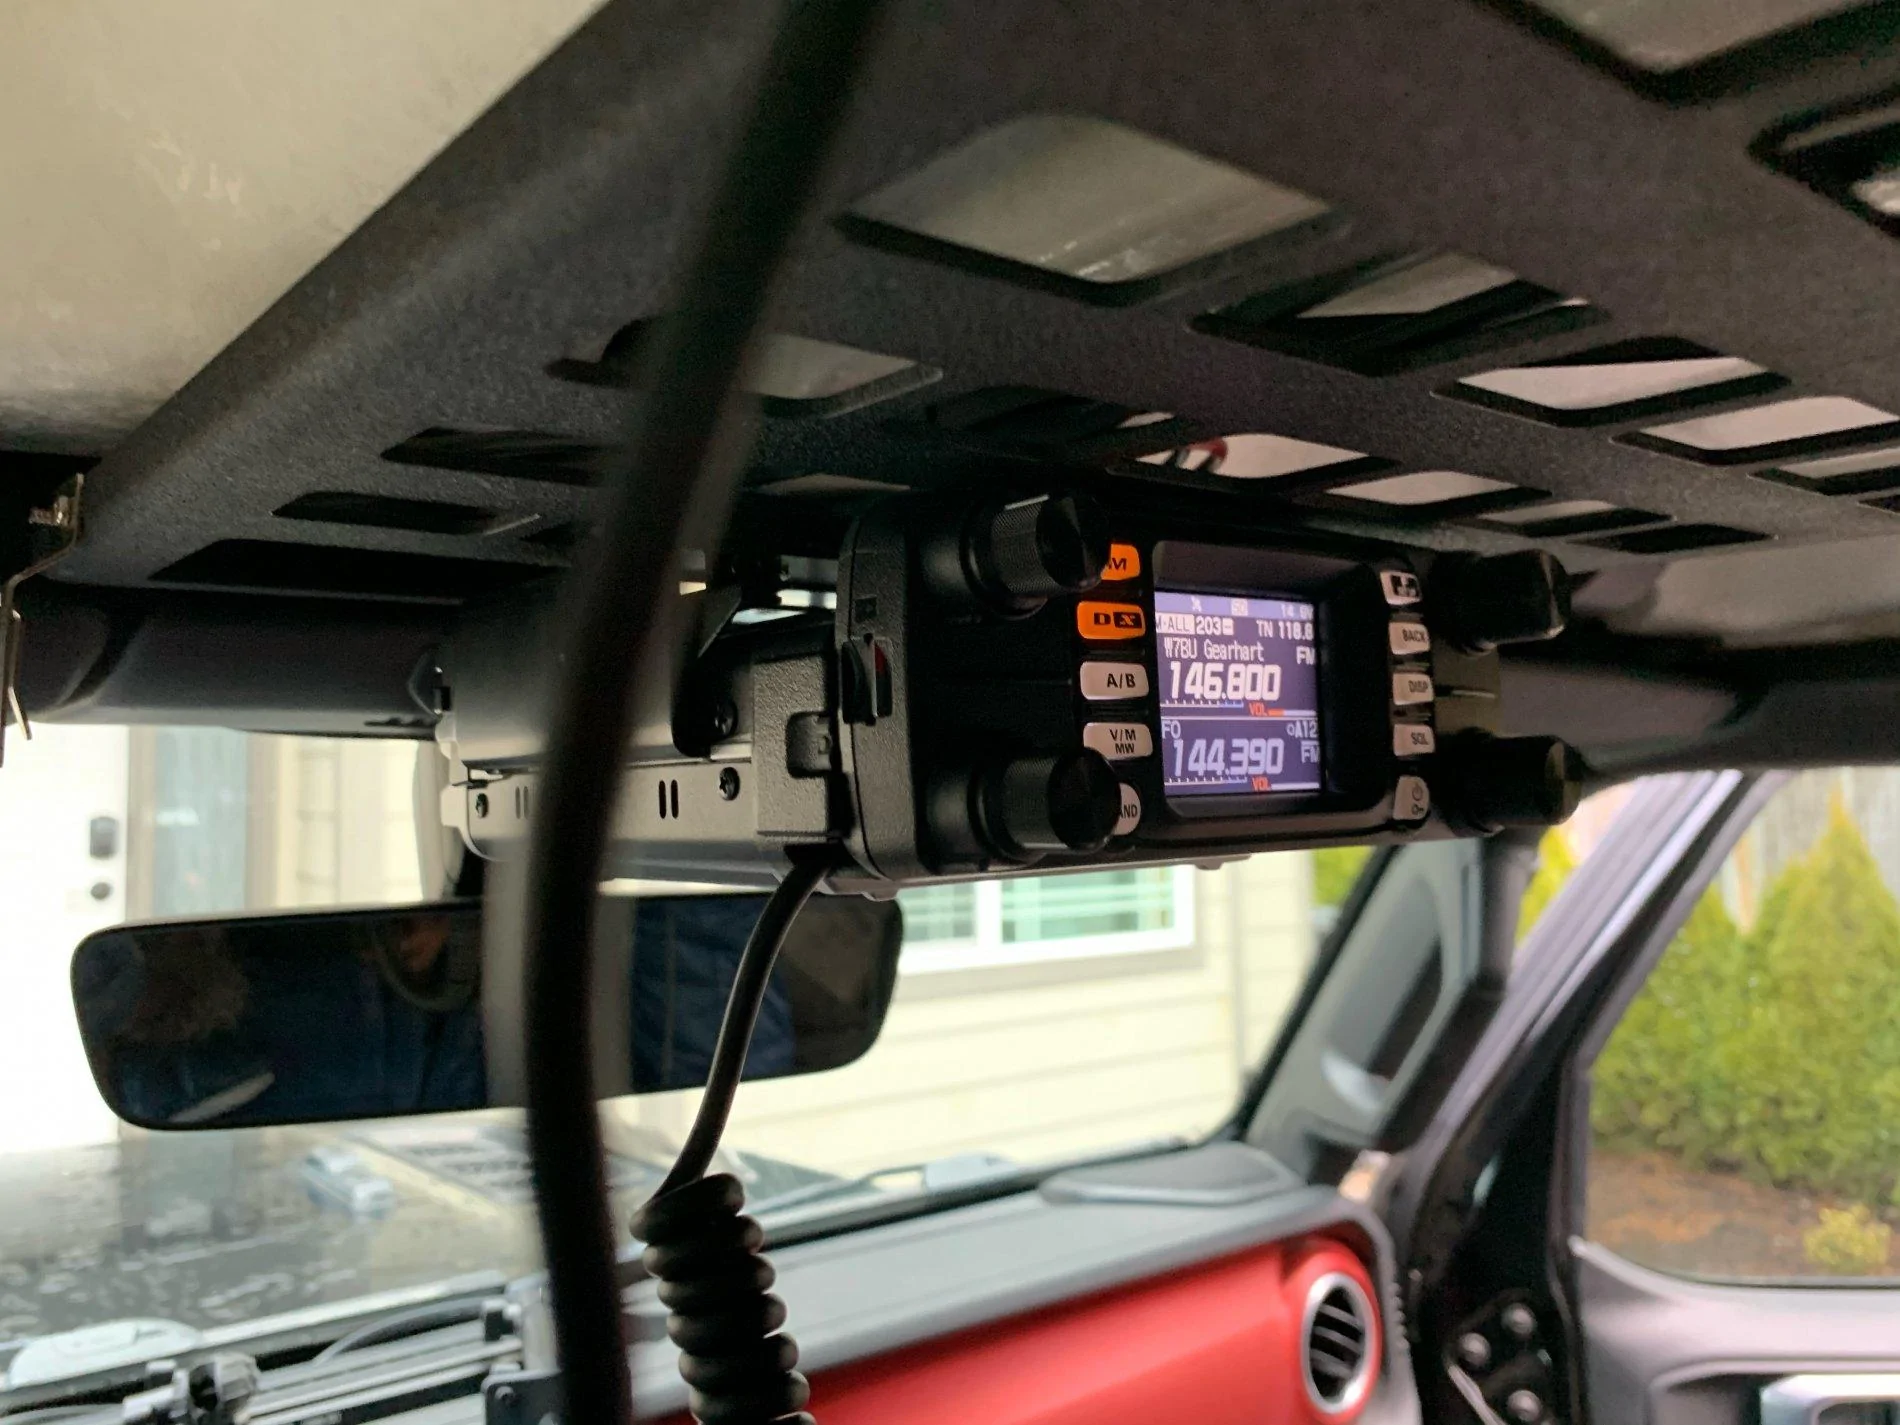
Now with all the stuff ran, car put together (and tested before I button things up) I installed the overhead MOLLE panel and attached the mount that came with the FTM-300.
Here is the cockpit view:
JeepUniq I ordered at the same time and got an email saying things are delayed. Fair enough, though everywhere else disclaims that BEFORE you order. They did not. I got an email 3 days later. I have since responded, asked questions, etc with no response in over a week. So, unfortunately I am not able to review that product but their customer care/support is terrible at this point.
Gear:
- Yaesu FTM-300DR
- Yaesu extension kit for the FTM-300DR
- Comet 2x4SR NMO Dual Band Antennae
- Comet coax with NMO mount
- CoolTECH JL NMO Mount
- Kraken Off-road overhead molle
- 67 Designs arms and amps mount
- Lido amps mount for Yaesu FTM-300
- JeepUniq 67 designs mic mount (someday maybe?)
I started off by installing the antennae mount and running the coax to the front. I snaked the coax under trims panels on the roll cage all the way to the front. The only problem I had with this path so far is when I have the rear view camera on it interferes with the reception.
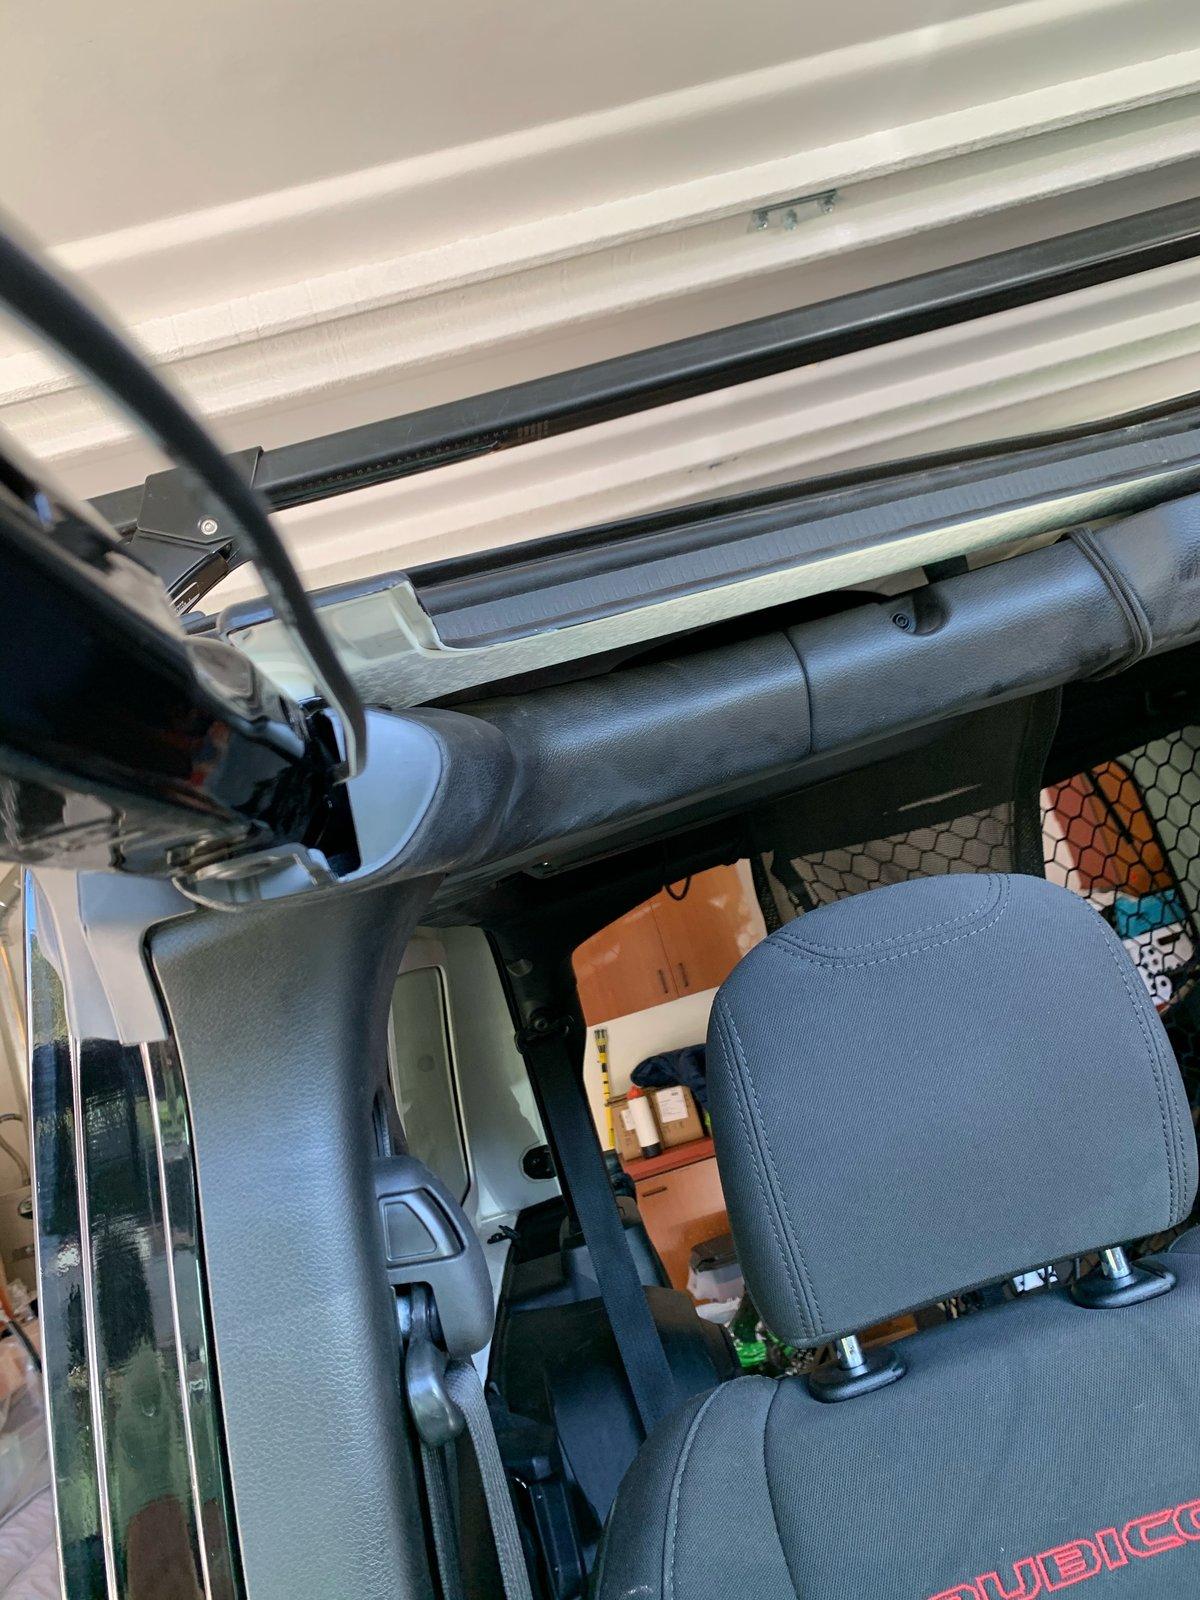
Next I ran the power from the battery using the supplied leads that came the the Yaesu. Removing the grab handle requires unbolting two bolts under the the covers on each end of the handle then it just pops off. I also removed the speaker cover to ease installation. I also removed the catches for the sun visors and unscrewed both of the visors and let them dangle. This allowed for the trim panel that runs across the front windscreen rollbar to pop off easily. The supplied leads were perfect length to fish then through the corner panel, up the rollbar behind the trim and out above the rear view mirror.
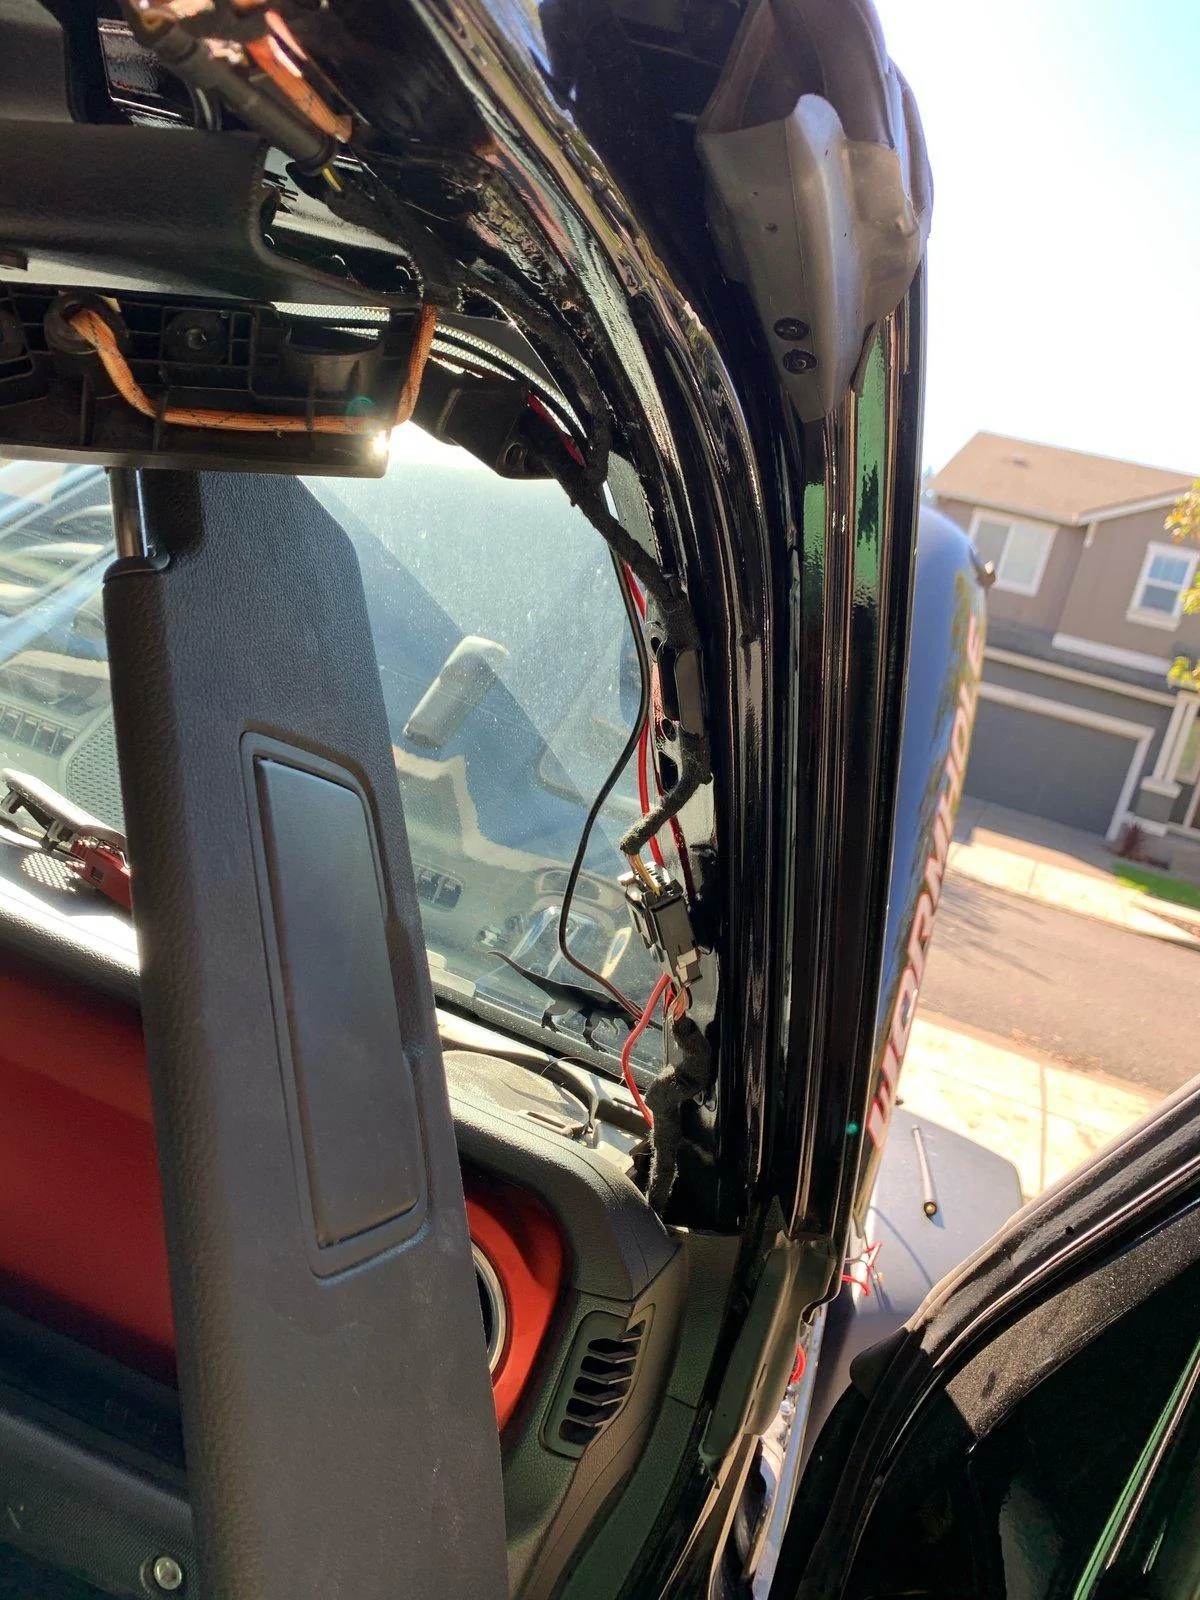
I wanted to make sure I had options to mount the display for the radio. I worried if I had the roof off and it was mounted by the rearview mirror it could be hard to see. The extension kit came with a long display and mic cable though any cat6 cable should work. Not having any of my tools I would of had to pay more for the tools to make the cables than it cost to buy their kit so I ponied up for the yaesu kit. I ran the mic and display down the driver side away from the power and antennae (though I would suggest getting a longer coax and run it across the roll bar and up the the middle of the molle panel which I will probably do in the future). The flat cable for the display worked perfectly to slip it in the weather stripping of the windscreen until I got it to the center of the dash.
The microphone cable went through the dash and out under the steering wheel. I used a coat hanger to fish it down the trim panel to where the door connection is. Then just zip tied across to the center console.
I then buttoned everything up, zip tied the cables and placed the supplied connector and double sided sticky tape to mount it just in front of the 4wd selector. I had to cut little notches in the trim above the mirror to allow for the cables to exit.
Now with all the stuff ran, car put together (and tested before I button things up) I installed the overhead MOLLE panel and attached the mount that came with the FTM-300.
Here is the cockpit view:
Sponsored
 .
.