GarageJimmy
Member
- Joined
- May 23, 2023
- Threads
- 3
- Messages
- 16
- Reaction score
- 65
- Location
- North Carolina
- Vehicle(s)
- 2016 Tacoma, Working on a 392
- Thread starter
- #1
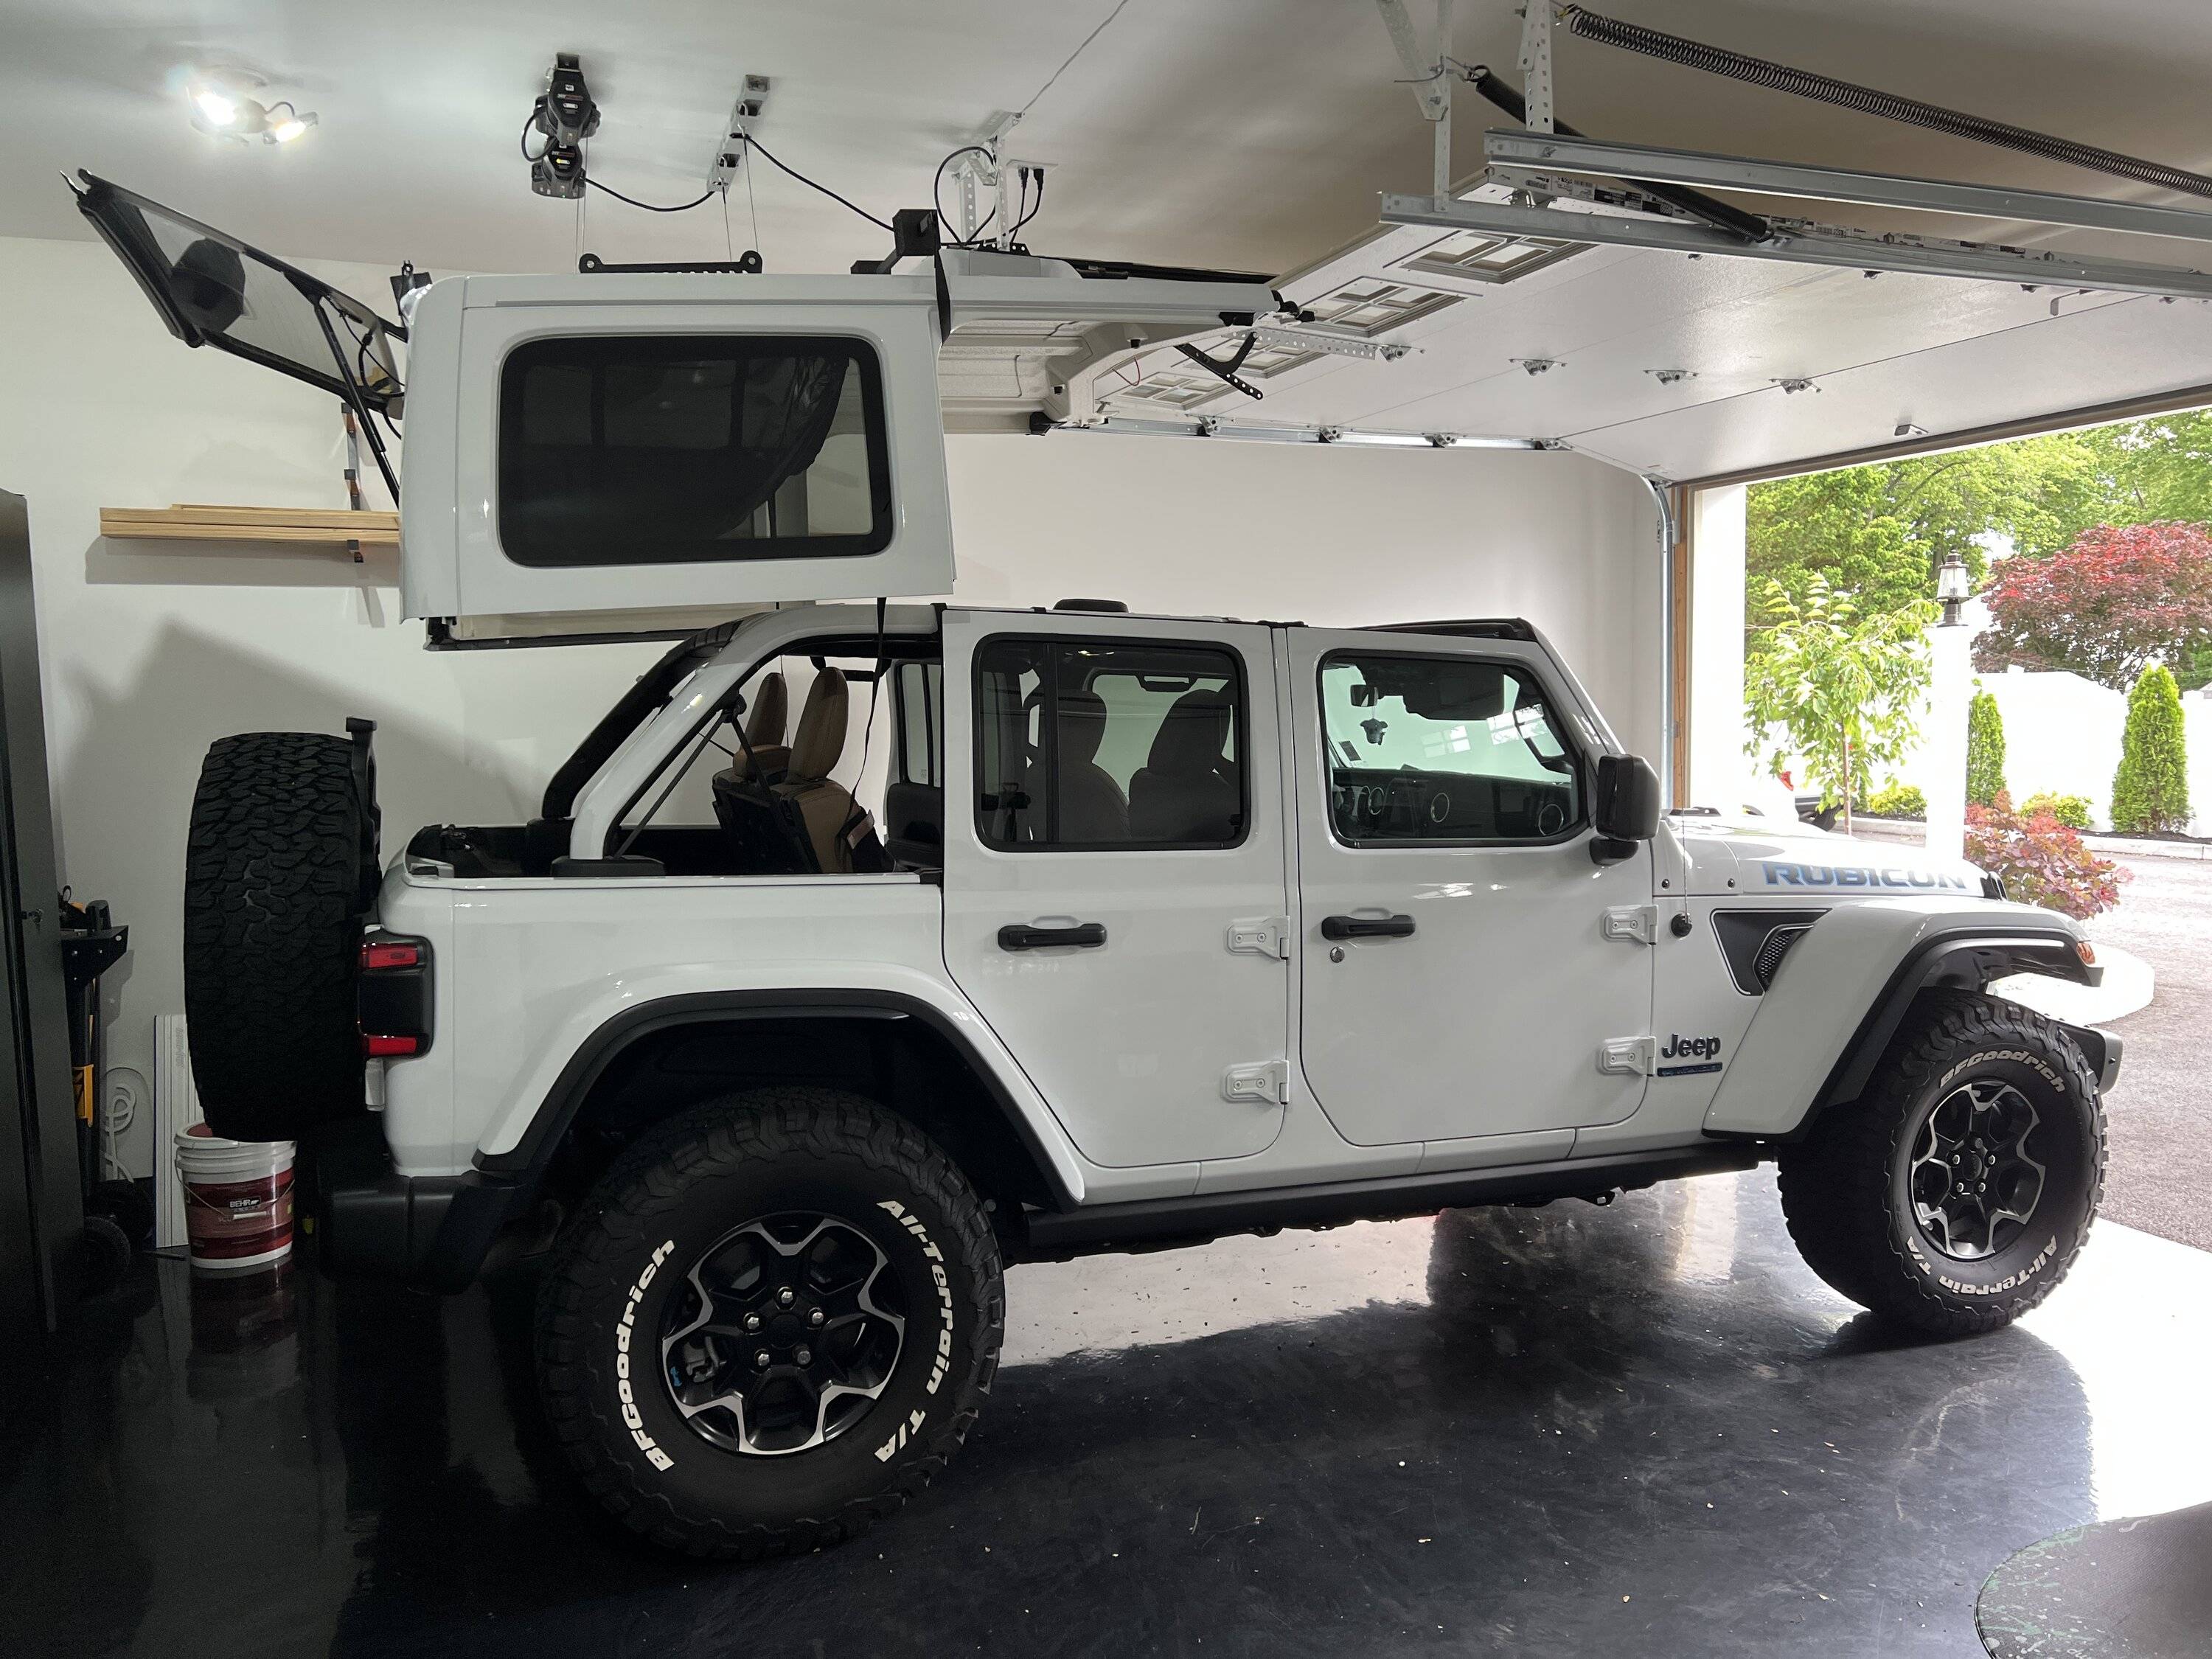
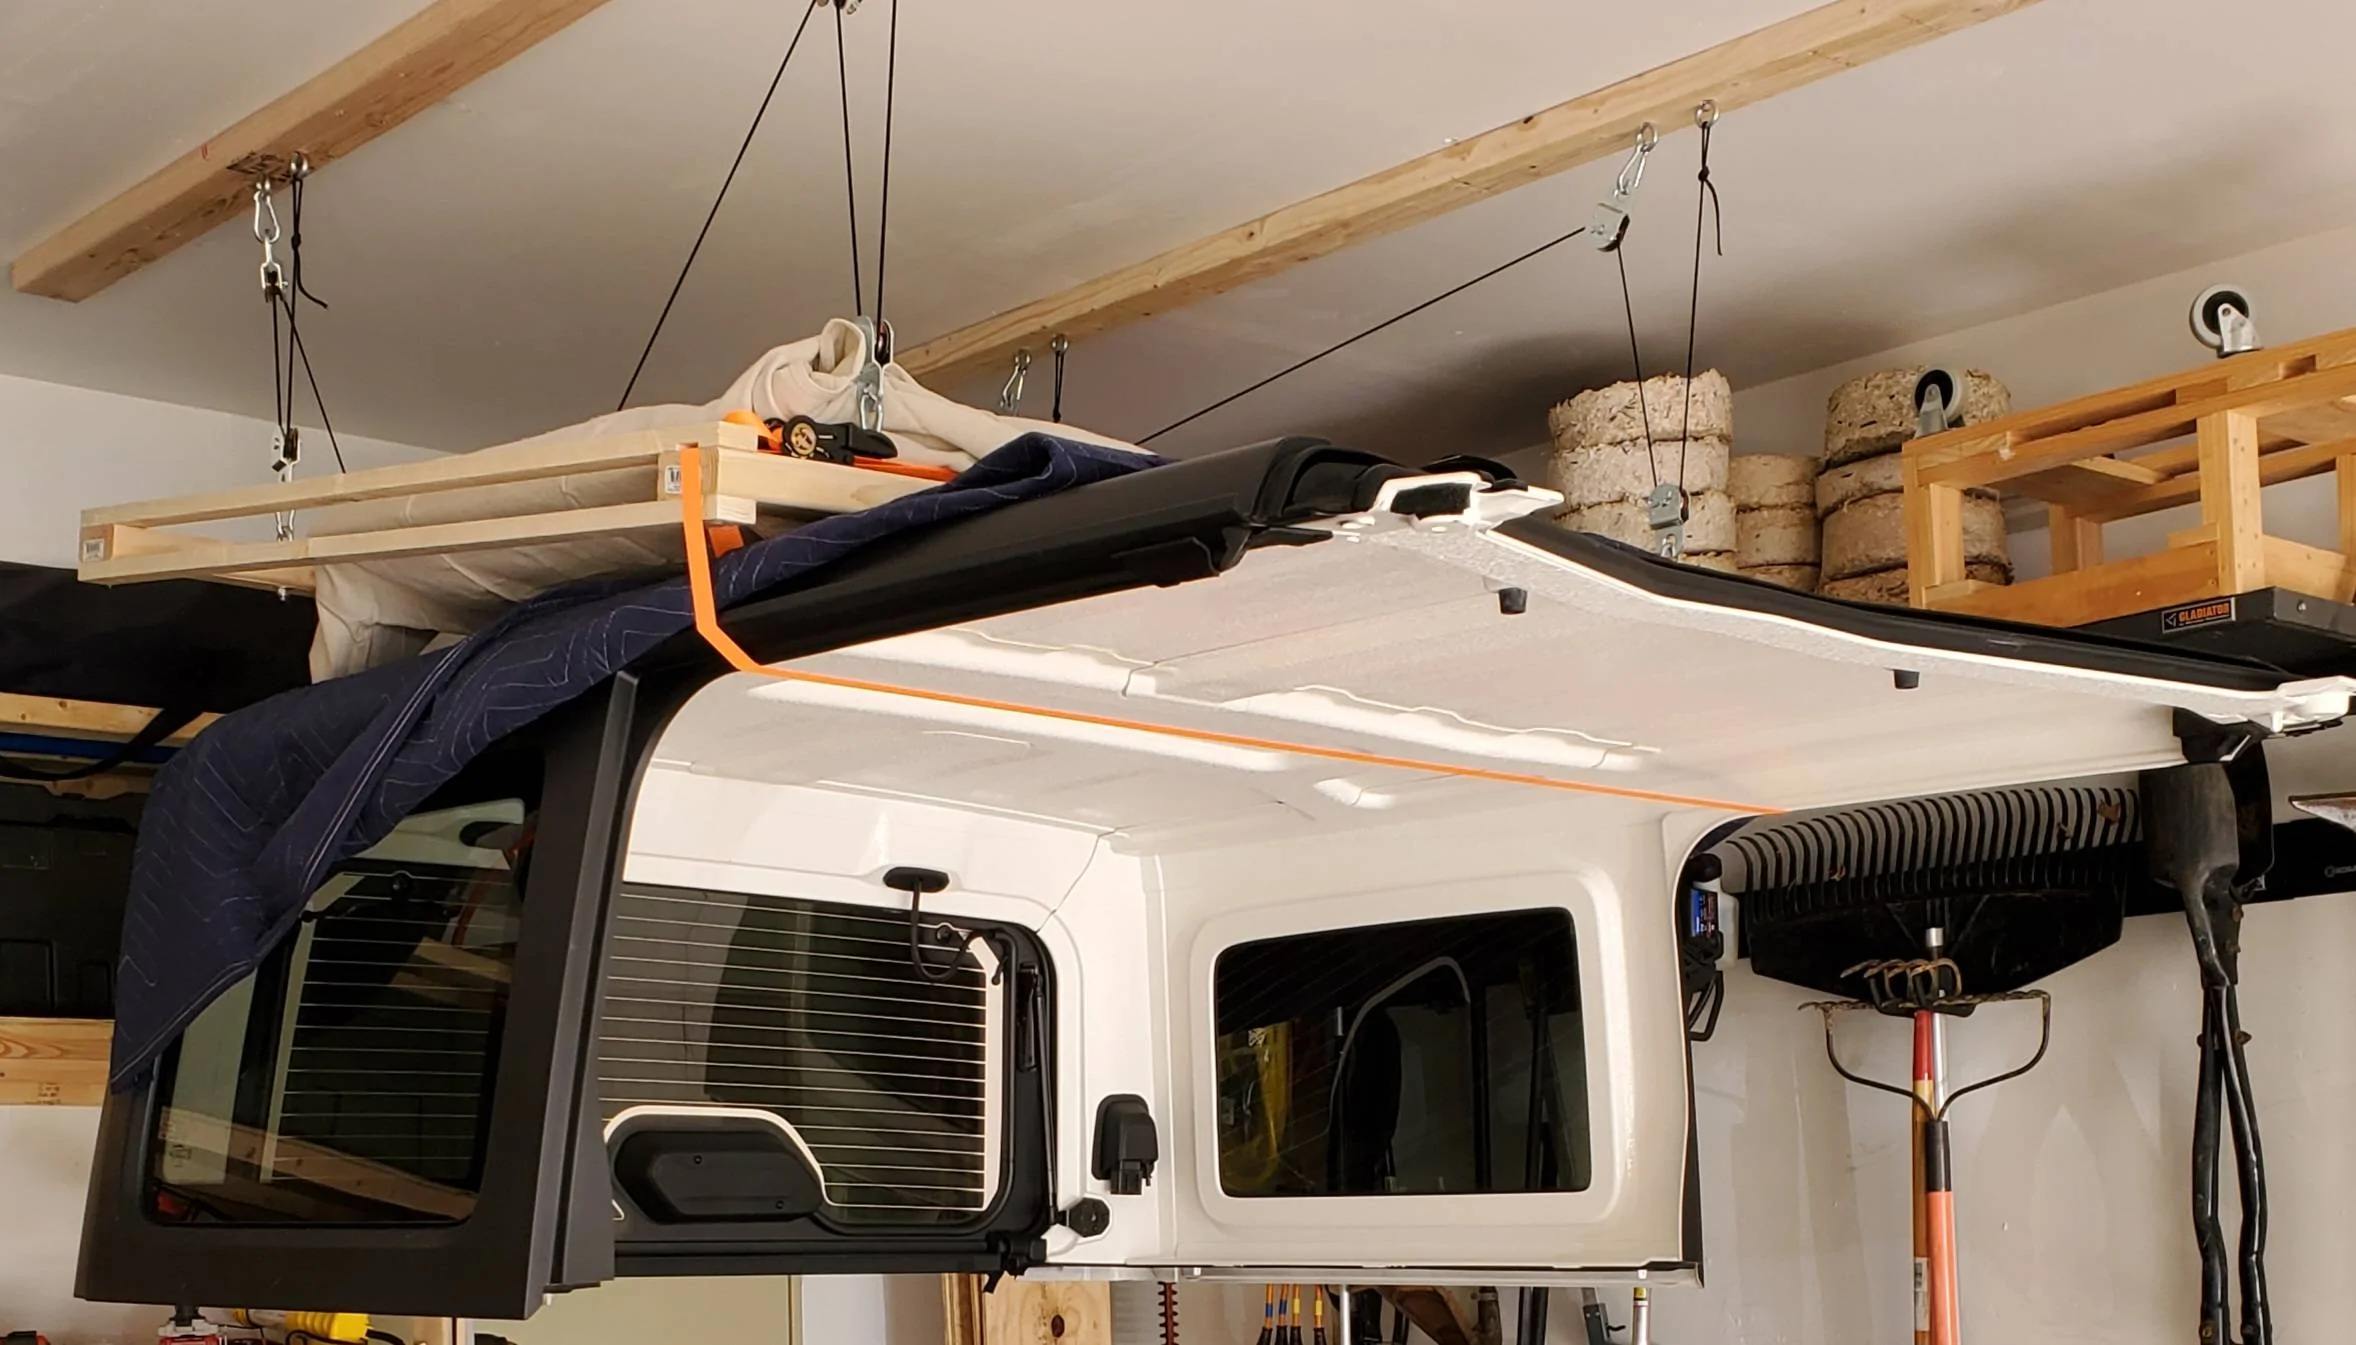
Hey all, just sharing some notes on my experience setting up a DIY hoist in my garage for the hard top. Took delivery of my new 2024 Anvil 392 last week and absolutely loving it. First project was to make sure I could get the top off by myself to enjoy the nice October days before it gets too cold.
Basic parts list:
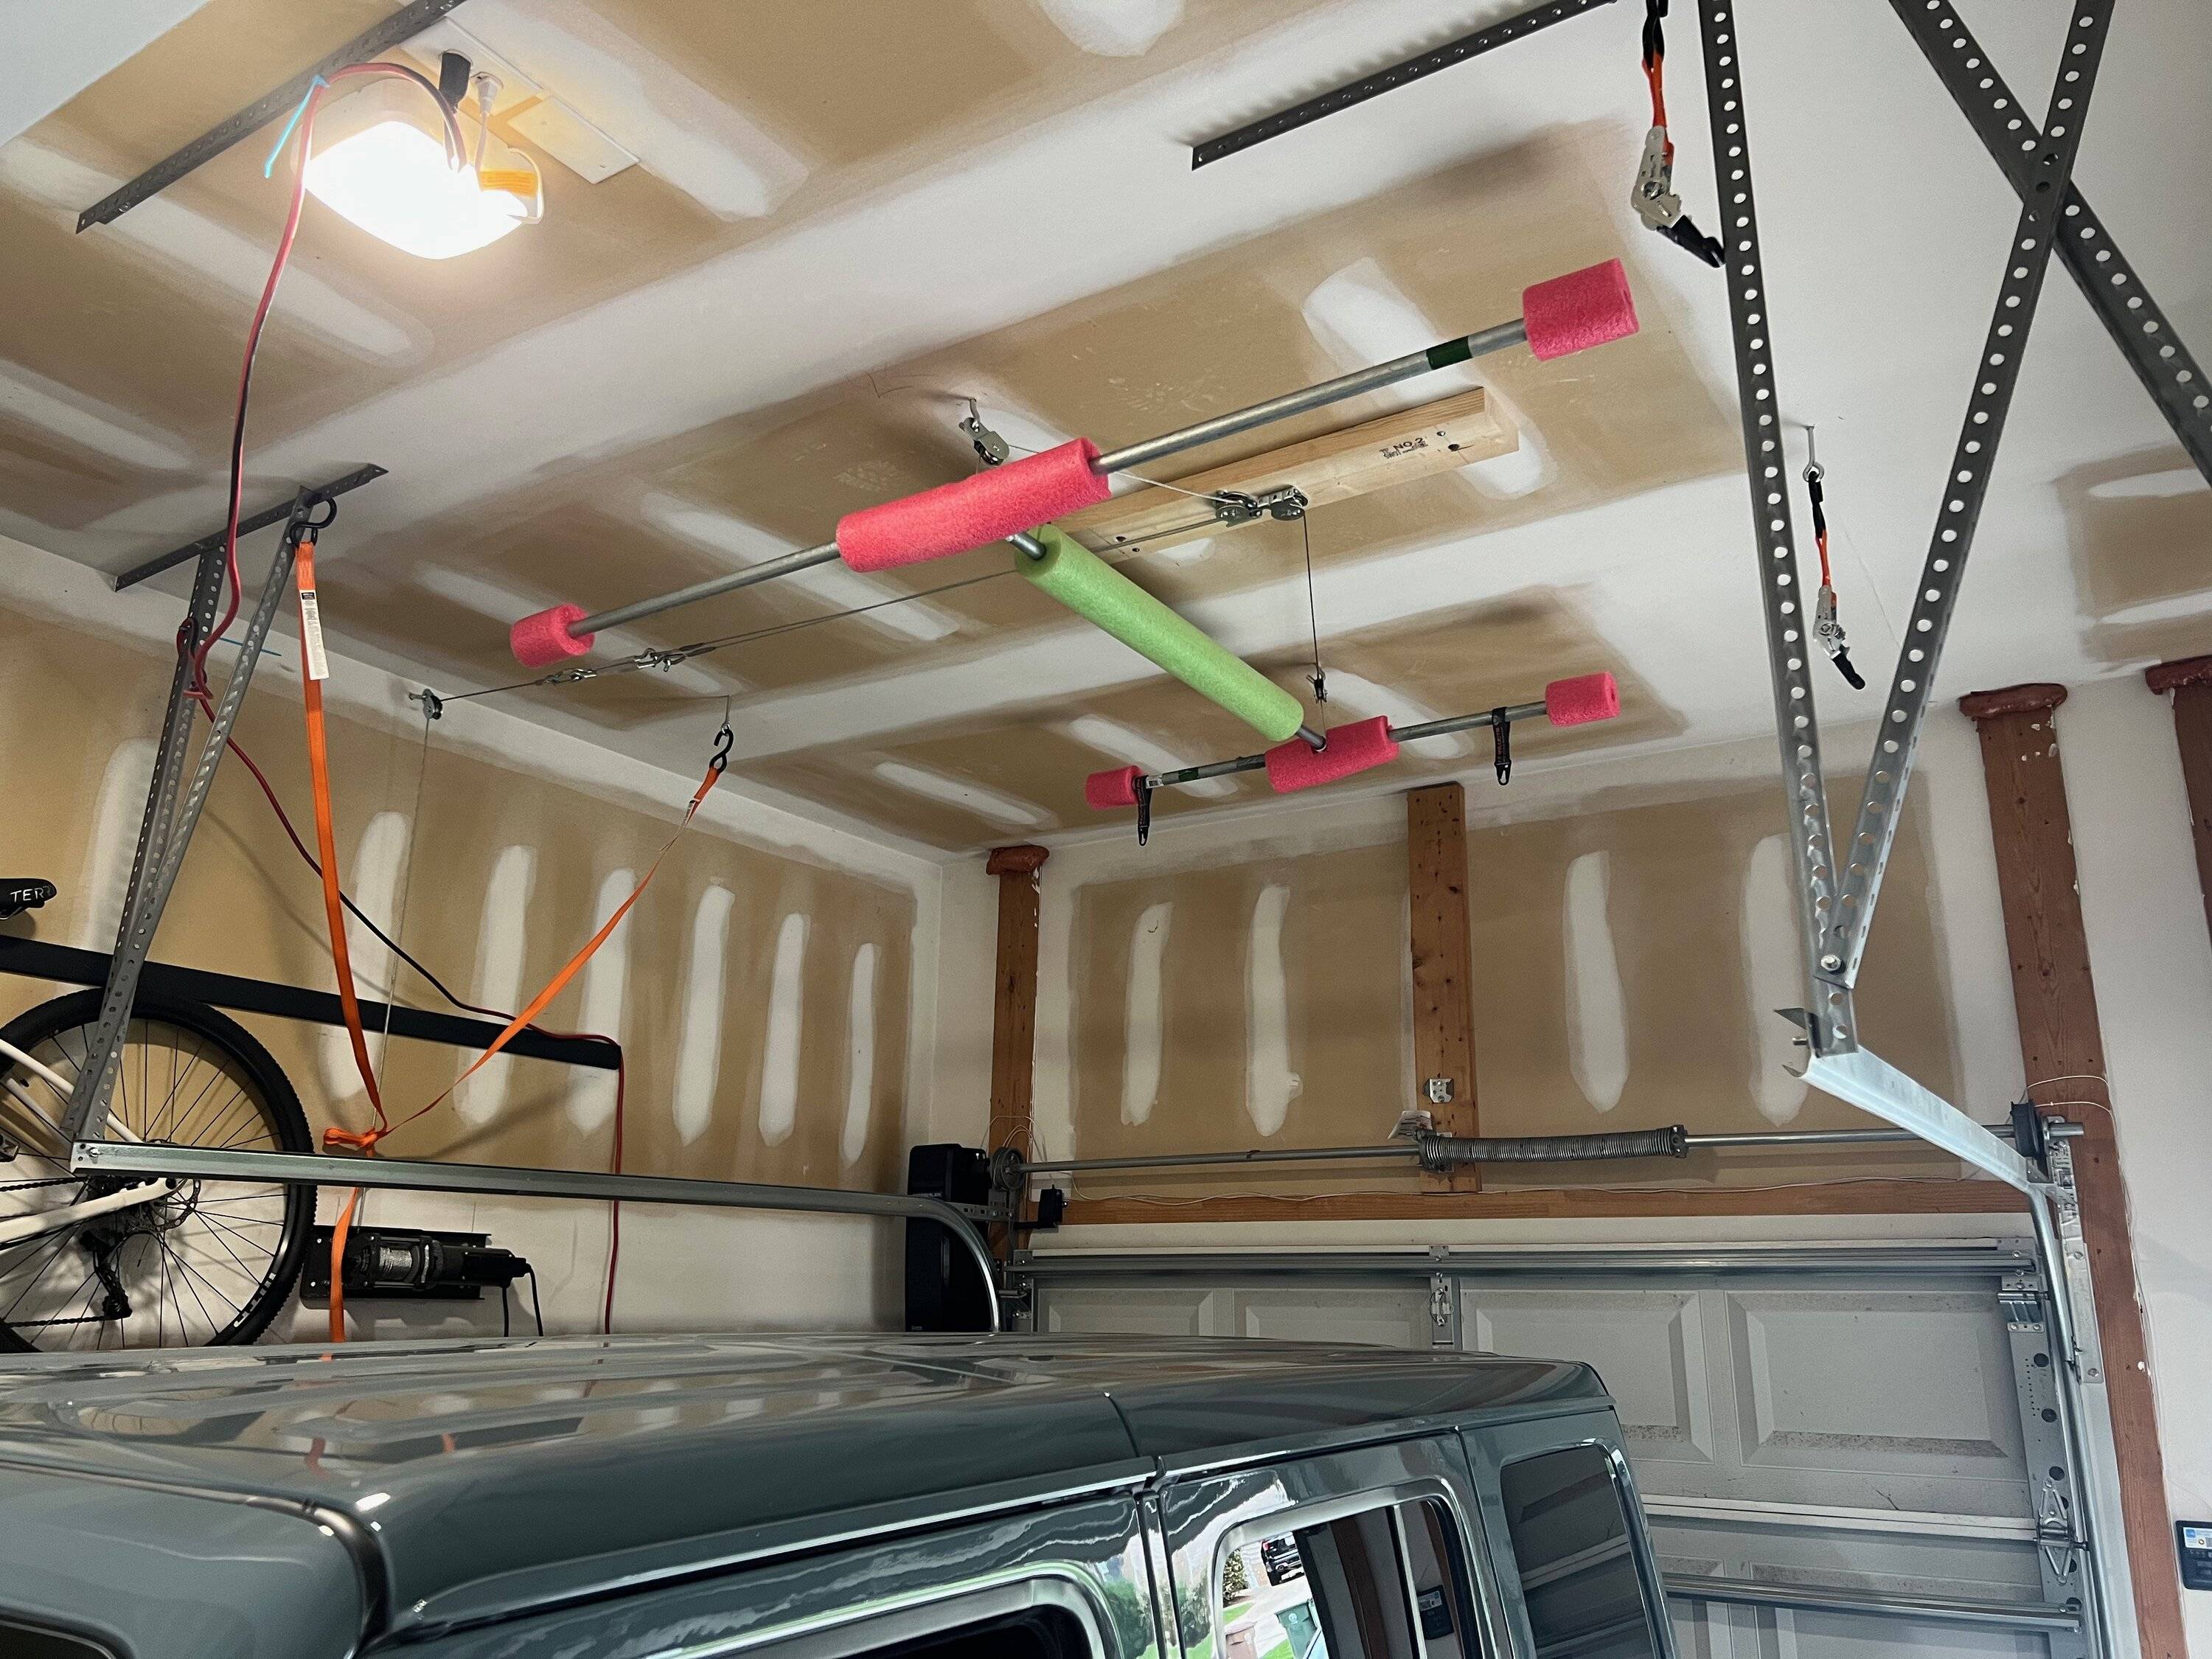
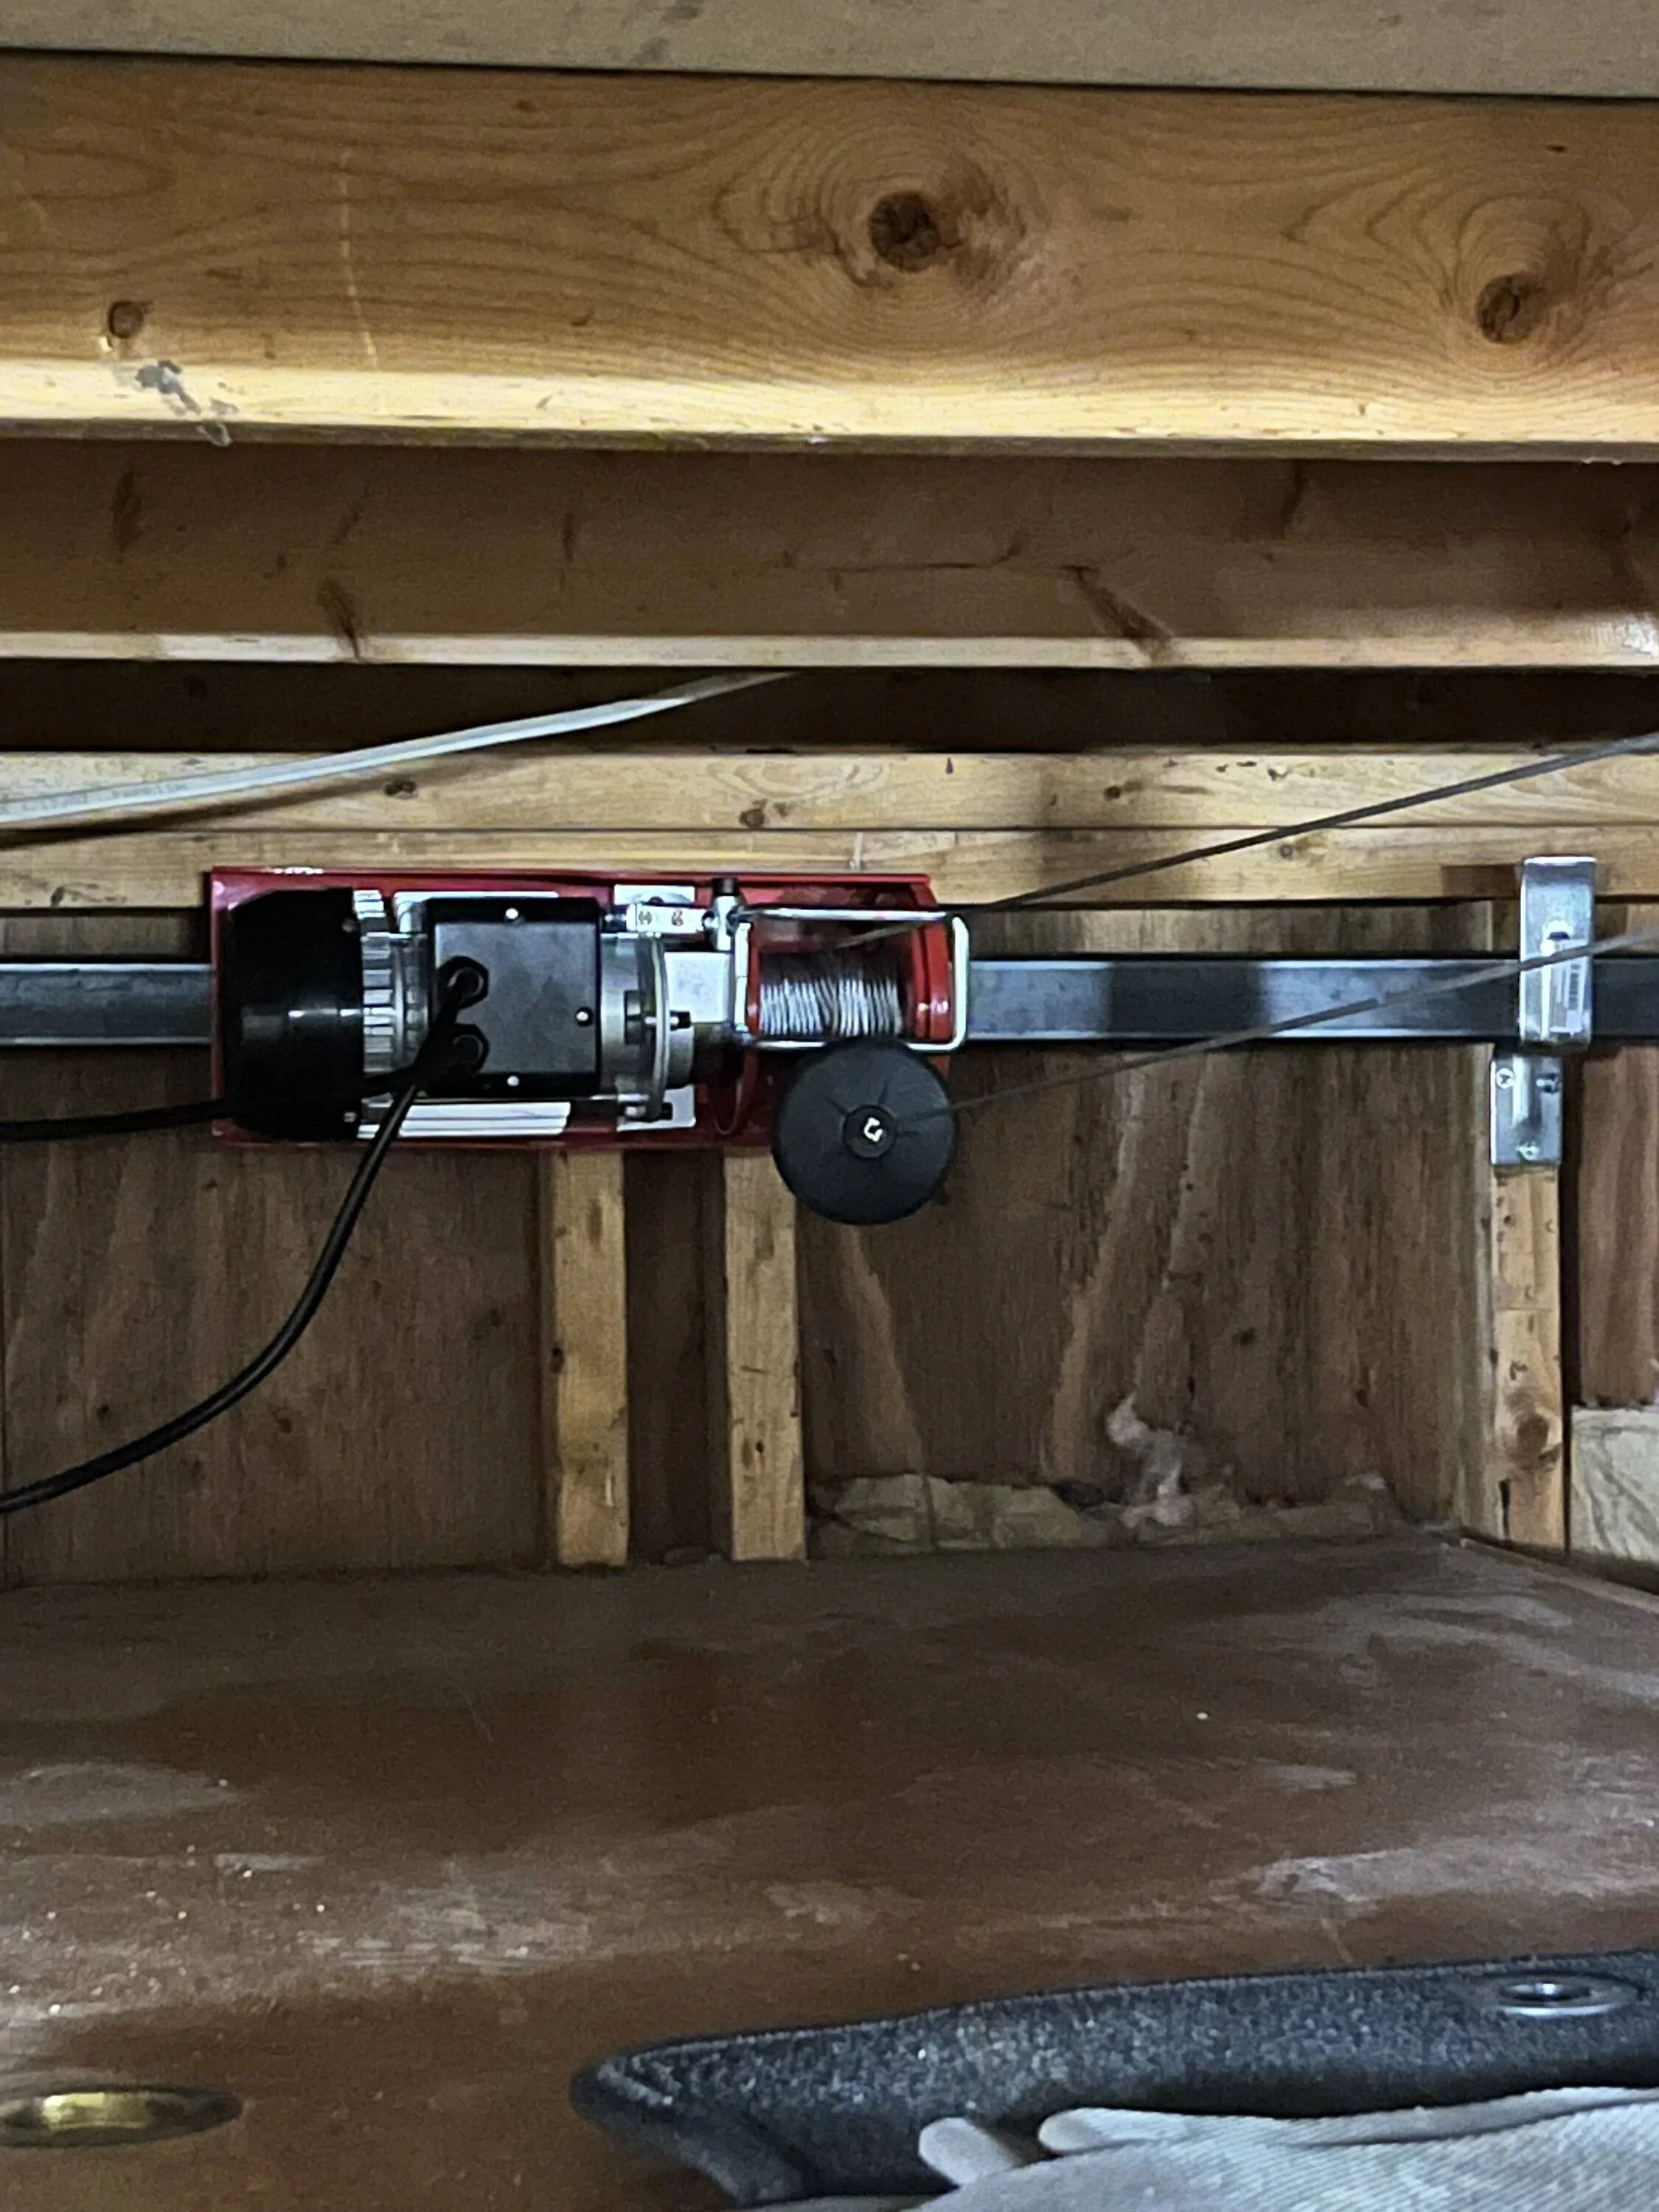
I tried several different methods to attach the cables to the H frame. The first try was with clamps, but this failed because the cables don't stretch equally and they interfered with each other at the connection to the hoist cable. It also takes a lot of line to set those clamps up right and this didn't leave enough clearance. I tried some really strong braided rope but it stretches way too much and I couldn't get a knot working that got the frame close enough to the ceiling anyway. Finally I bit the bullet and bought a swaging tool and used crimp style fittings that work really well. I drilled holes at the intersection of the H frame and ran the cable down through the hole, using a cable stop on the other side. The loops that attach to the turnbuckles and hoist cable are doubled up.
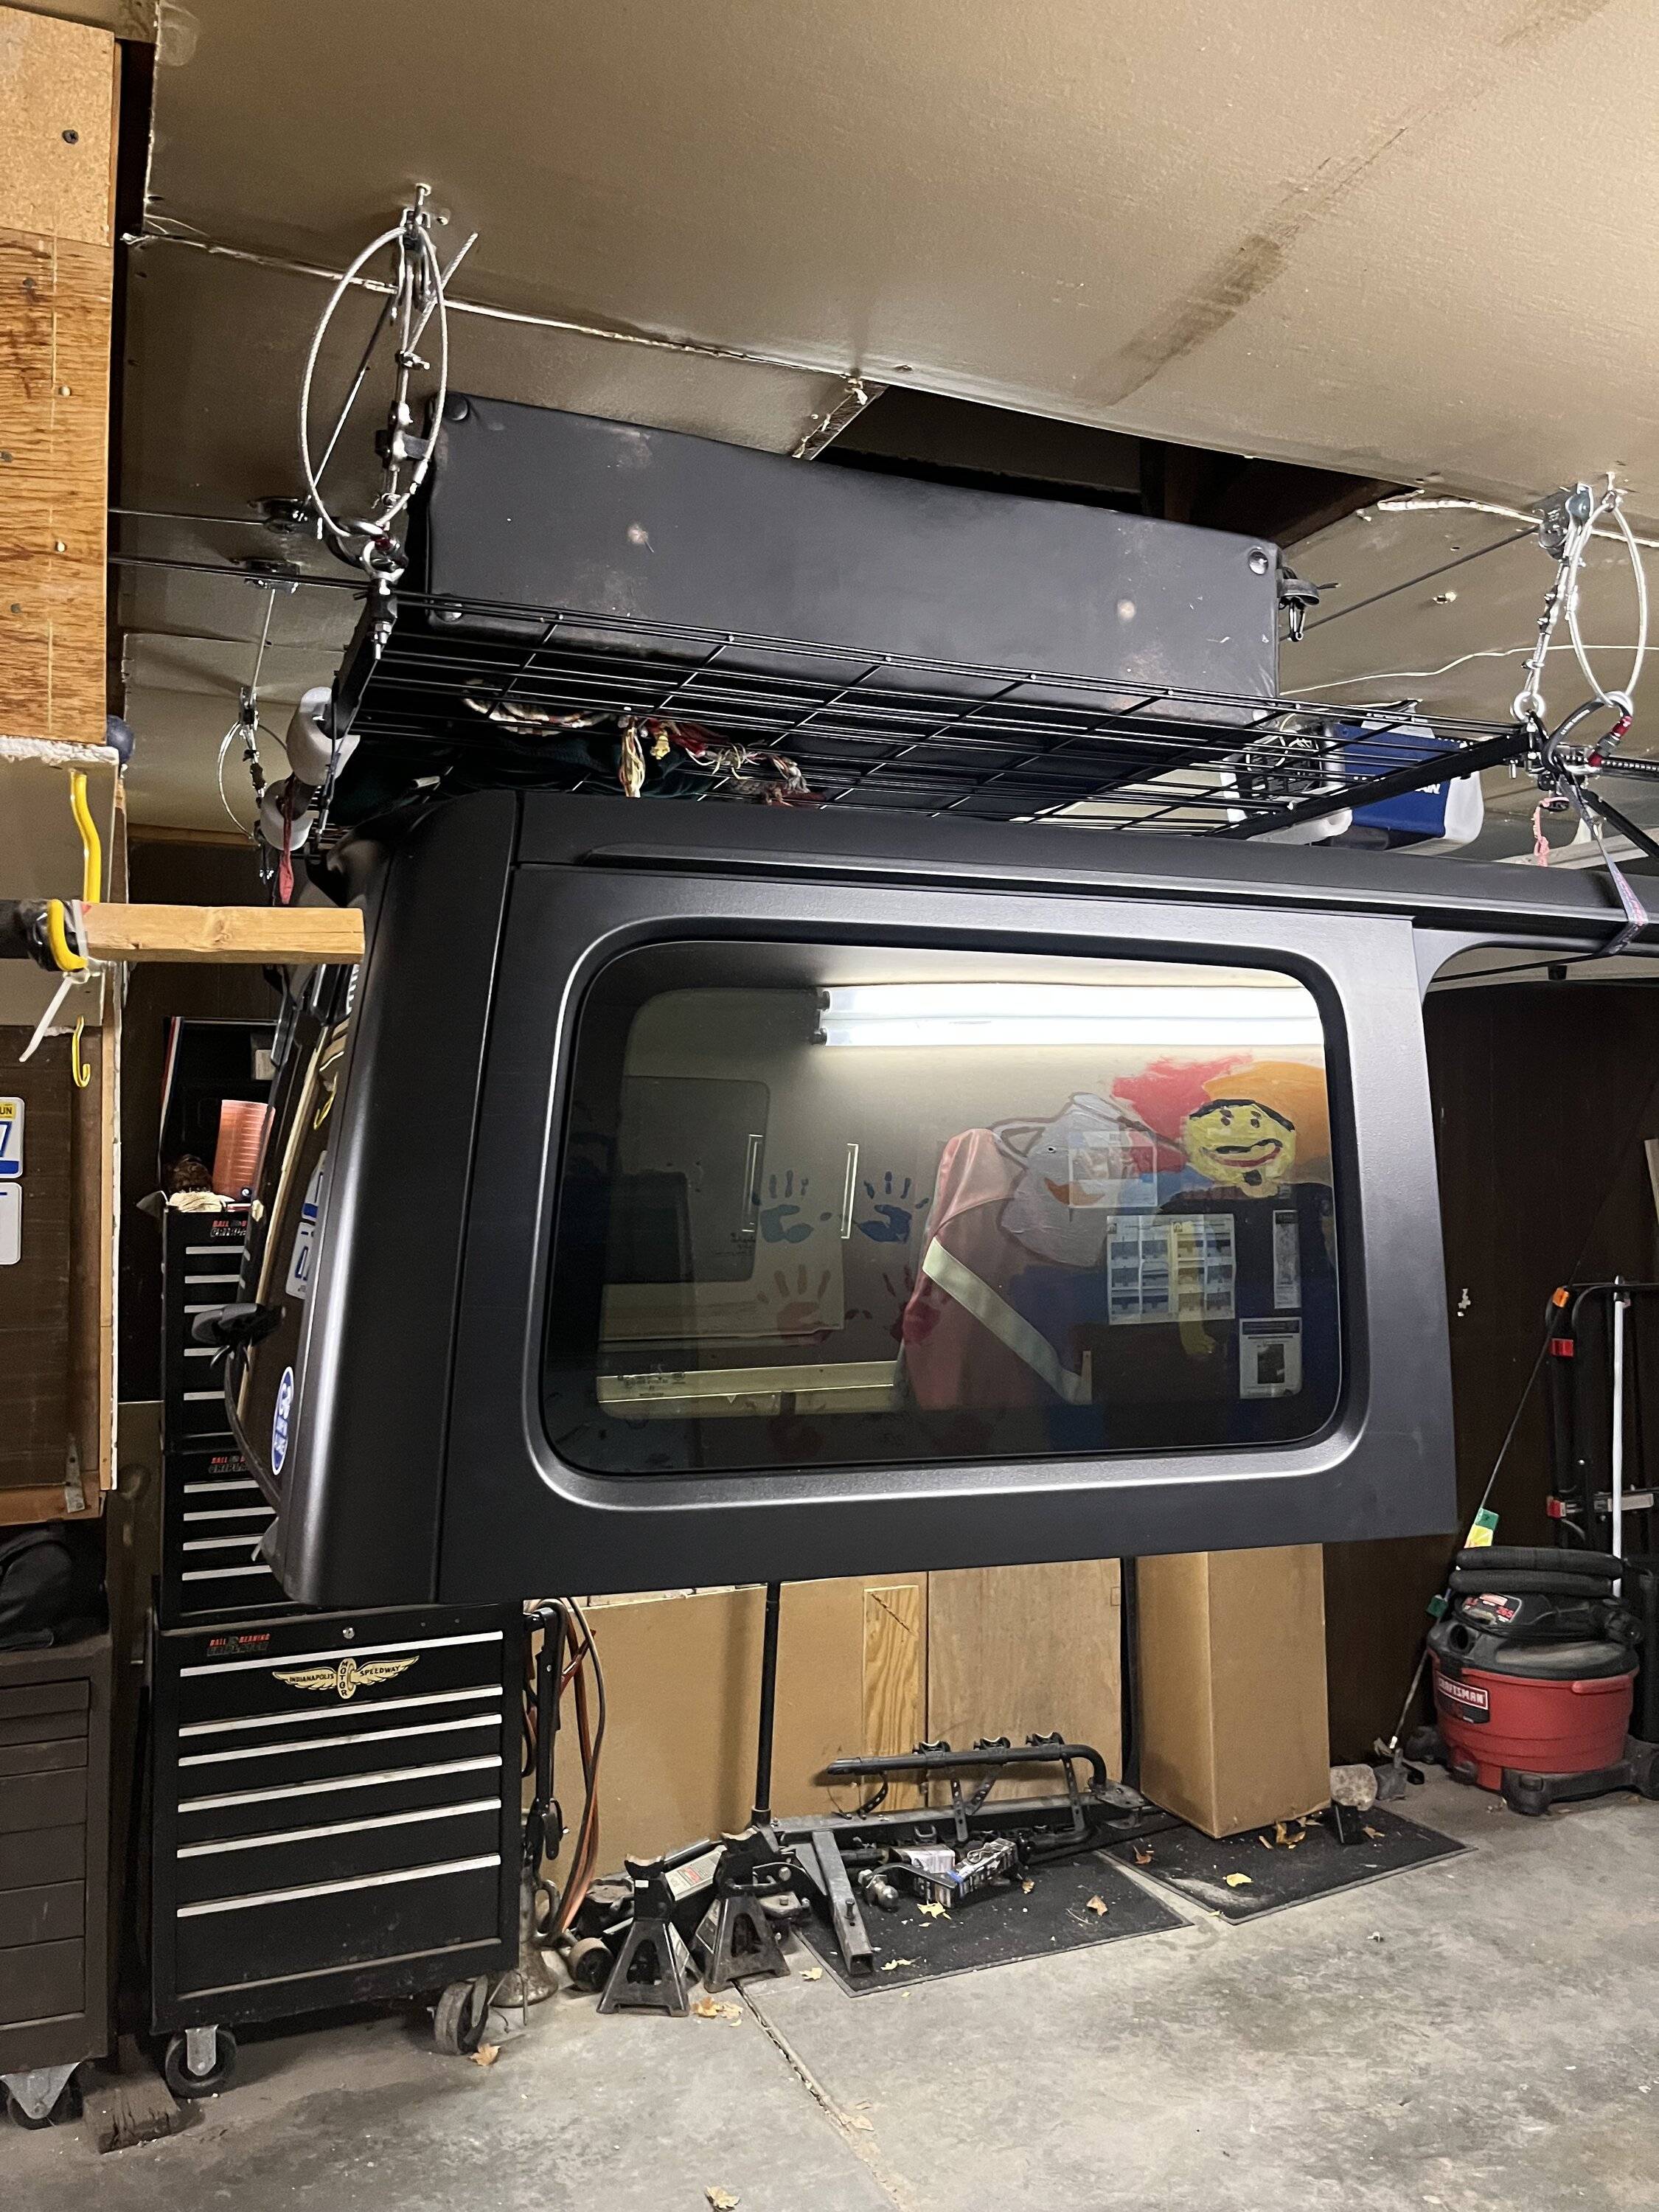
I will also share that I tried hard to make this work without using turnbuckles because technically they are not for overhead lifting like this. It's just not possible to get these cables perfectly aligned and crimped without them. It's a risk, but each of these can handle working loads of 275lbs so they are more than strong enough.
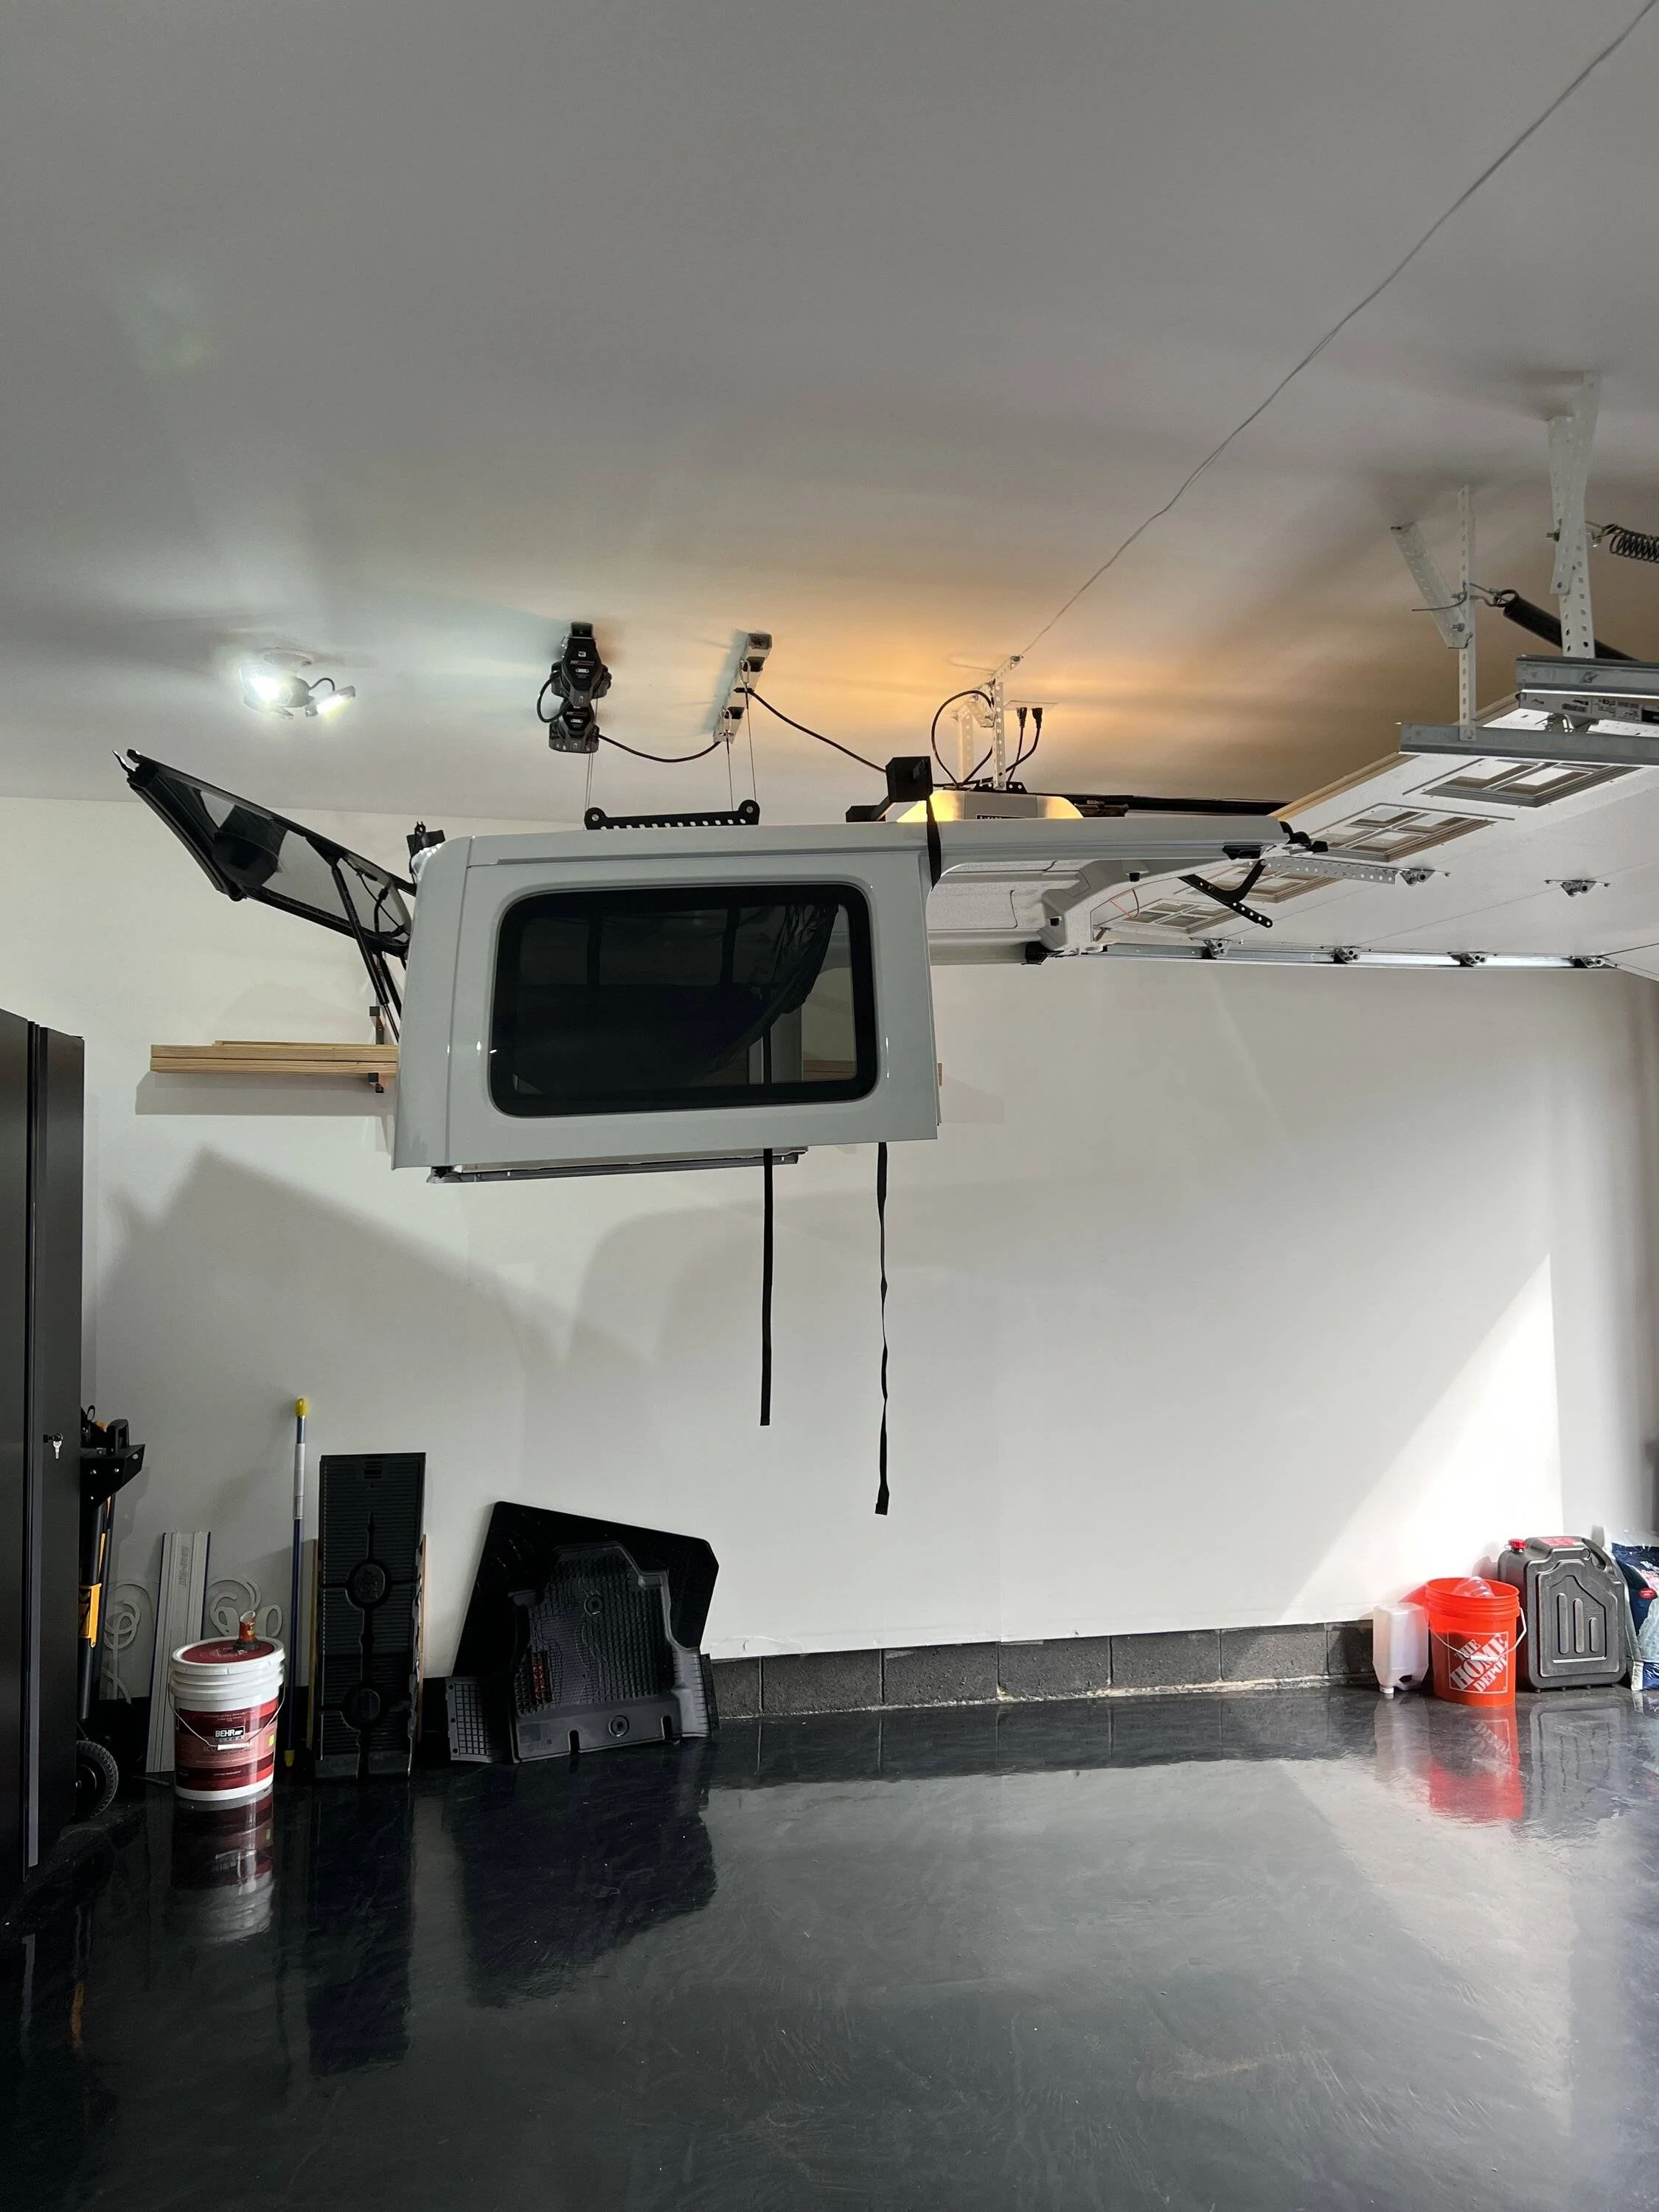
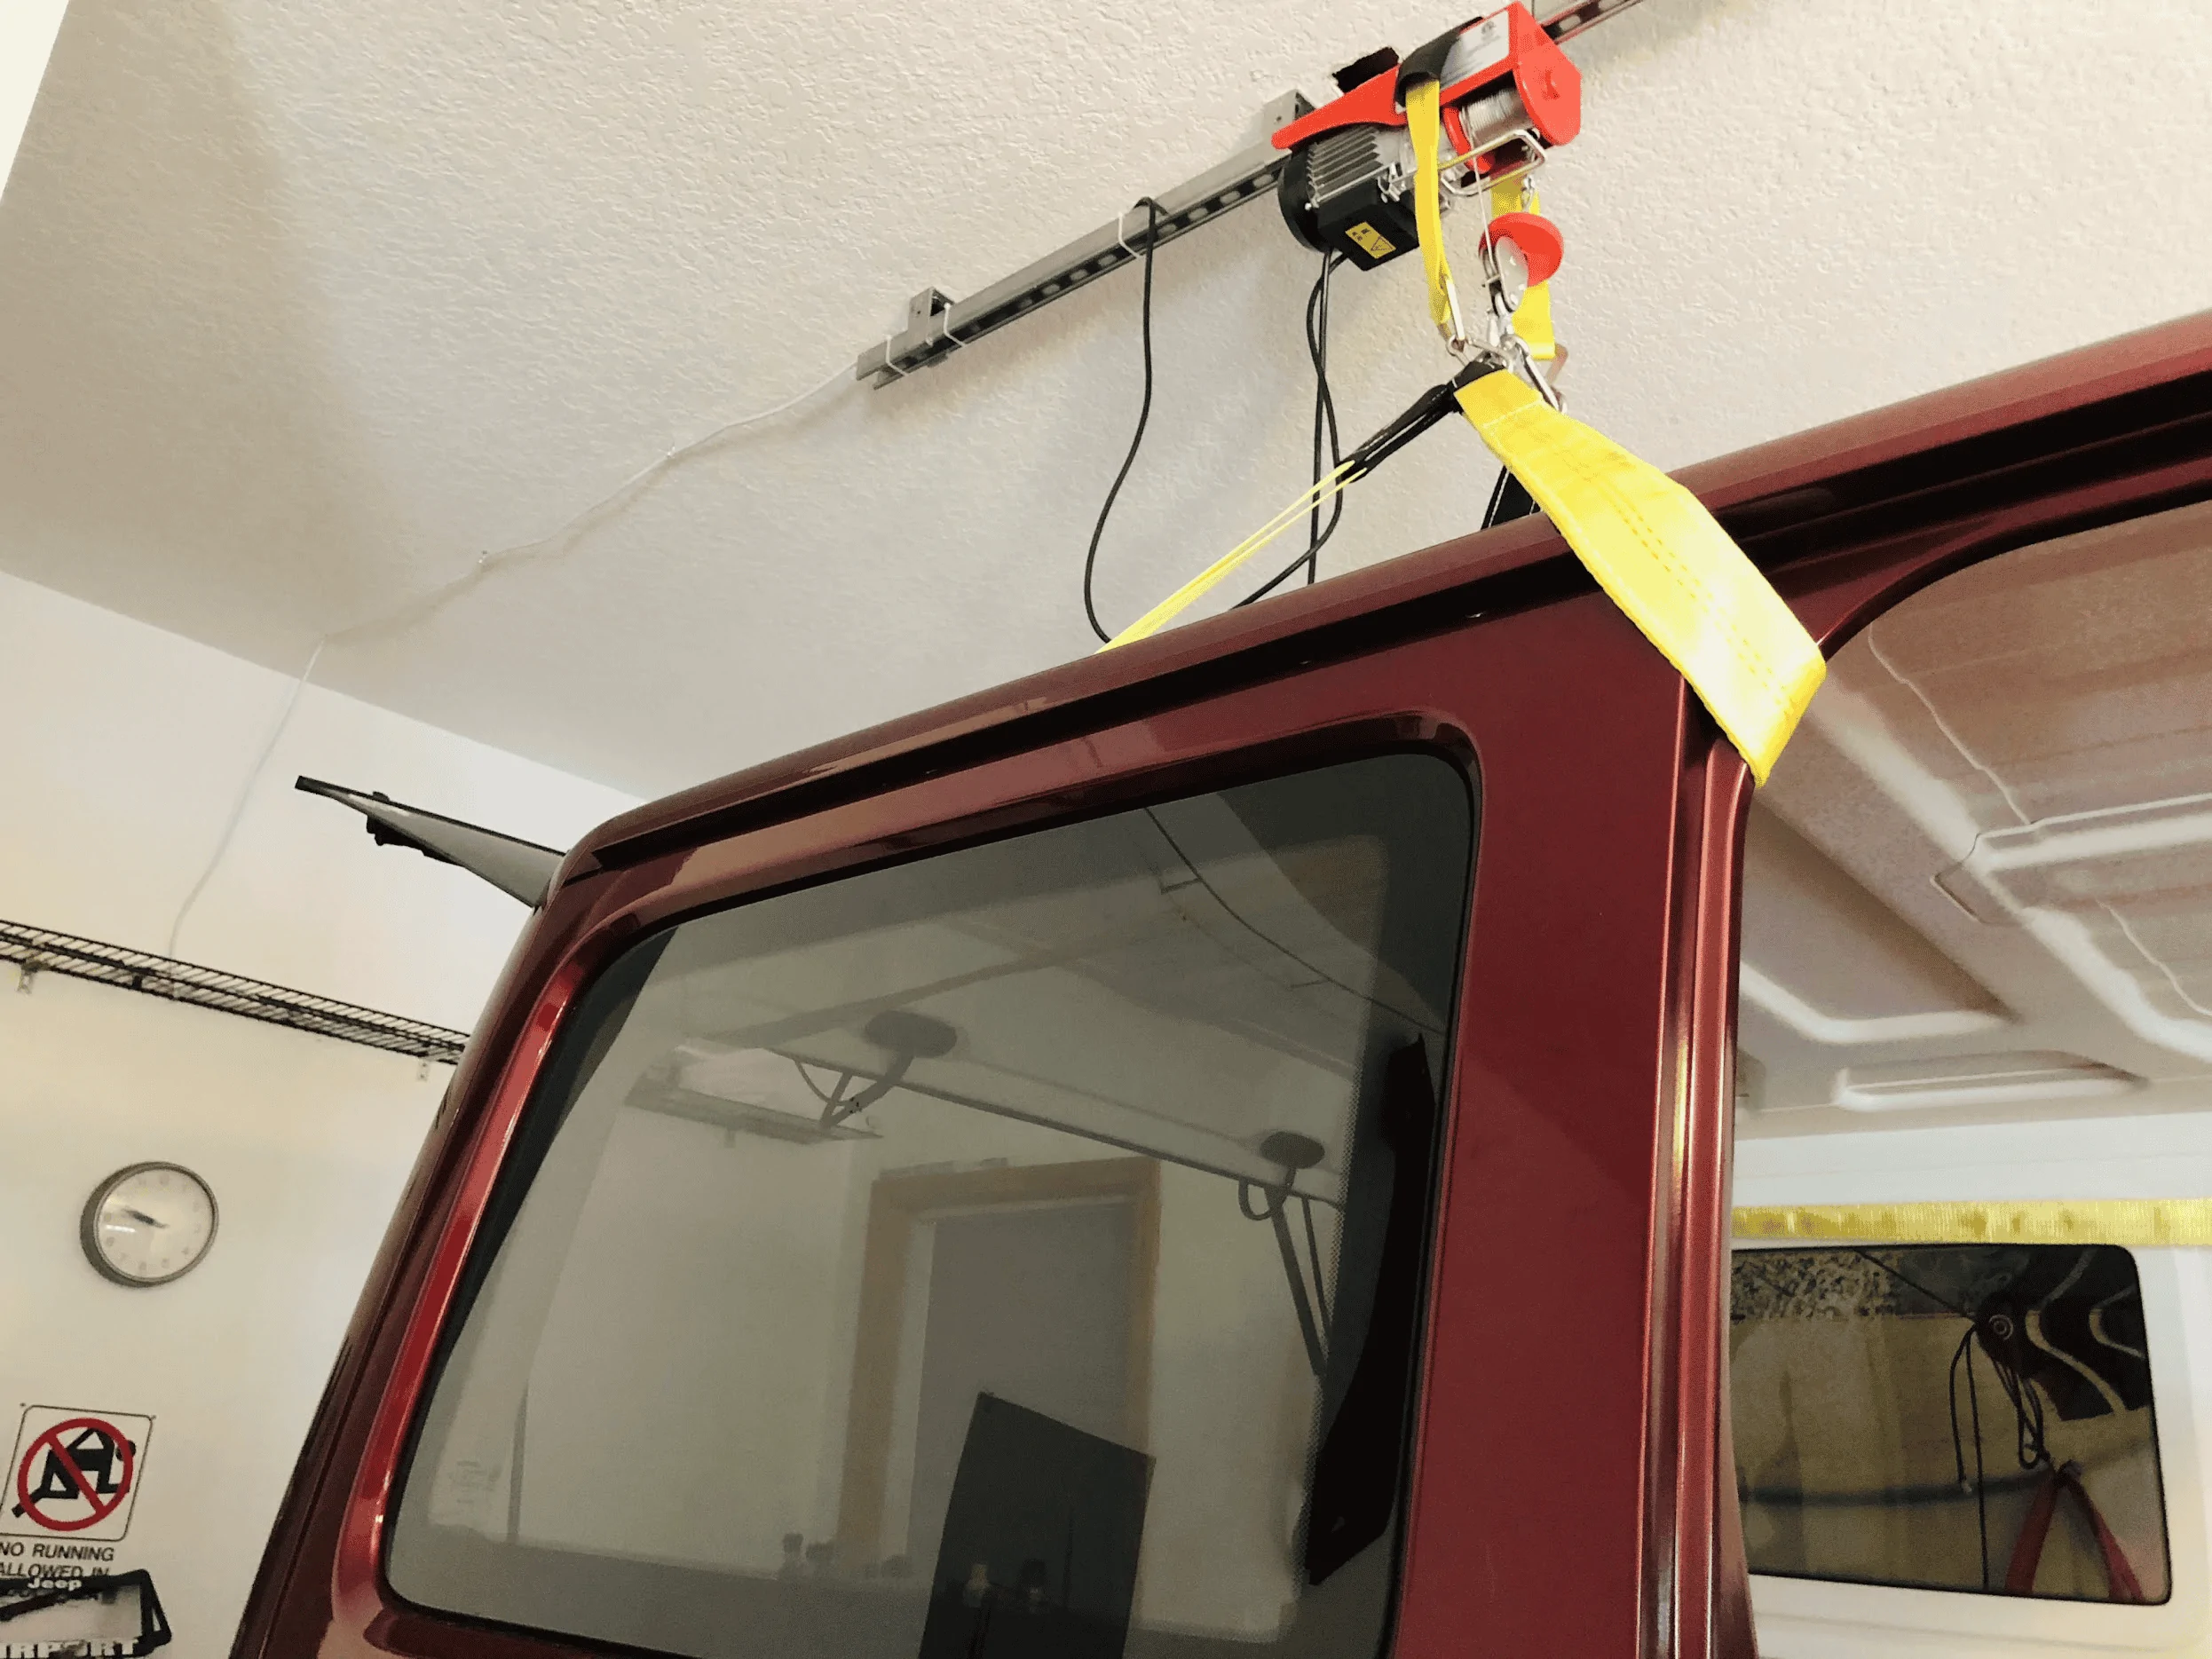
While the setup is really stable and seems to work fine, I'm all about fail safes so I tapped two extra eye bolts and use those ratchet straps across the front and the back to get some extra lift, keep it level, and have a backup support in case my fittings end up slipping. The ratchet in the front just ties in with the existing garage door brackets. All in I think I have about $400 in materials and tools here.

Takes me about ten minutes to take the top off or put it back on, all in, and it's easy to do by myself. Just sharing all this in case someone out there is wondering if they have enough space or not to do something similar. If I can help answer questions, let me know.
Basic parts list:
- 1500lbs Badlands hoist from Harbor Freight (https://www.harborfreight.com/automotive/winches/1500-lb-capacity-120v-ac-electric-winch-61672.html)
- 3/4" steel pipe and fittings from Lowes
- 1/8" steel cable, pulleys, fittings, turnbuckles, etc from Lowes
- Pool noodles
- Topsy kit: https://topsyproducts.com/collectio...s/products/hinge-hoist-bracket-kit-jlu-4-door
I tried several different methods to attach the cables to the H frame. The first try was with clamps, but this failed because the cables don't stretch equally and they interfered with each other at the connection to the hoist cable. It also takes a lot of line to set those clamps up right and this didn't leave enough clearance. I tried some really strong braided rope but it stretches way too much and I couldn't get a knot working that got the frame close enough to the ceiling anyway. Finally I bit the bullet and bought a swaging tool and used crimp style fittings that work really well. I drilled holes at the intersection of the H frame and ran the cable down through the hole, using a cable stop on the other side. The loops that attach to the turnbuckles and hoist cable are doubled up.
I will also share that I tried hard to make this work without using turnbuckles because technically they are not for overhead lifting like this. It's just not possible to get these cables perfectly aligned and crimped without them. It's a risk, but each of these can handle working loads of 275lbs so they are more than strong enough.
While the setup is really stable and seems to work fine, I'm all about fail safes so I tapped two extra eye bolts and use those ratchet straps across the front and the back to get some extra lift, keep it level, and have a backup support in case my fittings end up slipping. The ratchet in the front just ties in with the existing garage door brackets. All in I think I have about $400 in materials and tools here.

Takes me about ten minutes to take the top off or put it back on, all in, and it's easy to do by myself. Just sharing all this in case someone out there is wondering if they have enough space or not to do something similar. If I can help answer questions, let me know.
Sponsored


") )
)