KGriner
Well-Known Member
- Thread starter
- #1
I wanted to install a spare tire bike carrier however, that pesky back up camera was in the way so I needed to re-locate it.
I’m posting this because I looked all over the Internet and couldn’t find a solution, they were all for aftermarket bumper/spare tire mount applications, and cost way too much!
This is adjustable and will work with stock rims or rims that have larger openings between the spokes.It may not work for everyone but if you’re up for it, you’ll be able to make it work for you!
Below are very very rough instructions, you probably can’t depend on them to get you through but pictures give you a better general idea I think…
Cost was under $30
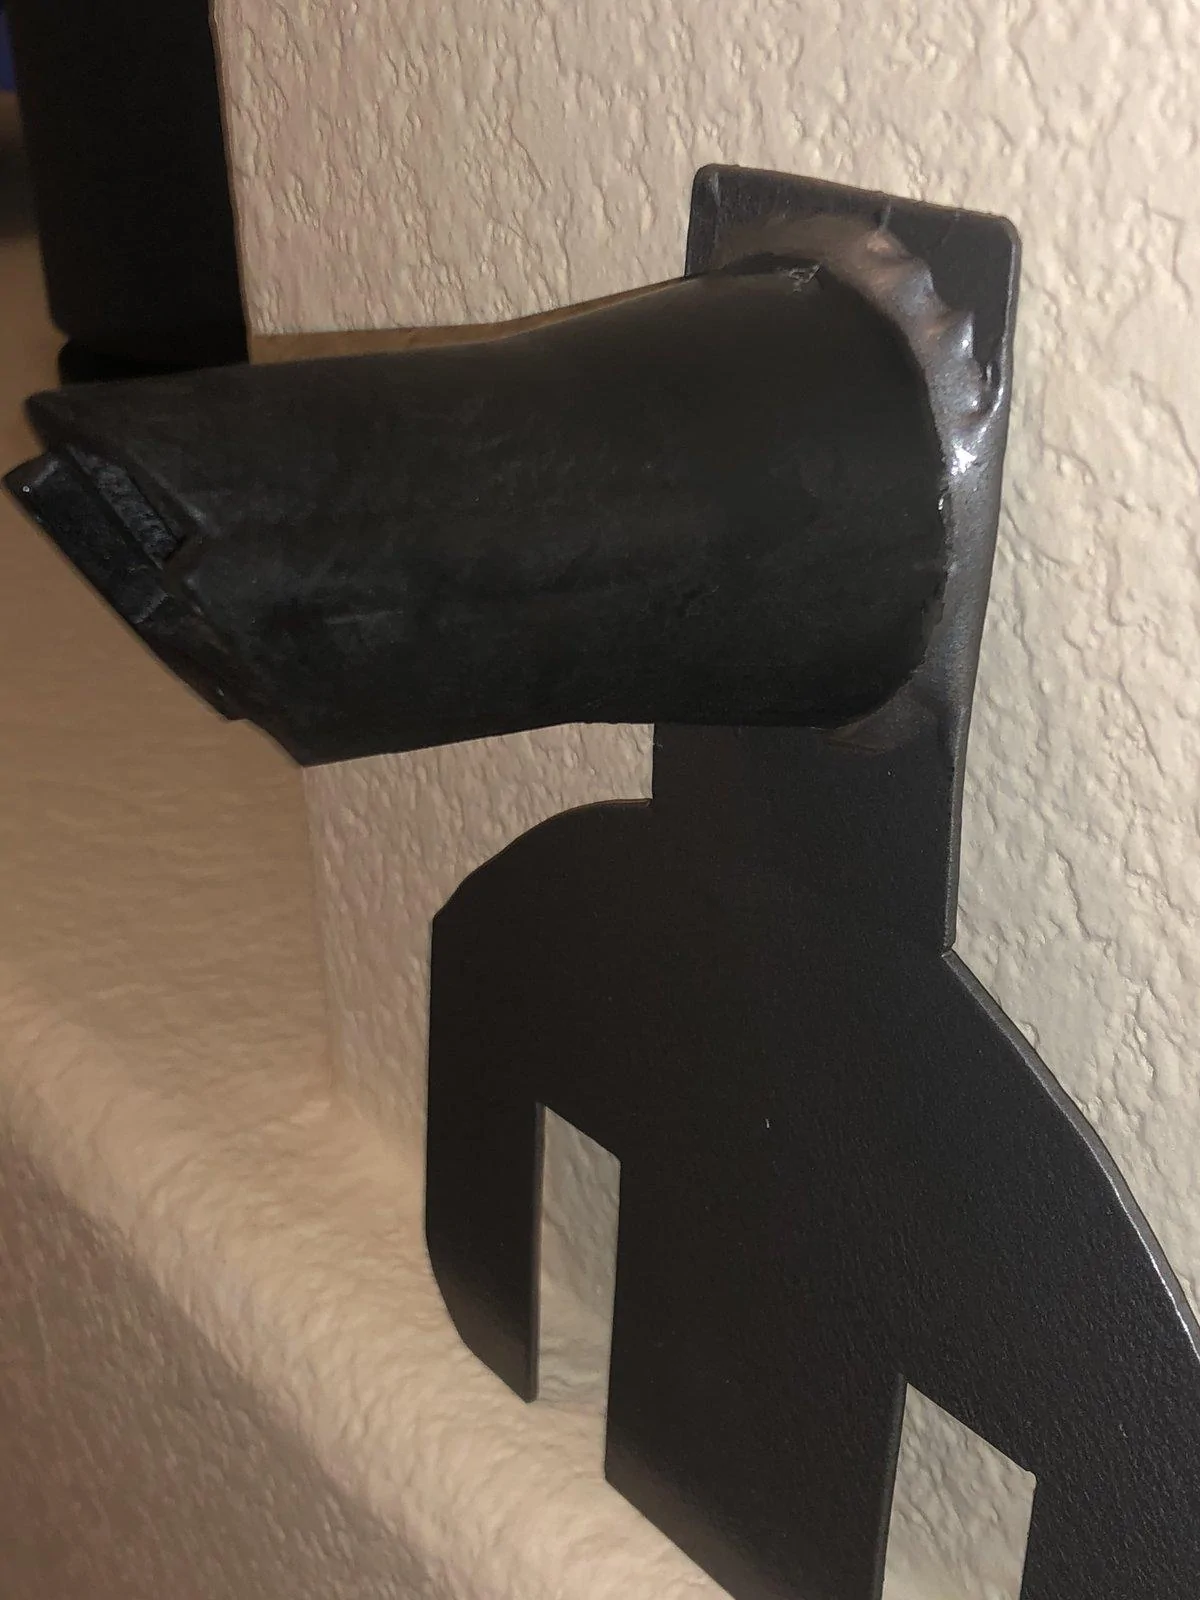
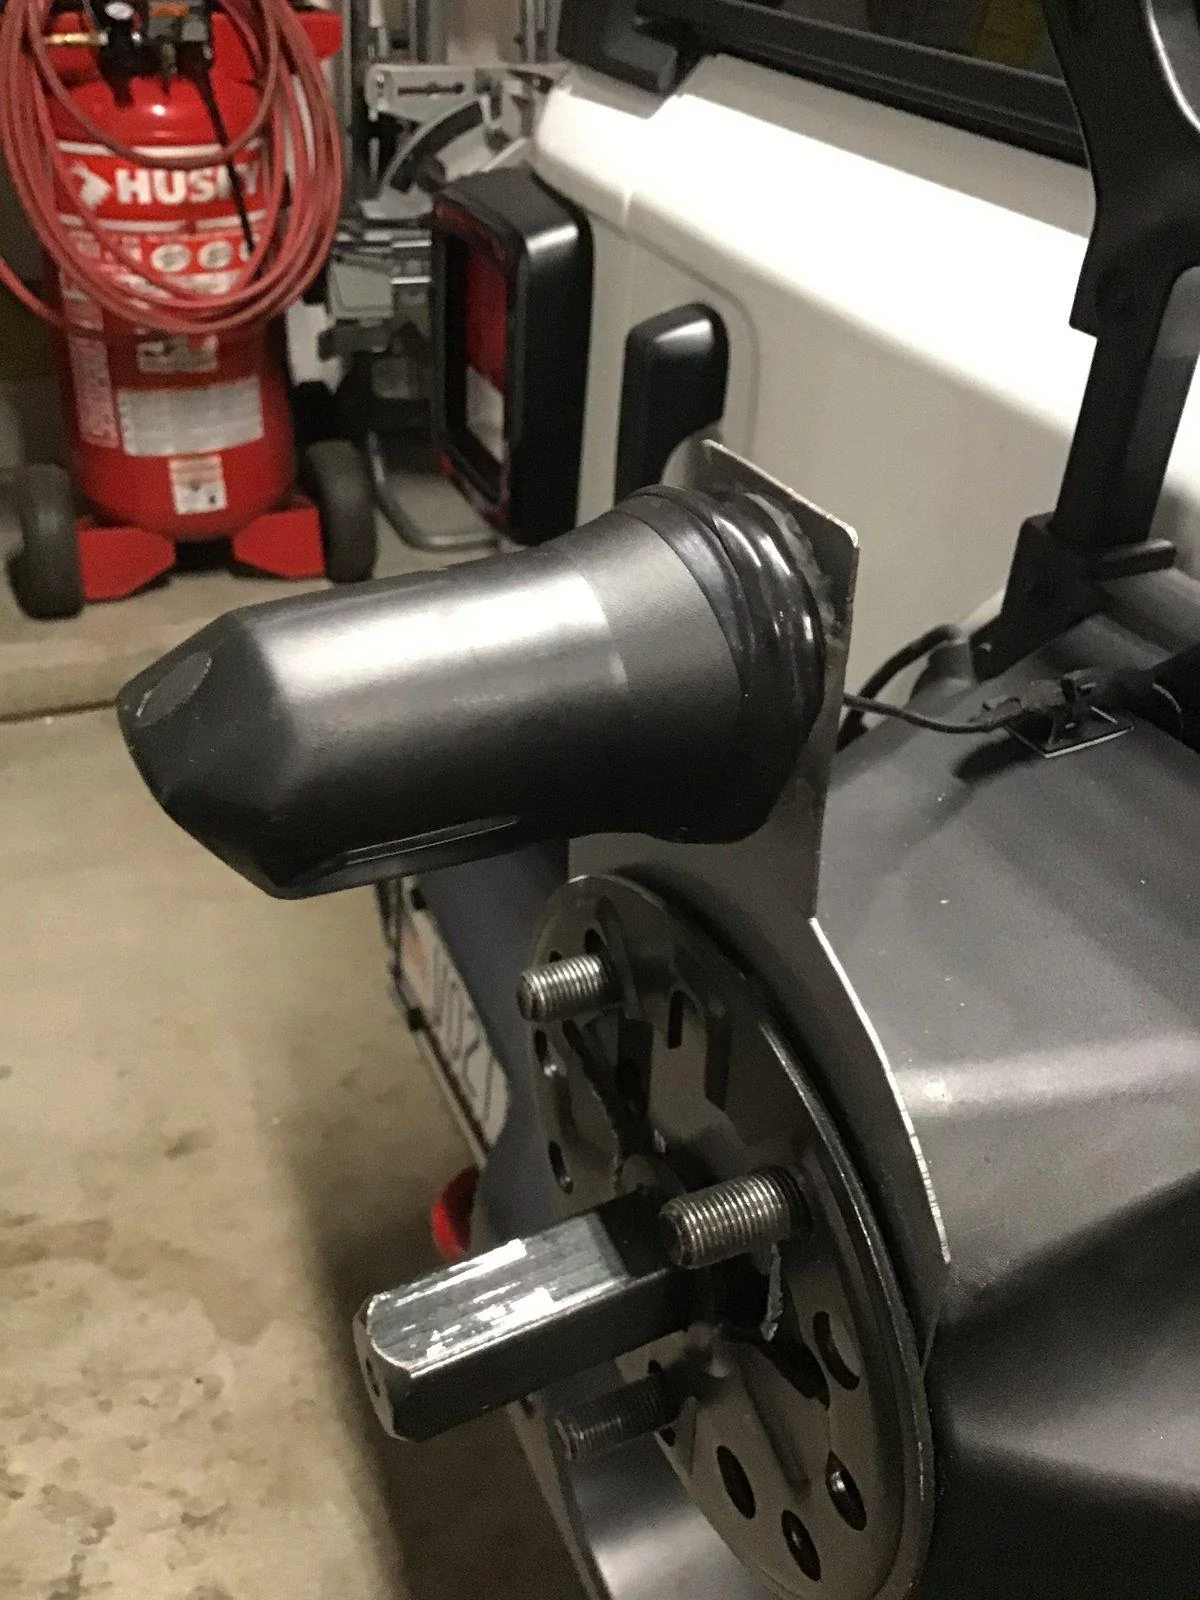
Fabricate the new camera mount from sheet metal:
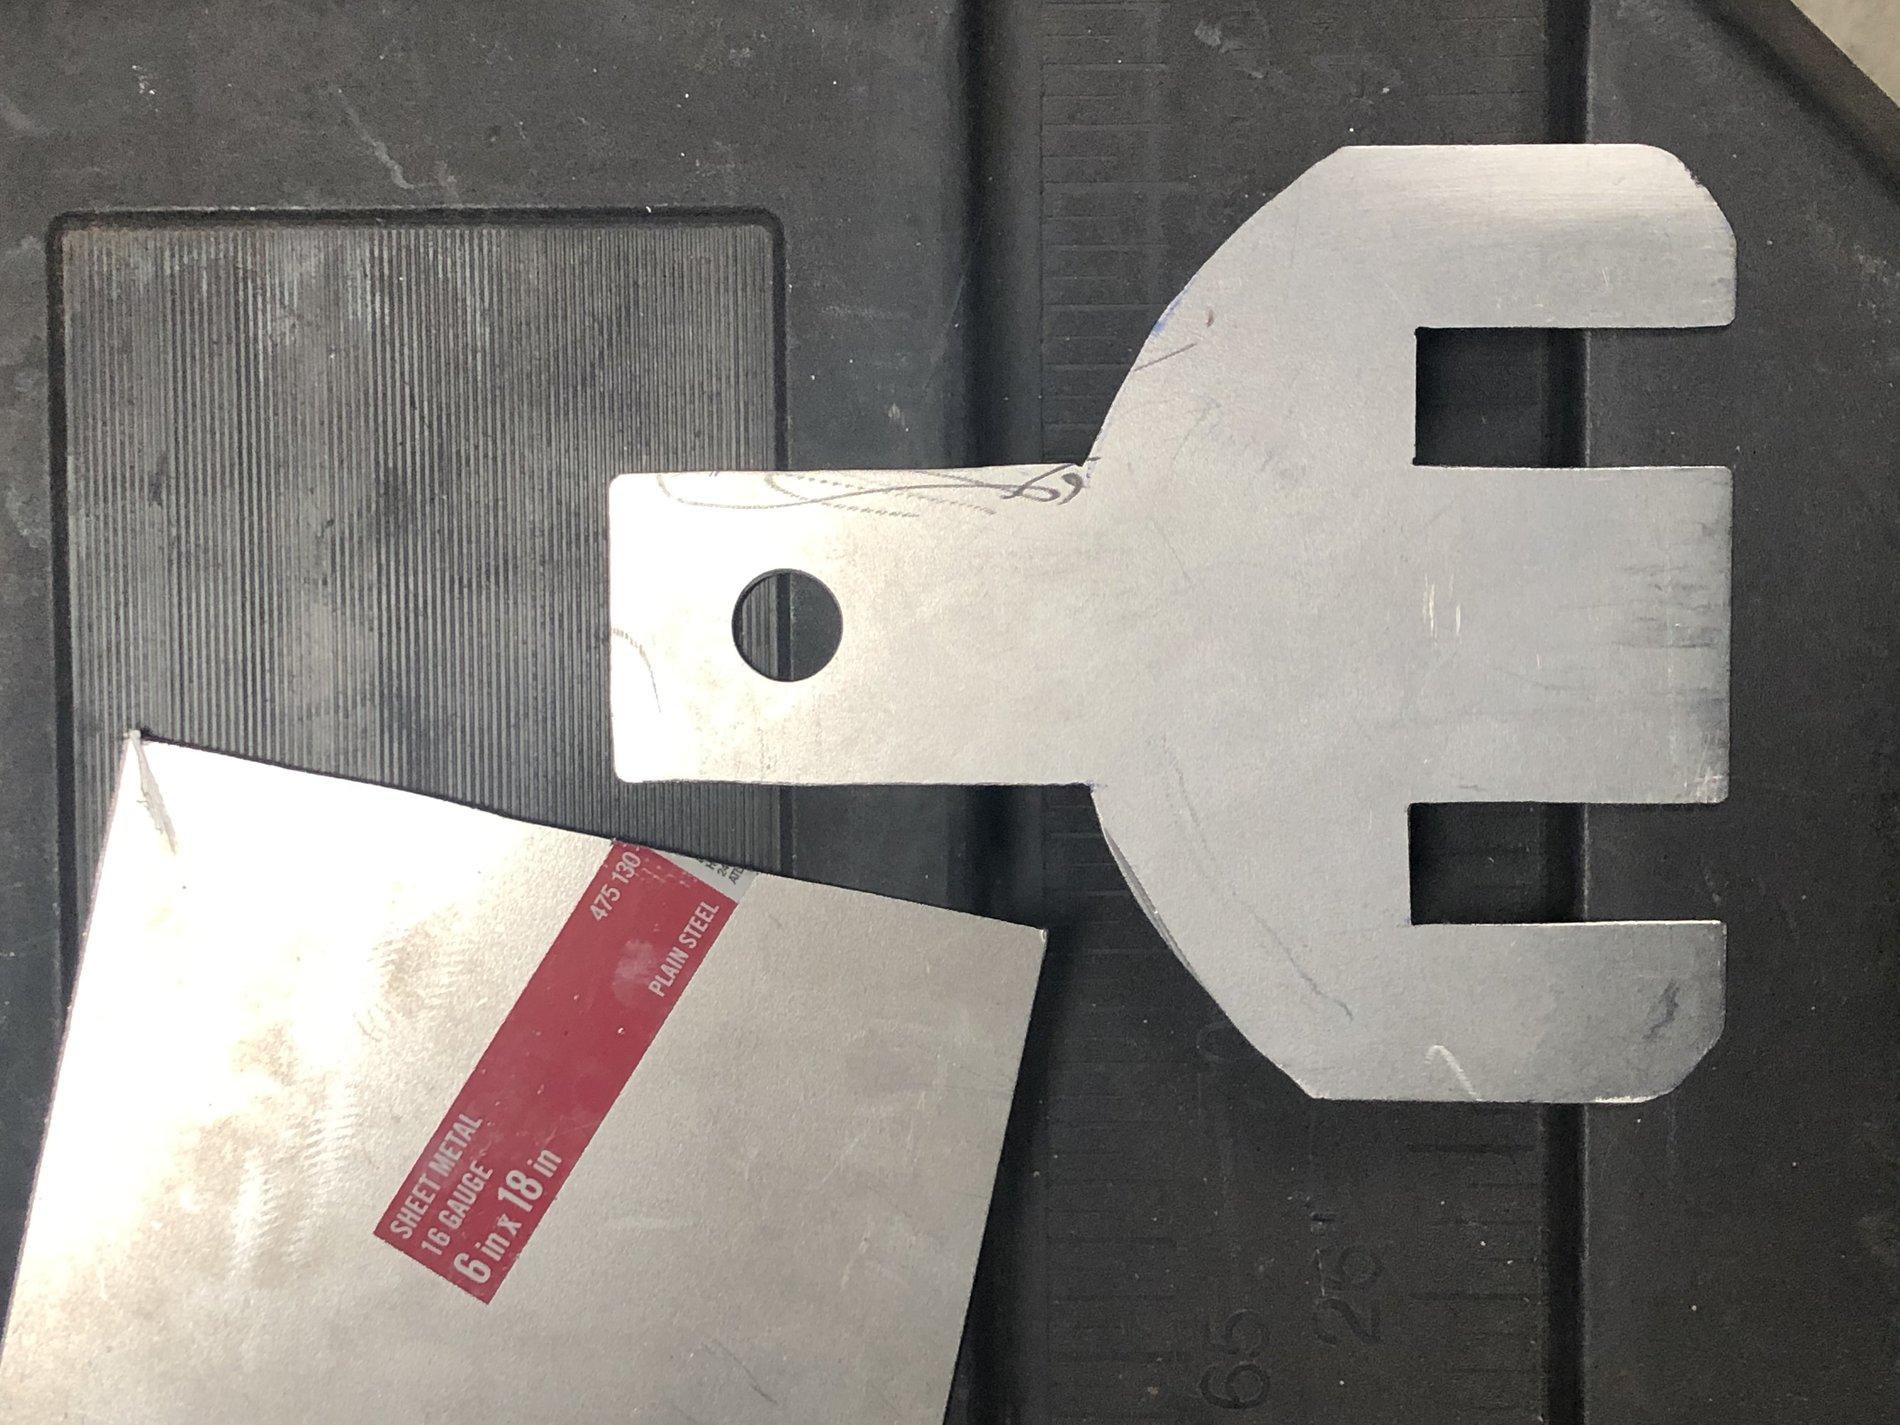
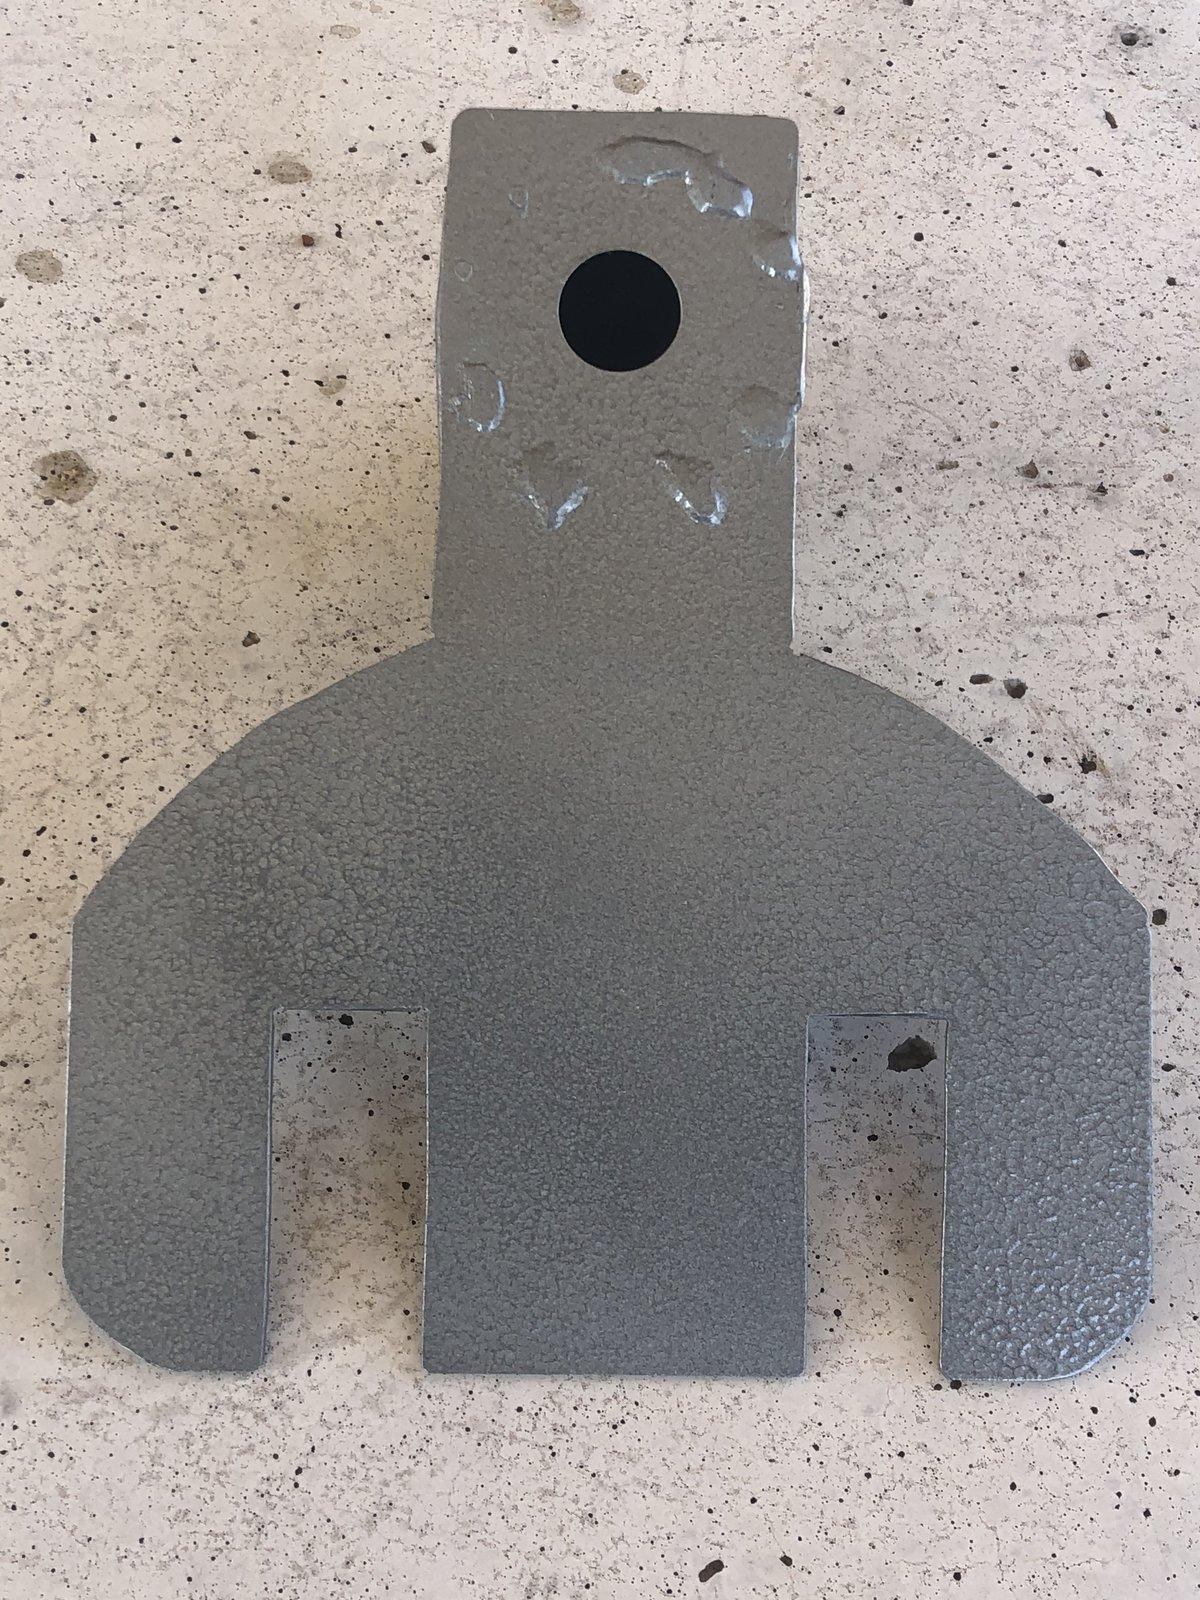
As pictured I used 16 gauge sheet-metal to cut the mount, I cut slots instead of holes, that way the slots can be used to adjust the mount up or down according to how big your rims are. Might have to use your imagination and change the design a bit to fit your particular rims size and shape configurations.
I drilled a 11/16 inch hole into the top of the completed mount using a step bit. According to your need and configuration, you might be able just to put the camera right into this hole without using the nosecone or any other protection for the camera. I believe the camera to be waterproof already,somebody correct me if I’m wrong please and I will change this...If you’re like me and you want " the nosecone, this whole will allow you to pass the harness/connector threw it into the attached nosecone.
Preparing the spare tire mount :
First you have to remove the Spare tire.
Then remove the entire spare tire mount, there are various directions online how to do this.
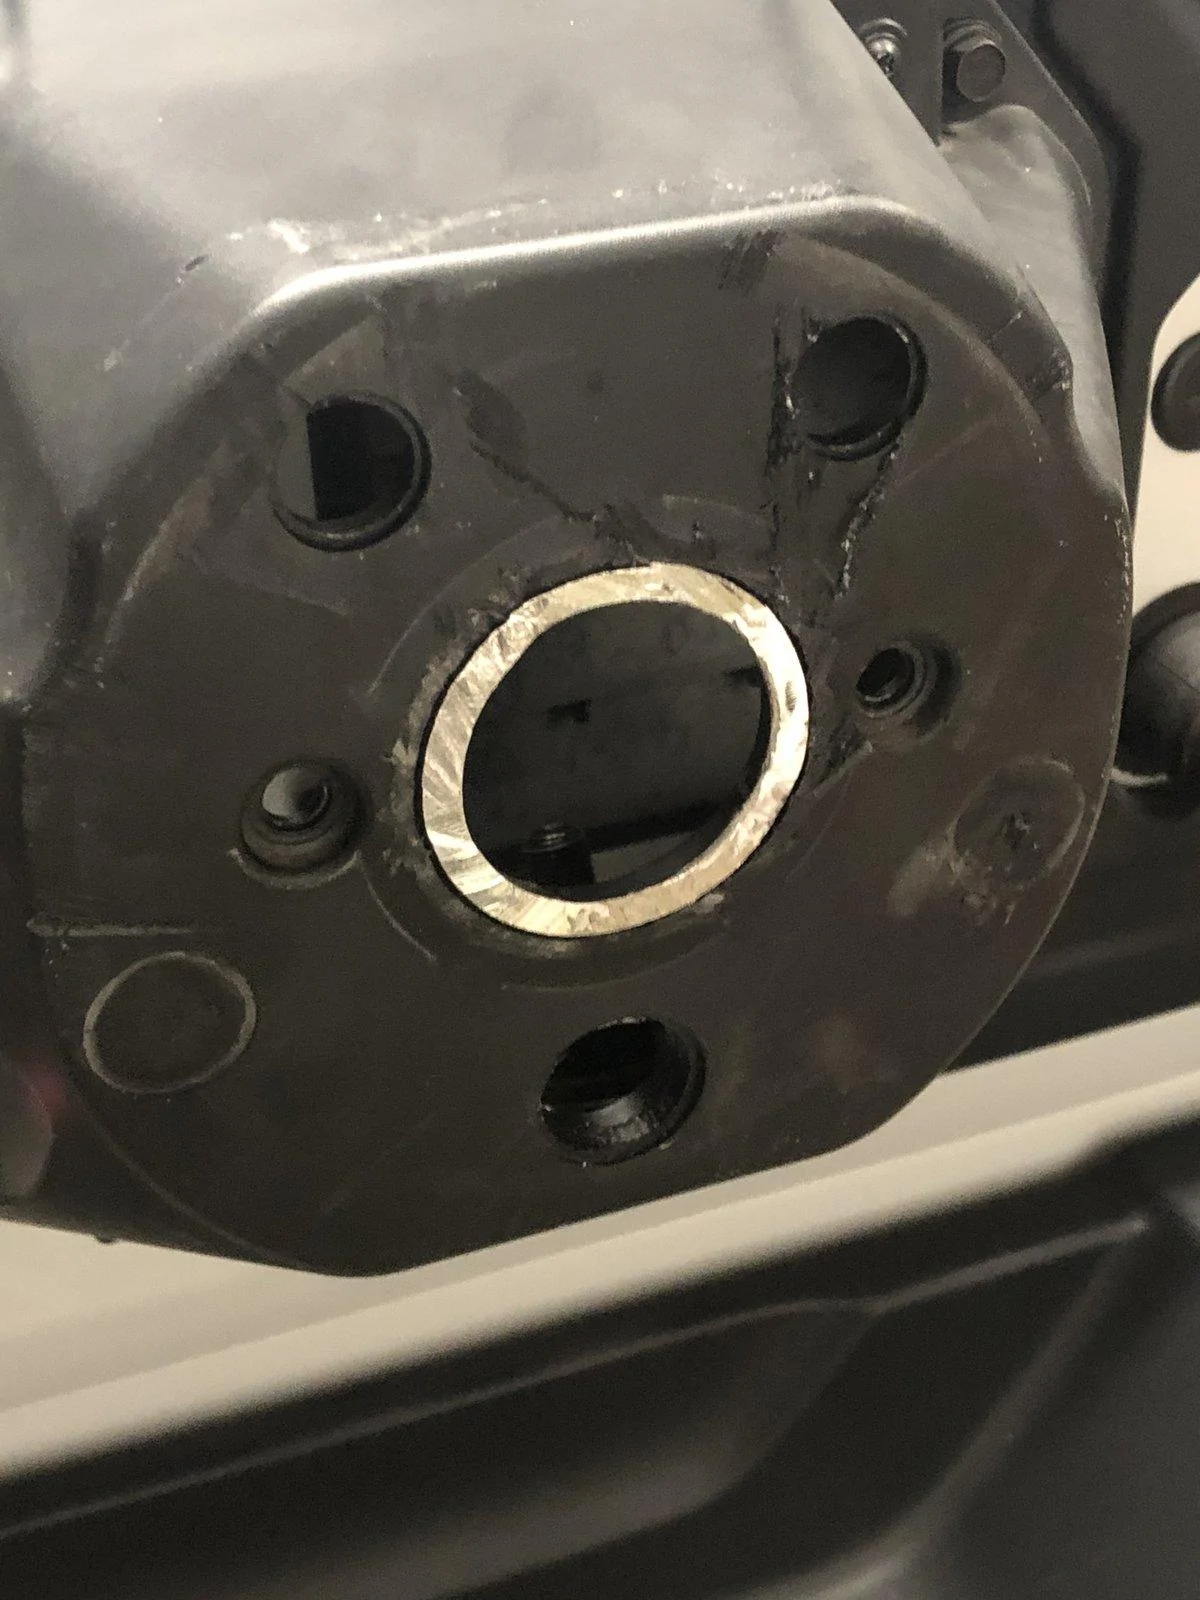
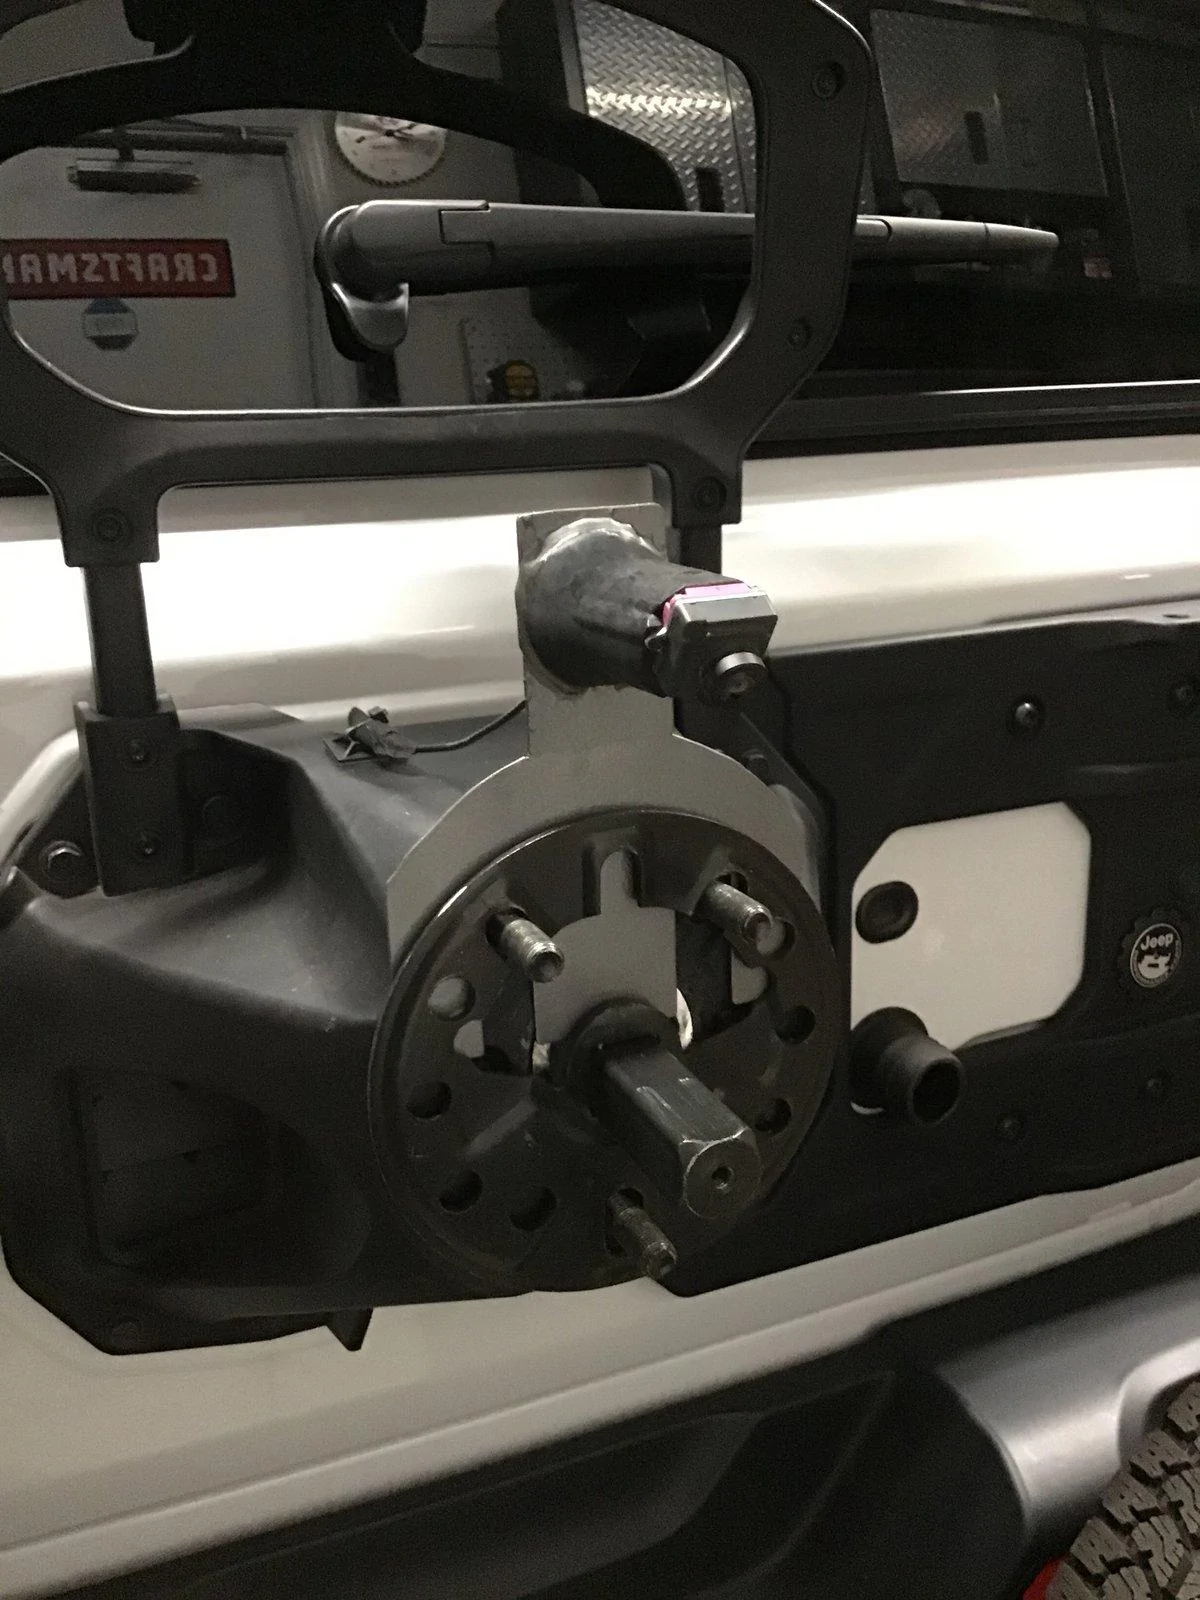
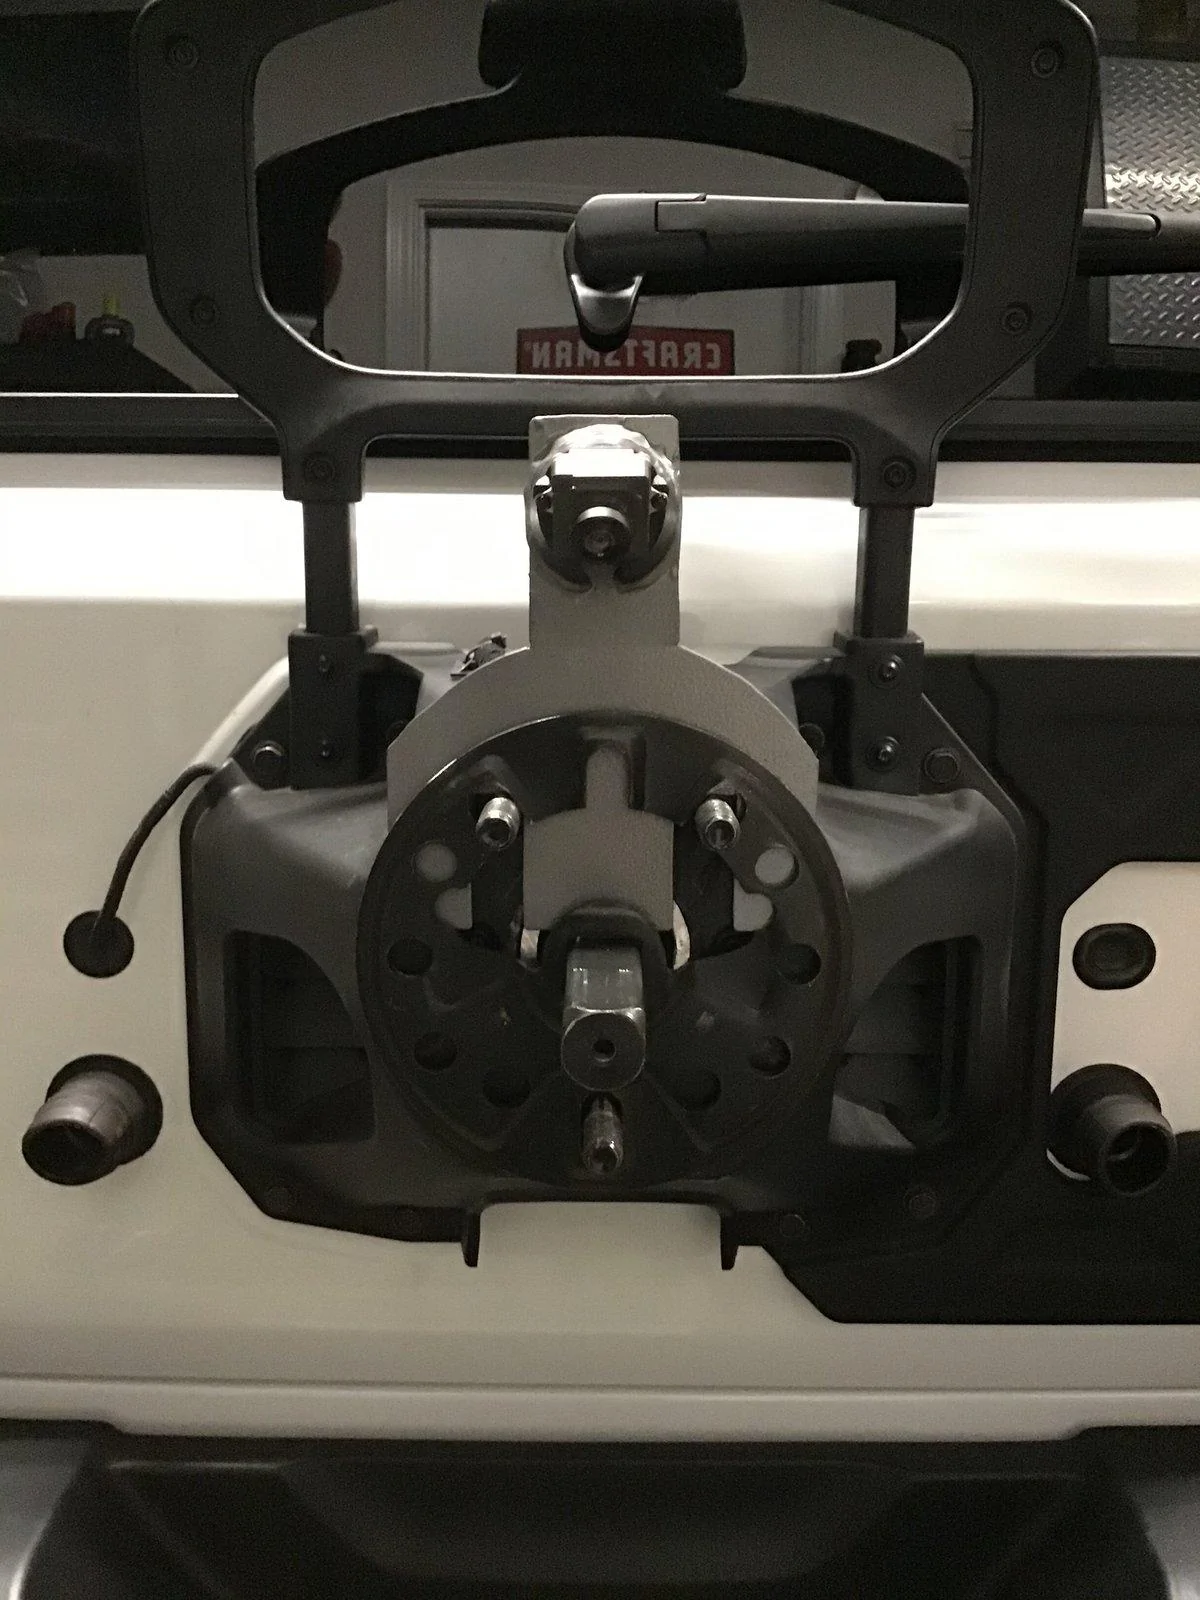
After you get the spare tire mount off unlock the Outer camera shroud with a torn driver and remove it.
As you’re looking at your spare tire mount you will see two screws at the 3 o’clock and 9 o’clock positions, they need to be removed and then the lug and the inner nose cone assembly and camera can all be removed, the cam unplugged.
Then remove the 3 tiny Torx screws that hold the camera to the mount, pull the camera off/away from the mount and stow the wire.
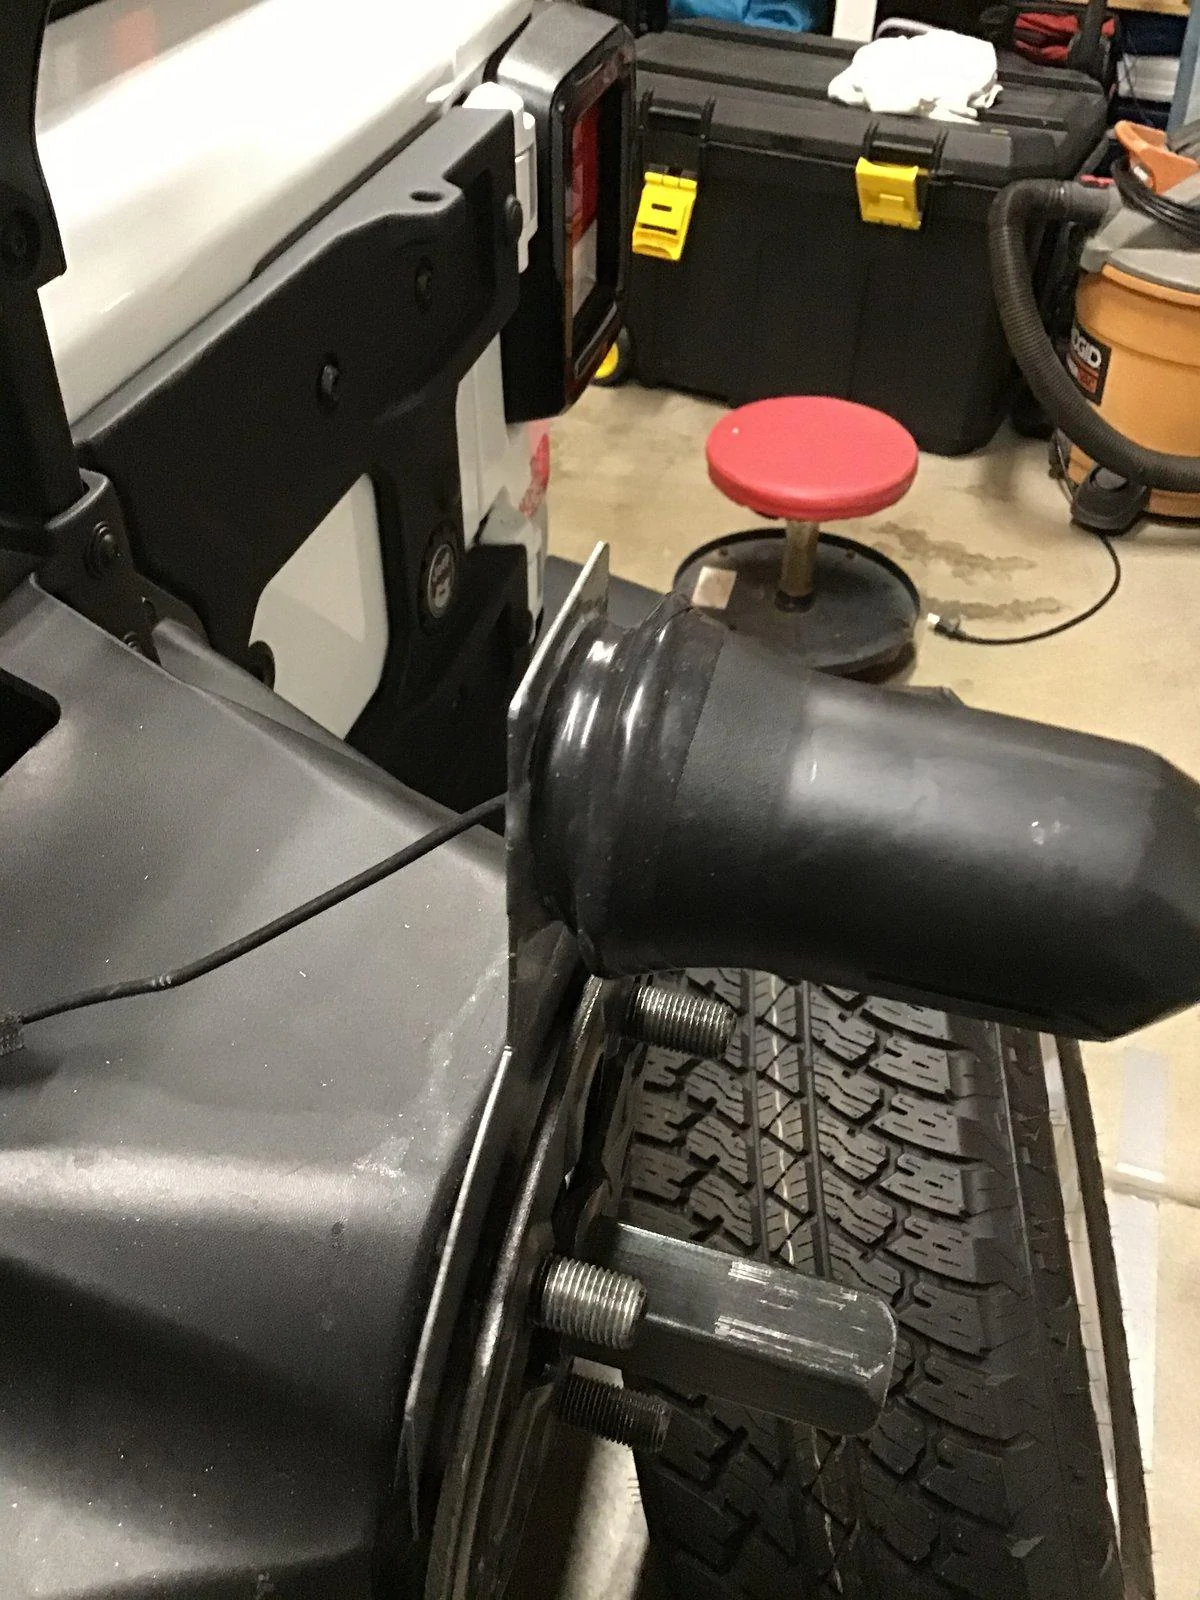
The nosecone needs to be cut off of that mount but the mount needs to be replaced, it holds the lugs on to the spare tire mount, The base of the nosecone can be smooth out using whatever sander or bench sander you have available. I must be smooth and as level as possible.
Now the outer mount, The one that is built into the tire mount, it needs to be removed with whatever hacksaw, preferably a sawsall, The spare tire mount looks like it’s plastic however, there is aluminum inside, it’s easy to cut but you still should have a hacksaw of some type… Again, the base of the outermount can be smoothed out using whatever sander or bench sander you have available. It doesn’t have to be as smooth as the nosecone however, if you want to make it neat, you’ll need to smooth the inner metal.
I used a sawsall with a hacksaw blade, But whatever does the job for you… neither cone will cut off clean enough so what I did was I took a bench sander and sanded it completely smooth and flat so that it could be glued onto the mount. either way, you must get that cut off area completely smooth and level as possible..
The inner nose cone needs to be attached to the new mount you fabricated: JB Weld, Plastic Bonder is made especially for this purpose. I got mine from Lowe’s and I’m sure Home Depot sells it as well.
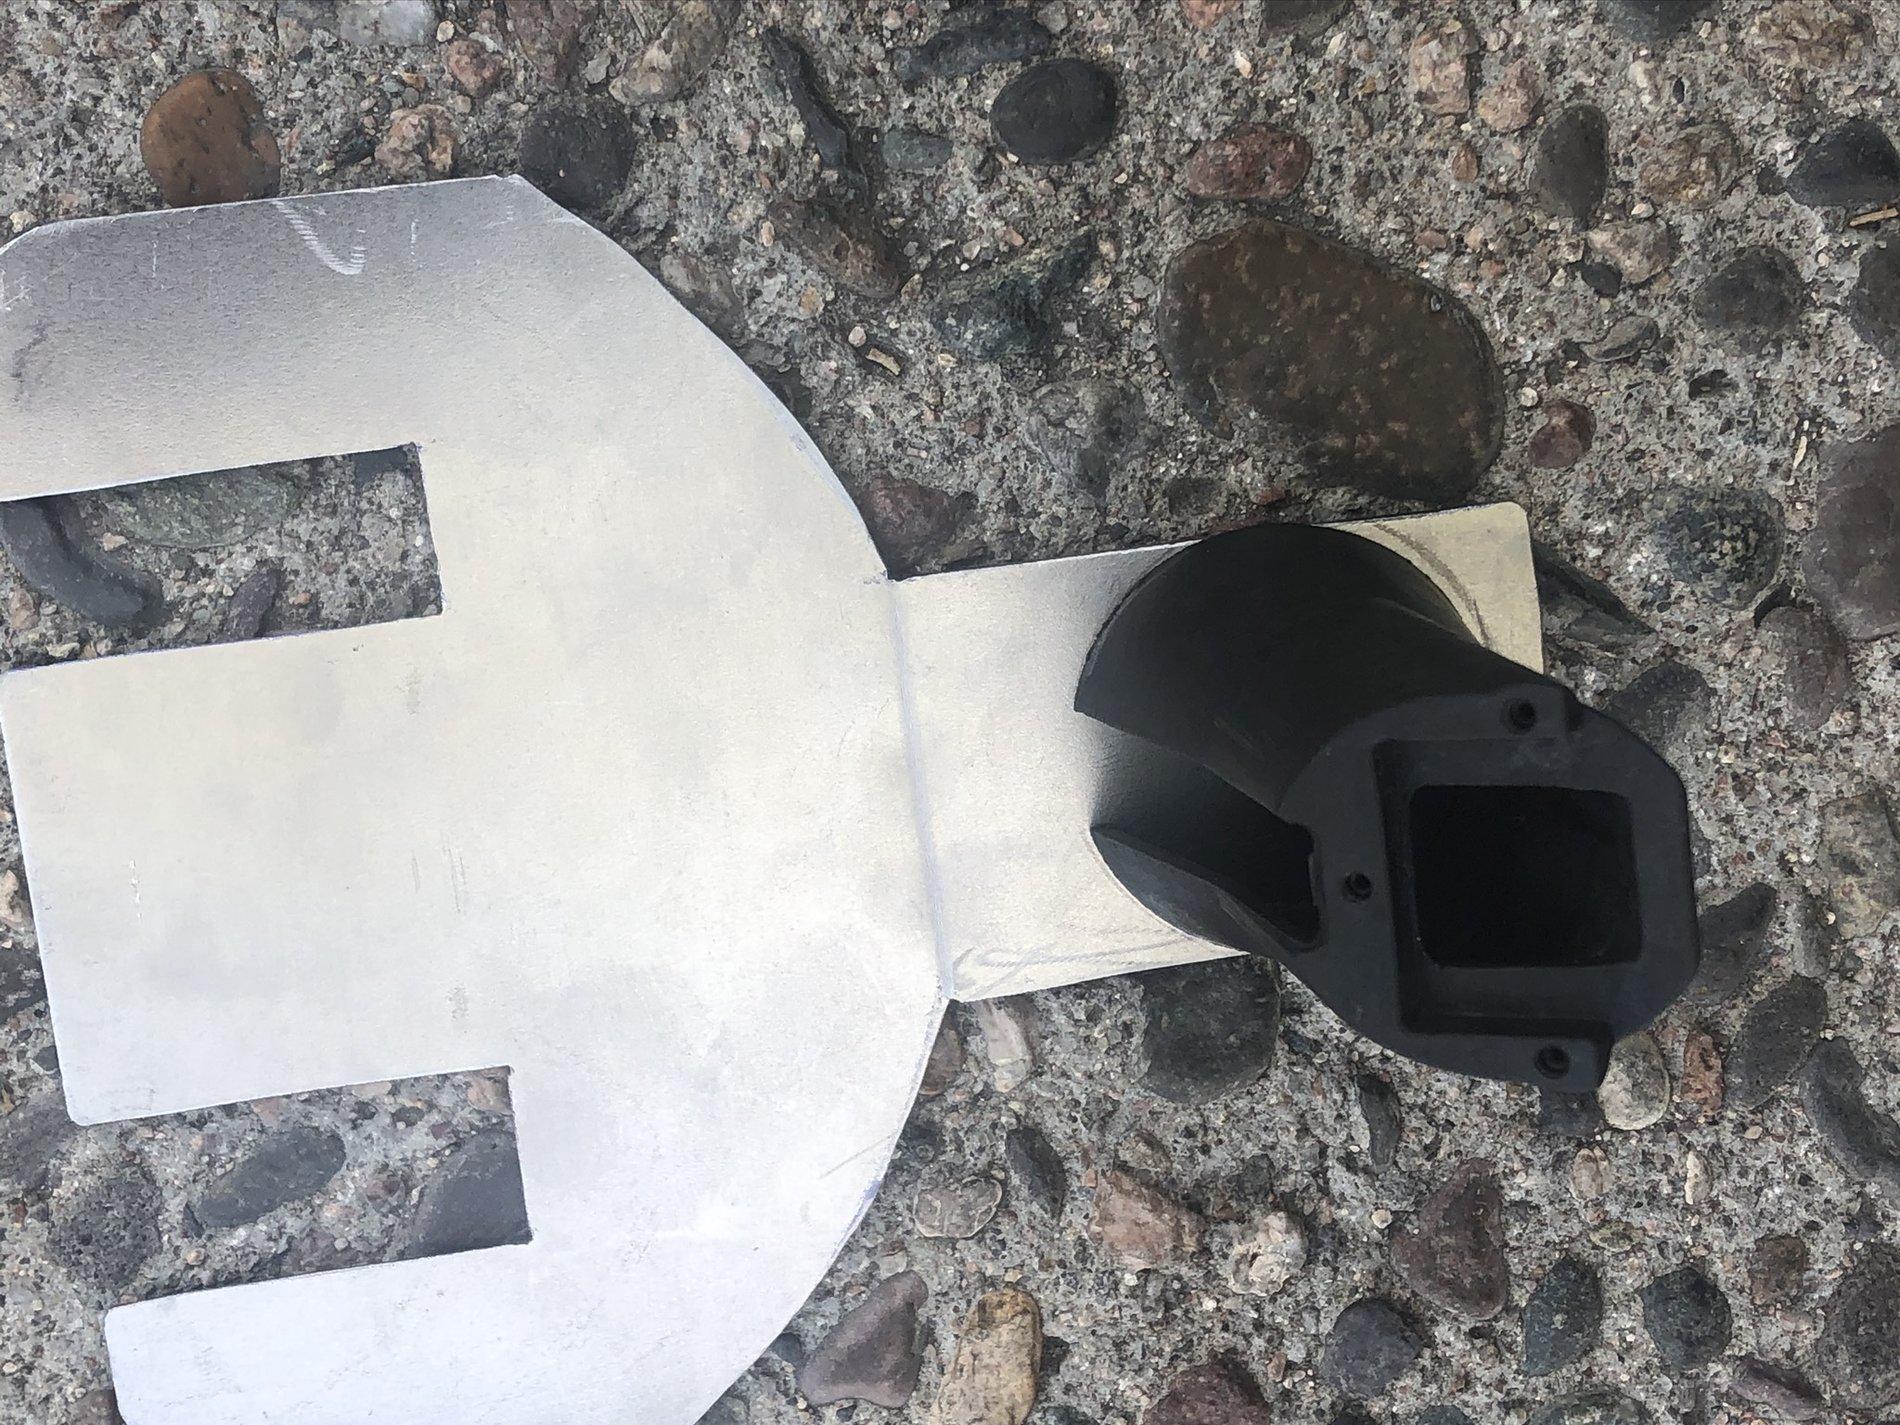
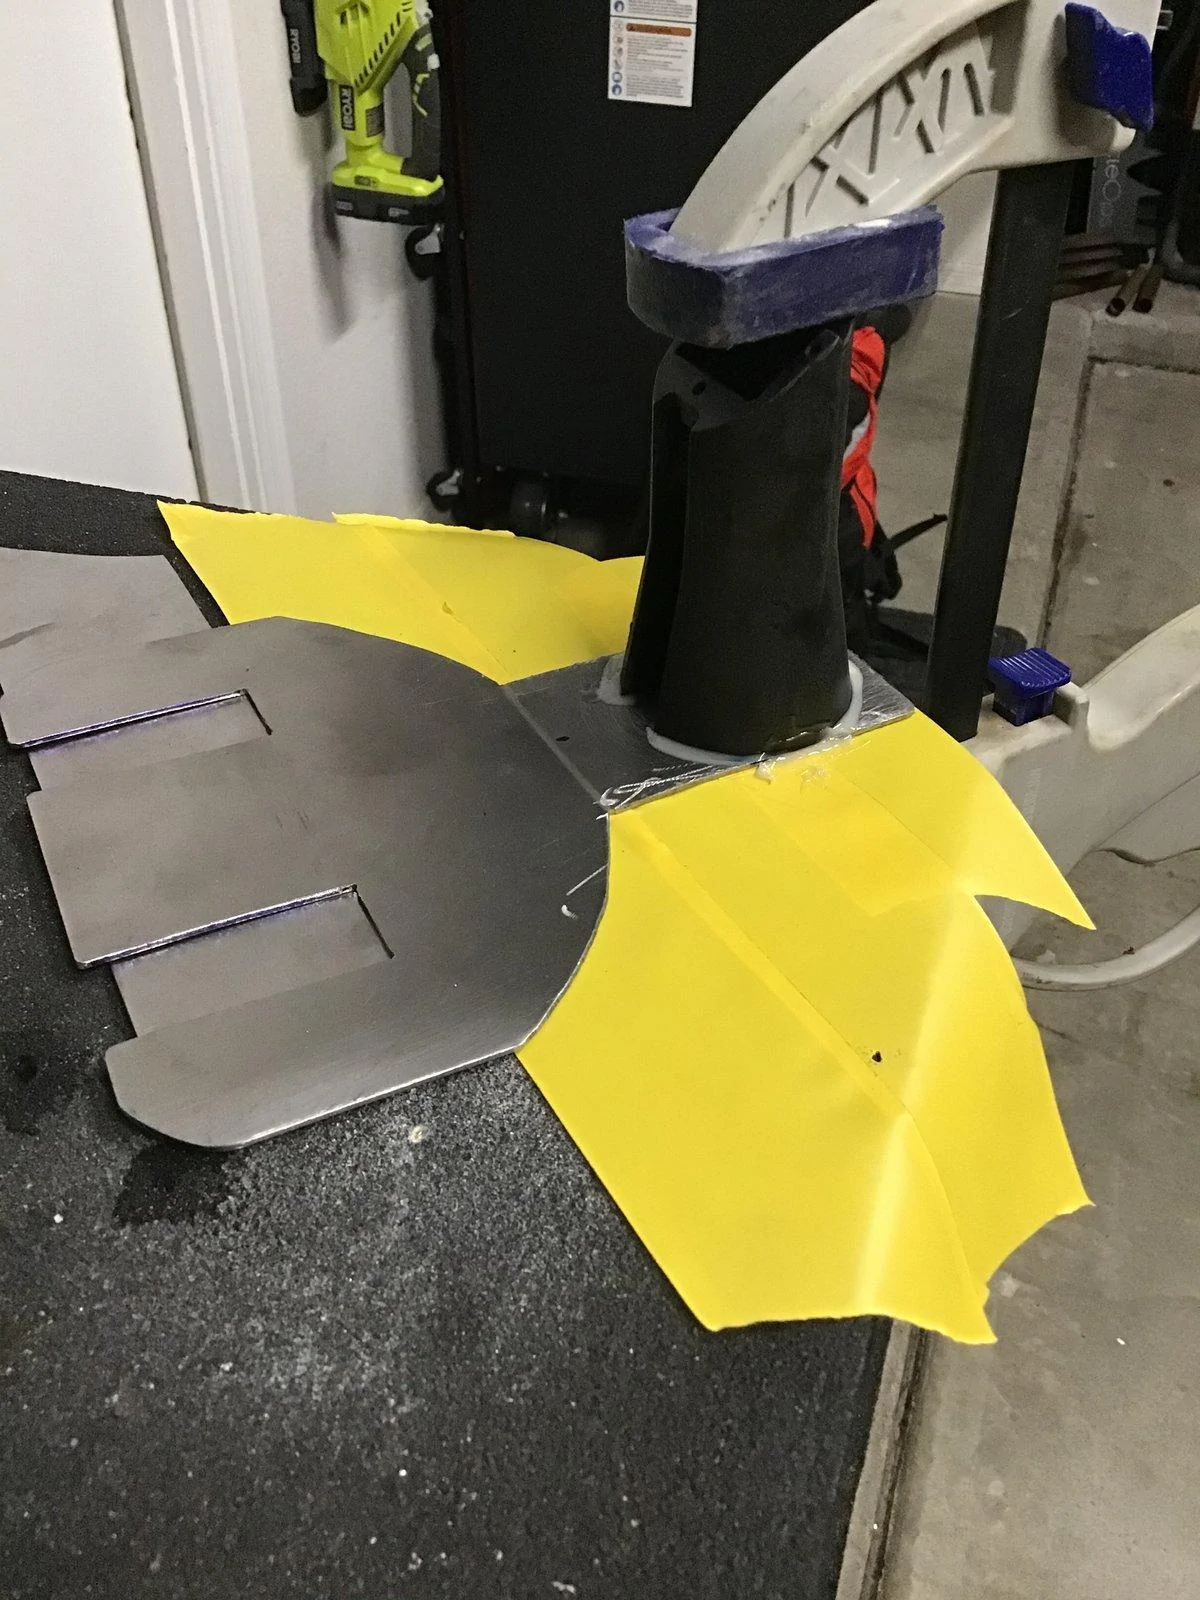
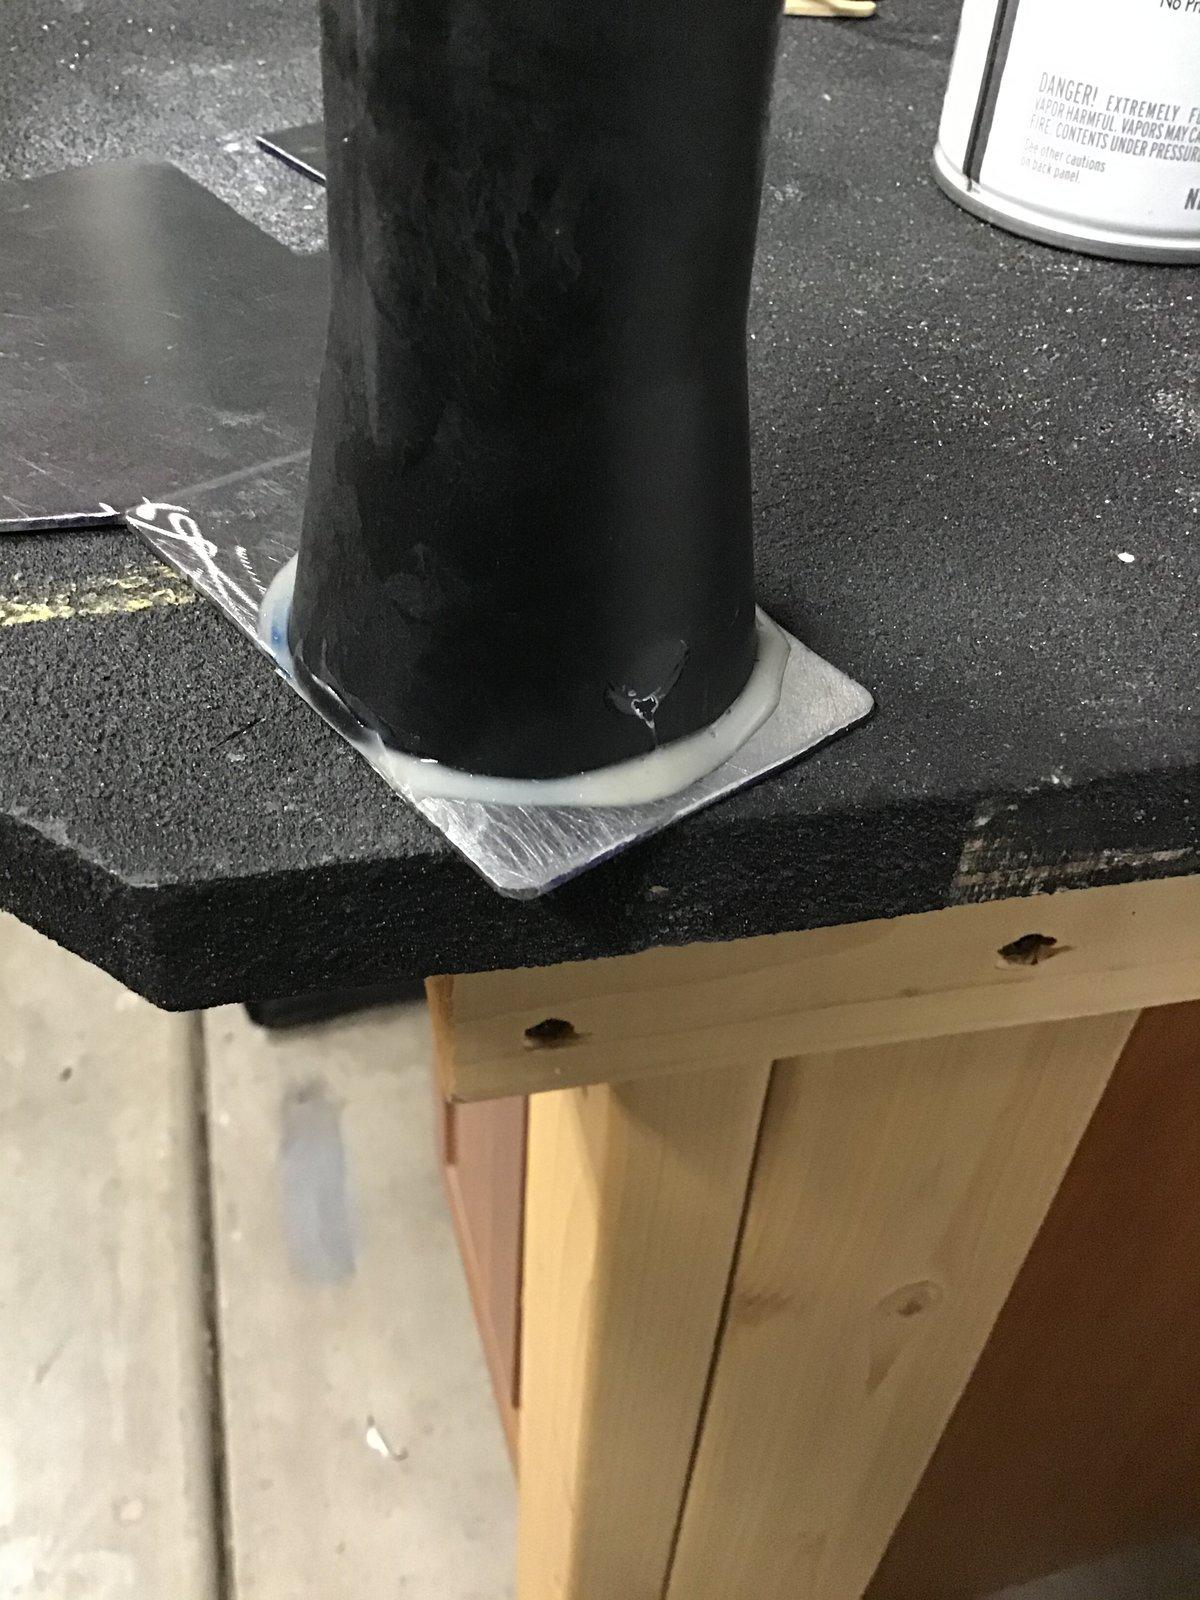
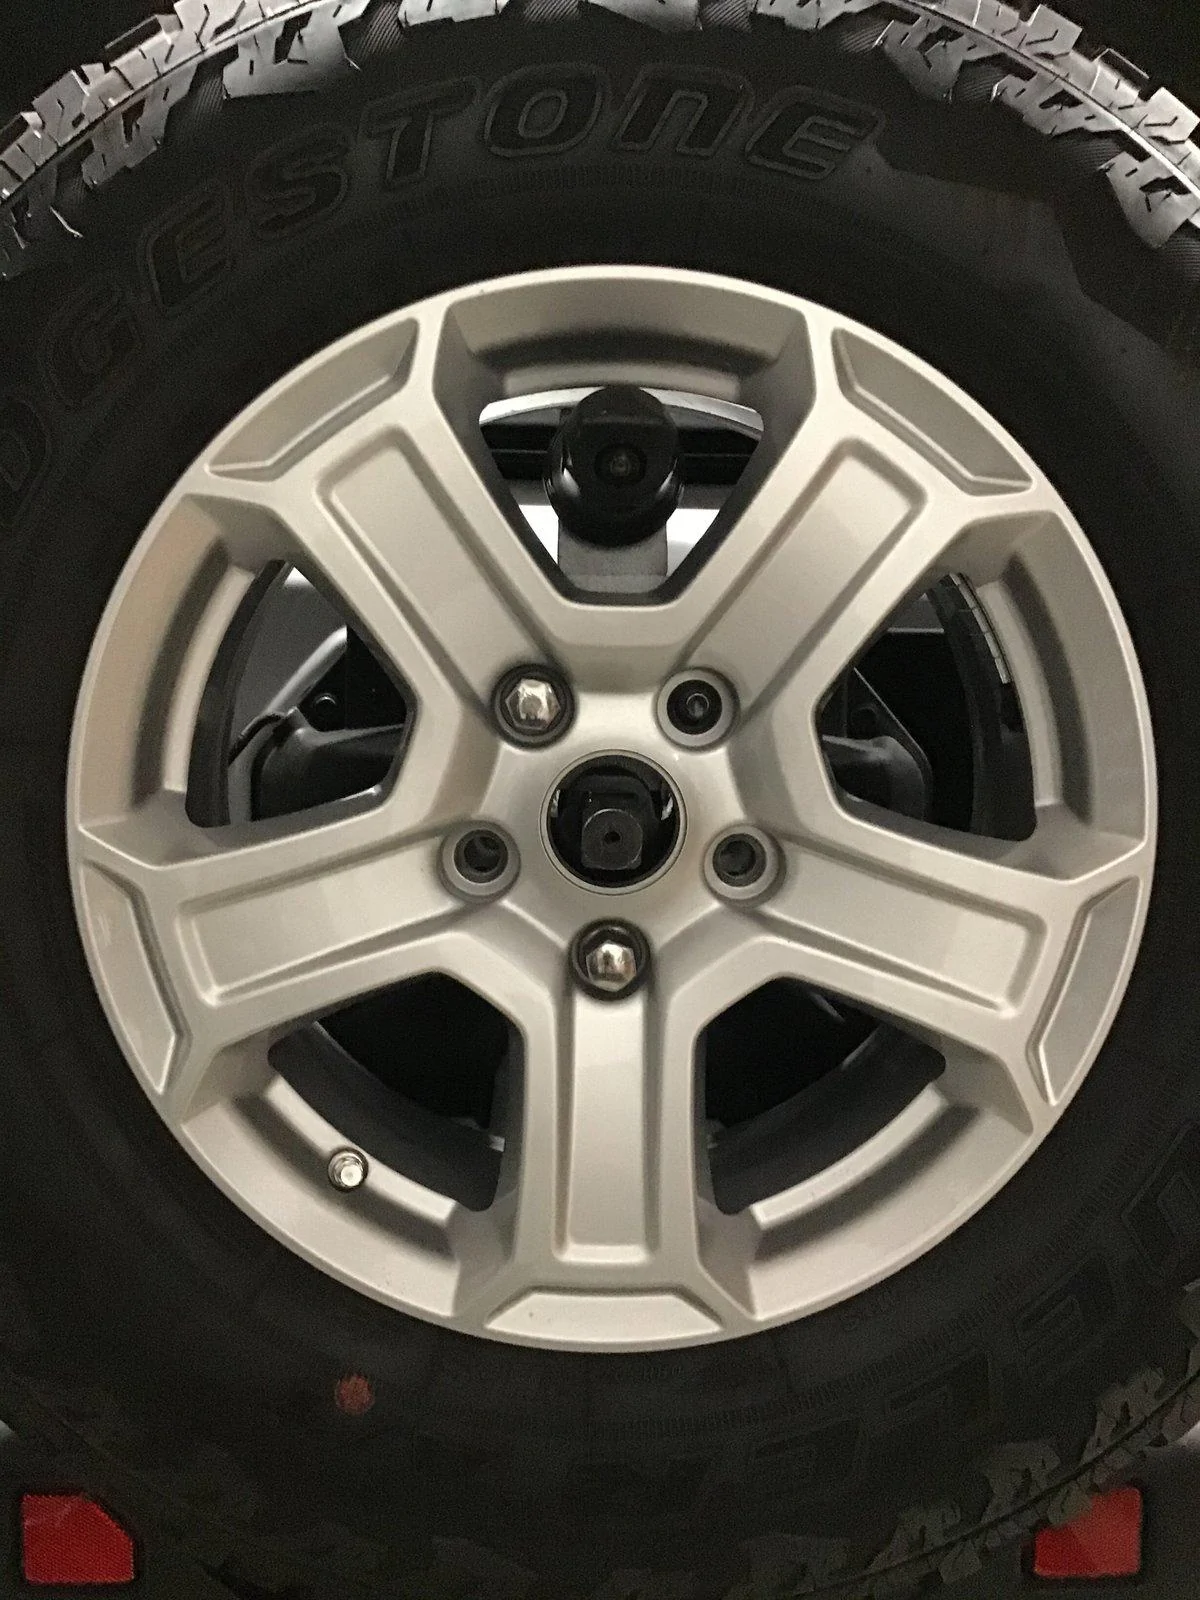
To prepare the two items to be bonded together what I did was place the nosecone flat over the 11/16 hole in a position so that amount will be completely squared to the downward position as in the picture.
Mark the outside of the nose comb placement with a marker. Then I took a very small drillbit and drilled holes around the exact area that the nosecone would sit on top of, to allow the epoxy to go all the way through the metal like a rivet. I did the same thing on the bottom edge of the nosecone, very carefully drilling holes with my drill press on that bottom plastic nose cone surface So that the epoxy would go downso that the epoxy would go up into the holes and give a little extra grip. Apply epoxy To the metal around the drilled holes and marked area and clamp for at least 30 minutes.
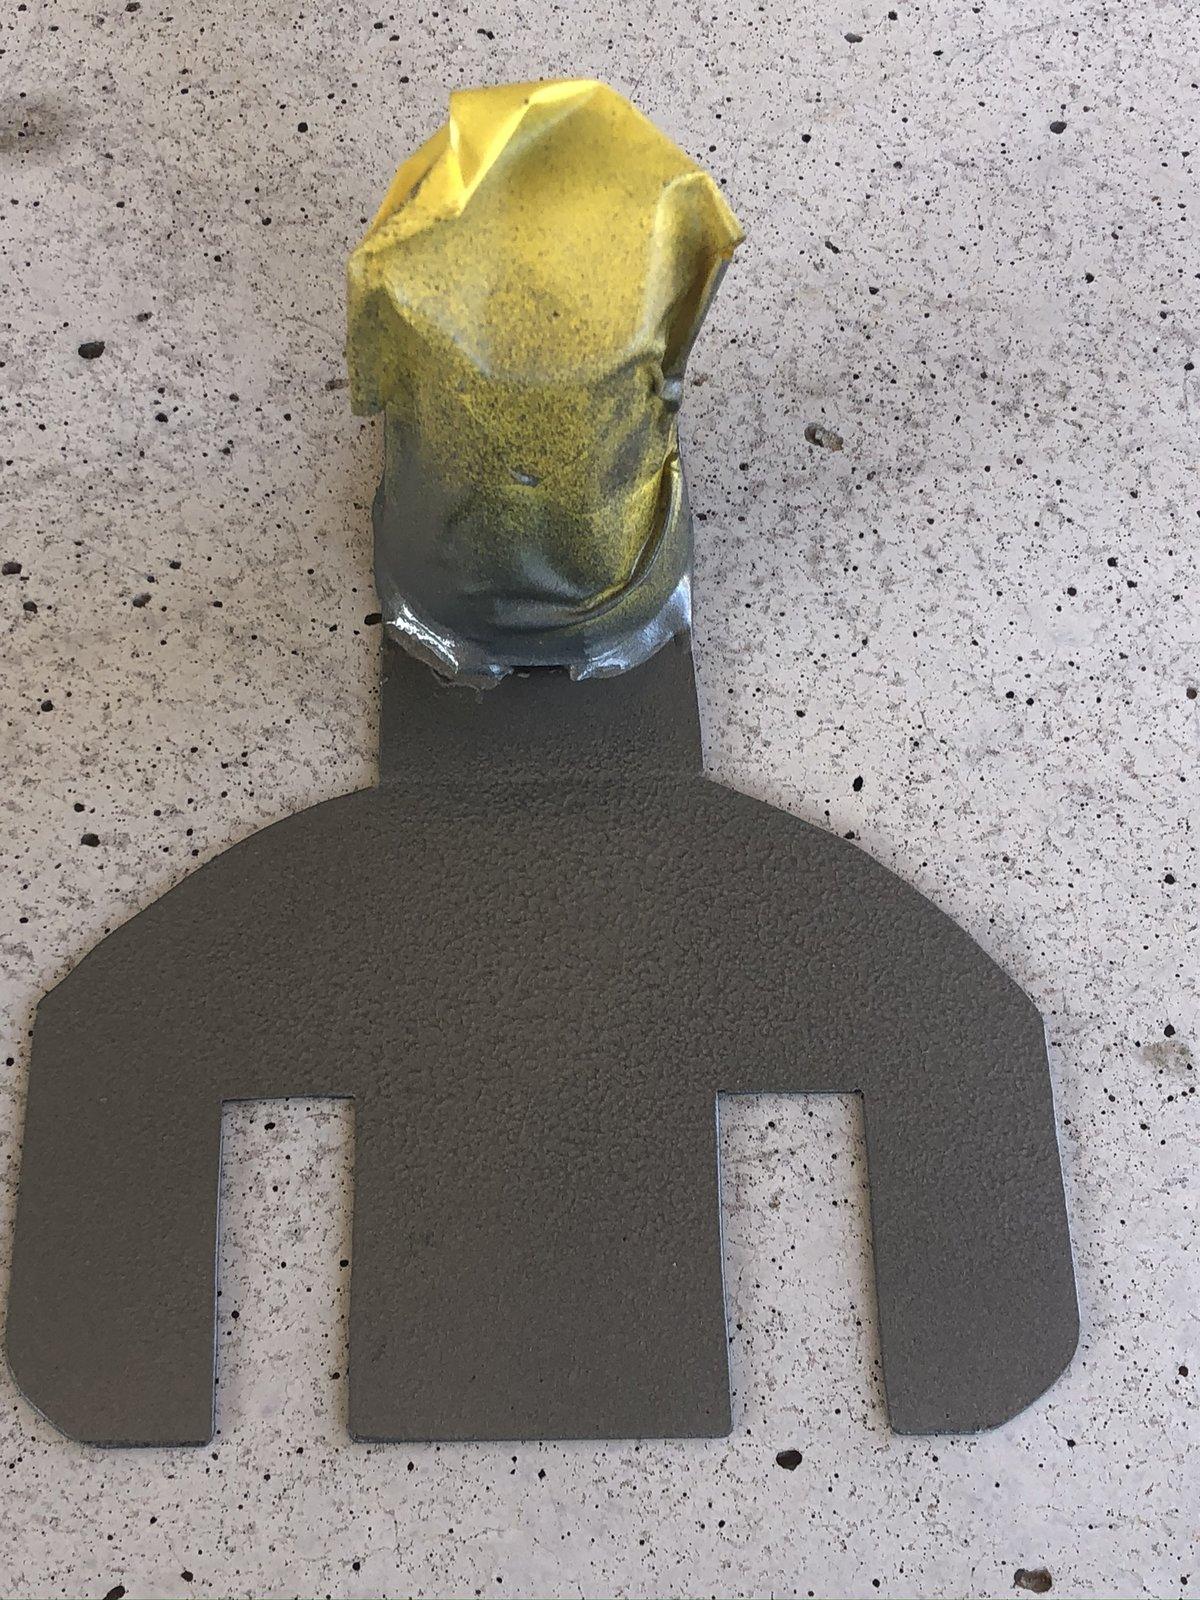
I waited 24 hours before I painted it but I painted it with Rust oleum hammered finish, I use this because it’s proven to be a really tough and durable finish that’s easy to apply. Let this dry for 12- 24 hours.
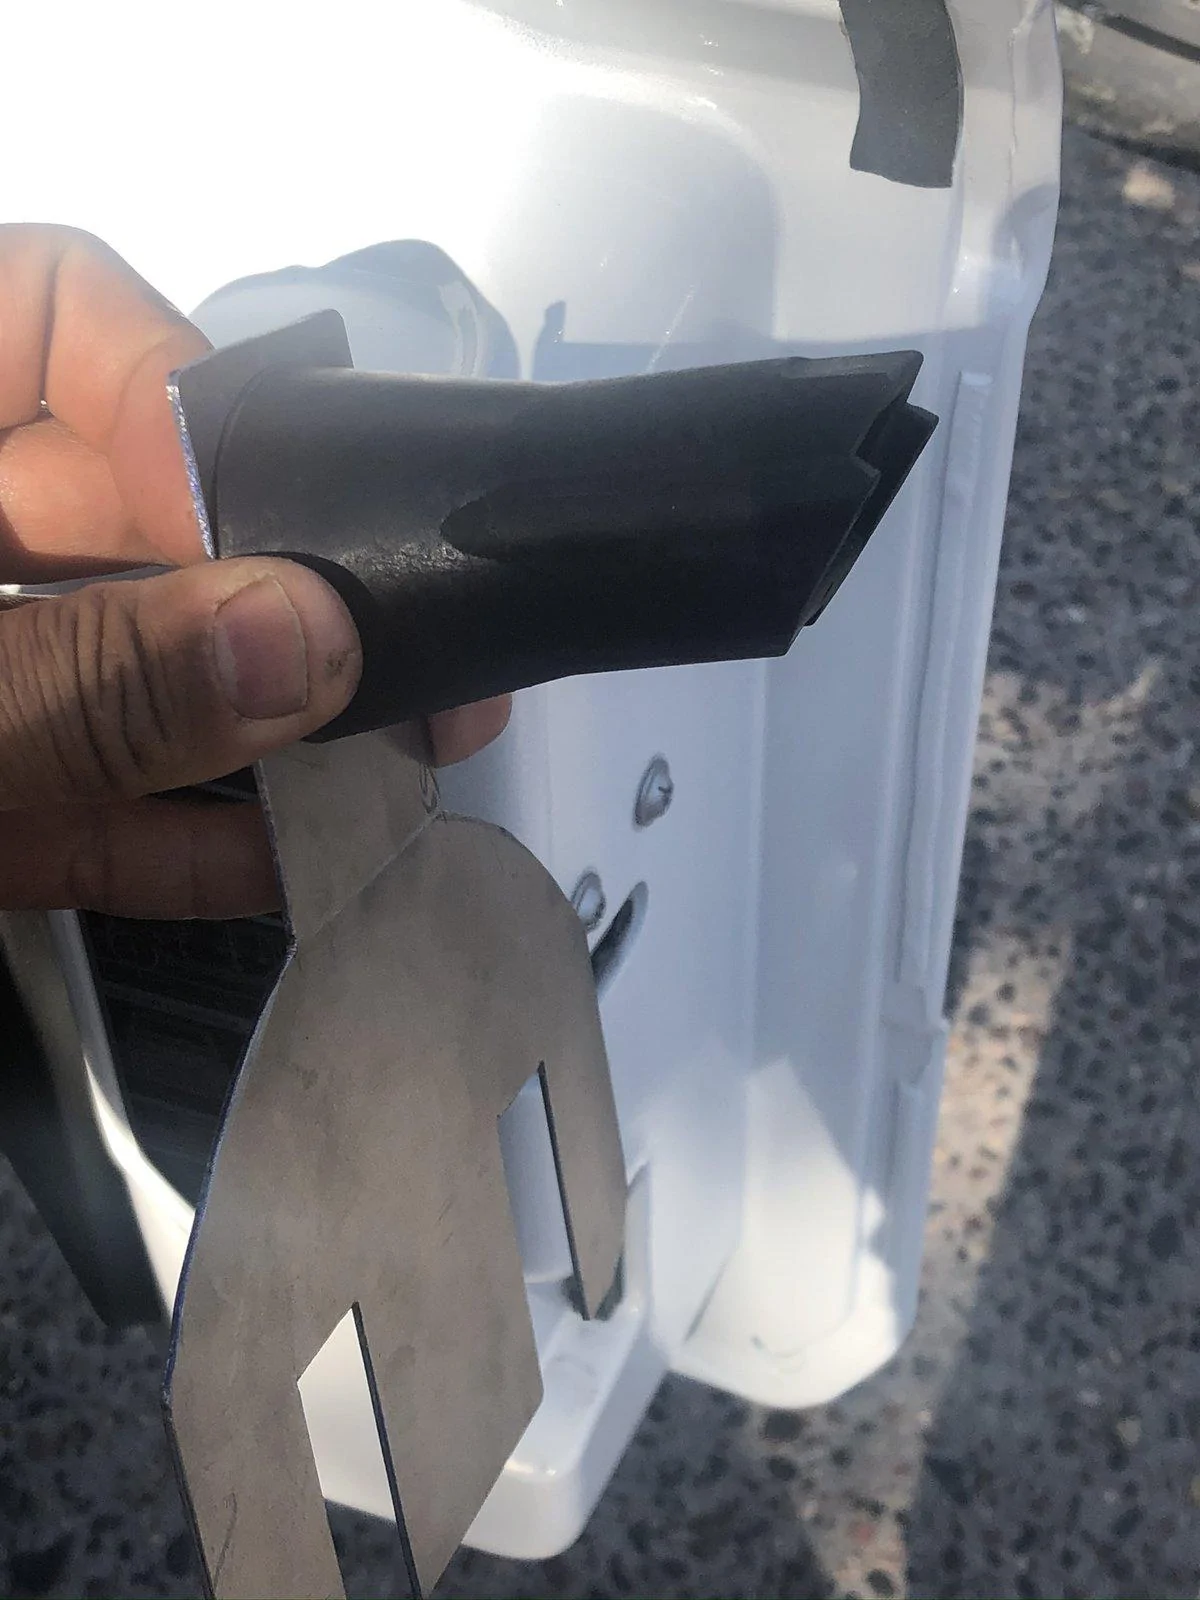
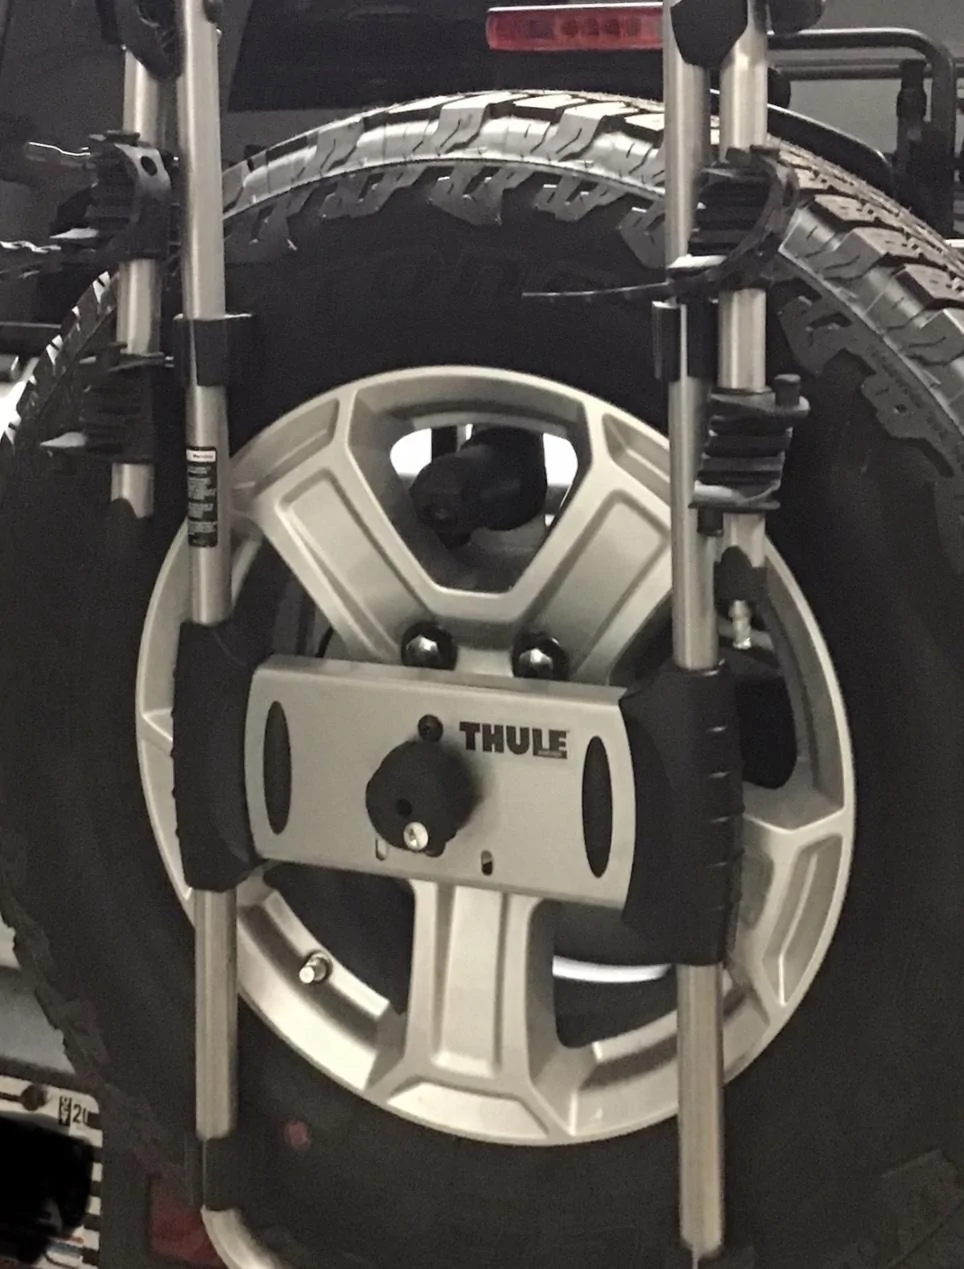
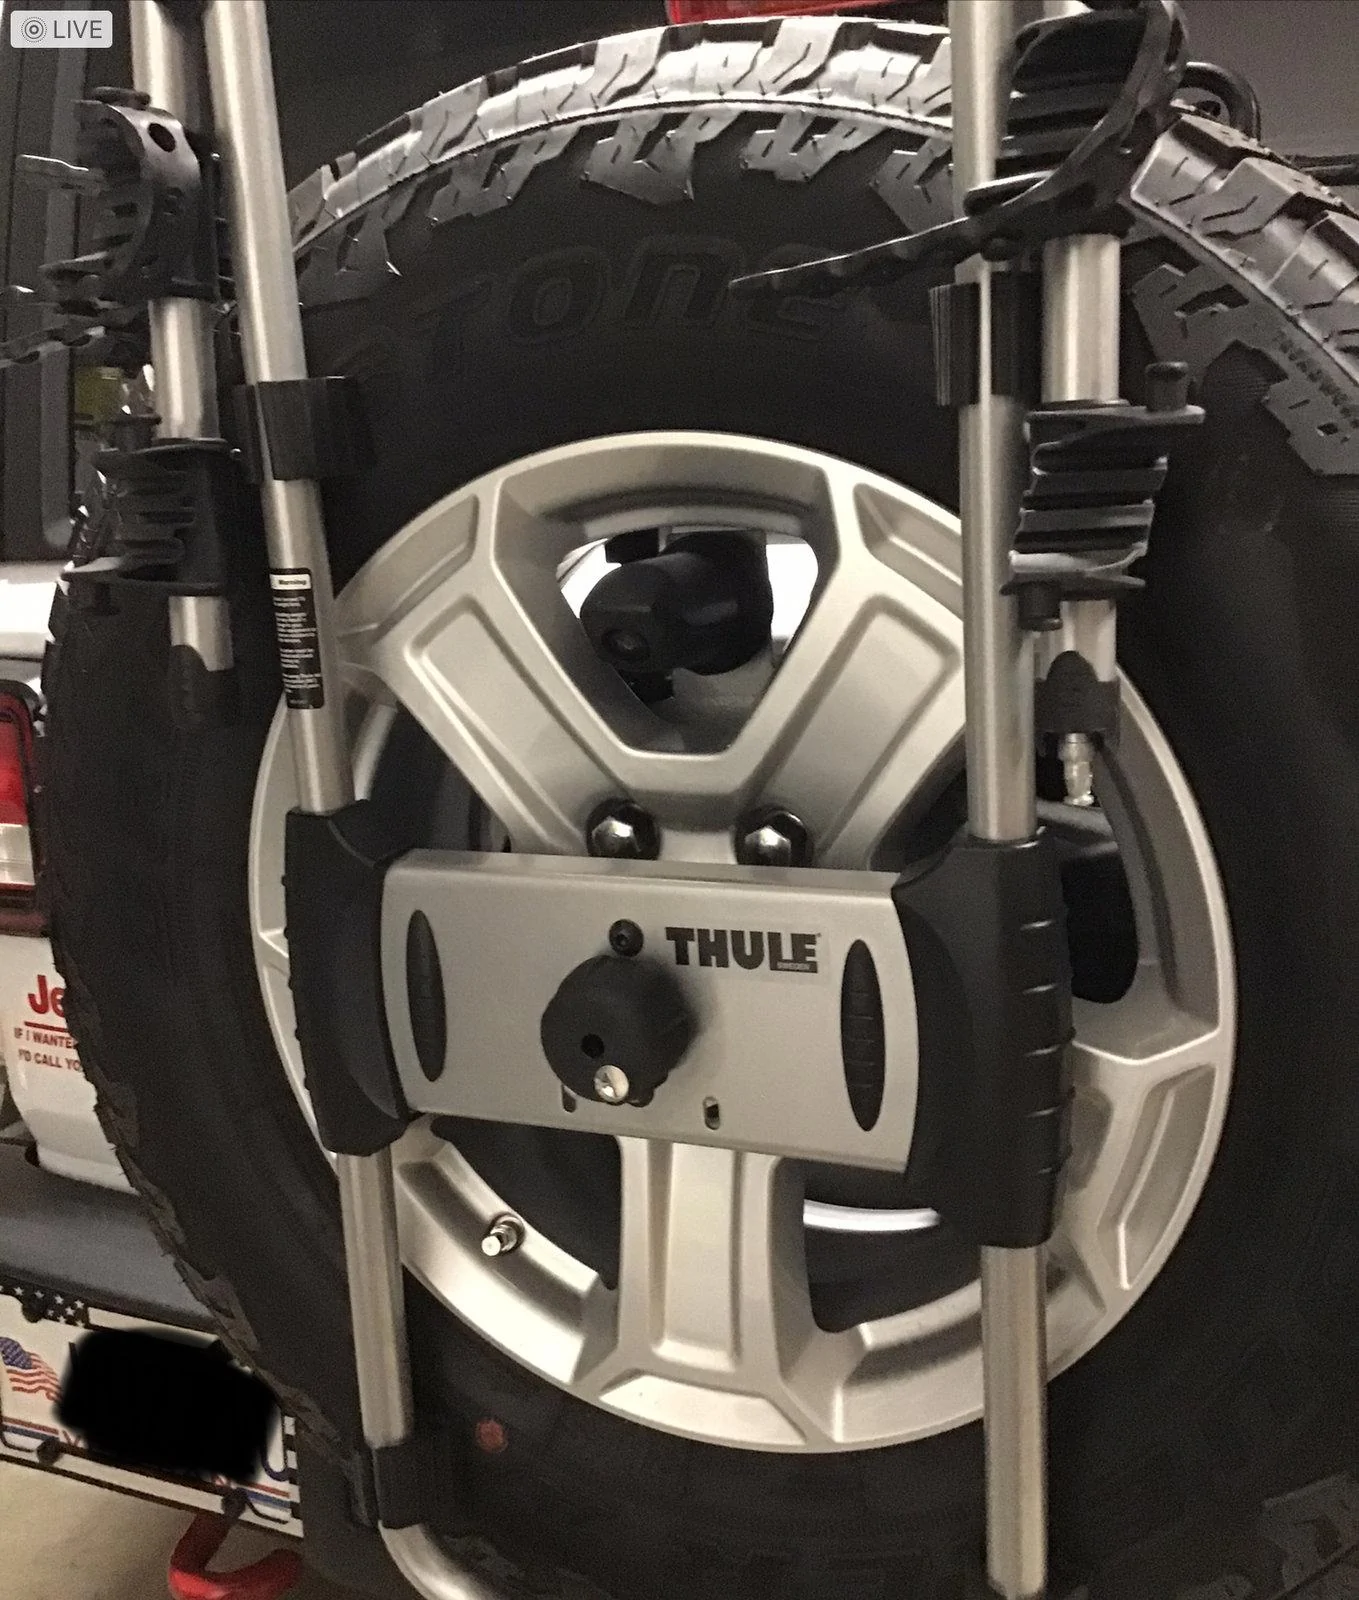
Run the cam cable through the hole in the mount, out of the nosecone, plug it into the camera and use the three small torx screws to attach the camera to the nosecone. Then slide the outer nose cone on, the one with the metal core, over the camera. Since there’s nothing to secure the two nose cones together, I used rescue tape as you can see in the picture. But you could probably use one or two small screws through both of the plastic nose cones to hold them… You might need to drill. Rescue tape is awesome if you don’t have some get some.
View attachment 284226
View attachment 284227
View attachment 284228


View attachment 284244
View attachment 284249
View attachment 284250


I’m posting this because I looked all over the Internet and couldn’t find a solution, they were all for aftermarket bumper/spare tire mount applications, and cost way too much!
This is adjustable and will work with stock rims or rims that have larger openings between the spokes.It may not work for everyone but if you’re up for it, you’ll be able to make it work for you!
Below are very very rough instructions, you probably can’t depend on them to get you through but pictures give you a better general idea I think…
Cost was under $30
Fabricate the new camera mount from sheet metal:
As pictured I used 16 gauge sheet-metal to cut the mount, I cut slots instead of holes, that way the slots can be used to adjust the mount up or down according to how big your rims are. Might have to use your imagination and change the design a bit to fit your particular rims size and shape configurations.
I drilled a 11/16 inch hole into the top of the completed mount using a step bit. According to your need and configuration, you might be able just to put the camera right into this hole without using the nosecone or any other protection for the camera. I believe the camera to be waterproof already,somebody correct me if I’m wrong please and I will change this...If you’re like me and you want " the nosecone, this whole will allow you to pass the harness/connector threw it into the attached nosecone.
Preparing the spare tire mount :
First you have to remove the Spare tire.
Then remove the entire spare tire mount, there are various directions online how to do this.
After you get the spare tire mount off unlock the Outer camera shroud with a torn driver and remove it.
As you’re looking at your spare tire mount you will see two screws at the 3 o’clock and 9 o’clock positions, they need to be removed and then the lug and the inner nose cone assembly and camera can all be removed, the cam unplugged.
Then remove the 3 tiny Torx screws that hold the camera to the mount, pull the camera off/away from the mount and stow the wire.
The nosecone needs to be cut off of that mount but the mount needs to be replaced, it holds the lugs on to the spare tire mount, The base of the nosecone can be smooth out using whatever sander or bench sander you have available. I must be smooth and as level as possible.
Now the outer mount, The one that is built into the tire mount, it needs to be removed with whatever hacksaw, preferably a sawsall, The spare tire mount looks like it’s plastic however, there is aluminum inside, it’s easy to cut but you still should have a hacksaw of some type… Again, the base of the outermount can be smoothed out using whatever sander or bench sander you have available. It doesn’t have to be as smooth as the nosecone however, if you want to make it neat, you’ll need to smooth the inner metal.
I used a sawsall with a hacksaw blade, But whatever does the job for you… neither cone will cut off clean enough so what I did was I took a bench sander and sanded it completely smooth and flat so that it could be glued onto the mount. either way, you must get that cut off area completely smooth and level as possible..
The inner nose cone needs to be attached to the new mount you fabricated: JB Weld, Plastic Bonder is made especially for this purpose. I got mine from Lowe’s and I’m sure Home Depot sells it as well.
To prepare the two items to be bonded together what I did was place the nosecone flat over the 11/16 hole in a position so that amount will be completely squared to the downward position as in the picture.
Mark the outside of the nose comb placement with a marker. Then I took a very small drillbit and drilled holes around the exact area that the nosecone would sit on top of, to allow the epoxy to go all the way through the metal like a rivet. I did the same thing on the bottom edge of the nosecone, very carefully drilling holes with my drill press on that bottom plastic nose cone surface So that the epoxy would go downso that the epoxy would go up into the holes and give a little extra grip. Apply epoxy To the metal around the drilled holes and marked area and clamp for at least 30 minutes.
I waited 24 hours before I painted it but I painted it with Rust oleum hammered finish, I use this because it’s proven to be a really tough and durable finish that’s easy to apply. Let this dry for 12- 24 hours.
Run the cam cable through the hole in the mount, out of the nosecone, plug it into the camera and use the three small torx screws to attach the camera to the nosecone. Then slide the outer nose cone on, the one with the metal core, over the camera. Since there’s nothing to secure the two nose cones together, I used rescue tape as you can see in the picture. But you could probably use one or two small screws through both of the plastic nose cones to hold them… You might need to drill. Rescue tape is awesome if you don’t have some get some.
View attachment 284226
View attachment 284227
View attachment 284228

View attachment 284244
View attachment 284249
View attachment 284250
Sponsored
Attachments
-
0 bytes Views: 0
-
0 bytes Views: 0
-
0 bytes Views: 0
-
0 bytes Views: 0
-
0 bytes Views: 0
-
0 bytes Views: 0
Last edited: