- Joined
- Jul 4, 2018
- Threads
- 52
- Messages
- 644
- Reaction score
- 682
- Location
- San Marcos, Ca
- Vehicle(s)
- Non-Applicable
- Thread starter
- #1


Our uService® technology is based around the compression of O-Ring seals instead of a silicone seal, thus giving a completely waterproof and dustproof seal that makes Baja Designs’ lights IP69K rated. Using this specially designed O-ring allows our lights to be totally serviceable, thanks to the uService® technology. This feature allows you to customize our lights with several of our lens kits to match your lighting needs. If for any reason you damage your lens or want to change the pattern of light, our uService technology allows users to easily refresh your product in minutes. Simply unscrew the Baja Designs’ water and dust proof lens and O-Ring seal to install the replacement lens, getting you back on the trail quickly.
In this segment, we will be featuring two of our lights and showing how easy it is to change the lens package you have. Starting with Squadron, We have a clear driving combo and we will be switching it to an amber work/scene. Ending off with the LP6, We have the clear driving combo and we will be switching over to an amber driving combo. Switching from clear to amber is a great option when you are faced with extreme conditions such as dust, fog, and snow.
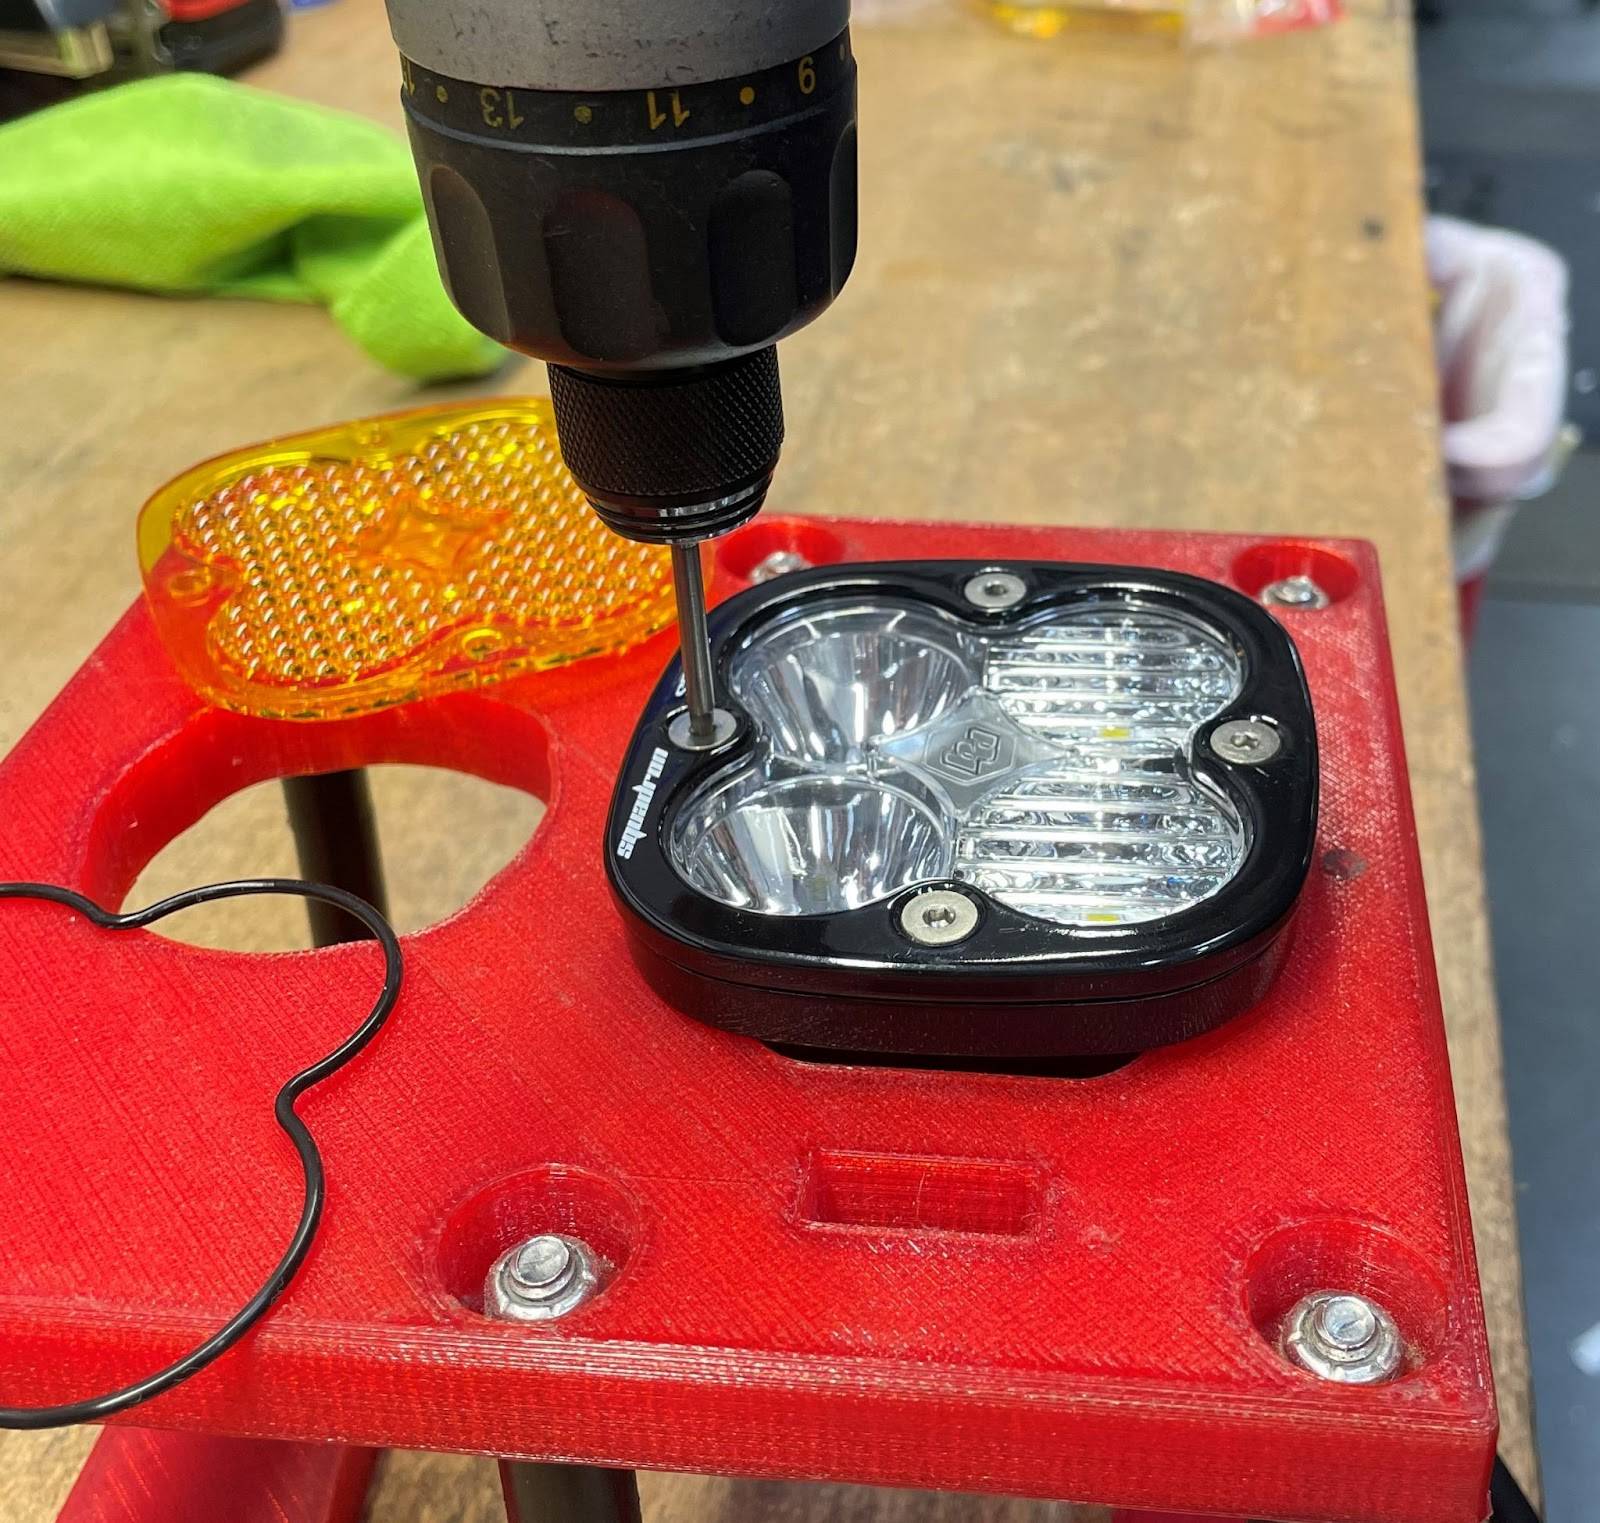
Step 1: Start by removing the 4 M4 flat head screws. This can be done with a drill or a standard Allen Key.
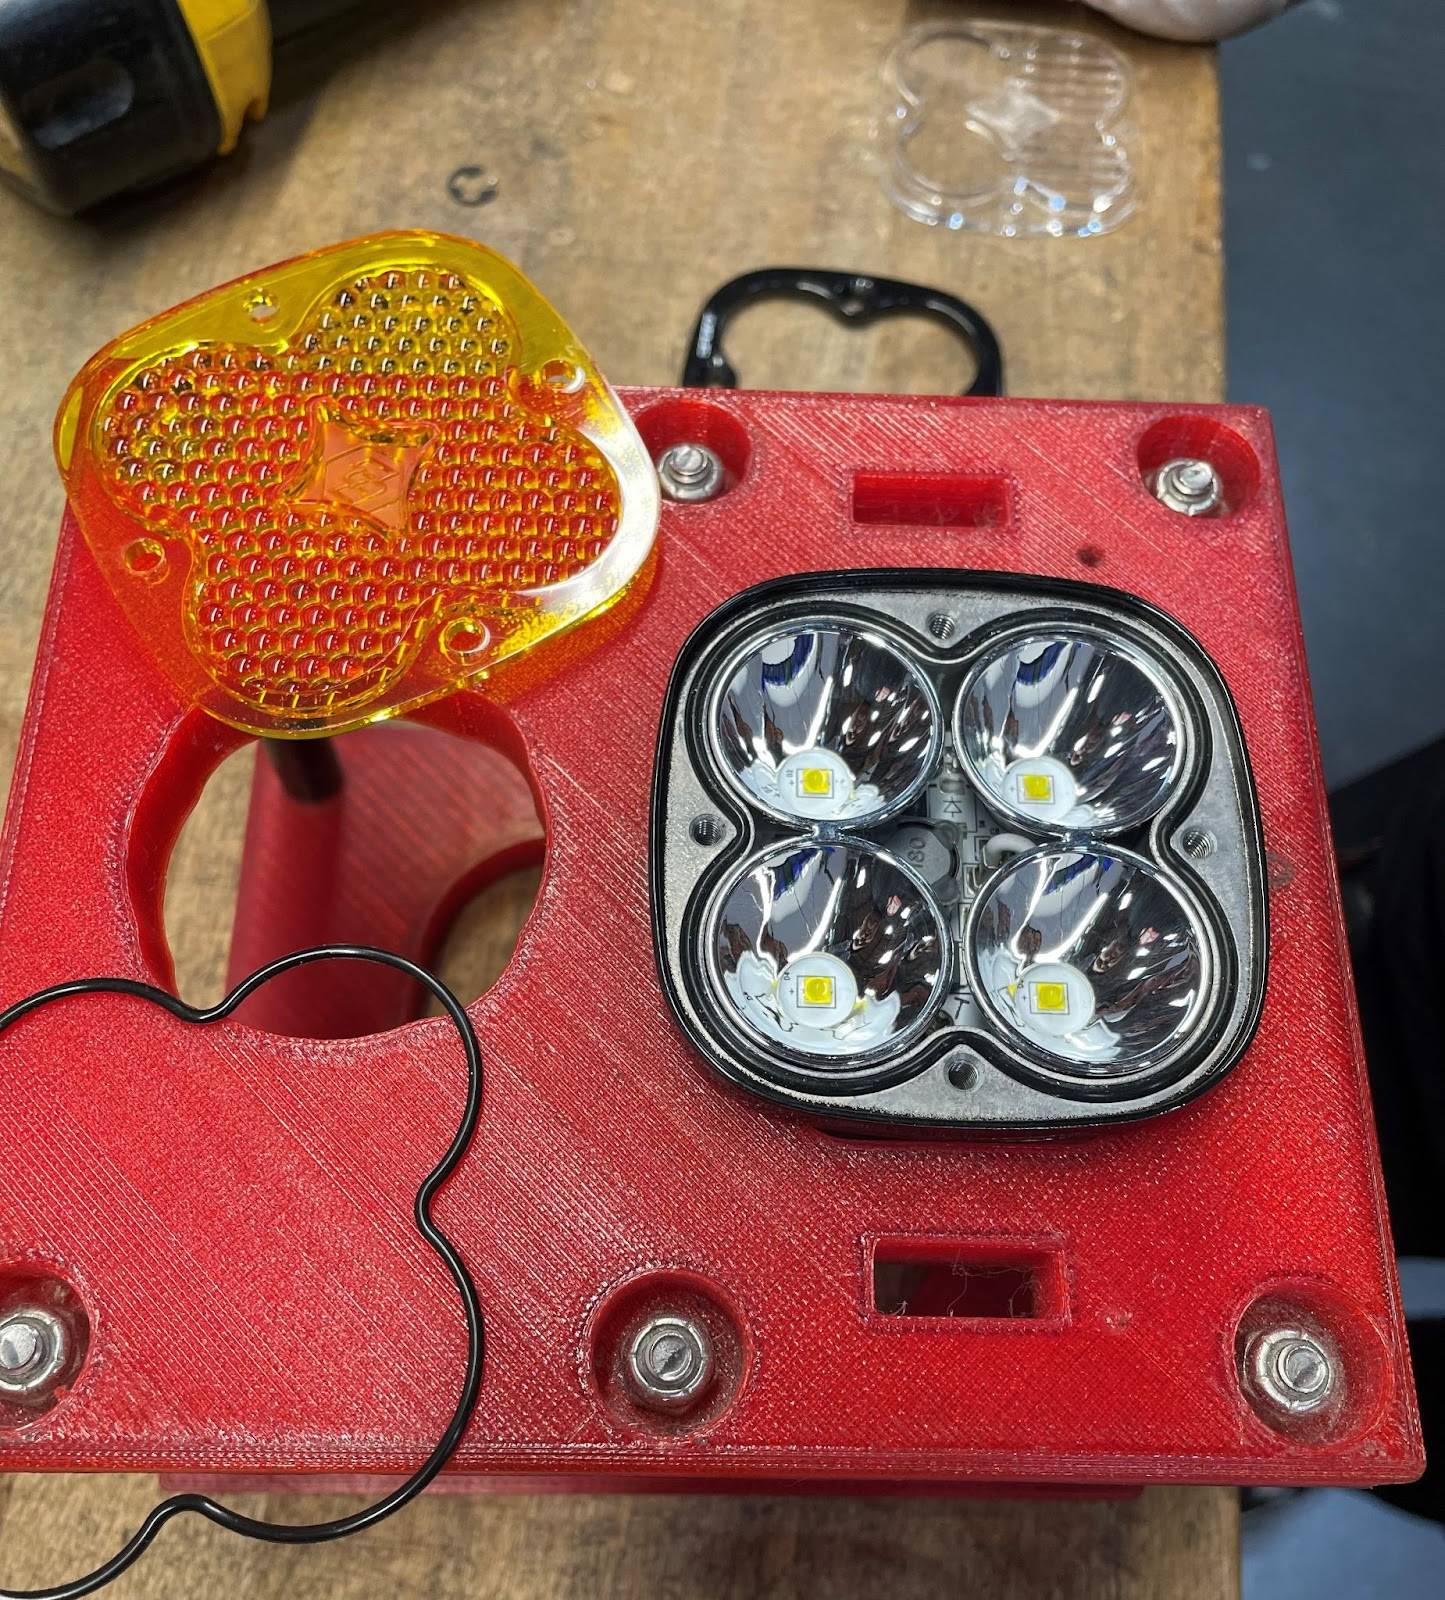
Step 2 : Carefully remove the bezel, lens, and o-ring. Place the new O-ring in the groove of the Squadron housing making sure it’s seated properly.

Step 3 : Set the lens and the bezel into place. If you plan on flipping the bezel 90 degrees or 180 degrees now is the time to do so.

Step 4 : Tighten down all 4 m4 flat head screws in a crisscross pattern. The M4 screws will need to be torqued to 3 inch-pounds per spec. Failing to do so can cause moisture to get into the light.

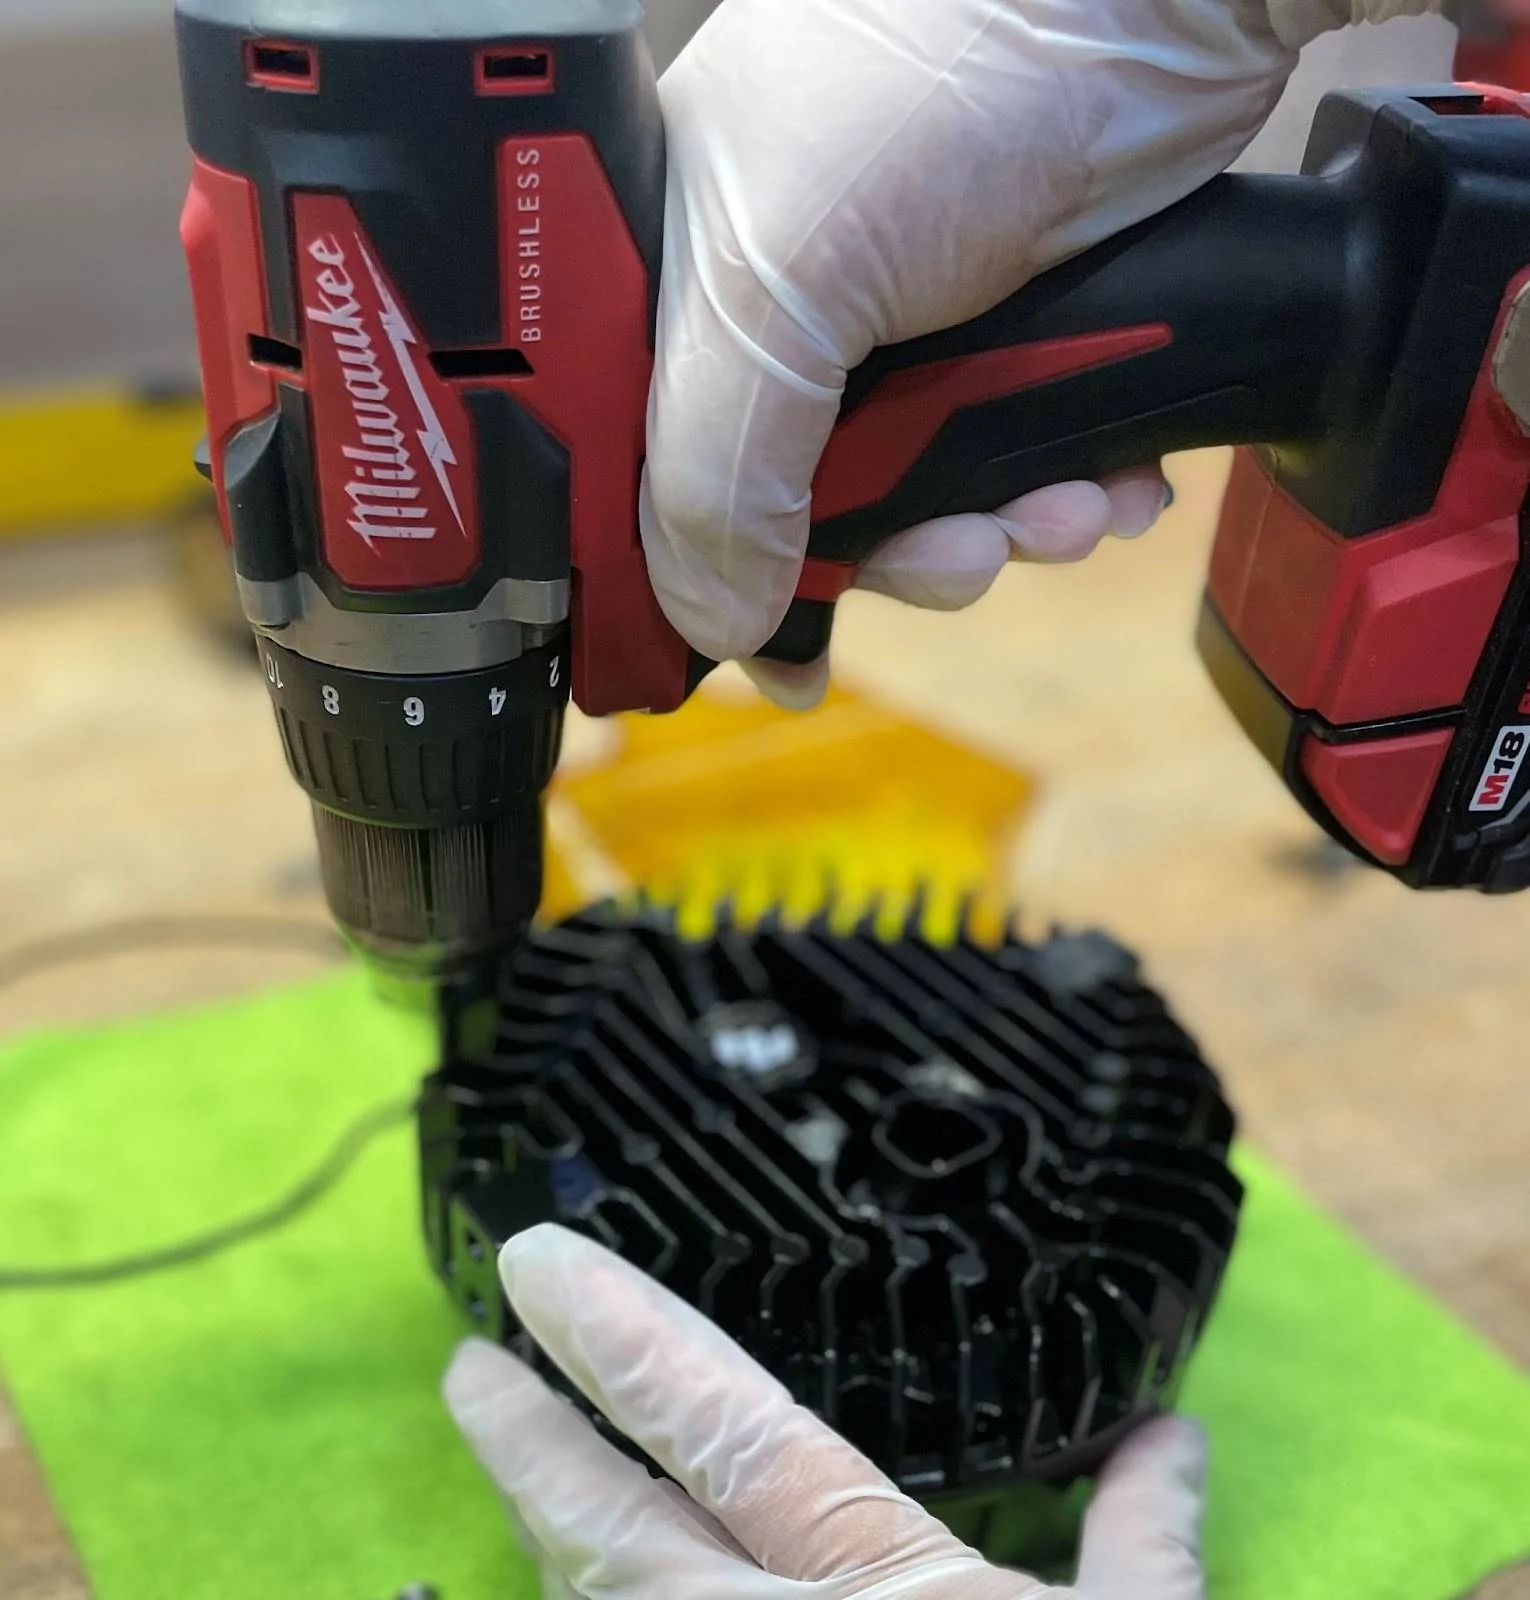
Step 1: Flip the LP6 so the connector side is up and remove the 4 M6 allen bolts. This can be done with a drill or a standard Allen Key.
Step 2: Once you have all the M6 bolts removed you can now carefully fip the LP6 back right side up with the lens facing you. With the 4 M6 bolts removed, you will be able to remove the LP6 front bezel and lens. Carefully remove the Lens as well as o-ring that seals the lens to the lights housing and replace it with your new lens o-ring and lens.

Step 3: With the new o-ring and lens secured place the LP6 bezel back on the light making sure that the lens o-ring has been seated properly. The lens o-ring is a very important aspect of this because if it is not seated properly it will allow moisture to enter the light.
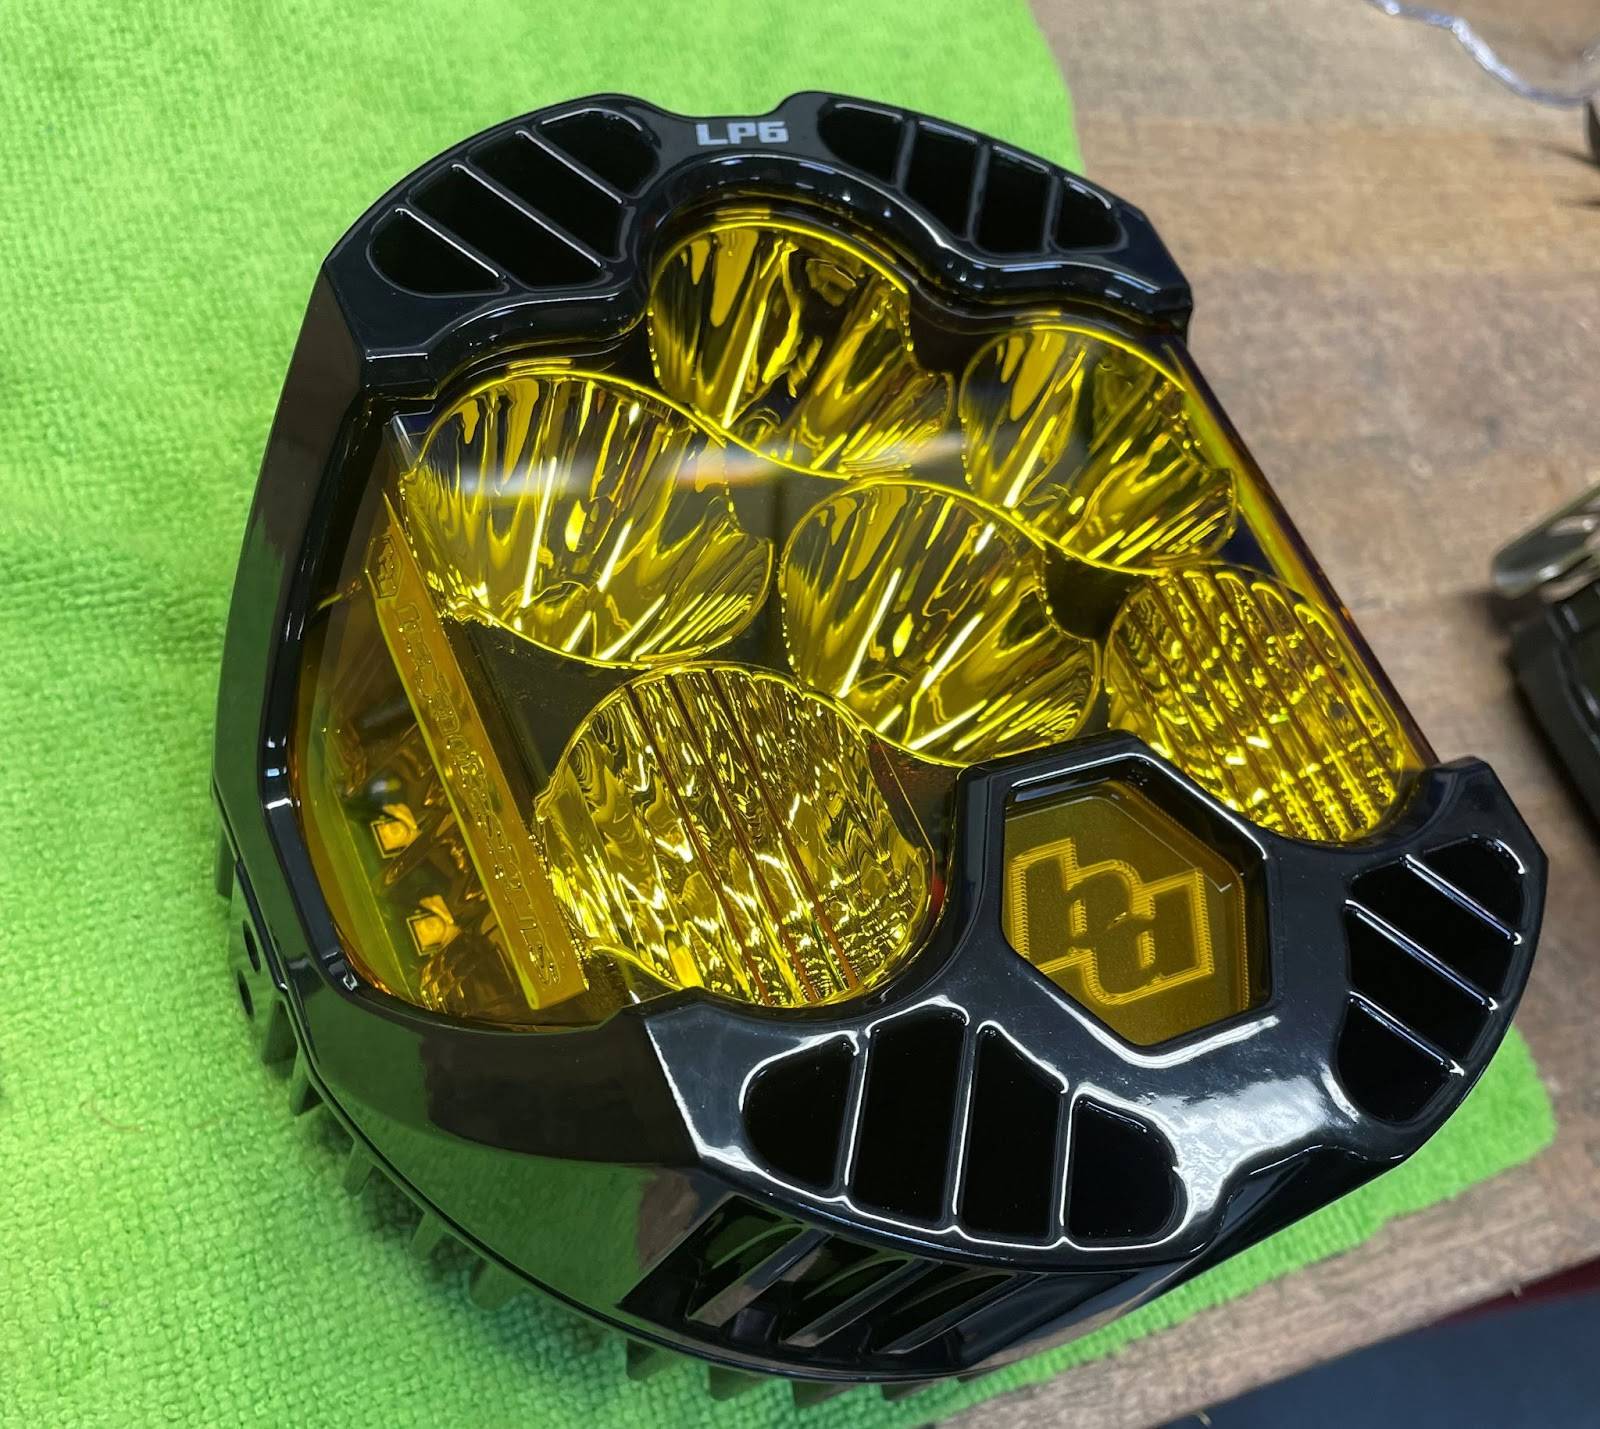
Step 4: This is the final step to get your LP6 Switched over to an amber lens. Once you have insured that the o-ring and lens have been properly set with the bezel ontop, flip the light back over and reinsert the 4 M6 allen head bolts back into the lights housing. We recommend tightening these in a star pattern allowing for the proper amount of pressure to be applied. Each M6 bolt will need to be torqued to 25 inch-pounds per spec.
For more information visit the links below
https://www.bajadesigns.com/uservice/?page=1&vid=143575
https://www.bajadesigns.com/products/?page=1&cat1=lighting-lenses
https://www.bajadesigns.com/
Sponsored