Varilux
Well-Known Member
- First Name
- Pete
- Joined
- Dec 29, 2018
- Threads
- 16
- Messages
- 320
- Reaction score
- 689
- Location
- Hickory Creek, TX
- Vehicle(s)
- 2018 Jeep Wrangler Rubicon
- Vehicle Showcase
- 1
- Thread starter
- #1
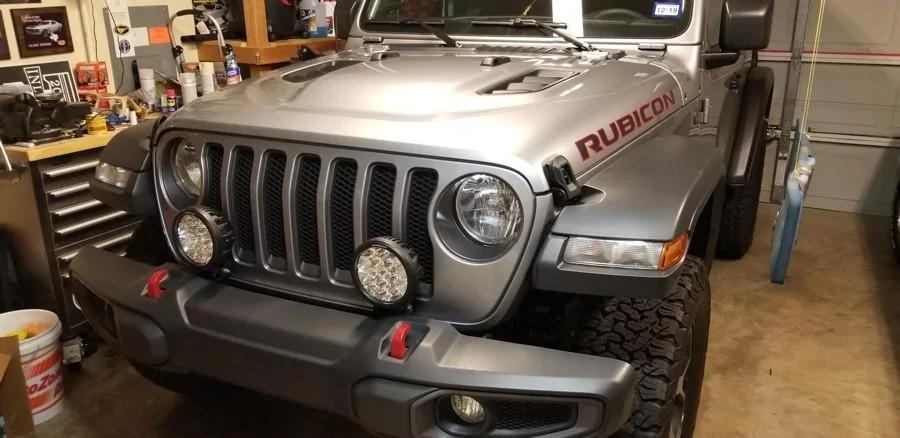
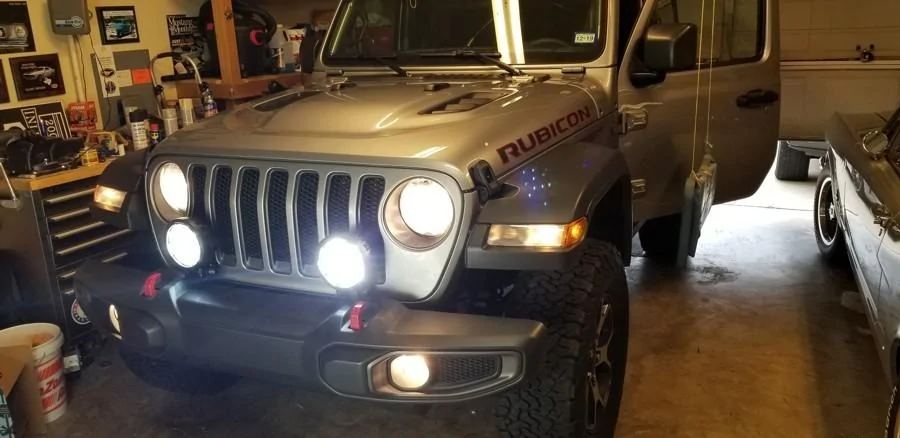
Finally tracked down a set of bumper brackets (part 82215428) to install some front lights. Although the install isn't difficult, there were a few issues with the supplied instructions and the kit, so I thought I'd post a few comments and pics...
After removing the grille and the plastic trim that covers the gap between the bumper and the body, you have access to the holes to which the brackets are supposed to mount (each bracket has two mounting bolts). This is where the first issue is encountered. The instructions indicate the holes should be enlarged with a 10mm drill bit. Then there is a collared sleeve which is supposed to be expanded within the hole to create a threaded mounting point for the bolt.

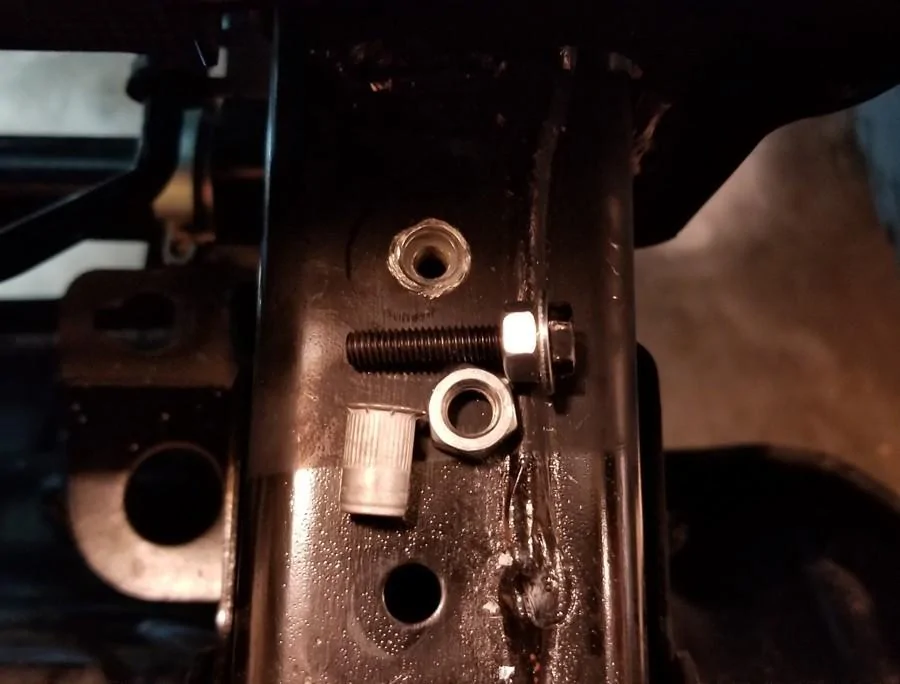
The idea is to insert the sleeve into the hole you've expanded with the drill bit (and you really do need a 10mm drill bit, because 3/8" is too small and 7/16" is a bit large). There is an extra bolt and nut supplied, and you are supposed to thread the bolt through the nut and into the sleeve. As you continue to tighten the bolt (with the sleeve in the hole), the sleeve will begin to crush- expanding it to be permanently positioned in the hole. Then you take the extra bolt and nut out and you have a mounting point for the bracket bolts.

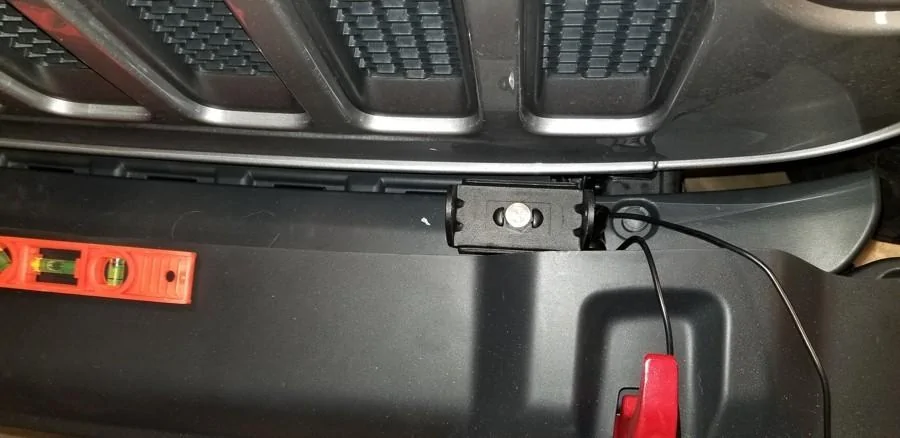
The problem (at least in my kit) is the nut was too big for the bolt- making it impossible to crush/expand the sleeve. Fortunately, like most of us I have a huge collection of miscellaneous nuts- and one of them was the correct size. The pic above shows the sleeve expanded into the back hole, along with a non-crushed sleeve, the bolt with my extra nut and the incorrect-sized nut supplied with the kit. Once I had the top sleeves mounted, I bolted them down and quickly decided I would NOT be drilling out the side holes- instead, I'll be using 5/16" rivets. Unless you plan to use the brackets as tow hooks (which I don't :^), there is no need to drill out the side mounting points. The only downside being- if I ever want to remove the brackets, I'll need to drill out the aluminum rivets.

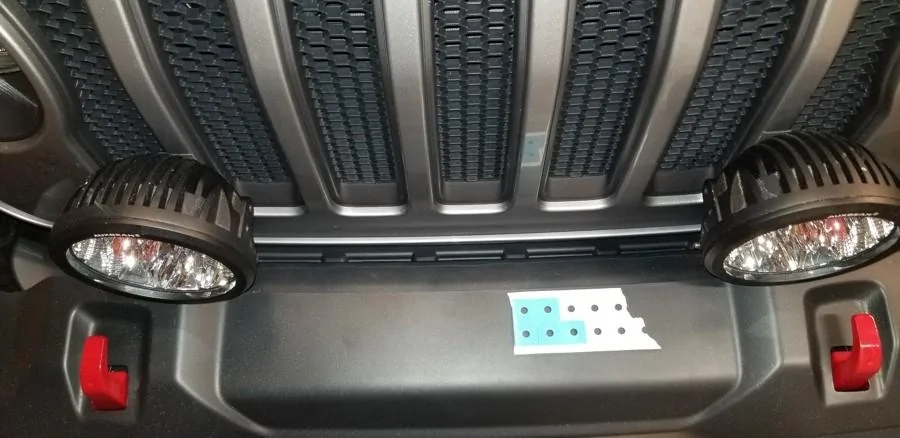
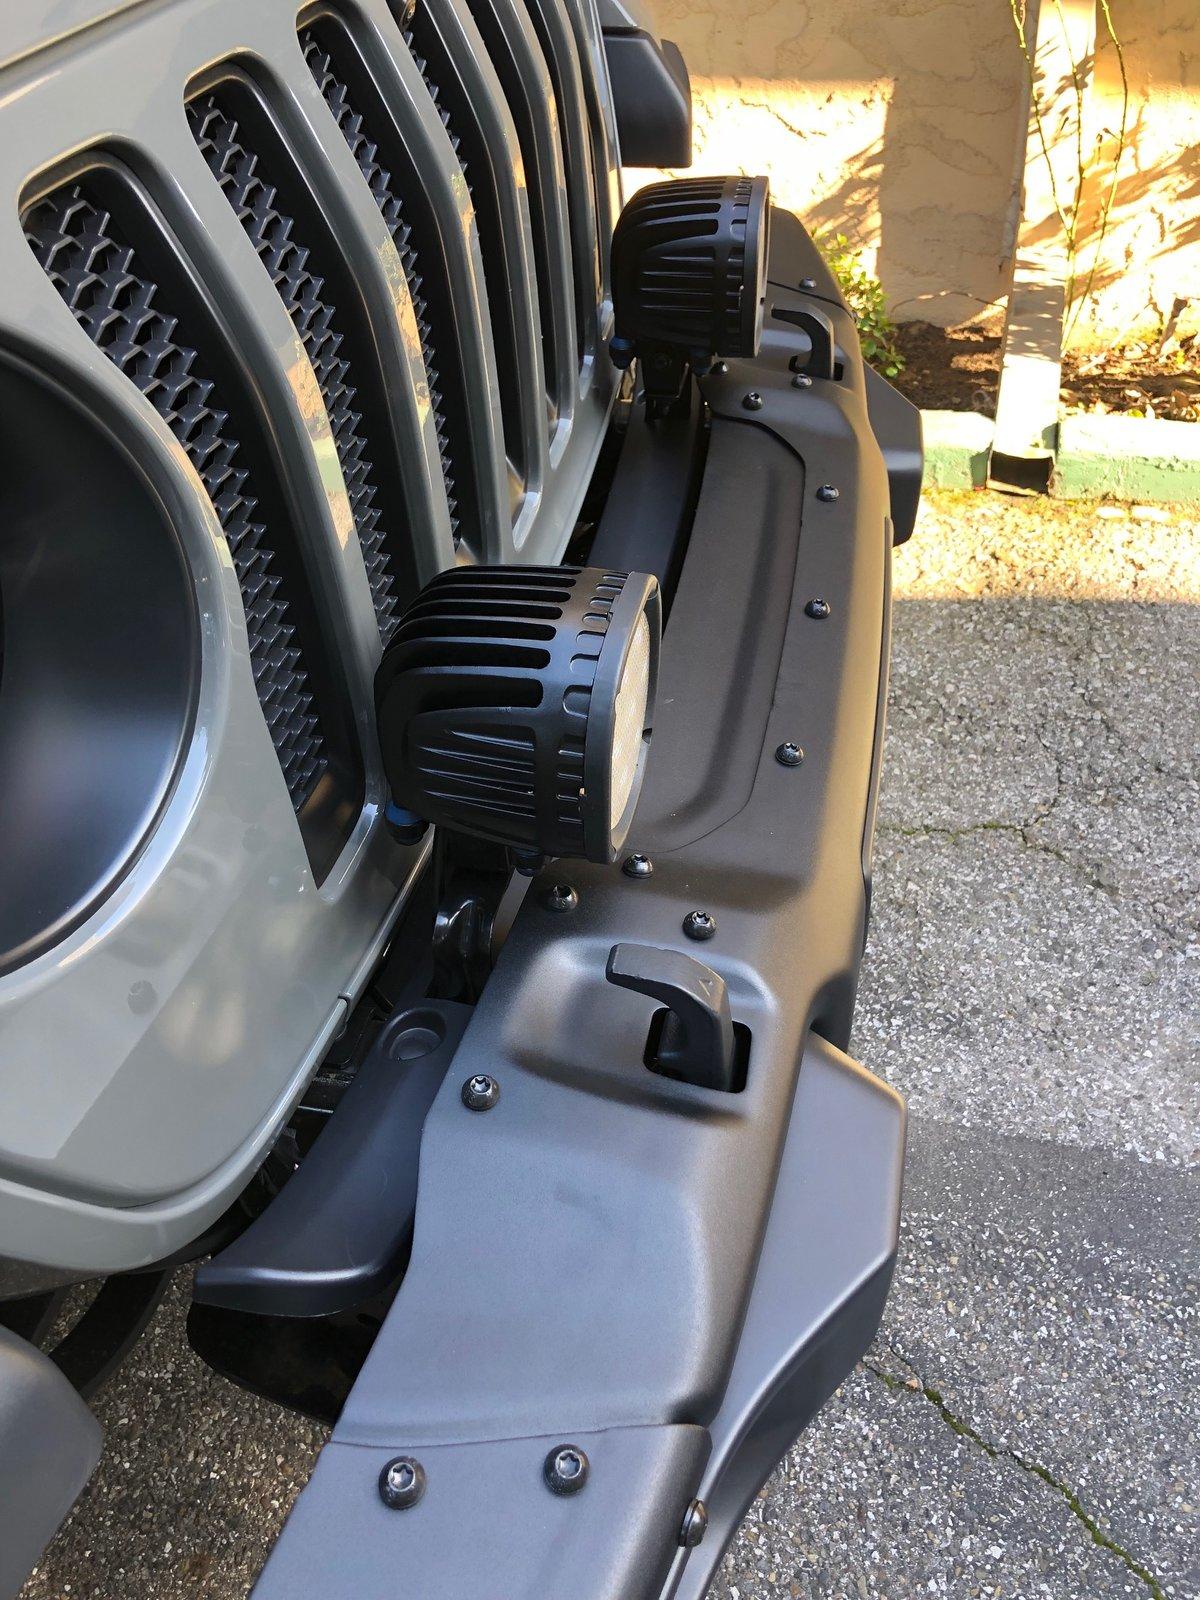
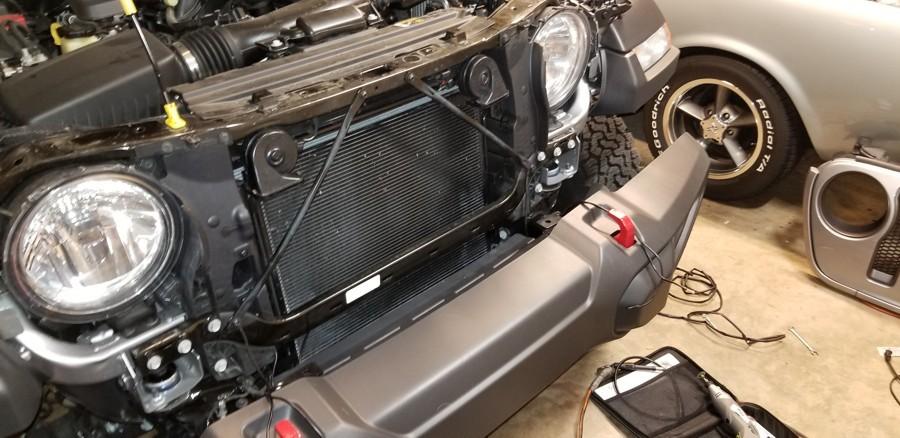
The pic above shows the brackets in place secured by only the top bolts. The yellow area shows the side mounting point where the rivets will go. At this point, I read ahead in the directions and noticed that Jeep's engineers apparently want you to discard the trim piece that fills the fender/body gap- or at the very least cut the back portion of the trim piece off! Just looking at how the brackets are set up, it becomes obvious that you do NOT need to discard- or even cut the back off- the trim piece. All you need to do is insert the brackets through the trim piece BEFORE attaching it to the mounting points.

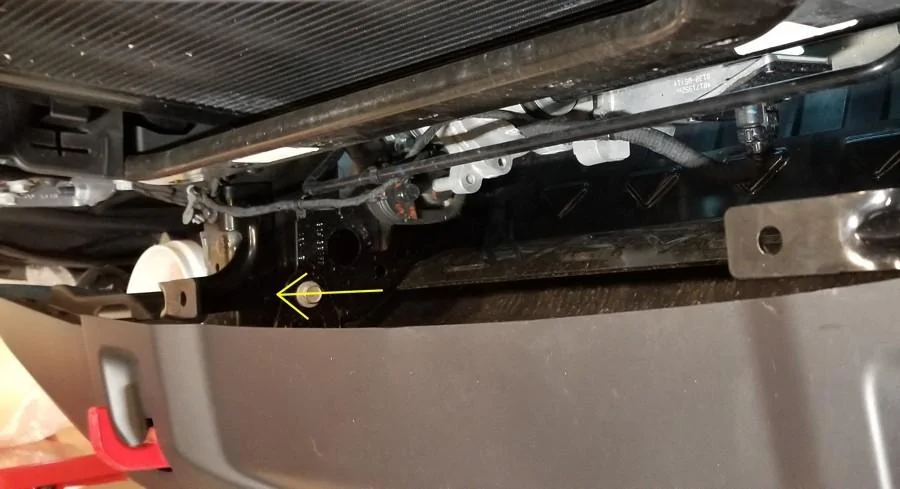
If (like any rational person) you decide to retain the trim piece, the instructions do provide a template to create holes in the piece for the trim to go through. The template works for the passenger side hole, but- as I discovered- it is incorrect for the driver side hole...

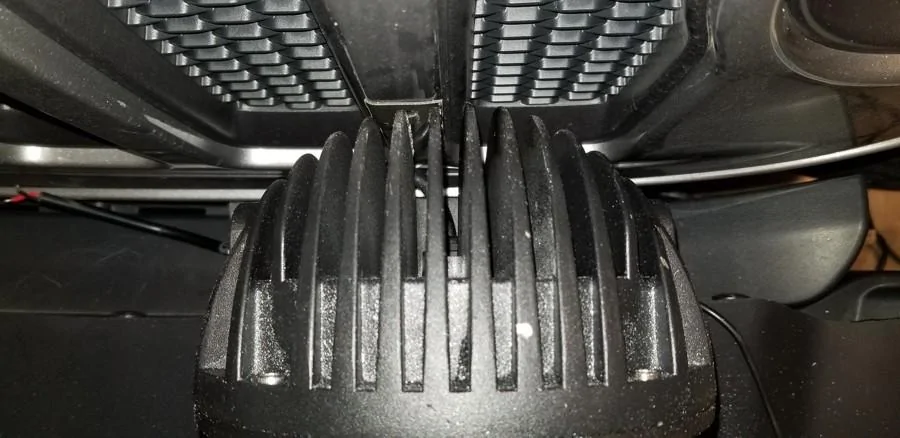
The yellow arrow shows where the driver side hole needs to be adjusted. Basically, you can still use the template, but move the rectangular opening in it towards the circular well that houses the round retaining clip. The edge of the hole needs to be about 1/8" from the hole (i.e., you need to move it over about 1/2" to 5/8" from where they tell you to put it). If you don't, the trim piece will not fit over the brackets. I figured it would be a lot easier to pre-install the wiring for my lights.
BTW, according to my voltmeter, the top of the mounting bolt cannot be used as a grounding point (as was my original plan). The only way to ground to the bracket mount is to touch the sleeve itself (which would require you to put the ground between the bracket and the mounting surface). So, I decided to ground to the radiator support. The yellow arrow shows a factory wiring connection point you'll need to take out of the mounting hole on the passenger side. The red arrow is where I grounded.
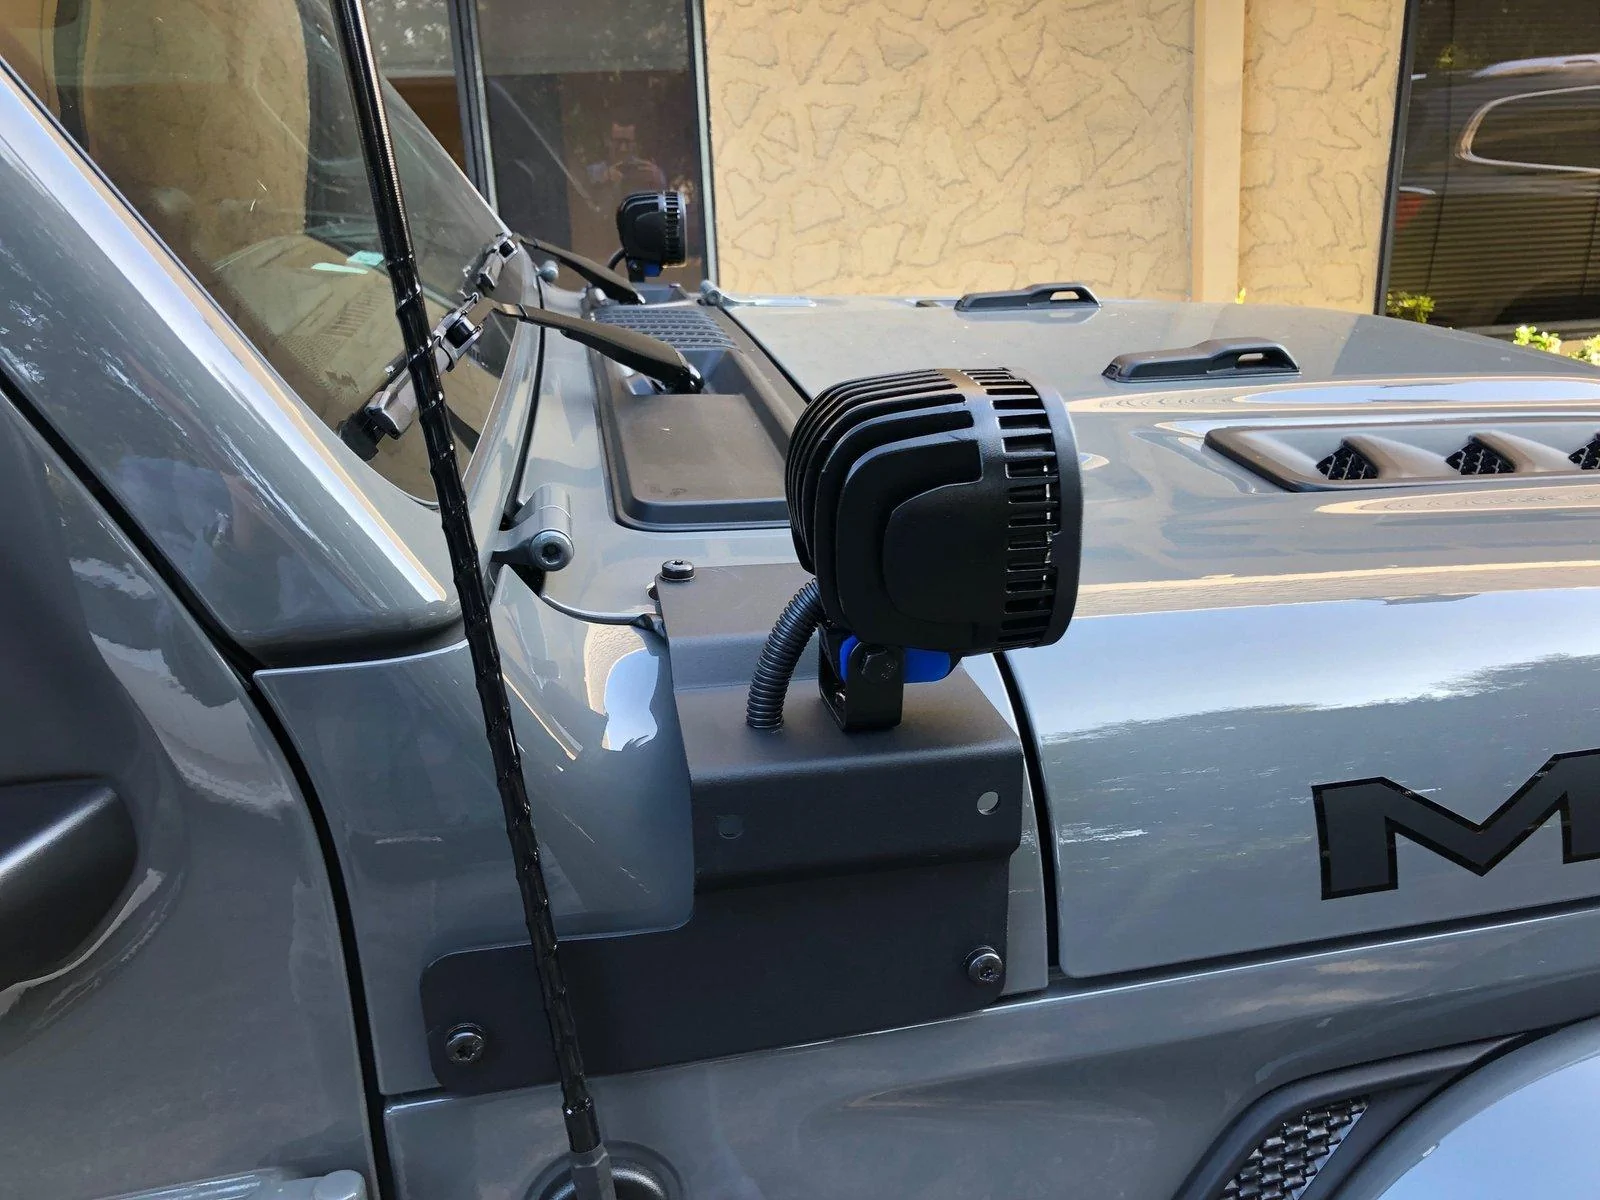
After enlarging the driver's side hole, I was able to bolt down the brackets using the top bolts (it's easy to access the bolts with your ratchet- even with the trim piece in place). Although the brackets feel very solid as is, I'll be putting in the rivets once I've reinserted all the hold down pins to the trim piece and reinstalled the grill (want to install the rivets last, since I can't take the brackets back off without drilling them out once I do). If I have to, I'll remove the skirt to access the sides of the brackets, but it looks like I'll be able to reach my riveter to where it needs to go without doing so. Now it's time to watch some football! Hopefully, I'll be able to post some pics of installed lights tomorrow (looking forward to using one of those factory AUX switches)!
Overall, the kit isn't all that bad, but considering you pay $138 at the dealer (I've seen it for $83 online), it seems to me they should have put more thought into it. At the very least, the supplied instructions leave a lot to be desired.
After removing the grille and the plastic trim that covers the gap between the bumper and the body, you have access to the holes to which the brackets are supposed to mount (each bracket has two mounting bolts). This is where the first issue is encountered. The instructions indicate the holes should be enlarged with a 10mm drill bit. Then there is a collared sleeve which is supposed to be expanded within the hole to create a threaded mounting point for the bolt.

The idea is to insert the sleeve into the hole you've expanded with the drill bit (and you really do need a 10mm drill bit, because 3/8" is too small and 7/16" is a bit large). There is an extra bolt and nut supplied, and you are supposed to thread the bolt through the nut and into the sleeve. As you continue to tighten the bolt (with the sleeve in the hole), the sleeve will begin to crush- expanding it to be permanently positioned in the hole. Then you take the extra bolt and nut out and you have a mounting point for the bracket bolts.
The problem (at least in my kit) is the nut was too big for the bolt- making it impossible to crush/expand the sleeve. Fortunately, like most of us I have a huge collection of miscellaneous nuts- and one of them was the correct size. The pic above shows the sleeve expanded into the back hole, along with a non-crushed sleeve, the bolt with my extra nut and the incorrect-sized nut supplied with the kit. Once I had the top sleeves mounted, I bolted them down and quickly decided I would NOT be drilling out the side holes- instead, I'll be using 5/16" rivets. Unless you plan to use the brackets as tow hooks (which I don't :^), there is no need to drill out the side mounting points. The only downside being- if I ever want to remove the brackets, I'll need to drill out the aluminum rivets.
The pic above shows the brackets in place secured by only the top bolts. The yellow area shows the side mounting point where the rivets will go. At this point, I read ahead in the directions and noticed that Jeep's engineers apparently want you to discard the trim piece that fills the fender/body gap- or at the very least cut the back portion of the trim piece off! Just looking at how the brackets are set up, it becomes obvious that you do NOT need to discard- or even cut the back off- the trim piece. All you need to do is insert the brackets through the trim piece BEFORE attaching it to the mounting points.
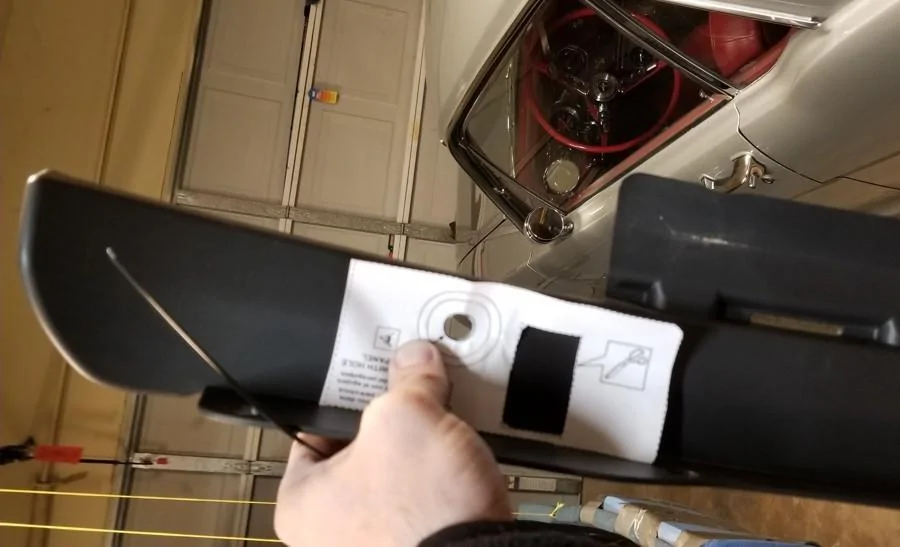
If (like any rational person) you decide to retain the trim piece, the instructions do provide a template to create holes in the piece for the trim to go through. The template works for the passenger side hole, but- as I discovered- it is incorrect for the driver side hole...

The yellow arrow shows where the driver side hole needs to be adjusted. Basically, you can still use the template, but move the rectangular opening in it towards the circular well that houses the round retaining clip. The edge of the hole needs to be about 1/8" from the hole (i.e., you need to move it over about 1/2" to 5/8" from where they tell you to put it). If you don't, the trim piece will not fit over the brackets. I figured it would be a lot easier to pre-install the wiring for my lights.
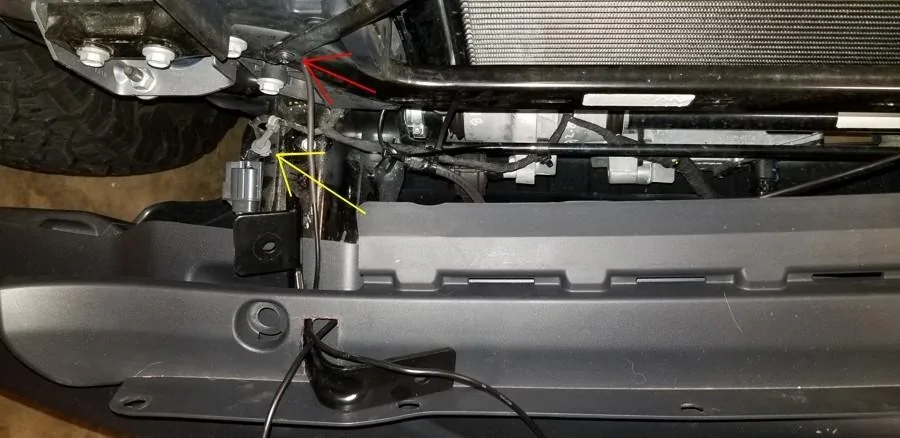
BTW, according to my voltmeter, the top of the mounting bolt cannot be used as a grounding point (as was my original plan). The only way to ground to the bracket mount is to touch the sleeve itself (which would require you to put the ground between the bracket and the mounting surface). So, I decided to ground to the radiator support. The yellow arrow shows a factory wiring connection point you'll need to take out of the mounting hole on the passenger side. The red arrow is where I grounded.
After enlarging the driver's side hole, I was able to bolt down the brackets using the top bolts (it's easy to access the bolts with your ratchet- even with the trim piece in place). Although the brackets feel very solid as is, I'll be putting in the rivets once I've reinserted all the hold down pins to the trim piece and reinstalled the grill (want to install the rivets last, since I can't take the brackets back off without drilling them out once I do). If I have to, I'll remove the skirt to access the sides of the brackets, but it looks like I'll be able to reach my riveter to where it needs to go without doing so. Now it's time to watch some football! Hopefully, I'll be able to post some pics of installed lights tomorrow (looking forward to using one of those factory AUX switches)!
Overall, the kit isn't all that bad, but considering you pay $138 at the dealer (I've seen it for $83 online), it seems to me they should have put more thought into it. At the very least, the supplied instructions leave a lot to be desired.
Sponsored